Sourdough Crackers

These crispy, crunchy, tasty crisps are the perfect way to quickly use up some of that sourdough starter discard that is threatening to take over your fridge.  Eaten on their own, or as a vessel for your favourite dip, they are a winner any way you serve them.

Sourdough crackers 8

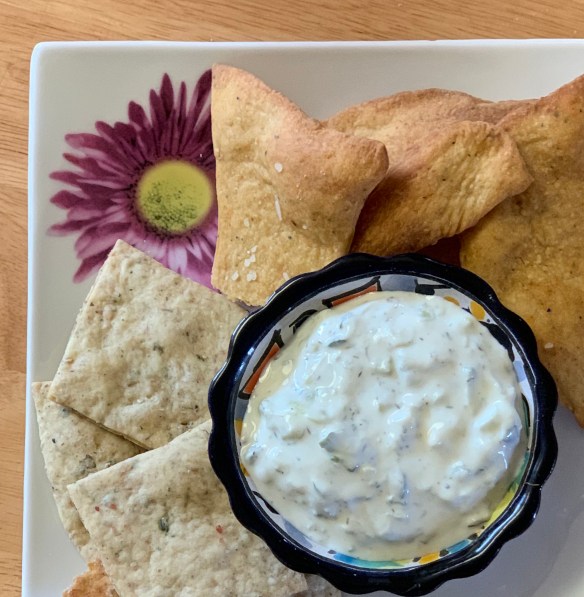
A little fresh homemade tzatziki sauce was the perfect way to eat up a bunch of these crisps!

  • 200 grams (about 1 cup) mature sourdough starter
  • 60 grams (about 1/2 cup) all purpose flour
  • 60 grams (about 1/2 cup) whole wheat flour
  • 12 grams (about 2 tbsp) rye flour
  • 32 grams (3 tbsp) extra virgin olive oil
  • 1 tbsp dried herbs de Provence (or any herbs you like)
  • 1/2 tsp fine sea salt


  • flaky sea salt for topping

In mixing bowl combine all ingredients except for the flaky sea salt.  Mix well, kneading until you get it all together in a nice smooth ball.

To get 200 grams of starter, I often use what I have left from the jar I am feeding, then add to it with starter discard that is in the fridge.  If using entirely discard from the fridge you can either wake it up with a feed and use it once you see it has doubled, or just use it straight from the fridge.  With these crackers you are mainly looking for the flavour more than a rise like you expect from a loaf of bread.

Wrap tightly in plastic and put in the fridge for anywhere from 30 minutes to 24 hours.  Sitting helps the sourdough flavours to develop, as well as make the dough easier to work with.

Preheat oven to 350 and line 2 baking sheets with parchment.

Cut dough in half, place one half in fridge and roll out the other very thin, as thin as you can get and still work with it.  If you like a hardier crisp, then just roll out to 1/4 inch.  I’ve also used my pasta rolling machine with varied success.  When the dough feels soft and supple it works extremely well, but if your dough ends up a bit on the drier side of things it is easiest to roll out by hand)

You can either cut the dough before putting on the baking  sheet, or bake them as is and then break them into rustic crisps.

Spritz very lightly with water, then sprinkle with flaky sea salt right before baking.

Bake for 12-15 minutes – make sure you rotate your pans half way through for even baking.

Sourdough crackers 4

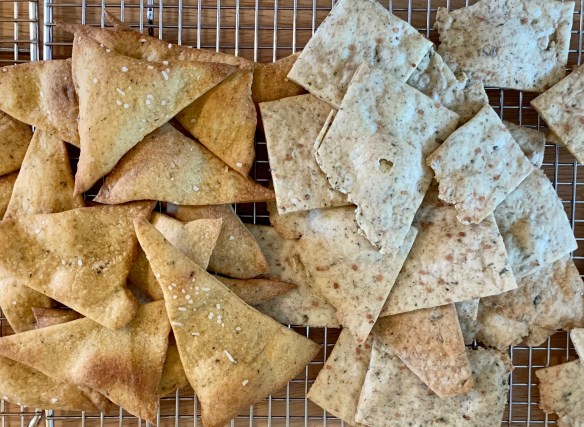
This dough is with the exact measurements and seasonings listed above.  It made a drier dough, and was much easier to roll out by hand than it was to put through the pasta roller.

Sourdough crackers 3

This dough was made with less whole wheat and rye flour, and it was by far the easiest dough to work with and slid through the pasta rollers with ease..  For seasoning I used my granddaughter Sloan’s magic taco seasoning mix.  They were delicious!

These crackers are only limited by your imagination!  Use any variety of flours or seasonings and get creative.

Sourdough crackers 1

These literally took minutes to make, and they are ready for the fridge.  I rested the dough until the next day (just because that was easiest today), and then rolled them out the next day.

Sourdough crackers

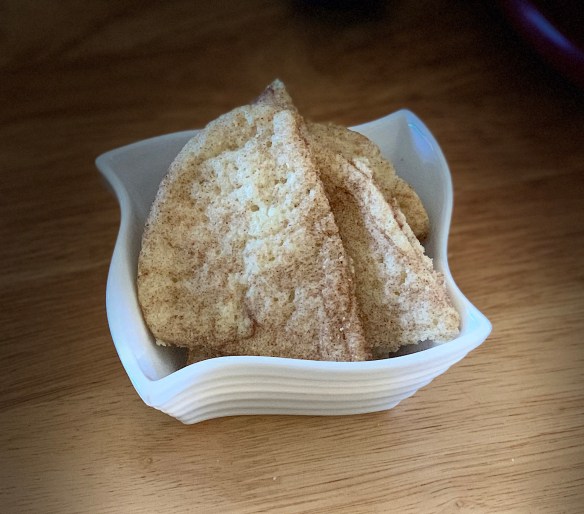
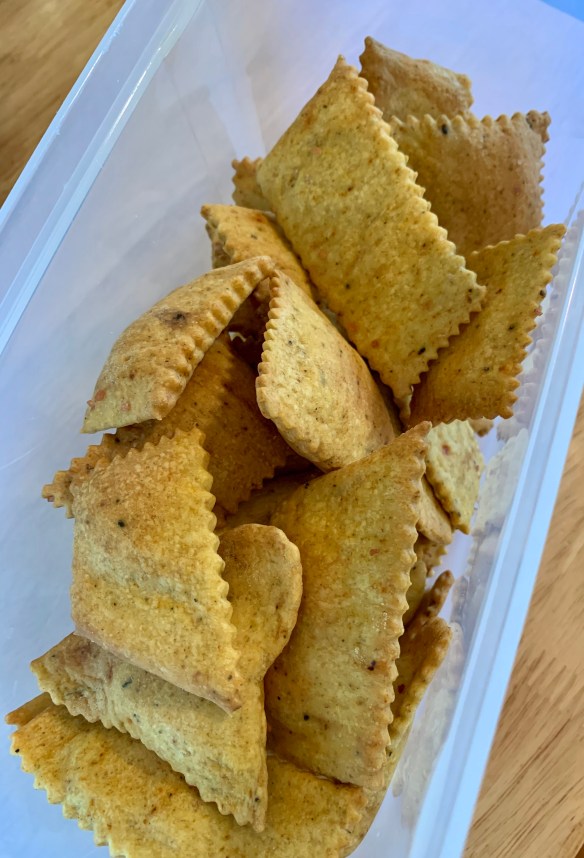
I cut these ones into long triangles prior to baking, but it is just as easy to create a more rustic crisp by baking them first and then breaking them up.

Sourdough crackers 2

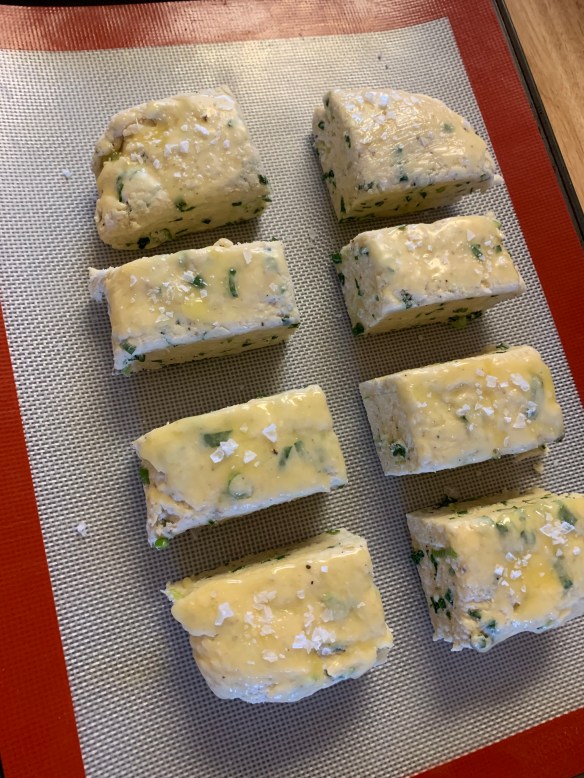
These herby little bites were cut into a square (fish) shape prior to baking.

Sourdough crackers 5

Aren’t they pretty??  I loved these!  So easy to make, and the extra bonus is that so far I haven’t actually had to “discard” any of my discard.

I found this recipe during one of my many ventures down the internet rabbit hole in search of ways to use sourdough discard – it was on http://www.loveandoliveoil.com

img_3328

Pretty hard to go back to buying crackers when you realize how easy these are, and how absolutely delicious.


Carne Asada

Missing Mexico right about now, so these Carne Asada tacos were just perfect!

Carne Asada 4

Carne Asada is one of those quintessential Mexican dishes …. pretty simple really, meat and a tortilla shell.  Make it exceptional by adding pickled onions and a fresh pico de gallo, and I promise – everything will look bright and cheerful!

Ingredients

  • 2 limes juiced
  • 4 cloves garlic crushed
  • 1/2 cup orange juice
  • 1 cup chopped fresh cilantro
  • 1/2 teaspoon salt
  • 1/4 teaspoon black pepper
  • 1/4 cup vegetable oil
  • 1 jalapeno minced
  • 2 tablespoons white vinegar
  • 2 pounds flank or skirt steak

Instructions

  • In a large resealable bag, combine lime juice, crushed garlic, orange juice, cilantro, salt, pepper, vegetable oil, jalapeno, and vinegar. Squeeze it around to mix it up.
  • Put the entire flank steak into the resealable bag. Seal it up tight. Make sure all the meat is exposed to the marinade, squishing the bag around to coat. Refrigerate for at least 2 hours, or overnight.
  • Heat an outdoor grill to high heat.
  • Remove the flank steak from the marinade, and discard excess marinade. Cook on the grill for 7 to 10 minutes per side.
  • Once done, remove from heat and let rest 10 minutes. Slice against the grain, and serve.

We love to serve this with fresh, homemade flour tortillas (my flour tortilla game is way stronger than my corn tortilla game ….. so far)

Carne Asada

You won’t believe it, but the rib eye steak was on sale, not the flank …. so that is what I used.  It was incredible.  All the citrus shows up in the marinade, and you can still taste it in the grilled steak, but it doesn’t overpower the meat.

Carne Asada 1

Grilled to perfection, moist and juicy inside – this steak is the best bite.  Just hope some gets to the table for the tortillas.

Carne Asada 2

Just look at how moist that steak looks.  Yum.

carne Asada 3

Place it all out on the table, and let the family make their own plates.  Smiles all around!


The “stay at home chef” adapted this recipe from one of my favourite chefs – Rick Bayless.  This is so easy to do at home and gives you the flavour you might expect from sitting in a Mexican cantina ….. not only that, it is easy!

The BEST Chocolate Chip Cookies

Stella says I’ve baked too much bread for them and she’s gained about 40 pounds (in total I think she weighs 40 pounds!).  She did, however, think chocolate chip cookies would be a good idea.

CC Cookies 5

The BEST Chocolate Chip Cookie Recipe

Makes 26 HUGE cookies (or 52 regular size!)

  • ½ pound butter, softened (2 sticks)
  • ¾ cup granulated sugar
  • ¾ cup packed light brown sugar
  • 2 large eggs
  • 1 ¼ teaspoons vanilla extract
  • ¼ teaspoon freshly squeezed lemon juice
  • 2 ¼ cups flour
  • 1/2 cup rolled oats
  • 1 teaspoon baking soda
  • 1 teaspoon salt
  • Pinch cinnamon
  • 2  cups Nestle Tollhouse semi-sweet chocolate chips (or sub 1/2 with cranberries)
  • 1 3/4 cups chopped walnuts

Preheat oven to 300

Cream butter, sugar and brown sugar in the bowl of a stand mixer on medium speed for about 2 minutes. 

Add eggs, vanilla and lemon juice, blending with mixer on low speed for 30 seconds, then medium speed for about 2 minutes, or until light and fluffy, scraping down bowl. 

With mixer on low speed, add flour, oats, baking soda, salt and cinnamon, blending for about 45 seconds. Don’t overmix. 

Remove bowl from mixer and stir in chocolate chips and walnuts.

Portion dough with a scoop (about 3 tablespoons) onto a baking sheet lined with parchment paper about 2 inches apart for extra large cookies – I prefer to get more cookies to share and make them smaller – to fit 12 on a cookie sheet.

Preheat oven to 300°F. Bake for 20 to 23 minutes, or until edges are golden brown and center is still soft. 

Remove from oven and cool on baking sheet for about 1 hour.

Cook’s note: You can freeze the unbaked cookies, and there’s no need to thaw. Preheat oven to 300°F and place frozen cookies on parchment paper-lined baking sheet about 2 inches apart. Bake until edges are golden brown and center is still soft.

CC Cookies 1

I found this the perfect size for home eating – 12 to a cookie sheet.

CC Cookies 2

Good thing I have 4 cookie sheets, otherwise it might have taken all day to allow them to completely cool on the baking sheet.  As it is, I did move them after about 30 minutes.

CC Cookies 3

CC Cookies 4

A plate of these crispy edged, chewy interior cookies is a good idea any time of day.

There are moments of sharing during this 2020 Covid-19 pandemic, and this recipe is one of them.  Apparently a famous recipe from DoubleTree hotels, it is their signature cookie, and I’m not the only one to love this cookie.  No, I haven’t stayed there, so I’ve never had one of these warm on arrival, but they are delicious out of your own oven.  I reduced the chocolate slightly – the original calls for 2 2/3 cups of chocolate chips but I found that a bit overpowering.  Yes, you can have too many chocolate chips.

Easy, authentic Sourdough Bread

It’s the 2020 Covid-19 pandemic, and like everybody else on Instagram, I’ve slipped down the rabbit hole of sourdough.  From initially thinking this is far too much work, don’t like being a slave to a starter, and ending up being a sourdough convert is very much a slippery slope folks, so don’t start unless you are prepared!  I’ve tried a variety of methods, and ended up with a variety of breads, all delicious, but this one … it’s going to be my house bread.   Chewy, dense, yet somehow light … it’s the perfect sourdough loaf.

Sourdough best

This loaf just made me happy, and when Sloan said she loved it, I was content.

  • 50 grams or bubbly sourdough starter, 1/4 cup
  • 350 gramswarm water (80° F)(1 ⅓ cups plus 2 tablespoons)
  • 500 grams bread flour (4 cups plus 2 tablespoons) You can use other flours, too: white unbleached flour, white whole wheat, or spelt. Whole wheat flour will be denser and won’t rise as much as white flour. For your first few loaves, you’ll have more success if you don’t use it. Don’t use gluten-free flours.
  • 9 grams finely ground sea salt ( 1½ teaspoons) or Himalayan salt

You need to make sure your sourdough starter is bubbly and ready to go. If it has not been fed recently then take a few spoonfuls of sourdough starter from your fridge and give it that much flour and water and let it ferment for 6 – 8 hours.

NIGHT PRIOR TO BAKING

Before bedtime (the night prior to baking), gather all your ingredients.

Close to your bedtime, add the bubbly sourdough starter and warm water to a ceramic bowl. Mix them together with a whisk until well combined.

Then add the flour and salt and combine together with a stiff spatula. You can also use your hands to get the flour fully incorporated. The dough will look a little scraggly, feel dense, and stick to your fingers. Try and scrape off as much dough from your hands as possible but don’t over mix it at this point. Then cover the bowl with plastic wrap for 30 minutes.

After 30 minutes, flour your hands and work the dough into a smooth ball. Do this by folding the dough over and pressing it into the center until the dough starts to turn into a smoother ball.

BAKING DAY

In the morning, use your spatula and gently pull the dough from the bowl onto a lightly floured work surface. Dust your hands with flour and start at the top and fold the dough over to the center, repeating on all sides (add more flour if needed).
Then flip the dough over and let it rest for 5-10 minutes.


Line an 8-inch bowl with a towel and dust generously with flour. Make sure your hands are still floured and pick up the dough and place it in the bowl with seam side up.

Cover the bowl and let it rest for 30 to 60 minutes. In the meantime, preheat your oven to 450 degrees. Cut a piece of parchment paper to fit your pot, leaving excess so you can grab the bread and take it out of the pot. Place your parchment paper over the bowl and invert the bowl to allow the bread to release onto the paper.

With a small razor blade or serrated knife, score the bread with four slashes.

Pick up the parchment and carefully place your bread in the pot.

Place the lid on the pot and place in the oven for 20 minutes. Then remove the lid and continue baking for 30 more minutes.

You can take it out of the pot and onto the rack to bake for 5 minutes longer to darken the bread if you’d like.

When bread is done, take bread out of pot and place on a wire rack to cool for about 20 minutes to an hour, although we often can’t wait to eat it! Store loaf in a bag on the counter, or this bread freezes beautifully

Sourdough best 2

Apparently the overnight rest helps to give the bread some volume, and more flavour, but also helps with the digestive properties – whatever the reason, it works!

Sourdough best 3

This bread was moist, tender and oh so delicious – it will be on repeat around here.

If you would like a little more guidance, lots of clear photos, and many sourdough tips, head on over to the site I got this recipe from – Cultured Food Life.


Cambodian Lok Lak

Lok Lak is one of Cambodia’s national dishes, we fell in love with it during our trip this year.  The marinated beef is delicious on it’s own, but dipping in the lime pepper sauce accentuates everything.

Lok Lak 1

We are food geeks, it is true.  One of our trip highlights was visiting a pepper plantation in Kampot, home of the worlds best pepper.  La Plantation was incredible, and we loved seeing pepper being harvested by hand.  Of course you can use whatever pepper you have on hand, we just happened to bring it home with us.

Ingredients

  • lb beef steak , sliced
  • 3 tablespoons vegetable oil
  • 4 scallions , chopped

Marinade

  • 3 tablespoons tomato sauce
  • 3 tablespoons soy sauce
  • 3 cloves garlic , chopped
  • ¼ teaspoon salt
  • 5 tablespoons fish sauce
  • ¼ teaspoon Kampot pepper
  • 2 tablespoons sugar
  • 3 tablespoons vegetable oil
  • 1 teaspoon chicken broth powder
  • 2 teaspoons potato starch (or cornstarch)
  • 3 teaspoons paprika

Sauce

  • Juice of 5 limes
  • 3 tablespoons cold water
  • ¼ teaspoon salt
  • 2 cloves garlic , chopped
  • 2 teaspoons sugar
  • 1 tablespoon fish sauce
  • 2 tablespoons vegetable oil
  • ½ teaspoon Kampot pepper

Sides

  • A few leaves lettuce
  • 2 ​​tomatoes , sliced
  • Steamed white rice

Instructions

  1. Mix all the marinade ingredients in a salad bowl, add the meat and stir well.
  2. Marinate the meat for 1 hour in the refrigerator.
  3. Heat the 3 tablespoons of vegetable oil in a wok or pan and fry the chopped scallions over medium heat until they turn light brown.

  4. Add the meat, mix well and sauté for 5 to 10 minutes.
  5. In a bowl, stir all the ingredients of the lok lak sauce vigorously.
  6. Prepare large plates.
  7. In each plate, place a bed of lettuce leaves and a few slices of tomato.
  8. Place the meat on the lettuce leaves and sliced ​​tomatoes.
  9. Serve with steamed white rice.
  10. Place a small bowl of lok lak sauce on the side or the center of each plate.
Lok Lak 2

Crispy but tender beef, soft rice, and a lime pepper dipping sauce to brighten it all up.  In Vietnam it is often served with French fries, but we like the rice best.

I found this recipe on a website 196 Flavors, and it was just like the Lok Lak we enjoyed in Cambodia …. lick your plate good!

Snickerdoodles

Snickerdoodles 6

The ultimate Snickerdoodle, courtesy of Heather, these ones made by her daughter Emily.  Just thin enough to be tender and chewy.

Have you ever noticed how many recipes are out there for Snickerdoodles?  They are everywhere, and I’ve tried a lot of them.  Some get quite complicated with refrigeration time required, shaping instructions, and the list goes on.  Ultimately, what I’m looking for  just isn’t that complicated.  This recipe is perfect, and make the best cookies, so quit looking for another snickerdoodle cookie recipe and get baking.  You won’t be sorry.

Whisk together:

  • 1/4 cup white sugar
  • 4 tsp cinnamon

Set aside.

Preheat oven to 350

Whisk until well blended:

  • 2 cups all purpose flour
  • 2 tsp cream of tartar
  • 1 tsp baking soda
  • 1/4 tsp salt

(alternatively you could omit the cream of tartar & baking soda, just use 3 tsp of baking powder)

Beat in a large bowl:

  • 1 cup (2 sticks) unsalted butter, softened
  • 1 1/2 cups white sugar

When light and fluffy, beat in:

  • 2 large eggs

Stir in the dry ingredients until cookies are well blended.  Form cookies into balls (about 1 1/4 inch), roll in cinnamon & sugar mixture and place on parchment lined baking sheet, about 2 1/2 inches apart.  Give them LOTS of space as they do spread.

Bake one sheet of cookies at a time.

Bake for 12-14 minutes, just until very lightly browned at the edges.  Allow to cool for a few minutes on the baking sheet before removing and placing on a cooling rack.

Snickerdoodles 5

I put these ones too close together, and they kind of all ran into each other ….. I might fail shape class but they were still delicious.

Our friend Heather makes the most beautiful cookies, they are seriously works of art.  Needless to say, when struggling with trying to find a recipe, I turned to her.  She provided this one, with the news that it came from Joy of Cooking!

Snickerdoodles 7

Heather’s daughter Emily will no doubt be as skilled with cookies as Heather is.

Baking with my girls is the best – they are getting so good at measuring – love Stella’s attention to the scale to make sure all the cookies are the same size.  (no, you don’t need to do that, but it sure kept her busy)

Baking

Really, it doesn’t seem that long ago I was baking with these two little cuties.  Now they have little cuties of their own, and I’m baking with the next generation too.  


Sour Cream & Onion Biscuits

Buttermilk Chive 2

Layers and layers of flaky biscuit with fresh chives …. these are a winner any day of the week.

You know those potato chips of the same flavour??  I don’t like them one little bit.  In the first place, I don’t care for sour cream.  Sure, I use it in recipes, but never as a topping for anything where you just taste sour cream …. yuck.  I know I’m in the minority on that.  These biscuits though?  The sour cream makes them rich and gives them a slight tang that is perfect to offset that richness.  Scallions are my favourite in everything right now …. just desperate for fresh vegetables at this time of year I guess.

  • 8 scallions, sliced thinly
  • 12 Tbsp. chilled unsalted butter, divided
  • 2½ tsp. kosher salt
  • 1 tsp. freshly ground black pepper
  • 1¾ tsp. baking powder
  • ½ tsp. baking soda
  • 1¼ tsp. sugar
  • 2½ cups all-purpose flour, plus more for surface
  • 1¼ cups sour cream, plus more for serving
  • Flaky sea salt

Place a rack in middle of oven; preheat to 425°. Line a baking sheet with parchment paper. Trim root ends from 8 scallions. Thinly slice crosswise (not on a diagonal); set aside.

Melt 2 Tbsp. chilled unsalted butter by whatever method is easiest for you; set aside. Whisk 2½ tsp. kosher salt, 1 tsp. freshly ground black pepper, 1¾ tsp. baking powder, ½ tsp. baking soda, 1¼ tsp. sugar, and 2½ cups (313 g) all-purpose flour in a large bowl to combine.

Cut remaining 10 Tbsp. chilled unsalted butter into ½” pieces. Add to dry ingredients and toss to coat. Using your hands, work butter into dry ingredients, smashing it between your fingers and flattening it between your palm until there are lots of thin shards and pea-size bits. Add reserved scallions and toss to evenly distribute.

Create a well in the center of mixture and add 1¼ cups sour cream to the center. Using a fork and working in circles, mix until large shaggy clumps form. If your bowl is wide enough, fold dough over itself a couple of times inside it until it comes together.

  • Pat dough into an 8×4” rectangle about 1” thick.

  • Working from a short side, fold dough in thirds as you would a letter. It doesn’t need to overlap perfectly. Pat dough into another 8×4” rectangle, then fold dough in thirds like a letter one more time. (You’ll have done the folding procedure two times total.) Pat dough back into an 8×4” rectangle and straighten up with your hands and/or your bench scraper. (This folding method is what will create those nice flaky layers in your final biscuits.)

  • Cut rectangle in half lengthwise, then cut each half crosswise into 4 squares for a total of 8 biscuits.

Transfer biscuits to prepared baking sheet. Brush tops gently with melted butter; sprinkle with flaky sea salt.

Bake biscuits until golden brown, 18-22 minutes.  Serve warm with sour cream or butter.

Buttermilk Chive 3

Ready for the oven – already you can tell they are perfect.

Buttermilk Chive 1

Just look at all those flaky layers – it comes from the folding technique.

If you want more concise instructions on how to make these, pop on over to the Bon Appetit website, and check out their “Basically” section.  Molly Baz made these, and not only are her instructions (complete with short videos) simply perfect, these biscuits are divine.

Flakiest Biscuits

Okay, here they are – BACK by popular demand … my fantastic baking powder biscuits.  

Biscuits 1

I’ve tried out a new technique …. folding the dough.  Pat into a rectangular shape and then fold into 3 (like folding a letter into an envelope), pat out into another rectangular shape and repeat.  You can literally see the folded dough, and just look at those flaky layers!  Finish with a little melted butter and sprinkle with salt and freshly cracked pepper before baking.

Once you get this down pat you will rely on these biscuits for anything from a summer morning with fresh peach jam or a winter evening served with a family favourite – chili, soup, stew … every household has their own comfort dinner!

  • 2 cups flour
  • 1 tsp salt
  • 1 tbsp sugar
  • 4 tsp baking powder
  • 1/2 cup cold butter
  • 1 egg
  • almost 1 cup milk or buttermilk

Stir dry ingredients to blend and then with pastry blender, or 2 forks, blend in 1/2 cup cold butter (my tip: freeze the butter for 15 min ahead of time, and use the large holes on a box grater to grate the butter – instant flakes of butter)

Lightly beat 1 egg in a 1 cup measure, then stir in enough milk to reach the 1 cup mark.

With a fork, stir the egg/milk mixture into the dry ingredients – only enough to have it start to hold together.  Turn onto floured surface and … oh so gently … without overmixing … pat it together, and then into a solid shape, about 1 inch or so in height.  Using floured biscuit cutter (or your favorite glass) cut out shapes and place on floured baking sheet.

These are so flexible – if you want to add any herbs, or cheese – do so at the dry ingredient stage.  Go ahead and experiment – makes these your own family favorite!

To guarantee extra tall, fluffy biscuits, pop them into the fridge or freezer for a few minutes.  The combination of hot oven and cold butter creates magic!

Bake at 400 for 15 – 20 minutes (depending on your oven – check it at 15) until lightly golden and very fluffy!  Image

Asian Chicken Mushroom Bowls with Peanut Sauce

So unlike me, but every so often I’m looking for a quick and easy dinner!  This hits all the notes with a delicious sauce, crunchy vegetables and the bright hit of those pickled vegetables – don’t skip them!

DD Chicken 5

INGREDIENTS: 

  • 1 tablespoon vegetable oil
  • 1 tablespoon toasted sesame oil
  • 1 pound ground chicken
  • 1 (3.5-ounce) package shiitake mushrooms, diced
  • 1 carrot, peeled and diced
  • 1 shallot, minced
  • 3 cloves garlic, minced
  • 1 tablespoon freshly grated ginger
  • 1/4 cup hoisin sauce
  • 2 teaspoons chili garlic sauce
  • 1 teaspoon fish sauce
  • 2 tablespoons chopped fresh cilantro leaves
  • 1 head butter lettuce

or

  • stir fried vegetables
  • cooked rice

FOR THE PEANUT SAUCE

  • 3 tablespoons creamy peanut butter
  • 1 tablespoon reduced sodium soy sauce
  • 1 tablespoon freshly squeezed lime juice
  • 2 teaspoons brown sugar
  • 1 teaspoon chili garlic sauce, or more, to taste
  • 1 teaspoon freshly grated ginger

QUICK PICKLED VEGETABLES

  • thinly sliced cucumbers & radishes
  • salt
  • vinegar (use what you have on hand, either white vinegar or rice wine vinegar

Thinly slice vegetables and place in non-reactive bowl.  Sprinkle with a little salt and then just cover with vinegar.  Set aside.

DIRECTIONS:

  1. To make the peanut sauce, whisk together peanut butter, soy sauce, lime juice, brown sugar, chili garlic sauce and ginger in a small bowl. Whisk in 2-3 tablespoons water until desired consistency is reached; set aside.
  2. Heat vegetable oil and sesame oil in a large skillet over medium high heat. Add ground chicken, mushrooms, carrot and shallot. Cook until browned, about 5-7 minutes, making sure to crumble the chicken as it cooks; drain excess fat.
  3. Stir in garlic and ginger until fragrant, about 1 minute.
  4. Stir in hoisin sauce, chili garlic sauce and fish sauce until heated through, about 30 seconds. Remove from heat; stir in cilantro.
  5. To serve, spoon several tablespoons of the chicken mixture into the center of a lettuce leaf, taco-style, drizzled with peanut sauce.

I’ve adapted (translate copied, but give credit where it is due!) this to a rice bowl from a Damn Delicious recipe for lettuce wraps …. if you haven’t been over to her site, treat yourself and go review a few recipes.   Needless to say we didn’t use carrots as Grant HATES cooked carrots so we just ignored that portion altogether.  Use whatever vegetables you have on hand to supplement the chicken mixture to create a colourful, delicious bowl.

DD chicken 2

Get everything ready to go, this all comes together so quickly.

DD chicken 3

Brown the chicken, mushrooms, onions, garlic and ginger, then stir in the sauce.

DD Chicken 6

Today’s vegetables were crunchy and delicious – use whatever you have on hand


DD Chicken 4

This takes only a few minutes to come together, so have your vegetables ready to go, and your rice cooked so you can put it all in your bowl within 20-30 minutes.

DD chicken 1

The leftovers are amazing in these fresh, soft pita’s I made.

Lamb Barbacoa

lamb barbacoa 4

Pretty simply delicious.  Feels just like you are at a roadside stand or a local Mercado in Mexico.  Serve with a salad and dinner is ready.

I wasn’t really sure what I wanted to do with the pack of frozen lamb stew meat in my freezer …… This turned out to be perfect!  It helps that whenever we come home from Mexico we bring dried peppers so I always have a good stock on hand.  The only thing I didn’t have, in fact, was the agave leaf, or banana leaf.  I’m sure it will add another dimension of flavour when I try that, but honestly this was just fantastic without.

FOR THE LAMB

  • 12-inch chunk of an agave leaf (penca de maguey) or 1 large banana leaf, optional
  • tablespoons vegetable oil
  • 3 pounds boneless lamb shoulder (you could also use beef or pork – marinade works with either)
  • 12-ounce bottle of beer (optional but I love this!)
  • Salt

FOR THE MARINADE

  • 2 dried guajillo chiles, stemmed, seeded and torn into large pieces
  • 2 dried ancho chiles, stemmed, seeded and torn into large pieces
  • 3 garlic cloves, peeled and roughly chopped
  • tablespoon cider vinegar
  • tablespoon dark brown sugar
  • teaspoon salt
  • 1 canned chipotle in adobo sauce
  • 1/4 teaspoon ground cinnamon, preferably Mexican canela
  • 1/2 teaspoon dried Mexican oregano

FOR SERVING

  • Your favorite hot sauce or salsa
  • A little chopped white onion or pickled red onions
  • A handful of cilantro leaves

This recipe came from Rick Bayless, and I have copied it here exactly as he posted it, but I’ve added my changes in the bold Italic font.

Roast the agave leaf being careful not to touch the exposed flesh of the agave) over an open flame, turning every few minutes until pliable and charred, 10 to 15 minutes, depending on the thickness.  (If using a banana leaf, run it briefly over an open flame to soften it.)  Cut into 3 pieces.  We are in the midst of Covid-19 pandemic, so I wasn’t about to run out to the store and try to buy agave leaf or banana leaf (the closest we can get to either of these is frozen banana leaf).  I just left this part out.

In the stovetop-safe insert of your slow cooker or in a very large (12-inch) skillet, heat the oil over medium-high.  Pat the lamb dry with a paper towel, sprinkle generously with salt and lay it in the insert of skillet.  Cook, turning occasionally, until richly brown on all sides, about 10 minutes.  Fit the insert into the machine or transfer the meat to the slow cooker.

Combine all the marinade ingredients in a blender with 2 cups of water and blend to a smooth puree.  Pour through a medium mesh strainer into the slow cooker. Nestle the pieces of agave leaf or banana leaf under and around the meat and pour the beer over the top, if you are using them.  Cover and turn on the slow cooker to high.  Your barbacoa  will be done in about 6 hours, though you can hold it for longer. (My slow-cooker can be programmed to switch from high after 6 hours to a “keep warm” temperature for up to another 6 hours. Some slow cookers click to “keep warm” automatically; others need to be switched manually.). I put the seasonings and the torn chile peppers into the blender along with hot water, and allowed it to sit for about 20 minutes before blending. This allowed the peppers to soften nicely and they blended up very smoothly.

Given that we are just “at home” these days, I didn’t use the slow cooker, but browned the meat well before adding it to a heavy cast iron dutch oven, covering with the marinade and slowly roasting at 275 for about 3 hours.  Honestly, I prefer this method most of the time anyway as it allows for the sauce to be richer.

lamb barbacoa 3

Just look at how rich that sauce is …. I don’t find the same result in a slow cooker.

When you are ready to serve, coarsely shred the lamb and arrange it on a warm platter.  Skim any fat from the sauce that remains in the slow cooker, then taste it.  If you feel it would be better with a more concentrated flavor, pour it into a medium saucepan or remove the insert and set it over high heat.  Boil for a few minutes to reduce that quantity, then taste and season with salt if it needs it. Spoon as much as you like over the lamb or beef.  (I like to sprinkle coarse salt over the meat at this point.)  Serve the barbacoa with the hot sauce or salsa, onion and cilantro.  Grab some tortillas, if you like, and you’re ready to make some delicious tacos.

lamb barbacoa 2

Needless to say, it isn’t necessary to make your own tortillas, but I love doing it.  I’m still struggling with getting my corn tortillas worthy of being a Mexican Abuela, but my flour tortilla game is strong!!  On Saturday mornings at one of our favourite mercados in Mexico City we have found the absolute B E S T pork carnitas.  This is the only spot we’ve ever seen this done, but they are making their tortillas loaded with herbs, so I tried that today.  Pretty successful, if I do say so myself.  I just kept adding herbs until it looked and smelled about right.

Lamb barbacoa 1

Most people come home from Mexico with decor, or tequila …… we bring home tortilla baskets, dried chile peppers and mezcal to make barbecue sauce.