Lemon Meringue Pie

It’s really not spring here yet, but I can feel it’s arrival any day now, and what better way to celebrate than with lemon meringue pie. It is Grant’s favourite pie, and I just had to make it on a bright sunny day, feeling that this spring in particular is so welcome!

We were in such a hurry to eat the pie that my photo isn’t the best, and yes – I just can’t seem to get away from having the meringue weep! Still delicious….

LEMON CURD

  • 5 large egg yolks (save the whites for meringue below)
  • 1 1/3 cups of water
  • 1 cup granulated sugar
  • 1/3 cup cornstarch
  • 1/4 tsp salt
  • 1/2 cup freshly squeezed lemon juice (yes – fresh is best!)
  • zest of 2 lemons
  • 2 tbsp unsalted butter, soft and at room temperature

Whisk egg yolks together and set aside.

Combine water, sugar, cornstarch, salt lemon juice and lemon zest in a medium heavy bottom saucepan. Cook over medium heat, stirring FREQUENTLY. Trust me, you don’t want this to burn. Once it thickens up, S L O W L Y stir a couple of tablespoons into the reserved egg yolks. Stir constantly and add another couple of tablespoons of the lemon sauce. Add the egg yolk mixture back into the saucepan with the rest of the lemon mixture and cook over medium heat, stirring constantly. This will thicken and release large bubbles, demonstrating just how thick the mixture is. Remove from heat and stir in the butter, continuing to stir until the butter has melted.

Pour into partially baked pie crust. Set aside while you whip the meringue.

Preheat oven to 350

MERINGUE

  • 5 large egg whites
  • 1/2 tsp cream of tartar
  • 1/2 cup granulated sugar
  • 1/8 tsp salt

Using a hand mixer or stand mixer, beat the egg whites and cream of tartar together on medium speed just until blended. Turn beaters to high and slowly add in the sugar and salt. Beat on high until stiff peaks form.

Using a large spoon dollop meringue all over the pie, being very careful to have it reach right to the edges, and touching the pie crust. (This will help to keep the meringue from separating away from the crust, and theoretically from weeping too much but mine always weeps??). Use the back of your large spoon to create swirls in the meringue.

Bake for 25-30 minutes, watching so it is just nicely browned.

Set on the counter for 1 hour and then put in the fridge for at least 4 hours to allow the lemon curd to set.

Check out my flaky pastry recipe for the best start to any pie!
Please!! Freshly squeezed lemon juice!!
Partially baked crust, warm lemon curd and just waiting for the meringue
Ready for the oven
The only tricky part of this whole recipe is waiting for the pie to completely cool down. This pie is best the day it is made, but without any family dinners, you just know Grant and I managed to make it last a few days and it was amazing right to the last bite.

One of my favourite sources for baking recipes is Sally’s Baking Addiction, and this lemon meringue pie recipe came straight from her blog. Make sure to check it out, she has so many great tips and videos to create amazing treats.

Empanadas

Most cultures have a pastry/hand pie like this one ….. empanadas are famous in many countries, but I’ve only had the pleasure of eating them in Mexico so that is what I have fashioned these after.  They can be deep fried, but I prefer baking them for fluffy, flaky pastry and creamy filling.  Extra bonus points for the way your house smells while they are baking!

Empanada 1

In today’s version I used chicken, onion & red pepper, topped with a chunk of jalapeño havarti.  The tomatillo salsa was delicious for dipping!

Empanadas are such a treat.  These will give you flaky pastry, and a creamy tasty filling.

Make sure when you roll out your dough that you do it a little thinner than you would for a pie – you want to make sure you have a good ratio of filling to crust.

Empanada 2

Saute onions and garlic until softened, then add red pepper and cook for only a couple more minutes.  Stir in cooked shredded chicken and season to taste.  In this version, I added a couple of tablespoons of tomatillo salsa, and then topped with jalapeño havarti cheese for an extra bit of kick and creaminess.

Other suggestions for empanada filling:

  • ground meat seasoned with taco spices, topped with Oaxaca string cheese
  • leftover pulled pork and pickled red onions
  • wilted spinach, sautéed mushrooms and feta cheese
  • go sweet with fruit, cinnamon and a bit of vanilla

I’ve included my pastry recipe here, but if you aren’t into making your own pastry go ahead and use a prepared frozen pie shell.  Just take it out and roll it a bit thinner.

Cut your pastry into rounds, brush beaten egg around the outside and then put about a tablespoon or two of filling in the middle, add some cheese on top.  You will want enough filling so that your ratio of stuffing to pastry is tasty.  Fold edges up together and press to seal.  Set them on a baking sheet and pinch/crimp the top to make sure it is well sealed.

Brush beaten egg over the top of the sealed empanada, and then poke a hole so steam can escape and the pastry doesn’t leak too much of your goods outside the shell.

Bake at 375 for 25-30 minutes until golden brown.  You can also freeze them on a cookie sheet at this point and bake later, from frozen.  Just bake a little longer.

Empanada 3

Oh, these were G O O D.  Before baking season the tops with salt and pepper.

Everybody loves flaky pie crust – but people are divided on whether to use shortening, lard or butter.  Through trial and error, I think I have found the best of them all – by combining lard and butter.  Try it ….. so light and flaky – you will love it.

  • 1 egg
  • 1 tbsp vinegar
  • 3/4 tsp salt
  • 3 cups white flour
  • 3/4 cup cold vegetable lard or (if you prefer) shortening
  • 3/4 cup cold butter
  • 5 tbsp very cold water
  • Lightly beat egg and vinegar

Whisk flour and salt

Using a pastry blender or 2 knives, cut in lard/butter until pea sized.  Add very cold water to egg and vinegar mixture.  Make a hole in the center of the flour blend and stir in the egg/vinegar/water combination.  Work just until pastry comes together – adding slightly more liquid if it doesn’t, and if it is too wet, add a wee bit more flour.  Work together just until it all comes into a solid mass.  Knead very lightly on floured surface.  Wrap tightly and put in the fridge for at least 40 minutes.

Roll on lightly floured board until just thin enough to use for pie dough.

This recipe makes enough for 1 smaller pie (top and bottom) or a large deep dish pie crust bottom.

Zucchini Ricotta Galette or Tomato Galette

Got a plethora of zucchini in your garden?  Here you go, you are very welcome.  Even if you don’t, head to the grocer or market and buy some because this galette is just that good.

Galette 8

This photo is gorgeous …. but even that doesn’t do it justice.  Oh, the crispy puffy pastry, the creamy rich base …the fresh from the garden (or market) zucchini …. and the aroma as it bakes. This is a sure winner, and certain to be on repeat.

Veg Galette 3

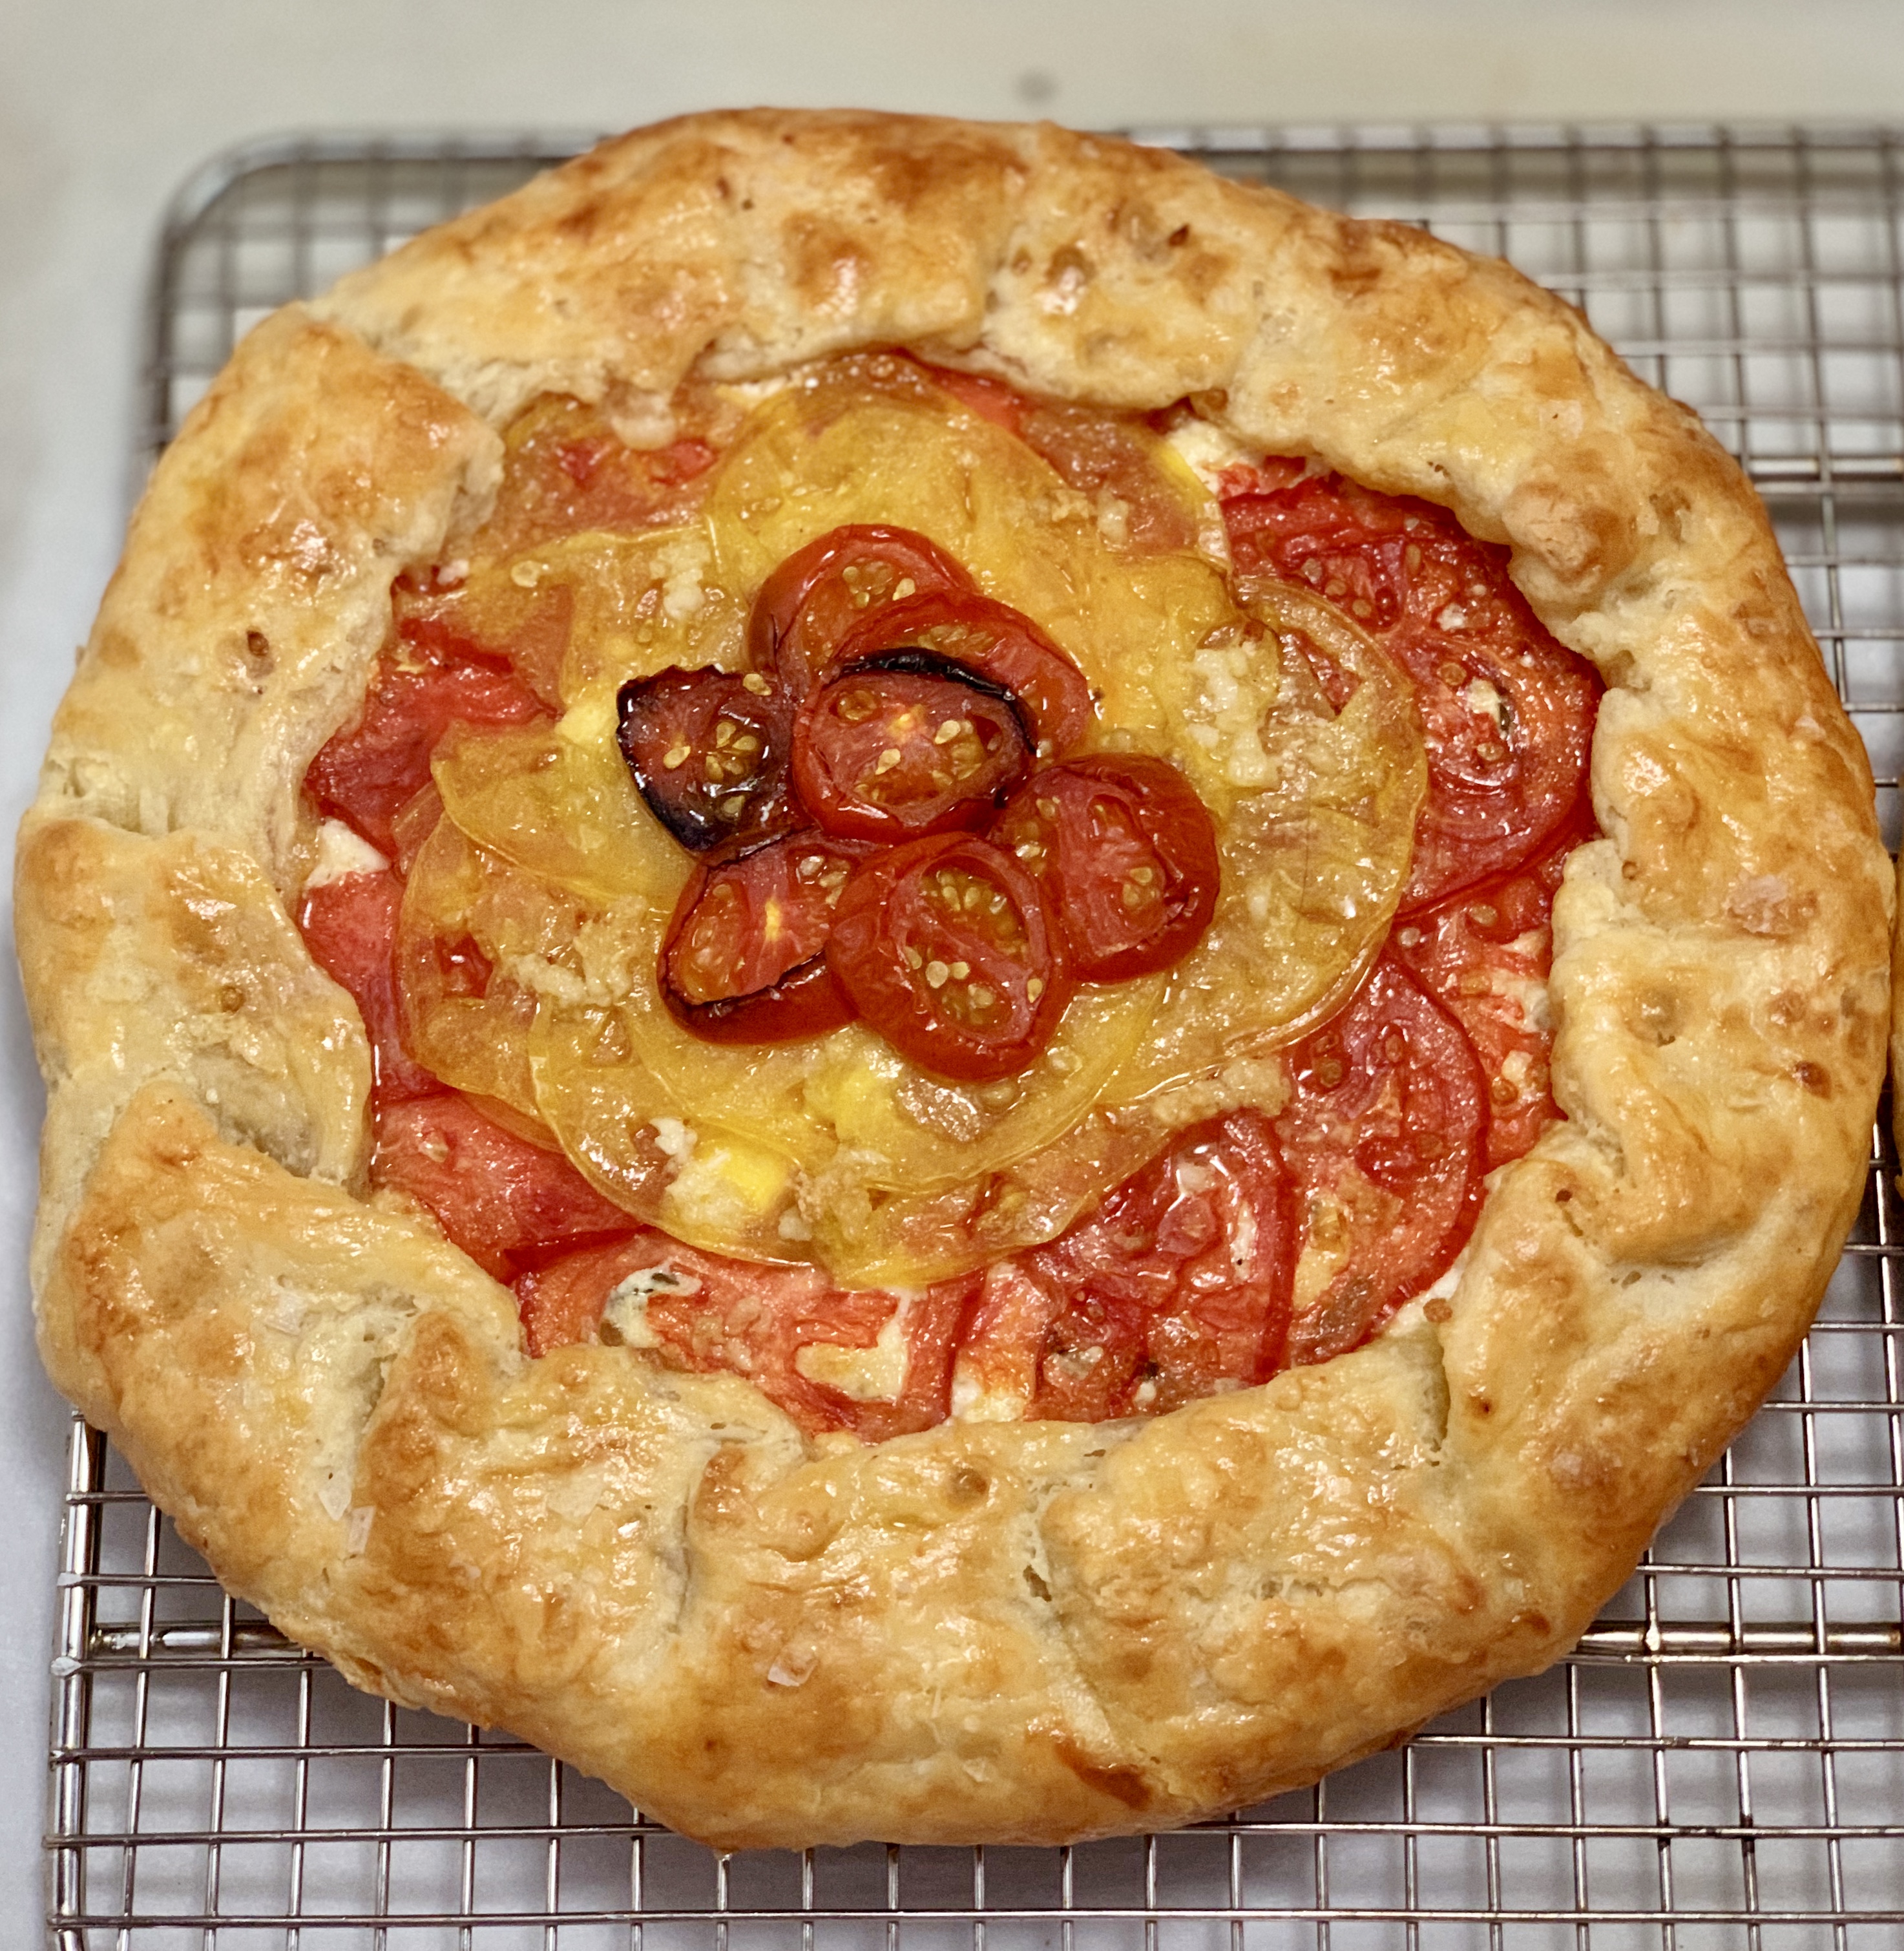
Incredibly delicious as a tomato galette also.

Serve this with a salad for a great vegetarian meal or cut into small pieces for an appetizer, either way it’s fantastic!

For the pastry:
1 1/4 cups all-purpose flour, chilled in the freezer for 30 minutes
1/4 teaspoon salt
8 tablespoons (1 stick) cold unsalted butter, cut into pieces and chill again
1/4 cup sour cream
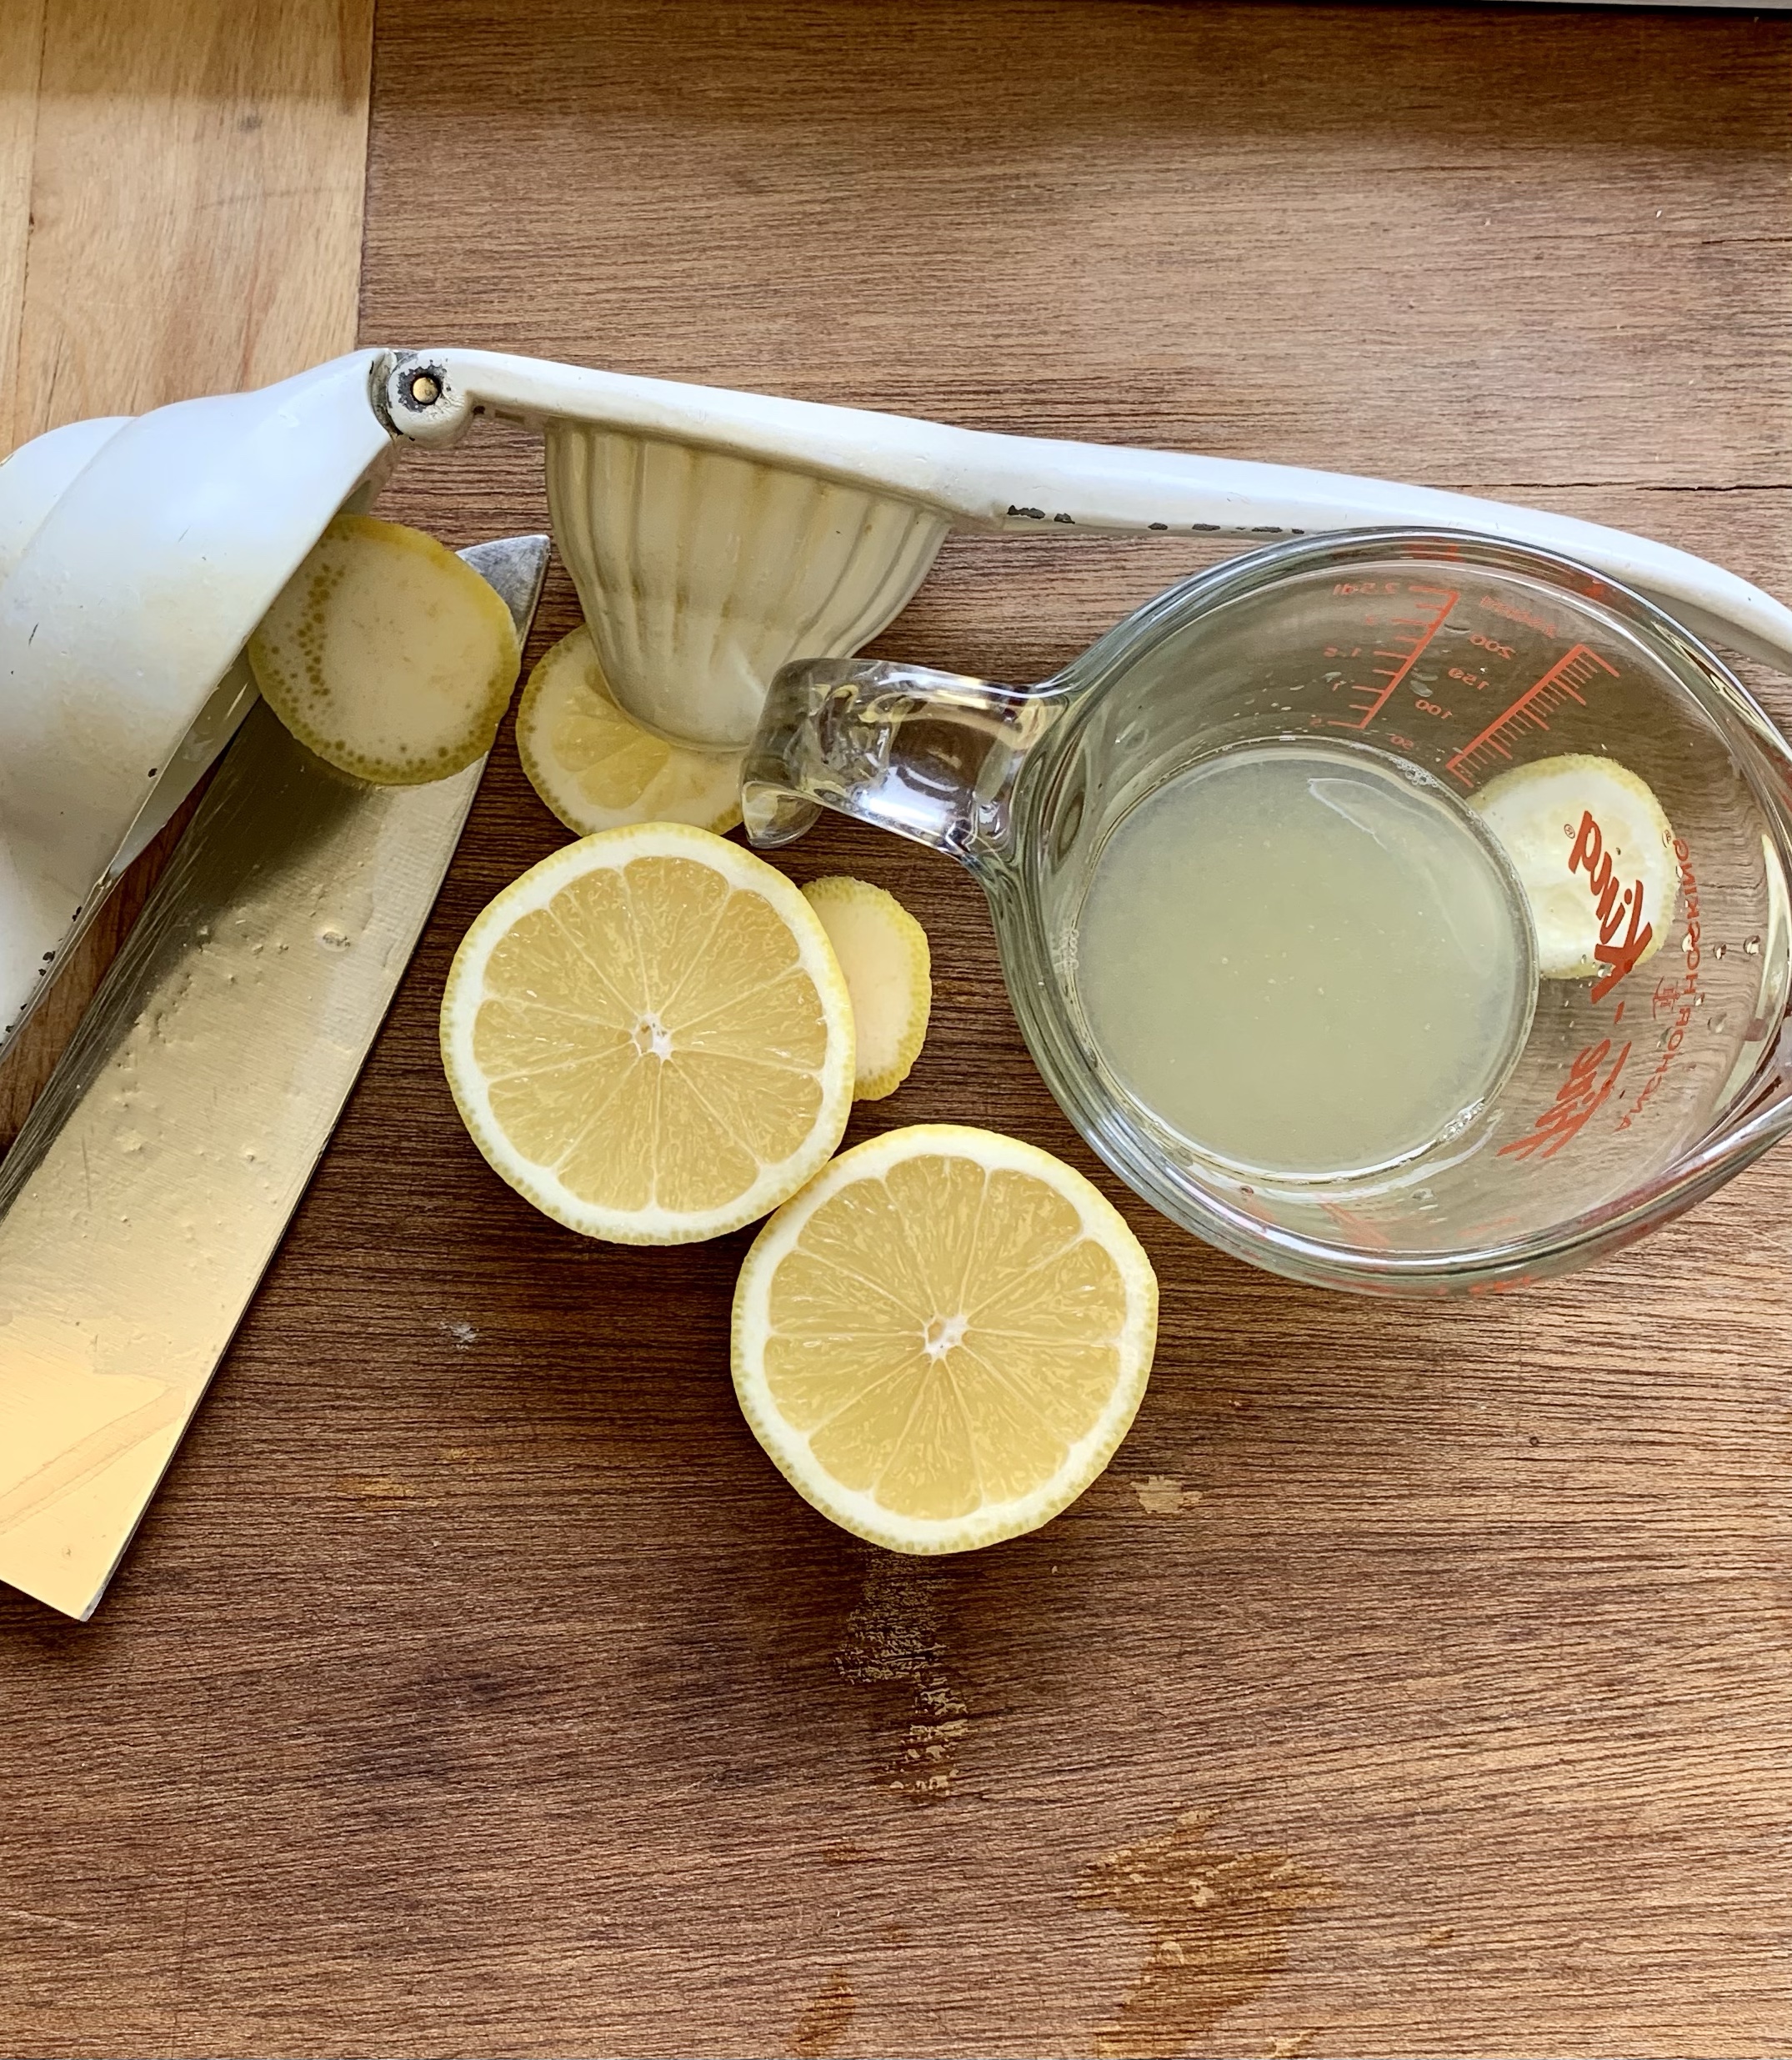
2 teaspoons fresh lemon juice
1/4 cup ice water

Filling:
1 large or 2 small zucchinis, sliced into 1/4 inch thick rounds
1 tablespoon plus 1 teaspoon olive oil
1 medium garlic clove, minced (about 1 teaspoon)
1/2 cup ricotta cheese
1/2 cup (about 1 ounce) grated Parmesan cheese
1/4 cup (1 ounce) shredded mozzarella
1 tablespoon slivered basil leaves

Glaze:
1 egg yolk beaten with 1 teaspoon water

Veg Galette 2

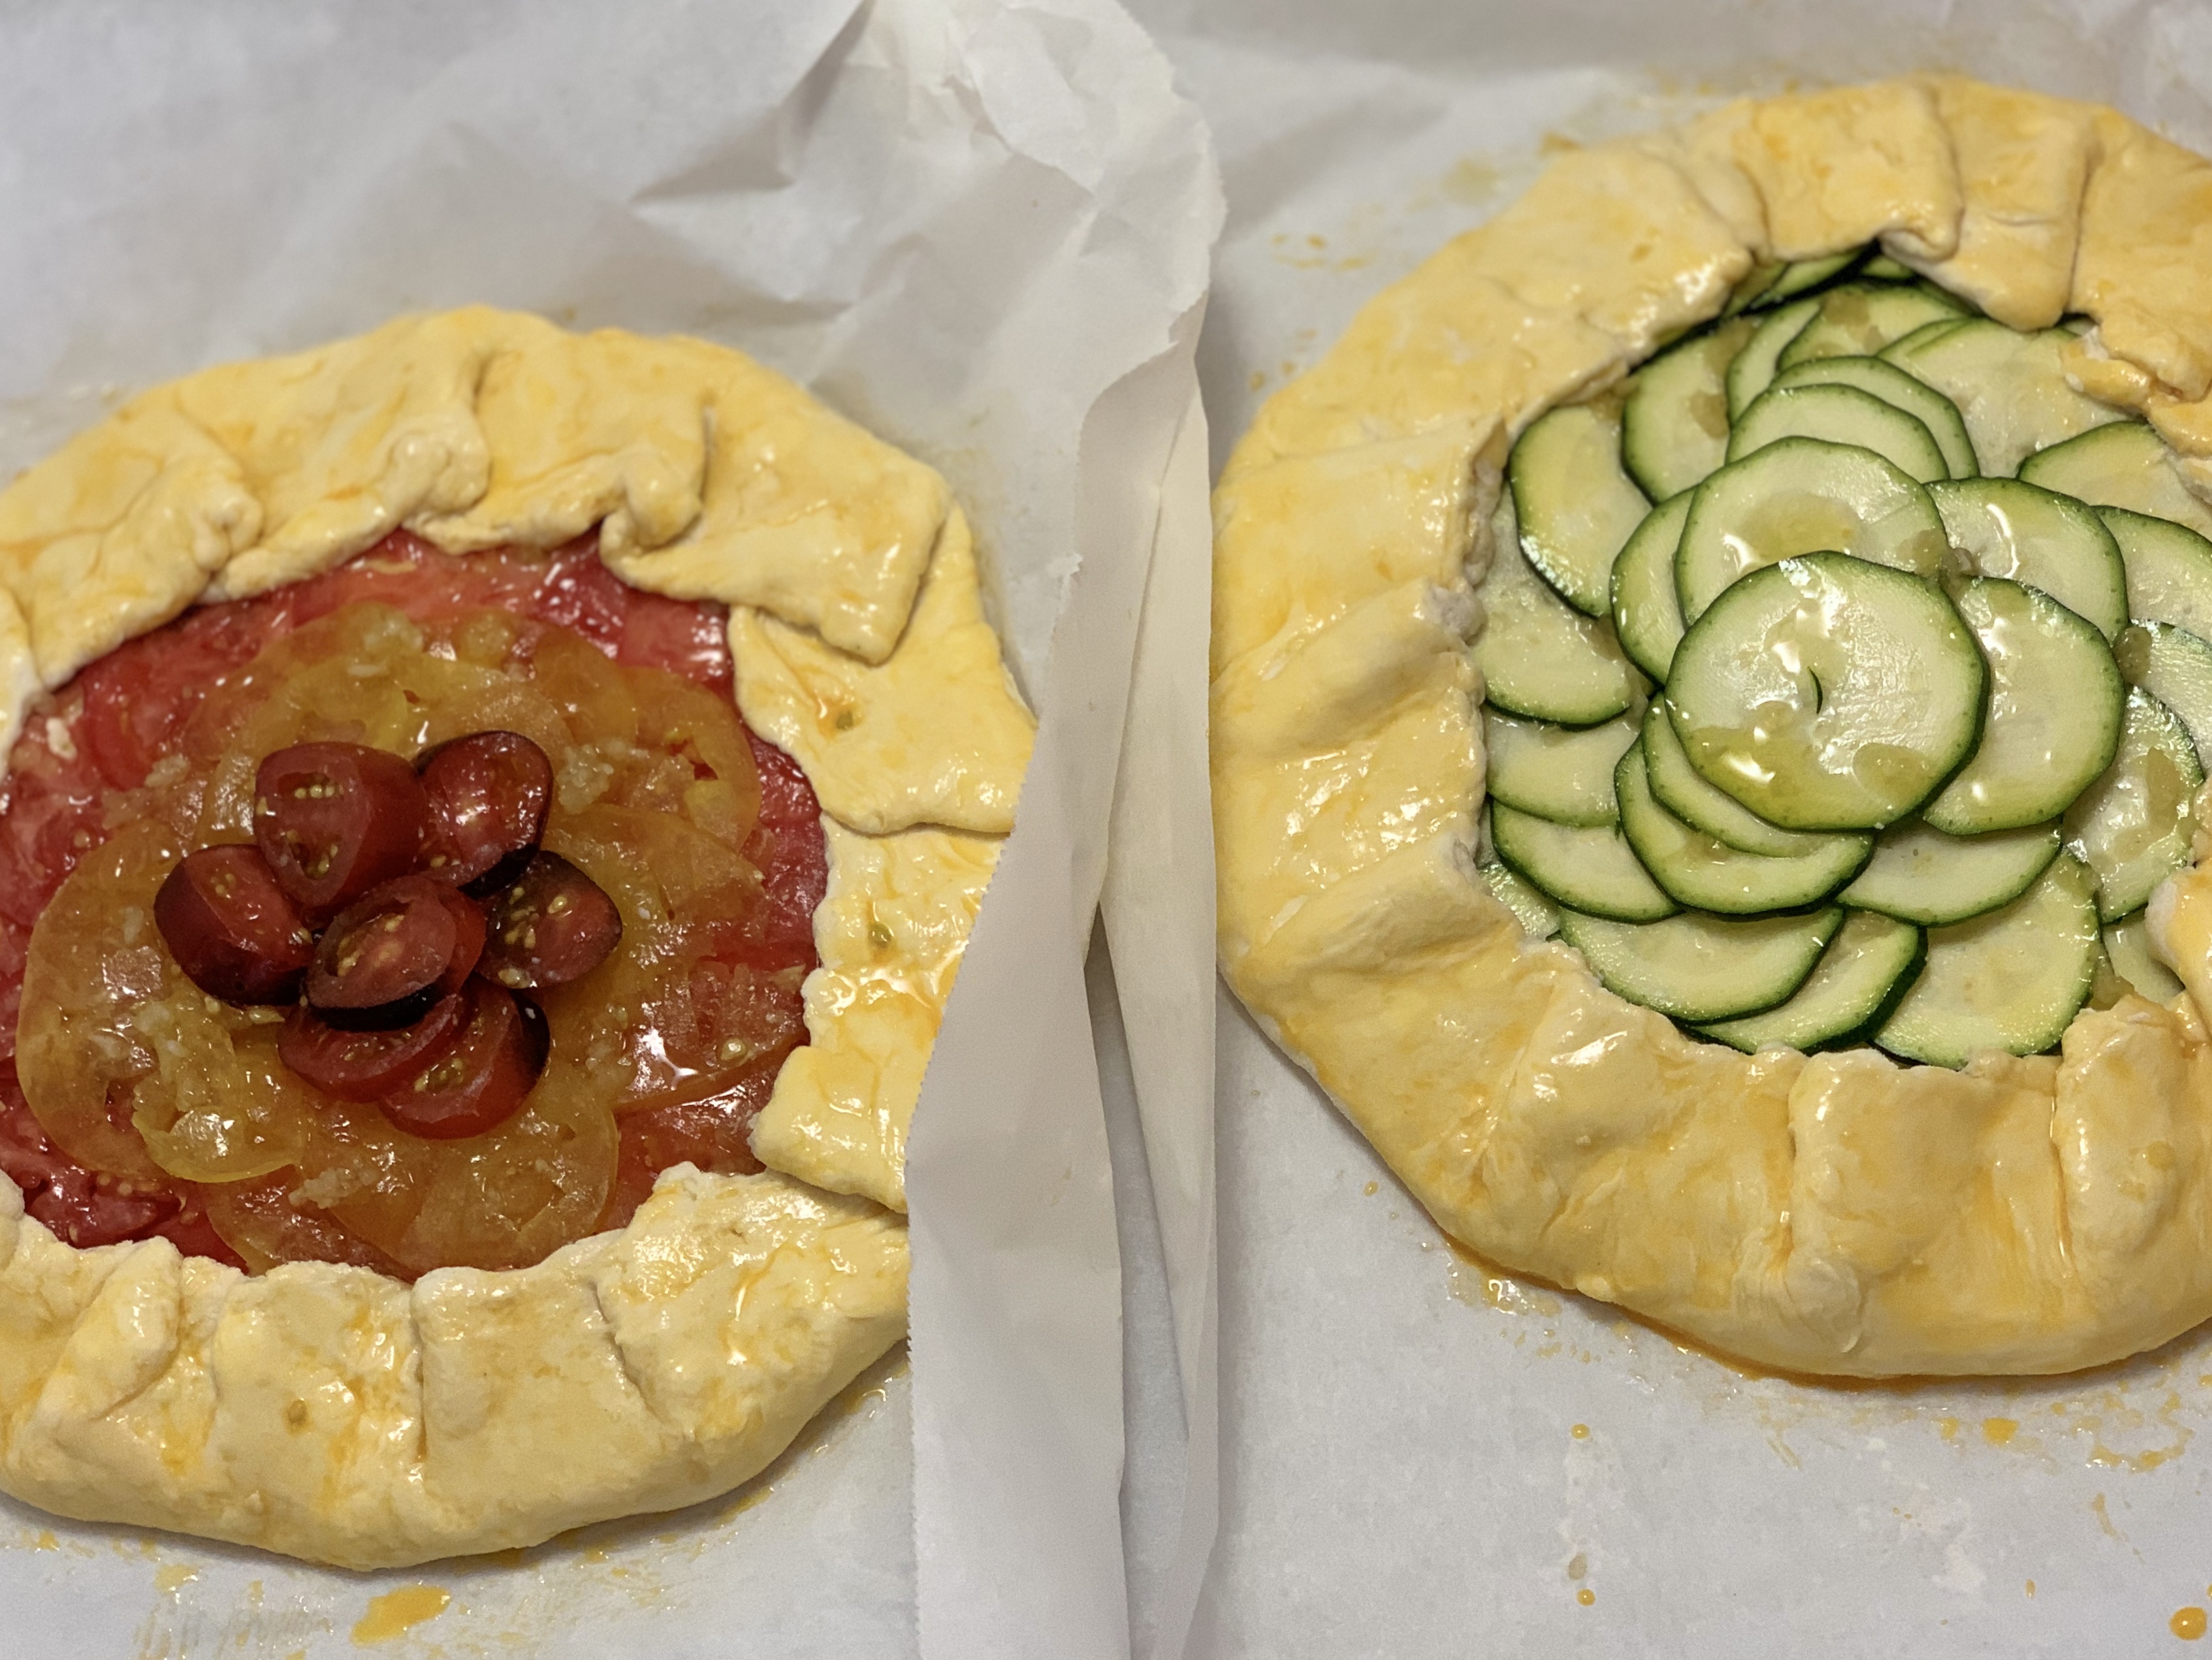
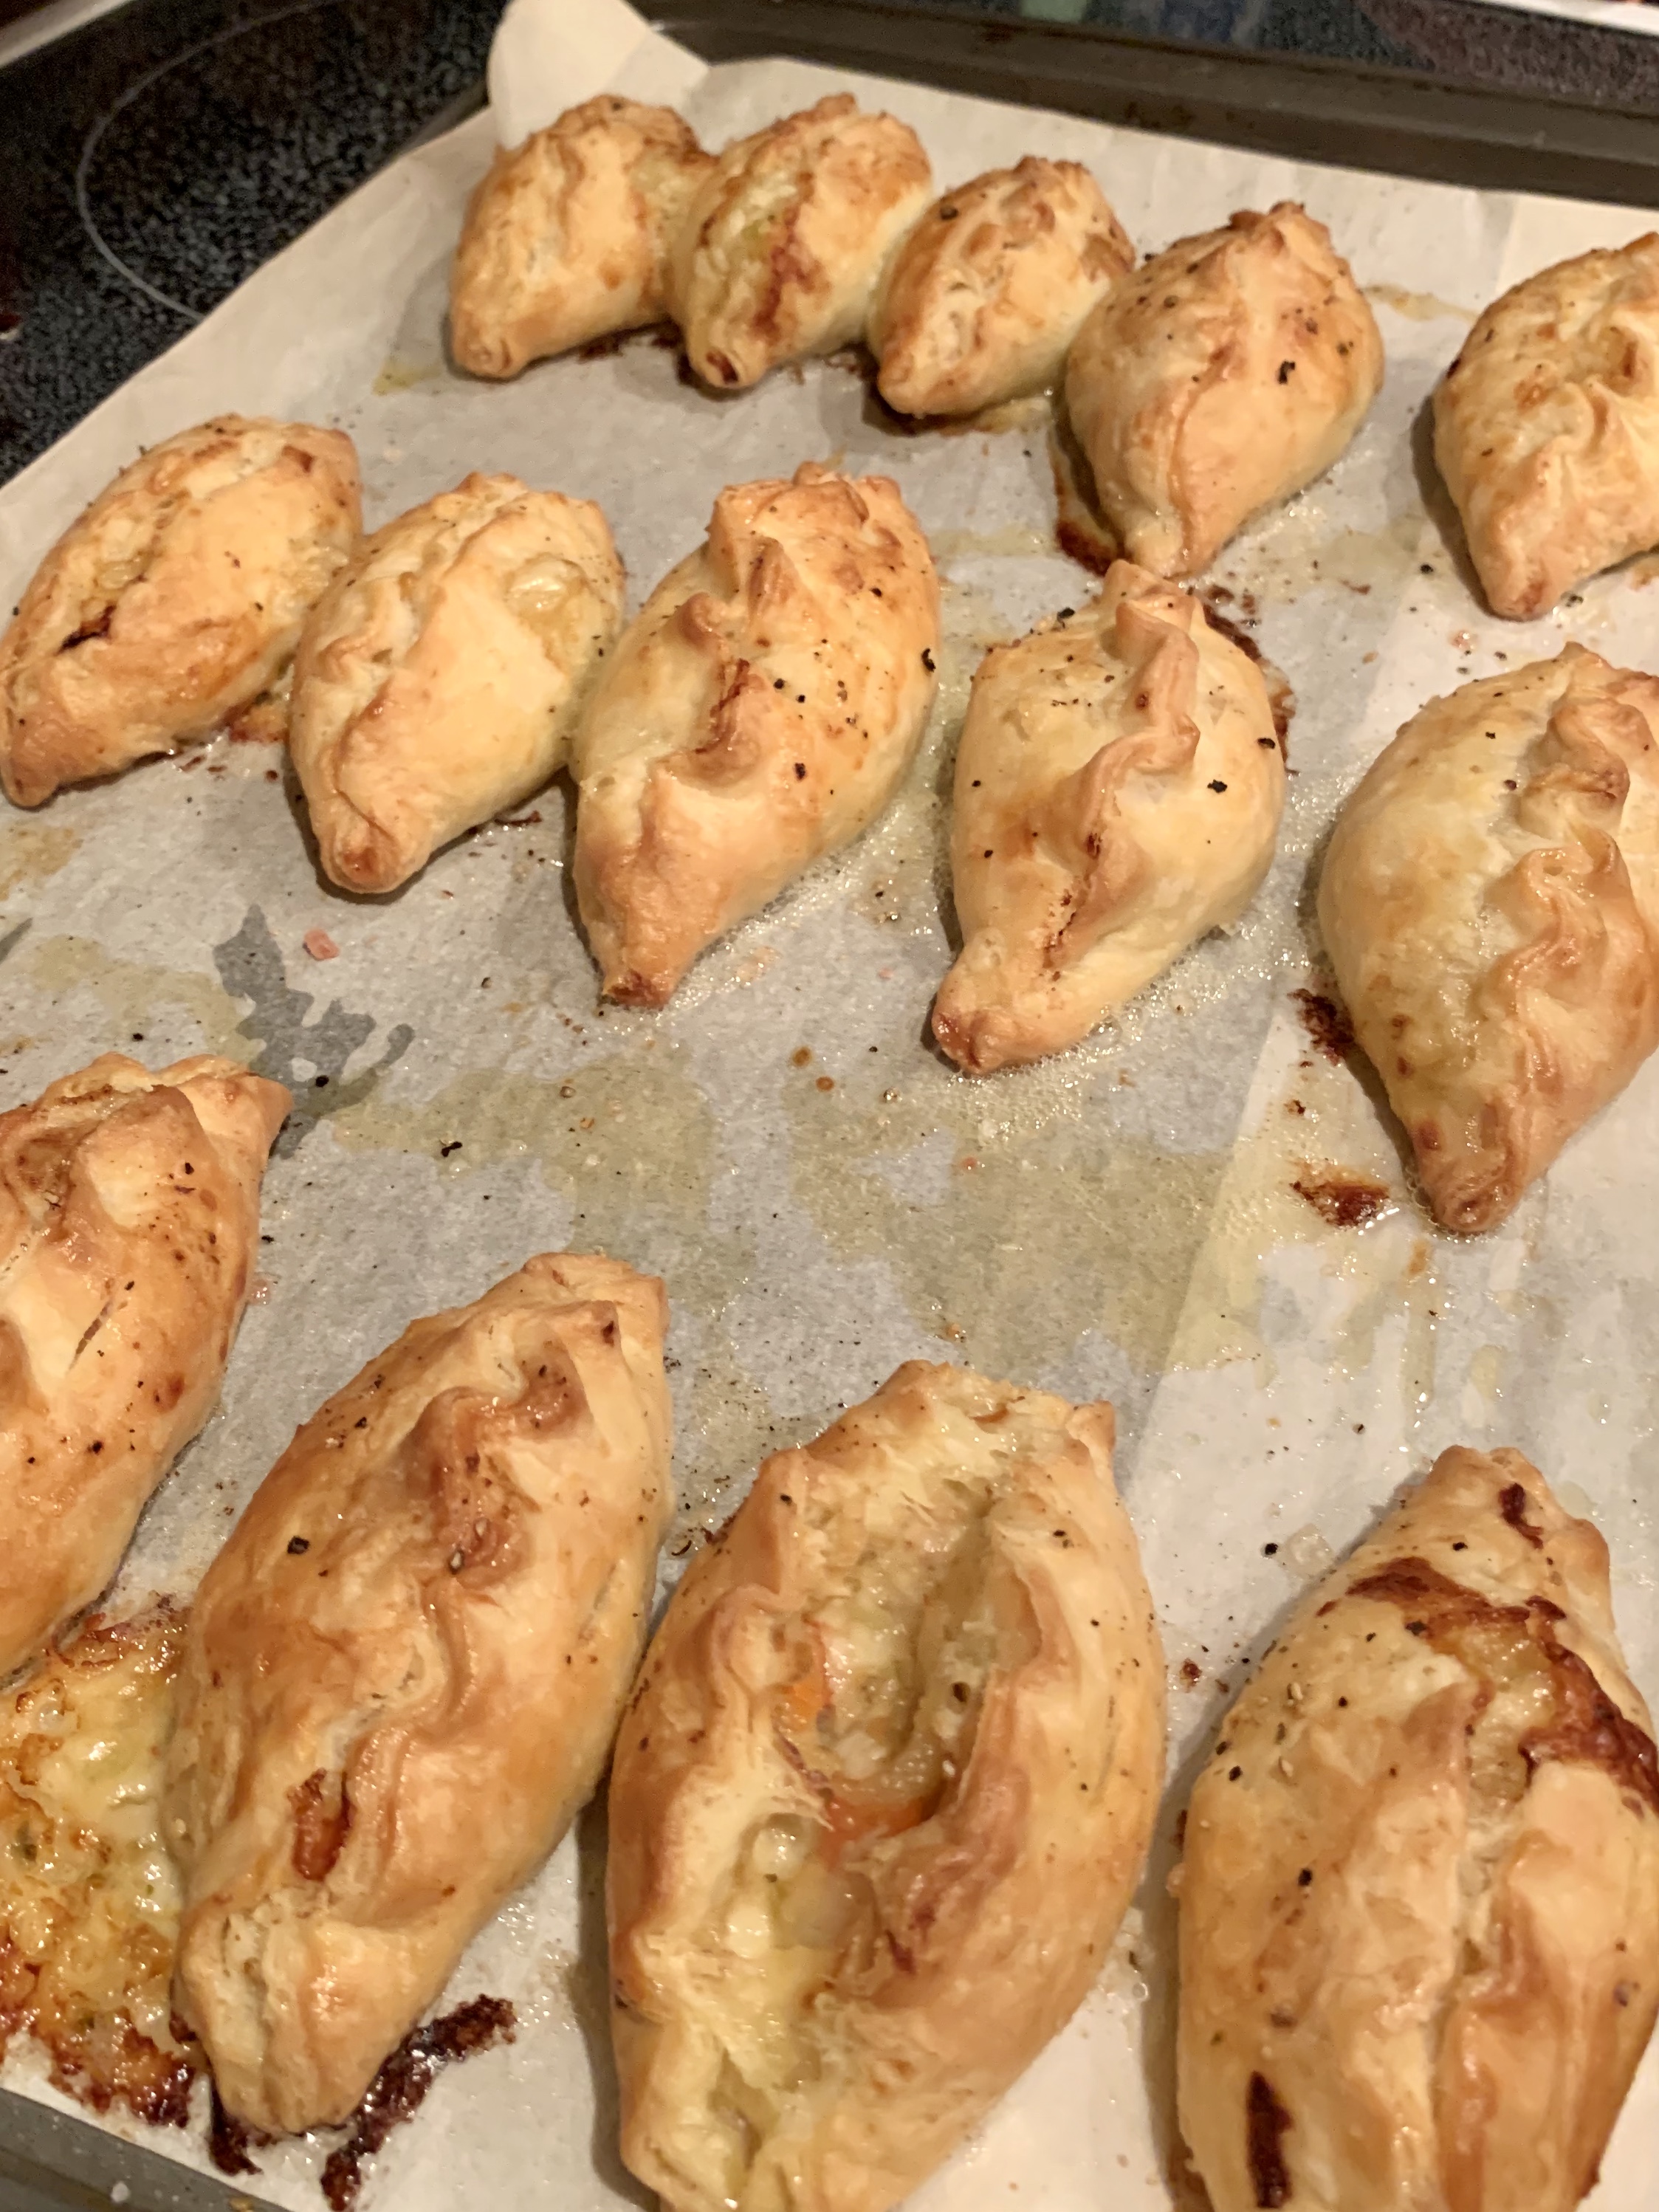
Glazed and ready for the oven – they already look and smell fantastic.


Make dough: Whisk together the flour and salt in a large bowl. Sprinkle bits of butter over dough and using a pastry blender, cut it in until the mixture resembles coarse meal, with the biggest pieces of butter the size of tiny peas. In a small bowl, whisk together the sour cream, lemon juice and water and add this to the butter-flour mixture. With your fingertips or a wooden spoon, mix in the liquid until large lumps form. Pat the lumps into a ball; do not overwork the dough. Cover with plastic wrap and refrigerate for 1 hour.

Make filling: Spread the zucchini out over several layers of paper towels. Sprinkle with 1/2 teaspoon salt and let drain for 30 minutes; gently blot the tops of the zucchini dry with paper towels before using. In a small bowl, whisk the olive oil and the garlic together; set aside. In a separate bowl, mix the ricotta, Parmesan, mozzarella, and 1 teaspoon of the garlicky olive oil together and season with salt and pepper to taste.

Prepare galette: Preheat oven to 400 degrees. On a floured work surface, roll the dough out into a 12-inch round. Transfer to an ungreased baking sheet (though if you line it with parchment paper, it will be easier to transfer it to a plate later). Spread the ricotta mixture evenly over the bottom of the galette dough, leaving a 2-inch border. Shingle the zucchini attractively on top of the ricotta in concentric circles, starting at the outside edge. Drizzle the remaining tablespoon of the garlic and olive oil mixture evenly over the zucchini. Fold the border over the filling, pleating the edge to make it fit. The center will be open. Brush crust with egg yolk glaze.

Bake the galette until the cheese is puffed, the zucchini is slightly wilted and the galette is golden brown, 30 to 40 minutes. Remove from the oven, sprinkle with basil, let stand for 5 minutes, then slide the galette onto a serving plate. Cut into wedges and serve hot, warm or at room temperature.

Galette 2

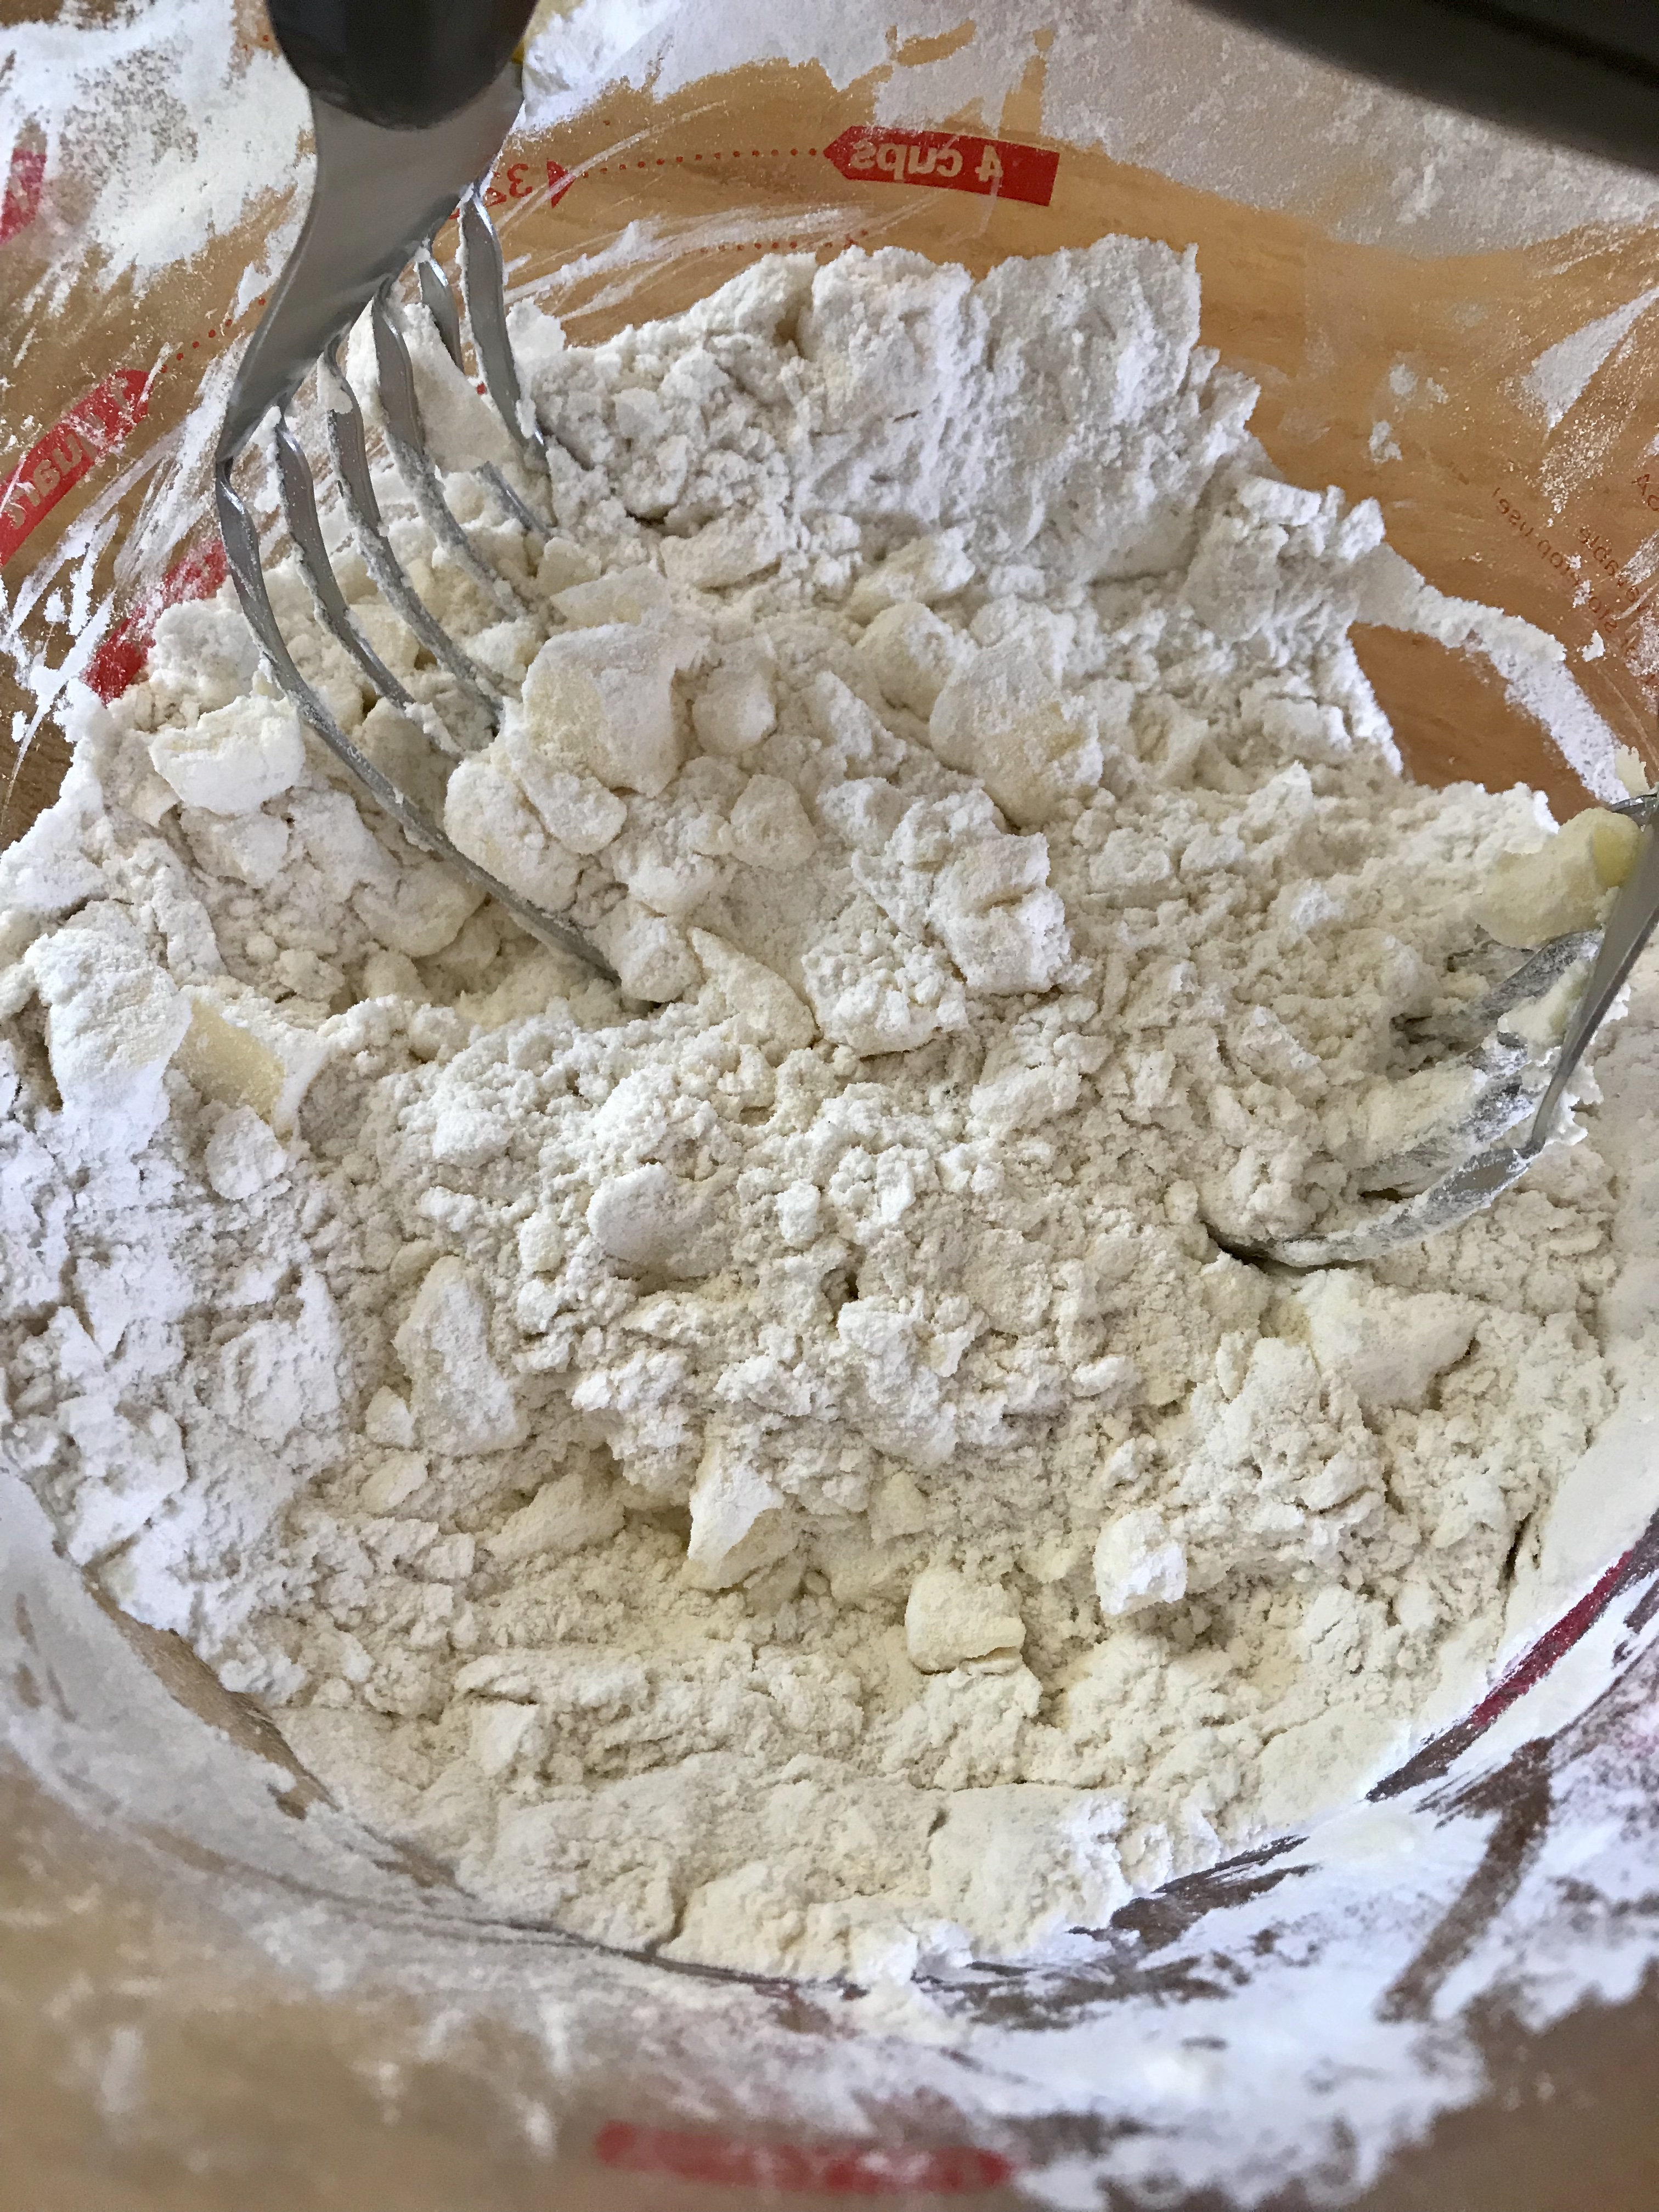
See …. not quite enough cutting in yet, those butter cubes are too big.

Galette 3

Small, pea sized bits now and the liquid added.

Galette 4

Do not over mix, just get it together and wrap it to put in fridge for at least 30 minutes).

Galette 7

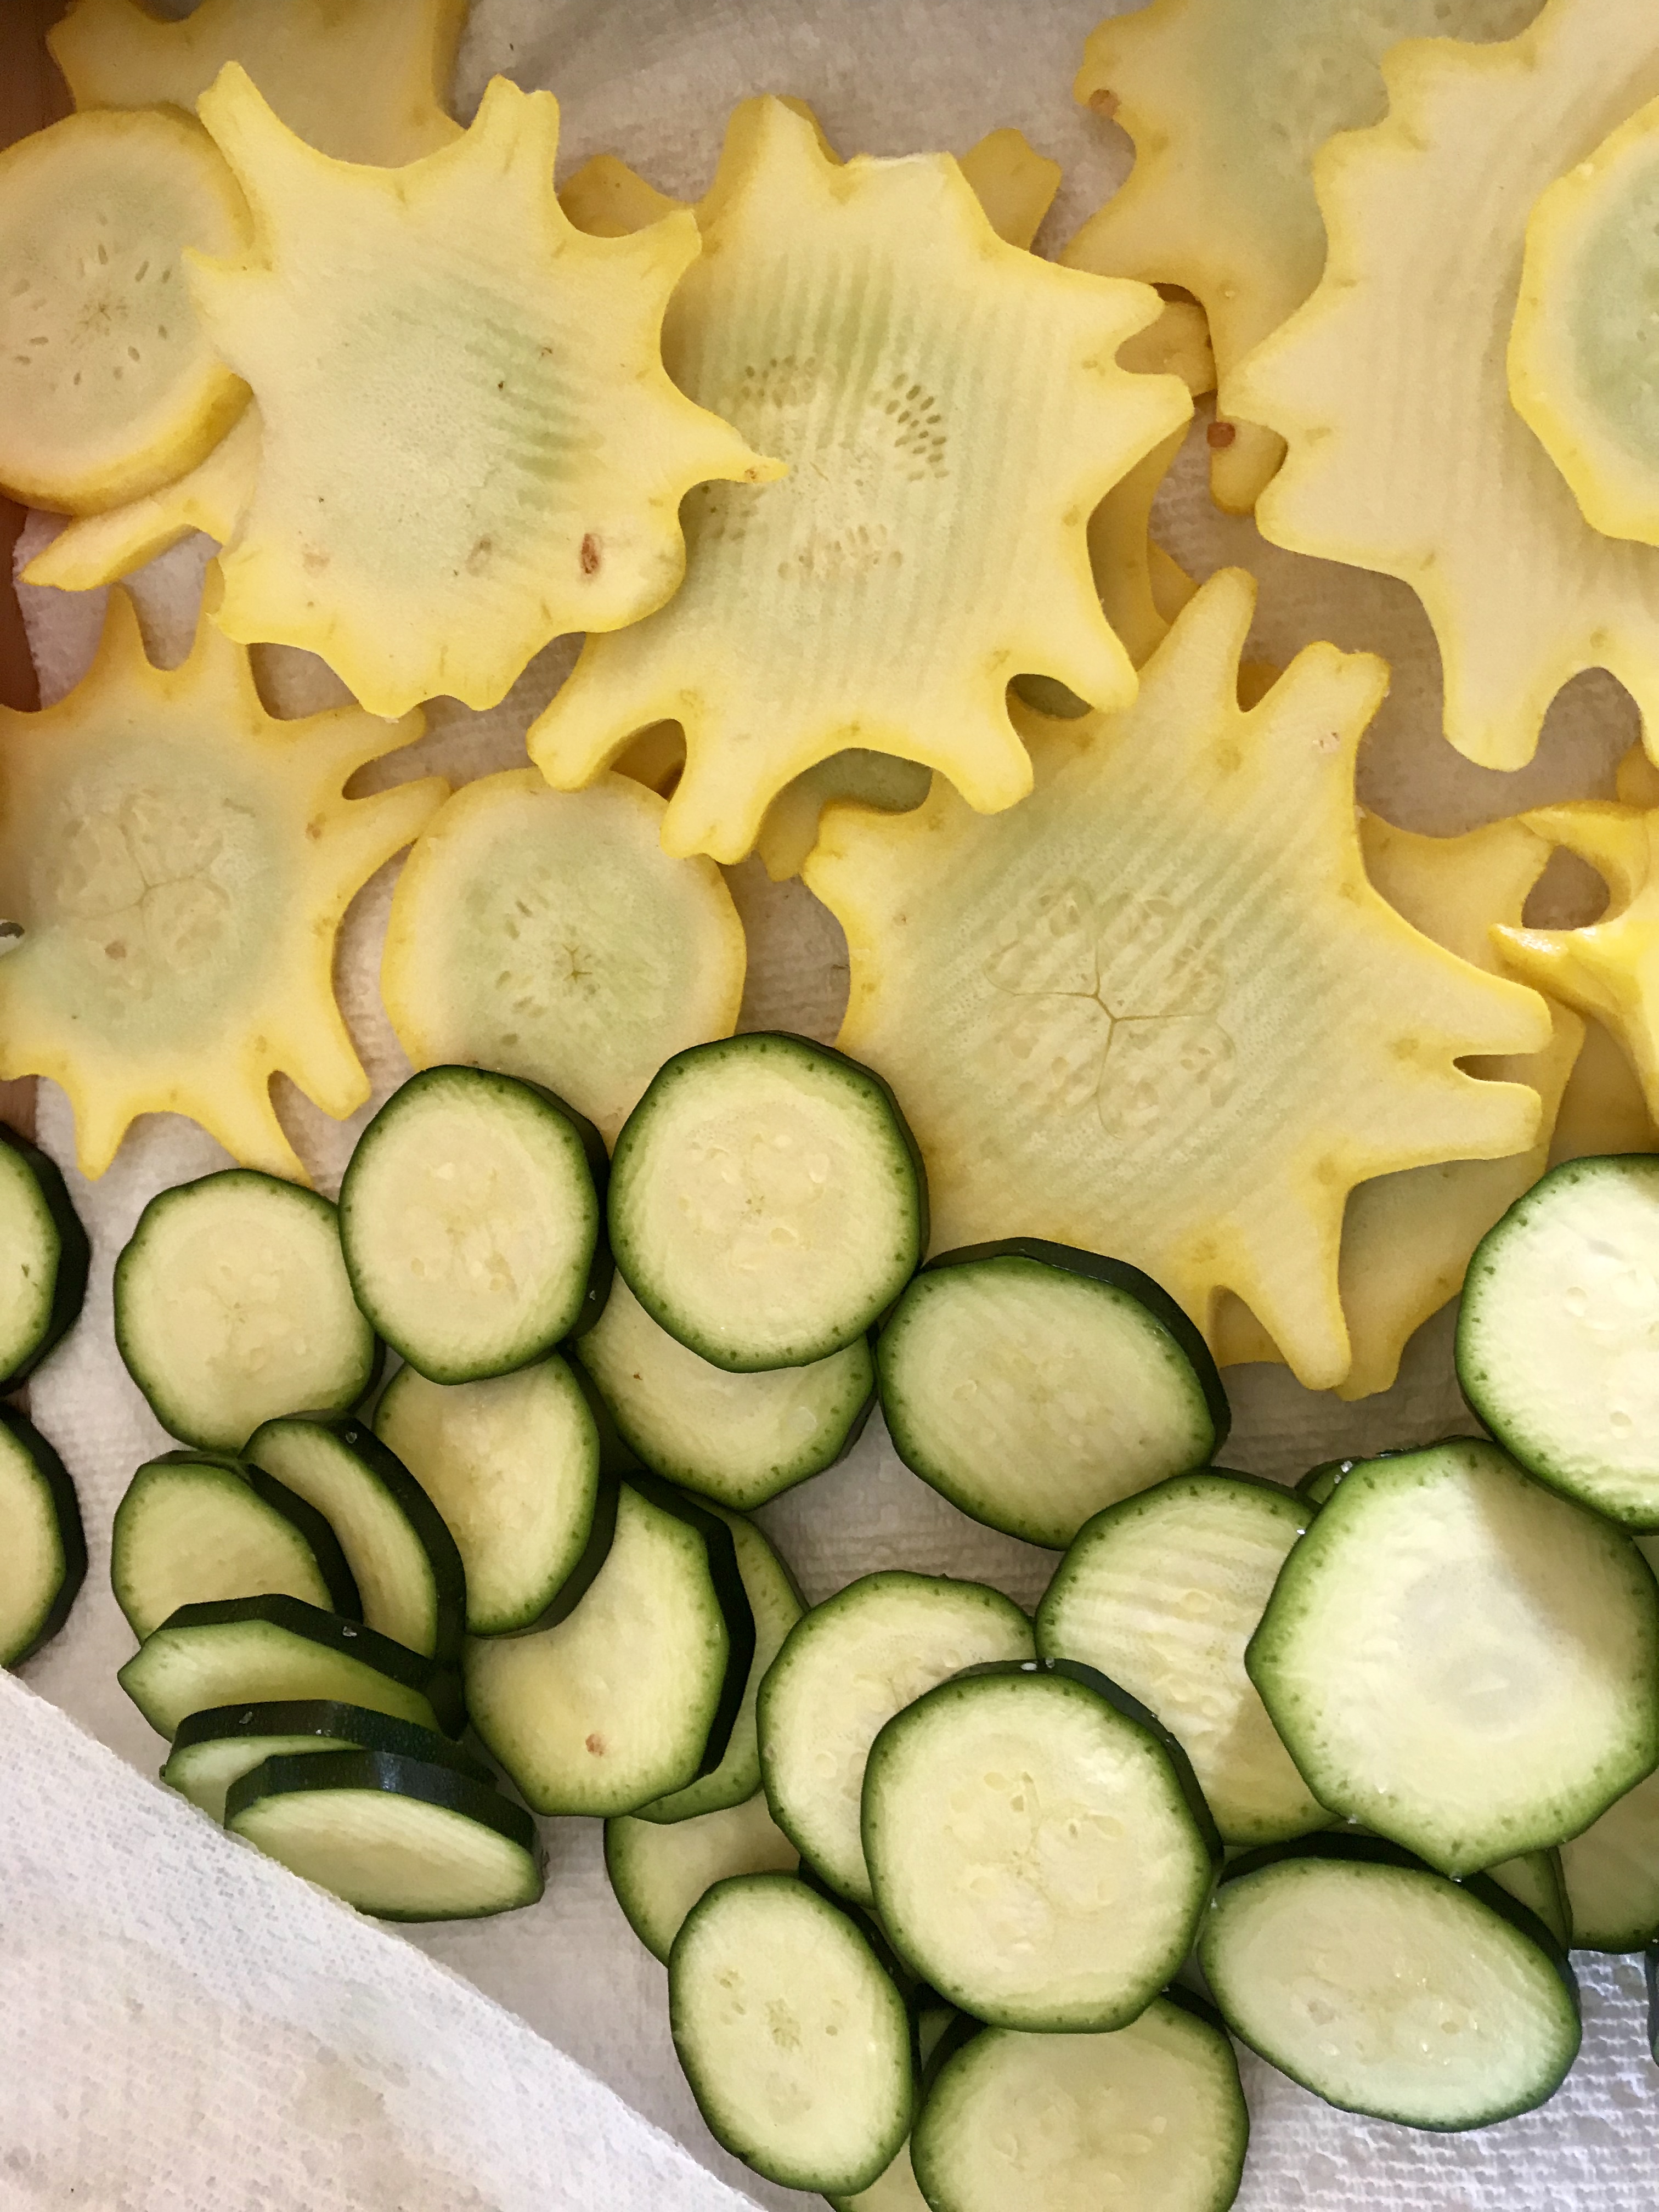
Salt, and allow to sit for a bit in order to draw the liquid out.

Galette 5

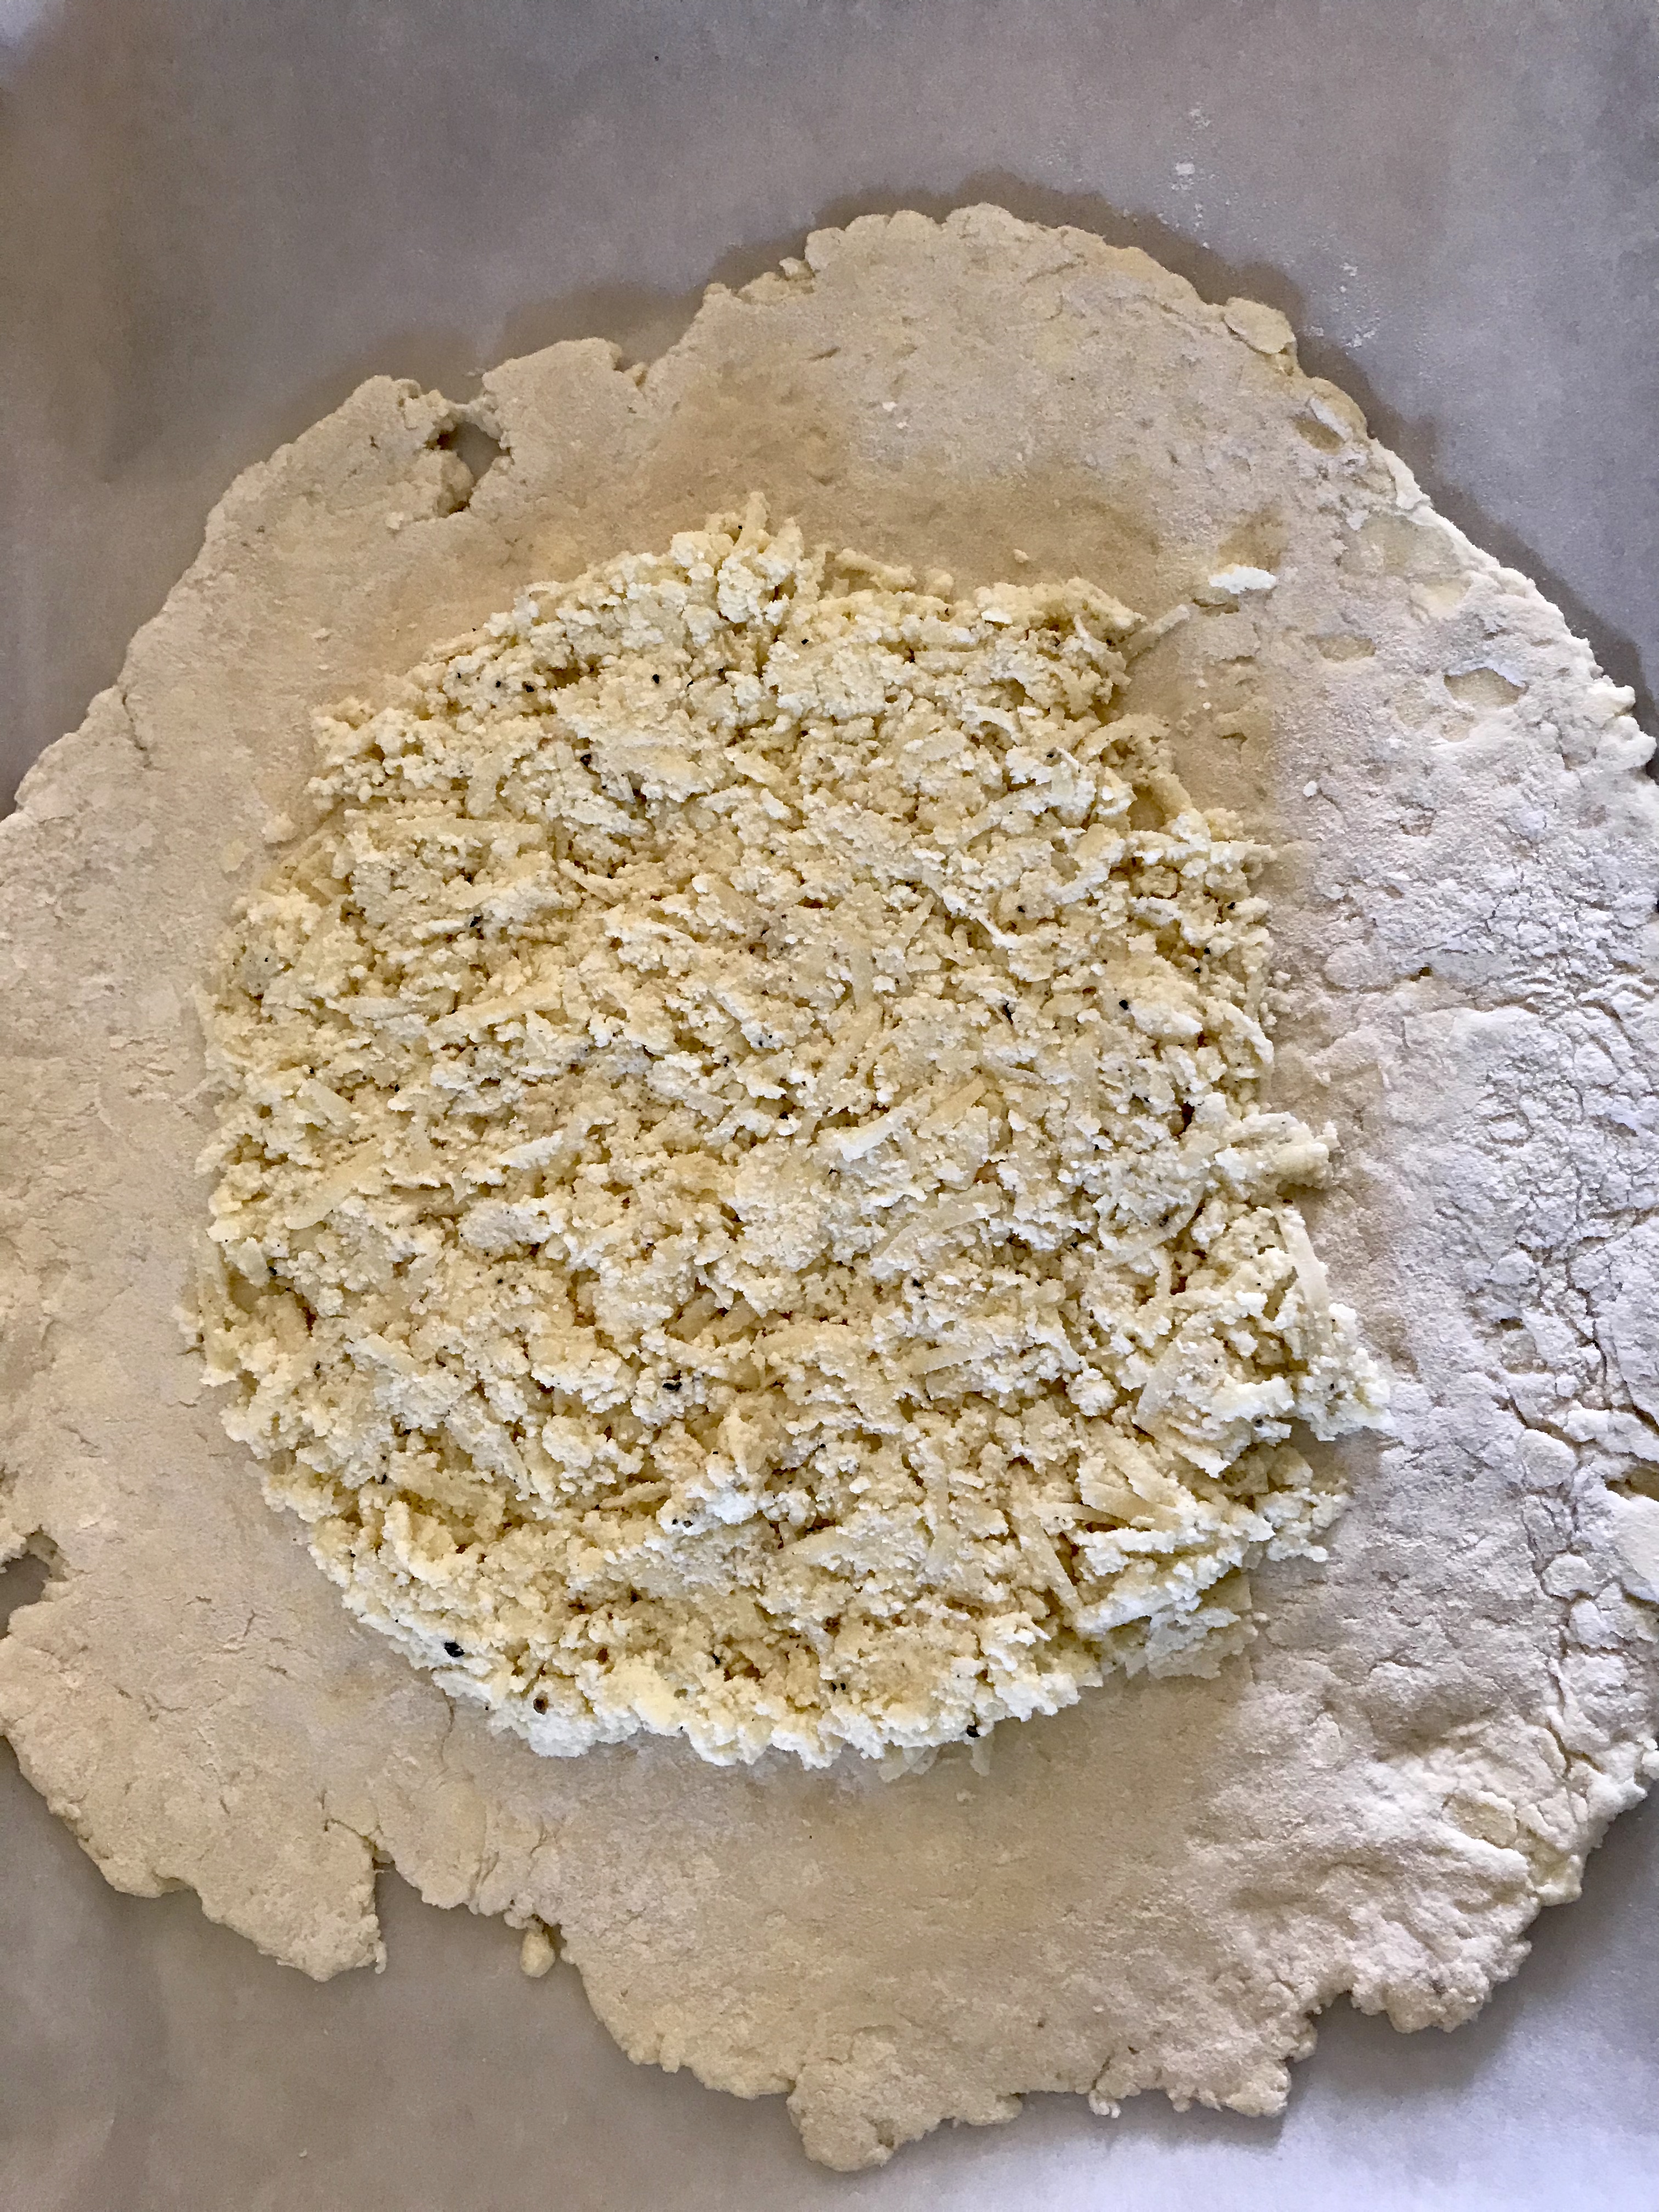
As you can see …. I’m not the best at an exact “12 inch” circle …. but I’m working on that!

Galette 6

Mix all your cheeses with the olive oil & garlic blend … adjust to taste with salt and pepper.

Galette 1

WHAT??  Already I’m crazy about this and it hasn’t even hit the oven yet.  Yes, I need to work on my even edges … ha ha

Veg Galette

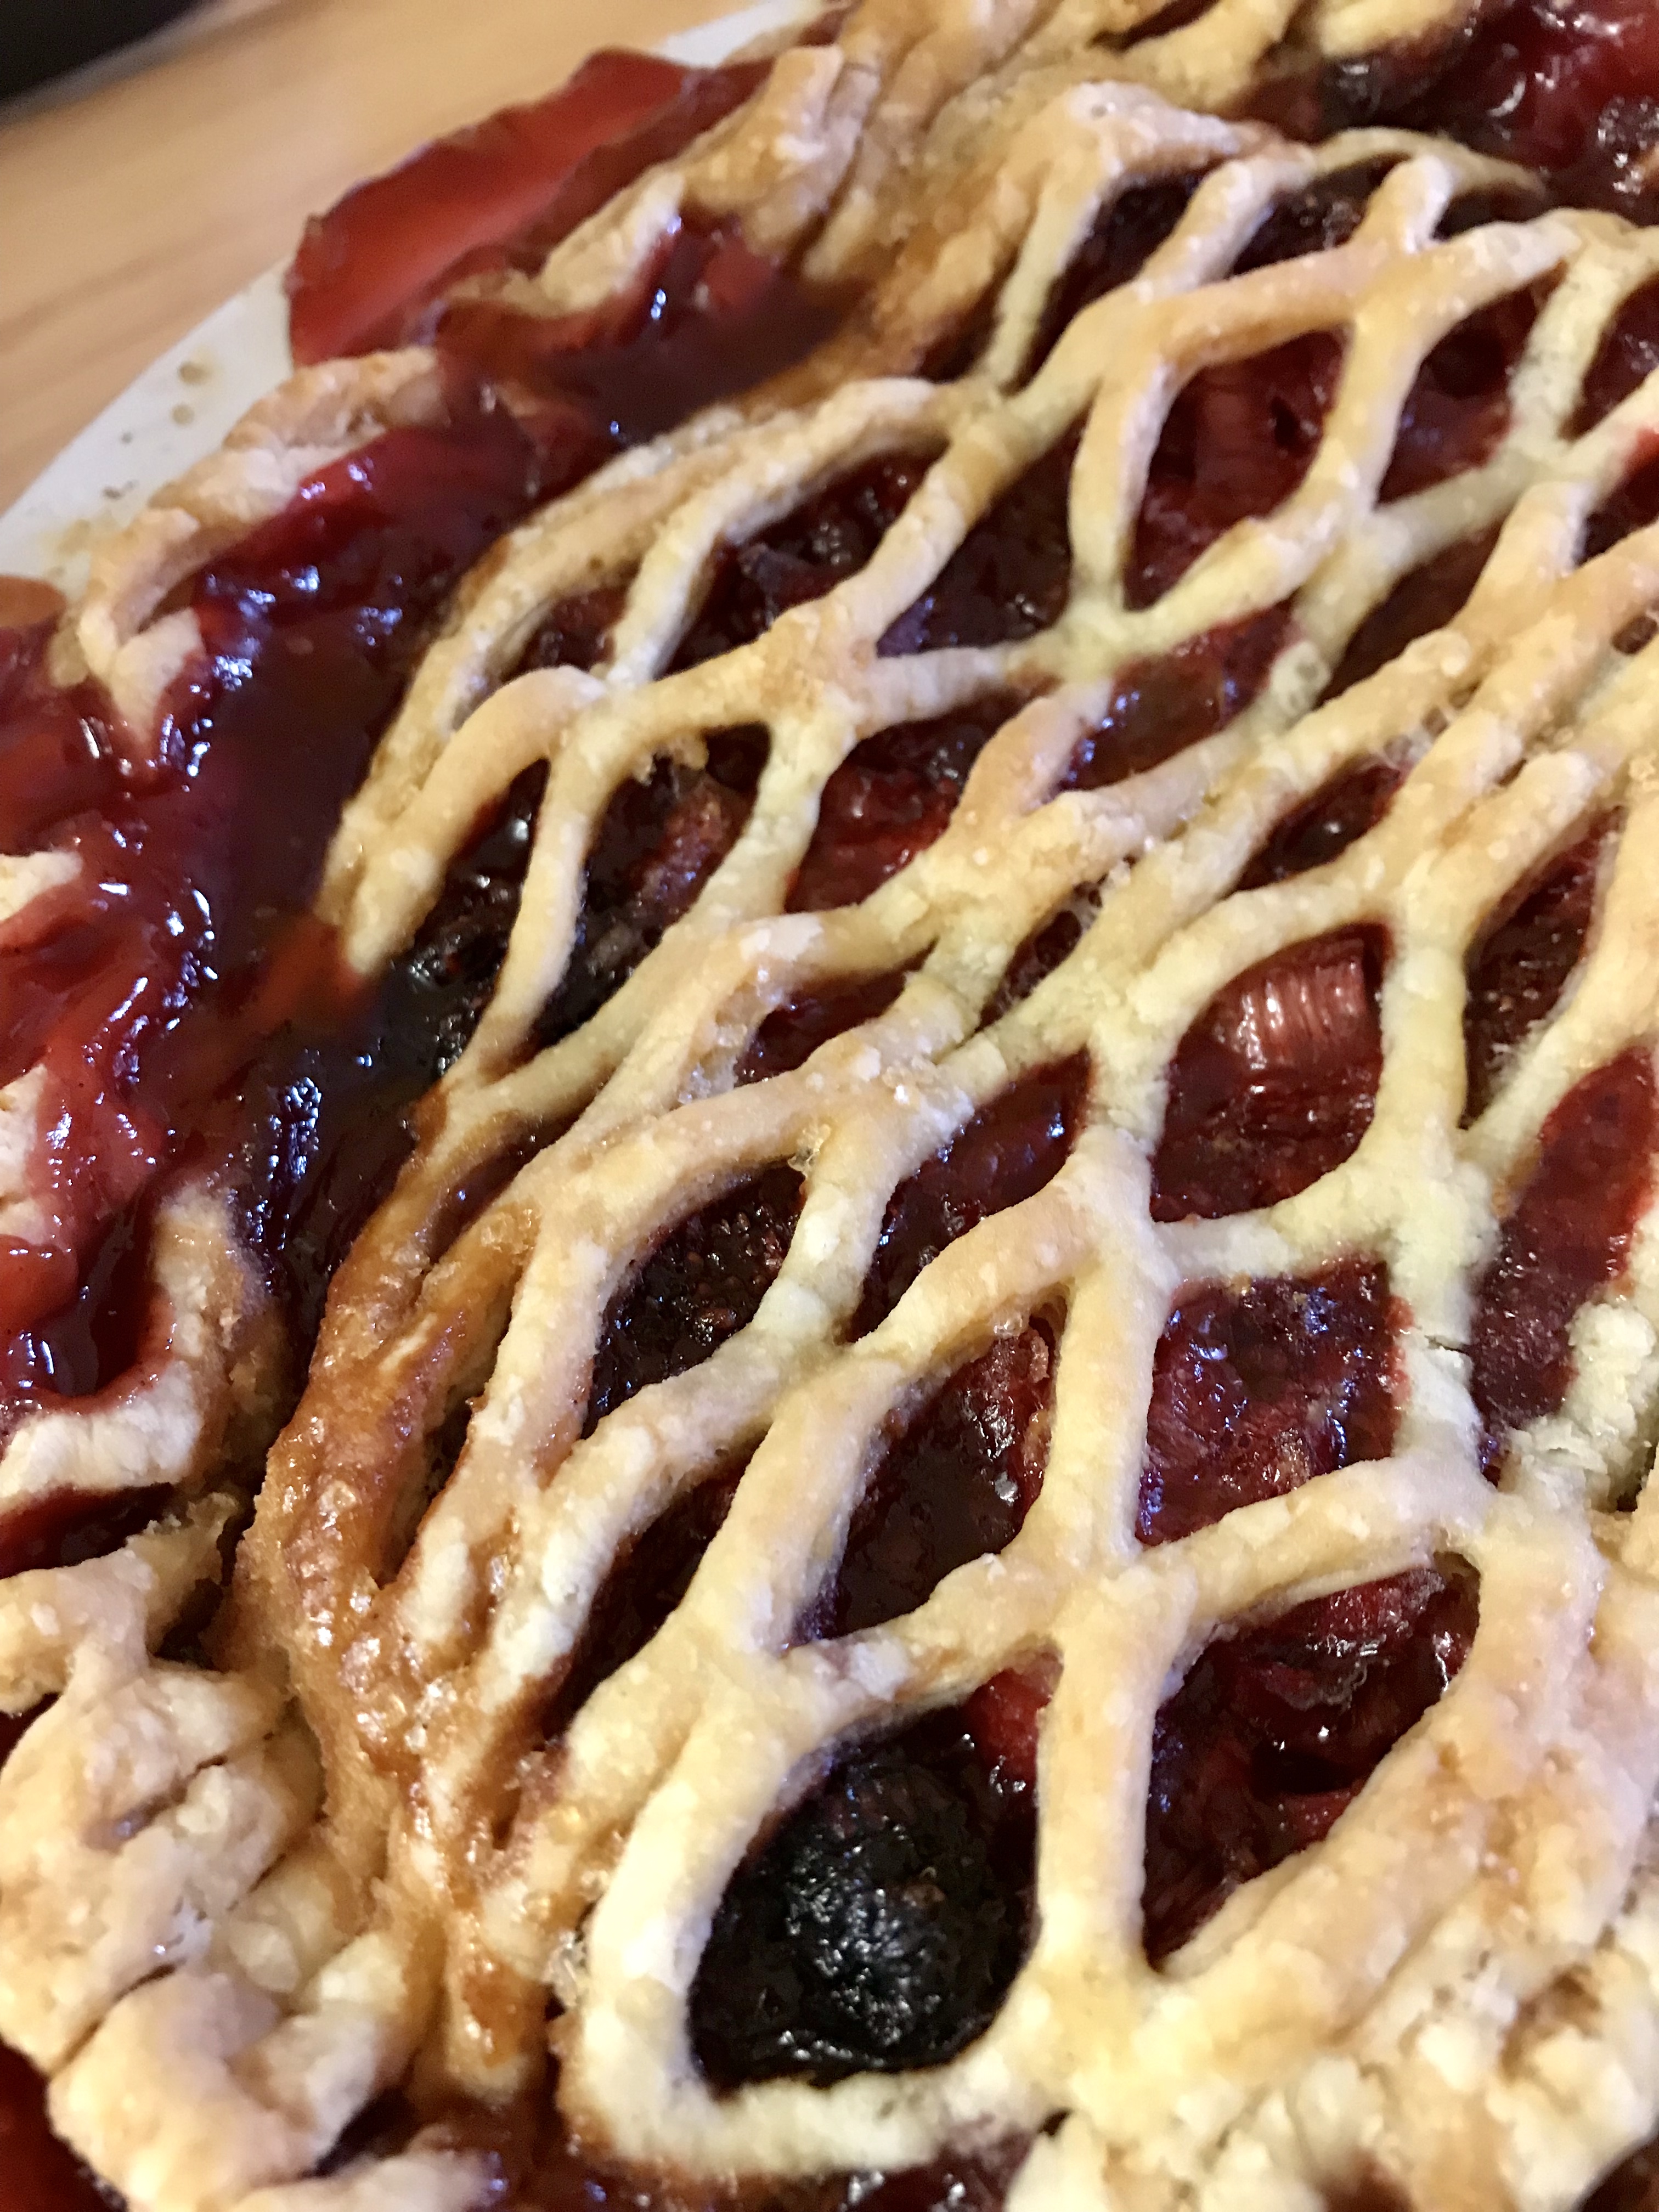
Tonight we had enough people celebrating Stella turning 6 that I needed to make 2 …. so I did a tomato galette as well as zucchini.  Both were delicious.

Be as inventive as you like with the cheeses, using the amounts as your guidelines.  With the tomato galette I used aged gouda as well as the ricotta and parmesan.  With the zucchini, tonight I had old white cheddar on hand ….  What won’t change is how amazing your house smells!  Go ahead, invite the neighbours in …..


Absolutely full credit (as well as the copy/paste feature) for this recipe – IN TOTAL – goes to Deb Perelman at http://www.smitten kitchen.com  – one of the very rare recipes I didn’t play around with at all …. okay except I used a couple of patty pan squash because I had them….


Strawberry Rhubarb Pie

The first fresh fruit pie of the season … strawberries and rhubarb are ripe at about the same time and those two belong together!  The strawberries are sweet, and the rhubarb is tart …. its a perfect match.

Strawberr rhubarb pie 3

INGREDIENTS

  • 1 recipe unbaked double pie crust
  • 2 1/2 cup rhubarb, sliced into 1/2-inch pieces (about 3 large stalks)
  • 2 1/2 cups hulled and sliced fresh strawberries
  • 1 cup sugar
  • 1/4 cup cornstarch
  • 1 teaspoon grated lemon zest
  • 2 tablespoons cold unsalted butter, cut into 1/4-inch pieces
  • large egg yolk beaten to blend with 1 teaspoon water (for glaze)

Strawberry rhubarb pie

When the fruit looks this fresh, colourful and juicy you just know the pie will be perfect.

NSTRUCTIONS

  1. Preheat the oven to 450°F.
  2. Prepare the bottom crust by rolling out one of the pastry disks to an 11-inch circle. Nestle the crust inside the pan so about an inch hangs over the sides. Press the pastry down. Cover loosely with plastic wrap and place in the freezer for about 10 minutes.
  3. Mix the fruit with the sugar, flour (or cornstarch) and lemon zest. Using the tines of a fork, poke the bottom of the pie crust evenly about five times. Pour the fruit mixture into the chilled pastry. Dot with the butter pieces.
  4. Moisten the edge of the bottom crust with a finger dipped in water. Put on the top pastry in one piece and slice in a few air vents, or in a lattice pattern, trim, and crimp the edges.
  5. Brush the egg glaze over the crust. Transfer the pie to a baking sheet.
  6. Bake in the oven for 15 minutes, then reduce the heat to 350°F and bake another 30 minutes longer, or until the crust is golden brown and the filling is bubbling.
  7. Remove from the oven and cool on a rack before serving.
  8. Strawberry rhubarb pie 2

    I have a fancy little roller press that cuts this lattice pattern, but I can never get it onto the pie with it all looking smooth and even … I think I prefer just doing an old fashioned lattice … stay tuned for a photo next time I do that!

    Strawberry rhubarb pie 4

    Cut the pie while it is still warm, and you will end up with juices running … still delicious, but if you want it to be a firm slice, let it cool for at least a couple of hours.

    Strawberry rhubarb pie 5


Chicken Pot Pie

Chicken Pot Pie 2

See the sauce bubbling out the side?  That’s what you are looking for.  Crust is golden, now just try and wait while it sets up a bit …. no judgement if you can’t!  I promise it is delicious.

Fall ….. it just makes me want to bake, and roast, and toast.  This chicken pot pie recipe is a staple around here.  You can make it as easy as “pie” by purchasing pre-made pastry shells or make your own – either way, this pie is flaky, tender and bursting with bites of chicken and vegetable goodness.  Serve with a tossed salad and dinner is ready.

Preheat oven to 400

  • 2 pastry shells
  • 2 cups cooked chicken (use leftovers or a rotisserie chicken for simplicity)
  • olive oil
  • 1 small onion
  • 1 garlic clove
  • 2 tbsp flour
  • 1/4 tsp pepper
  • 1 tsp salt
  • 2 cups chicken stock
  • diced vegetables – your choice and about 2 cups worth of:
  • sweet peppers
  • celery
  • carrots
  • peas (not in my house, neither of us like cooked peas)
  • zucchini
  • corn
  • green beans
  • a generous handful of herbs, I like thyme, basil, oregano and parsley
  • salt and pepper

Brush one pie shell with beaten egg white, sprinkle with sea salt and bake at 400 for 8-10 minutes, just until starting to turn golden brown.  Remove from oven and allow to cool.

pie shell

I find if you pre-bake the bottom crust, brushed with beaten egg white, the pastry stays flaky.  Sprinkle a little sea salt on for that extra bit of crunch.  I think you can see here that my bottom crust was in the freezer, thank you Tenderflake pastry!

In saucepan heat olive oil, then stir in onion.  Stir until just translucent and add in the garlic clove.  If celery is one of your chosen vegetables, add it now too.  Allow to saute for a few minutes until just starting to become tender.  Add the flour and create a thick paste, letting the flour cook for a minute in order to remove that “floury” taste.  Gradually stir in the chicken stock, just a bit at a time until it is all incorporated and your sauce is starting to thicken.  Stir in the rest of your vegetables, taste and season with salt and pepper, and set aside.

Pour the chicken & vegetable mixture into the prebaked pie shell, and cover with the 2nd pastry shell.  If you’ve purchased pre made pastry, just squish and squiggle it around a bit and play with the edges, nobody will ever know you didn’t make it!

chicken pot pie

The top crust was a pastry shell I had in the freezer, probably leftover from an apple pie day!

TIP:  If you are vegetarian, or just feel like a vegetarian meal, this is so easy to do!  Just omit the chicken and use a LOT more veg.  Instead of chicken stock use a vegetable stock.  Your results will be ever so delicious …. you’re welcome!

Sprinkle the top with a bit more salt and pepper, some Italian herbs and either paprika or a bit of dried roasted red pepper.  (yes, we do our own dried seasonings with the surplus of vegetables in the field)

Put the whole pie in the oven (I’ve learned to have a foil dripping sheet below it…..) and cook for 15 minutes at 400, then lower the oven to 350 and cook for about 40-50 minutes, until you see the sauce bubbling out the side and the pie looks golden brown.

If your pie is looking golden brown, but not yet bubbling out the sides, loosely lay a sheet of tin foil over the pie until you see that bubbling action.

Make sure you let it sit for 15-20 minutes after it comes out of the oven, that allows it to set a bit.  Not that it tastes any less wonderful if it is running all over your plate ……..

chicken pot pie 3

See what I mean?  We couldn’t wait the 15 minutes, but it was delicious.  By the time we came back for seconds it had set up and made nice even slices.  Amazing either way!

Pumpkin Pie

I will bet you don’t even know how easy it is to make your own pumpkin pie at home!  Try this one out and you may never go back to grocery store pumpkin pie.

Pumpkin Pie

This pumpkin pie hit all the notes, tender and creamy, with just the right amount of spice to wake up your taste buds.   I used my flaky pie crust with vinegar and egg to make the crust, but if you’d rather, a frozen pie crust will work well too.  Give yourself that break when you need it …

  • 1 (14 ounce) can EAGLE BRAND® Sweetened Condensed Milk
  • 2 large eggs
  • 1 teaspoon ground cinnamon
  • 1/2 teaspoon ground ginger
  • 1/2 teaspoon ground nutmeg
  • 1/2 teaspoon salt
  • 1 15 ounce can pure pumpkin puree

1 (9 inch) unbaked pie crust

  1. Preheat oven to 425 degrees F. Whisk pumpkin, sweetened condensed milk, eggs, spices and salt in medium bowl until smooth. Pour into crust. Bake 15 minutes.
  2. Reduce oven temperature to 350 degrees F and continue baking 35 to 40 minutes or until knife inserted 1 inch from crust comes out clean. Cool. Garnish as desired (we like whipped cream).
  3. Store leftovers covered in refrigerator.

Flaky Pie Crust with egg and vinegar

P1100930

Everybody loves flaky pie crust – but people are divided on whether to use shortening, lard or butter.  Through trial and error, I think I have found the best of them all – by combining lard and butter.  Try it ….. so light and flaky – you will love it.

  • 1 egg
  • 1 tbsp vinegar
  • 3/4 tsp salt
  • 3 cups white flour
  • 3/4 cup cold vegetable lard or (if you prefer) shortening
  • 3/4 cup cold butter
  • 5 tbsp very cold water
  • Lightly beat egg and vinegar

Whisk flour and salt

Using a pastry blender or 2 knives, cut in lard/butter until pea sized.  Add very cold water to egg and vinegar mixture.  Make a hole in the center of the flour blend and stir in the egg/vinegar/water combination.  Work just until pastry comes together – adding slightly more liquid if it doesn’t, and if it is too wet, add a wee bit more flour.  Work together just until it all comes into a solid mass.  Knead very lightly on floured surface.  Wrap tightly and put in the fridge for at least 40 minutes.

Roll on lightly floured board until just thin enough to use for pie dough.

This recipe makes enough for 1 smaller pie (top and bottom) or a large deep dish pie crust bottom.

Boston Cream Pie

Boston Cream Pie

This Boston Cream Pie is much easier to make than many desserts, and will quickly be a family favourite.

Boston Cream with fruit

Look what I did here.  Topped with fruit instead of chocolate.  Make a slurry out of juice and cornstarch, cook over medium heat until thickened, and spread that lightly on top of the cake just enough to set the fruit onto, then cover the top of the fruit with what’s left.  So light tasting, and even though it isn’t spring here yet, this made me feel like it’s on the way!

CAKE

Preheat oven to 350                       

  • 1 cup flour
  • 3/4 cup white sugar
  • 1/4 tsp salt
  • 1/3 cup milk
  • 1 1/2 tsp baking powder
  • 1/4 tsp baking soda
  • 6 tbsp butter
  • 1 1/2 tsp vanilla
  • 2 eggs

(I have listed these ingredients in random order to show you just how simple this cake is – throw everything in a bowl and mix!)  It will quickly become your “go to” cake any time you need a simple white cake. If you really feel the need to get technical, mix the butter, eggs and vanilla together until light and fluffy, then add the rest.

Mix well with hand beater at low speed until mixed, then high speed for 2 minutes.  Pour into greased and floured 9″ round cake pan.

Bake at 350 for 25 minutes, check with cake tester.  Cake should be just baked enough to be pulling away slightly from the sides of the baking pan, and tester should come out clean.  Let rest for 10 minutes then remove from pan and cool completely on wire rack.

CREAMY CUSTARD FILLING 

  • 2 cups milk
  • 1/4 tsp salt
  • 1/4 cup sugar
  • 2 egg yolks
  • 3 tbsp cornstarch

In heavy saucepan, whisk all ingredients until incorporated very well then cook over medium-low heat until mixture thickens and boils, about 20 minutes.  Boil 1 minute stirring frequently.  Remove from heat and stir in 1 tsp vanilla.

I have also done this part in the microwave – stir every 2 minutes until mixture has thickened well.  Make sure you use a large bowl as the mixture will raise and lower several times while it cooks.

Cover right on the surface of the pudding with saran until cool, but not set, about 30 minutes.

CHOCOLATE ICING

  • 2 squares semisweet chocolate
  • 1 tbsp butter or margarine
  • 1/2 cup icing sugar
  • 2-3 tbsp milk

In heavy saucepan over low heat, melt chocolate and butter.  Remove saucepan from heat.  With wire whisk beat in 1/2 cup icing sugar and 2-3 tbsp milk until smooth and easy spreading consistency.

ASSEMBLY

With serrated knife, cut cake horizontally in half to form 2 equal layers.  Place 1 cake layer on cake platter, spread evenly with the cooled custard.  Top with 2nd cake layer, pressing down gently but firmly.  Cover top of cake with chocolate icing.  Try to spread chocolate cover to the edges so it drips down over the sides.  Refrigerate until serving time.

This cake is so versatile.  If you have a large crowd, double the recipe and make it 4 layers high!  So impressive looking – for extra flair, save some of the custard and spread it around the outside of the cake, then press in sliced toasted almonds.  You can also make one cake with chocolate  (add 1/4 cup cocoa powder to cake batter or use your own favorite chocolate cake) and add your toasted almonds to the top.