Stella’s Quick Icing

Stella woke up with a desire to make a small layer cake. Takes after her Nana?? 🤣 She quickly put together my yellow cake with some leftover chocolate buttercream icing. The cake batter however was more than we needed for her layers so out came the donut pans.

We also had some blood oranges so she whipped up this quick icing glaze – and instructed me to get it on the blog!

1/2 cup icing sugar

Juice of one blood orange

1/2 tsp lemon juice

Stir together until you have a somewhat thick glaze. Dip your donuts in and allow to set. If you want a thicker coating allow the first one to dry a bit, and then dip again.

Yum, says Stella.


Strawberry Shortcake

This is my favourite basic white cake recipe.  It is quick and easy to do – light, fluffy, and tastes great.  In the spring it is the perfect way to make strawberry shortcake for any occasion.

SS 2

CAKE

1 cup white sugar
1⁄2 cup butter (soft)
2 eggs
2 teaspoons vanilla extract
1 1⁄2 cups all-purpose flour
1 3⁄4 teaspoons baking powder
1⁄2 cup milk

Preheat oven to 350 degrees F

Grease and flour a 9×9 inch pan or line a muffin pan with paper liners.  If you want to make a 9 x 13 cake, or a layer cake, double this recipe.

In a medium bowl, cream together the sugar and butter. Beat in the eggs, one at a time, then stir in the vanilla.

Combine flour and baking powder, add to the creamed mixture alternately with the milk until batter is smooth.

Scoop batter into the prepared pan.

Bake for 30 to 40 minutes in the preheated oven. For cupcakes, bake 20 to 25 minutes. Cake is done when it springs back to the touch, and a toothpick or tester comes out clean.

IMG_5162

This might just be sweet little Stella’s first whipped cream beater to lick …. but shhhh – don’t tell anyone, Mom and Dad are away!

SS 1

5 YEARS LATER – Stella is just as sweet, but now she’s serving up the desserts!

Coconut Prawn Curry

This sauce is incredibly good.  How, I wondered, did so much flavour show up in 25 minutes?

Garlic Herb Naan 3

I managed to get a few sprigs of cilantro on here for a photo, but it was ready so quickly, and smelled so heavenly there was no fancy plating for a photo!

I’ve made it with some jumbo prawns tonight but you could easily substitute any protein you like, or go straight vegetarian and you will be so glad you tried it.

SHRIMP & MARINADE

  • 1 lb extra large shrimp, peeled & deveined
  • 1/4 tsp salt
  • 1/4 tsp freshly ground black pepper
  • 2 tbsp lemon juice (freshly squeezed please)

CURRY SAUCE

  • 1 tbsp coconut oil
  • 1 medium onion, finely chopped
  • 3 cloves garlic, minced
  • 1 tbsp fresh minced ginger
  • 1/2 tsp freshly ground black pepper
  • 1/2 tsp salt
  • 1/2 tsp turmeric powder
  • 2 tsp ground coriander
  • 1 tsp Madras curry powder
  • 1 can (14.5 ounce) diced fire roasted tomatoes
  • 1 can (13.5 ounce) coconut milk

cilantro for garnish

rice for serving

INSTRUCTIONS

  • In a small bowl toss the shrimp with the marinade ingredients. Cover with plastic wrap and refrigerate for 10 minutes.
  • While the shrimp is marinating, heat the oil in a medium size skillet. To it add the onion, and cook for 2 or 3 minutes until the onion softens and becomes translucent. Stir in the garlic, ginger, pepper, salt, coriander, turmeric and curry powder. Cook for another minute.
  • Add the diced tomatoes with juices and all, the coconut milk, stir and bring to a boil. Cook for about 5 minutes stirring occasionally. Add the shrimp with the accumulated juices from the marinade and cook for another 2 minutes or until the shrimp is pink and cooked through.
  • Serve over hot rice and garnish with cilantro or parsley.

I’d say the only way you could be disappointed by this dish is if your spices are old.  They really aren’t meant to last forever just because they are dry!

Coconut curry 2

Get your prawns gently tossed in the marinade and put in the fridge until you are ready to add them to the curry sauce. (I used chili flakes rather than cayenne pepper today)

Coconut curry 3

Follow the instructions on how to build your flavour base – it really is important in many dishes, but I find especially so in Indian food.

Coconut curry 6

Coconut Curry 5

The next night we still had enough for another meal – so I lightly sauted some fresh vegetables in a sauce pan until just tender crisp.  Then add the sauce and heat only enough to warm through.  This keeps the individual flavour of your vegetables and doesn’t overcook either the remaining prawns or the curry sauce.

Make sure to serve these with Garlic Herb Naan – just what you need to sop up this inviting sauce.

These were my best naan ever!  So tender, with dough that is very easy to work with.  As an added bonus they freeze well so for nights when it is just the two of us I only cook half and freeze the other half …. ready for fresh frying when I am.


I have a lot of “authentic” food bloggers I follow for cooking dishes from India, Thailand, and Mexico just to name a few.  This recipe came from a fellow Canadian!  If you haven’t been to Jo’s website …..   http://www.jocooks.com then I recommend you do.  She has specific hints to make everything better, and is well worth a read.


Garlic Herb Naan

Garlic Herb Naan 1

Hands down, these were my best naan yet!  I think I had to convince myself to go with the lightly oiled pan as well as brushing butter on the naan itself before putting it in the pan – but it was SO worth it.

  • 1/4 cup warm water
  • 1 tablespoon honey
  • 3/4 teaspoon active dry yeast
  • 3/4 cup warm whole milk
  • 1 cup full fat plain greek yogurt
  • 4 cups all purpose flour
  • 1 1/2 teaspoons baking powder
  • 1 teaspoon baking soda
  • 1/4 teaspoon kosher salt
  • 8 tablespoons (1 stick) salted butter, melted and divided in half
  • 2-4 cloves garlic, grated
  • 3/4 cup chopped mixed herbs (such as parsley, cilantro, chives, and/or dill)

INSTRUCTIONS

1. In the bowl of a stand mixer, combine the water, honey, and yeast. Let sit for 5-10 minutes or until the mixture begins to bubble on top.

2. Add the milk, yogurt, flour, baking powder, baking soda, and salt. Using the dough hook, mix until the flour is completely incorporated, about 2-4 minutes. The dough should be sticky. Dust lightly with flour and knead the dough into a ball using your hands. Cover the bowl with plastic wrap and let sit in a warm place for 1 hour, until doubled in size, or if not using right away, overnight in the fridge.

3.  When ready to cook divide the dough into 8 equal balls. Using a rolling pin, roll each piece of dough into a large oval, about 8 inches long and about 1/4-inch thick. Repeat with the remaining dough.

4. Heat a large cast iron skillet over medium-high heat, you want the pan screaming hot. Brush both sides of the naan with half of the melted butter. Drizzle the the skillet with a teaspoon of olive oil, then carefully use a paper towel to wipe the oil around the skillet. Place the naan on the hot skillet, immediately cover with a lid and cook for 1 minute, bubbles will form. Flip and cook, uncovered for another 1-2 minutes, until large toasted spots appear on the underside. Remove from the skillet and wrap in a clean kitchen towel. Repeat with the rest of the naan, keeping them wrapped in a towel while you work.

5. To make the garlic herb butter. Melt together the remaining half of the melted butter plus the garlic. Heat over low heat until the butter is lightly browned and the garlic golden. Remove from the heat and add the herbs. Brush the garlic herb butter over the warm naan and serve. These are best served warm, right off the skillet, but leftovers are still delicious. Keep stored in an airtight container for up to 3-4 days or freeze for up to 3 months.

Garlic Herb Naan 4

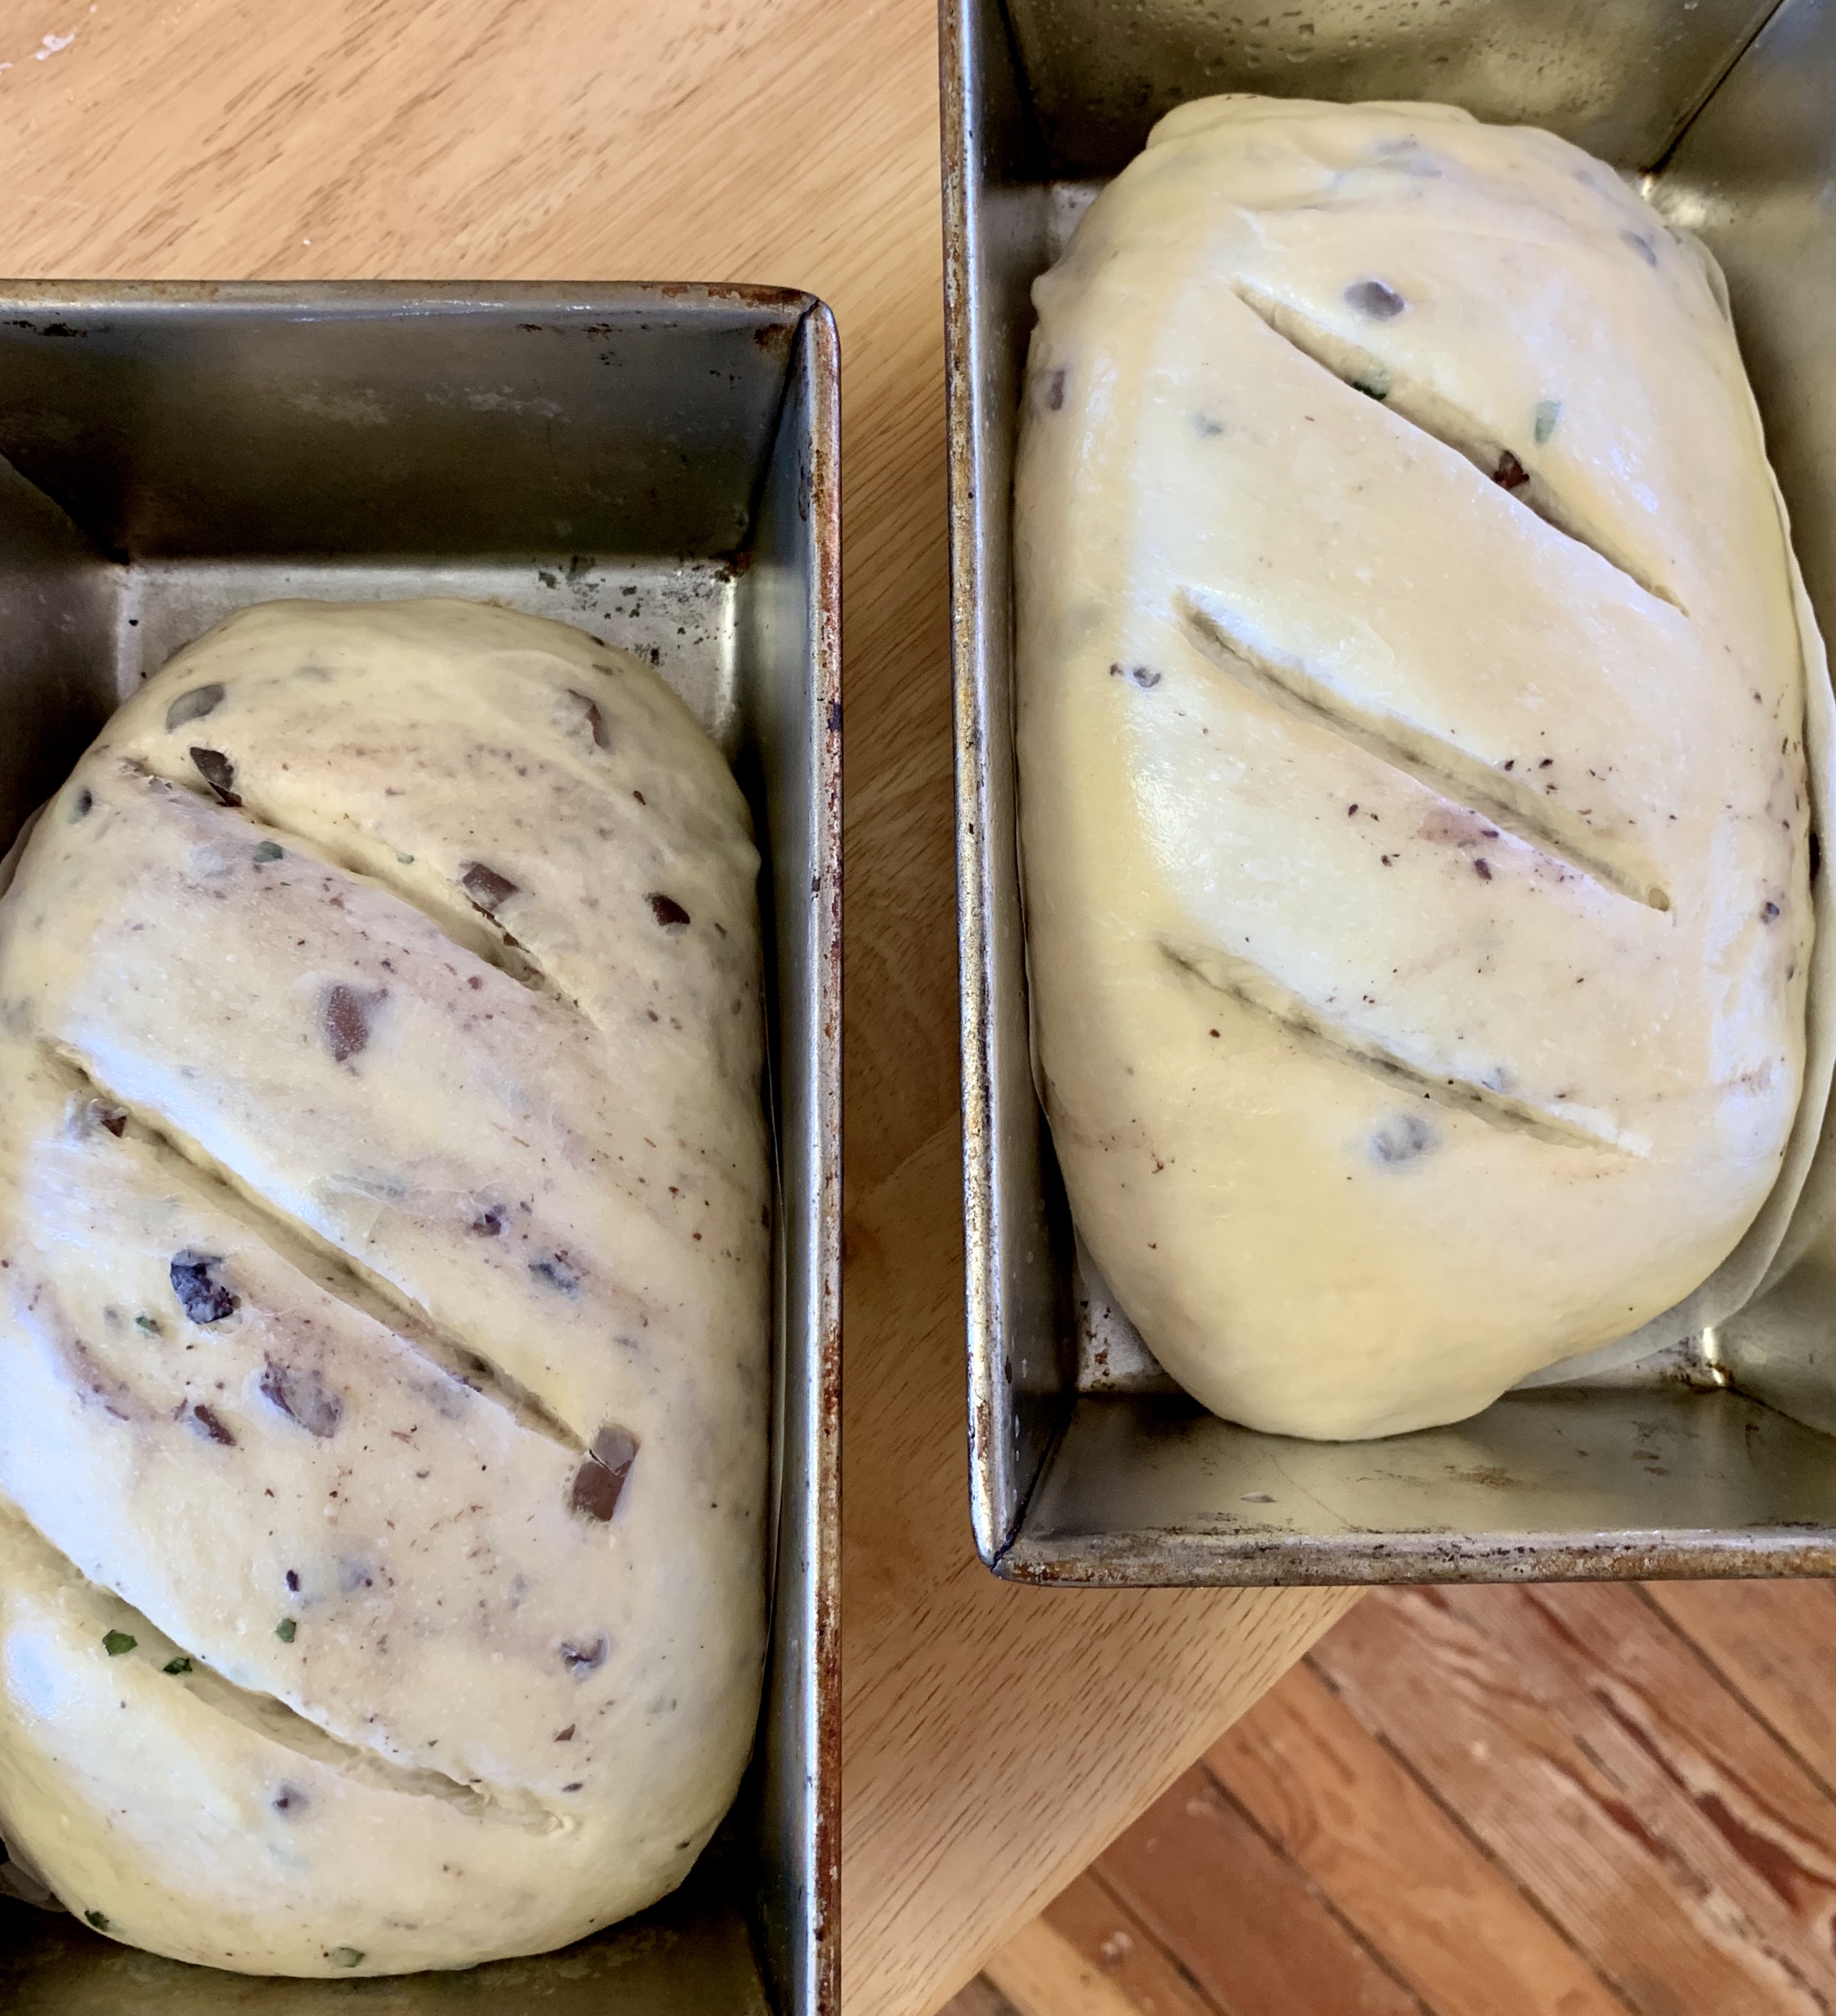
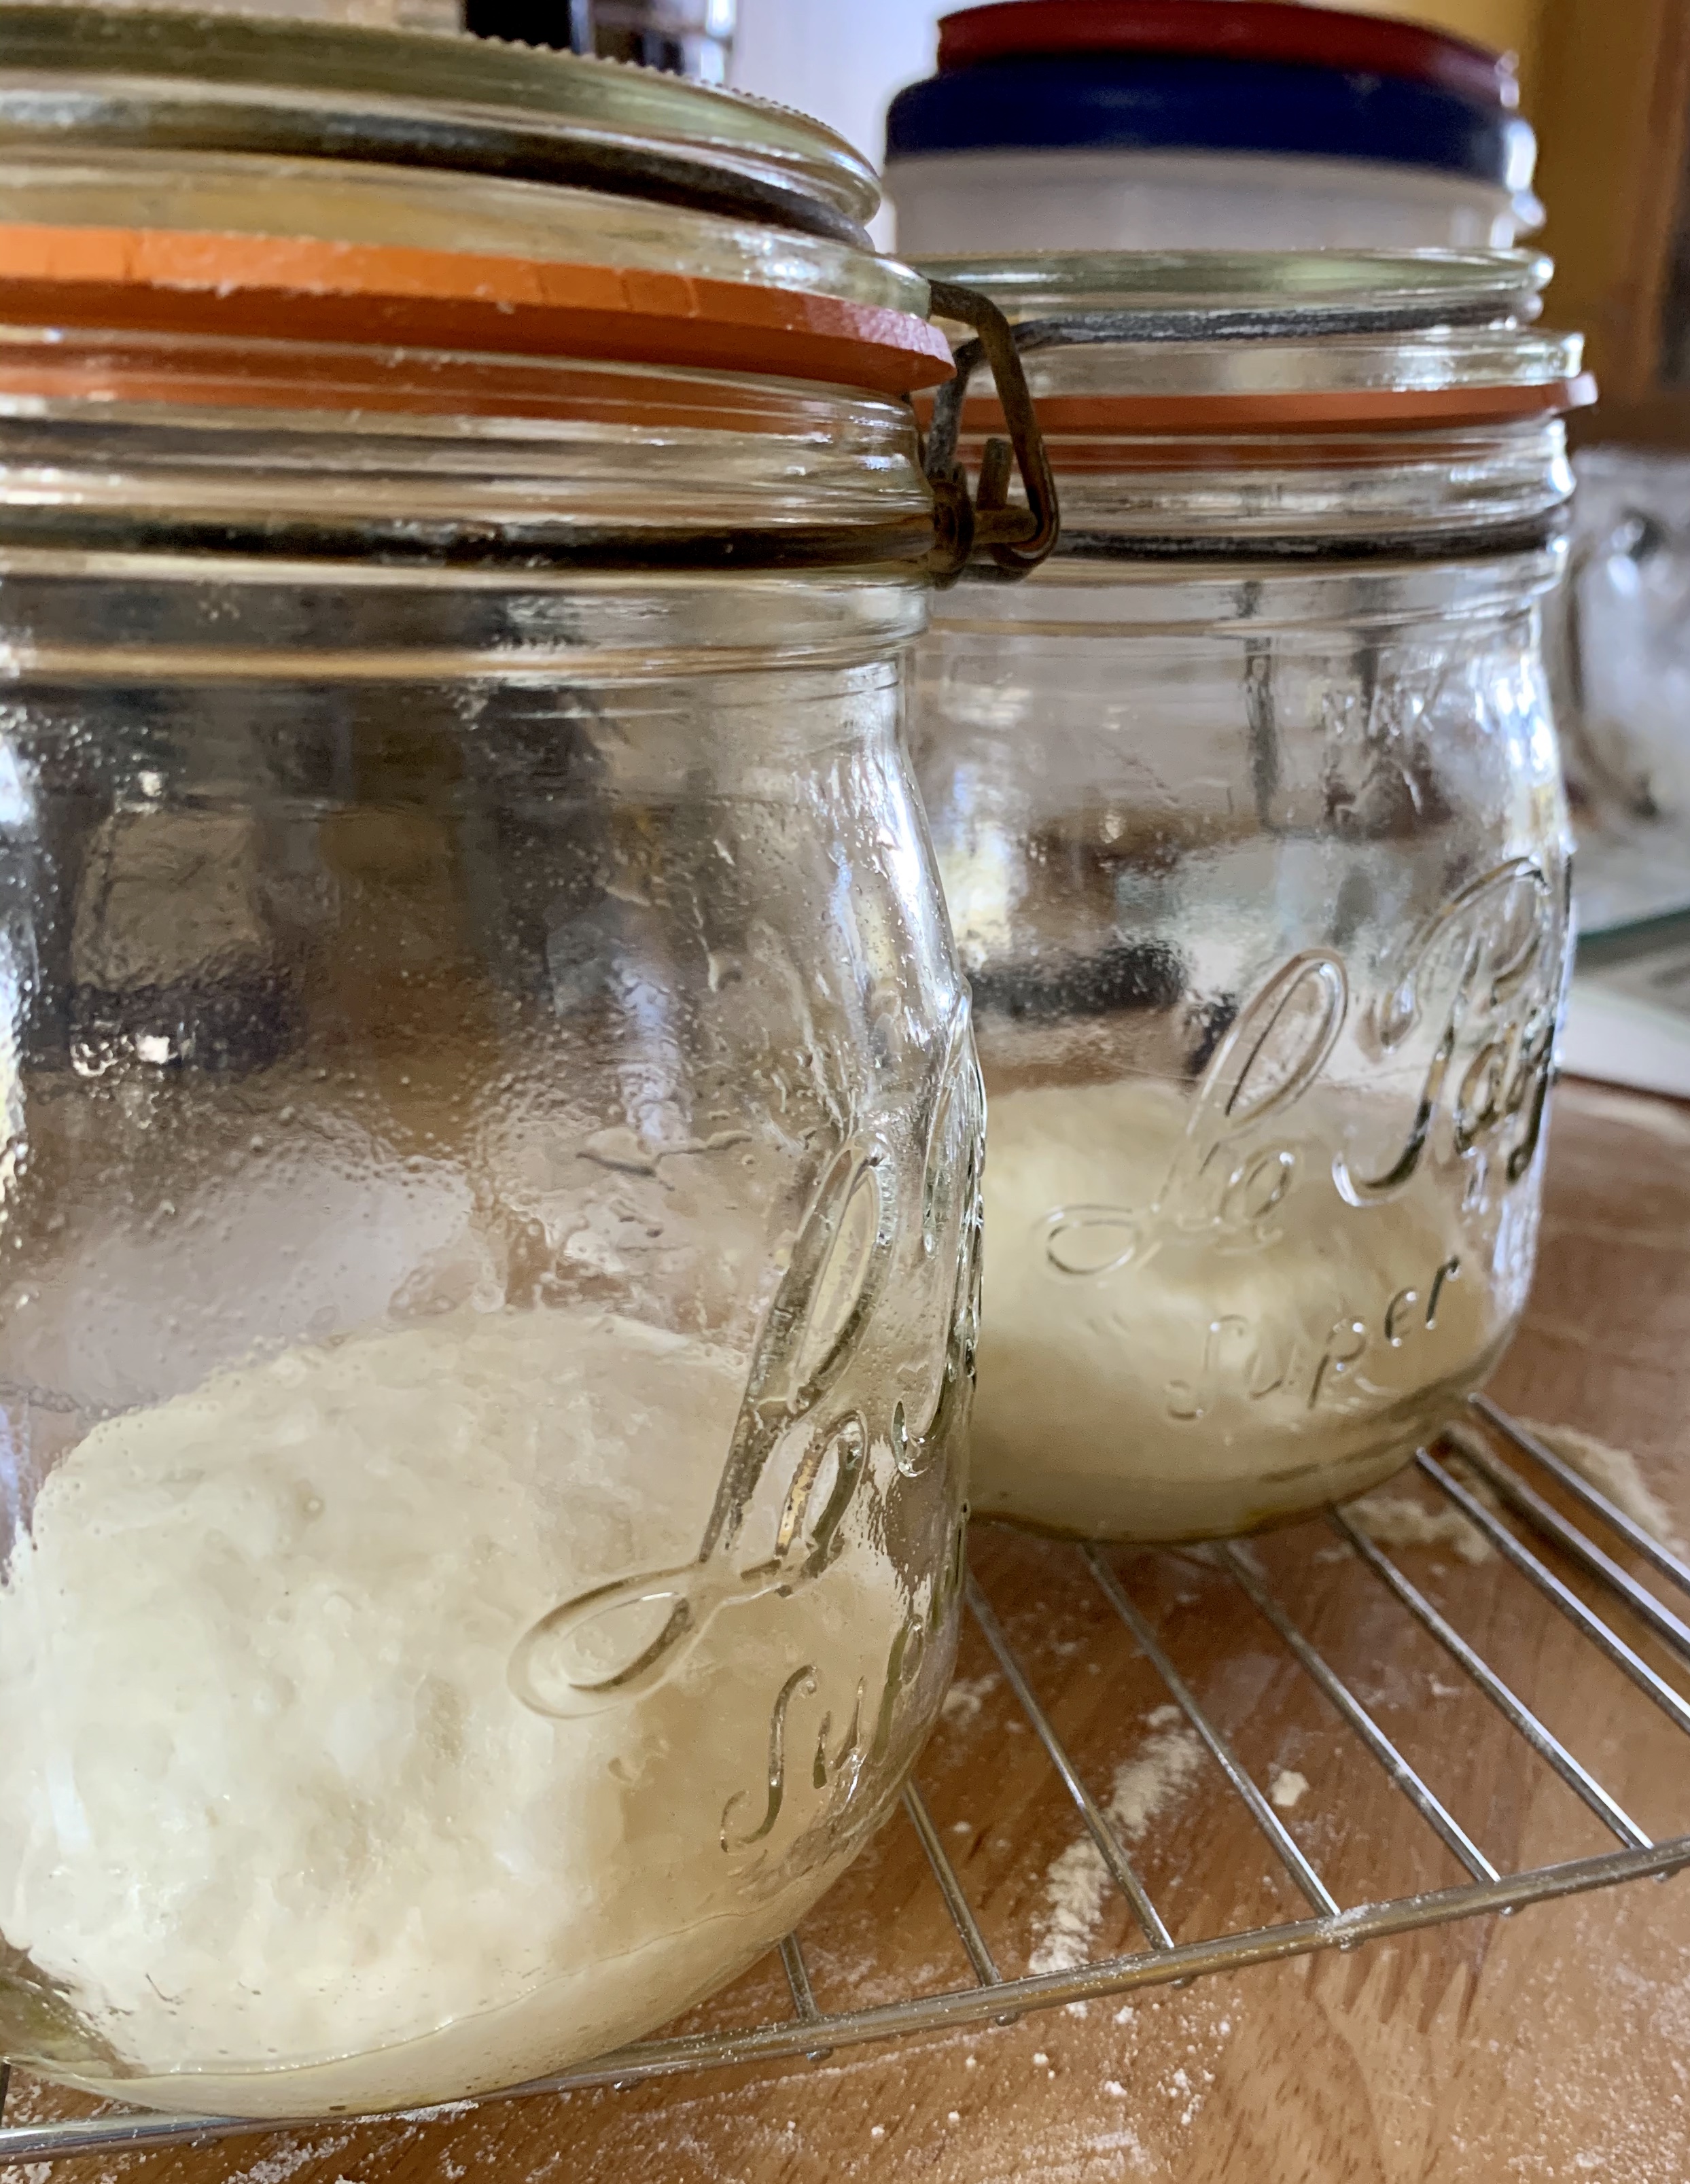
Even from this photo you can see little air pockets waiting to puff up, and you can see how soft the dough is.  With only two of us to cook for during this Covid 19 pandemic, I cooked up 4 of them, and rolled the other 4 out to put in the freezer.                                                                             One busy day ahead I will have naan ready for the fry pan, and I’m pretty happy about that.


This is one of those “sometimes” recipes where you just have to go with full fat milk and full fat yogurt.  Of course, if you aren’t able to do that, they will still be delicious, just not quite as delectable.

Garlic Herb Naan 3

Naan is perfect for dipping in this creamy coconut shrimp curry.  

Thanks for this amazing naan recipe go to http://www.halfbakedharvest.com

I love her recipes – they always seem to turn out perfectly – I didn’t change a single thing on this.  If you don’t have a stand mixer, no worries, just mix by hand and then get your workout kneading the dough until it is soft and not too sticky.

Sourdough Sandwich Bread

I love those round loaves of sourdough bread, crunchy crust, chewy interior with lots of holes …… but this is not one of them.  Sometimes I also just want a soft sandwich loaf with all the flavour of my sourdough breads.  This makes enough for 2 loaves.  I made one in a traditional loaf pan and the rest of the dough turned into the most amazing rolls I’ve ever come up with.

Soft sourdough 6

Ingredients

Levain

  • 1 cup + 1 tablespoon (128g) King Arthur Unbleached All-Purpose Flour
  • 1/2 cup + 1 tablespoon (128g) cool water (60° to 70°F)
  • 3 tablespoons (44g) ripe (fed) sourdough starter

Dough

  • 5 1/4 cups (631g)  Unbleached Bread Flour or  Unbleached All-Purpose Flour*
  • scant 6 tablespoons (50g) milk powder
  • 1/4 cup (50g) sugar
  • 2 1/2 teaspoons salt
  • 2 teaspoons instant yeast
  • 1/4 cup (4 tablespoons, 57g) unsalted butter, room temperature
  • 1 1/2 cups (340g) water (70° to 80°F)
  • all of the ripe levain
*All-purpose flour will produce a somewhat stickier dough.

Instructions

  1. To make the levain: Mix all of the levain ingredients together and place in a covered container with room for the levain to grow. It will almost double in size, and will take about 12 hours to ripen (ferment) at room temperature (70°F). When perfectly ripened, there’ll be large bubbles (mostly below the surface) creating a somewhat rippled effect. It’ll appear almost fluffy. If the levain is covered with a froth of tiny bubbles, it’s a bit over-ripened; but don’t worry, you can still use it.
  2. To make the dough: Mix and then knead together all of the dough ingredients, including the levain, to make a smooth, supple, and not overly sticky dough.
  3. Place the kneaded dough in a lightly greased bowl, cover the bowl, and let the dough rise for 1 to 2 hours, until doubled in size.
  4. Divide the dough in half, and shape each half into 8″ logs. Place the logs in two lightly greased 8 1/2″ x 4 1/2″ bread pans. Cover the pans with lightly greased plastic wrap (or a couple of plastic shower caps), and let the loaves rise until they’ve crowned about 1″ over the rim of the pan, about 1 to 2 hours.

Soft sourdough 4

Look at all this from just a few moments work!  I almost injured my arm I was so enthusiastically patting myself on the back.

This recipe yielded such a beautiful soft sandwich loaf for sure, but it was these rolls that stole the show.  The dough is tender and incredibly flavourful.

Soft Sourdough 1

It’s the same principal as a cinnamon bun – but savoury!  You can fill the roll with anything you like.  Today I used Black Forest ham, cut into small squares, and spicy Calabrese sausage cut into little strips along with kalamata olives and diced yellow pepper.

Today I got frustrated because I wasn’t able to use tomato sauce like the pizza roll I envisioned.  So, Plan B …… I defrosted one of my basil almond pesto blocks, stirred in a bit more olive oil and spread that over the dough.  In the end, it was the happiest of Plan B’s ever!  In fact I got so excited by how good it was smelling that I rolled it all up, forgetting to add cheese.  Oh well, another Plan B – cheese sprinkled over the top before baking.

Soft sourdough 3

A mixture of aged white cheddar and mozzarella graced the top of these rolls right before baking and it was just fabulous.

I’ve been reading a lot of the King Arthur Flour website recipes during my sourdough explorations, and this recipe also came from there.  We don’t have any of that particular flour around here, but I wonder how much difference that makes?  We do have Rogers Flour locally and that is what I have been using with great success.

Rhubarb Citrus Bars

With a hint of citrus these rhubarb bars just scream spring.  I think everybody is glad I found something to bake other than sourdough bread.  

Rubarb citrus 4

Nothing better than the smell of this custard filled rhubarb citrus bar on a rainy spring day.

INGREDIENTS

FOR THE SHORTBREAD:

  • 1 ½ cups/190 grams all-purpose flour
  • cup/65 grams granulated sugar
  • ¼ teaspoon fine sea salt
  • ¾ cup/170 grams cold unsalted butter (1 1/2 sticks), cut into 1-inch pieces

FOR THE FILLING:

  • 10 ounces rhubarb, sliced (2 1/2 cups), plus 1 slender red stalk for the top
  • 1 ¼ cups/250 grams granulated sugar
  • 4 large eggs
  • 2 tablespoons freshly squeezed lemon juice (1 to 2 lemons)
  • 3 tablespoons all-purpose flour
  • 1 tablespoon finely grated orange or lemon zest
  • Pinch of fine sea salt
  • Confectioners’ sugar, for serving

PREPARATION

  1. Heat oven to 325 degrees and line a 9-by-9-inch pan with parchment paper, leaving two edges long so they overhang the pan by at least 1 inch. (This is for lifting the bars out later.)
  2. In a food processor, pulse together flour, sugar and salt. Add butter and process until a crumbly dough forms. Press dough into the lined pan in an even layer. Don’t clean out the food processor, you’re going to need it.
  3. Bake crust until golden at the edges, 35 to 40 minutes, rotating halfway through. Transfer to a wire rack and raise oven temperature to 350 degrees.
  4. While the crust is baking, make the filling. In a medium saucepan, combine the rhubarb slices and 1 cup sugar. Cook, stirring frequently, over medium-low heat until rhubarb releases its juices. Raise heat and bring to a simmer. Keep simmering, stirring once in a while, until the rhubarb breaks down completely, about 15 to 20 minutes. Transfer the rhubarb and juices to the food processor, and let it sit with the cover off until it cools down a bit, about 15 minutes.
  5. Meanwhile, using a vegetable peeler, lay the very pink rhubarb stalk on its narrower side. From the edge of the stalk, peel a long strip from the stalk. Continue to peel strips from the stalk, flipping it around the other side to keep it even. (This makes it easier to peel, but don’t worry too much about getting uniform strips.) Line up peeled strips and cut into 1 1/2-inch lengths. Some may curl up, and that’s fine. You’ll have about 1 cup strips.
  6. To the food processor, add the eggs, remaining 1/4 cup sugar, lemon juice, flour, zest and salt, and pulse until mixture is puréed. Pour into baked shortbread base, and carefully scatter the rhubarb strips on top. It should look a little like confetti. Bake until the filling is set and puffy, 20 to 30 minutes. Transfer to a wire rack to cool completely in the pan.
  7. Once cool, use a butter knife to cut at the edges of the crust to release them from the pan, then use the parchment “handles” to lift up and transfer the pastry to a cutting board. Cut into 1 3/4-inch squares. Dust with confectioners’ sugar before serving.

Ready to put together … you can see I’ve added a bit of orange zest to the shortbread crust, loved the way it was aromatic and added a bit of flavour as well.

Rhubarb Citrus 7

The custard is creamy, the rhubarb is tart, and the shortbread crust is buttery …. perfect.

This recipe came from New York Times, and they recommend a 9″ square pan, which I don’t have …. the only adjustments I made (for the sizing) were to use just 3 eggs, and I withheld a bit of the shortbread crust and sprinkled it over the top before baking as a bit of a crumb, and it worked perfectly in my 8″ pan.  Some reviewers suggested less sugar, and I’d agree with that – depending on your rhubarb.  I also didn’t  need to put the rhubarb into the mixer to blend as it cooked down beautifully and I preferred the texture.

Rhubarb citrus 3

You can totally skip the step of those rhubarb ribbons on top, but I love the way they look.  Also, the extra crumb on top is just because I didn’t have a large enough baking vessel, and I’m kind of glad I didn’t ….. love anything with crumb on top.

Rhubarb citrus 5

Just out of the oven and the house smells fabulous!  So hard to let this cool down until it is safe to cut it – must let that custard set ….

Miso Glazed Sablefish

We don’t cook a lot of fish, really only seafood like prawns, crab, or white meaty fish items that are as tasty as this is.  Fish and chips are my specialty and they often show up … Of course, when Grant isn’t home …. salmon might be on the menu!

IMG_2947

Just look at that glistening, tender, flaky sablefish.  Drool worthy.


6 6 ounce pieces of fresh sablefish (any meaty white fish will do)

Marinade

  • 1 tbsp miso paste
  • 2 tbsp grainy dijon mustard
  • 2 tbsp creamy dijon mustard
  • 1/2 cup low sodium soy sauce
  • 2 tbsp wasabi paste (from tube)
  • 1/4 cup olive oil
  • 1/2 fresh lemon (juiced)
  • 3 tbsp fresh ginger, peeled and finely grated
  • 2 tsp crushed garlic

Crust

  • 2 cups panko breadcrumbs
  • 3 tbsp cornmeal
  • 1/4 tsp salt
  • 1/4 tsp pepper

3 tbsp olive oil

Whisk together all marinade ingredients – pour over fish pieces in a shallow pan – make sure all sides are coated.  Cover and marinate for 45 minutes in the fridge.

Combine panko, cornmeal, salt and pepper.

Remove fish from marinate and dip in panko mix.

Heat olive oil in heavy bottom fry pan – once it is sizzling, add the fish.

Cook for about 4 minutes per side, just until fish flakes and is glistening.

This recipe is deceptively simple.  It holds such a flavour wallop. As an added bonus, I make it often just for the two of us, and freeze the excess marinade.  It freezes well and I’ve got all the work done for another night.

Thanks go entirely to the cookbook “Whitewater Cooks” for this amazing recipe (and many more!).


Olive Sourdough Loaf

Okay, my goodness …. you have to try this loaf.  Love kalamata olives any day of the week, but add them to a loaf of sourdough goodness, include some fresh garlic chunks and oregano right out of the garden and you have a sure fire winner.

olive loaf 6

I think it is the combination of sourdough starter with the yeast that creates the perfect crumb and texture for soft and delicious bread.

  • 1 cup (227g) sourdough starter, ripe (fed) or discard
  • 1 1/4 cups (283g) lukewarm water
  • 1/4 cup (50g) olive oil
  • 2 teaspoons instant yeast
  • 1 tablespoon sugar
  • 2 1/2 teaspoons salt
  • 2 cloves garlic, finely chopped
  • 1 tablespoon fresh oregano, finely chopped; or 1 1/2 teaspoons dried oregano
  • 4 1/2 to 4 3/4 cups (539g to 574g) Unbleached All-Purpose Flour
  • 1/2 to 3/4 cup (71g to 142g) drained, pitted, and coarsely chopped kalamata olives
  1. Combine all of the ingredients, except the olives, mixing and kneading to form a smooth dough then fold in the olives.
  2. Cover the dough, and allow it to rise until it’s doubled in size, about 90 minutes.
  3. Gently divide the dough in half; it’ll deflate somewhat.
  4. Shape each piece of dough into a round loaf. Place each loaf on a lightly greased or parchment-lined baking sheet.

olive loaf 3

Knead the olives in until the dough is soft, only slightly sticky to the touch, and smooth.

Olive loaf 1

This loaf came out of the oven looking irresistible.  It was amazing!


olive loaf 4

I was looking for a loaf shape today, so baked them in these pans.

olive loaf 5

Just look!  These olive loaves were absolutely perfect – the texture and flavour can’t be beat.

This recipe came from the King Arthur Flour website, and if you ever have any questions about baking, check out their website, they have everything.


Sourdough Pizza Dough

Starting a sourdough project means a lot of sourdough discard …. this is a brilliant way to use some of that discard.

Ingredients

  • 180 grams bread flour
  • 120 grams warm water
  • 60 gram active sourdough starter
  • 15 grams extra virgin olive oil
  • 5 grams sea salt
  • Gather the ingredients.

  • Add all of the ingredients to a medium bowl (a glass bowl is great because you will be able to observe bubbles from fermentation activity). Stir to thoroughly combine. The dough will look rough and shaggy and feel soft and sticky.

  • Cover bowl with a damp towel or plastic bag and rest for 20 minutes.

  • Then stretch and fold the dough, more or less as follows. Moisten your hand with a little water, scoop your hand underneath the dough and gently grasp one side of the lump. Lightly stretch the dough in your hand away from the main mass, then fold it over. Repeat this motion on different sides of the dough three or four more times.

  • Then flip the whole mass of dough such that the seams of your folds face down against the bottom of the bowl. You should notice that the shaggy dough becomes considerably more smooth, which is the goal.

  • Rest the dough for another 20 minutes, then stretch and fold again.

  • Cover once more and ferment for 3 to 4 hours at room temperature. Your dough will probably not rise significantly, but you should see bubbles forming on the surface and underneath (which you can observe if your dough is in a glass bowl). If you do not see bubbles, continue to ferment until you do.

  • Lightly flour a work surface. Invert the bowl above the floured area and wait for the dough to release itself from the bowl. Divide the dough in half. Using essentially the same technique as the stretch and fold earlier (minus the wet hands), shape the pieces into rounds.

  • Coat the inside of two round, one-pint storage containers (preferably with lids) with oil and place a dough ball seam-side down into each one. Cover with lids or plastic wrap.

  • Refrigerate for at least 24 hours before using. Dough kept in the refrigerator longer will continue to develop flavor and has a shelf life of a week or more.

  • To make pizza, remove the dough from the refrigerator and place on a well-floured surface. Coat the dough lightly all over with flour as well. With your hands, gently flatten and stretch the dough into a thin circle about 12 inches in diameter.

  • Add sauce and toppings as desired and bake according to your preferred method. Serve immediately.


    This recipe comes from http://www.thespruceeats.com – love it!


    Sourdough pizza dough

    Look at those little bubbles in there already – you know its going to be good.

    Sourdough pizza dough 1

    Set aside to rest – a minimum of 24 hours, and up to one week.

    Sourdough pizza 1

    Flour your hands to stretch the dough out … it is super soft and moves easily.

    Sourdough pizza 2

    This dough is soft, chewy and extremely tasty!


    This recipe makes enough for 2 small pizza shells …… not sure about your home, but that’s never enough for my household so make sure to double this recipe

Wonton Soup

A gloomy April day needs just this kind of soup – so much flavour and just packed with fresh vegetables.  I think the miso is what really bring the flavour bomb.

Wonton Soup 4

Loads of vegetables, a few wontons and the best broth you could wish for.


  • 1 tablespoon sesame oil
  • 2 cloves garlic, minced
  • 1 tablespoon freshly grated ginger
  • 4 cups chicken broth
  • 3 tablespoons low sodium soy sauce
  • 1 tablespoon chili oil
  • 4 ounces shiitake mushrooms
  • 2 baby bok choy
  • 3 green onions, thinly sliced
  • 1 tablespoon yellow miso paste, or more, to taste

FOR THE WONTONS

  • 8 ounces medium shrimp, peeled, deveined and diced
  • 2 cloves garlic, minced
  • 2 green onions, thinly sliced
  • 1 tablespoon oyster sauce
  • 1 tablespoon reduced sodium soy sauce
  • 1 tablespoon freshly grated ginger
  • 1 teaspoon sesame oil
  • 1/2 teaspoon Sriracha, optional
  • 1/4 teaspoon ground black pepper
  • 36 2-inch won ton wrappers

DIRECTIONS:

  • In a large bowl, combine shrimp, garlic, green onions, oyster sauce, soy sauce, ginger, sesame oil, Sriracha and pepper.
  • To assemble the wontons, place wrappers on a work surface. Spoon 1 tablespoon of the shrimp mixture into the center of each wrapper. Using your finger, rub the edges of the wrappers with water. Fold the dough over the filling to create a half-moon shape, pinching the edges to seal; set aside.
  • Heat 1 tablespoon sesame oil in a large stockpot or Dutch oven over medium heat. Add garlic and ginger, and cook, stirring frequently, until fragrant, about 1-2 minutes.
  • Whisk in chicken broth, soy sauce, mushrooms and 2 cups water.
  • Bring to a boil; reduce heat and simmer until mushrooms have softened, about 10 minutes. Stir in bok choy and green onions. Stir in miso paste until well combined, about 1-2 minutes.
  • Stir in wontons until cooked through, about 2 minutes.
  • Serve immediately.
  • This soup is as flexible as the ingredients in your fridge – I like to prep them and stir fry them separately, which keeps them fresh and bright.

Wonton soup 1

A huge pile of fresh vegetables disappears in a hurry in this delicious broth.

Serve this incredible soup with these crispy scallion pancakes for a total win.

The soup recipe is courtesy of http://www.damndelicious.net and I’d recommend looking at her recipes …. everything I’ve tried has been fantastic.