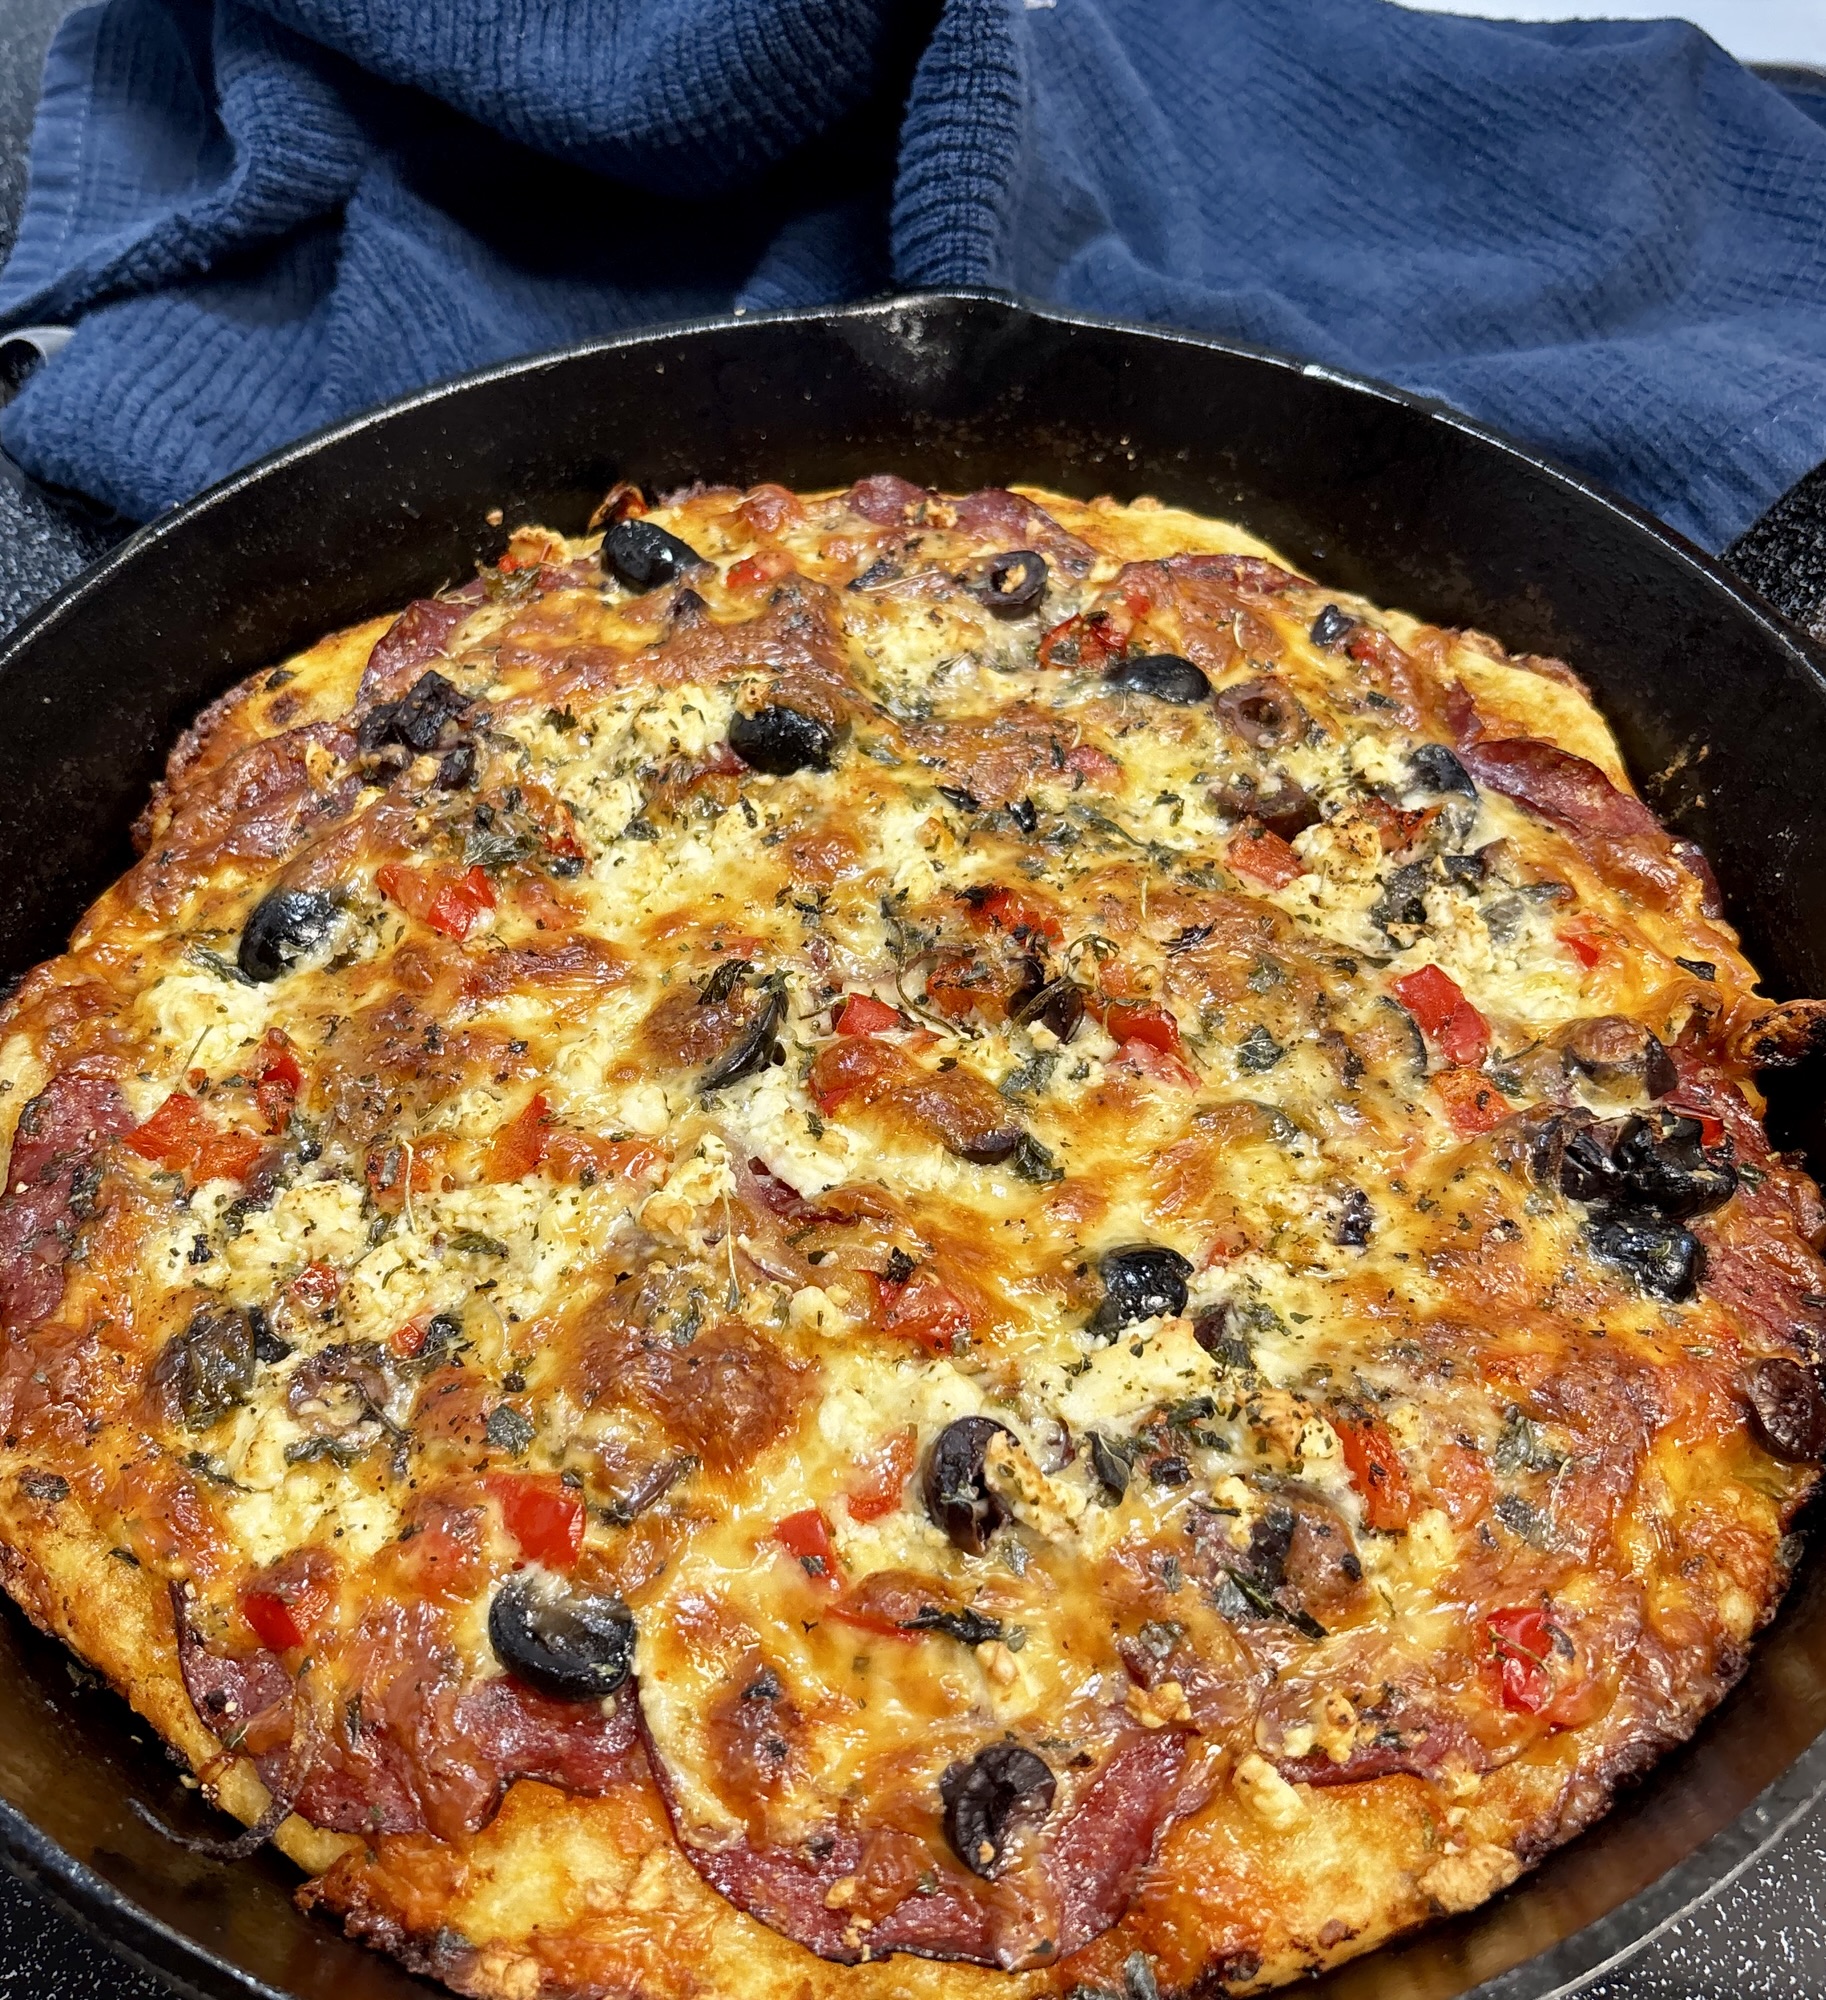
We’ve certainly made pizza a pile of different ways – I’ve even bought a Ooni pizza oven which we only used a handful of times before deciding deep dish pizza was our favorite way to eat a pizza. I found this recipe from Smitten Kitchen – it’s a winner and on repeat around here.
CRUST 1 10 inch pizza – I use my cast iron skillet
2 cups (280 grams) all purpose flour
1 tsp instant yeast
1 tsp kosher salt
1 cup lukewarm water (100-115 degrees is perfect)
olive oil
In a large bowl, whisk together flour, yeast and salt. Add the warm water and 1 tbsp olive oil. Stir together to make sure all the flour is mixed well, be certain there are no dry bits of flour. Cover and set aside to let it rest for about 2 hours, or until doubled in size. (I have a “proof” setting on my oven and that is what I use.
If I”m thinking ahead of time, this can go in the fridge once it has risen a bit, and carry on the next day when I’m ready to eat pizza.
Preheat oven to 450
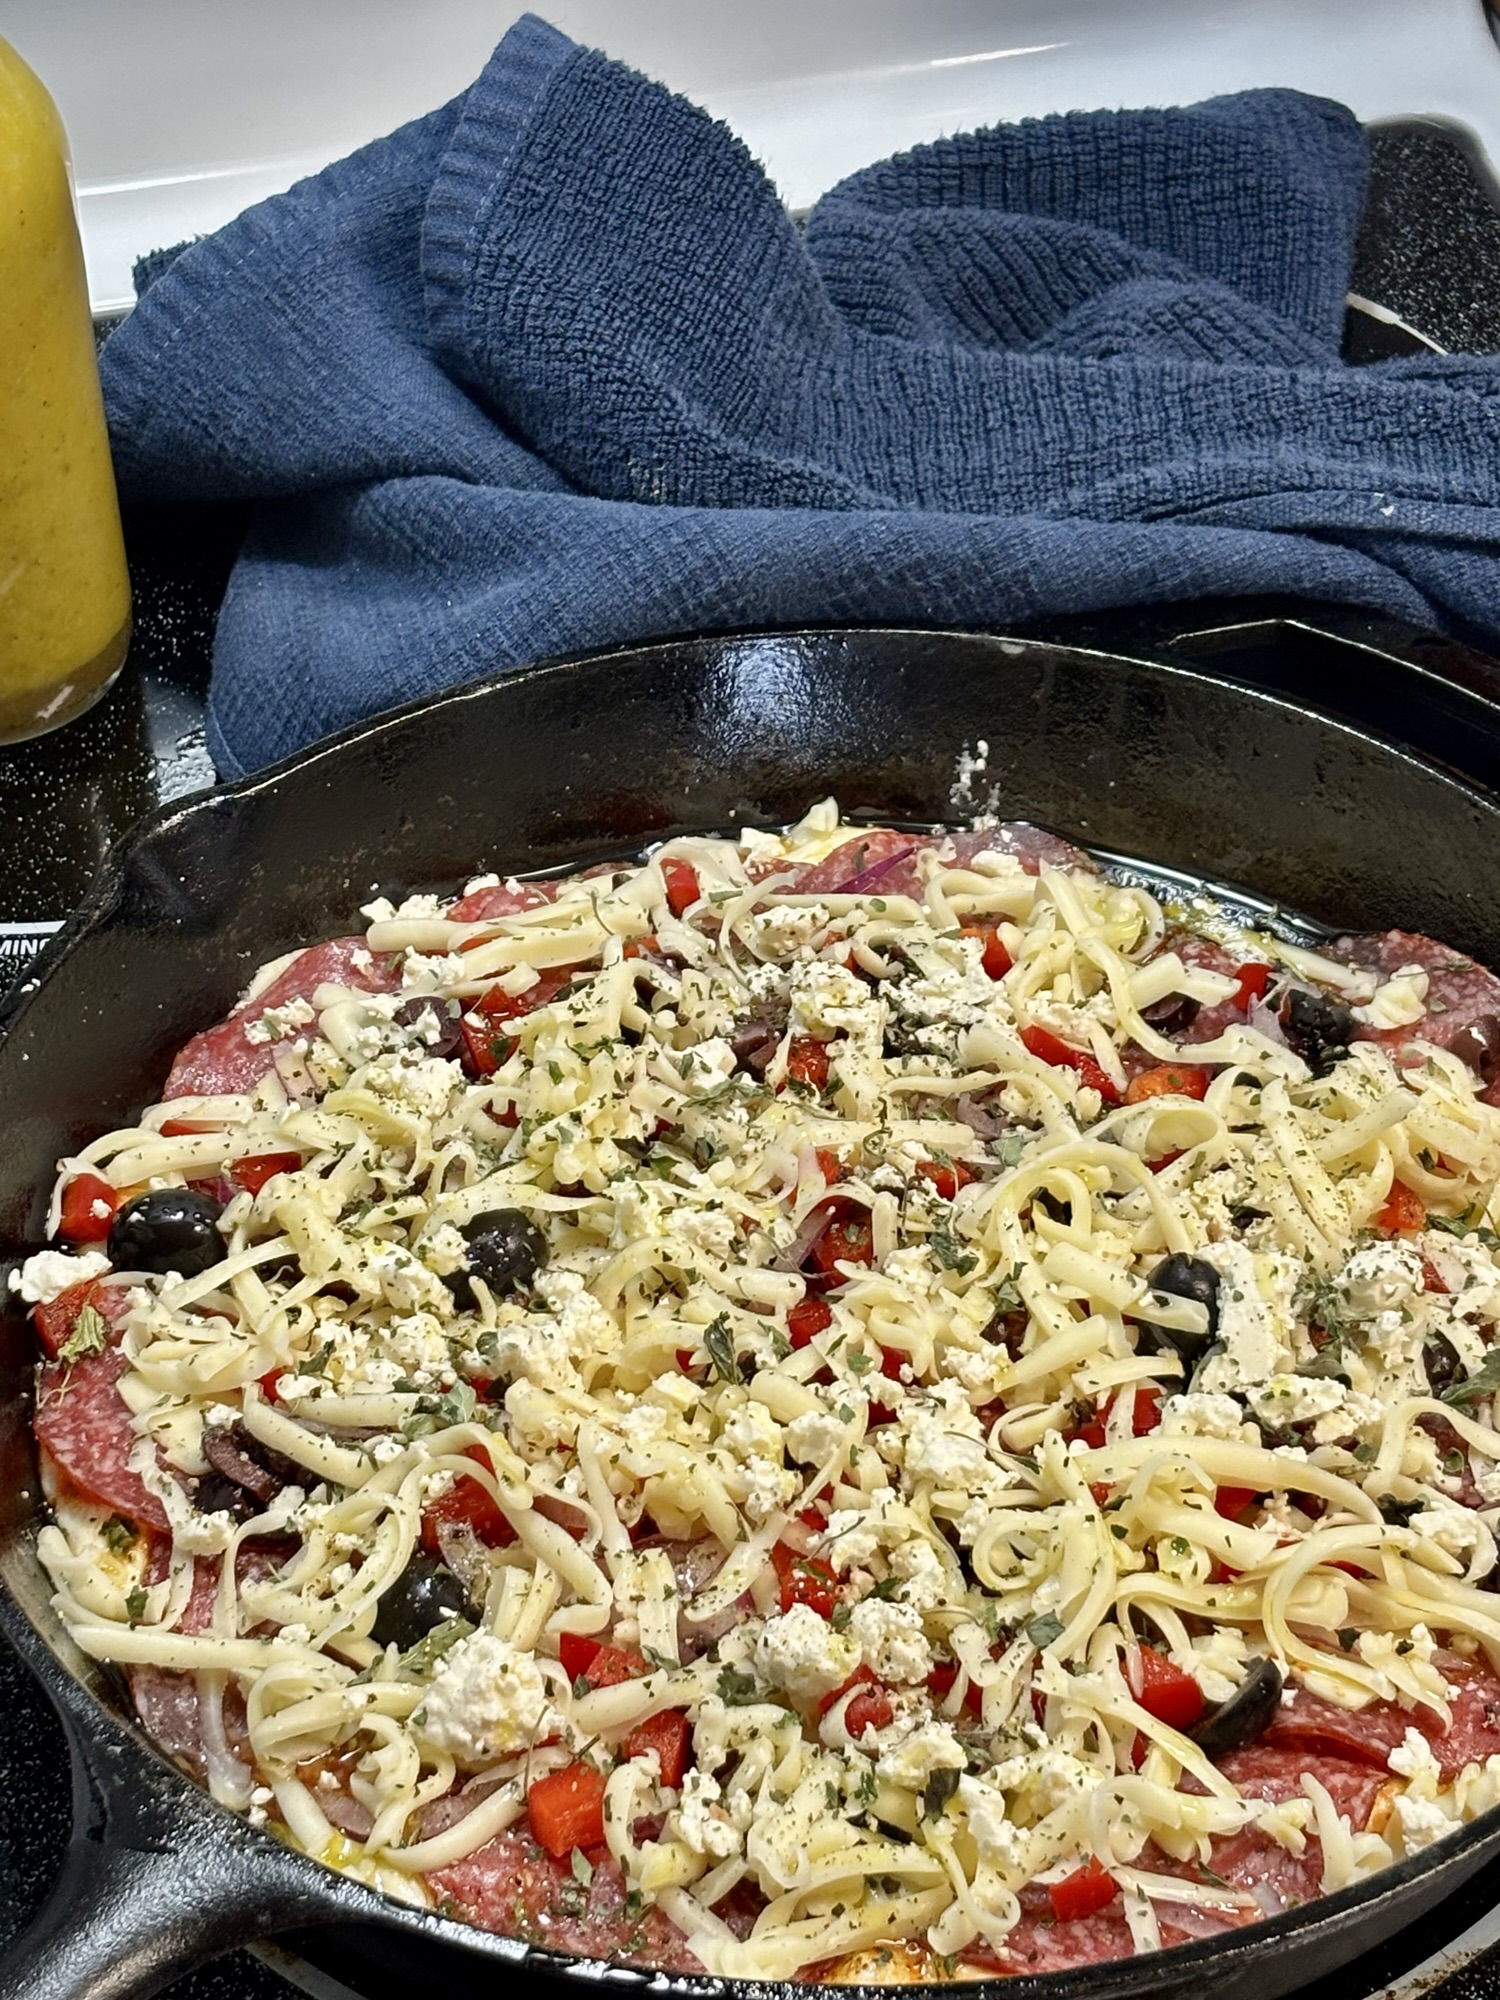
When the dough has risen to double, gently turn it into a very well oiled baking utensil. My cast iron skillet is perfect. (Make sure the baking vessel is good at 450 degrees) Gently stretch it to fill the skillet, and allow to proof once again until it is light, puffy and filling the skillet.
Cover with pizza sauce right to the edges, and cover with your favorite toppings.
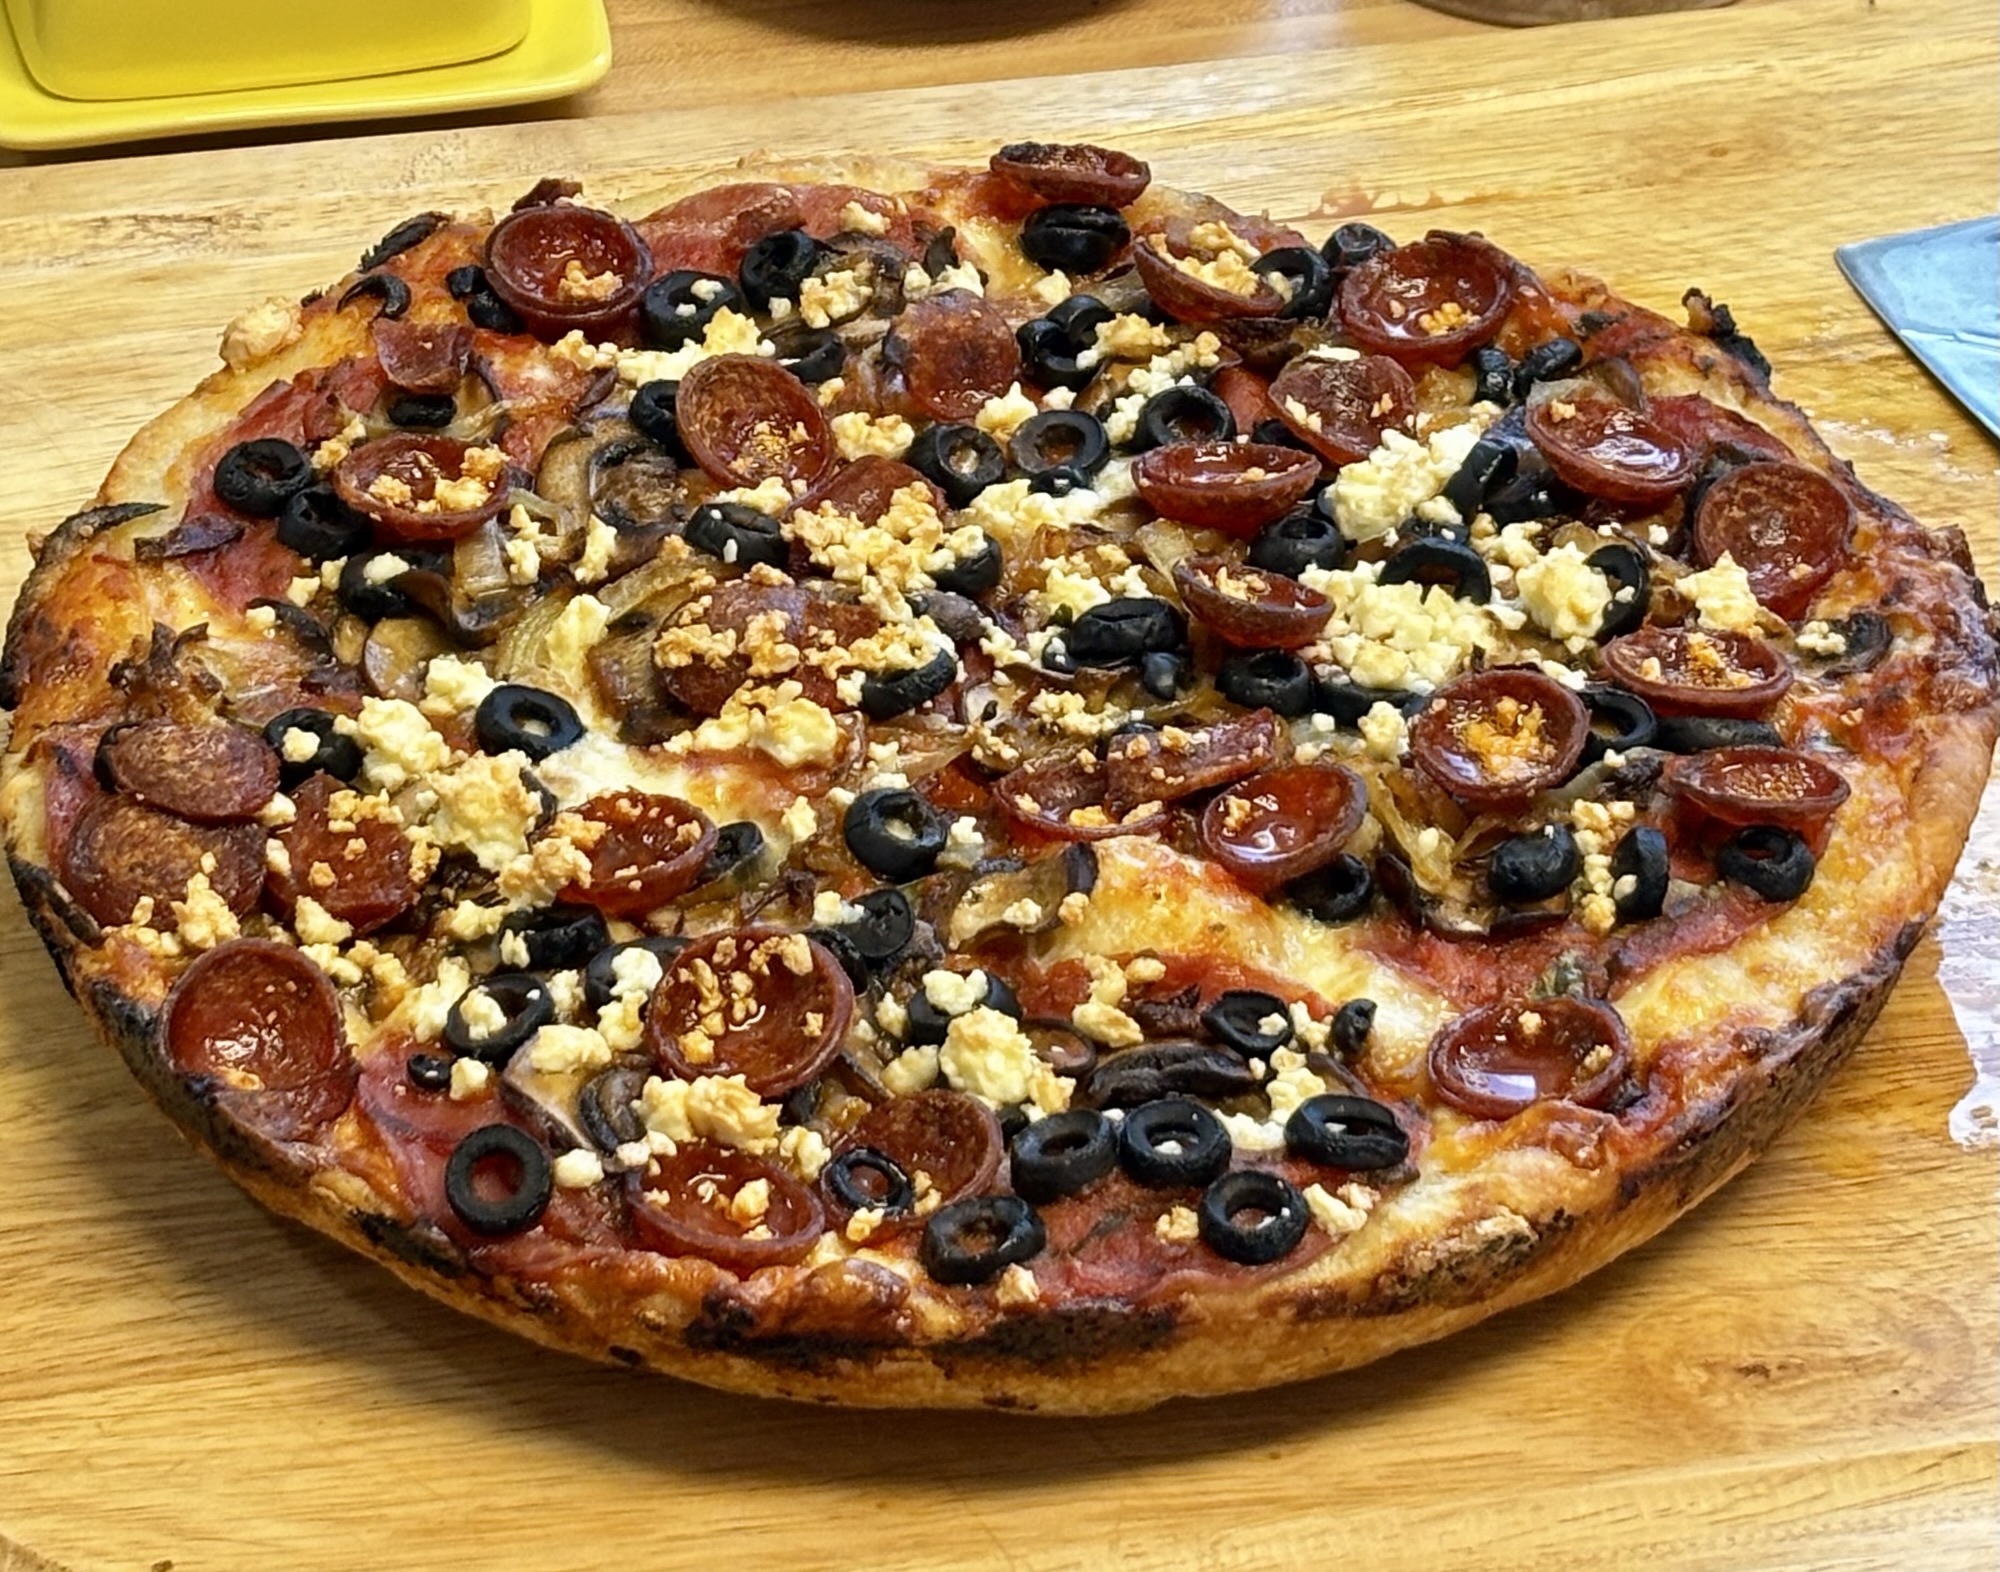
Bake at 450 for 30 minutes. Yes, really. The crust will be crispy and delicious!
Allow to sit for 10-15 minutes, if you can, before slicing.
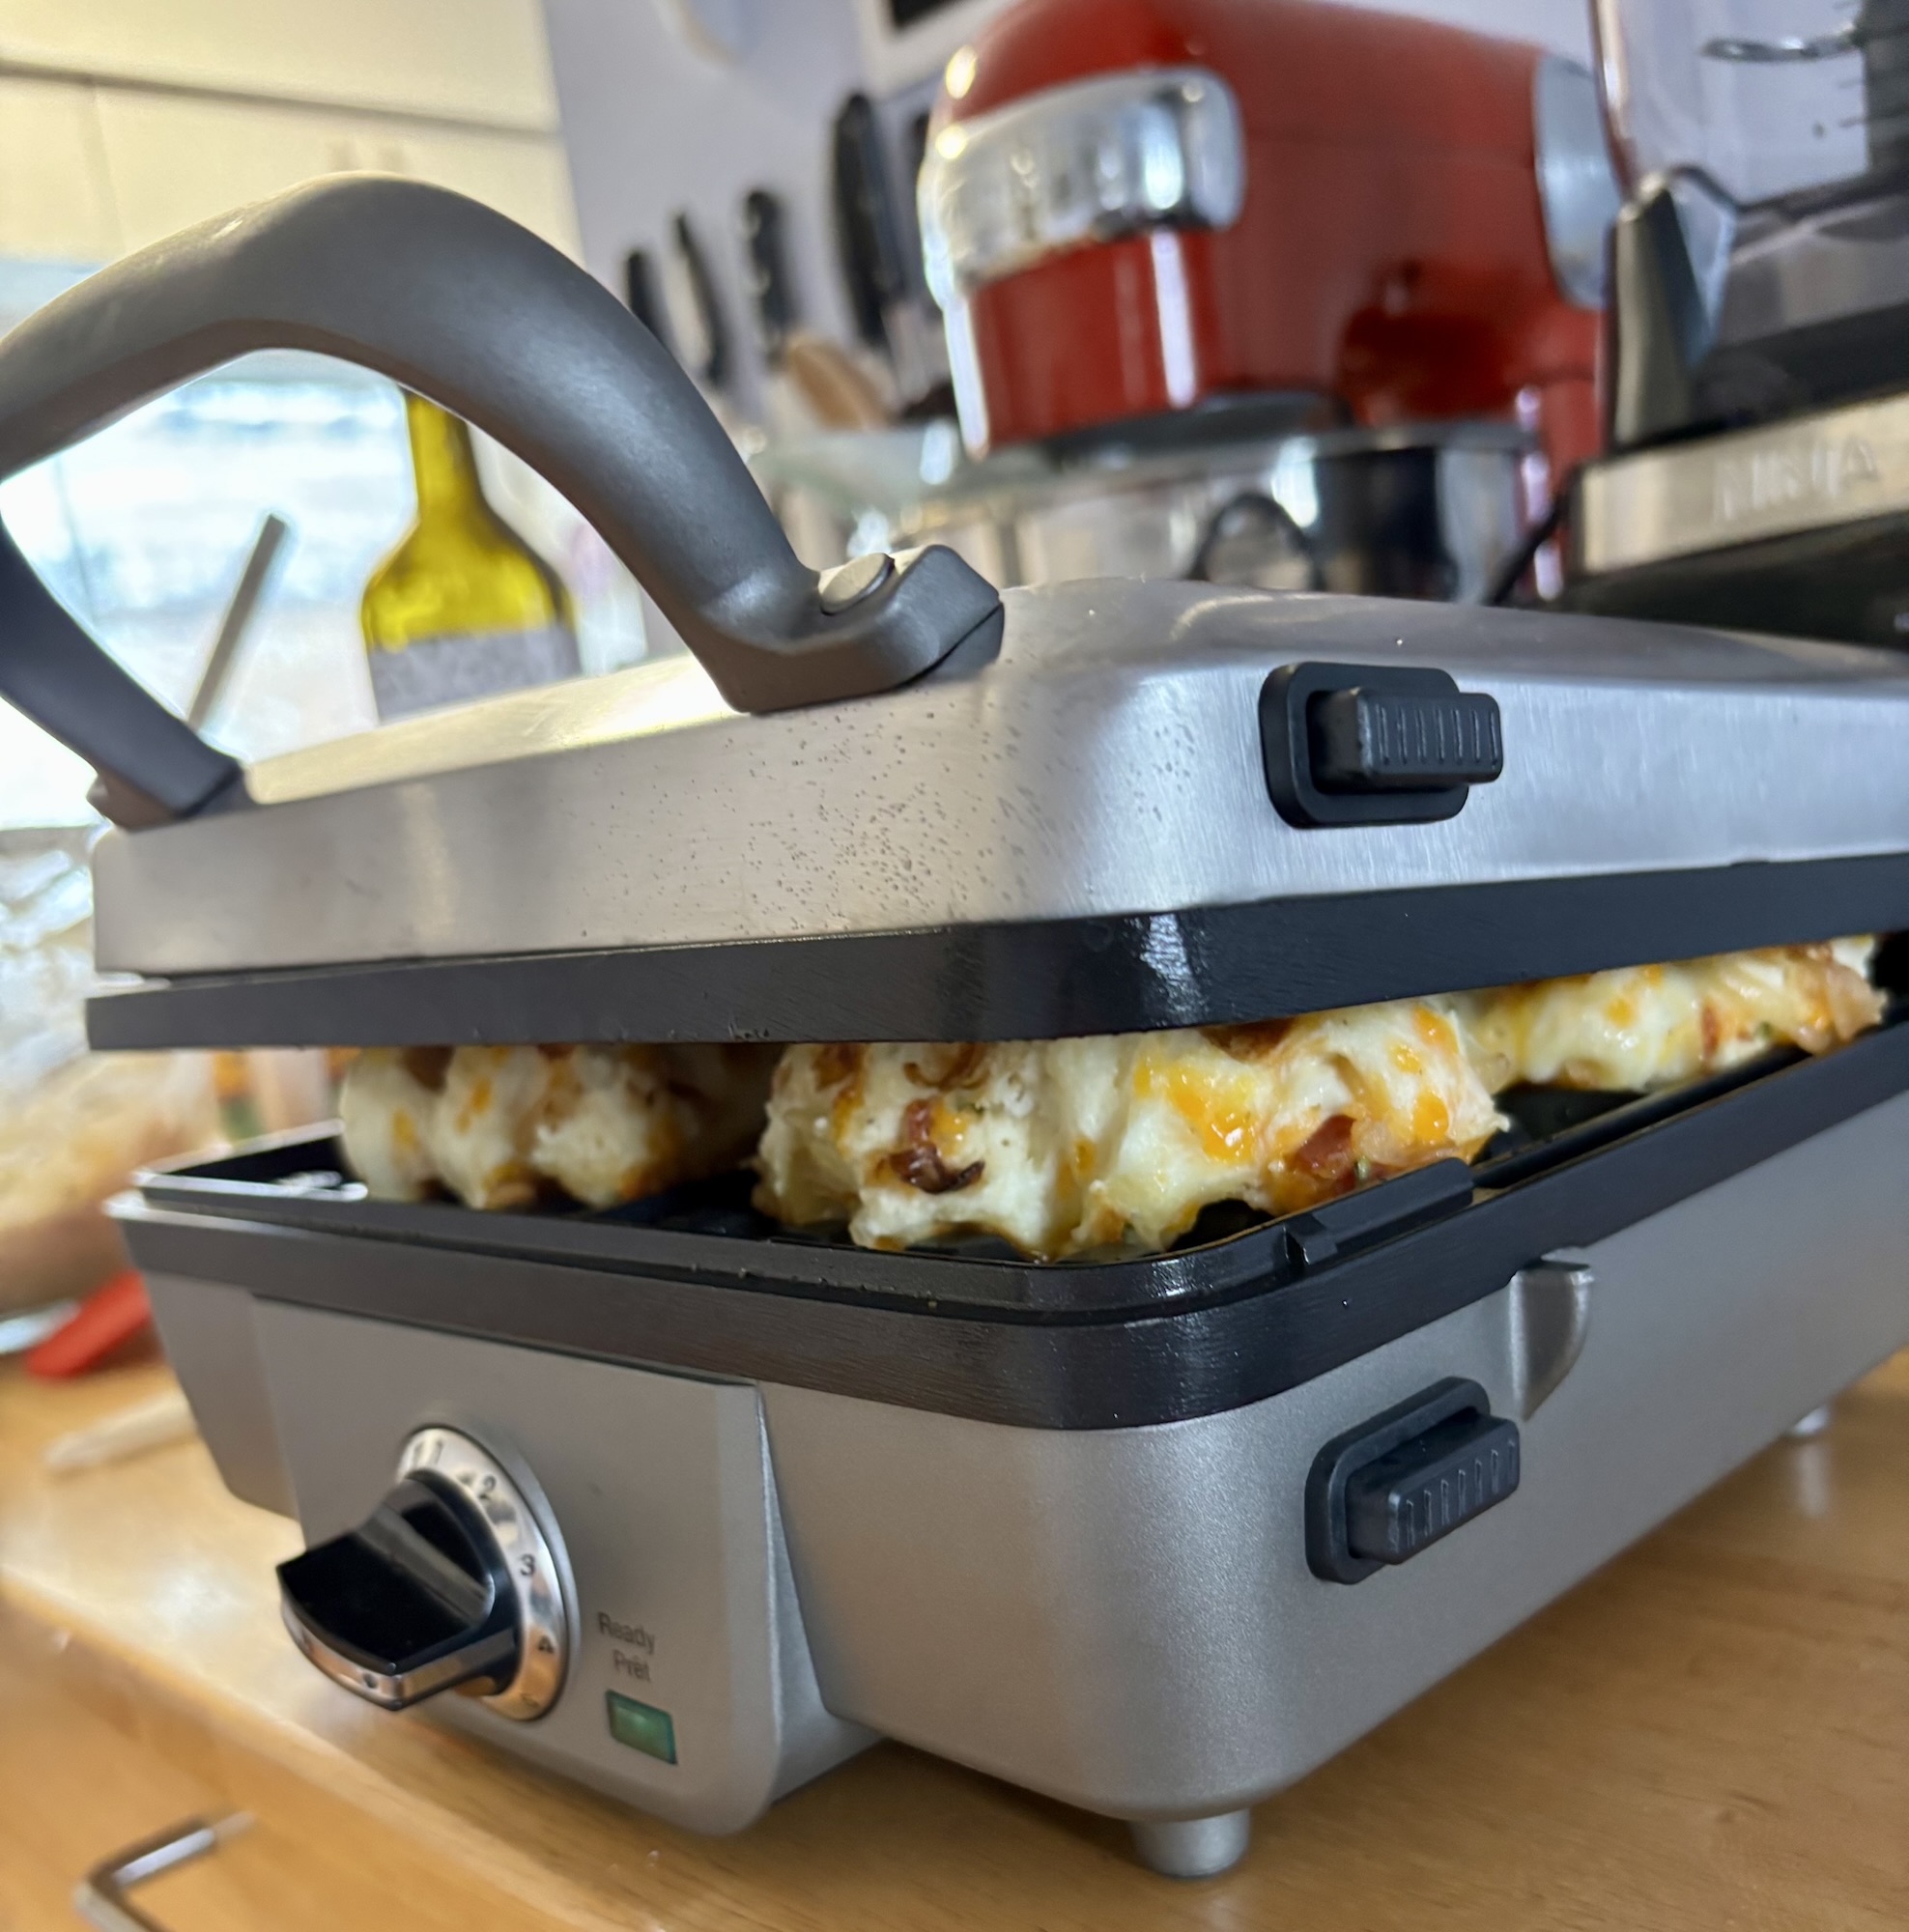
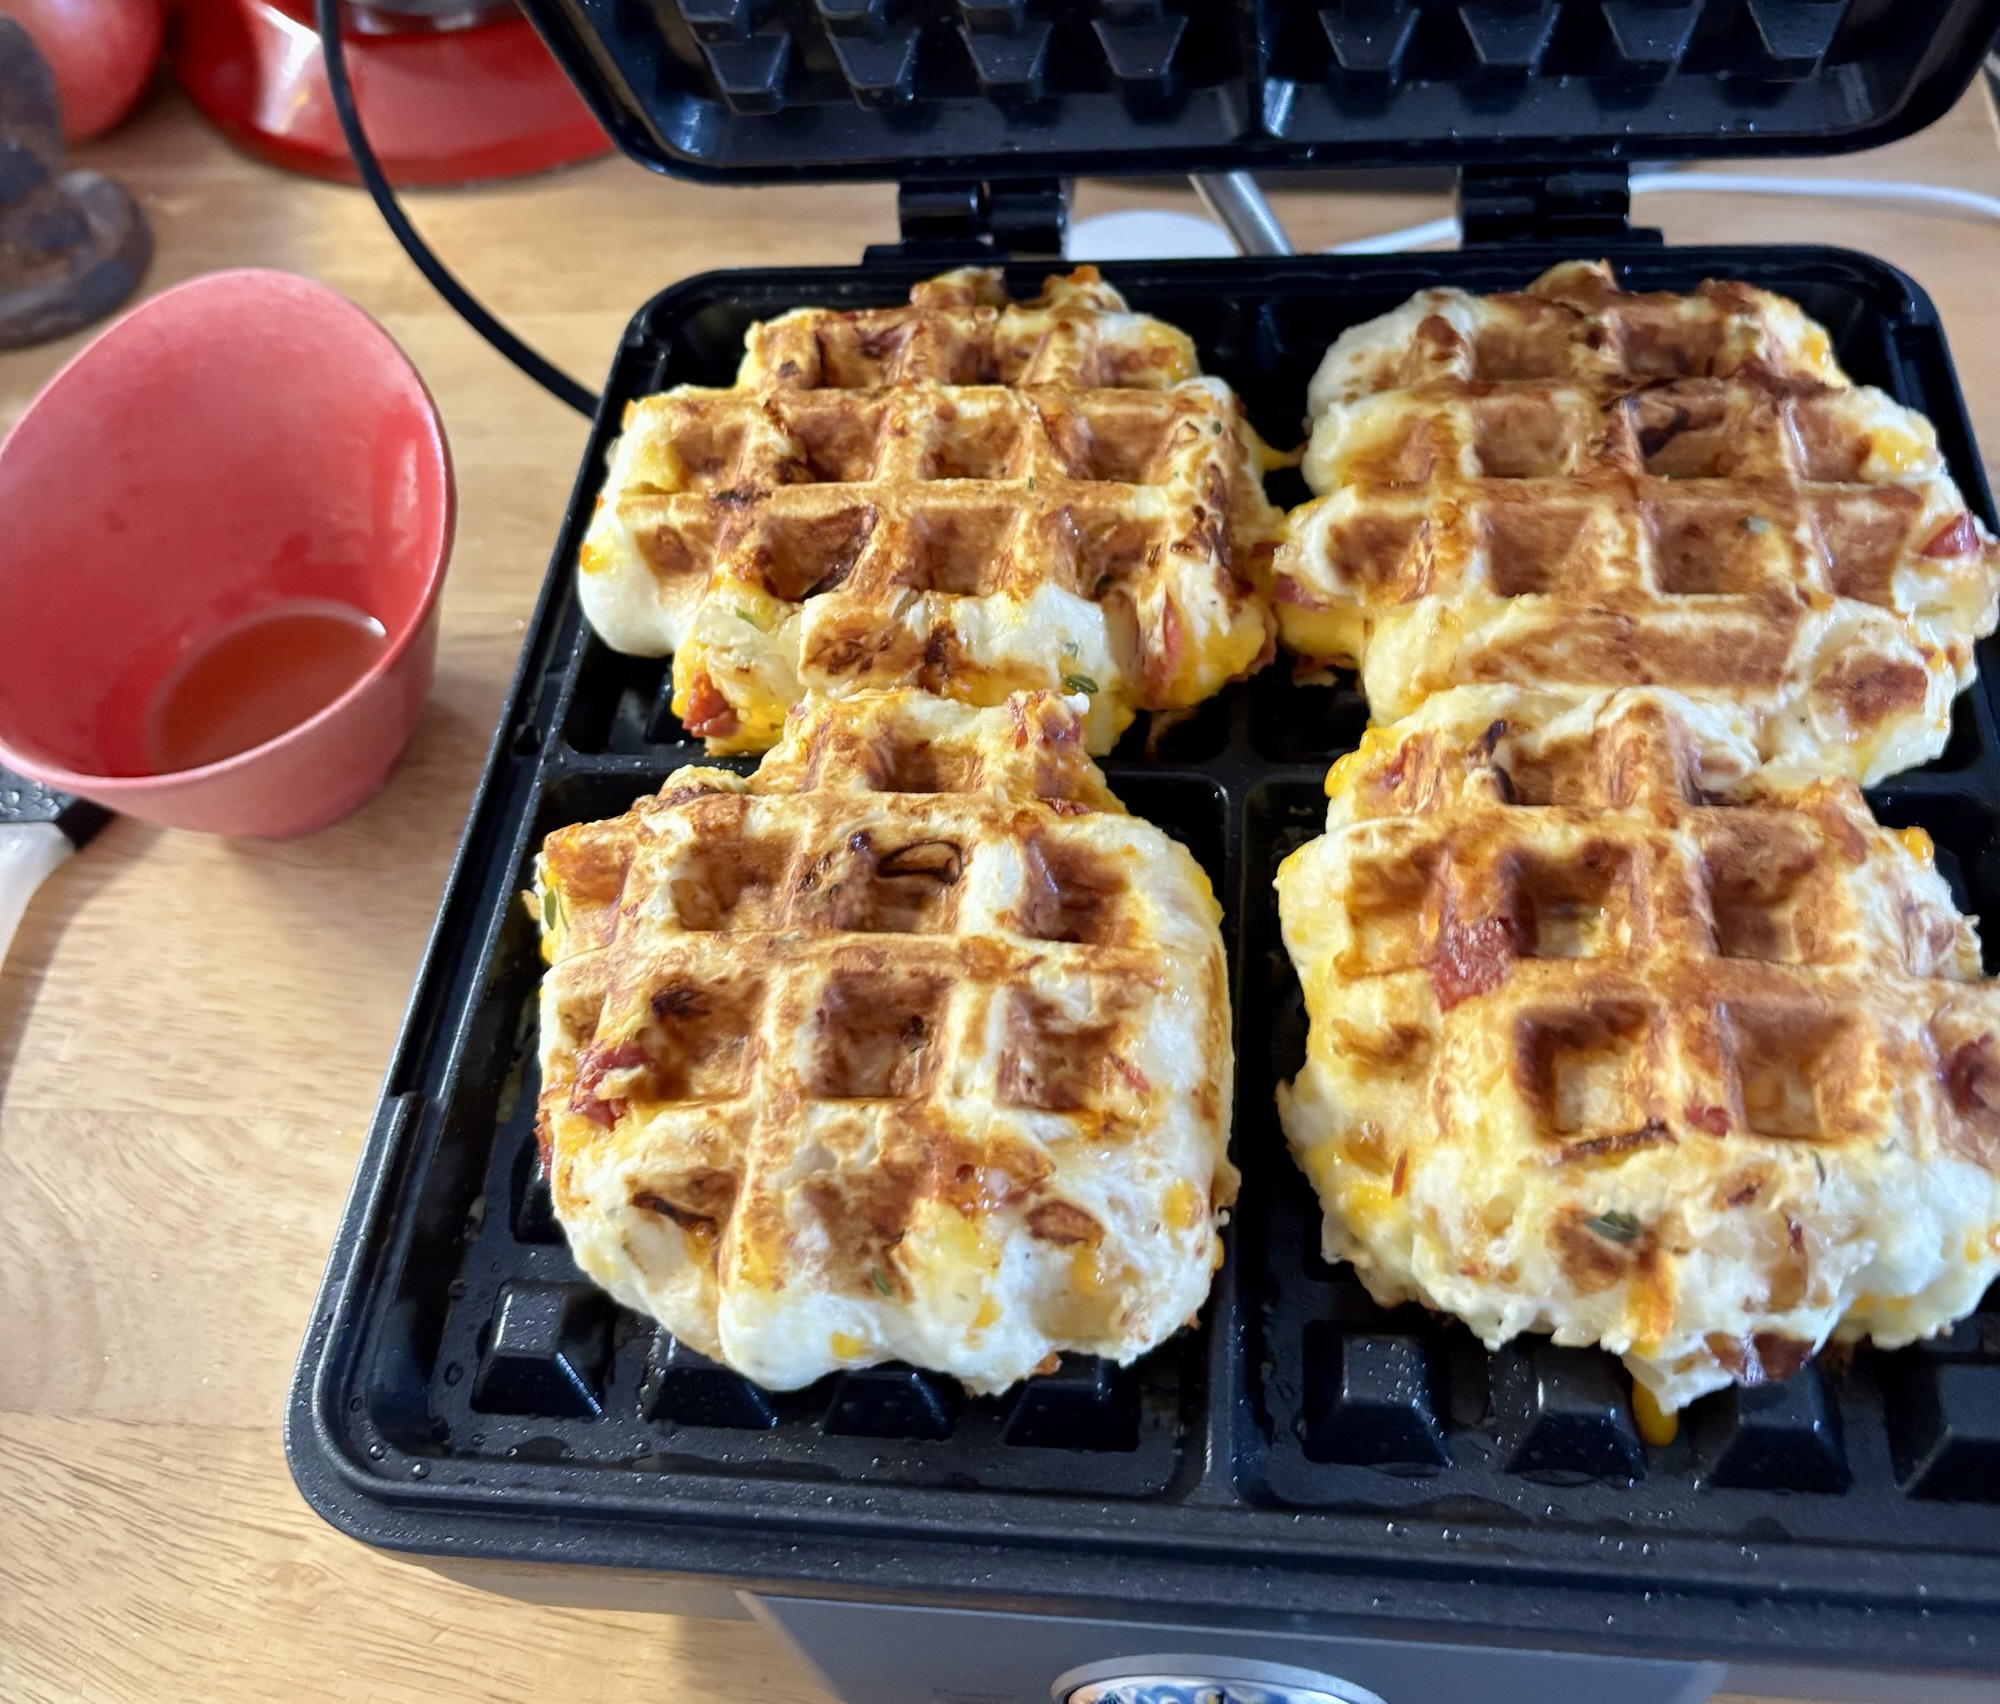
Will it waffle???? These certainly did, and created the most amazing aroma in the kitchen! I took some of my favorite flavors from my recent gluten free scones, and turned them into waffles as a quick handy snack. Stella has a 3 day market (WildflowerWoods2024) this weekend, and I wanted to make sure she had something tasty to pick up and eat whenever she had a moment.
Crispy, tasty and packed with protein!
2 small onions, thin slivers or sub sliced scallions (green onion)
1/3 cup minced pepperoni (or use cooked, crumbled bacon)
1 1/2 cups grated cheddar cheese (use your favorite!)
1 3/4 cups flour – all purpose, or a gluten free substitute (I used Cup4Cup)
1 tbsp & 1 tsp baking powder
1 tsp white sugar
1 tsp salt
freshly cracked black pepper to taste (a few grinds should be good)
3 large eggs
1 cup milk (I used full fat)
** olive oil to brush your waffle maker**
The first thing to do is carmelize your onions – take your time with this step and do it early enough to allow them to cool before using. When cooled, chop them up. If you want to skip this step – use thinly sliced green onions.
Mince pepperoni and set aside.
Shred cheese and set aside. I don’t like to use preshredded, but if you do, go ahead!
In a large bowl whisk egg and milk together until well combined.
In a smaller bowl combine all the dry ingredients, flour, baking powder, sugar, salt and pepper.
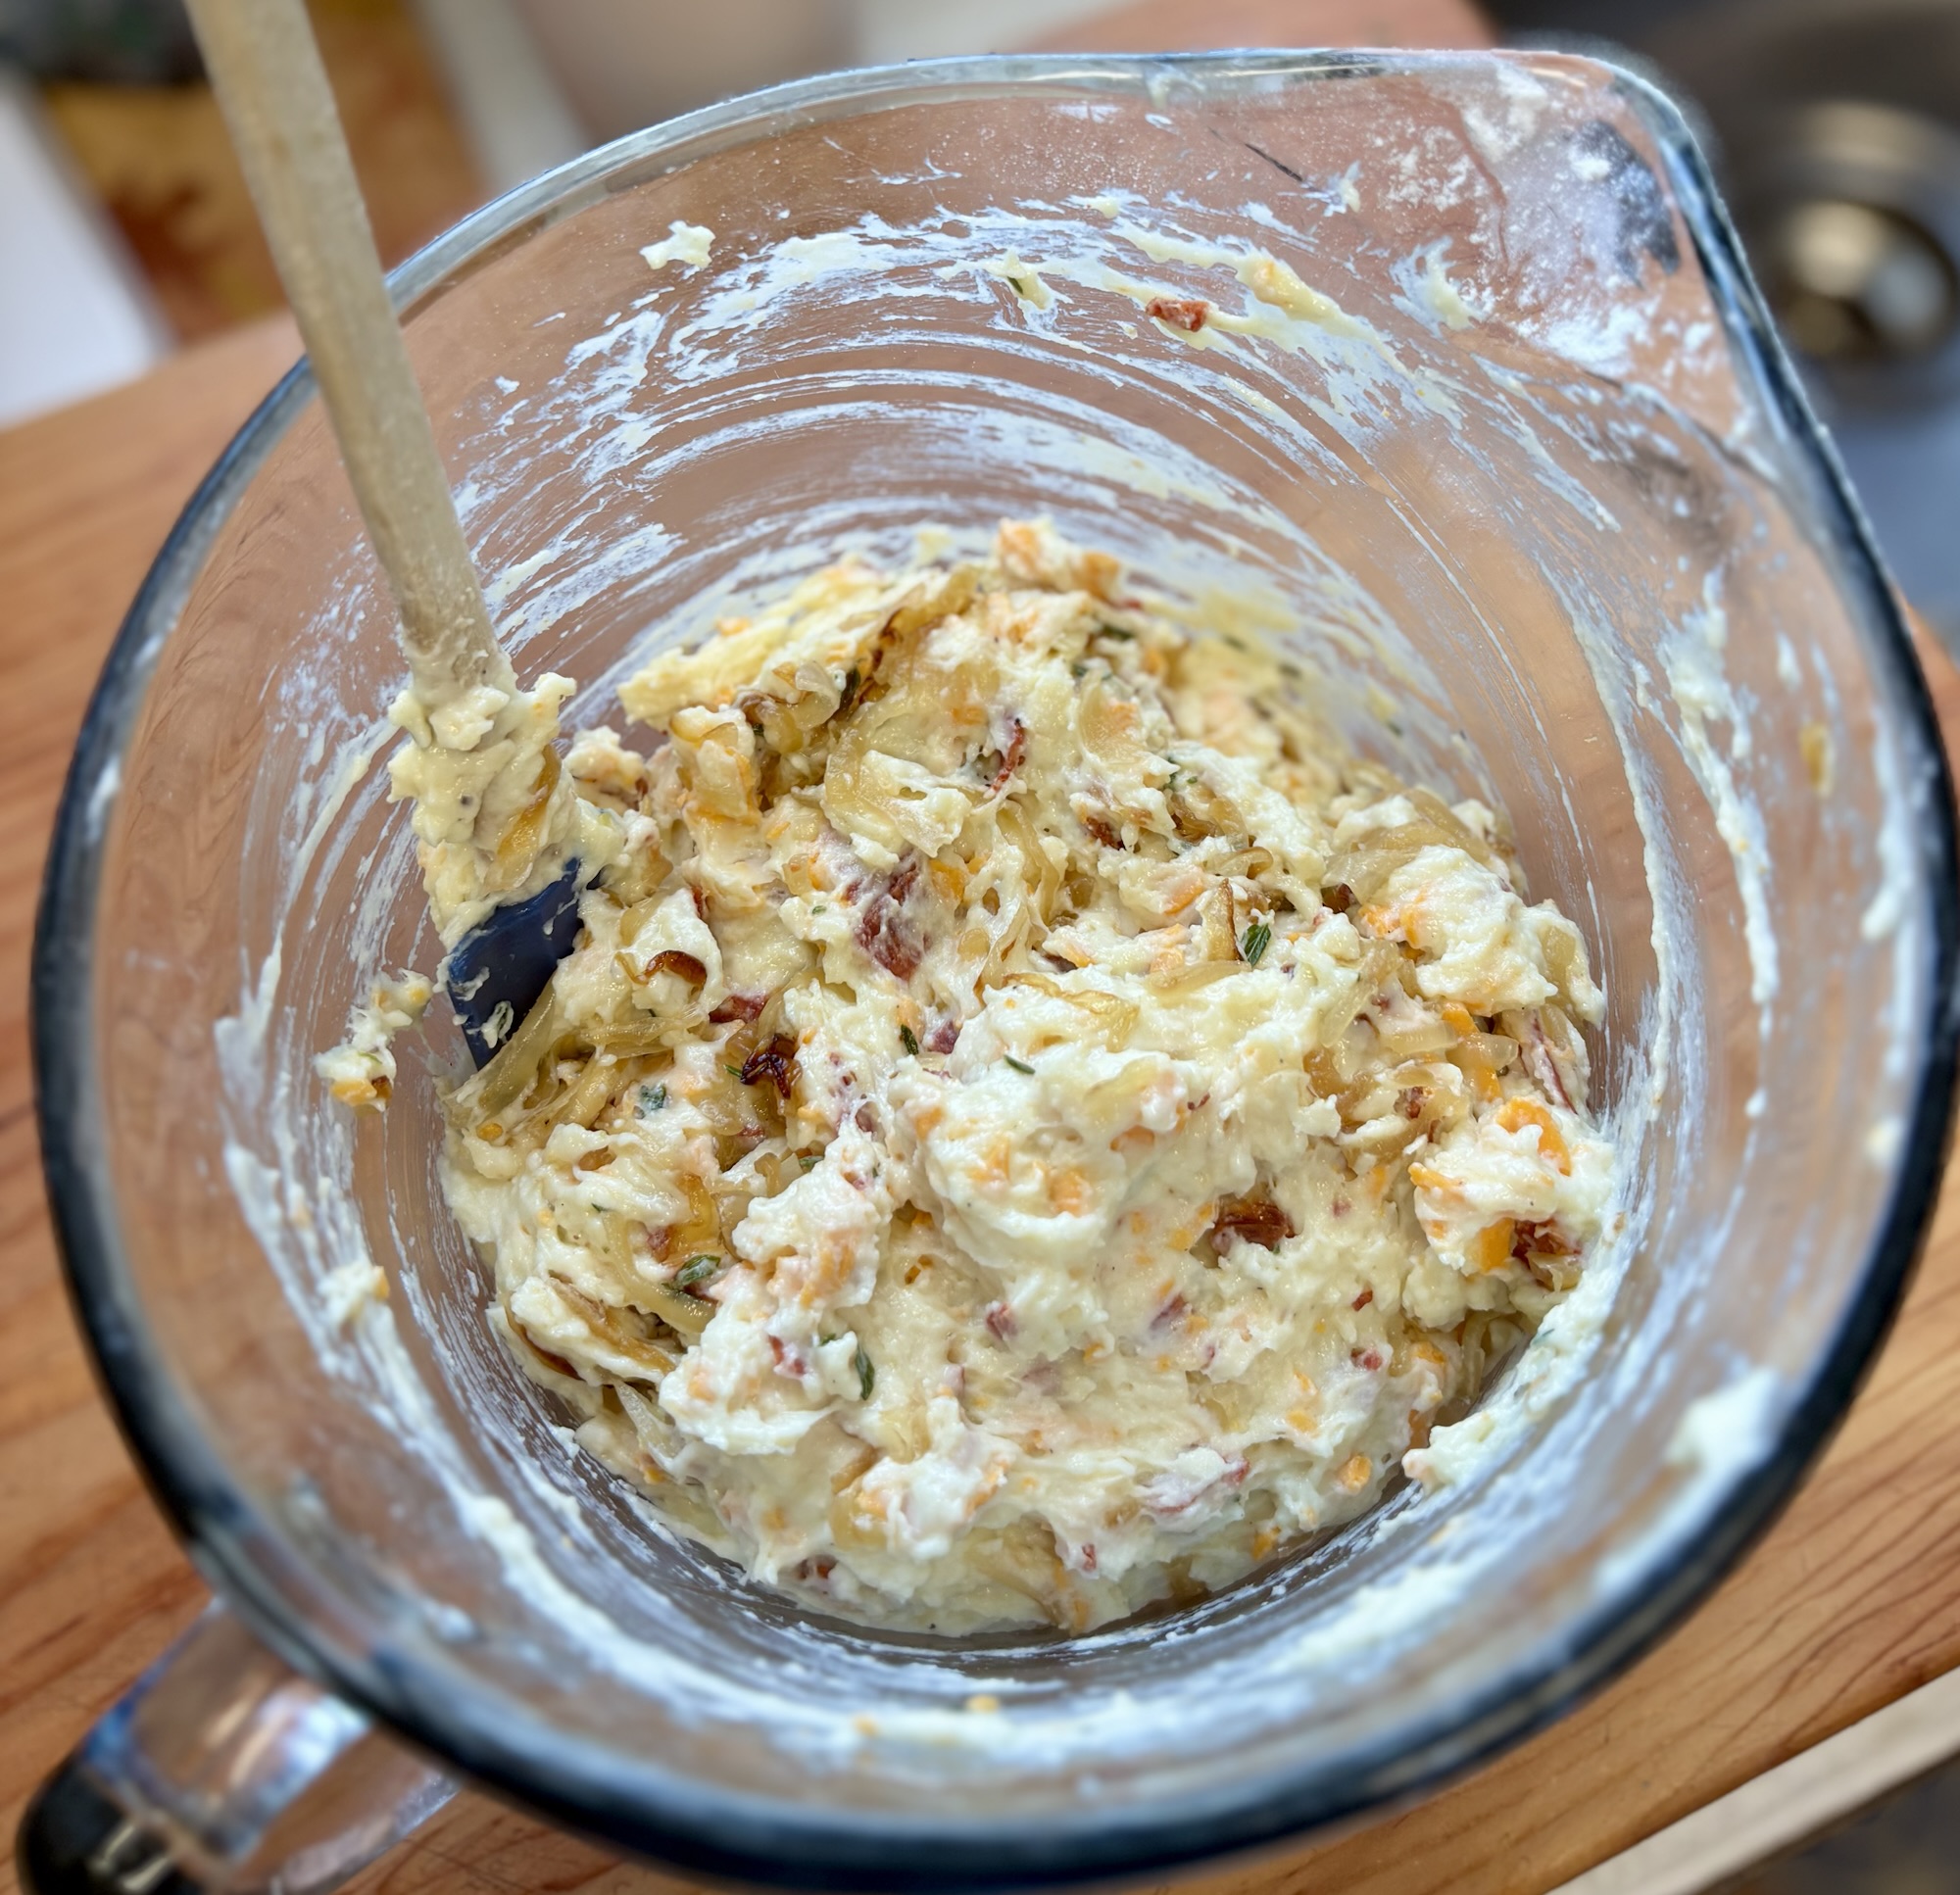
Slowly incorporate the dry ingredients into the egg mixture. If you are using a gluten free blend, allow it to sit for 5 minutes. I find GF flours have a tendency to be gritty, and this seems to alleviate that. Add in the onions, pepperoni, and cheese. Stir well to make sure you get goodness in every bite.
Preheat your waffle iron, and for every batch use a silicone brush to coat the surface with olive oil once you are ready. My waffle iron has 4 smaller waffles on the lower pan, I first tried 1/3 of a cup and found that a bit too much, so settled on 1/4 cup per individual waffle.
If you don’t have a waffle iron, I would imagine these come out fine as a pancake also.
They were inhaled so I can’t say with certainty, but I imagine they would freeze well, and reheat in toaster oven just fine.
You know something good is coming when this already smells great.Make sure to distribute your goodies throughout.I wasn’t even sure they would cook through they puffed up so much, but they did!Perfect little hand held bites of deliciousness!
It’s been a hot minute since I posted anything, but these beautiful jalapeno peppers got me excited! The peppers at Ringo En Orchard are going strong, it is nearly the end of a beautiful September, and they are still plentiful.
10-12 largeish jalapeno peppers
8 oz (1 large pack) cream cheese
1/2 a small onion, finely grated
1/2 tsp garlic powder
1/2 tsp salt
1/4 tsp pepper
1 1/2 cup shredded cheddar cheese (I like to use extra old)
1/4 cup finely sliced chives
TOPPING
1/2 a pack of bacon, sliced finely, cooked, then crumbled
1/3 cup finely crumbled tortilla chips
Combine softened cream cheese with the onion, garlic powder, salt, pepper, shredded cheese.
Slice jalapeno peppers in half, remove membrane and seeds (I like using gloves for this).
Scoop cheese mixture into jalapeno halves, sprinkle bacon and tortilla chips over top.
At this point, you can either freeze them in a single layer to serve up another time, (when frozen, place in freezer bag or airtight container), or heat and serve!
Bake at 400 for 20 minutes.
These are naturally gluten free if you make sure your bacon and tortilla chips are gluten free. It’s easy to turn these vegetarian by leaving out the bacon.
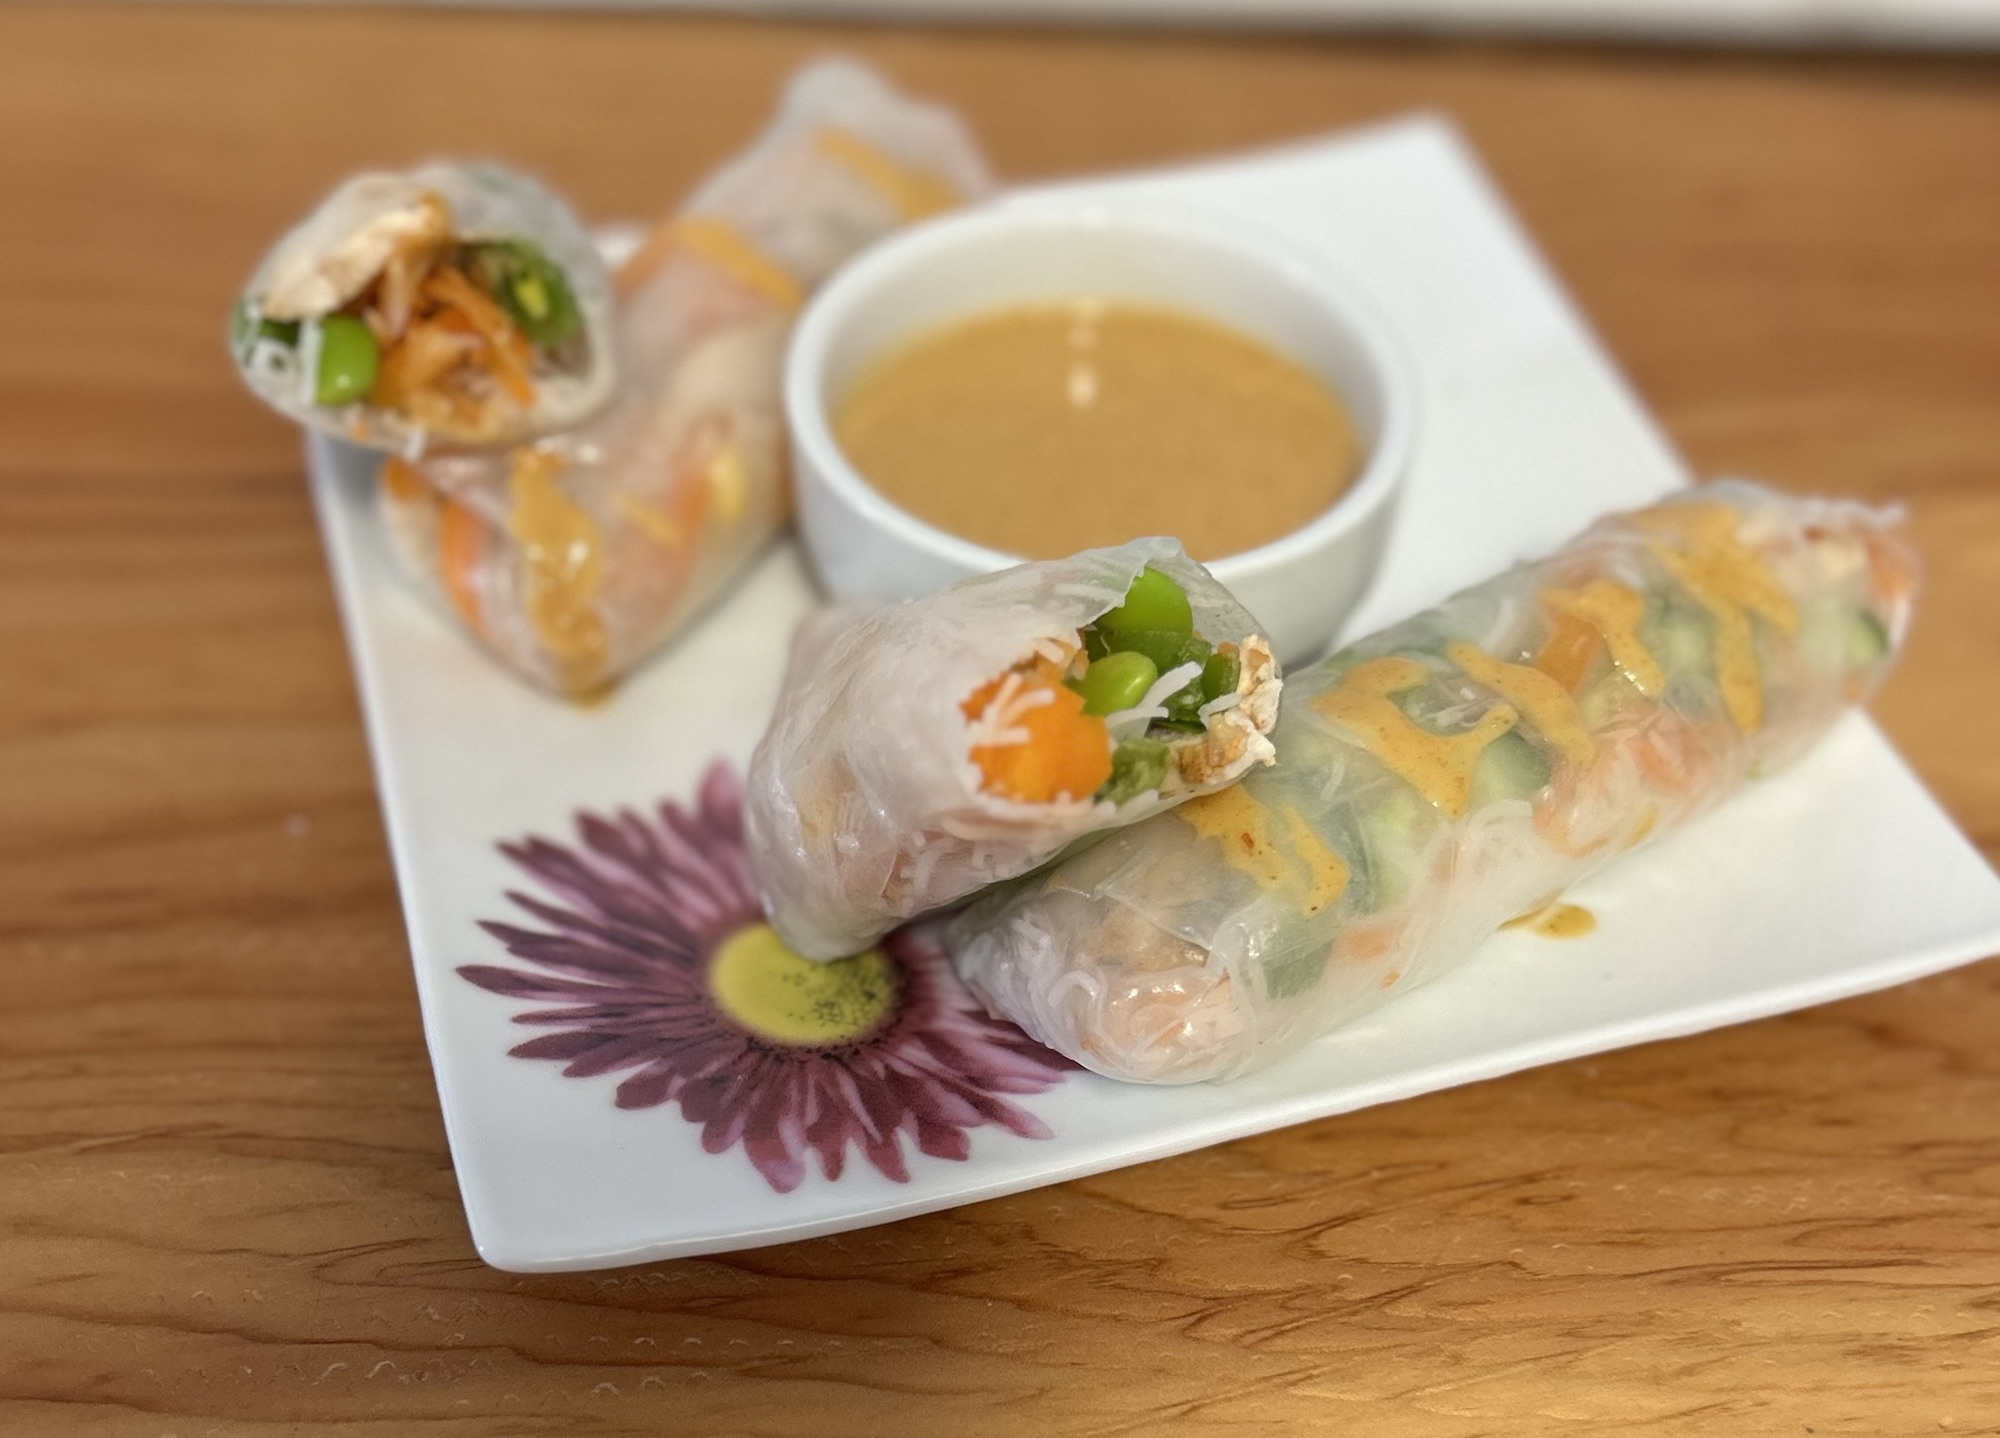
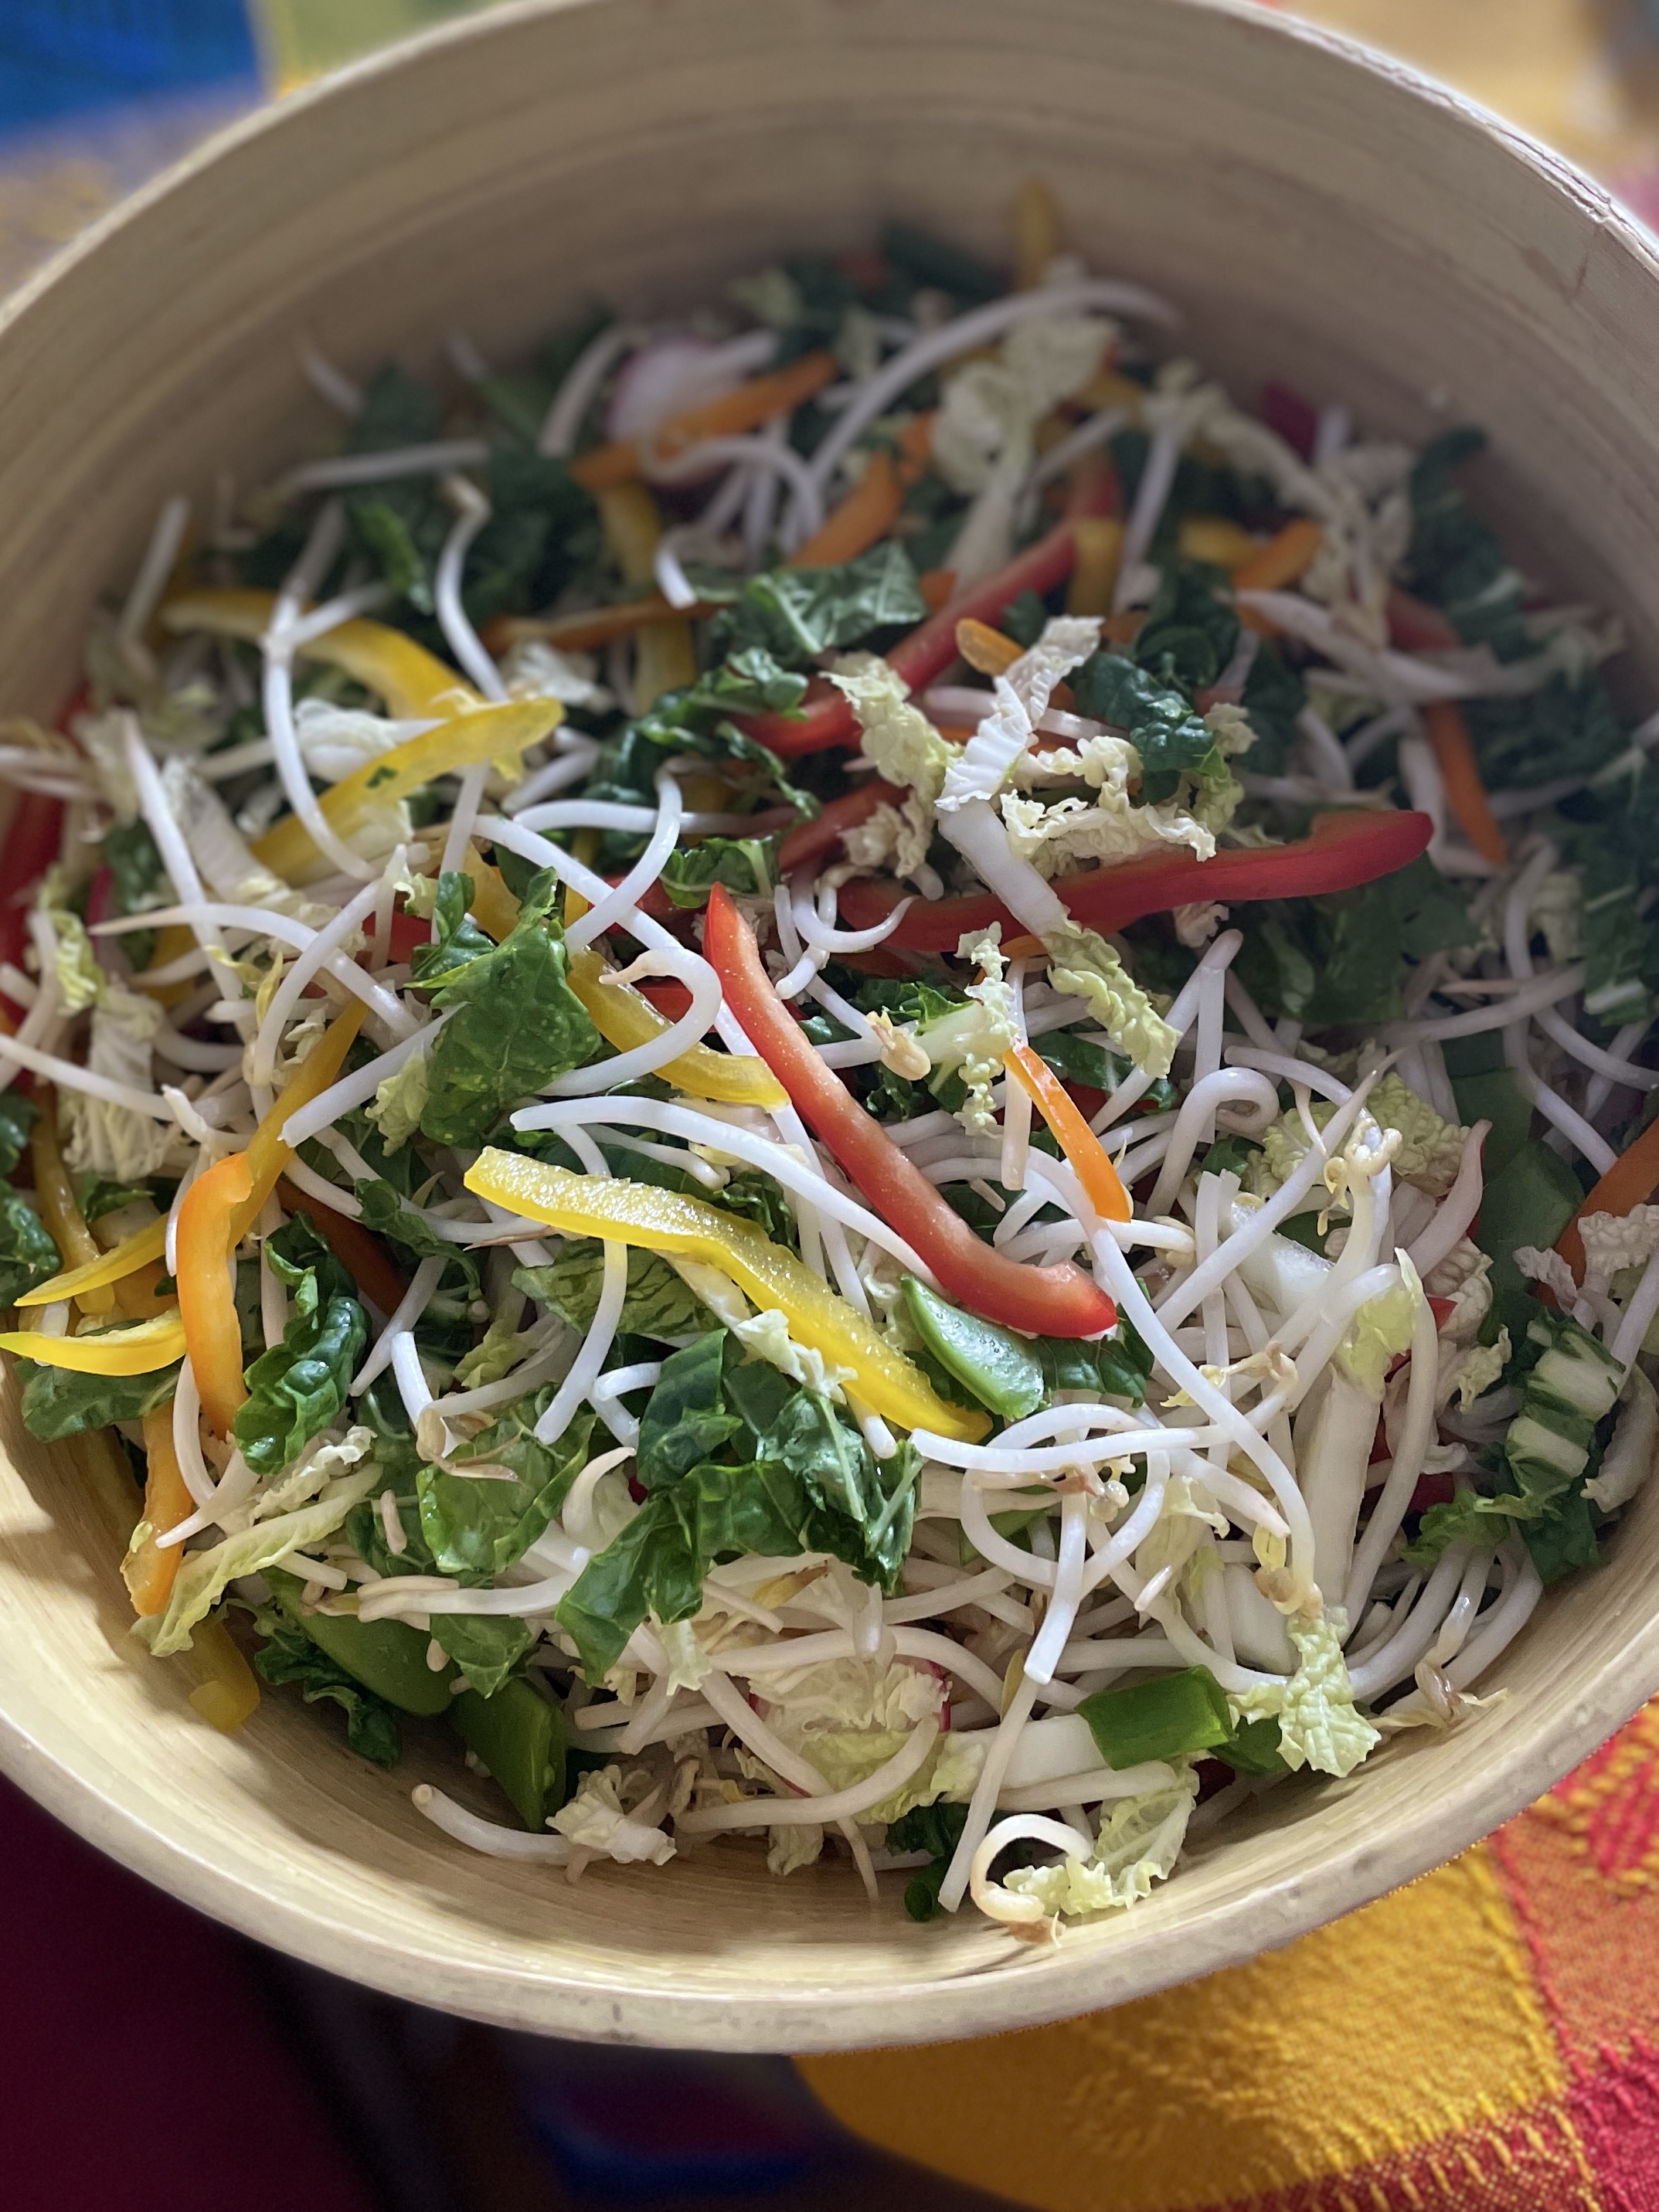
We had Salad Bar (Sloan’s choice) for Sunday dinner, which meant creating these salad rolls from the leftovers was a breeze! Stella and I often get stuck in on projects for lunch, but this was so quick and easy, utilizing the grilled chicken and prepared vegetables.
What sells this though, is the peanut sauce! So good, Stella and I decided it better go on the blog right away so we remember the recipe, and how quickly it came together.
SALAD ROLL INGREDIENTS
rice paper wraps
cooked thin rice noodles
cooked chicken, grilled prawns, or whatever protein you fancy
slivered vegetables, whatever you like
bean sprouts
lettuce
Soften wraps in warmish water, don’t allow to get too soft or they will tear as you wrap. They continue to soften as they sit.
Lay wrap down, and with lightly moistened fingers place your ingredients in the lower half of the wrap, fold edges in to trap filling and then roll as tightly as you can. The sky is the limit with whatever you like to fill your salad rolls with. We didn’t have any lettuce but if you do, laying a leaf down, and then placing the filling on the lettuce helps to prevent the wrap tearing and gives the salad rolls a nice crunch.
(you can google wrapping salad rolls – there are lots of those videos available)
The star here …. PEANUT SAUCE
1/2 cup peanut butter (use natural for the most peanut flavour)
1/3 cup soy sauce
2 tbsp toasted sesame oil
2 tbsp rice vinegar
2 tbsp sambal oelek or chili paste
1 tbsp hoisin sauce
2 tbsp sugar (could sub honey if you prefer)
1 knob of fresh ginger, peeled (to taste)
1 garlic clove, peeled
Up to 1/4 cup of water, to thin as needed.
Whiz all this up in a blender, using water as you see fit and taste to see if it needs any adjustments.
The chili paste is where the little bit of spicy heat comes from. We both like a little bit of heat, but not overwhelmingly spicy. We found 2 tbsp was perfect but go according to your own tastes, and of course the type of chili paste you have.
I got the base of this recipe from Lindsay at Pinch of Yum, and we decided to get it on here so we don’t keep looking for one … thanks Lindsay!
Ready to eat, these salad rolls were so quick, we had them on the table easily.
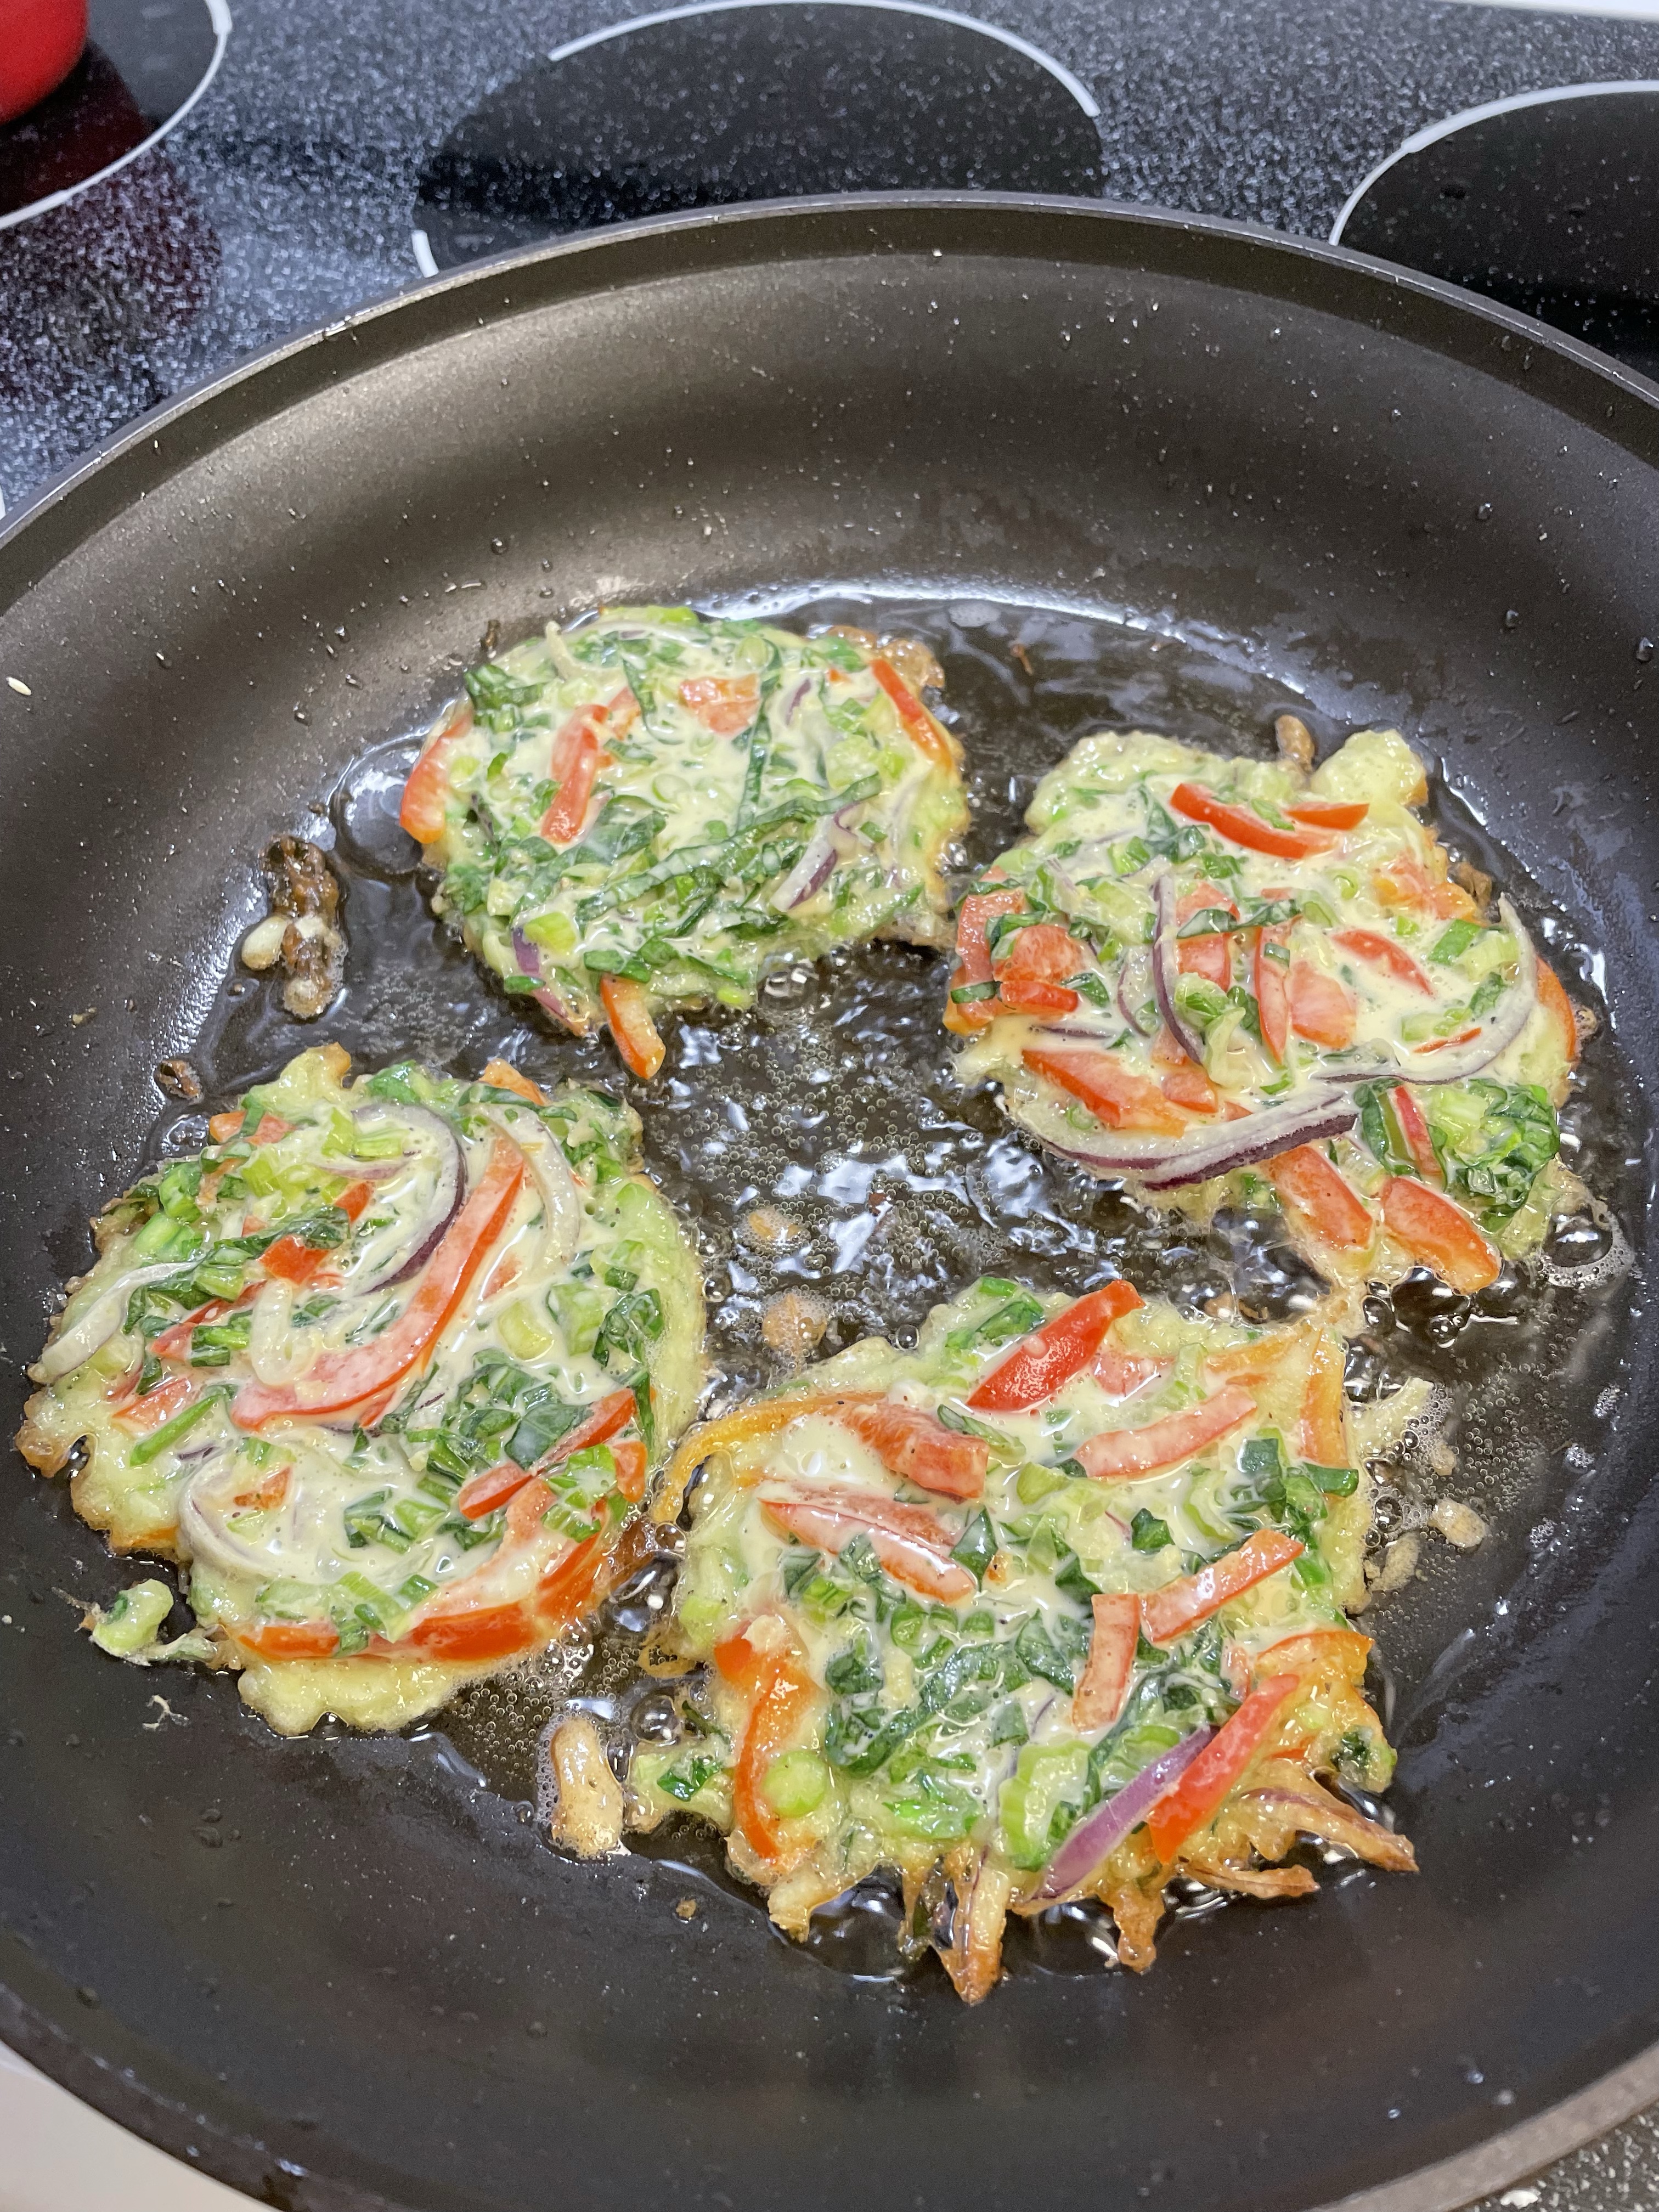
Stella was insistent that I get my recipe for vegetable pancakes on the blog right away so she could make them at home with Hayley! Such a quick, easy and delicious way to have a meal on the table in minutes, these are great for lunch, dinner or snacking. I usually make a pile and they warm up quickly in the toaster oven. They are a bit of a mash up of Korean pajeon, Japanese Okonomiyaki and Chinese scallion pancakes (even a bit like my zucchini fritters!)
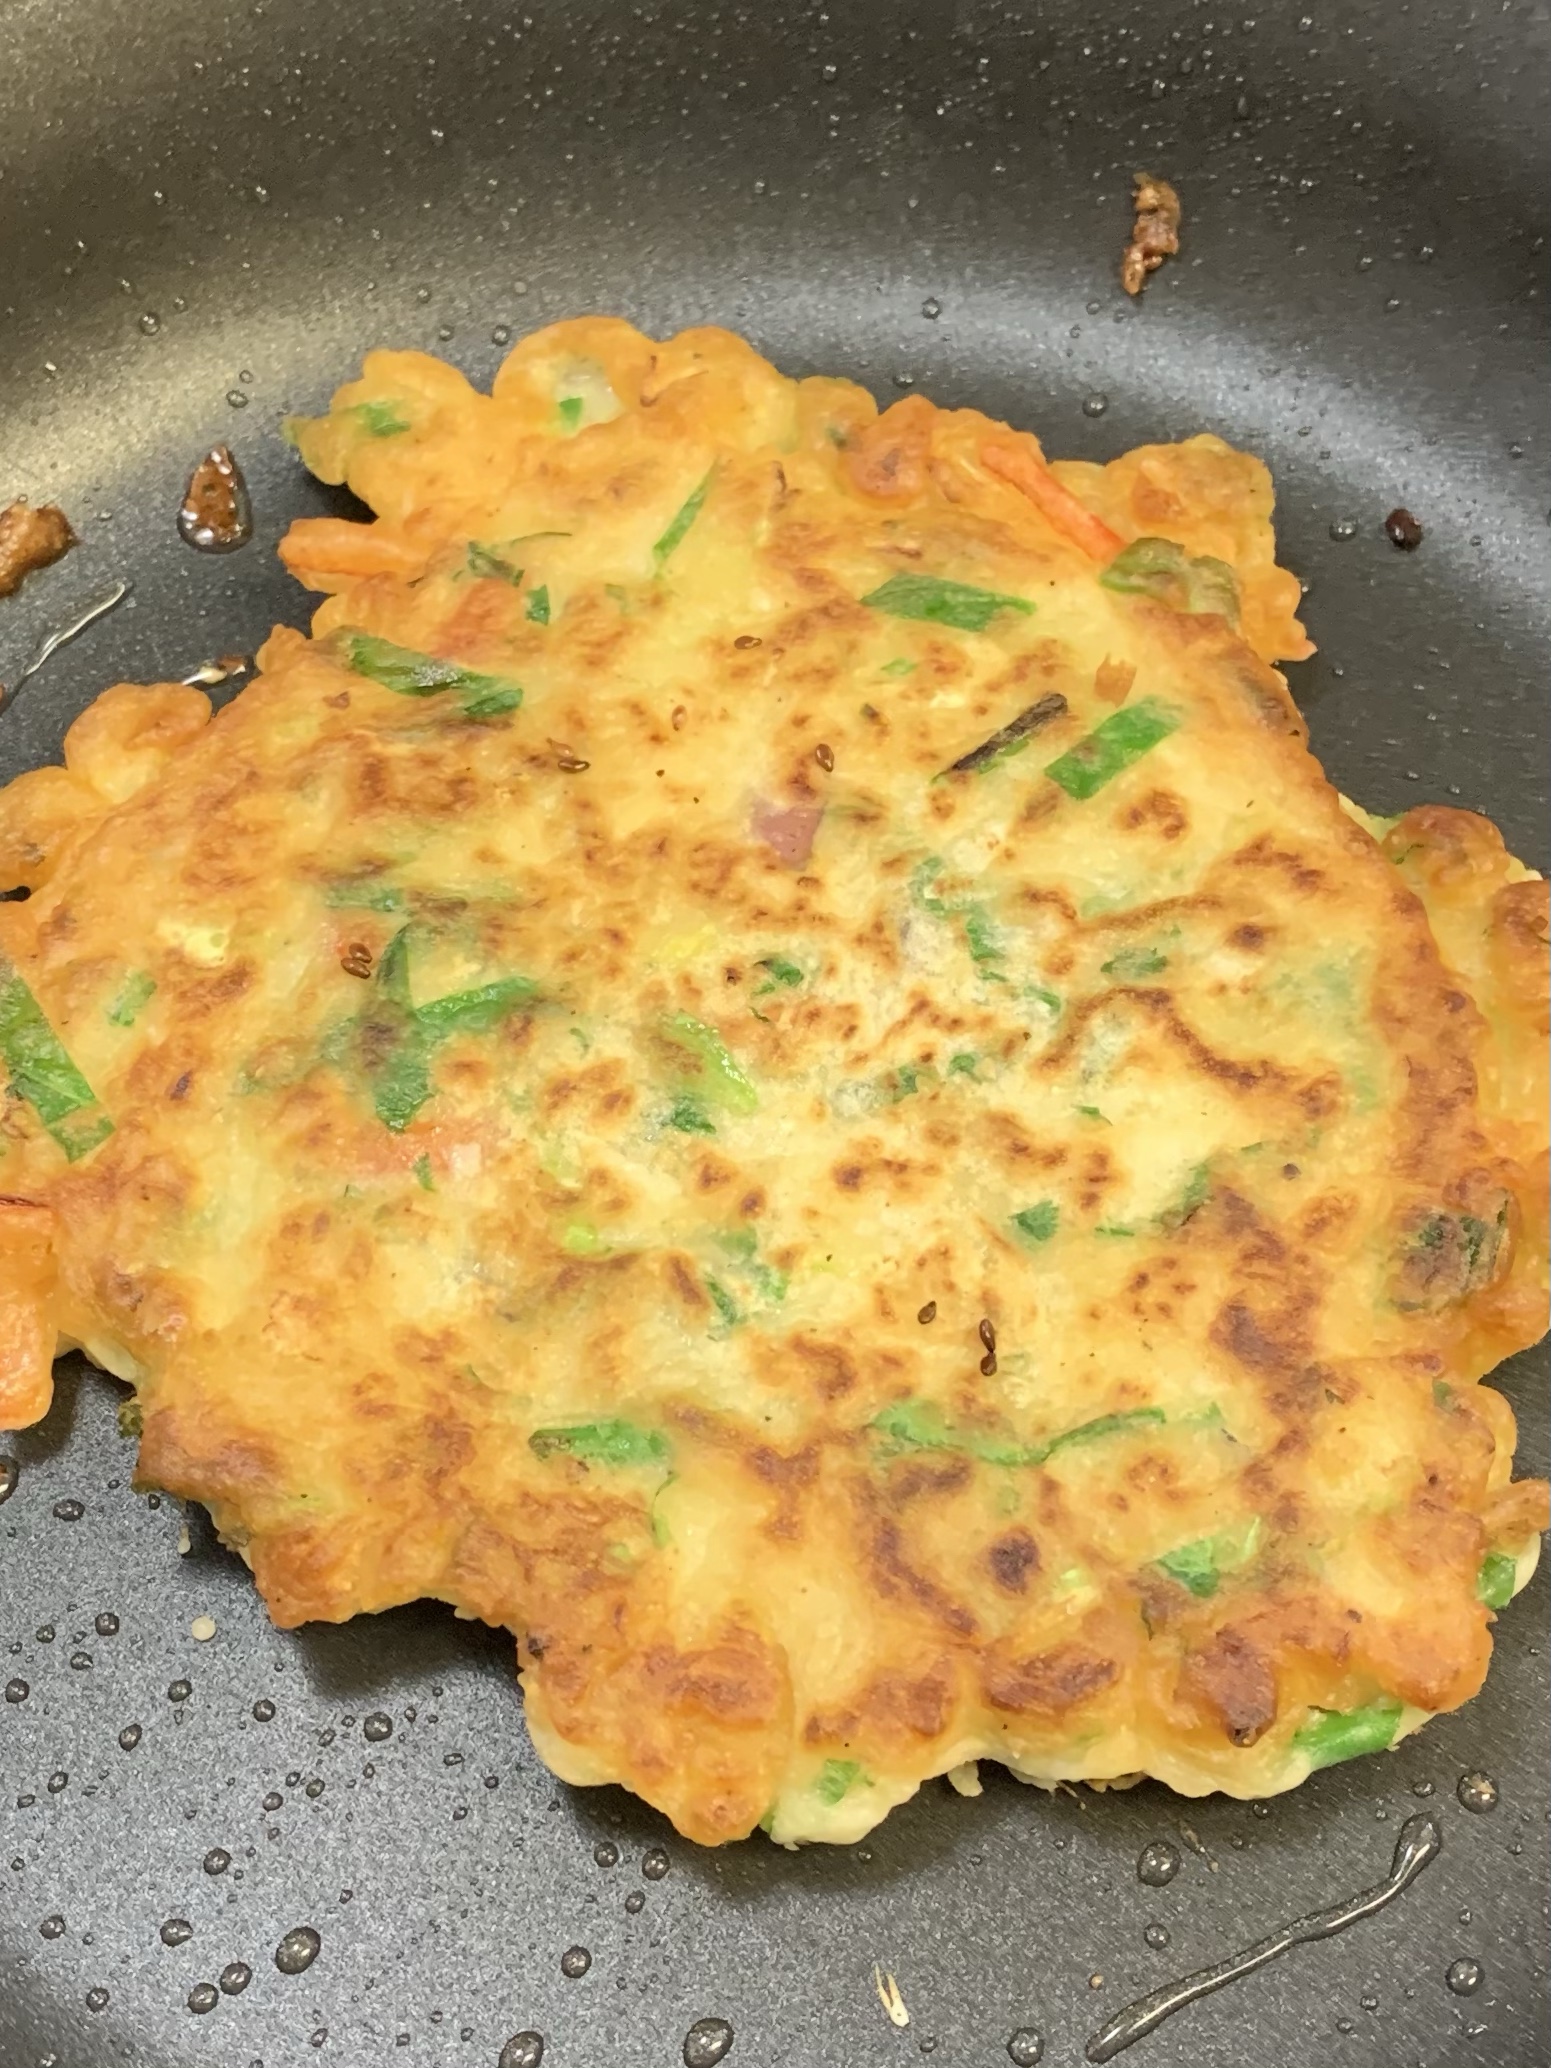
I will get a better photo, but Stella didn’t want me to wait, she loved them so much!
1/2 cup all purpose flour (once Stella was diagnosed with celiac, we used Gluten Free Flour)
1/2 cup potato starch or cornstarch
1/2 tsp baking powder
1/2 tsp Chinese 5 spice powder (optional but we liked it)
1 tsp sea salt
1 egg
3/4 cup very cold water ( soda water works great!)
4-6 cups very thinly sliced or julienned vegetables
oil for frying
Whisk dry ingredients together, then stir in egg and water. Add in all your vegetables and stir just to combine. You only need enough batter to hold the vegetables together.
Preheat oven to 300 to keep the pancakes warm as you cook them.
Heat oil in frying pan, and drop in 1/4 cup amounts, flattening them out slightly. Cook for 3-5 minutes on each side until golden brown and crispy. You will have to do this in batches, so keep them warm in a 300 oven until you have them all fried. Don’t crowd the pan or they will steam rather than fry.
I first tried this recipe as Korean pancakes, adding some chopped kimchi as well as a bit of the juice, but ended up using it for many different vegetables.
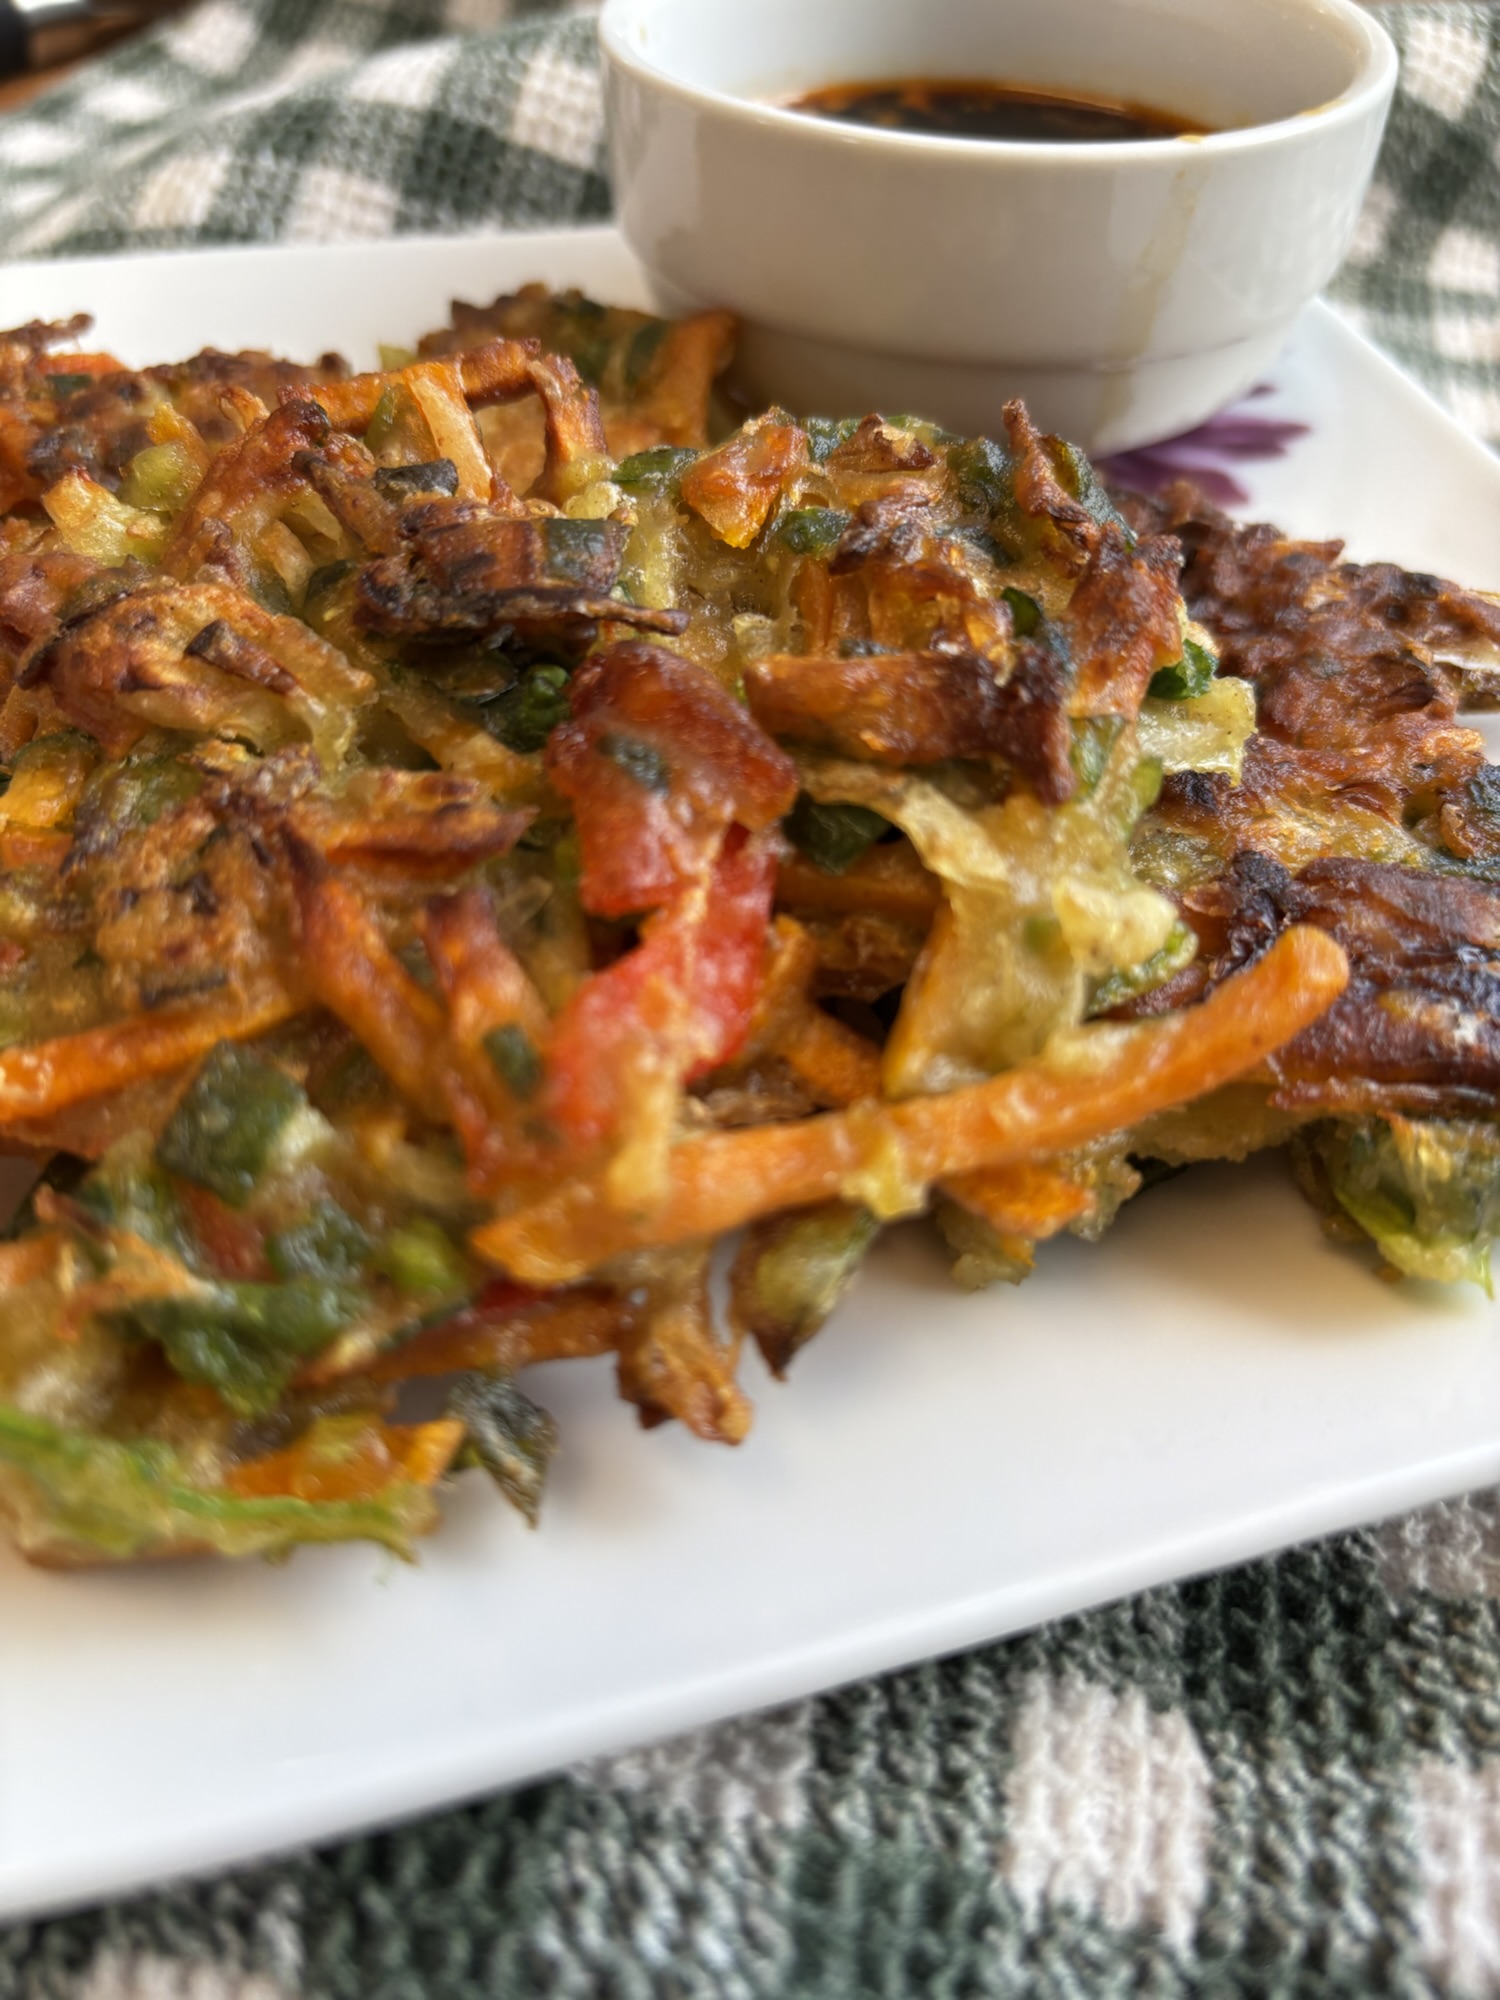
Serve with dipping sauce:
1/4 cup soya sauce
1-2 tbsp rice vinegar
1/2 tsp sesame oil (I like toasted)
1/2 tsp sugar
1/2 tsp hot sauce or chili crisp (such as sriracha)
Stir together and set aside for service. Taste and adjust for your personal preference.
Use whatever vegetables you have in your fridge! It really is a fridge clean out in the best possible way.Okay, so i have more than 4 cups vegetables … ha ha … you only need enough batter to hold it all together!Make sure you don’t crowd the pan – it takes very little oil.Flip when nice and crispy, and a golden brown.These ones had fresh shrimp and lots of chives.Another day, another batchThis time we used very little batter – mostly veg!
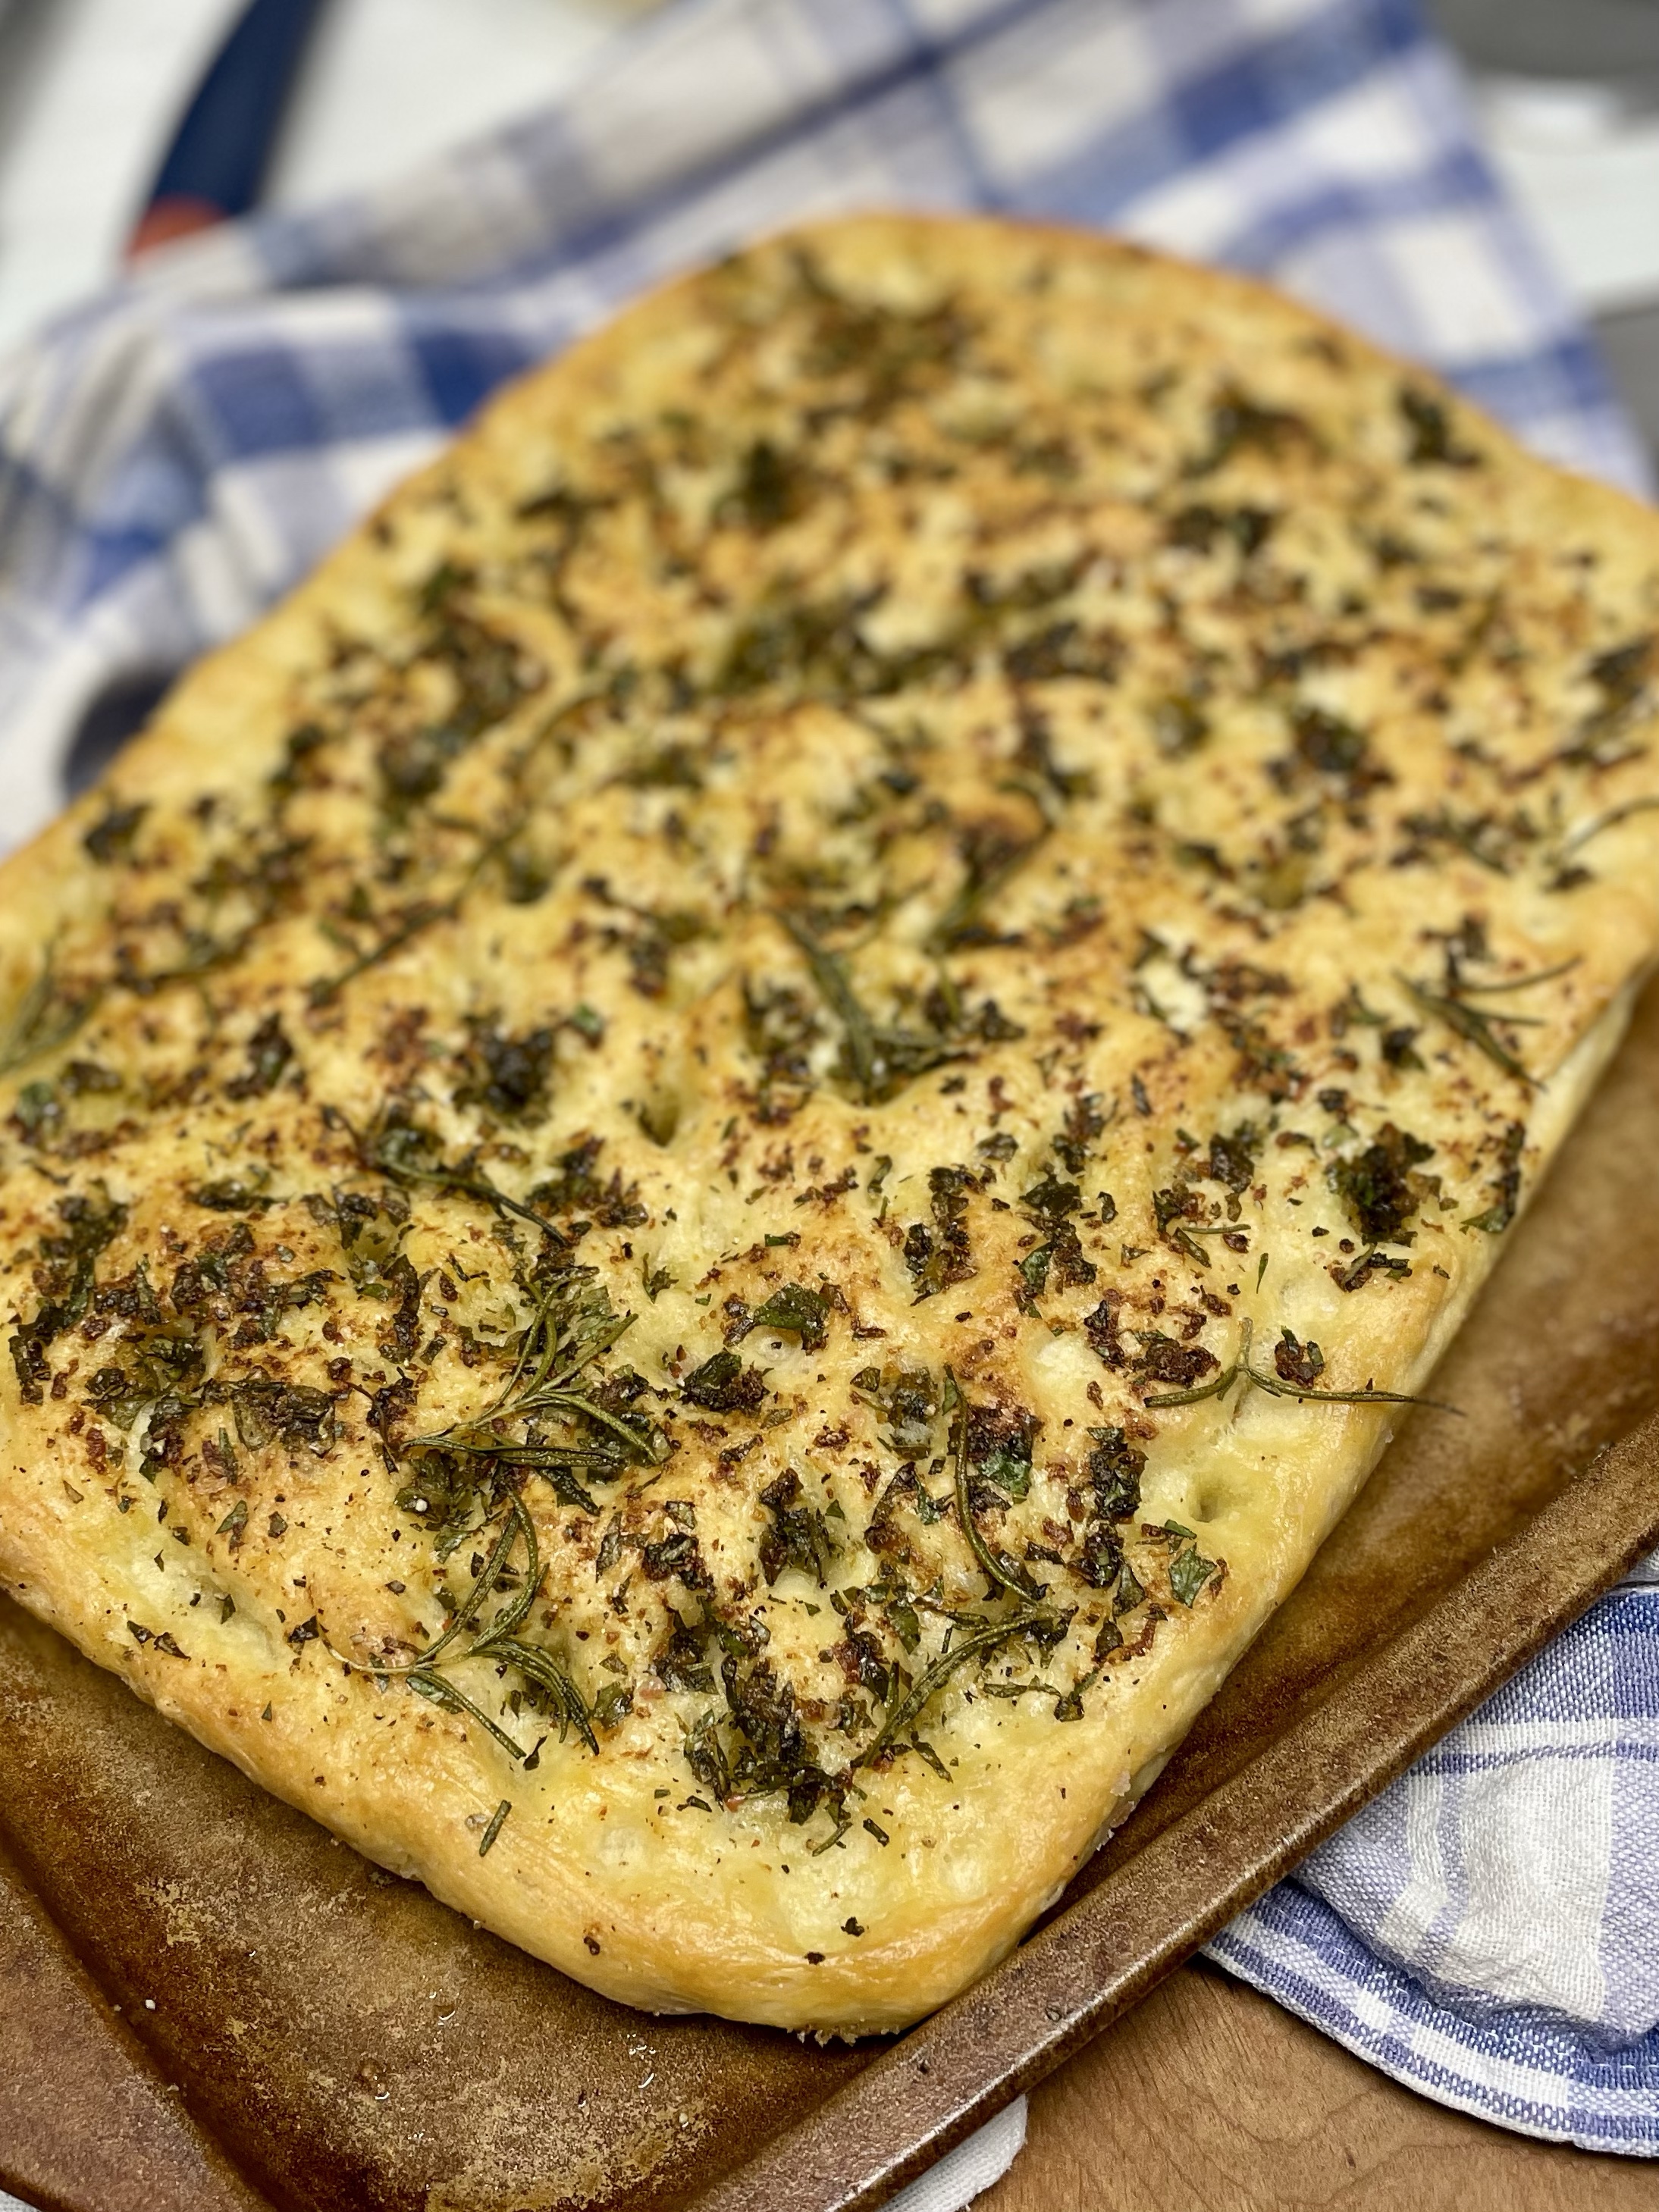
There is something about making breads that just feels like a win. Focaccia always does that! The very best focaccia recipes allow for the dough to rest anywhere from hours to days. If you are like me, some days you are driving home from work thinking focaccia would really boost dinner TODAY. Not 3 days from now. This recipe is for those days. If you’ve got a little over an hour, you’ve got enough time to pull this off – and trust me, it’s easy. No intensive kneading or stand mixer necessary!
2 Tbsoolive oil
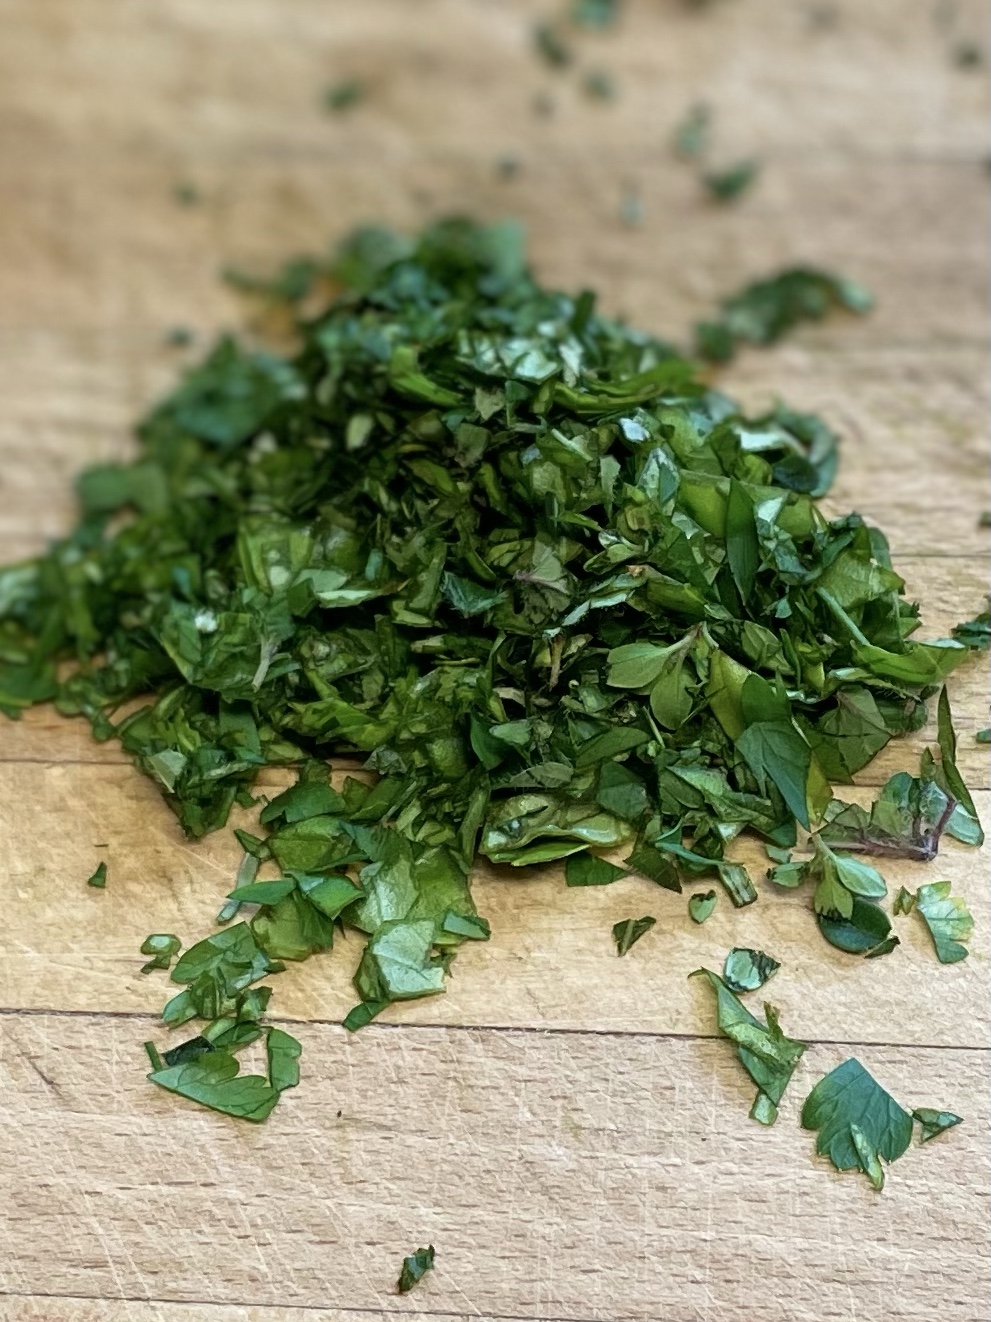
2 Tbspfresh herbs – I used basil, parsley, rosemary, oregano and thyme. minced
Mix well and if it looks a little herb heavy, add a bit more olive oil. Set aside.
3/4cupwarm water (the perfect temperature for blooming yeast is between 105-115)
2 1/4tspdry active yeast (1 pack)
1/2tspsugar
2cupsall purpose flour
1tspsalt
1Tbspolive oil
Top with flaky sea salt and more fresh rosemary.
INSTRUCTIONS
Proof yeast and sugar in 3/4 cup warm water – 105-115 degrees F until foamy and active.
In a bowl, combine flour, salt.
Add in yeast mixture & olive oil, and mix to get it all together. You may need to add a couple tablespoons more warm water. You want this to be slightly sticky.
Cover and allow dough to rise for around 30 minutes. The time isn’t as important as that you need to let the dough to pretty much double in size.
Add 1 -2 tbsp olive oil into small baking vessel – either 9 x 7 inch sheet pan, or this also works well in an 8 x 8 square baking pan. You want a fair bit of oil here, rub it all around the sides of the pan as well.
Add dough and stretch to fit pan, if dough springs back, let it sit, covered, for 5 minutes and try again. The rest helps the gluten to relax.
Once dough has been stretched enough to fit the baking sheet, allow to rest (covered) for 30 minutes. Honestly, do whatever time you have – I find this to be fairly forgiving.
Dampen your fingers and dimple the dough like you are playing a piano.
Drizzle herbed olive oil over dimpled dough and allow it to fill in the dimples, I like to be generous with the herb oil mixture.
Sprinkle on some flaky sea salt and more fresh rosemary that isn’t all minced up.
Bake for 15 – 20 minutes or until golden brown.
Once out of the oven, allow to rest on a cooling rack to keep the bottom crusty as well.
So many ways you can serve this;
Use it as an appetizer with a charcuterie board
Fresh out of the oven with simple oil and vinegar
Try it with your best olive oil and my dukka recipe, (If you’ve never tried dukka you are in for a treat!)
Completes a soup or salad meal
It’s October and this is what my herb garden still looks like! Ready to go, and this herby oil smells so fresh – today I added in some roasted garlic.Ready for the oven – love the way those little dimples fill up, I think those pockets of oil help crisp up the top.You just know how good your house smells – it’s ready to dunk in your soup.
That dipping sauce might look a little muddy, it was doubling up but trust me, it was delicious!
One of the dishes (among many) that we loved on our travels through Vietnam and Cambodia was Salt & Pepper squid. Naturally, that squid was ultra fresh, and so very tender it literally melted in your mouth. Typically served with a bowl of rice, and a pile of greens it is the perfect light dinner. I love the combination of flavours found in most Vietnamese dishes – fish sauce, lime juice and pepper. Those show up in so many tasty dishes – makes my mouth water just thinking about it!
SALT & PEPPER SQUID
400 gr squid **
1 tbsp coarse salt
1 tbsp whole black peppercorns
1/4 cup all purpose flour
1/4 cup rice flour (you can substitute corn starch)
OIL – to use for frying – make sure you use a high smoke point oil such as peanut, canola or vegetable. – heat to 350 degrees. If you don’t have a thermometer, stick a chopstick in there …. once it bubbles all around the chopstick it is ready.
SALAD OR GREENS TO SERVE
Prep whatever fresh vegetables or salad you want to serve.
DRESSING
1 clove garlic, minced
1 tsp ginger, minced
1-2 tbsp fresh red chili, seeded and finely chopped (or chili flakes to taste)
2 spring onions, thinly sliced
2 tbsp freshly squeezed lime juice
1-2 tbsp sugar (I usually stick with 1)
4 tbsp fish sauce
4 tbsp water
If you try anything – make it this dressing! I use it for salads all the time and it is so light and refreshing while adding so much flavour to a simple salad.
** Squid – if you can get it fresh then clean it and slice into rings – leaving tentacles whole. I’ve only used frozen at this point but you know I will be sourcing some fresh squid!!
Once your squid is prepped, bash up the salt and pepper in a mortar and pestle – bash until cracked and broken but don’t turn it in to a fine grind. Sprinkle a little directly onto the prepared squid. Pour the rest into a bowl with the flours and stir until combined.
When oil is hot enough, put a handful of the squid into the salt/pepper/flour mix and toss to coat lightly and cook in batches in the hot oil. Do not overcrowd your oil or it will cool down and your squid will absorb more of the oil.
Remove from oil and sprinkle lightly with salt and pepper.
If you like a dipping sauce – just bash up a bit more salt and pepper, mixing it with fresh lime juice.
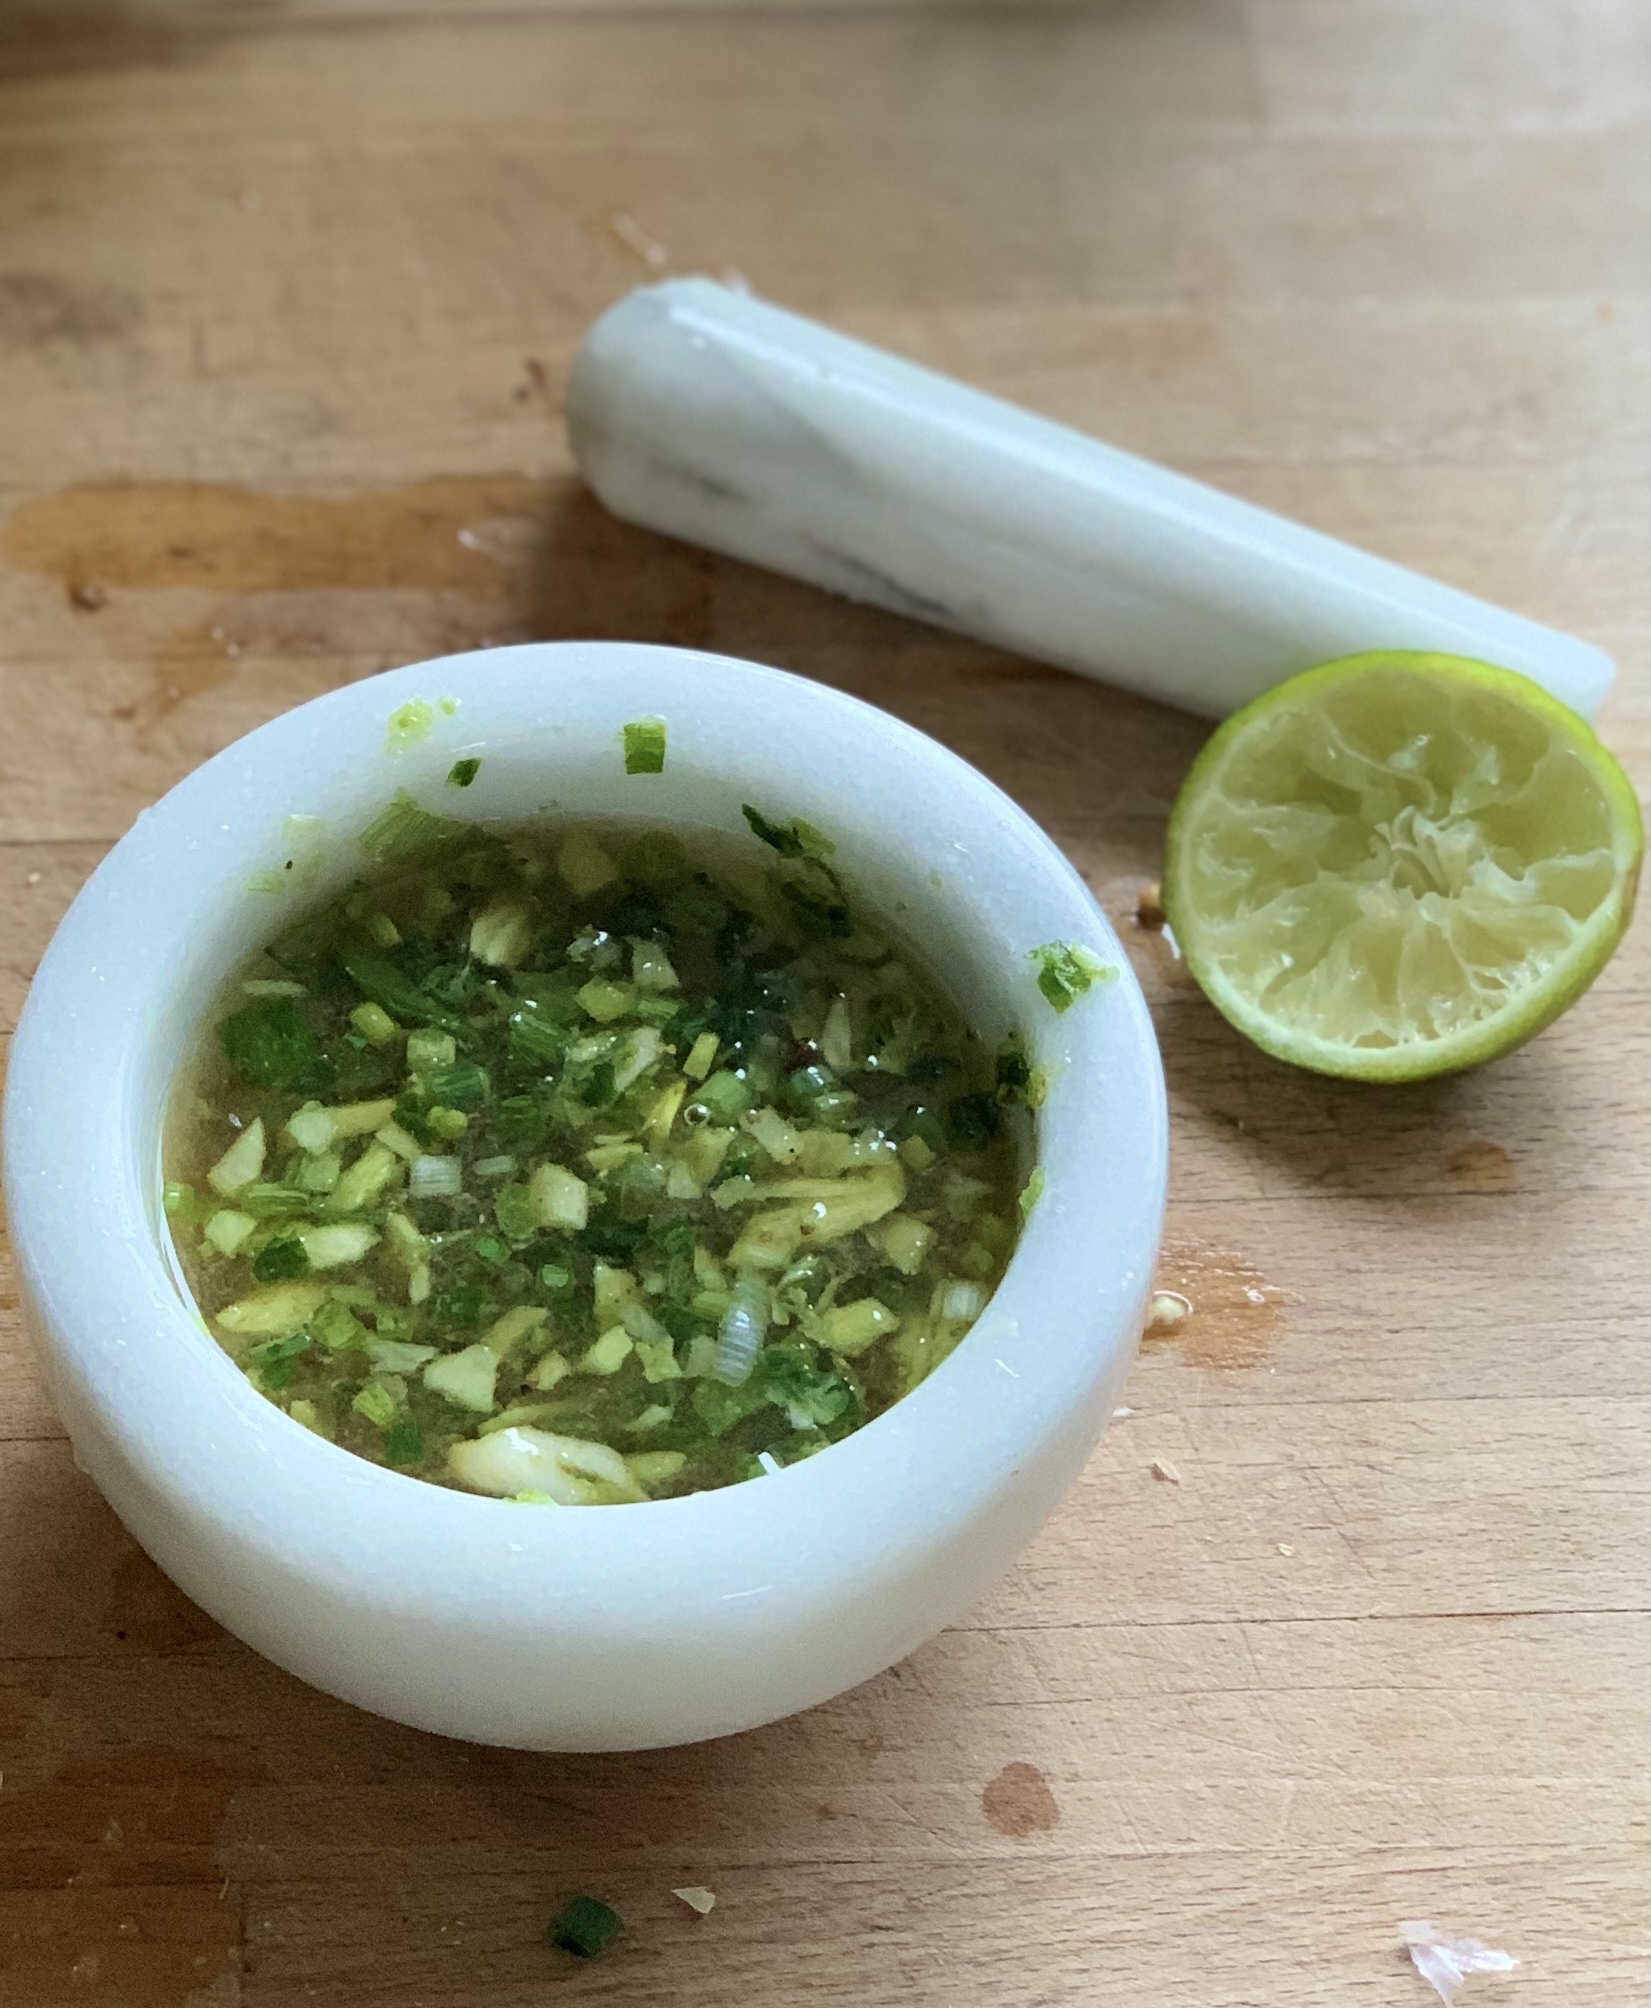
The dressing couldn’t be easier! Again, the mortar and pestle comes into action so I hope you didn’t clean it after bashing salt and pepper …… Drop in garlic, ginger, spring onion and chili …give it a good bit of action until you have created a paste. Add lime juice, sugar, fish sauce and water. TASTE. TASTE IT AGAIN. Every single item can be a slightly different taste profile from what I am using and for your individual tastes. Adjust if necessary. It should be slightly sweet, slightly salty, slightly hot and slightly tangy.
If you don’t have a mortar and pestle then just chop everything quite fine and add in the other ingredients … I have about 3 of them so I love using them but don’t run out and buy one if you don’t love the process!
To serve lightly dress your salad with the dressing, pile the squid on and serve with a side of rice if you like, just the way it is served in Cambodia & Vietnam ….. oh take me back! We bought our pepper from the Kampot Pepper Plantation in Cambodia. Touted as the best pepper in the world we had no choice. It really does make a difference when the pepper is that fresh.
Give that salt and pepper a good bash up, but stop before it is all pulverized, a little texture is perfect.I wish you could smell this! (even though fish sauce tastes a lot better than it smells)Ready to be dressed at the last moment – this is so light, partially due to the lack of oil.At the Kampot Pepper Plantation …. yes, those ladies are hand selecting black peppercorns with tweezers!
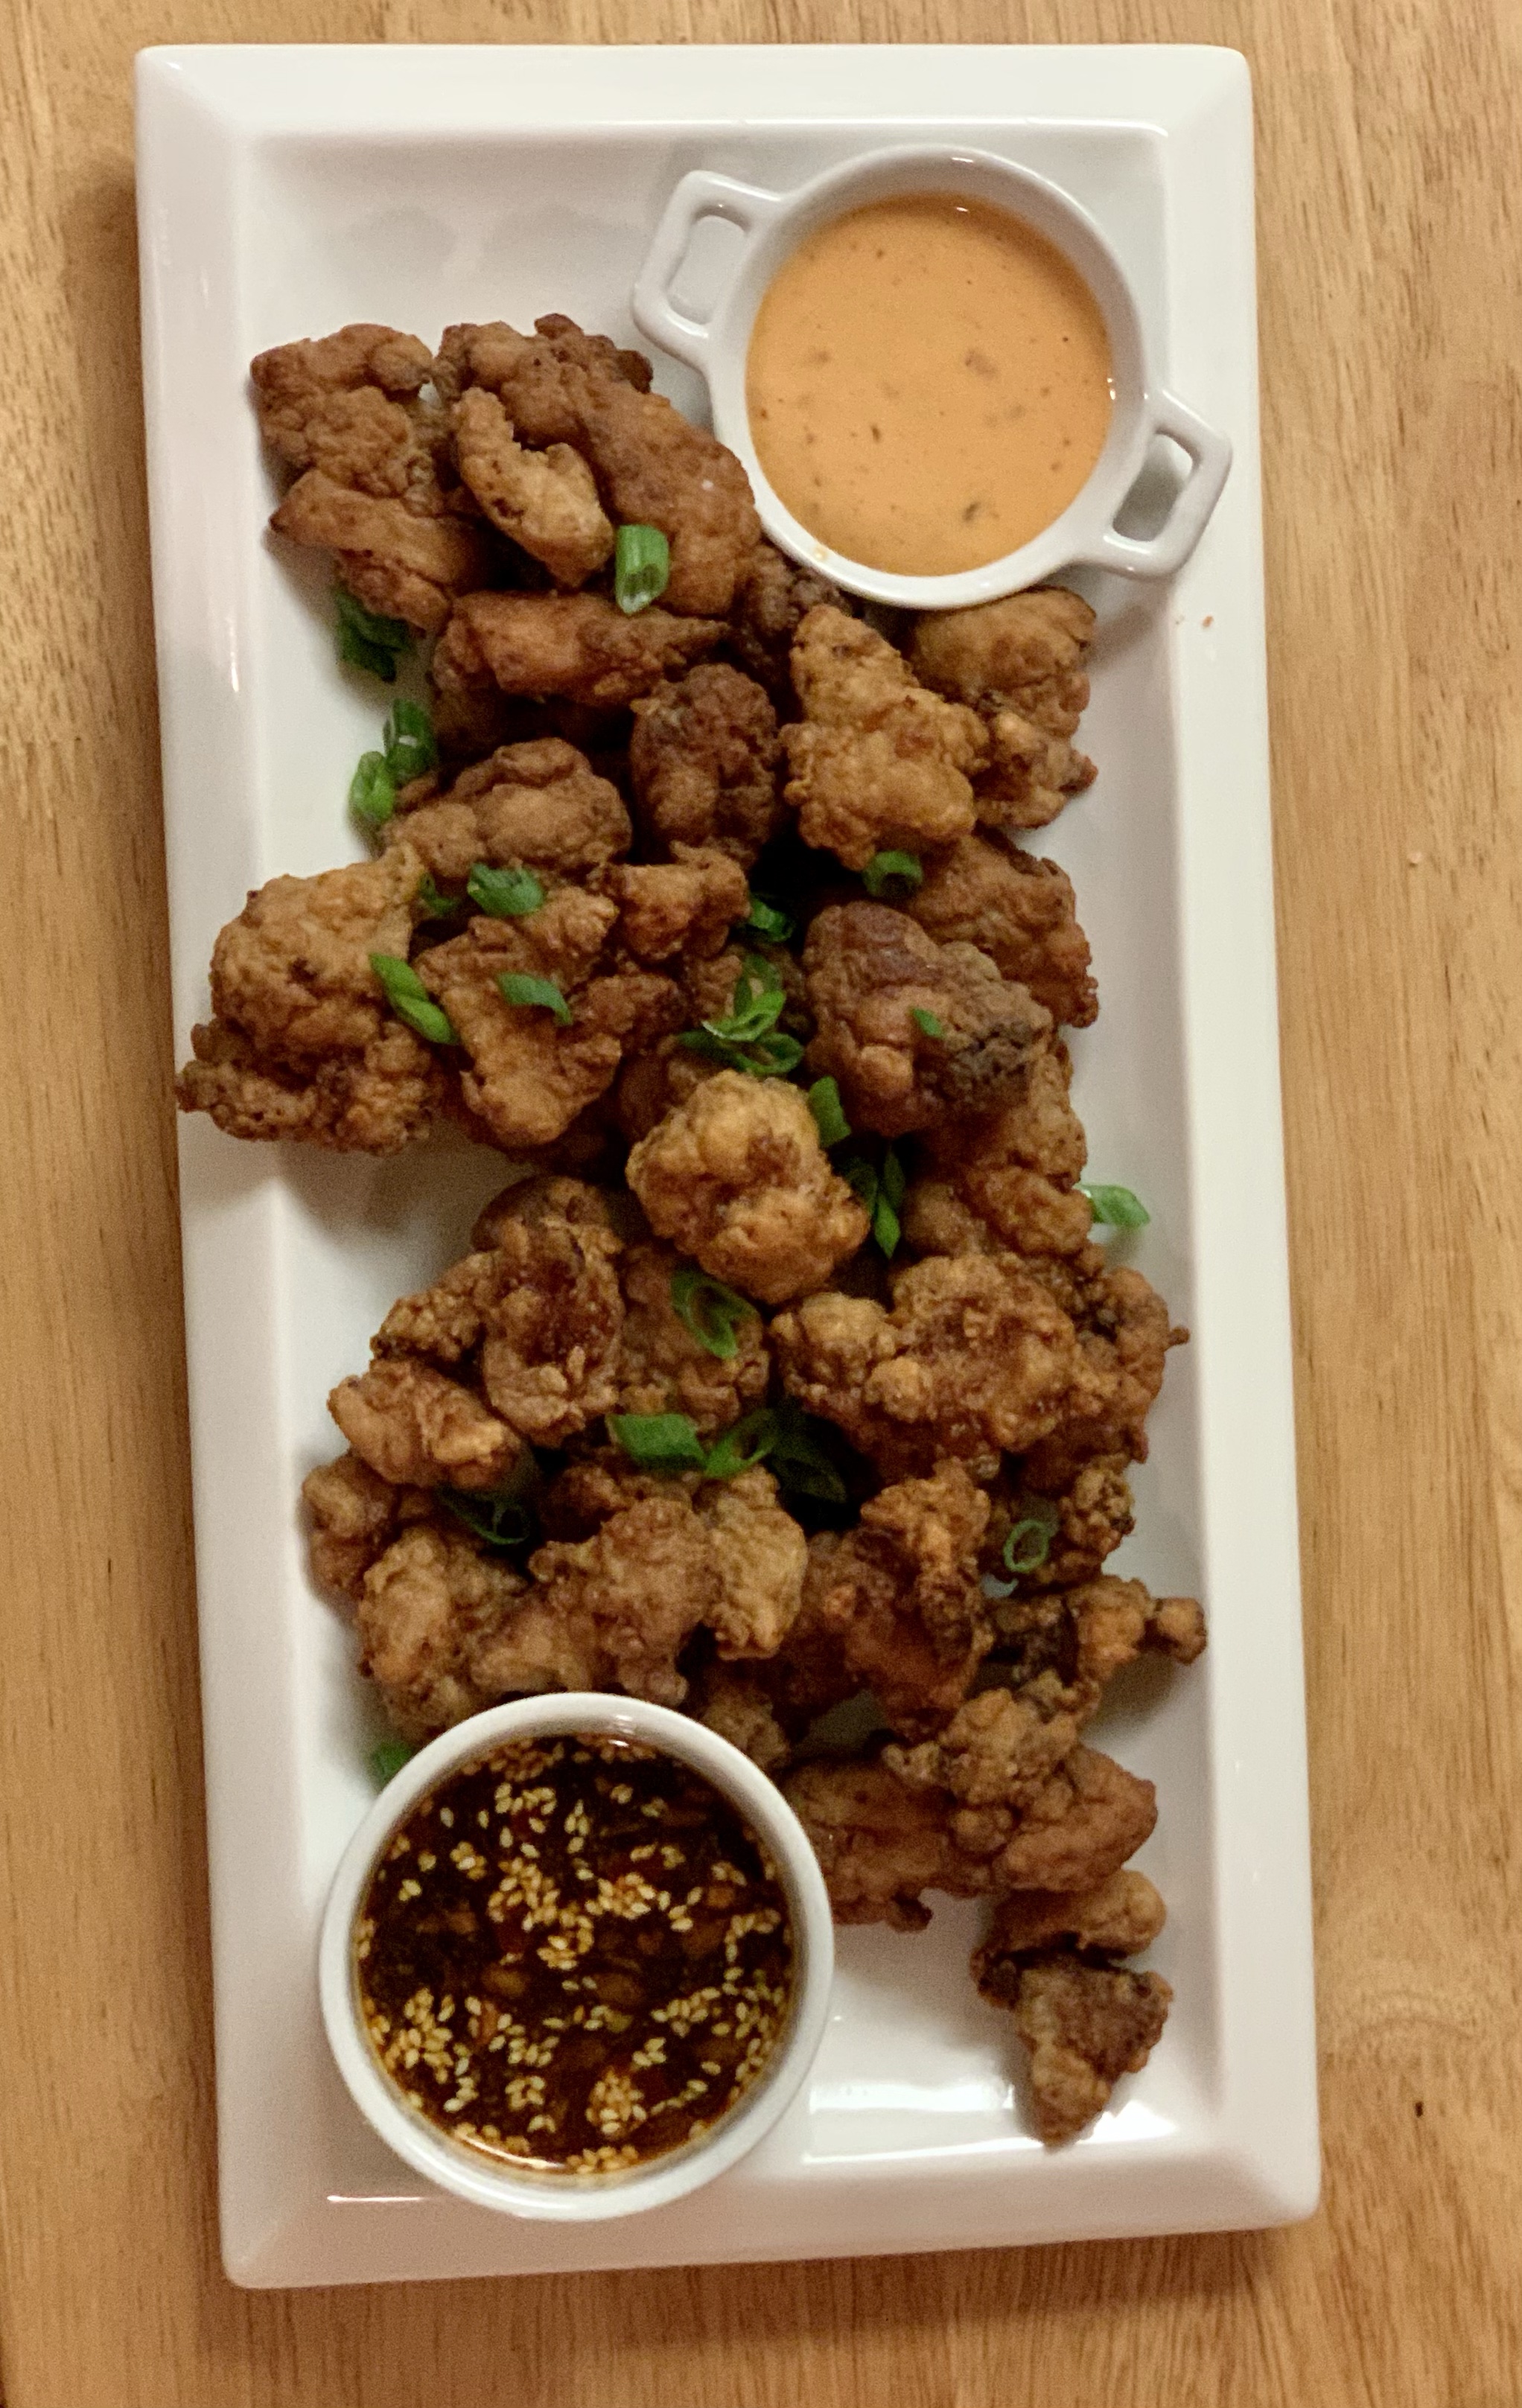
How can chicken so crunchy be this tender? Try it and see.
One of our favourites to order in a Japanese restaurant, this is just as good as restaurant quality. Don’t get me wrong, whenever we can go out to restaurants again (post Covid) I will still be delighted to sit in a booth and order ….. but for now I can at least satisfy my cravings. It is also one of Sloan and Stella’s favourites to order and I just know when we can gather around the Sunday dinner table again this will be requested.
1 lb chicken thighs cut 1 inch pieces
1/4 cup corn starch or potato starch
1/4 cup flour
4 cups canola oil
3 tbsp soy sauce
4 tbsp mirin (sub Sake if you have it)
2 tbsp minced garlic
2 tbsp minced ginger
Reserve the starch and flour for just prior to frying up. Combine soy sauce, miring, garlic and ginger in either a sealable plastic bag or bowl with lid. Stir in the chicken pieces and set aside. You can either do this earlier in the day or at late as 20 minutes before dinner – I find it very flexible.
Heat your oil to 350, if you don’t have a thermometer, just stick a chopstick in – if it sizzles happily, then it is time to add your chicken.
Toss the starch and flour together, then toss with chicken. It doesn’t matter if the coating is uneven, it just means more texture.
Add about 1/3 of the chicken at a time to wok – do not overcrowd. Any time you overcrowd when you are frying it reduces the temperature of the oil and that leads to greasy fried food! Keep the chicken moving while in the wok, and remove when golden brown. Sprinkle immediately with salt. Keeping the cooked pieces in a 200 degree oven allows them to retain their crispness while you do the remaining 2 batches.
DIPPING SAUCES – I’ve given two options because that’s the way I like it!
CREAMY
1/2 cup Kewpie Mayonnaise
3 tbsp sriracha
3 tbsp soy sauce
3 tbsp sweet chili sauce
SOY
3 tbsp soy sauce
3 tbsp rice vinegar
1 tsp sesame oil
1 tbsp toasted sesame seeds
chili oil to taste
This well used wok is perfect. Of course, you can use a deep fryer if you have it handy, but I like the wok just fine for this, and it encourages me to fry only small amounts at a time. Be sure to strain and reserve your oil for use another day!Love having the option of two sauces – everybody gets their own little sauce dipping bowl and dip away!Definitely not as many vegetables as we normally get onto our plates, but this Japanese dinner was so tasty! I even made my own gyoza wrappers and that’s a story for another day…..
I gotta say ….. hard to make a bowl of miso soup look exciting … but here it is, the best ever! I didn’t have any seaweed at home so added a few spinach leaves. Delicious!
2 teaspoons dashi granules
4 cups water
3 tablespoons miso paste
1 (8 ounce) package silken tofu, diced
2 green onions, sliced diagonally into 1/2 inch piece
In a medium saucepan over medium-high heat, combine dashi granules and water; bring to a boil. Reduce heat to medium, and whisk in the miso paste. Stir in tofu. Separate the layers of the green onions, and add them to the soup. Simmer gently for 2 to 3 minutes before serving.
I think the key to this is the dashi. You can easily make your own dashi at home – just look up a few YouTube videos, but for the amount I use, keep some granules in the freezer and it is ready whenever I need it.
We followed the miso sop with these tasty Japanese dishes ….. chicken karaage with 2 dipping sauces, pork and cabbage gyoza and garlic soy snap peas. Goes without saying that a Japanese inspired dinner needs a serving of rice!
I often serve Miso soup to accompany a few other dishes, and this makes it very easy to prep a bit earlier and just leave it simmering – don’t add the tofu or green onions until closer to serving time.
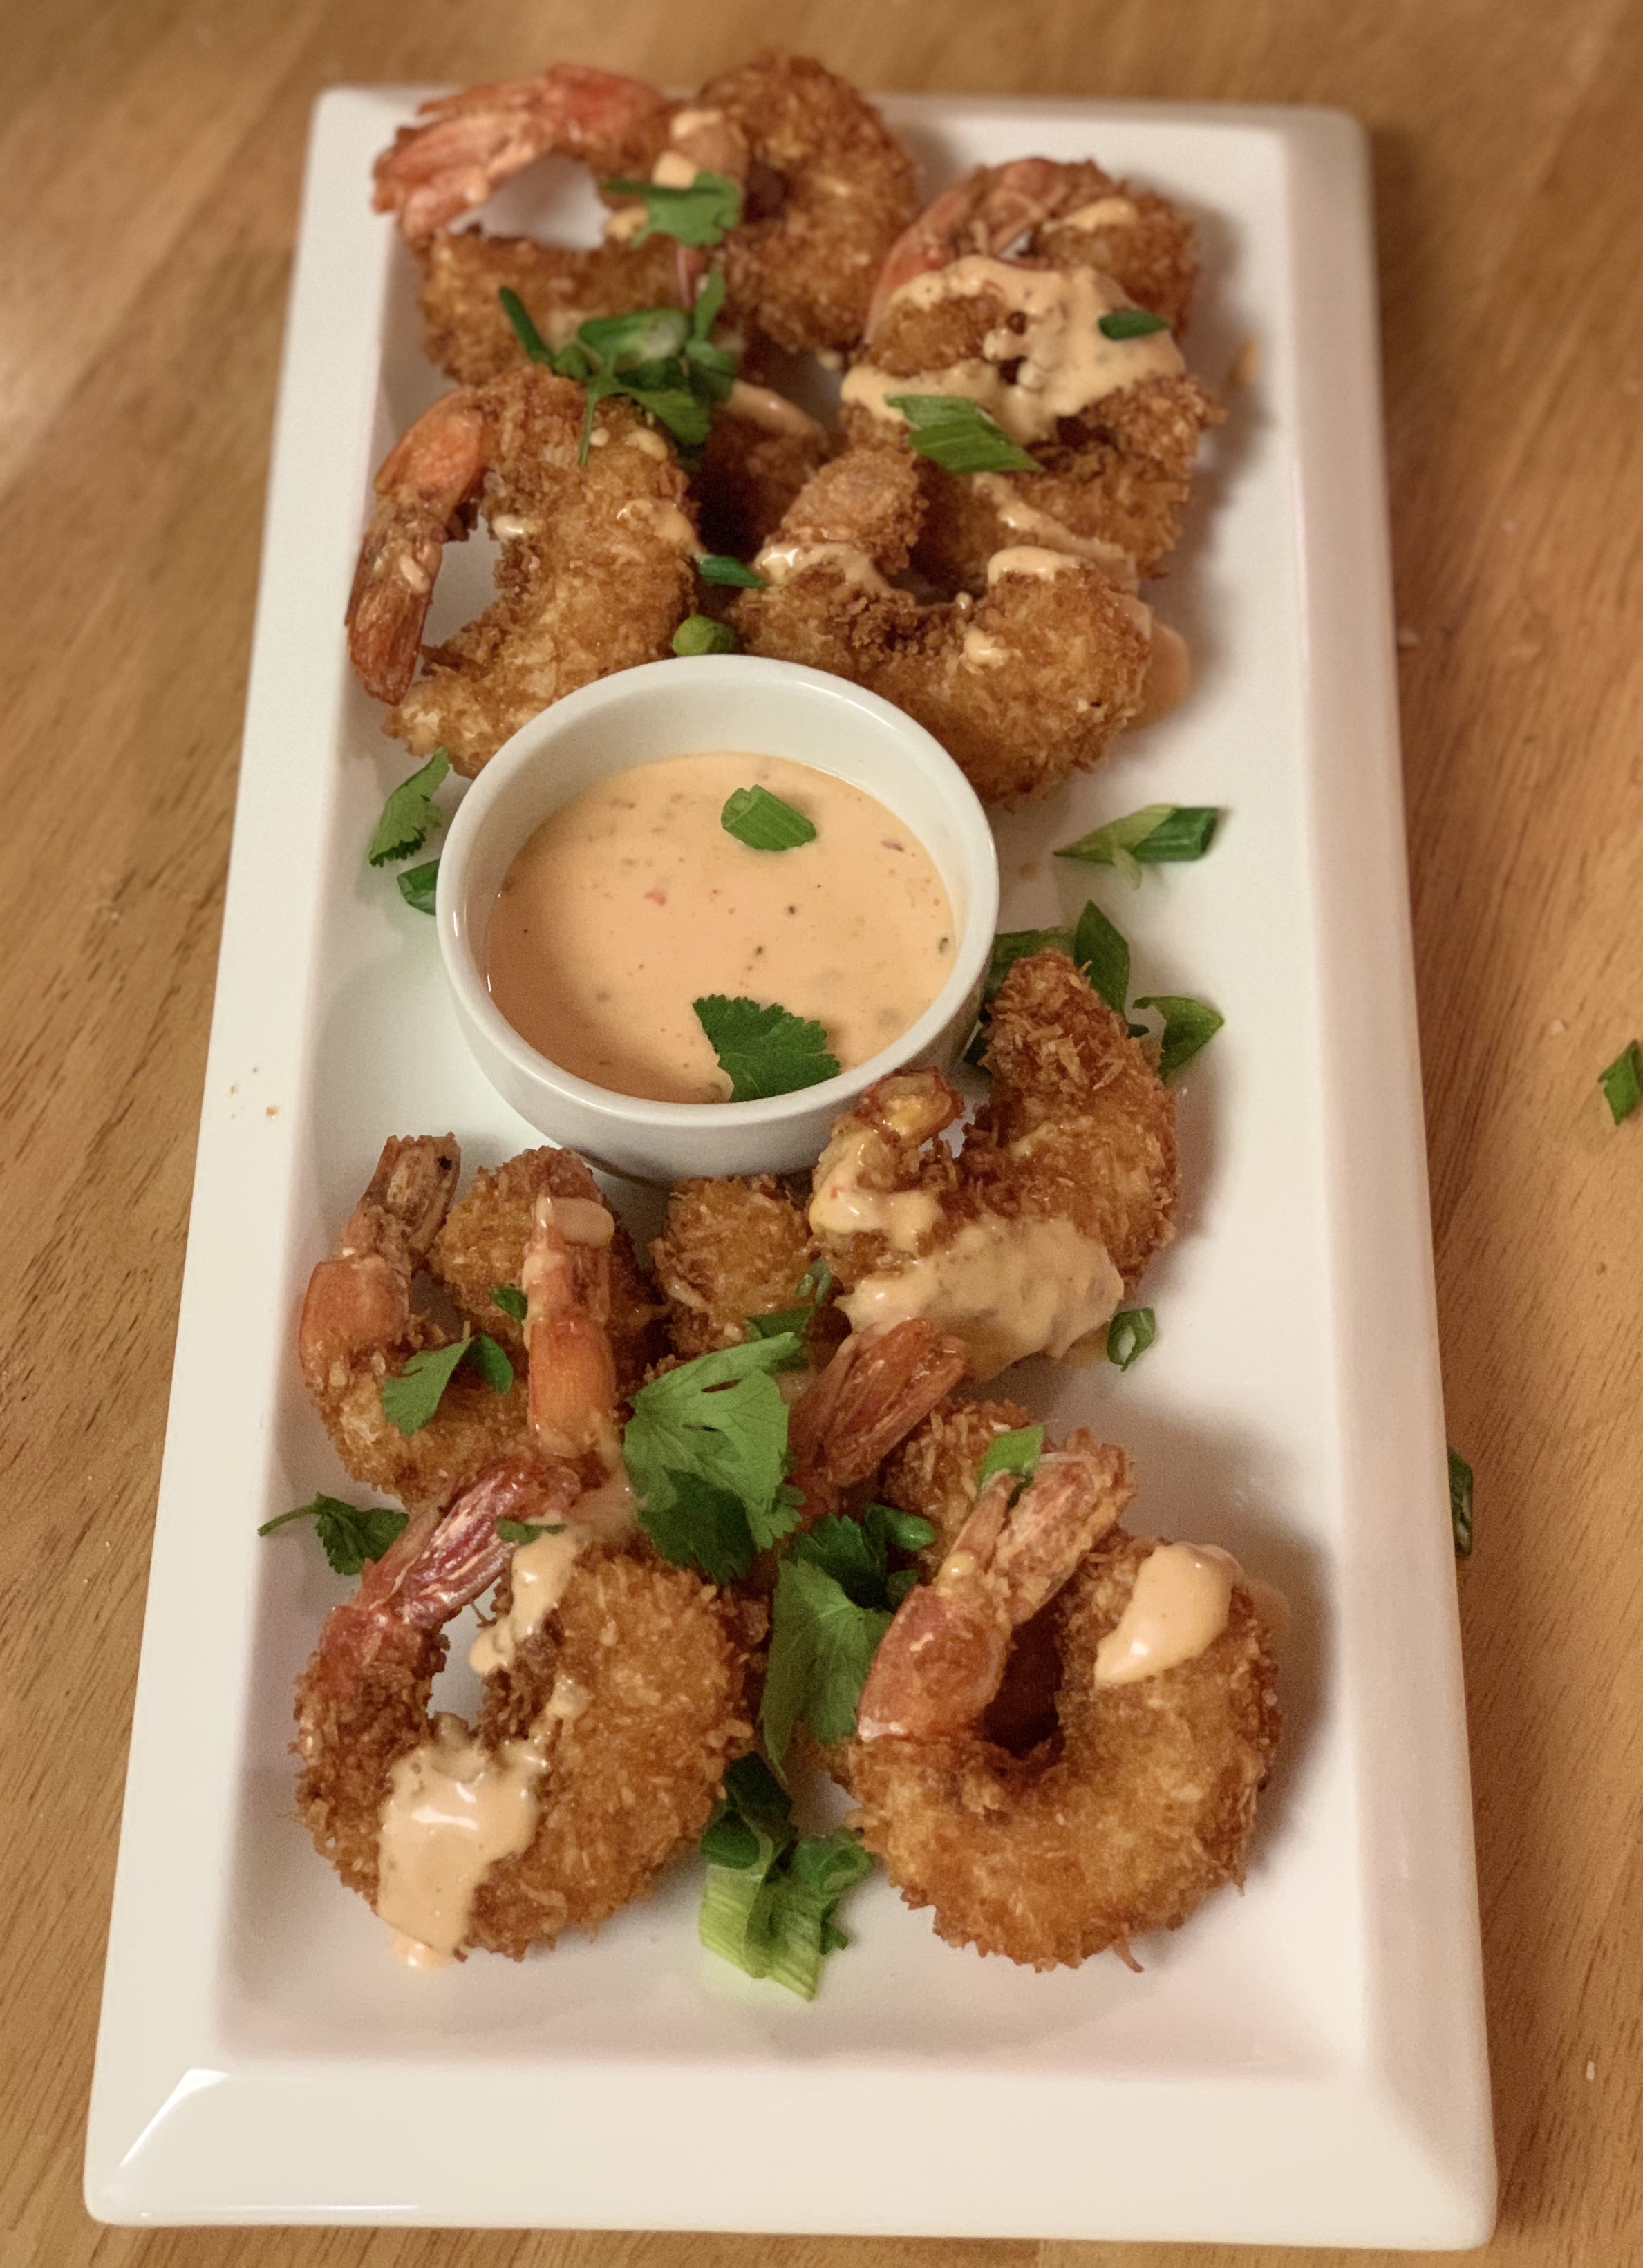
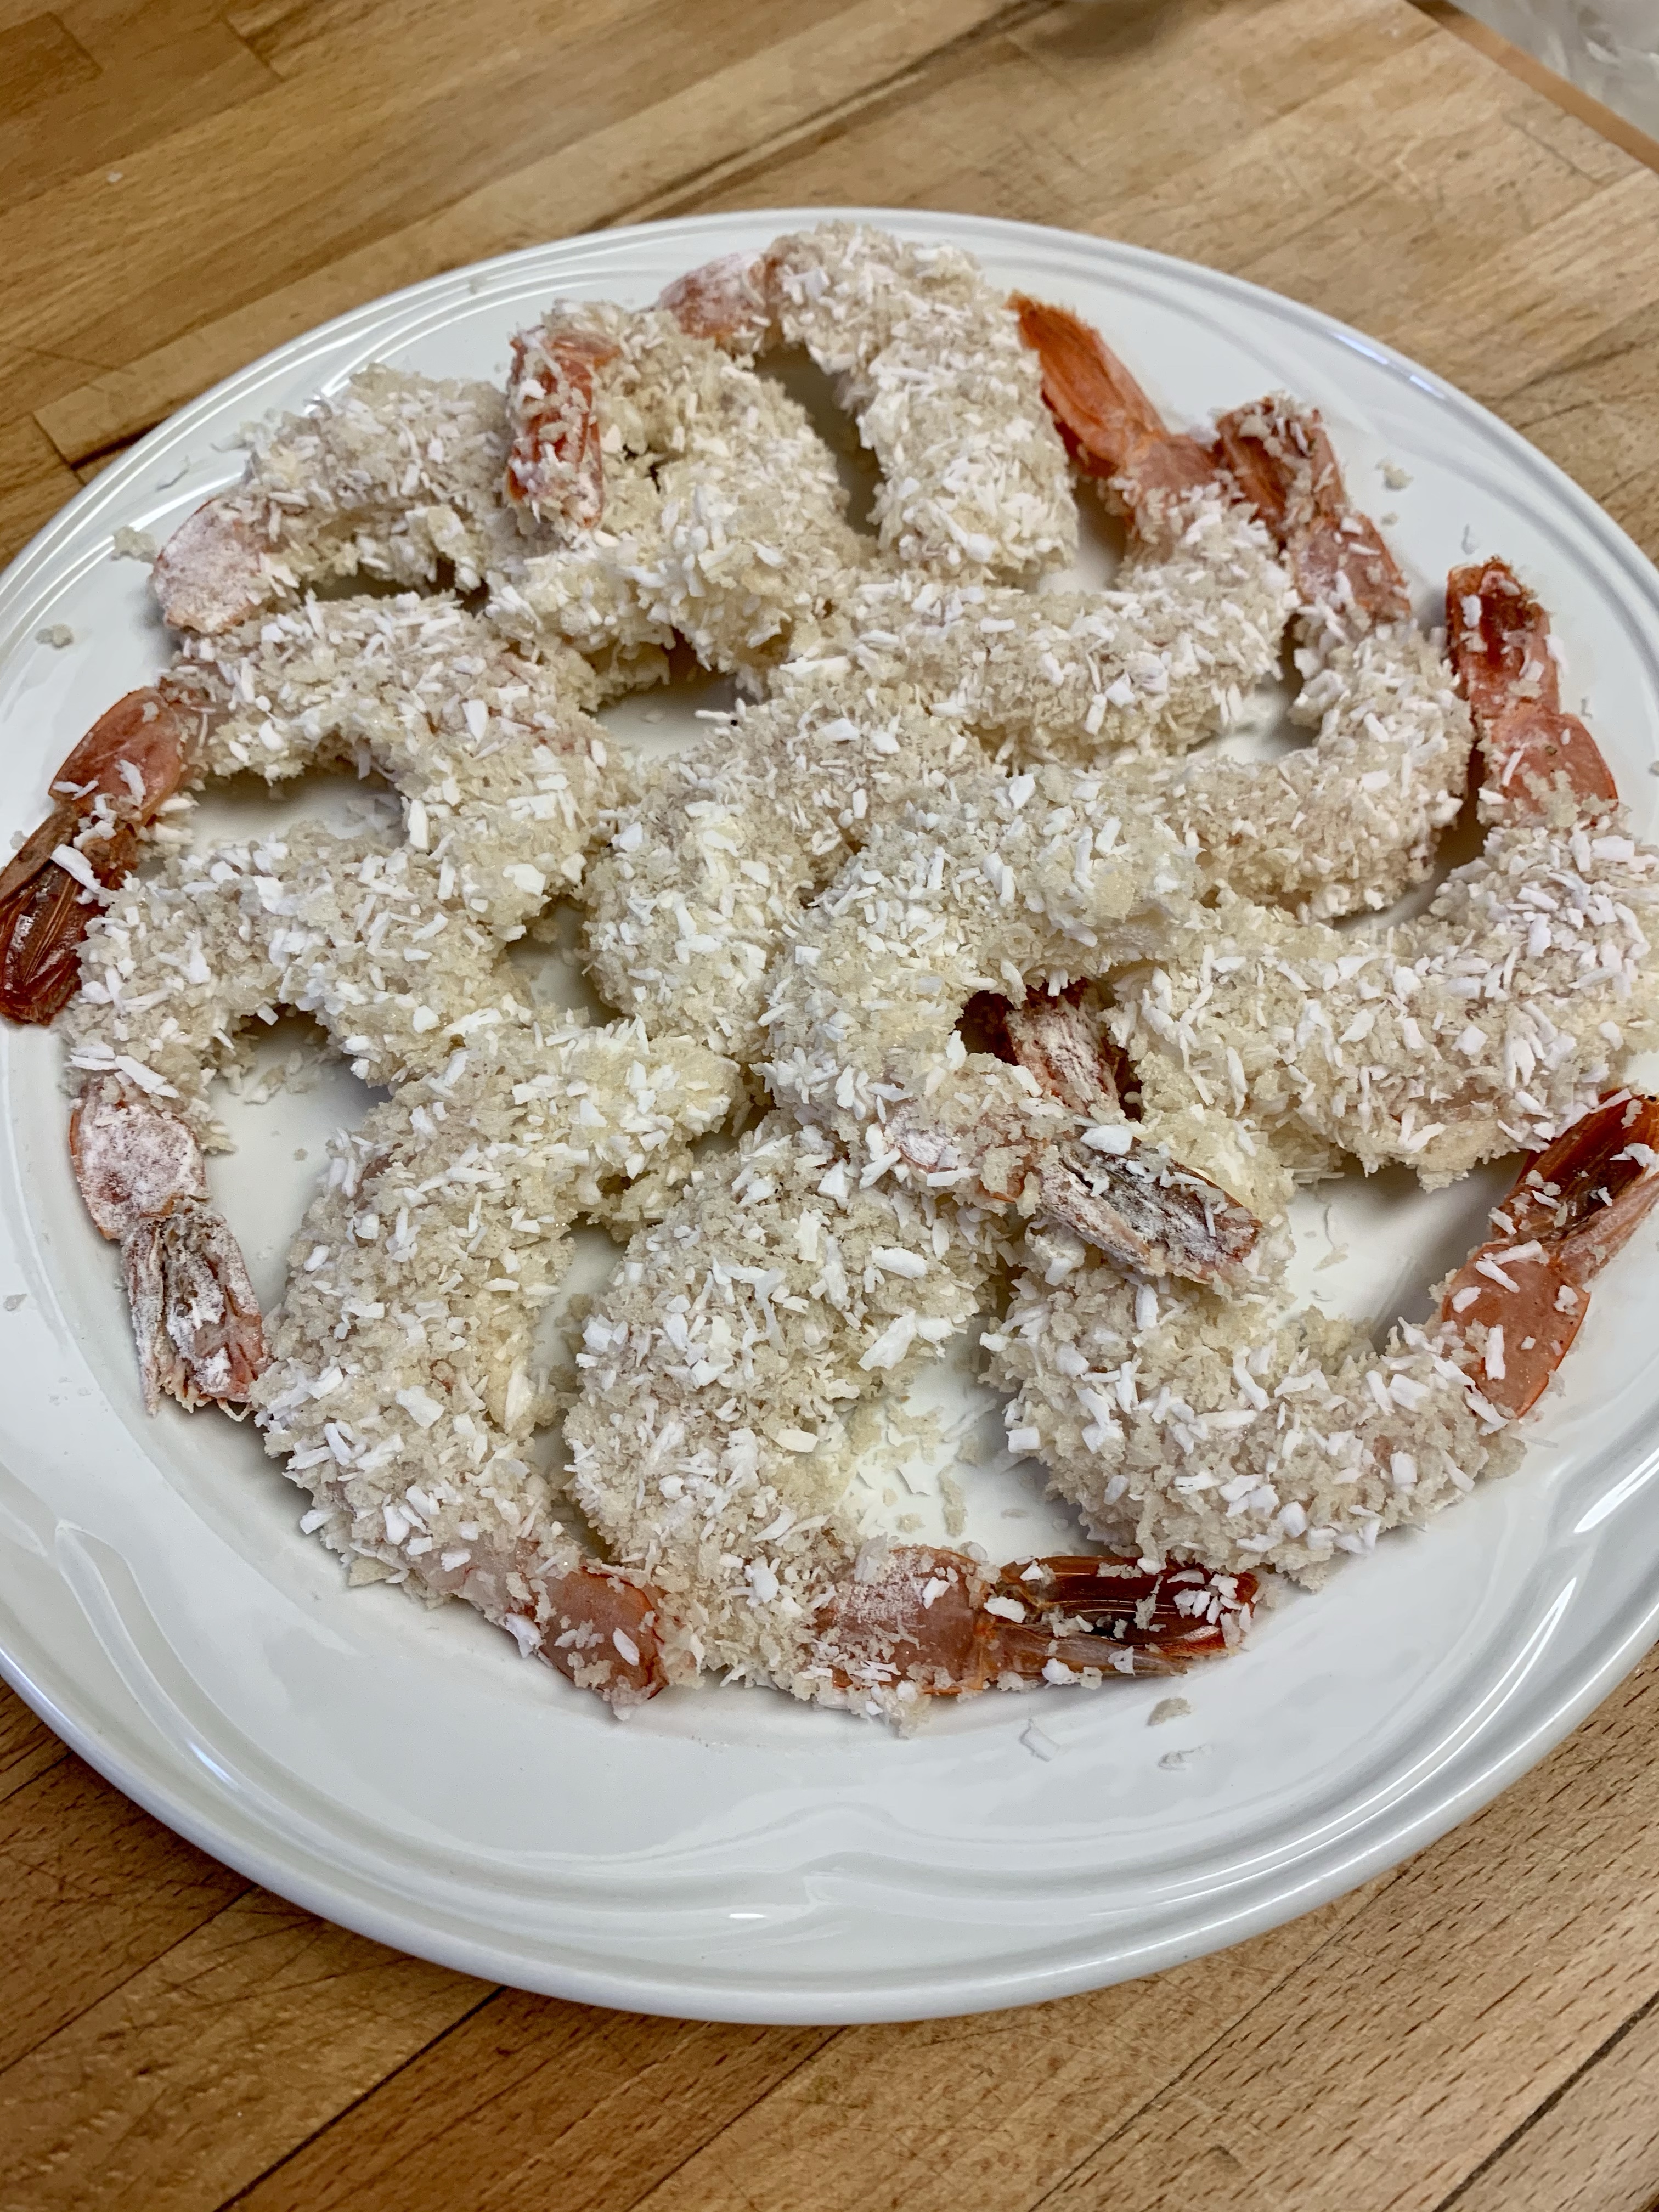
Couldn’t wait to dive into these. Every time I make them it surprises me how easy and how incredibly delicious they are.
Just like you get in the tropics….. minus the palm trees and ocean breeze. That dang Covid thing is still keeping us at home, during a time of the year when we’d so much rather be in the land of palm trees & sunshine, ocean bobbing and munching coconut shrimp. Never mind the beach, I’d happily settle for just being able to cuddle my granddaughters!!! Enough whining, here is the perfect recipe to make you feel like you’ve escaped to the beach.
2 cups vegetable oil
1 cup Panko bread crumbs
1 cup unsweetened shredded coconut
1 pound medium shrimp, peeled & deveined
1/2 cup all purpose flour
2 large eggs, beaten well (can just use egg white if you like)
salt and pepper to taste
Heat the oil in a large skillet or dutch oven over medium high heat (350-360 degrees)
Set up 3 dredging bowls:
flour
egg
panko/coconut mixture
Season shrimp with salt and pepper, then working with one shrimp at a time, dredge through flour, then egg, then panko/coconut. Press into the panko mixture to make sure the shrimp are well coated. Set aside until you have them all coated.
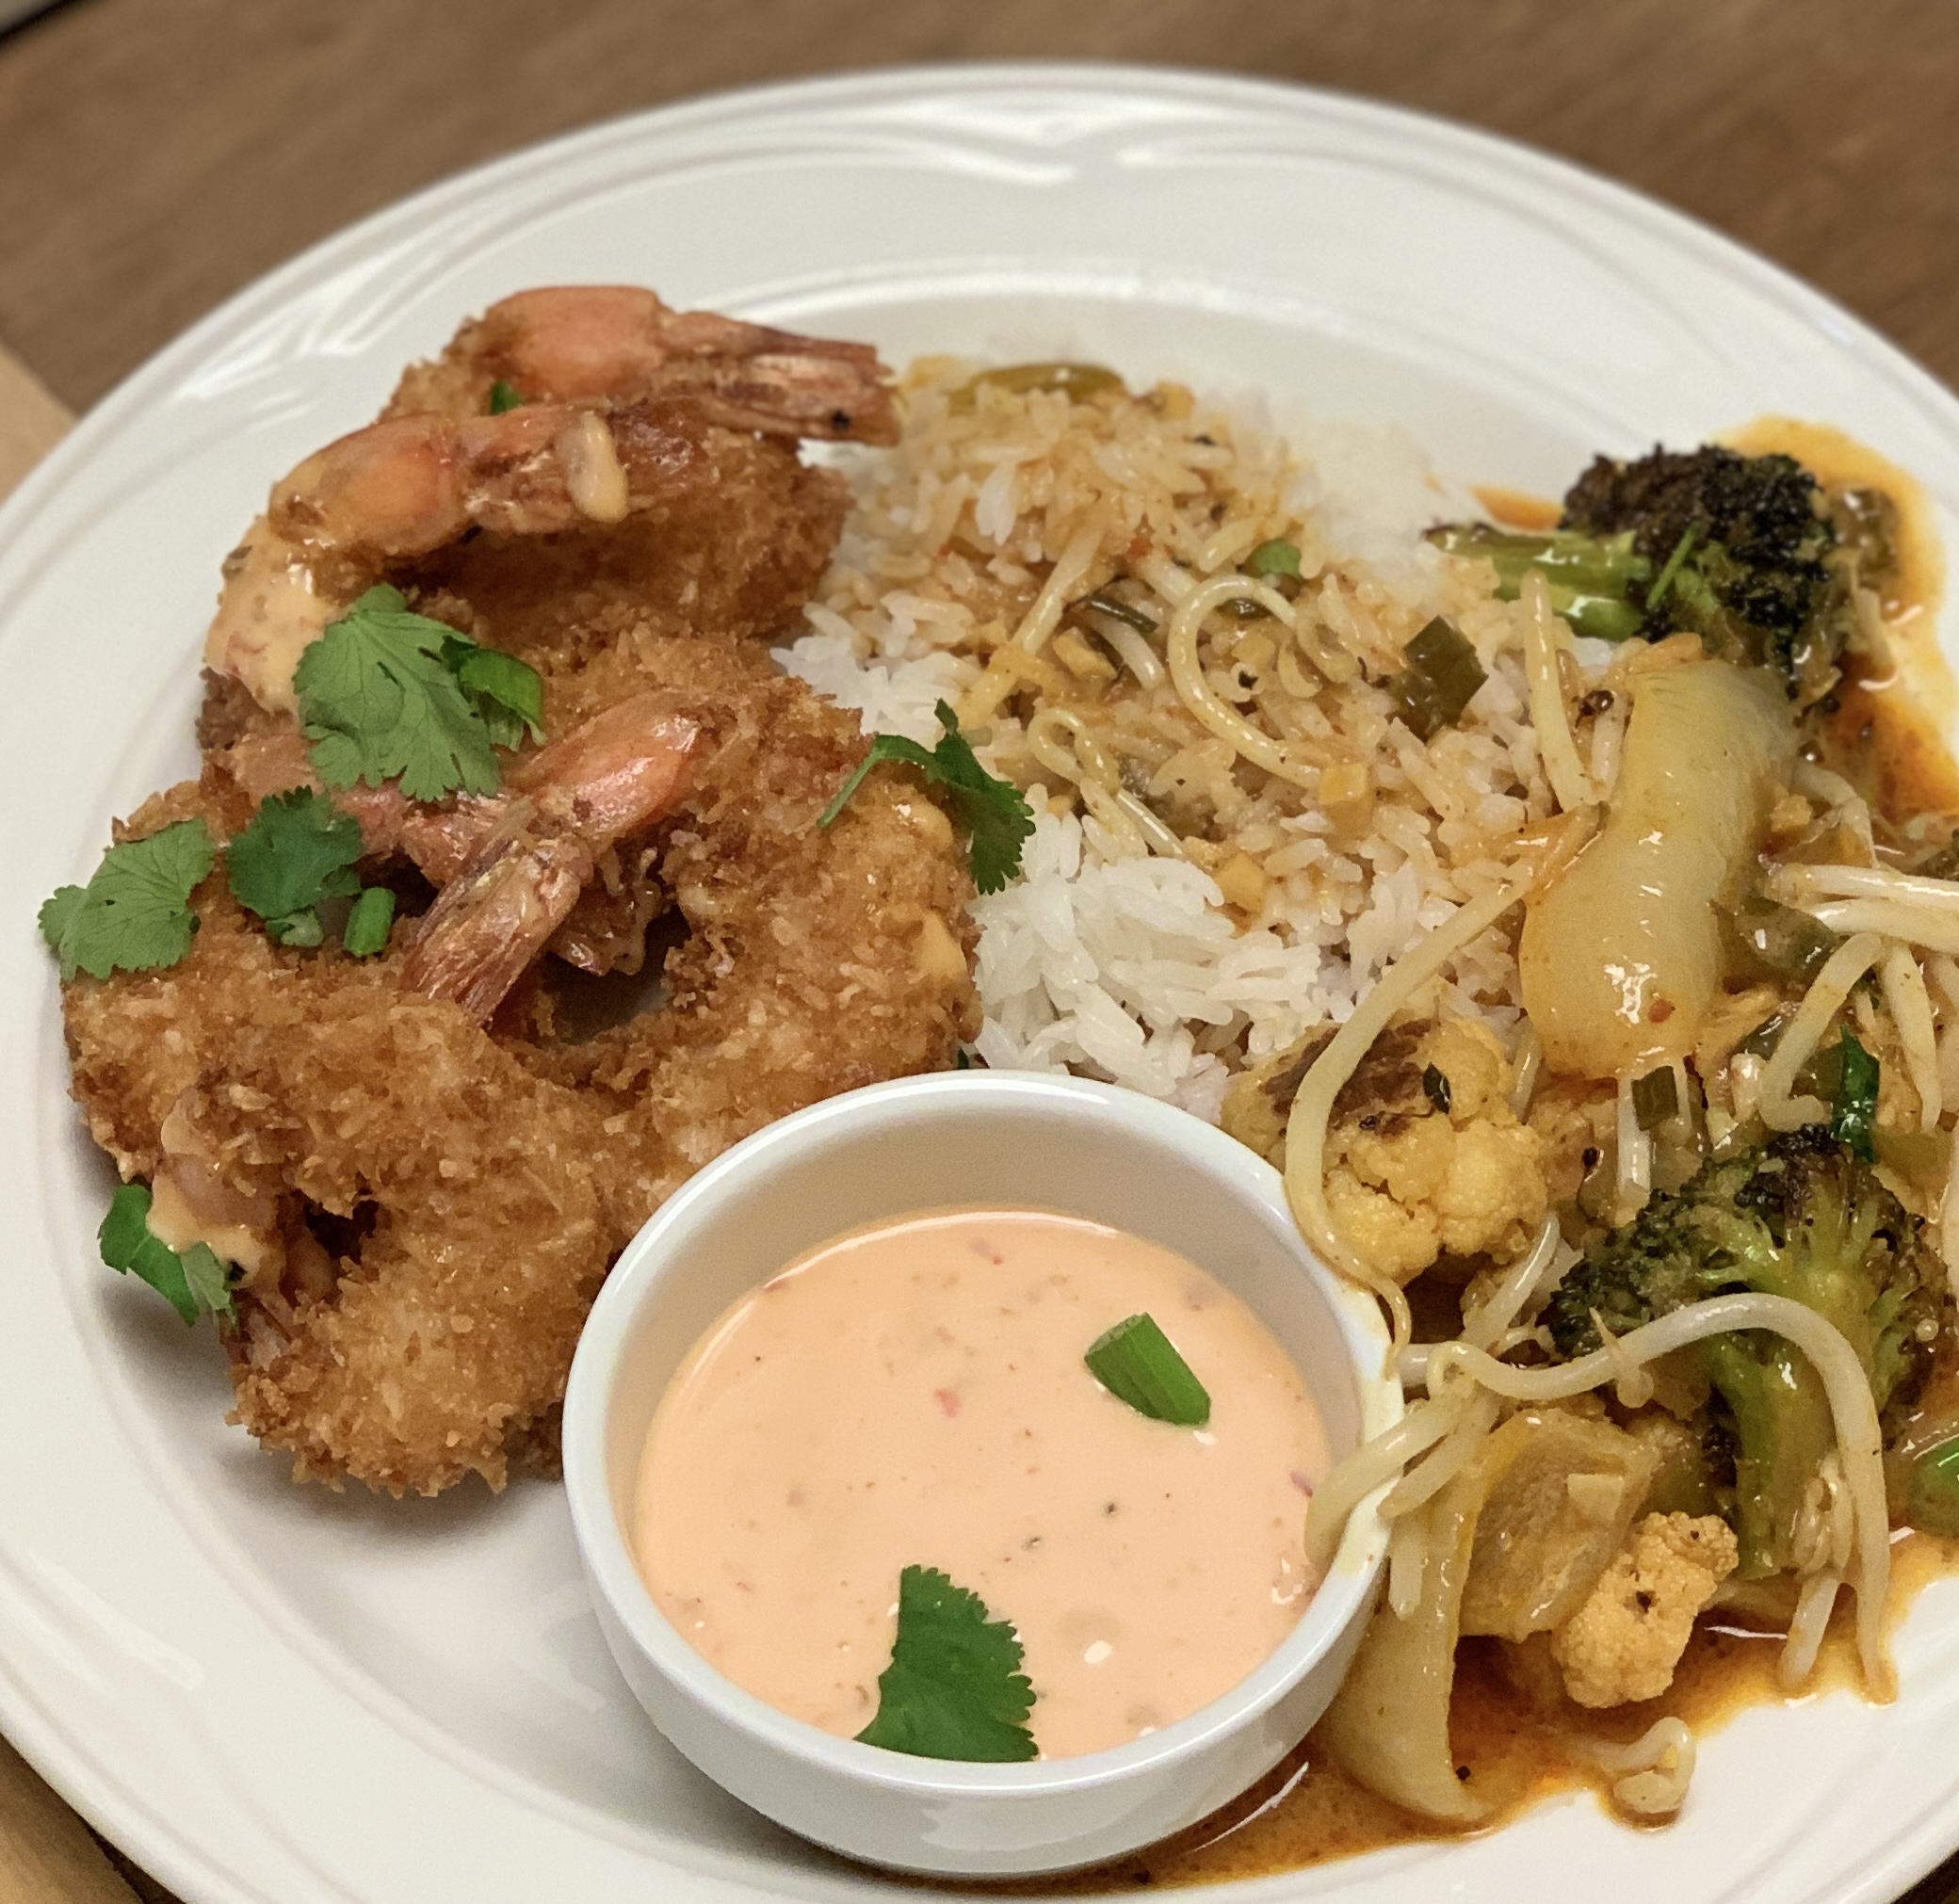
Working in batches, add shrimp to hot oil and fry until golden brown, turning as necessary until they are crunchy and looking irresistible – around 3 minutes. Transfer to a paper towel lined plate.
Serve immediately with dipping sauce.
DIPPING SAUCE
1/2 cup mayonnaise
1/4 cup sweet chili sauce
1-2 tbsp sriracha (or to taste)
juice of 1 lime
salt and pepper to taste
Mix well to combine. If you think of it, mix this ahead of time and set in fridge to allow flavours to meld beautifully.
I can’t promise you will smell the ocean when you make these, but it might make you feel a little better about staying home!
You can get these prepped ahead of time and just keep in the fridge until ready to fry.Served tonight with rice and curried vegetables. This would disappear in a hurry if served as an appetizer also.
I originally got this recipe off Damn Delicious website, and she’s right – they are damn delicious! The dipping sauce is my own concoction and it’s yummy!!