Raspberry Coconut Banana Loaf

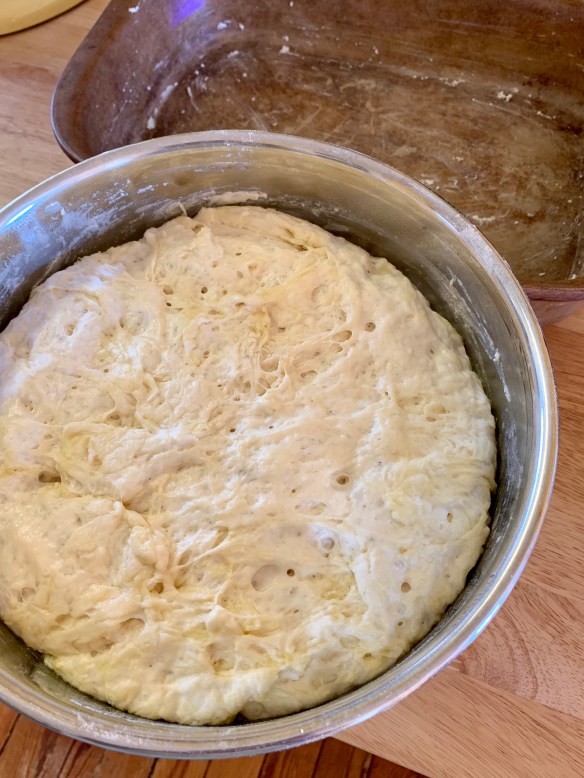
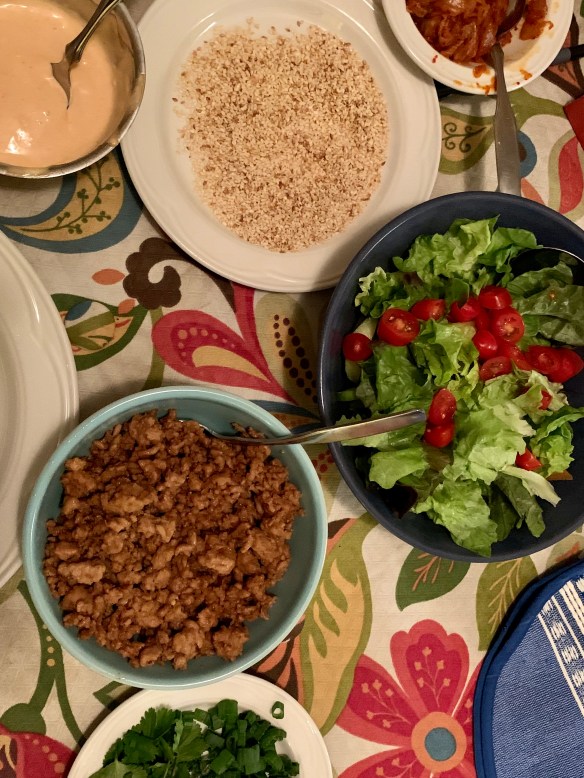
Here we are, in the midst of the Covid-19 crisis, I’m working from home, and my stress management is to bake.  Lots.  I planned on making a banana blueberry loaf, but where are the blueberries I was so sure were in my freezer?  Who knows?  Only realized that of course when I was in the midst of the batter, so here we are, and sometimes the best recipes come from necessity!  This is one of those happy circumstances.

banana loaf 2

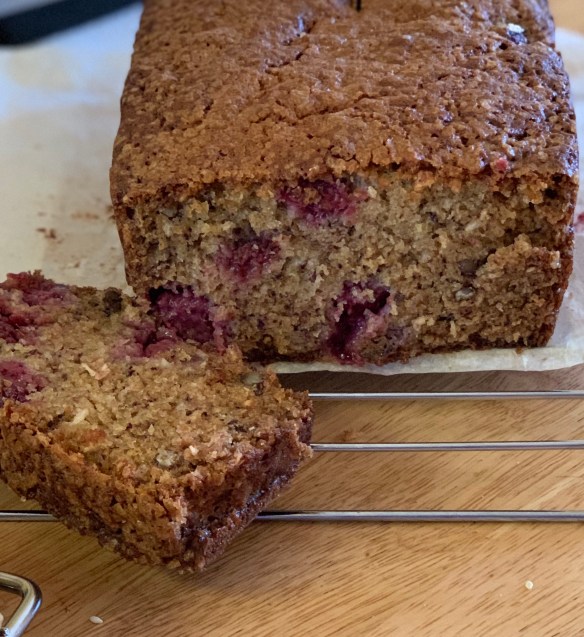
Just look at that crunchy top!

  • 1 1/2 cups all purpose flour
  • 1 tsp baking soda
  • 1 tsp salt
  • 1/2 tsp baking powder
  • 1/2 tsp cinnamon
  • 1/2 tsp freshly grated nutmeg (if you can, trust me, this makes a difference)
  • 1/2 cup toasted shredded coconut


  • 1/2 cup melted butter (but not hot)
  • 1 cup sugar
  • 2 large eggs, beaten
  • 1 tbsp vanilla
  • 3/4 cup mashed banana
  • 1 cup raspberries (fresh or frozen – if frozen DO NOT THAW)

Raw sugar

Preheat oven to 350.

Butter and flour a standard loaf pan (9″ x 5″)

Whisk dry ingredients together in large mixing bowl.

In separate bowl beat together the sugar, melted butter, eggs, vanilla and banana.

When ready to combine, and only then, toss the raspberries with the flour mixture.  This will prevent them from sticking together.  Stir in the liquid mixture, and only stir just until it all comes together.  Do not overmix.

Turn batter into prepared pan and sprinkle the top with raw sugar – you won’t believe how crunchy that top will get – pure delight.

Bake at 350 for at least 60 minutes, use a tester to make sure it is cooked in the middle.  Remove from oven to a cooling rack and allow to sit for 15 minutes before removing from loaf pan.

As per my original plans you could just as easily use fresh or frozen blueberries!


Korean BBQ wings, sweet & spicy!

These are the quickest, easiest wings that deliver the most amazing flavour – they hit all those sweet, spicy and sticky notes.

Korean BBQ wings

  • 1.5 pounds chicken wings
  • 1 tbsp olive oil
  • 1/4 cup flour
  • 1/2 tsp salt
  • 1/2 tsp freshly cracked black pepper

Korean BBQ Sauce

  • 6 tbsp low sodium soy sauce
  • 3 tbsp brown sugar
  • 1 tbsp honey
  • 2 tbsp rice vinegar
  • 1 tbsp sriracha sauce
  • 2 tsp minced garlic
  • 2 tbsp sweet chili sauce
  • 1 tbsp water
  • 1 tsp corn starch

Garnish:  

  • sesame seeds
  • thinly sliced green onions

Preheat oven to 400 – use convection if you have it.

Combine flour, salt and pepper in bowl.  Pat wings dry and toss with olive oil, then lightly coat with the flour mixture.  Place on a rack over a baking sheet and put in prepared oven.  Bake for 20 minutes, flipping them at 10 minutes, then turn oven to broil and broil for 3 -4 minutes, then turn over and do another 3 minutes or so – watch carefully so they don’t burn!

In a small sauce pan combine soy sauce, brown sugar, honey, rice vinegar, sriracha, garlic and sweet chili sauce.  Bring to a boil, then mix the water and corn starch together and stir into the sauce mixture.  Return the sauce to a boil, and simmer until it thickens. Set aside.

Toss wings with the BBQ sauce – garnish with sesame seeds & onions,  and get out the napkins!

KFC cauliflower

Perfect served with these KFC cauliflower bites – so yummy.


Crazy Good NO Knead Focaccia

No Knead Focaccia 2

You are going to love this … soft, chewy, and the best focaccia you could possible imagine.  Can’t you just smell it from the photo?  Yum.

  • 2 1/2 tsp active dry yeast (or 1 pack)
  • 2 tsp honey
  • 2 1/2 cups lukewarm water
  • 1 tbsp kosher salt
  • 5 cups all purpose flour
  • 6 tbsp extra virgin olive oil – divided
  • 4 tbsp butter
  • flaky sea salt
  • 2-4 garlic cloves

Whisk 1¼-oz. envelope active dry yeast (about 2¼ tsp.), 2 tsp. honey, and 2½ cups lukewarm water in a medium bowl and let sit 5 minutes (it should foam or at least get creamy; if it doesn’t your yeast is dead and you should start again—check the expiration date!).

Add 5 cups (625 g) all-purpose flour and 1 Tbsp. kosher salt and mix with a rubber spatula until a shaggy dough forms and no dry streaks remain.

Pour 4 Tbsp. extra-virgin olive oil into a big bowl that will fit in your refrigerator. This puppy is going to rise! Transfer dough to bowl and turn to coat in oil. Cover with a silicone lid or plastic wrap and chill until dough is doubled in size (it should look very bubbly and alive), at least 8 hours and up to 1 day. If you’re in a rush, you can also let it rise at room temperature until doubled in size, 3–4 hours.

Generously butter a 13×9″ baking pan, for thicker focaccia that’s perfect for sandwiches, or an 18×13″ rimmed baking sheet, for focaccia that’s thinner, crispier, and great for snacking. The butter may seem superfluous, but it’ll ensure that your focaccia doesn’t stick. Pour 1 Tbsp. extra-virgin olive oil into center of pan. Keeping the dough in the bowl and using a fork in each hand, gather up edges of dough farthest from you and lift up and over into center of bowl. Give the bowl a quarter turn and repeat process. Do this 2 more times; you want to deflate dough while you form it into a rough ball.

Transfer dough to prepared pan. Pour any oil left in bowl over and turn dough to coat it in oil. Let rise, uncovered, in a dry, warm spot (like near a radiator or on top of the fridge or a preheating oven) until doubled in size, at least 1½ hours and up to 4 hours.

Place a rack in middle of oven; preheat to 450°. To see if the dough is ready, poke it with your finger. It should spring back slowly, leaving a small visible indentation. If it springs back quickly, the dough isn’t ready. (If at this point the dough is ready to bake but you aren’t, you can chill it up to 1 hour.) Lightly oil your hands. If using a rimmed baking sheet, gently stretch out dough to fill (you probably won’t need to do this if using a baking pan). Dimple focaccia all over with your fingers, like you’re aggressively playing the piano, creating very deep depressions in the dough (reach your fingers all the way to the bottom of the pan). Drizzle with remaining 1 Tbsp. extra-virgin olive oil and sprinkle with flaky sea salt. Bake focaccia until puffed and golden brown all over, 20–30 minutes.

No Knead Focaccia 3

Rising with bits of oil throughout, this little fella has filled the bowl!

No Knead Focaccia 4

It’s pretty darn cold outside today, but this is sitting with the sun streaming in the window and the radiator near …. it rose beautifully.

No Knead Focaccia 1

Just look, 2 hours later it is fluffy and puffed right to the brim.

No Knead Focaccia 5

This is the part where you could get as interesting as you like …. add olives, or rosemary, or little tomato slices ….

I stopped before this last step, just because I wasn’t sure the 12, 9 & 6 year olds at the table wanted the garlic …. but next time!!!

Hold off on this last step until you’re ready to serve the focaccia: Melt 4 Tbsp. unsalted butter in a small saucepan over medium heat. Remove from heat. Peel and grate in 2–4 garlic cloves with a Microplane (use 2 cloves if you’re garlic-shy or up to 4 if you love it). Return to medium heat and cook, stirring often, until garlic is just lightly toasted, 30–45 seconds. (Or, if you prefer raw garlic to toasted garlic, you can grate the garlic into the hot butter, off heat, then brush right away.)

Brush garlic-butter all over focaccia and slice into squares or rectangles.

Focaccia Art 1

Too much time on my hands …. the Covid- 19 Coronavirus has us all hunkered down in our homes …. look what happens when you can’t go anywhere …

Focaccia Art 2

I was afraid how things would look after baking, but it’s pretty good!

I’ve reposted this from Bon Appetit “Basically” as part of their baking series, it is amazing!!!


Yellow Cake with Chocolate Buttercream

Stella arrived to the orchard with a plan …. an easy cake that she could frost with a chocolate icing.  This cake fit that description perfectly, and we were all blown away by how absolutely delicious it was.

yellow cake 1

Cake Ingredients

  • 2 and 1/4 cups (266g) cake  flour
  • 2 1/4 tsp baking powder
  • 1/4 teaspoon baking soda
  • 1/2 teaspoon salt
  • 1 cup (230g) unsalted butter, softened & at room temperature
  • 1 and 3/4 cups (350g) granulated sugar
  • 2 large eggs, at room temperature
  • 2 teaspoons pure vanilla extract
  • 1/2 cup (120g) sour cream, at room temperature
  • 1 cup (240ml) whole milk, at room temperature

Chocolate Fudge Frosting

  • 1 cup (230g) unsalted butter, softened & at room temperature
  • 4 and 1/2 cups (540g) confectioners’ (icing) sugar
  • 3/4 cup (65g) natural unsweetened or dutch-process cocoa powder
  • 1/2 cup (120ml) whole milk
  • 1 Tablespoon light corn syrup*
  • 2 teaspoons pure vanilla extract
  • 1/8 teaspoon salt
  • optional: rainbow sprinkles or lightly toasted pecan pieces – roughly chopped

Instructions

  1. Preheat oven to 350°F (177°C). Generously grease and lightly flour a 12×17 inch half sheet/jelly roll pan. Set aside.  SEE BELOW TO ADJUST FOR DIFFERENT PAN SIZES
  2. Whisk the flour, baking powder, baking soda, and salt together in a large bowl. Set aside. Using a handheld or stand mixer fitted with a paddle attachment, beat the butter on high speed until smooth and creamy – about 1 minute. Add the sugar and beat on high speed for 3 full minutes until creamed together fairly well. Scrape down the sides and up the bottom of the bowl with a rubber spatula as needed. On medium-high speed, add 1 egg at a time, beating well after each addition until both are mixed in. On high speed, beat in the vanilla extract and sour cream. Scrape down the sides and up the bottom of the bowl with a rubber spatula as needed.
  3. With the mixer running on low speed, add the dry ingredients to the wet ingredients alternating with the milk. Mix each addition just until incorporated. Do not overmix this batter. The batter will be smooth, velvety, and slightly thick.
  4. Spread the cake batter into the prepared pan. Smooth it out into a thin, even layer. Bake for 20-22 minutes or until the top is lightly browned and a toothpick inserted in the center comes out clean. Make sure you rotate the cake pan once or twice during bake time if your oven has hot spots. Remove from the oven and allow the cake to cool in the pan placed on a wire rack. As the cake is cooling, make the frosting.

Frosting Instructions

  1. Make the frosting: Using a handheld or stand mixer fitted with a paddle attachment, beat the butter on high speed until pale, smooth, and creamy – about 4 full minutes. Sift the confectioners’ sugar and cocoa together. On low speed, gradually add the sugar/cocoa mixture, followed by the milk, corn syrup, vanilla, and salt. Beat for 1 minute. Turn the mixer up to medium-high speed and beat for 3 full minutes. If the frosting is too thick, add a splash more of milk.
  2. Frost cooled cake and top with sprinkles. Slice and serve. Cover leftovers tightly and store in the refrigerator for up to 5 days.
  • Make Ahead & Freezing Instructions: Cake can be made 1 day in advance, covered tightly at room temperature, and then frosted before serving. Frosting can also be made 1 day ahead of time– cover tightly and keep in the refrigerator. Frosted or unfrosted cake can be frozen up to 3 months. Thaw overnight in the refrigerator before serving.
  • Sour Cream: Full-fat sour cream lends the best flavor! You can use plain yogurt instead. I suggest a full-fat variety.
  • Milk: Whole milk is best– the fat is what gives this cake it’s wonderfully rich texture. You can use 2% instead– or even buttermilk!
  • Corn Syrup: This tiny bit of corn syrup makes the frosting uniquely glossy and shiny. You can leave it out if you’d like.
  • Different Size Cakes & Cupcakes: you can use this recipe to make a 9×13 cake. Same oven temperature, just bake for about 35-40 minutes. You can also use this recipe to make about 18-20 cupcakes. Fill cupcake liners halfway. About 20 minutes bake time, same oven temperature.  
  • Frosting:  This makes enough for the larger size pan, or a layer cake, or to frost 18-20 cupcakes.  If you are making this in a 9×13 pan, you will only need about half.  Either halve the recipe or freeze some for another day, it freezes well.

yellow cake 9

yellow cake 3

Team Effort!

yellow cake 11

yellow cake 10

yellow cake 8

Sloan helping Liv keep the beaters upright …. don’t skip the beating time – in fact, use your timer and you will be amazed at how much fluffier your butter gets.

yellow cake 7

Best part of any baking project, right??

yellow cake 2

These kids …..

yellow cake 6

Stella was firm on the design …. she wanted smooth icing (thanks Sloan for doing that), then she wanted to create spikes ….. took a few tries, but she got it exactly the way she wanted, and then decided it needed a few pecans toasted and sprinkled over top.

yellow cake 4

Stella came up with the pecans for a topping and it was just perfect!

yellow cake 5

Total winner!  And, we are total winners with these 3 little sweeties.

I copied this entirely from Sally’s Baking Addiction, I’ve loved every one of her recipes that I have tried, and my 9 year old granddaughter Sloan insisted I get it on here right away so we don’t forget this recipe!

Best Asian Noodle Soup

noodle soup 2

This big beautiful bowl of soup is all you need for a great family dinner!

Can a person every have too many soup recipes???  I think not …. The best part of this recipe is that it is just a guideline for making an amazingly tasty soup out of whatever you have on hand.  The focus here is on the vegetables, so make sure you prepare way more than you think will fit in the pot!

The flavour base is what makes this soup such a keeper.

  • 3 scallions, cut in 3 large pieces
  • 1/2 inch knob of minced ginger
  • 3 tbsp oyster sauce
  • 6 cups chicken stock/vegetable stock/beef stock/6 inch piece of kombu


  • chicken breast/prawns/tofu
  • any amount of vegetables, as many as you think you can get in the pot
  • bean sprouts
  • cooked rice noodles or Chinese wheat noodles

Garnishes:

  • cilantro
  • green onion
  • sesame seeds
  • toasted sesame seeds
  • soy sauce
  • peanut sauce
  • chili oil

Start with a big pot, cover the bottom with a neutral oil and once it has heated up add about a 1/2 inch knob of minced ginger and 3-4 scallions (green onions).  Saute until they have generated a bit of colour and become nicely caramelized.  This is where you start, but from here the sky is the limit.

Add the oyster sauce and heat through, then add your broth.  If you are using the kombu, allow it to soften for at least 30 minutes.

When the broth is hot enough, add any protein you want to use – if using meat, slice it thinly.

Add the vegetables according to how long they take to cook – as in cabbage or bok choy will take a little longer than snap peas or thinly sliced sweet peppers.

I like to serve the noodles prepared and separate from the soup so people can add them as they wish, and that way they don’t get soggy.

This should all come together really quickly once the broth has heated – as in maybe 5 minutes!  When ready to serve stir in bean sprouts and serve with the garnishes so everybody can create the soup bowl of their own dreams.

noodle soup 1

Serve with a basket of crispy scallion pancakes for the perfect meal.


Korean Tacos

These Korean Beef tacos are incredibly delicious … who would have thought??  Just try them – as a bonus you won’t believe how quick and easy this is.

korean tacos 5

KOREAN BEEF

  • 2 tablespoons reduced sodium soy sauce
  • 2 tablespoons brown sugar
  • 1 teaspoon sesame oil
  • 1/4 teaspoon crushed red-pepper flakes
  • Pinch of ground ginger
  • 2 teaspoons vegetable oil
  • 2 cloves garlic, minced
  • 8 ounces ground beef

CARMELIZED KIMCHI

  • 2 teaspoons sesame oil
  • 1 cup chopped kimchi
  • 1 teaspoon sugar

SRIRACHA MAYONNAISE

  • 1/4 cup mayonnaise
  • 1 tablespoon Sriracha
  • 2 teaspoons freshly squeezed lime juice

TACO ASSEMBLY

  • 12 mini flour tortillas
  • 1/4 cup diced red onion
  • 2 tablespoons chopped fresh cilantro leaves
  • 1/4 teaspoon toasted sesame seeds

DIRECTIONS:

  1. KOREAN BEEF: In a small bowl, whisk together brown sugar, soy sauce, sesame oil, red pepper flakes and ginger.
  2. Heat vegetable oil in a large skillet over medium high heat. Add garlic and cook, stirring constantly, until fragrant, about 1 minute. Add ground beef and cook until browned, about 3-5 minutes, making sure to crumble the beef as it cooks; drain excess fat.
  3. Stir in soy sauce mixture until well combined, allowing to simmer until heated through, about 2 minutes; set aside.
  4. KIMCHI: Heat sesame oil in small skillet over medium high heat. Add kimchi and sugar, and cook, stirring constantly, until caramelized and heated through, about 3-5 minutes; set aside.
  5. SRIRACHA MAYONNAISE: In a small bowl, whisk together mayonnaise, Sriracha and lime juice; set aside.
  6. TACOS: Serve ground beef mixture in tortillas, topped with kimchi, red onion, cilantro and sesame seeds, drizzled with Sriracha mayonnaise.
Korean tacos 1

Kimchi is great, but have you ever had it like this?  Amazing what a little caramelization can do.

I used pork tonight but you can easily use beef, chicken or tofu – it’s the seasoning that will win you over.

korean tacos 4

Set everything out and assemble your tacos – serve with a tossed salad and dinner is quick, easy and fantastic.

I got this recipe from Damn Delicious – if you haven’t checked out her blog you definitely should, every recipe I’ve tried has been fantastic.

Vietnamese Rice Bowl

Vietnamese Bowl

Lime juice is used in so many dishes in Vietnam and Cambodia, and we loved it.  Tonight I sautéed the green vegetables with garlic and ginger, once tender I just squeezed fresh lime over and used a generous sprinkle of fresh Kampot pepper – they were so good and fresh.

We’ve just returned from a month in Cambodia and Vietnam and can’t seem to leave those fresh bright flavours behind us.  This rice bowl (or use rice noodles if you like) is delicious – use a variety of different textures and flavours to get the right balance, but whatever you use – make it your own.  The only actual recipe portion of this is the Vietnamese sauce, Nuoc Cham, the rest of it is more of a guideline.

You will need:

  • cooked rice
  • grilled steak (or chicken/prawns/tofu)
  • pickled fresh vegetables
  • sauteed vegetables (tonight I used broccoli, baby bok chow & snap peas)

Garnish:

  • toasted peanuts
  • slivered spring onions
  • rough chopped cilantro/basil/mint
  • toasted sesame seeds

Nuoc Cham Sauce:

  • 2 – 2/12 tbsp sugar (I used palm sugar but you can use white, or maple syrup or honey)
  • 3-4 tbsp fresh squeezed lime juice
  • 1/2 cup very warm water (warm helps the sugar to dissolve)
  • 2 tsp unseasoned rice vinegar
  • 3-4 tbsp fish sauce

Stir sugar and lime juice together, then add warm water and stir until sugar has dissolved.  Add rice vinegar and fish sauce.  I always start with the lesser amount of sugar, lime juice and fish sauce … adjust as needed when you have it all together.

To assemble, place your rice or rice noodles in the bottom of a bowl, then layer on your other ingredients.  Drizzle Nuoc Cham over and sprinkle with garnishes.  This dish is just as versatile as you want it to be.

Vietnamese noodle bowl 1

This time the Vietnamese bowl featured rice noodles and chicken.

Vietnamese noodle bowl 2

Quick pickled vegetables and Nuoc Cham sauce ready to dress up your bowl.

Vietnamese noodle bowl 3

Put everything out on the table and let everyone create their own bowl.

Vietnamese noodle bowl 4

Good to the last drop!