We had Salad Bar (Sloan’s choice) for Sunday dinner, which meant creating these salad rolls from the leftovers was a breeze! Stella and I often get stuck in on projects for lunch, but this was so quick and easy, utilizing the grilled chicken and prepared vegetables.
What sells this though, is the peanut sauce! So good, Stella and I decided it better go on the blog right away so we remember the recipe, and how quickly it came together.
SALAD ROLL INGREDIENTS
rice paper wraps
cooked thin rice noodles
cooked chicken, grilled prawns, or whatever protein you fancy
slivered vegetables, whatever you like
bean sprouts
lettuce
Soften wraps in warmish water, don’t allow to get too soft or they will tear as you wrap. They continue to soften as they sit.
Lay wrap down, and with lightly moistened fingers place your ingredients in the lower half of the wrap, fold edges in to trap filling and then roll as tightly as you can. The sky is the limit with whatever you like to fill your salad rolls with. We didn’t have any lettuce but if you do, laying a leaf down, and then placing the filling on the lettuce helps to prevent the wrap tearing and gives the salad rolls a nice crunch.
(you can google wrapping salad rolls – there are lots of those videos available)
The star here …. PEANUT SAUCE
1/2 cup peanut butter (use natural for the most peanut flavour)
1/3 cup soy sauce
2 tbsp toasted sesame oil
2 tbsp rice vinegar
2 tbsp sambal oelek or chili paste
1 tbsp hoisin sauce
2 tbsp sugar (could sub honey if you prefer)
1 knob of fresh ginger, peeled (to taste)
1 garlic clove, peeled
Up to 1/4 cup of water, to thin as needed.
Whiz all this up in a blender, using water as you see fit and taste to see if it needs any adjustments.
The chili paste is where the little bit of spicy heat comes from. We both like a little bit of heat, but not overwhelmingly spicy. We found 2 tbsp was perfect but go according to your own tastes, and of course the type of chili paste you have.
I got the base of this recipe from Lindsay at Pinch of Yum, and we decided to get it on here so we don’t keep looking for one … thanks Lindsay!
Ready to eat, these salad rolls were so quick, we had them on the table easily.
Set aside a bit of time to make this dish – today it took me 2 1/2 hours but it makes a lot, and keeps really well in the fridge for a couple of days. Just call it kitchen yoga and you are guaranteed to feel quite smug.
This Korean noodle dish is truly crave worthy. If anything, tastes even better the next day but don’t let that stop you from making and eating it for dinner the same day! It took a bit of effort to find potato starch noodles but it was worth the effort. They have a springy texture that is unlike any other noodle I’ve had.
12 ounces (340g) of pork loin or steak – cut into very thin slivers
3 garlic cloves, minced
1 tbsp water
1 1/2 tbsp chinese cooking wine (shaoxing)
1 /2 tsp oyster sauce
2 tsp sugar
1/2 tsp baking soda
1 1/2 tsp cornstarch
1/2 tsp freshly ground white pepper
1/2 tsp sesame oil
I’ve also learned a new technique through J.Kenji Lopez-Alt about velveting meat for stir frying, and trust me, it makes a huge difference!
First, give your meat a little bath – scrub it in running water and then squeeze to drain it really well.
Combine the meat with all the other ingredients in a bowl and massage it vigorously – I like my using my hands but feel free to use a spoon if you prefer. Set aside for 30 minutes, or in the fridge for 4 hours or so.
Blanch spinach or kale in boiling water, cool and chop a little.
Stir in:
1 clove minced garlic
1 tsp sesame oil
1/2 tsp salt
10 ounces (280 gr) of sweet. potato starch noodles (Dangmyeon) – cooked acording to package
Sauce for noodles:
1 tbsp sesame oil
1 tbsp soy sauce
2 tsp sugar
Once noodles are cooked, drained and rinsed, cut them into smaller pieces and stir with the sauce. Set aside.
1 onion, thinly sliced
1 red pepper, thinly sliced
1 yellow pepper, thinly sliced
3 garlic cloves, diced
3 scallions, cut in 3 ” pieces
1 pack of baby spinach or kale (as much as you like, really)
bean sprouts (as many as you like)
OPTIONAL:
raw carrot strands
slivered snap peas
pea shoots
cucumber, thinly sliced
Japchae sauce
2 tsp sugar
1/2 tsp freshly ground pepper
2 1/2 TBSP soy sauce
1 TBSP sesame oil
1 TBSP gojuchang (korean spice paste)
Stir well in a large bowl. Taste and adjust for seasoning. I usually use low sodium soy sauce but using Gluten Free soy sauce, now that Stella is Celiac, we are all learning to cook without any wheat in our products, so initially I found this a bit salty, I adjusted with a little rice vinegar and touch of oil. (Basically, the vinaigrette I had made and in the fridge)
UPDATE – see below for a sauce suitable for all gluten free folks – it was so good!
Time to stir fry the veg!
In a wok or large fry pan heat vegetable oil and stir fry onion and red pepper until soft and set aside. Then stir fry any other vegetable you choose to add.
I like to have a mix of raw and stir fried veg……
Heat wok again and add some vegetable oil – stir fry the meat, and add in the bean sprouts and kale or spinach, fry just until softened. Add back the red pepper, onion, garlic mix as well as the cooked noodles. Toss well to warm everything through and then add to the bowl with the sauce, mixing well
Once you have everything prepared, toss it all with the sauce. My usual tactic is to put all the veg in the bowl and then gradually add the sweet potato noodles, that way I don’t overload the bowl with too many noodles. Just ask Mike, I’m guilty of cooking more noodles than needed – always.
Sprinkle with toasted sesame seeds and chives or green onions for a little color.
Sit back and enjoy! Pour yourself a glass of well deserved wine.
Todays version included sautéed mini bok choy. You could easily call this a clean out the fridge noodle dish, anything goes! This doesn’t have any meat in it at all, I felt like some Korean grilled chicken thighs – a bit of sweet, spicy and char makes it perfect. That is on the grill separately. If you leave it as is, you’ve got a great vegetarian dinner!
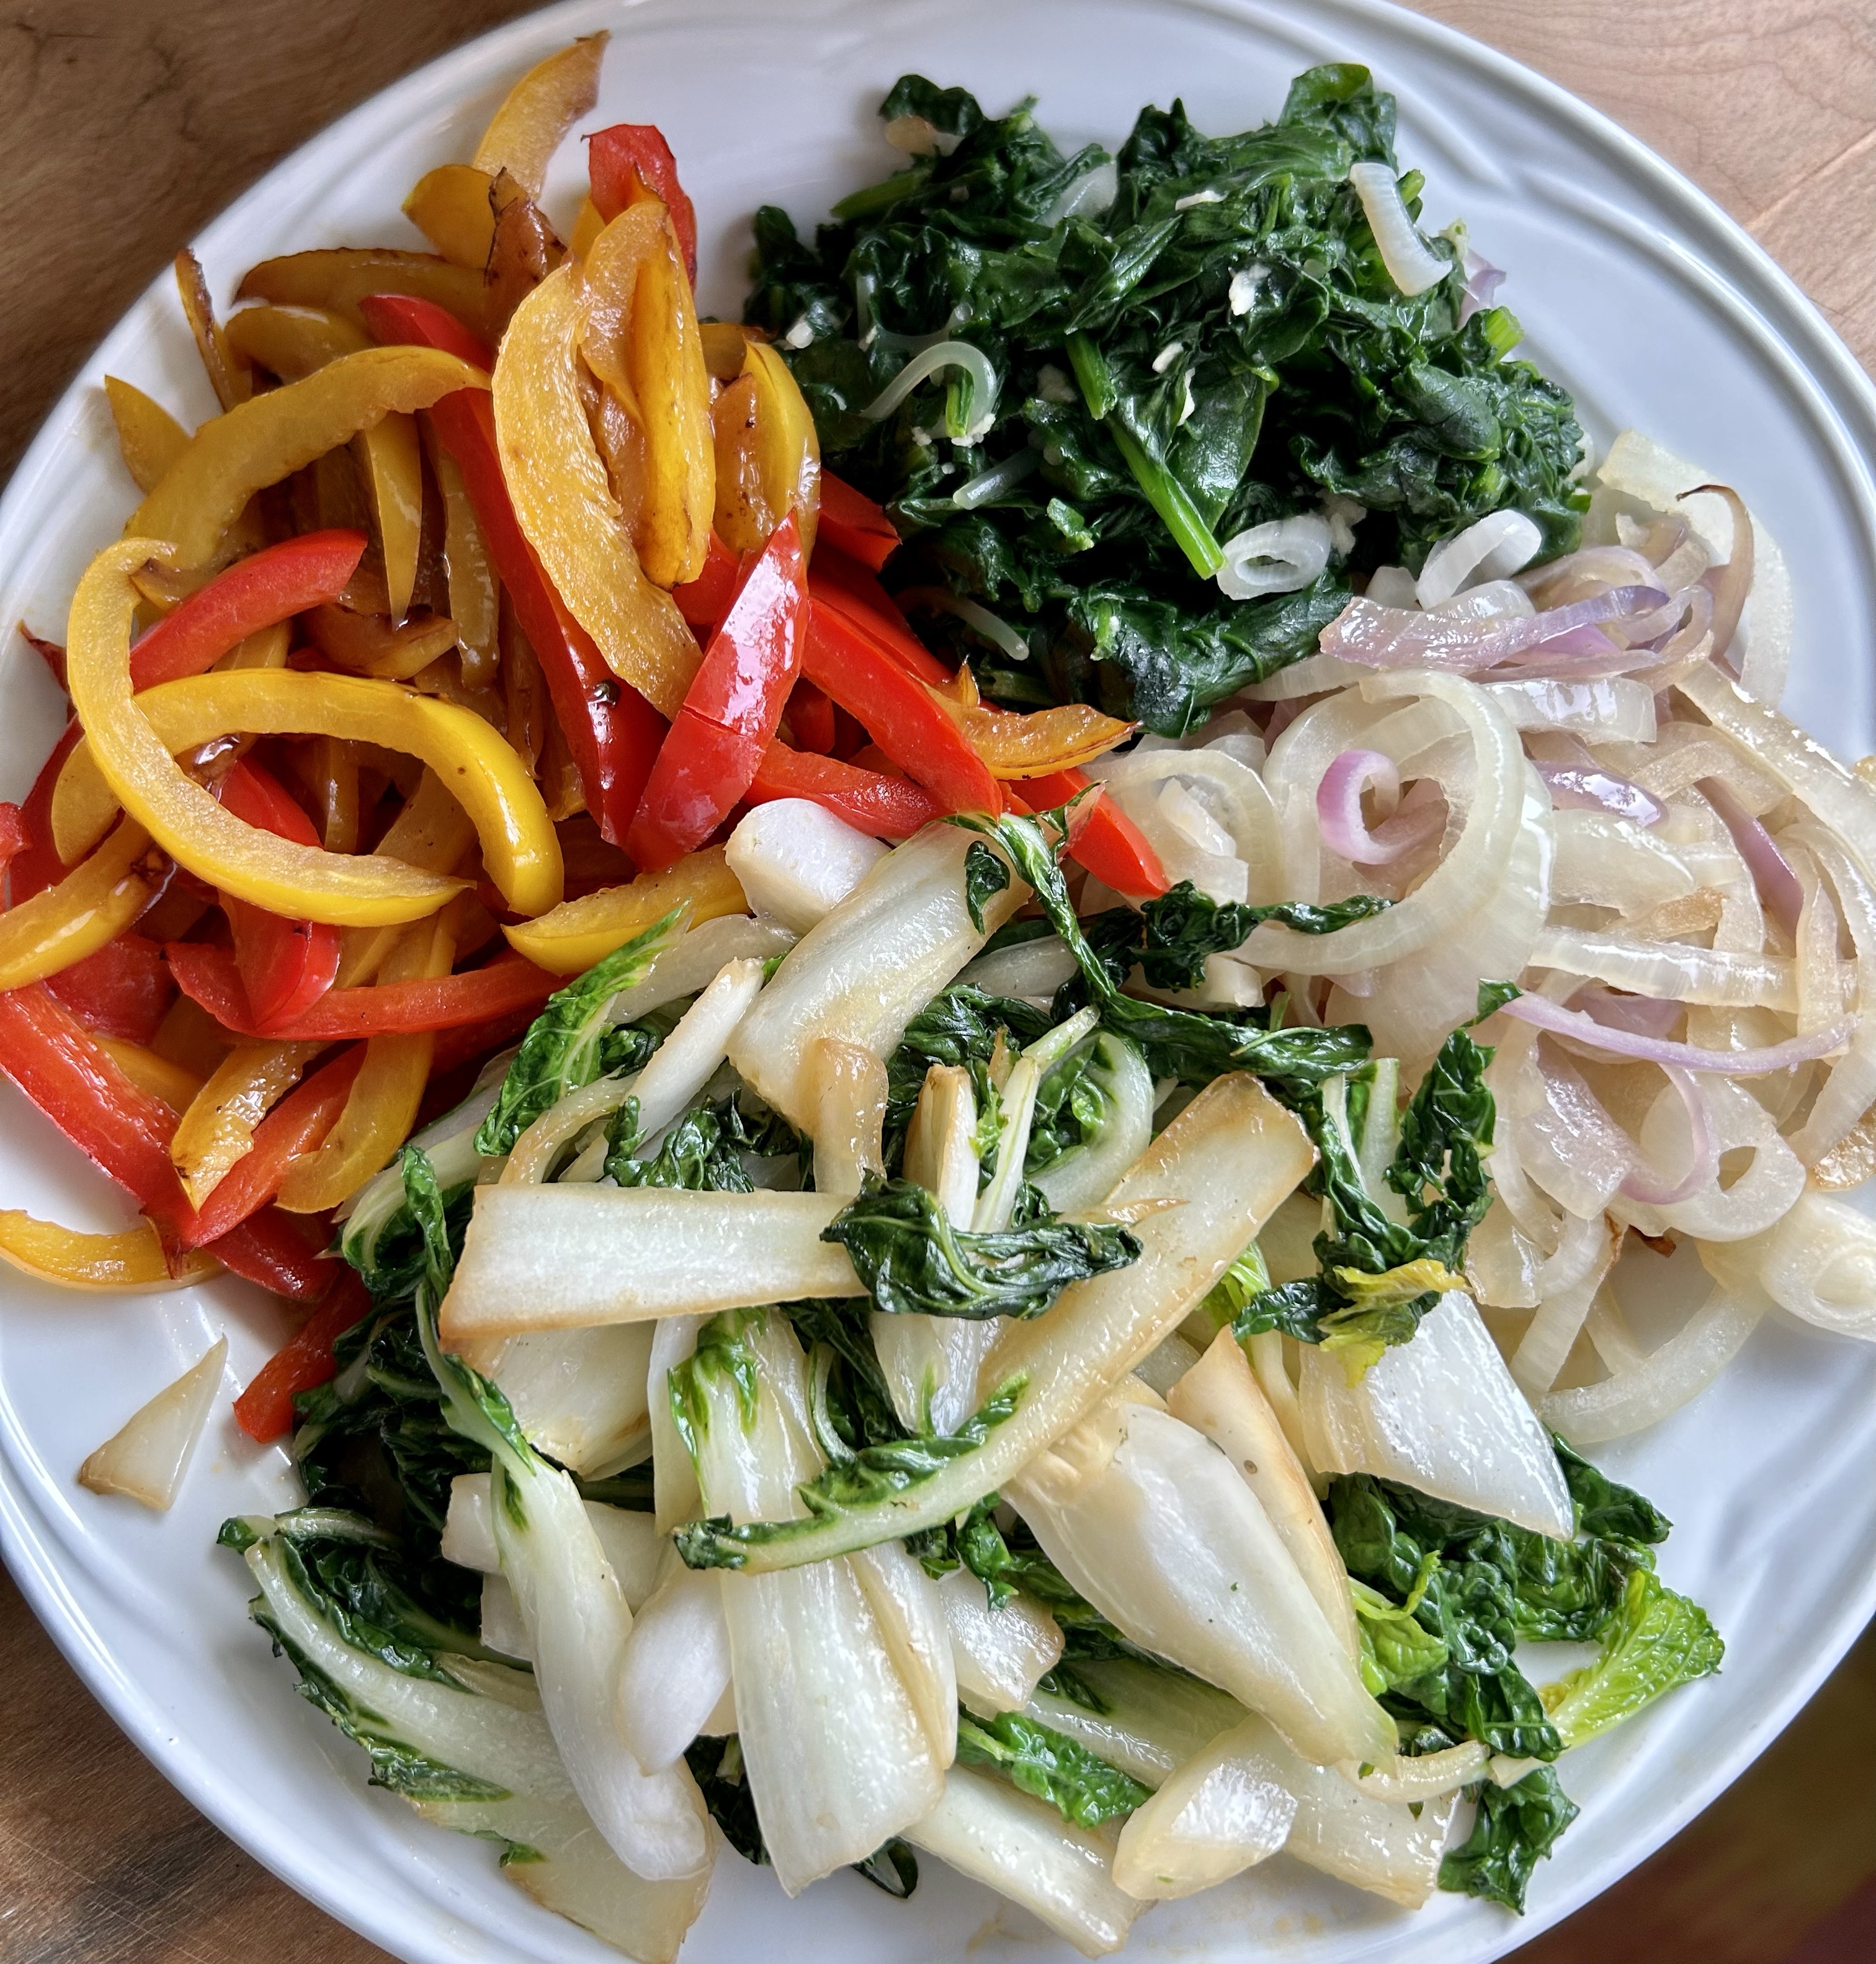
This was all the sautéed vegetables in tonights dish – each in the pan at separate times. I know, I’m fussy that way – go ahead and throw it all in at once if you like, and let me know if it makes any difference …. haha
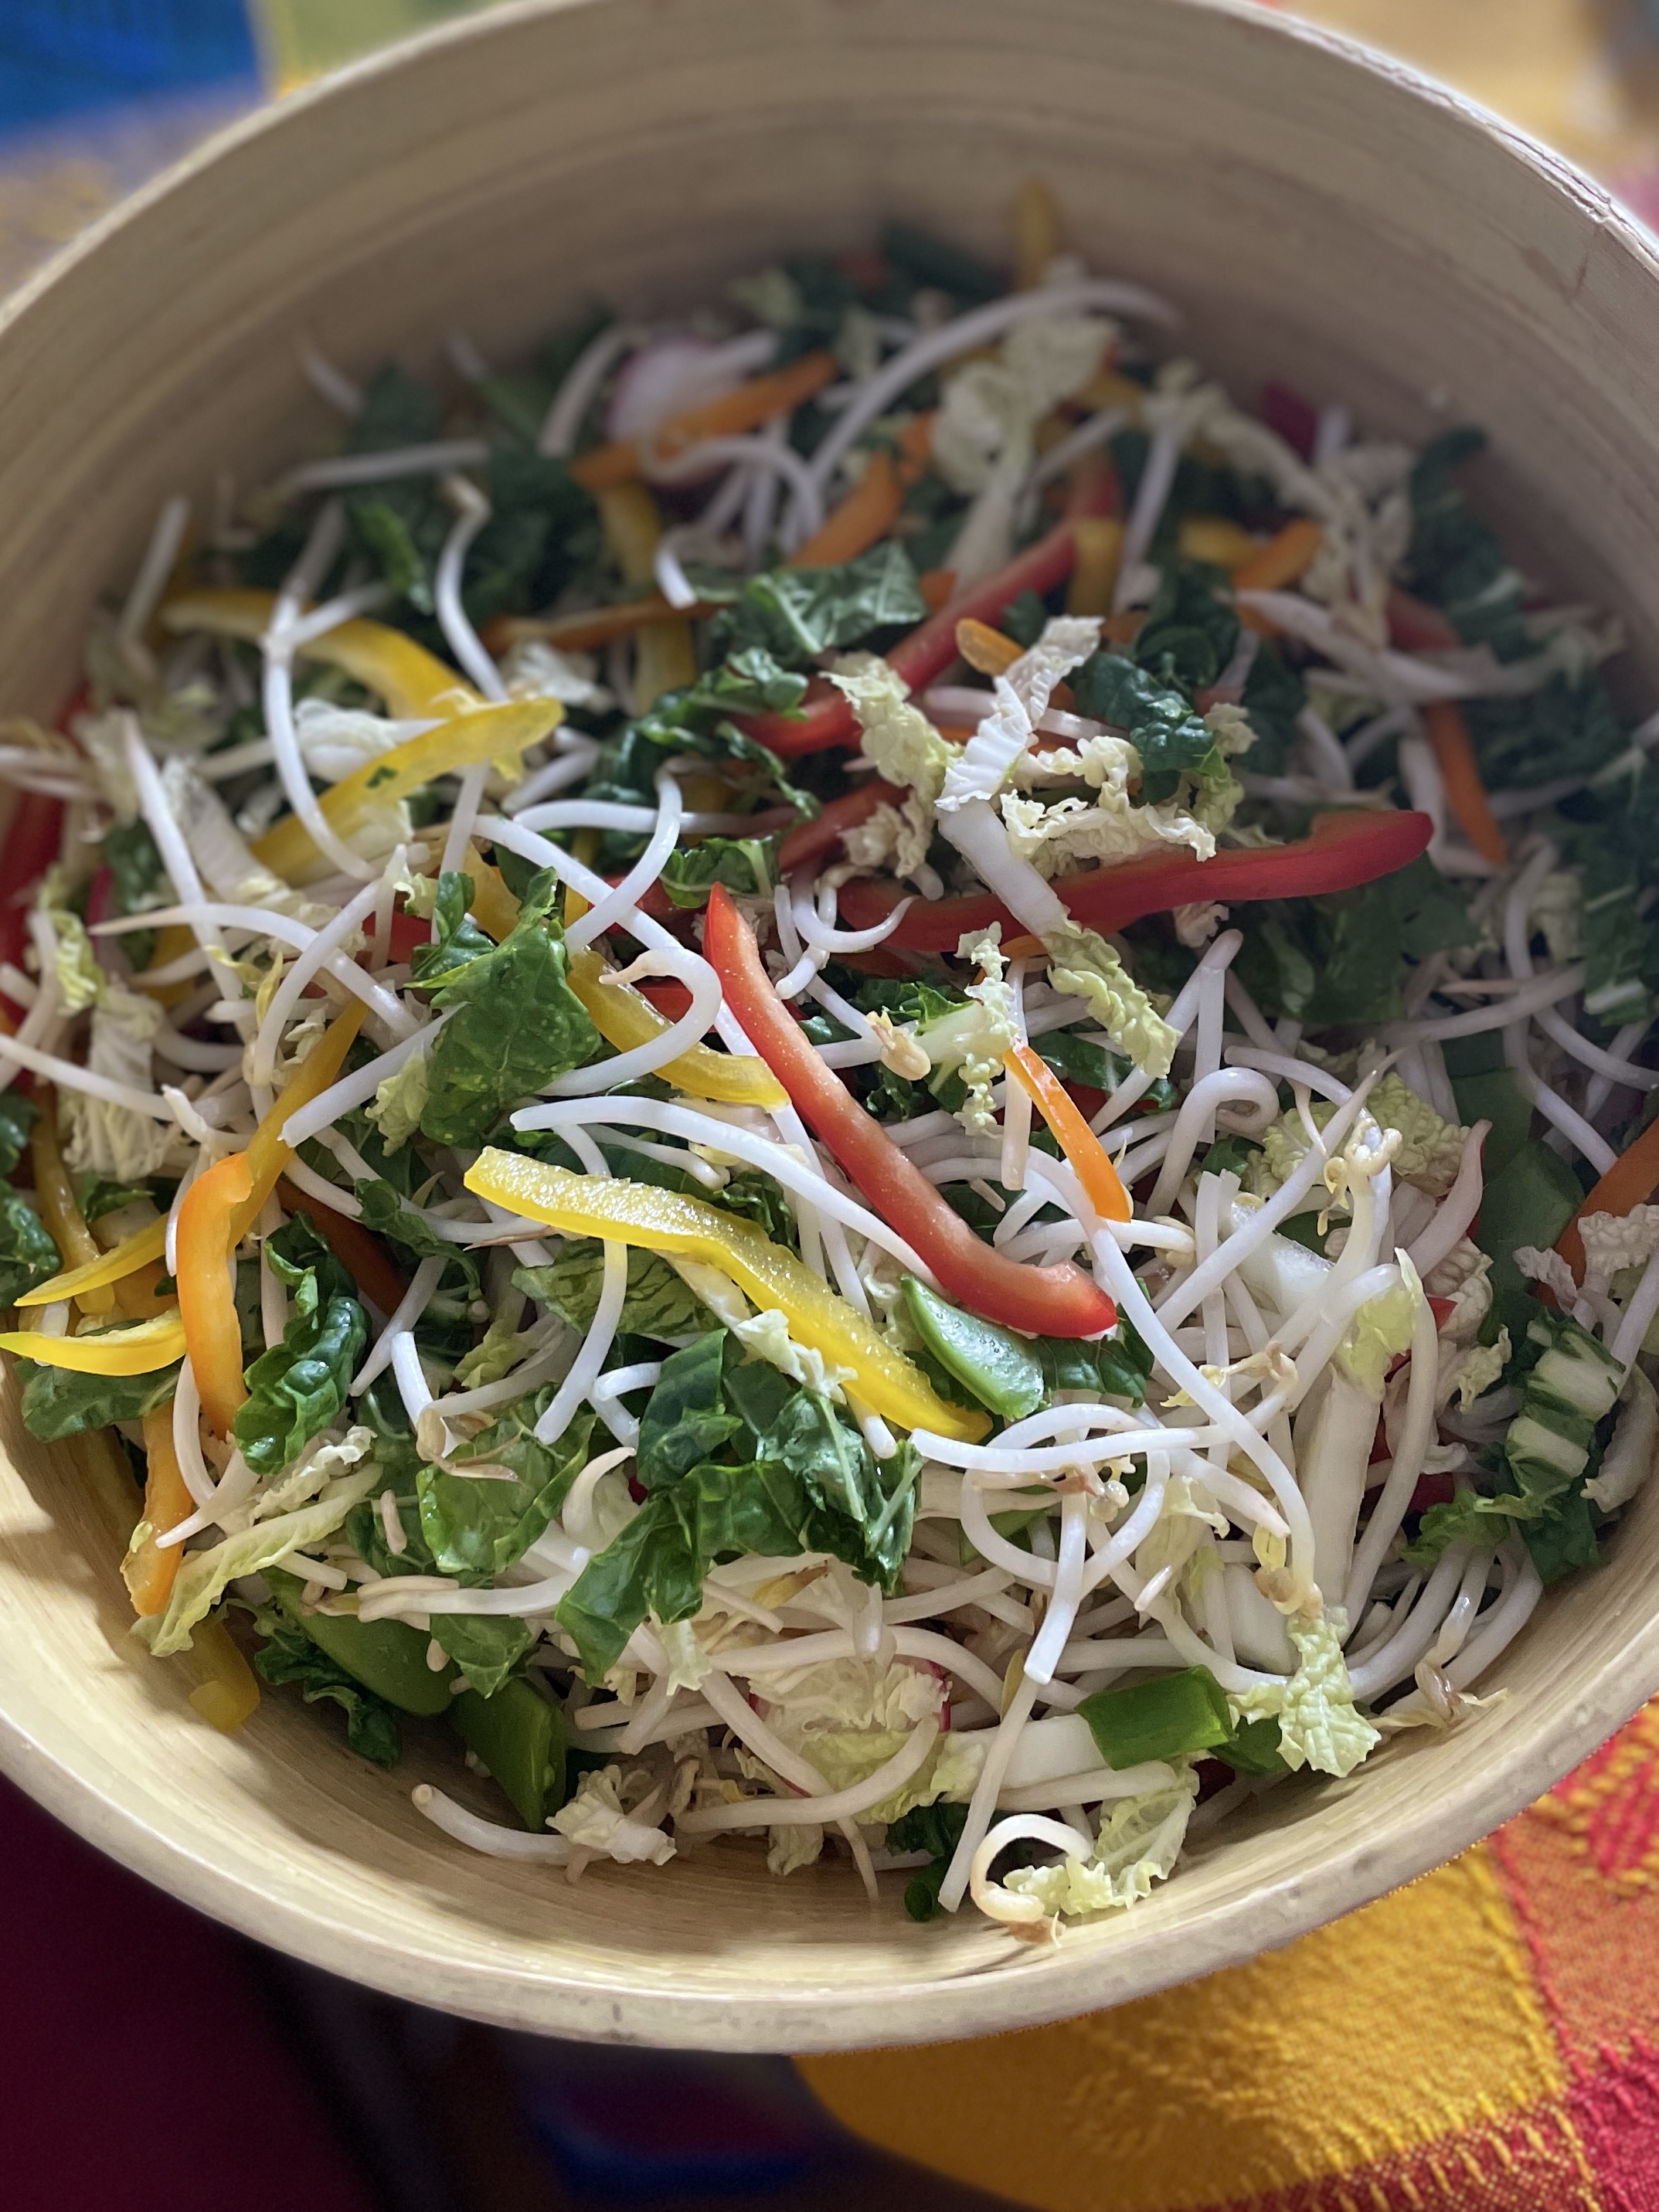
Here are the raw veg – along with the cooked sweet potato noodles. – today was spiral carrots, bean sprouts, pea sprouts and slivered snap peas.
JAPCHAE SAUCE GLUTEN FREE VERSION
3 TBSP GF soy sauce
1 TBSP brown sugar
1/2 TBSP sesame oil
Whisk together until the sugar is dissolved. I added a bit of chili oil for a little kick, but honestly, this was fantastic, and we all loved it.
If you can find gojuchang free of malt barley, then you could just use the original sauce recipe.
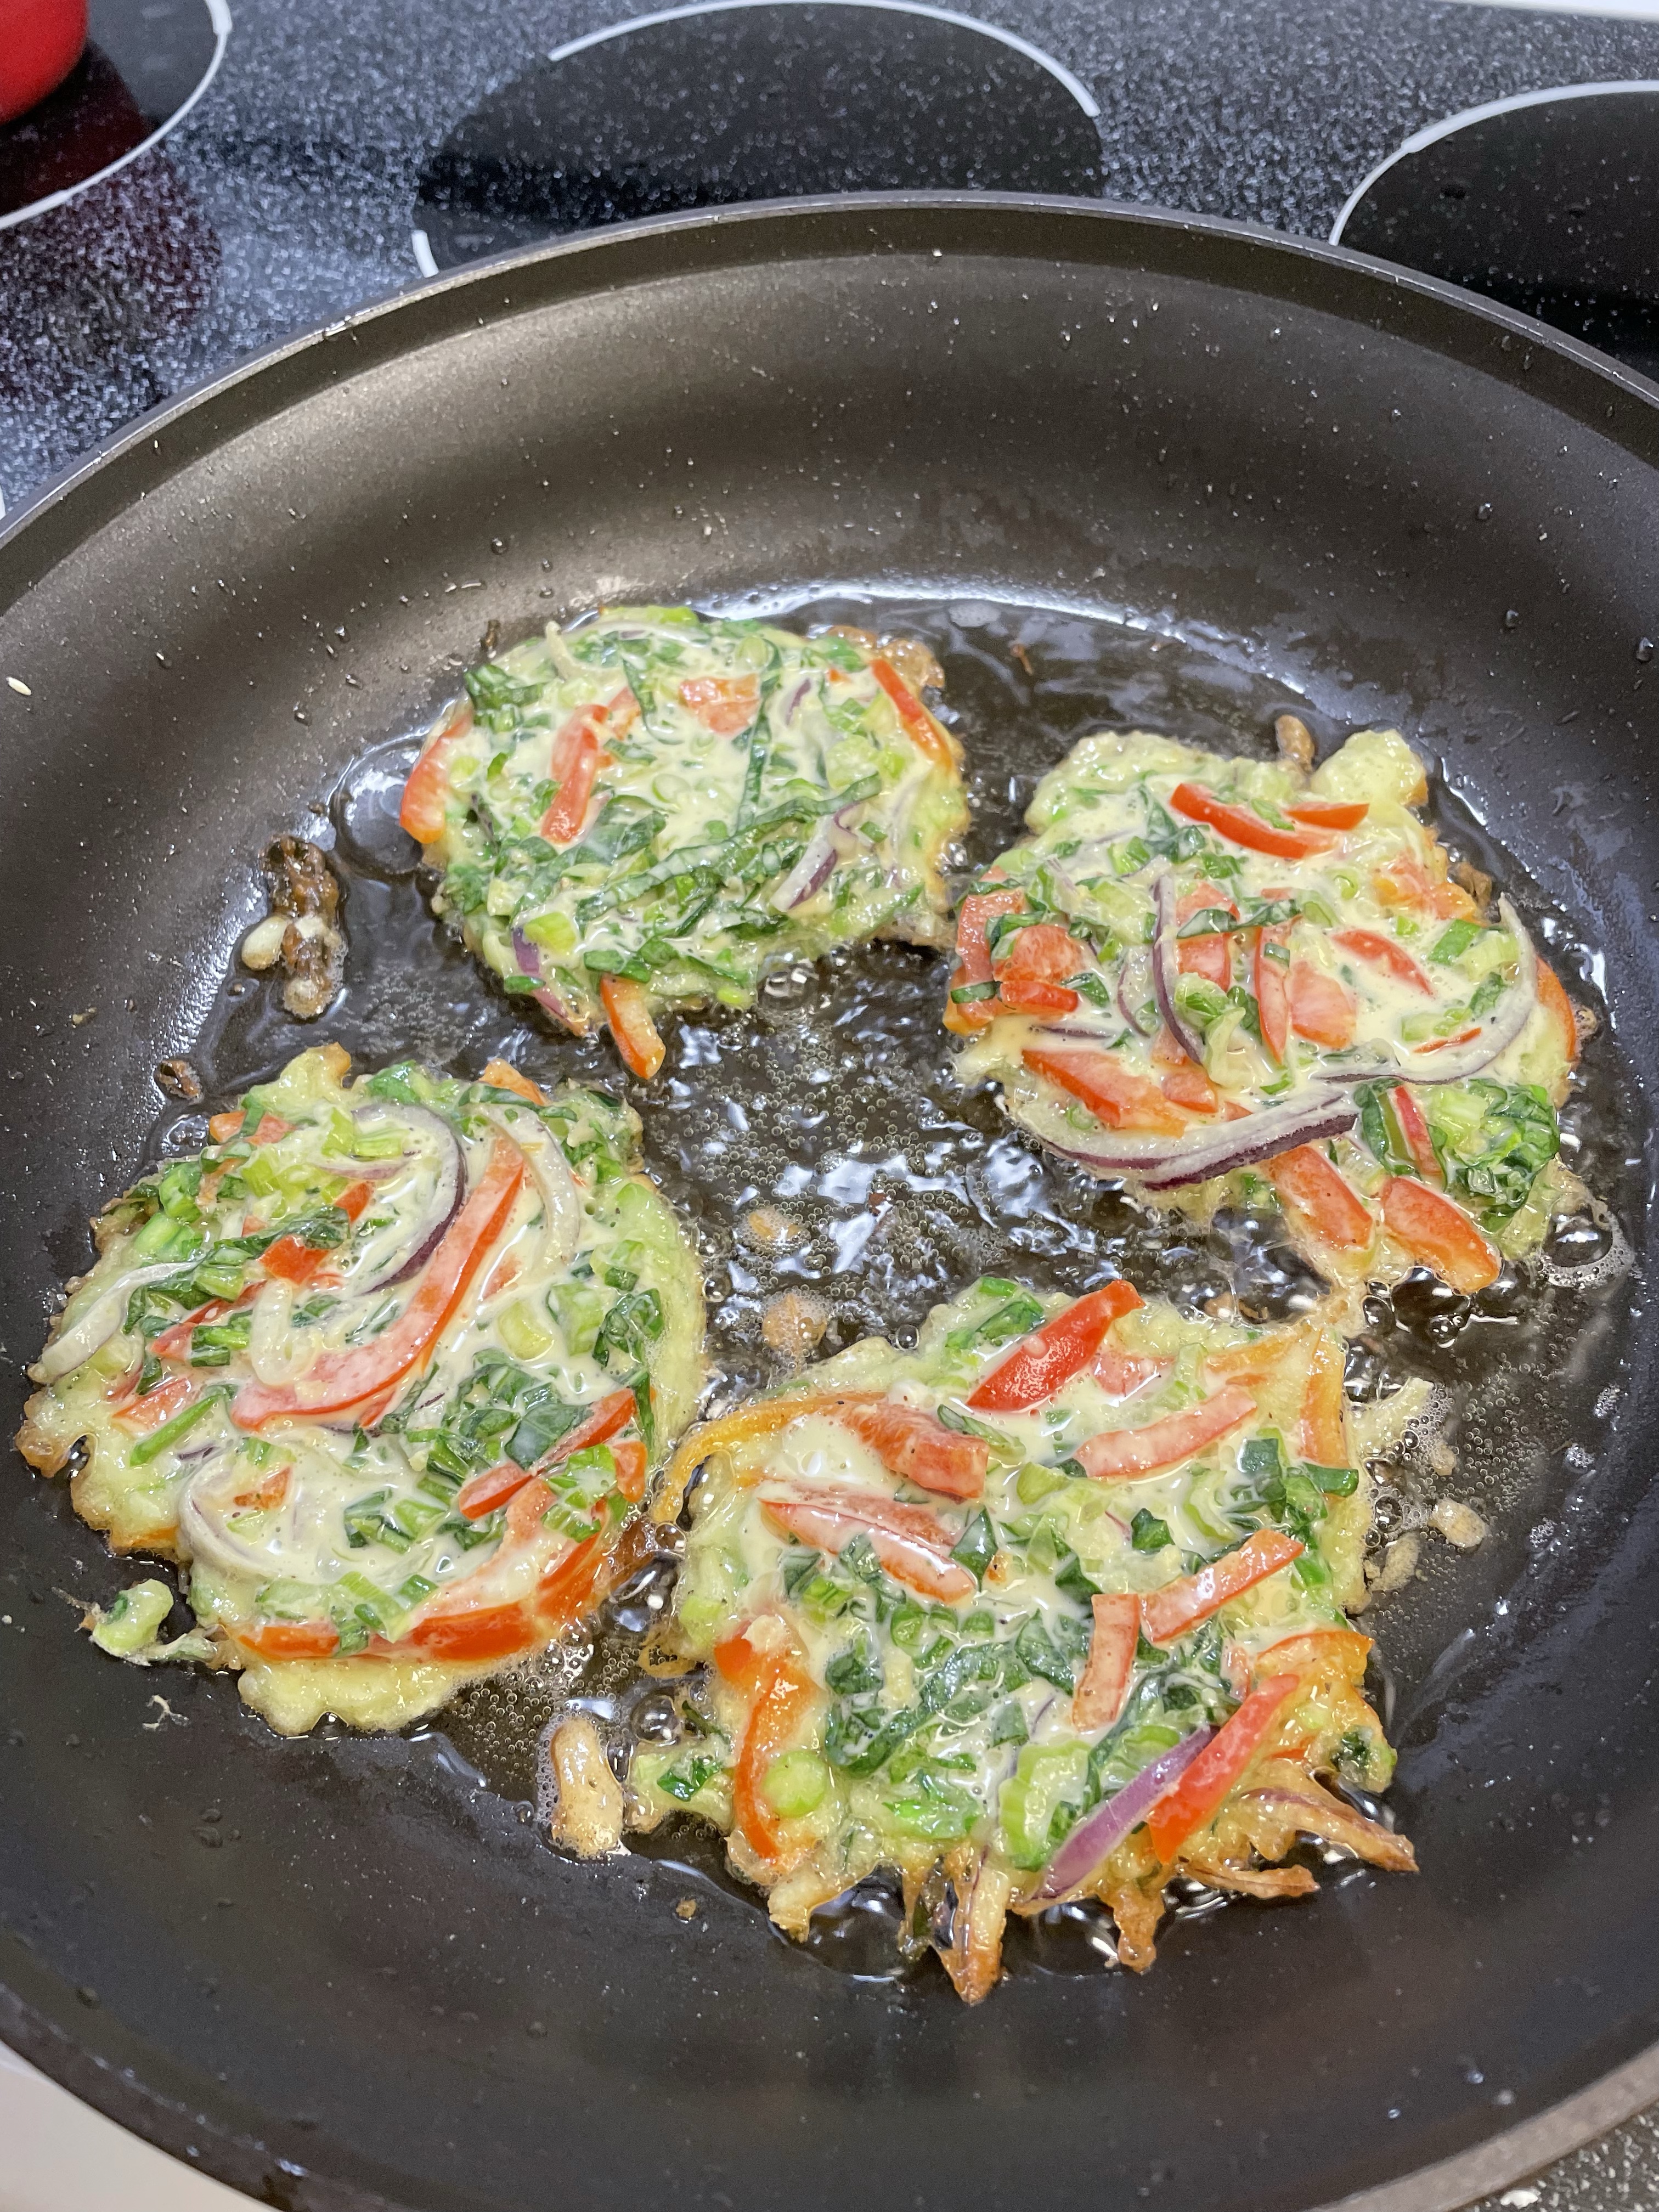
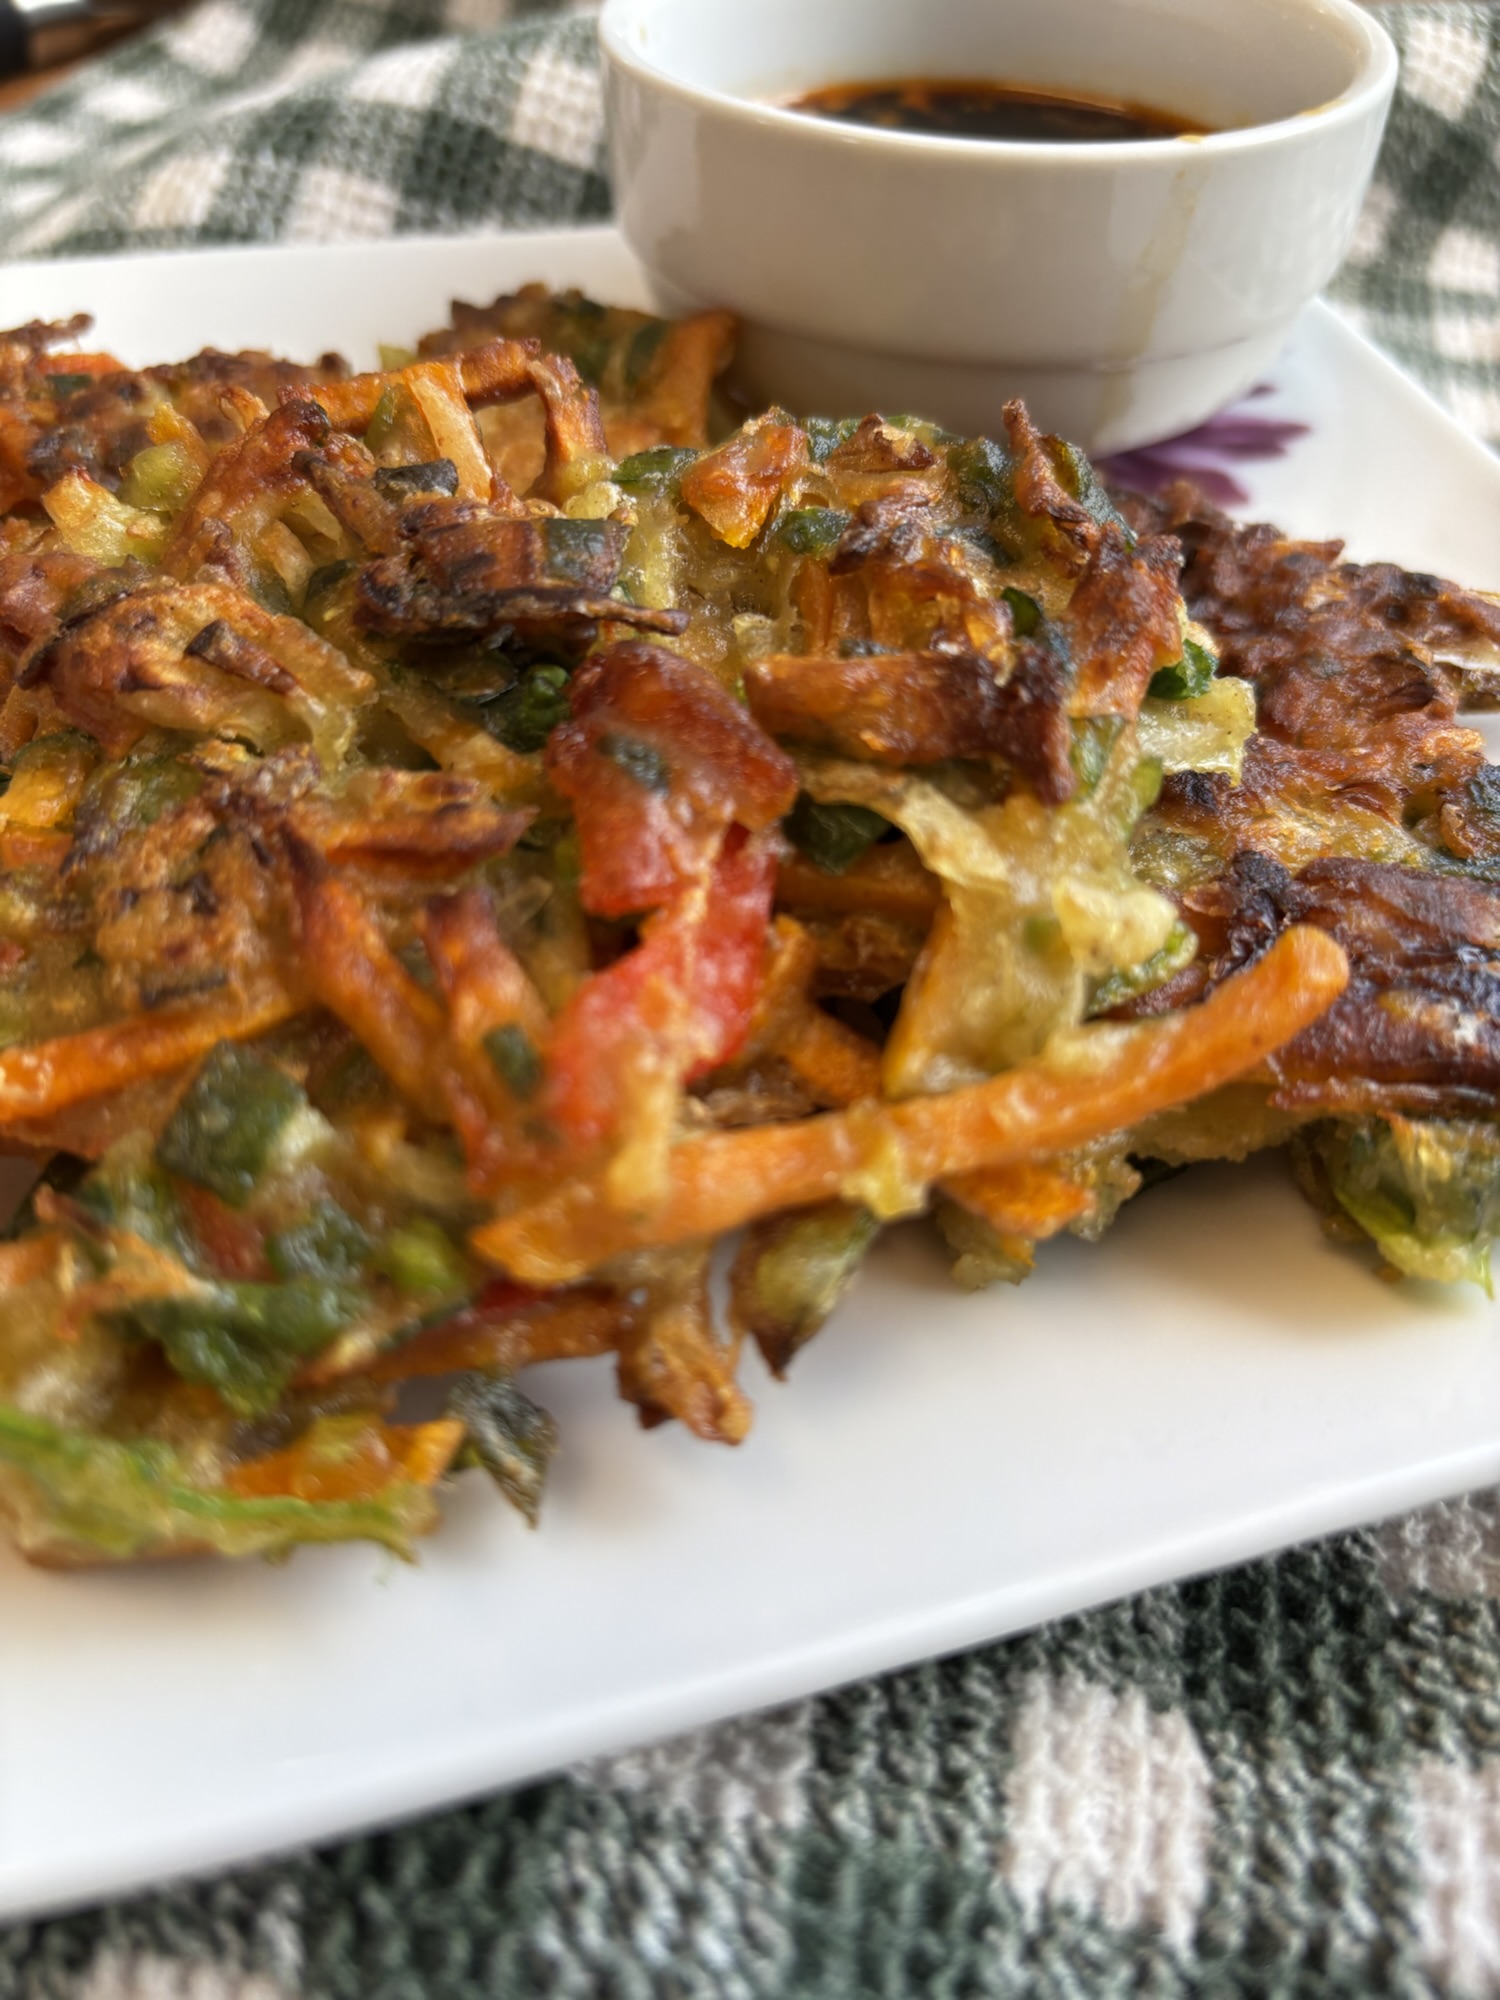
Stella was insistent that I get my recipe for vegetable pancakes on the blog right away so she could make them at home with Hayley! Such a quick, easy and delicious way to have a meal on the table in minutes, these are great for lunch, dinner or snacking. I usually make a pile and they warm up quickly in the toaster oven. They are a bit of a mash up of Korean pajeon, Japanese Okonomiyaki and Chinese scallion pancakes (even a bit like my zucchini fritters!)
I will get a better photo, but Stella didn’t want me to wait, she loved them so much!
1/2 cup all purpose flour (once Stella was diagnosed with celiac, we used Gluten Free Flour)
1/2 cup potato starch or cornstarch
1/2 tsp baking powder
1/2 tsp Chinese 5 spice powder (optional but we liked it)
1 tsp sea salt
1 egg
3/4 cup very cold water ( soda water works great!)
4-6 cups very thinly sliced or julienned vegetables
oil for frying
Whisk dry ingredients together, then stir in egg and water. Add in all your vegetables and stir just to combine. You only need enough batter to hold the vegetables together.
Preheat oven to 300 to keep the pancakes warm as you cook them.
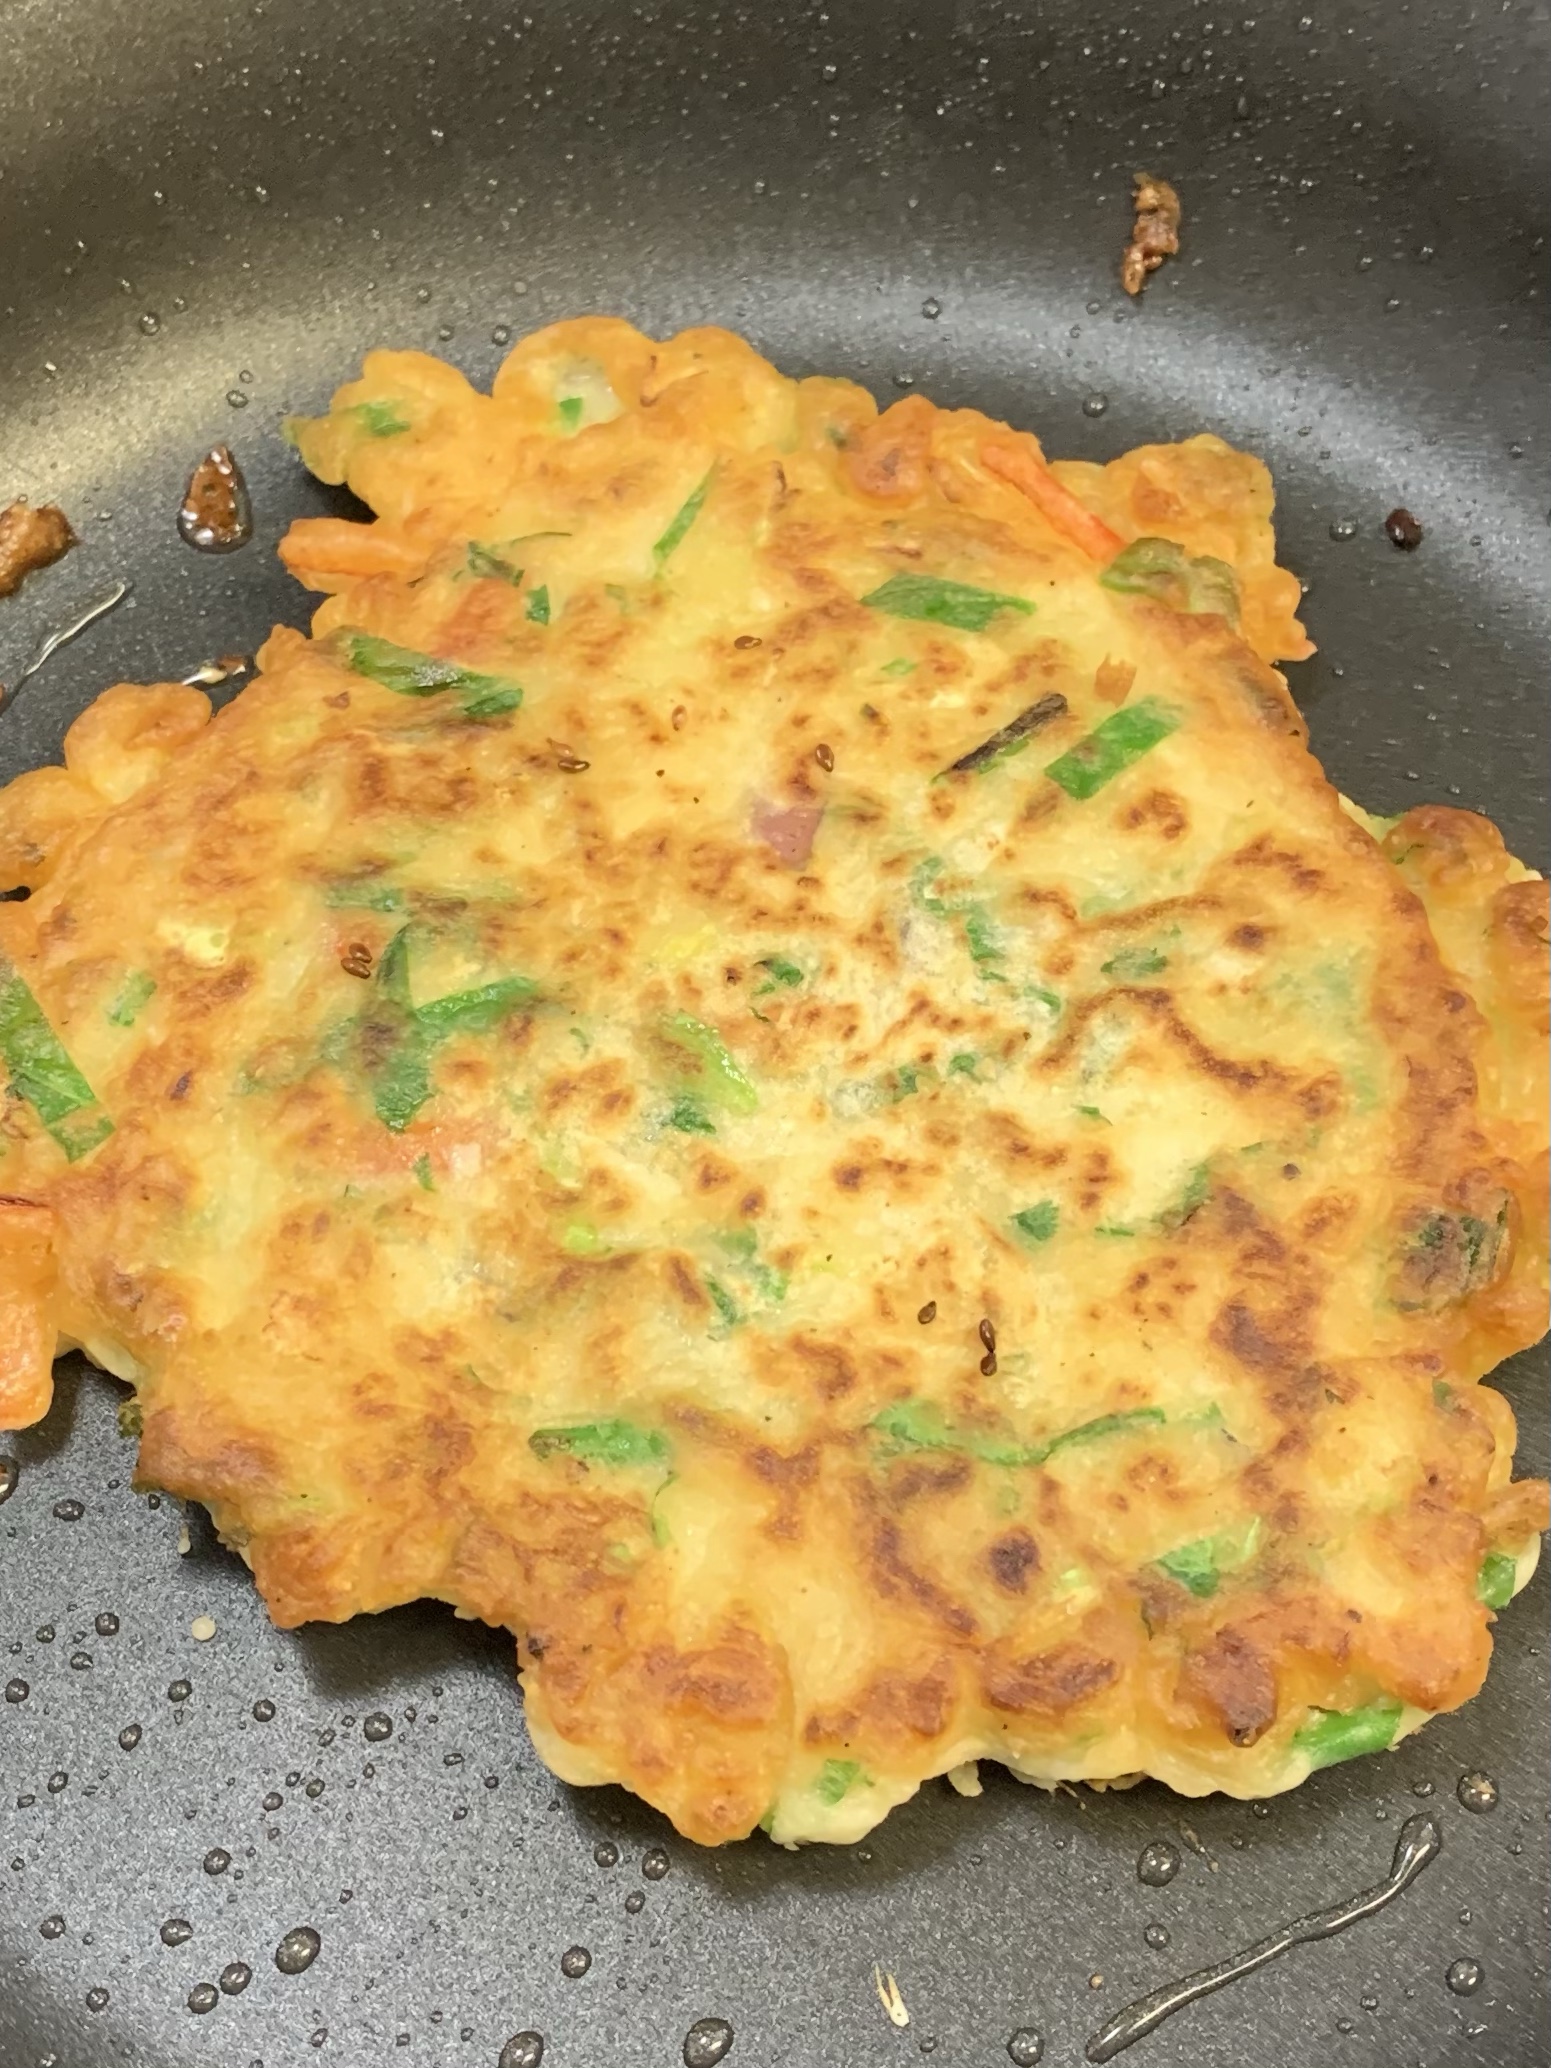
Heat oil in frying pan, and drop in 1/4 cup amounts, flattening them out slightly. Cook for 3-5 minutes on each side until golden brown and crispy. You will have to do this in batches, so keep them warm in a 300 oven until you have them all fried. Don’t crowd the pan or they will steam rather than fry.
I first tried this recipe as Korean pancakes, adding some chopped kimchi as well as a bit of the juice, but ended up using it for many different vegetables.
Serve with dipping sauce:
1/4 cup soya sauce
1-2 tbsp rice vinegar
1/2 tsp sesame oil (I like toasted)
1/2 tsp sugar
1/2 tsp hot sauce or chili crisp (such as sriracha)
Stir together and set aside for service. Taste and adjust for your personal preference.
Use whatever vegetables you have in your fridge! It really is a fridge clean out in the best possible way.Okay, so i have more than 4 cups vegetables … ha ha … you only need enough batter to hold it all together!Make sure you don’t crowd the pan – it takes very little oil.Flip when nice and crispy, and a golden brown.These ones had fresh shrimp and lots of chives.Another day, another batchThis time we used very little batter – mostly veg!
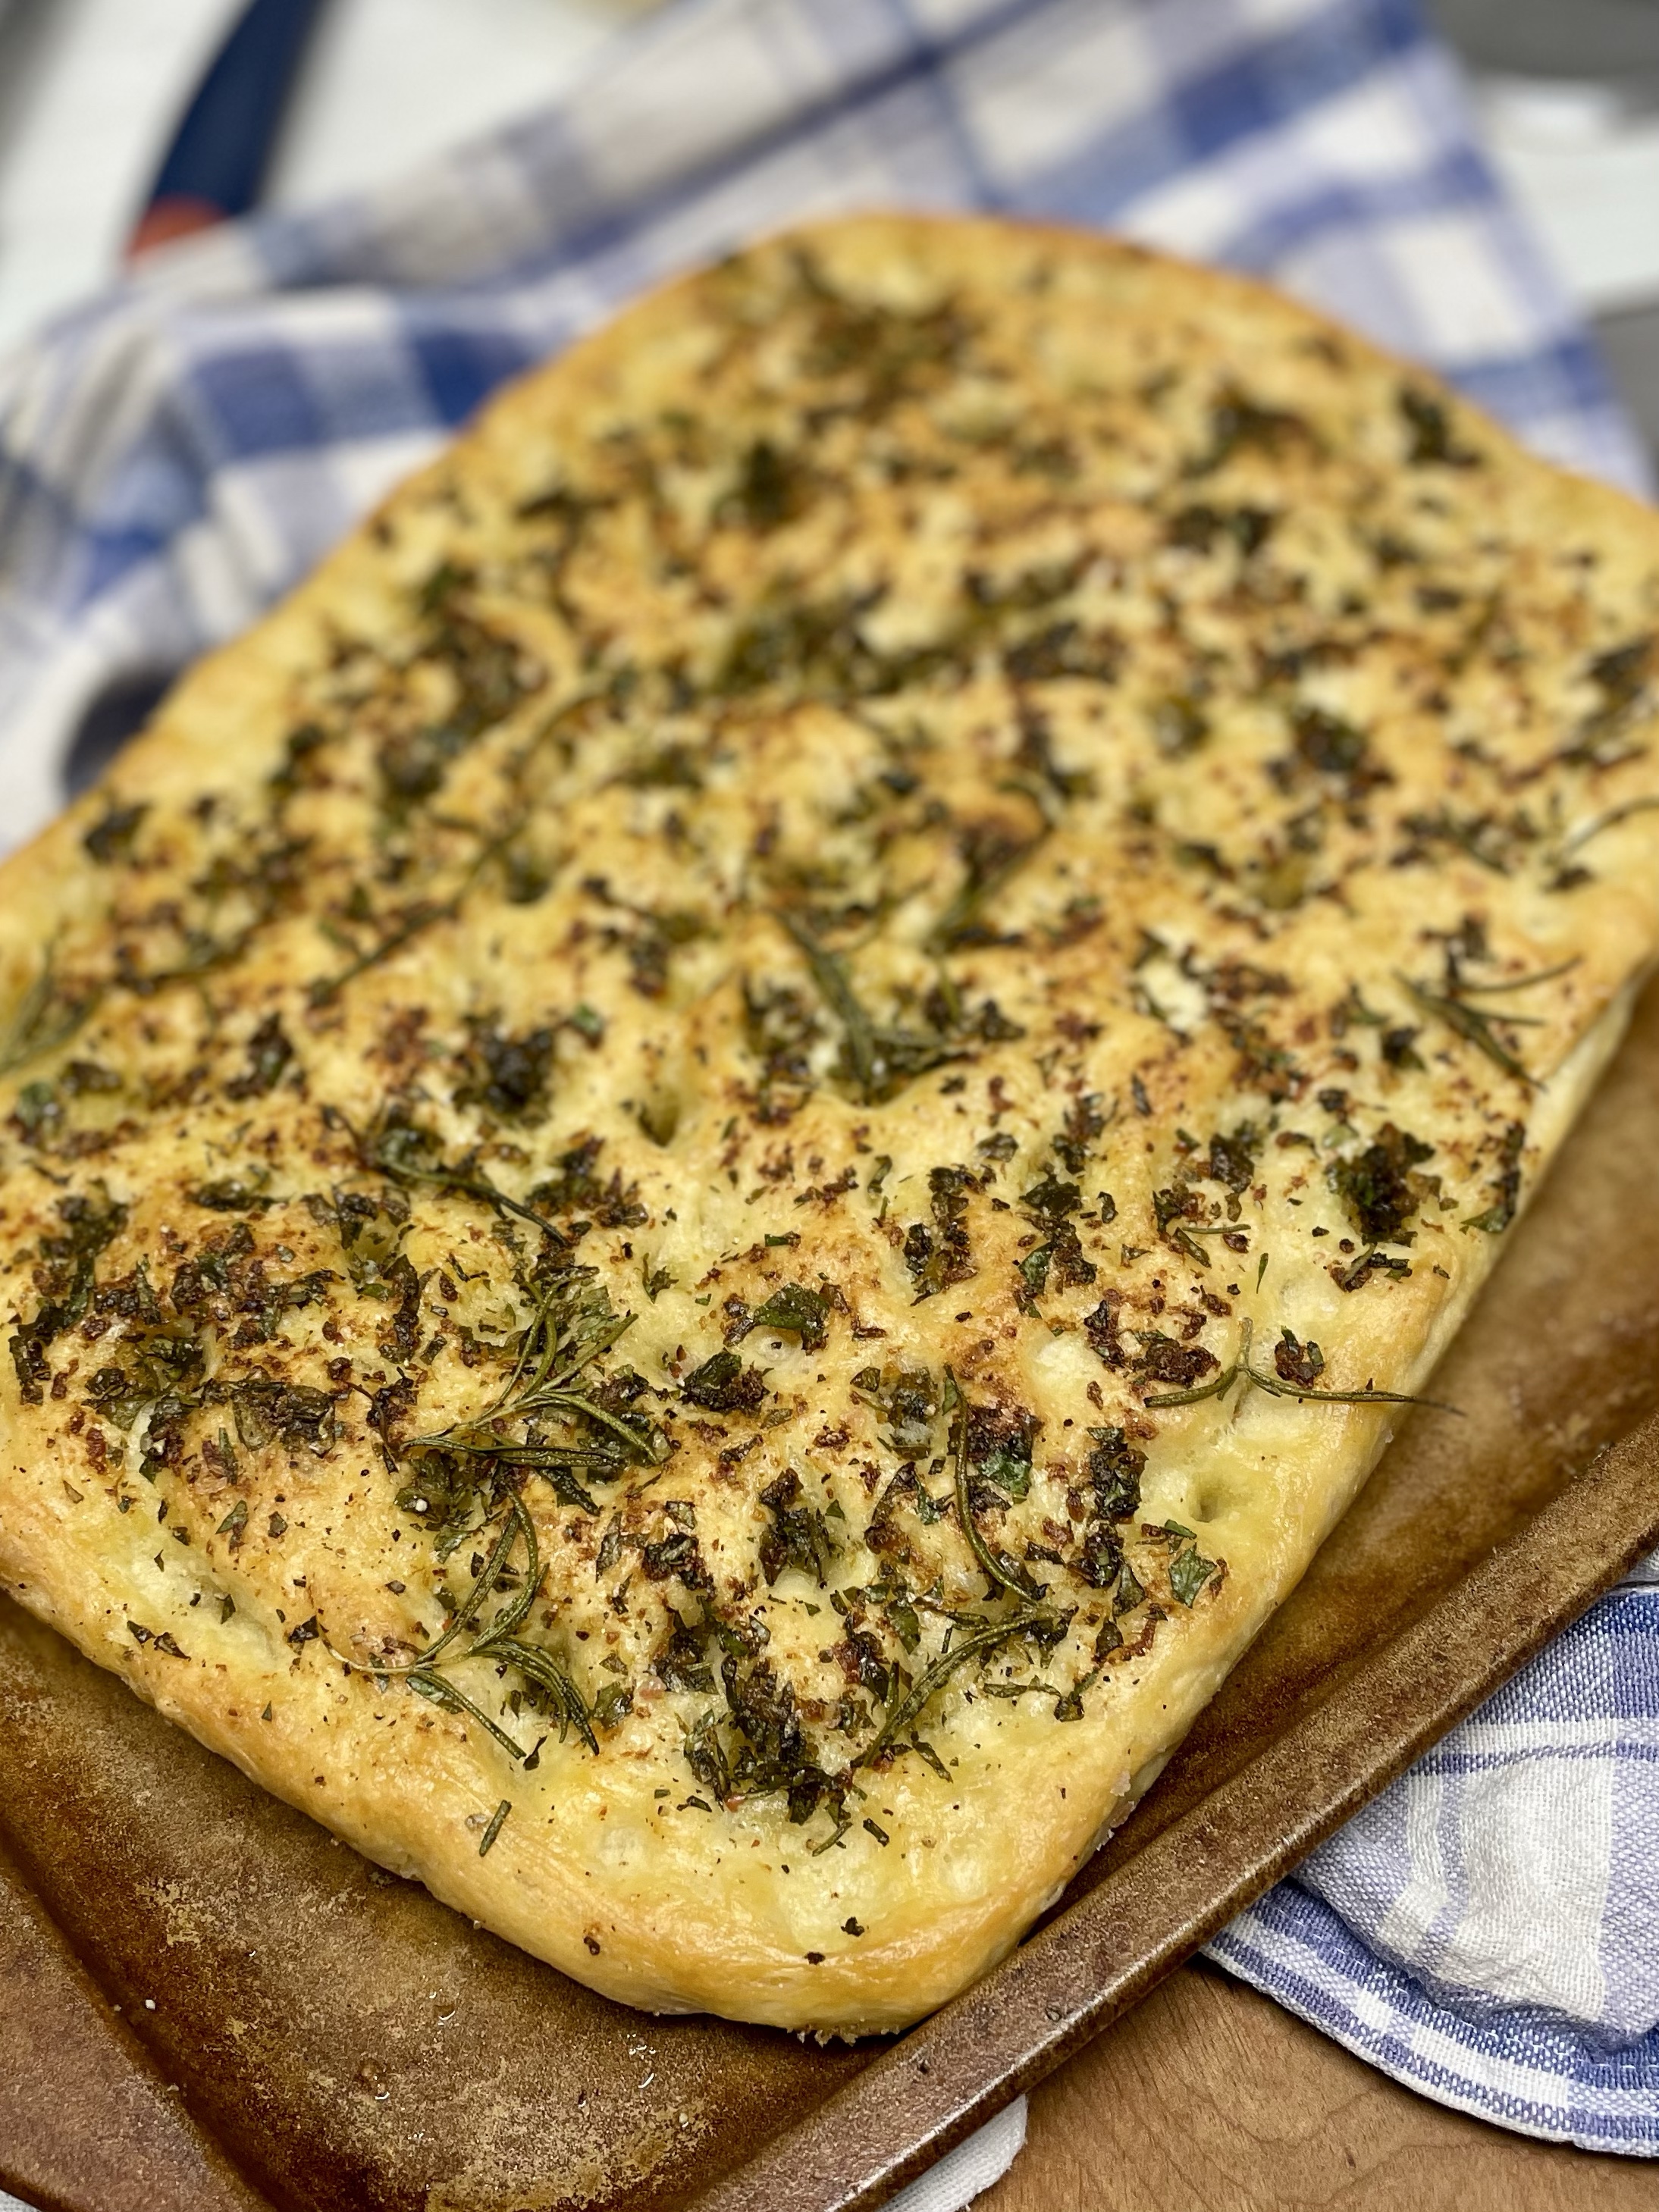
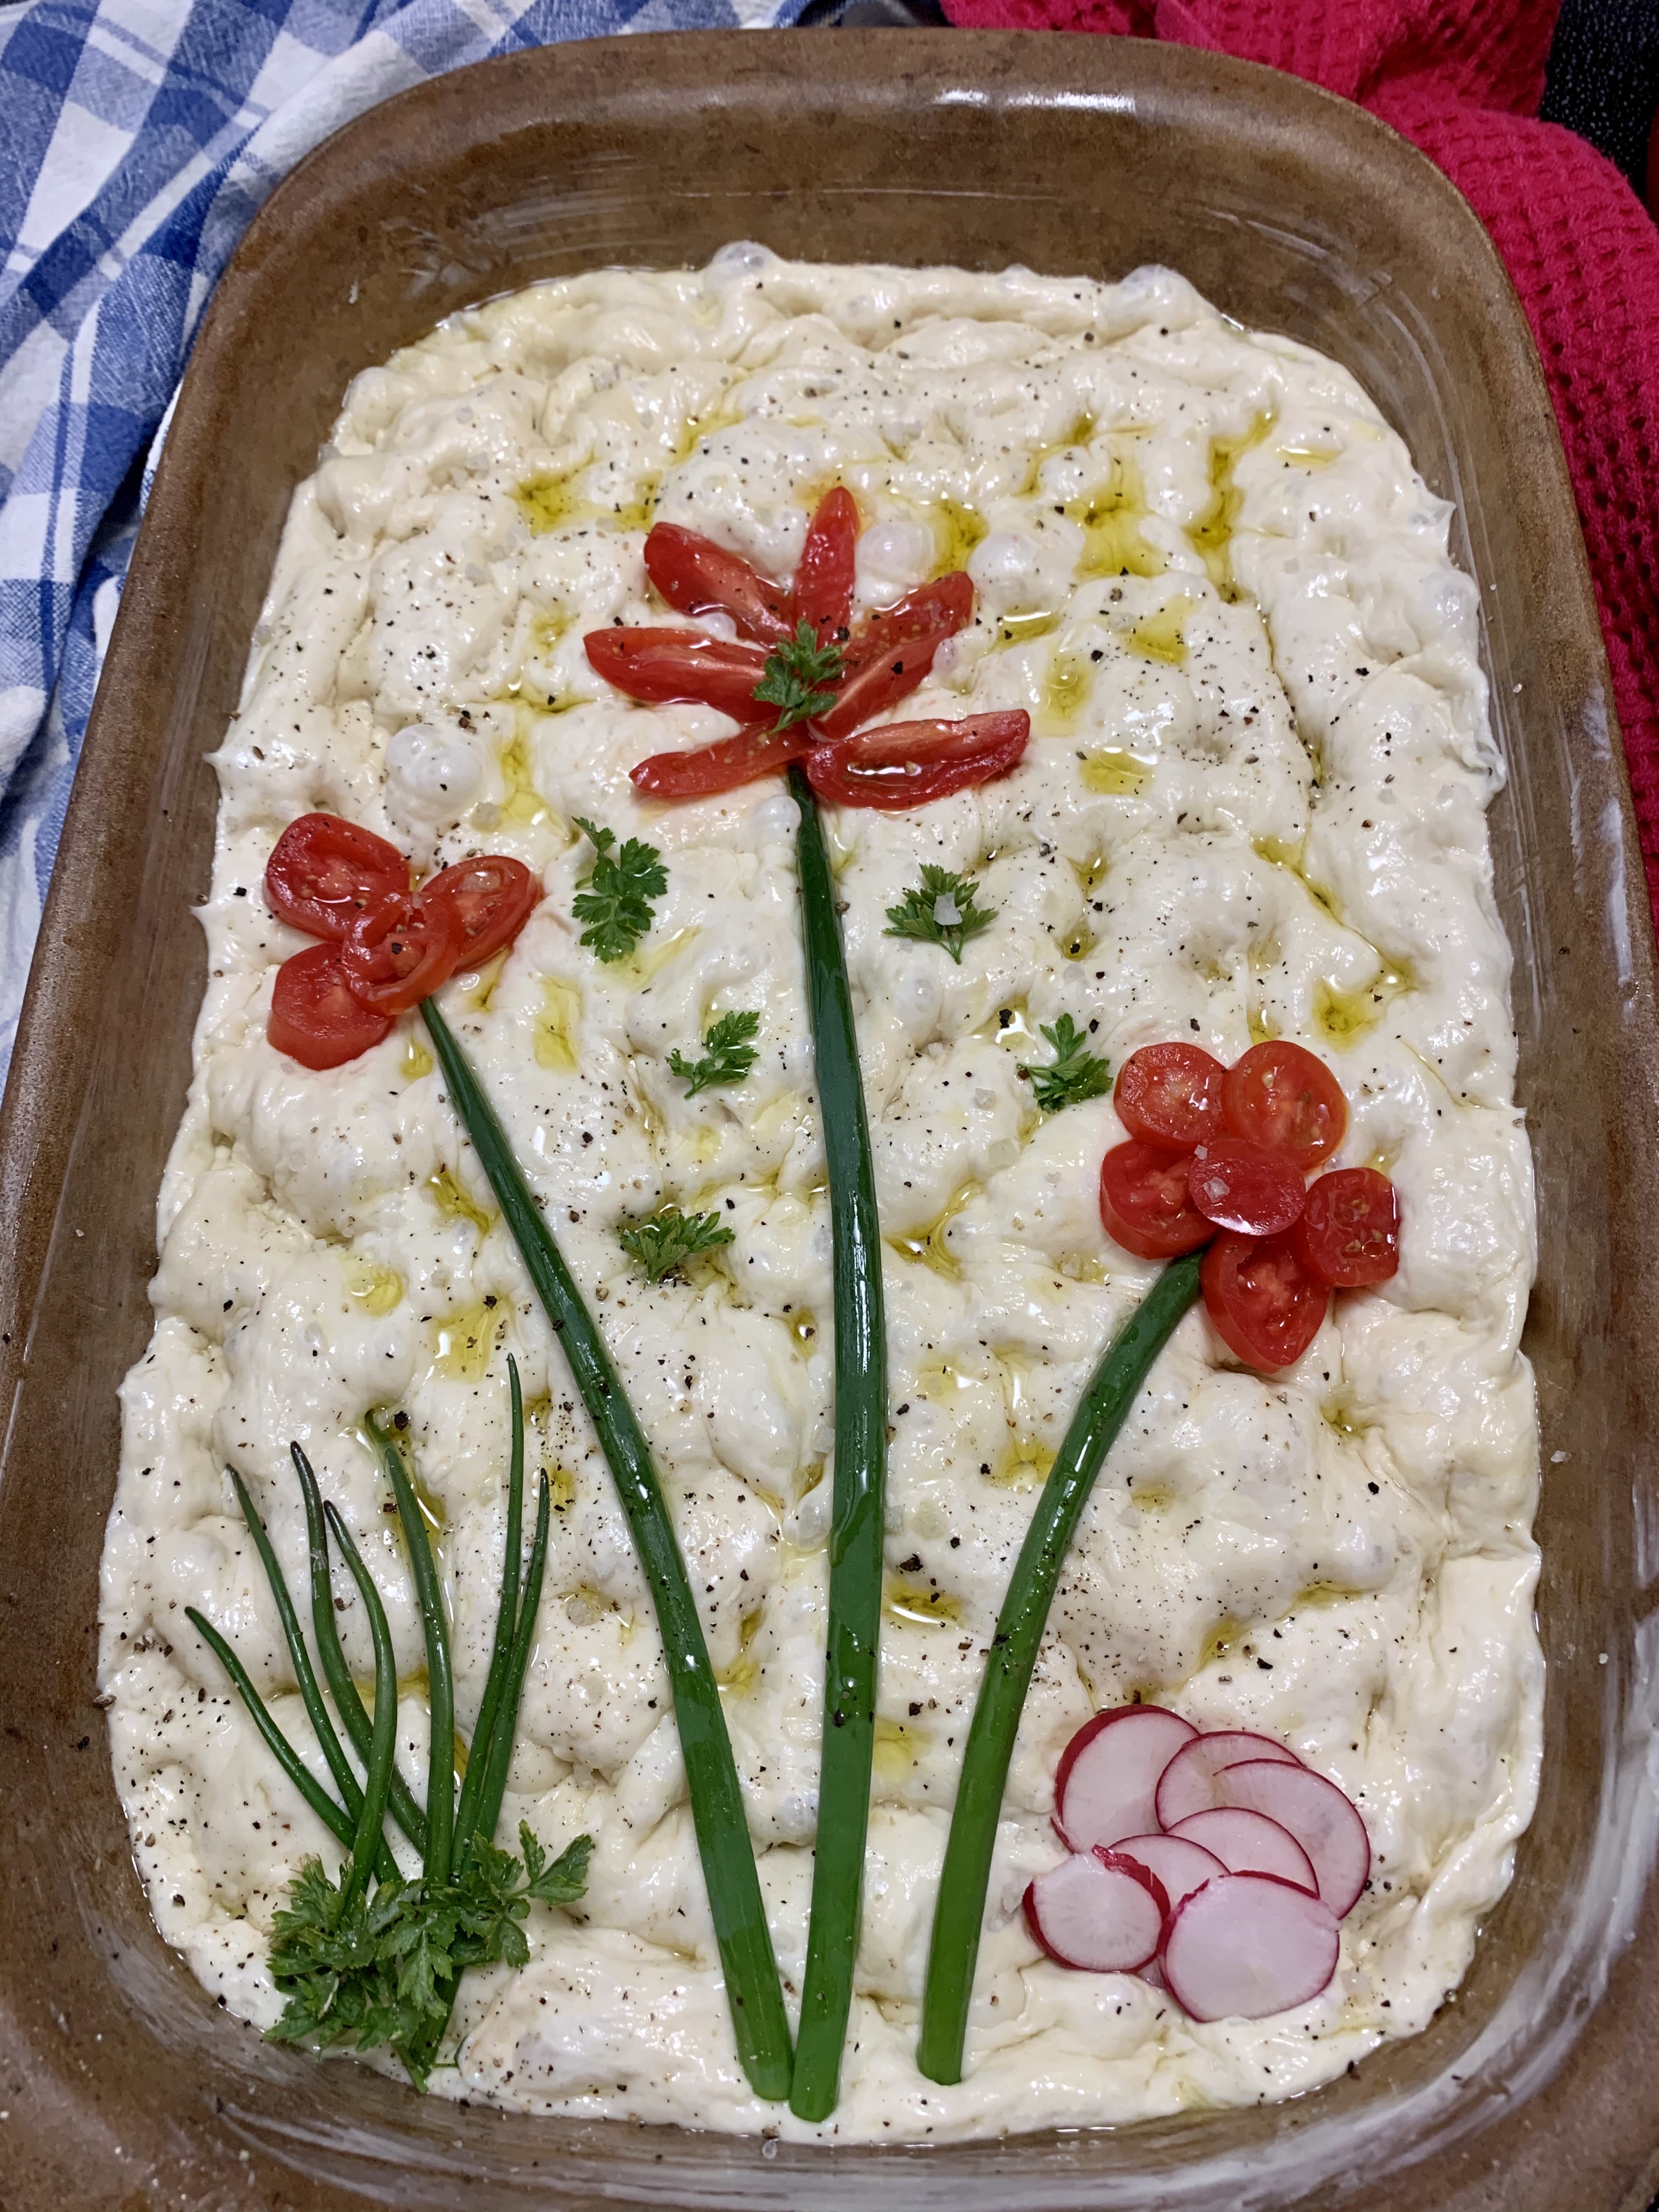
There is something about making breads that just feels like a win. Focaccia always does that! The very best focaccia recipes allow for the dough to rest anywhere from hours to days. If you are like me, some days you are driving home from work thinking focaccia would really boost dinner TODAY. Not 3 days from now. This recipe is for those days. If you’ve got a little over an hour, you’ve got enough time to pull this off – and trust me, it’s easy. No intensive kneading or stand mixer necessary!
2 Tbsoolive oil
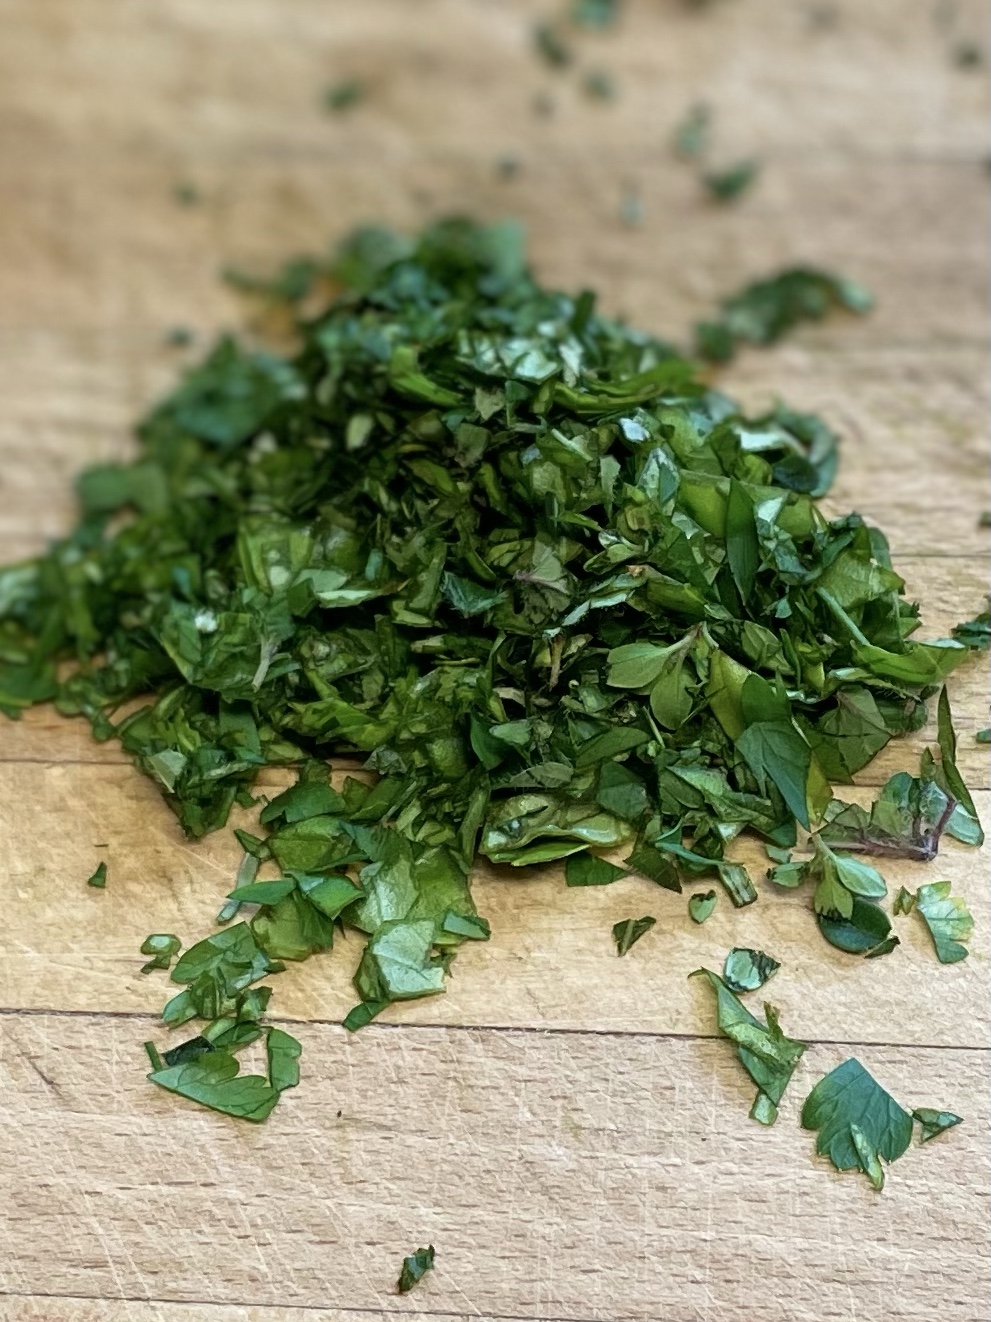
2 Tbspfresh herbs – I used basil, parsley, rosemary, oregano and thyme. minced
Mix well and if it looks a little herb heavy, add a bit more olive oil. Set aside.
3/4cupwarm water (the perfect temperature for blooming yeast is between 105-115)
2 1/4tspdry active yeast (1 pack)
1/2tspsugar
2cupsall purpose flour
1tspsalt
1Tbspolive oil
Top with flaky sea salt and more fresh rosemary.
INSTRUCTIONS
Proof yeast and sugar in 3/4 cup warm water – 105-115 degrees F until foamy and active.
In a bowl, combine flour, salt.
Add in yeast mixture & olive oil, and mix to get it all together. You may need to add a couple tablespoons more warm water. You want this to be slightly sticky.
Cover and allow dough to rise for around 30 minutes. The time isn’t as important as that you need to let the dough to pretty much double in size.
Add 1 -2 tbsp olive oil into small baking vessel – either 9 x 7 inch sheet pan, or this also works well in an 8 x 8 square baking pan. You want a fair bit of oil here, rub it all around the sides of the pan as well.
Add dough and stretch to fit pan, if dough springs back, let it sit, covered, for 5 minutes and try again. The rest helps the gluten to relax.
Once dough has been stretched enough to fit the baking sheet, allow to rest (covered) for 30 minutes. Honestly, do whatever time you have – I find this to be fairly forgiving.
Dampen your fingers and dimple the dough like you are playing a piano.
Drizzle herbed olive oil over dimpled dough and allow it to fill in the dimples, I like to be generous with the herb oil mixture.
Sprinkle on some flaky sea salt and more fresh rosemary that isn’t all minced up.
Bake for 15 – 20 minutes or until golden brown.
Once out of the oven, allow to rest on a cooling rack to keep the bottom crusty as well.
So many ways you can serve this;
Use it as an appetizer with a charcuterie board
Fresh out of the oven with simple oil and vinegar
Try it with your best olive oil and my dukka recipe, (If you’ve never tried dukka you are in for a treat!)
Completes a soup or salad meal
It’s October and this is what my herb garden still looks like! Ready to go, and this herby oil smells so fresh – today I added in some roasted garlic.Ready for the oven – love the way those little dimples fill up, I think those pockets of oil help crisp up the top.You just know how good your house smells – it’s ready to dunk in your soup.
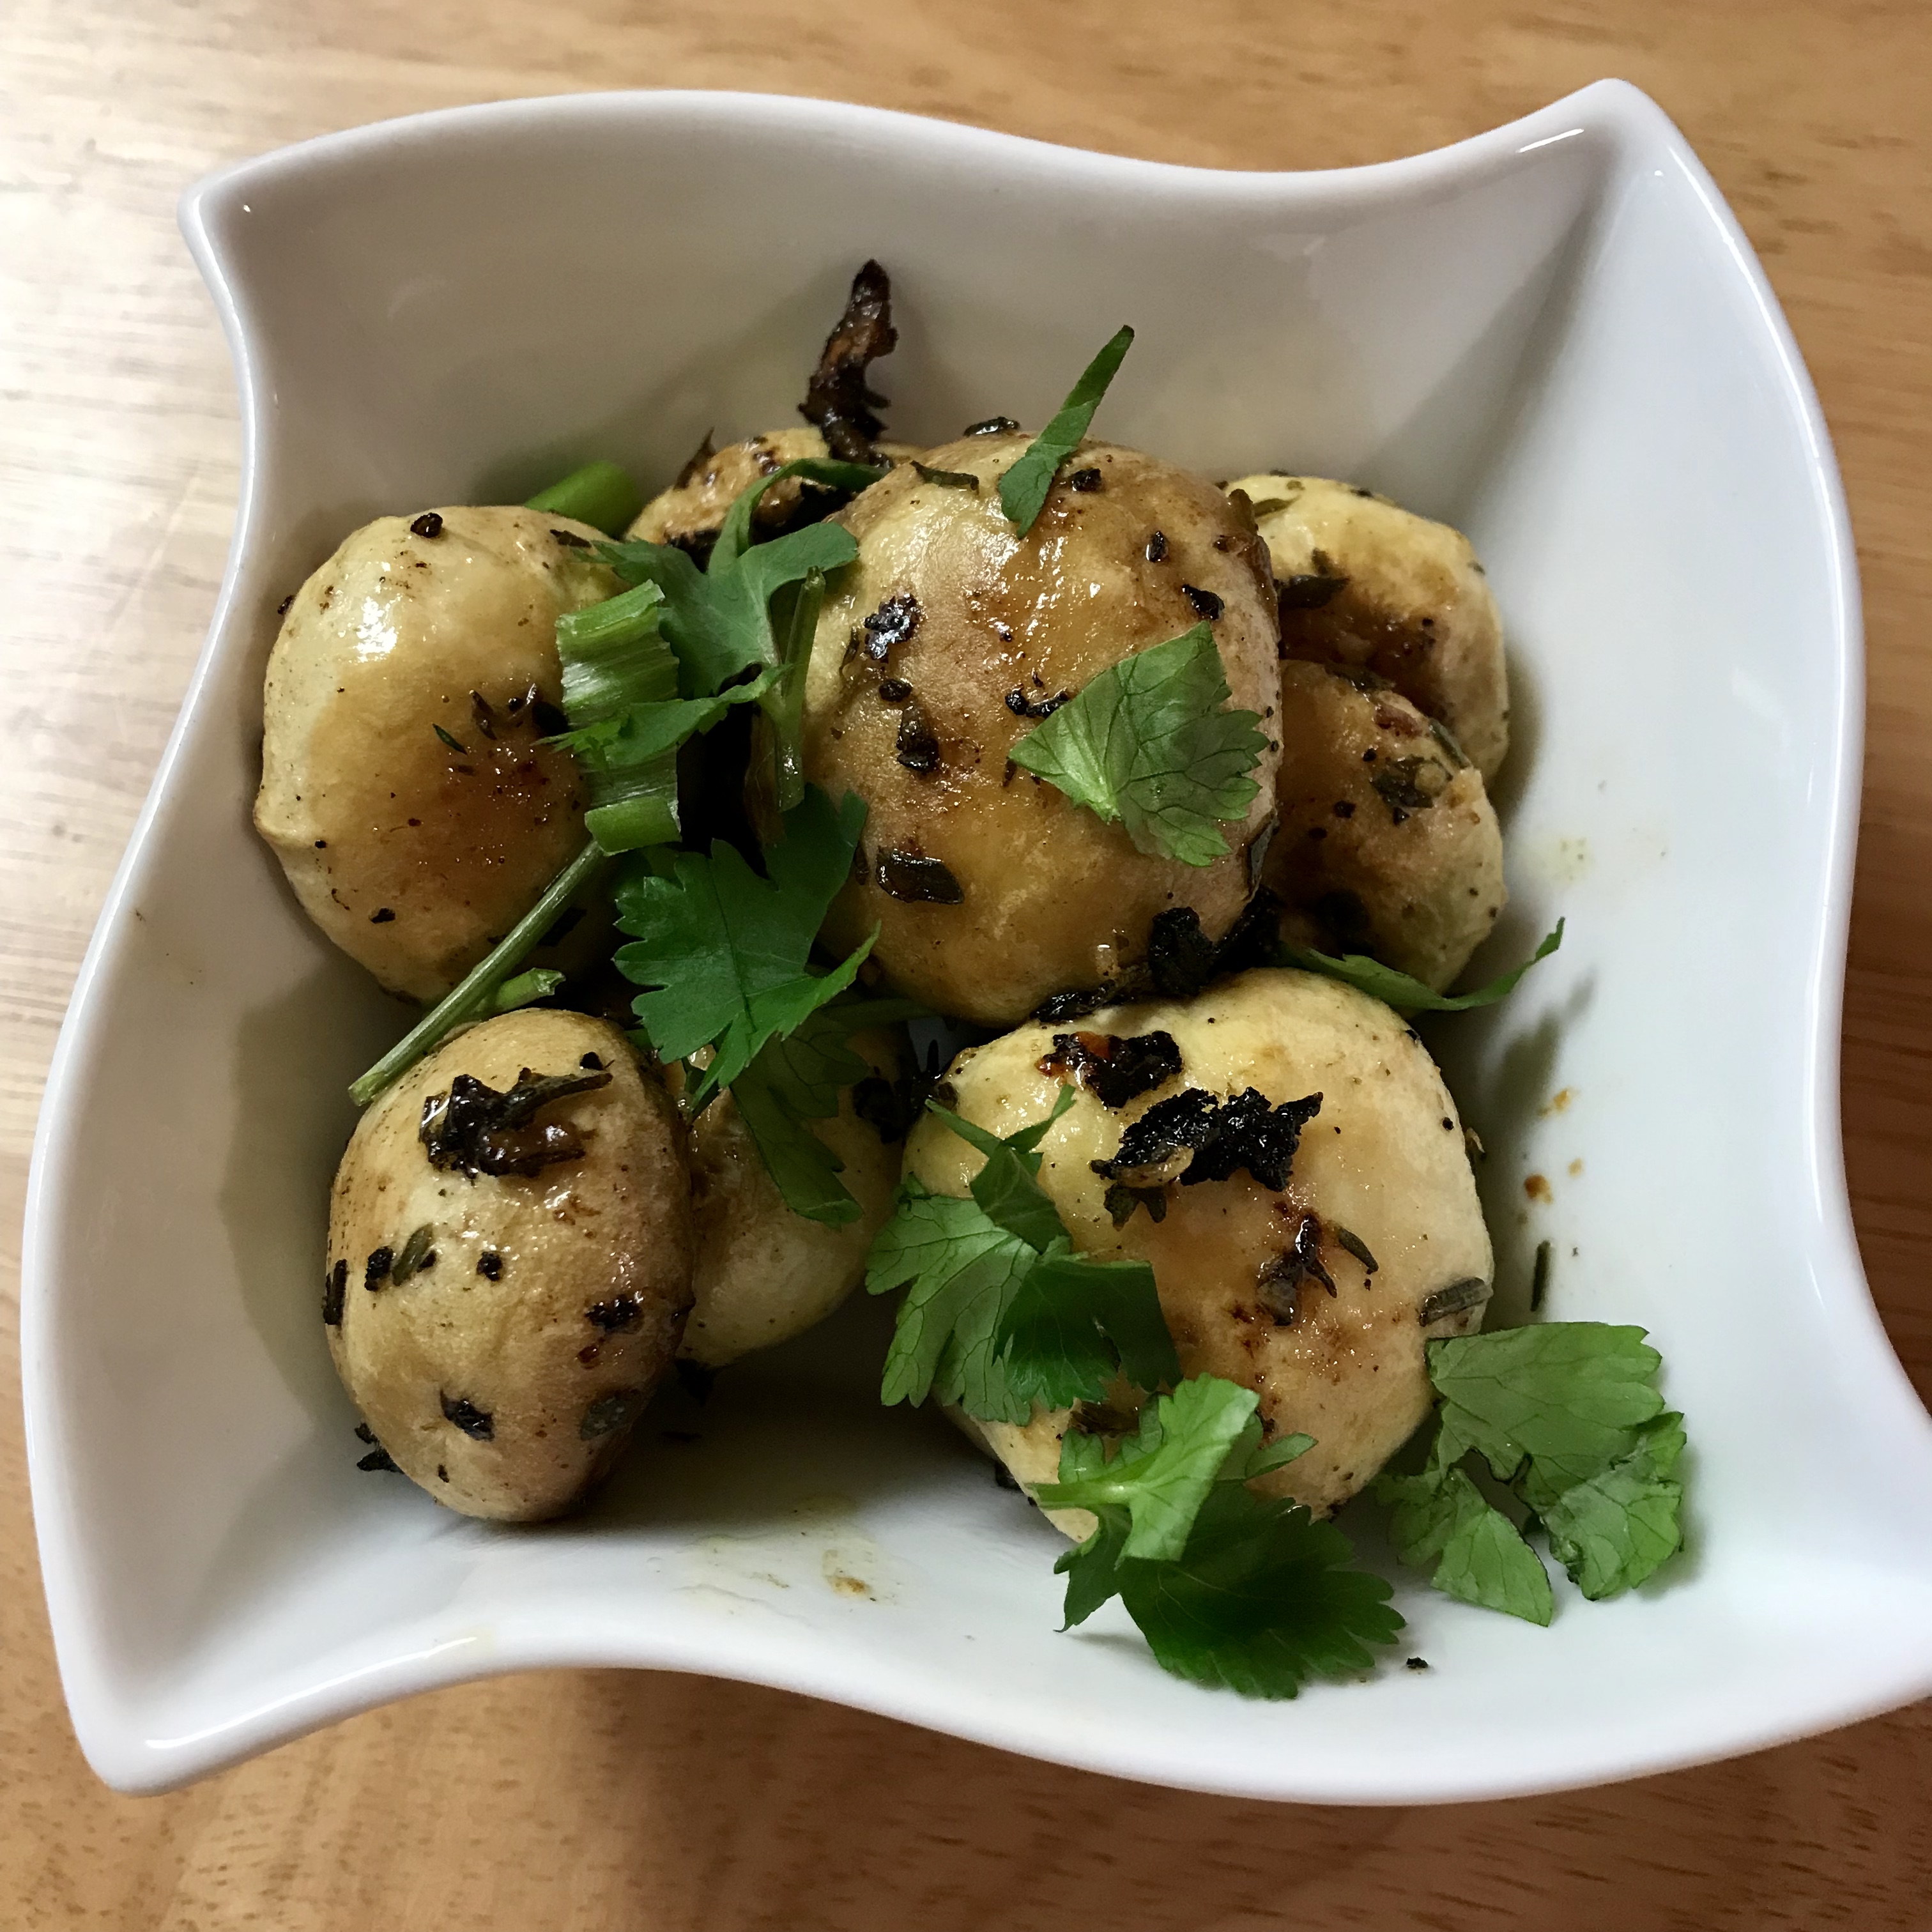
I can’t pretend to be humble when it comes to my cooking, but these naan impressed me more than I usually impress myself! The dough is very pillowy soft and tender, they were so delicious I pulled six out of the oven and they were inhaled.
This is the kind of thing you do when you have a little time on your hands, not necessarily because they are so much work, but it is important to give the dough time to rise and develop that light texture you want in a naan.
NAAN
1 tsp dry active yeast
2 tsp sugar (separated)
3/4 cup lukewarm water (around 100* )
2 cups all purpose flour
1 tsp fine sea salt
1/8 tsp baking powder
1/2 tsp garlic powder
1 tsp dry herbs
2 tbsp olive oil
3 tbsp plain yogurt
In a large glass, dissolve 1 tsp sugar in the warm water and sprinkle in the yeast. Let sit for 10 minutes until it is foamy.
In a large bowl stir together the flour, salt, remaining 1 tsp sugar, baking powder, garlic powder and herbs.
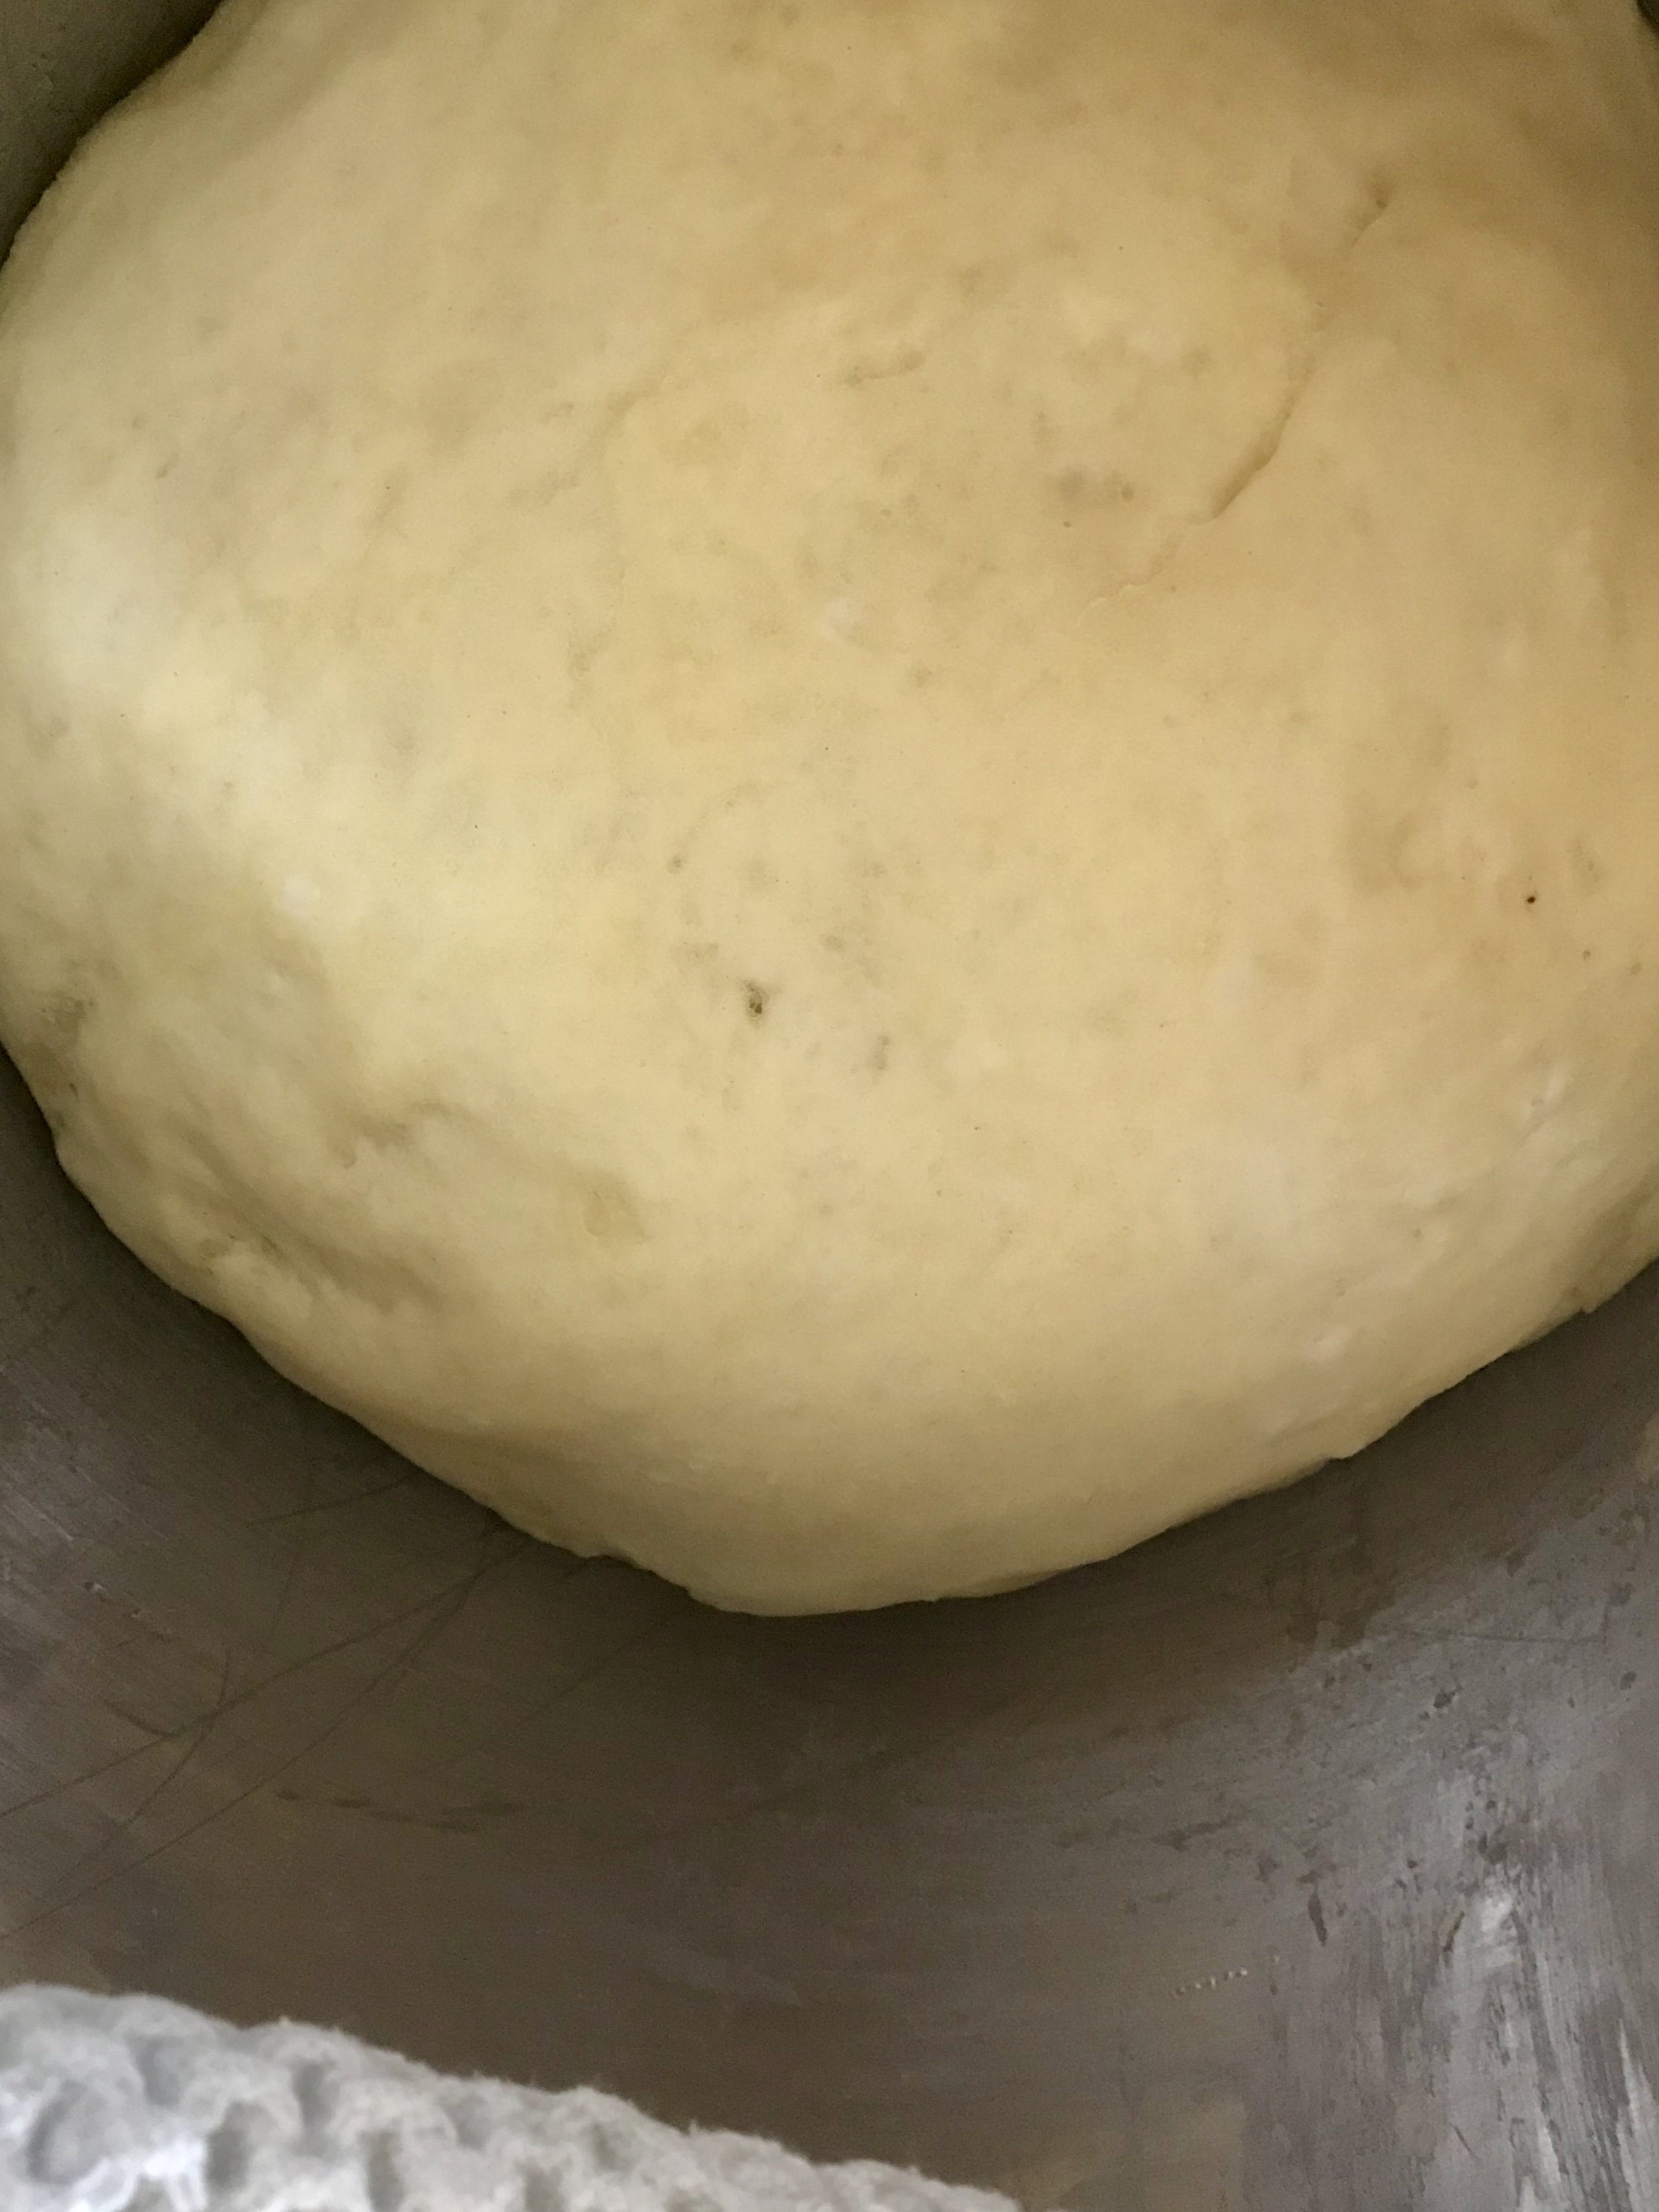
Once yeast is nice and foamy stir in the olive oil and yogurt. Mix well and then stir into flour mixture with a fork. Using your hand, mix and knead in the bowl just until everything is incorporated. As soon as it is together, soft, and slightly sticky, cover it all and let it rest until doubled in size. This could be anywhere from 2-4 hours depending on how warm your kitchen is.
FILLING
1 cup cooked & chopped up potato (could be leftover mashed potatoes too!)
Saute 1/2 -1 cup of minced onions in ghee, until nice and soft (amount of onion depends on your love of onions!)
Remove from heat and stir in one crushed garlic clove and 1/2 tsp dried coriander.
Season to taste with salt and pepper.
Set aside until cooled down.
(Ghee is clarified butter and most grocery stores carry it now, but you could easily substitute olive oil or butter)
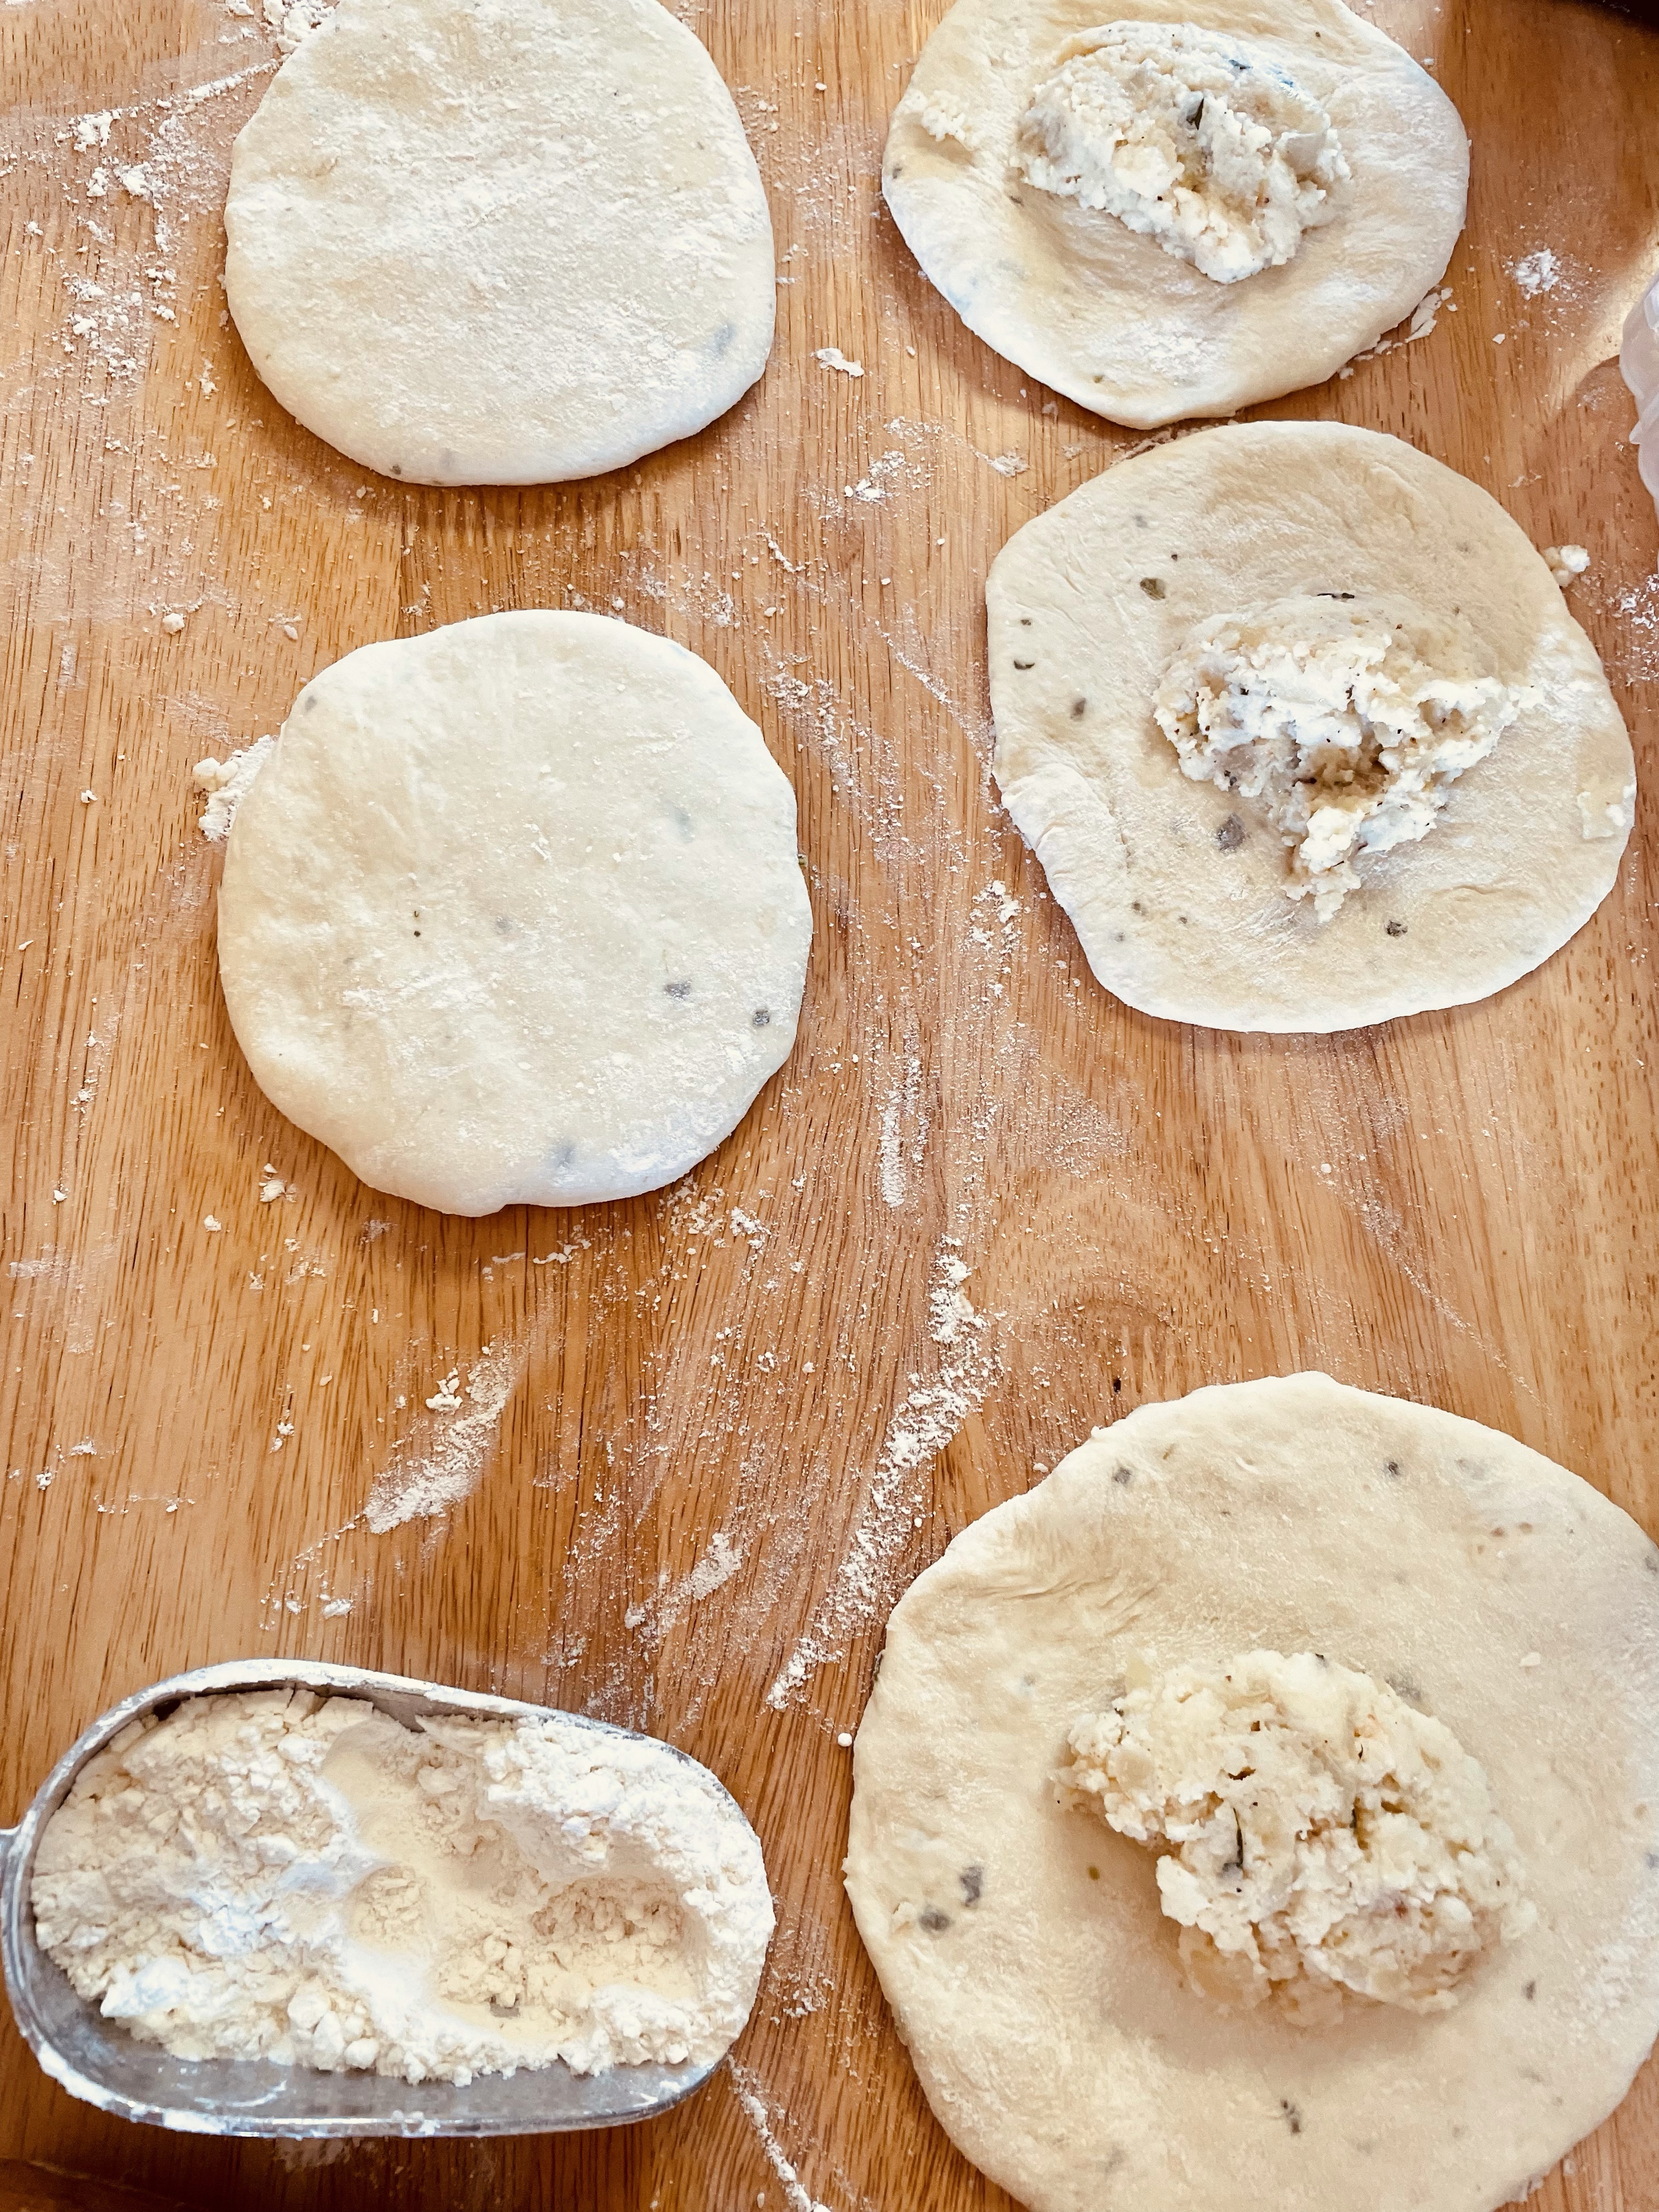
Once the dough has doubled, gently punch it down and divide into 6, rolling those into balls.
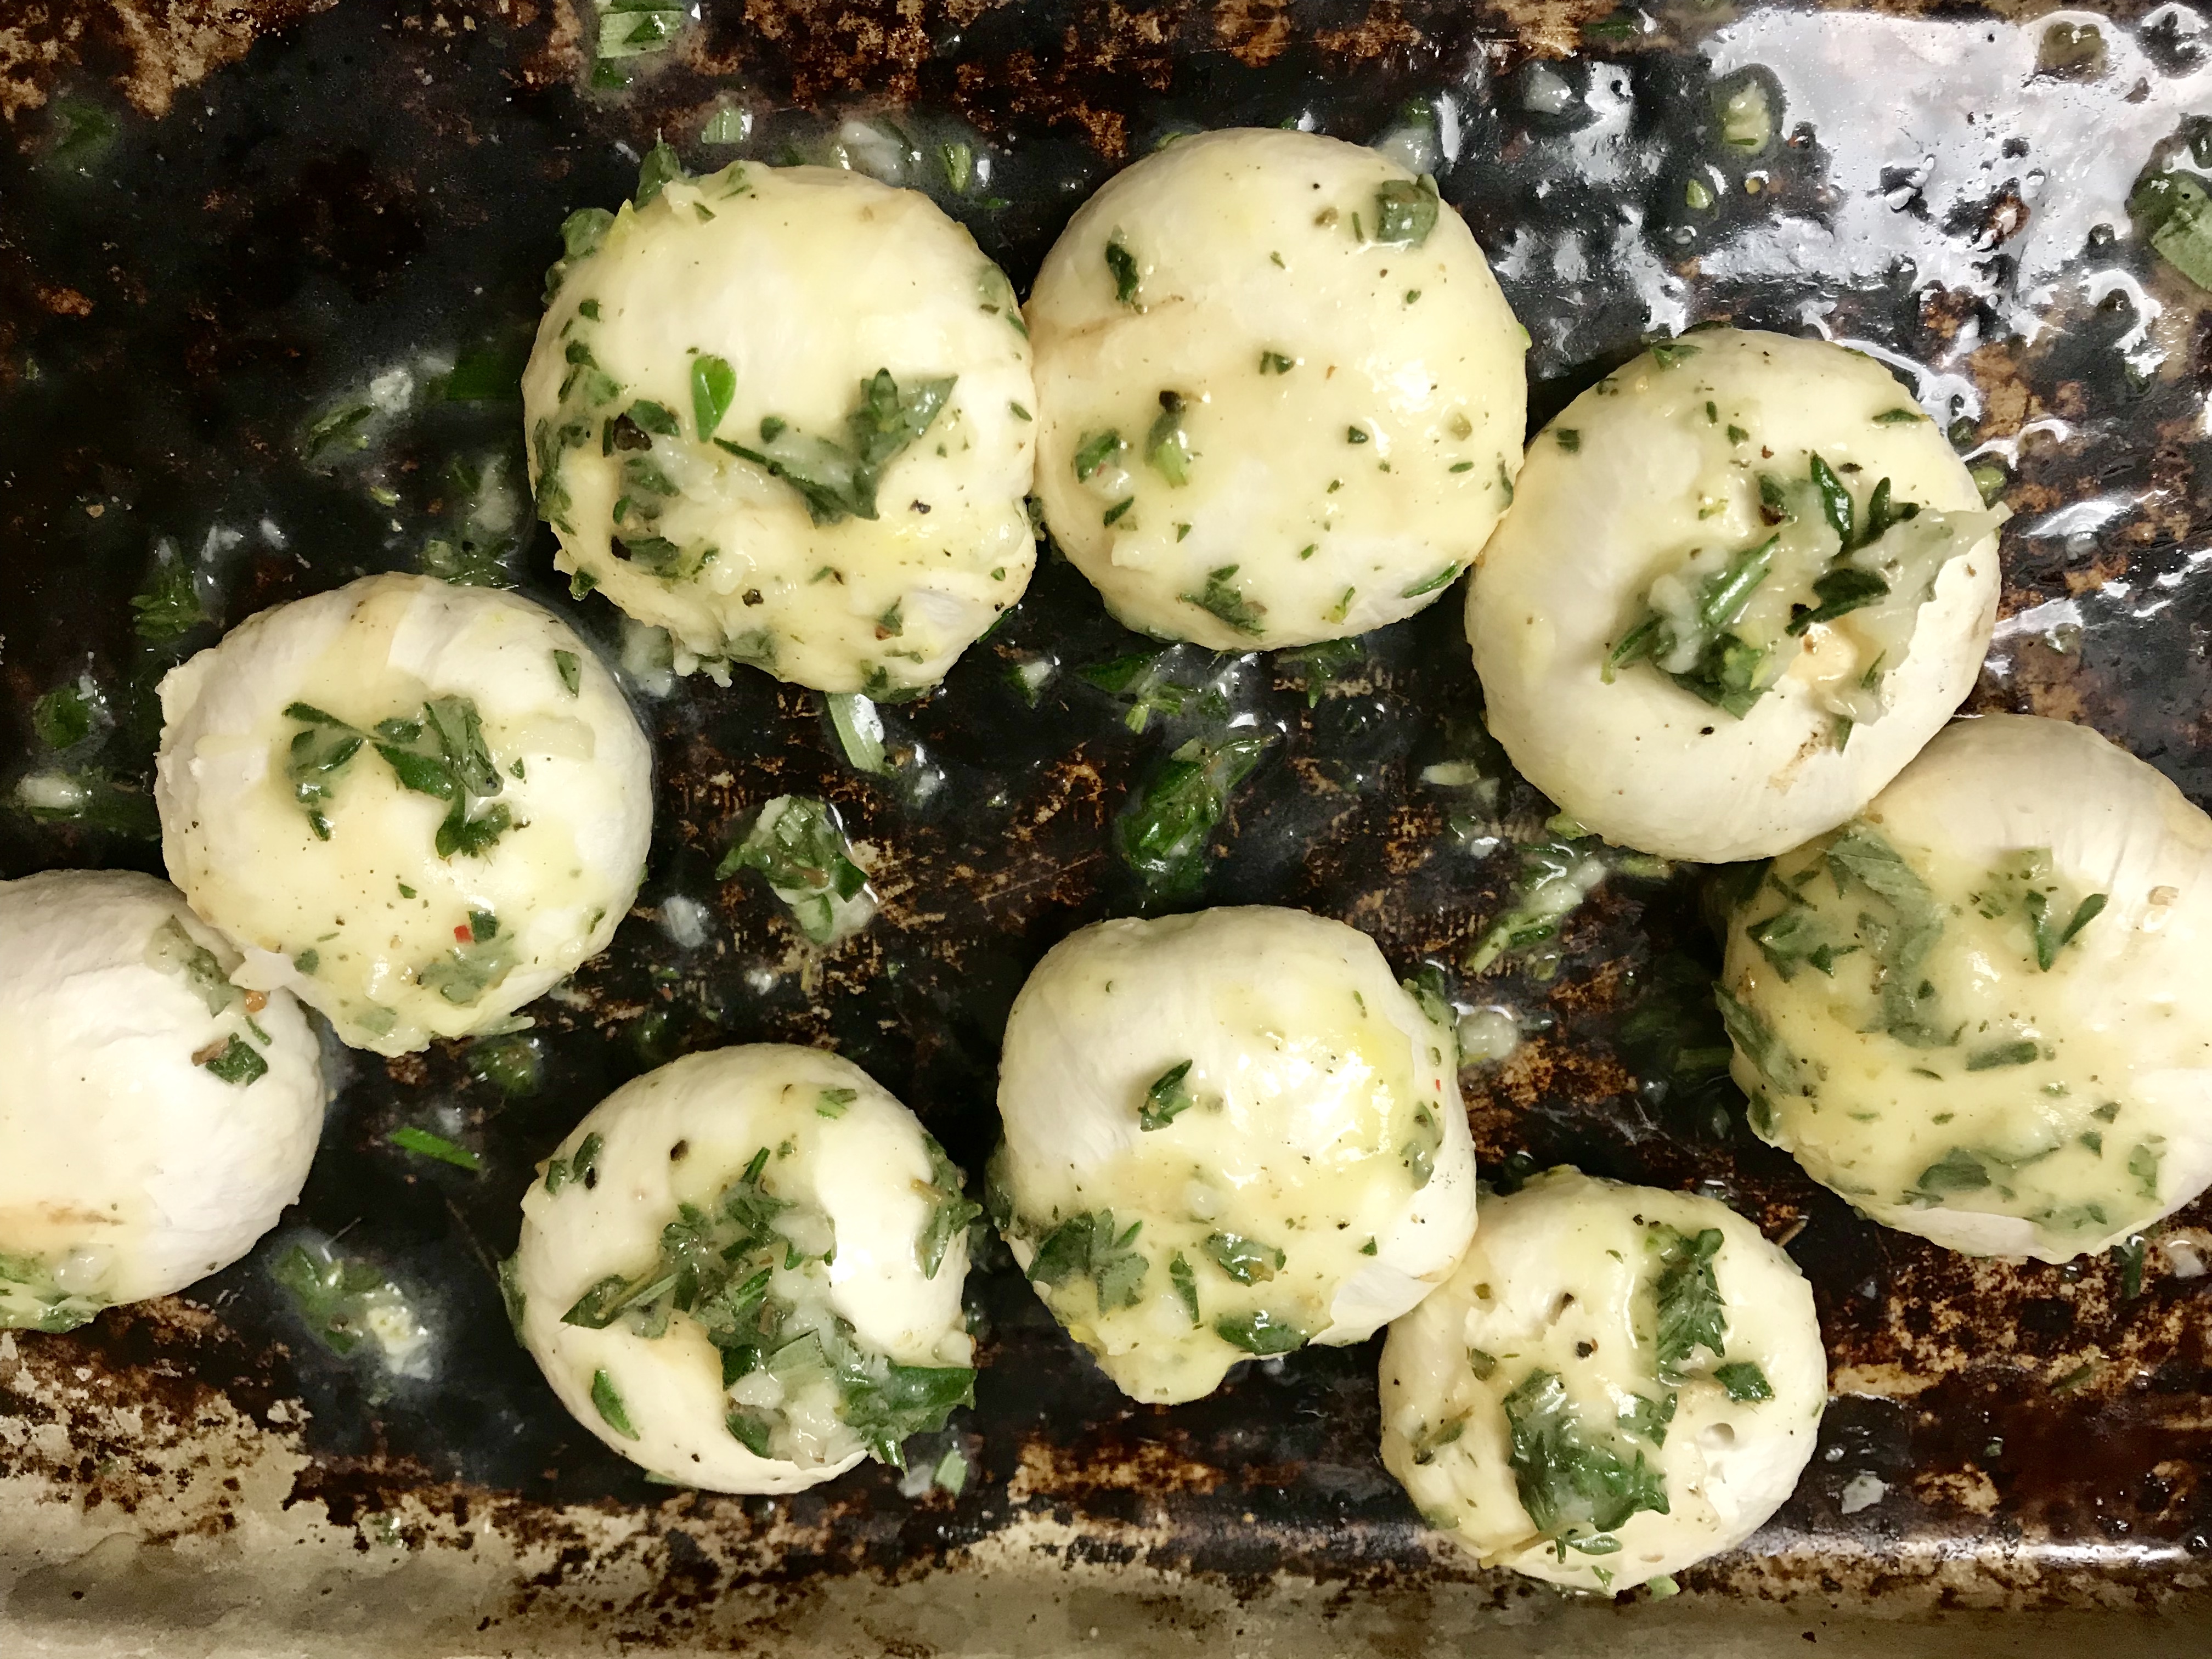
Flatten each ball with your hands until they are 6-7 inches across. Divide the potato stuffing amongst the flattened dough pieces, and then gather the outer edges like you are forming a little pocket or purse.. Once you have completely encased the potato mixture press down gently until flattened and once again about 6-7 inches across.
Brush the tops with beaten egg, sprinkle with a little salt & pepper, chili flakes and sesame seeds.
Bake at 400 until golden brown – about 20 minutes.
Remove from oven and rub with a little melted butter and sprinkle with minced cilantro.
Ready to flatten, you can see the bits of herb and they already smell great.This dough was the easiest naan dough I have ever worked with – so tender and easy to flatten.Once you have them all stuffed and flattened back out, sprinkle with beaten egg and toppings. Confession time? Somehow I got on a roll and before I knew it I had brushed the tops with melted ghee, not the egg wash I had planned on. Hmm. Still turned out so do whatever floats your boat.Using your finger tips, flatten around the outer edge to create a bit of a border. Some of them puffed right up like a pita, and others didn’t, and either way they were delicious!Ready for the ovenSoft potato and onion filling made these the best ever!Next time I’m going to leave out the garlic, and try using a different stuffing …. ham and cheese maybe? They’d be great for lunches.
This naan dough originally came from an Indian Cookbook I have – Aarti Sequeira “Aarti Paarti”. I’ve loved watching her on Food Network. She added fennel and nigella seeds, and didn’t stuff them. I had something different in mind so I used this dough, and then watched endless YouTube videos on stuffing naan to come up with my own version. Have fun, play around and let me know if you come up with any other stuffings.
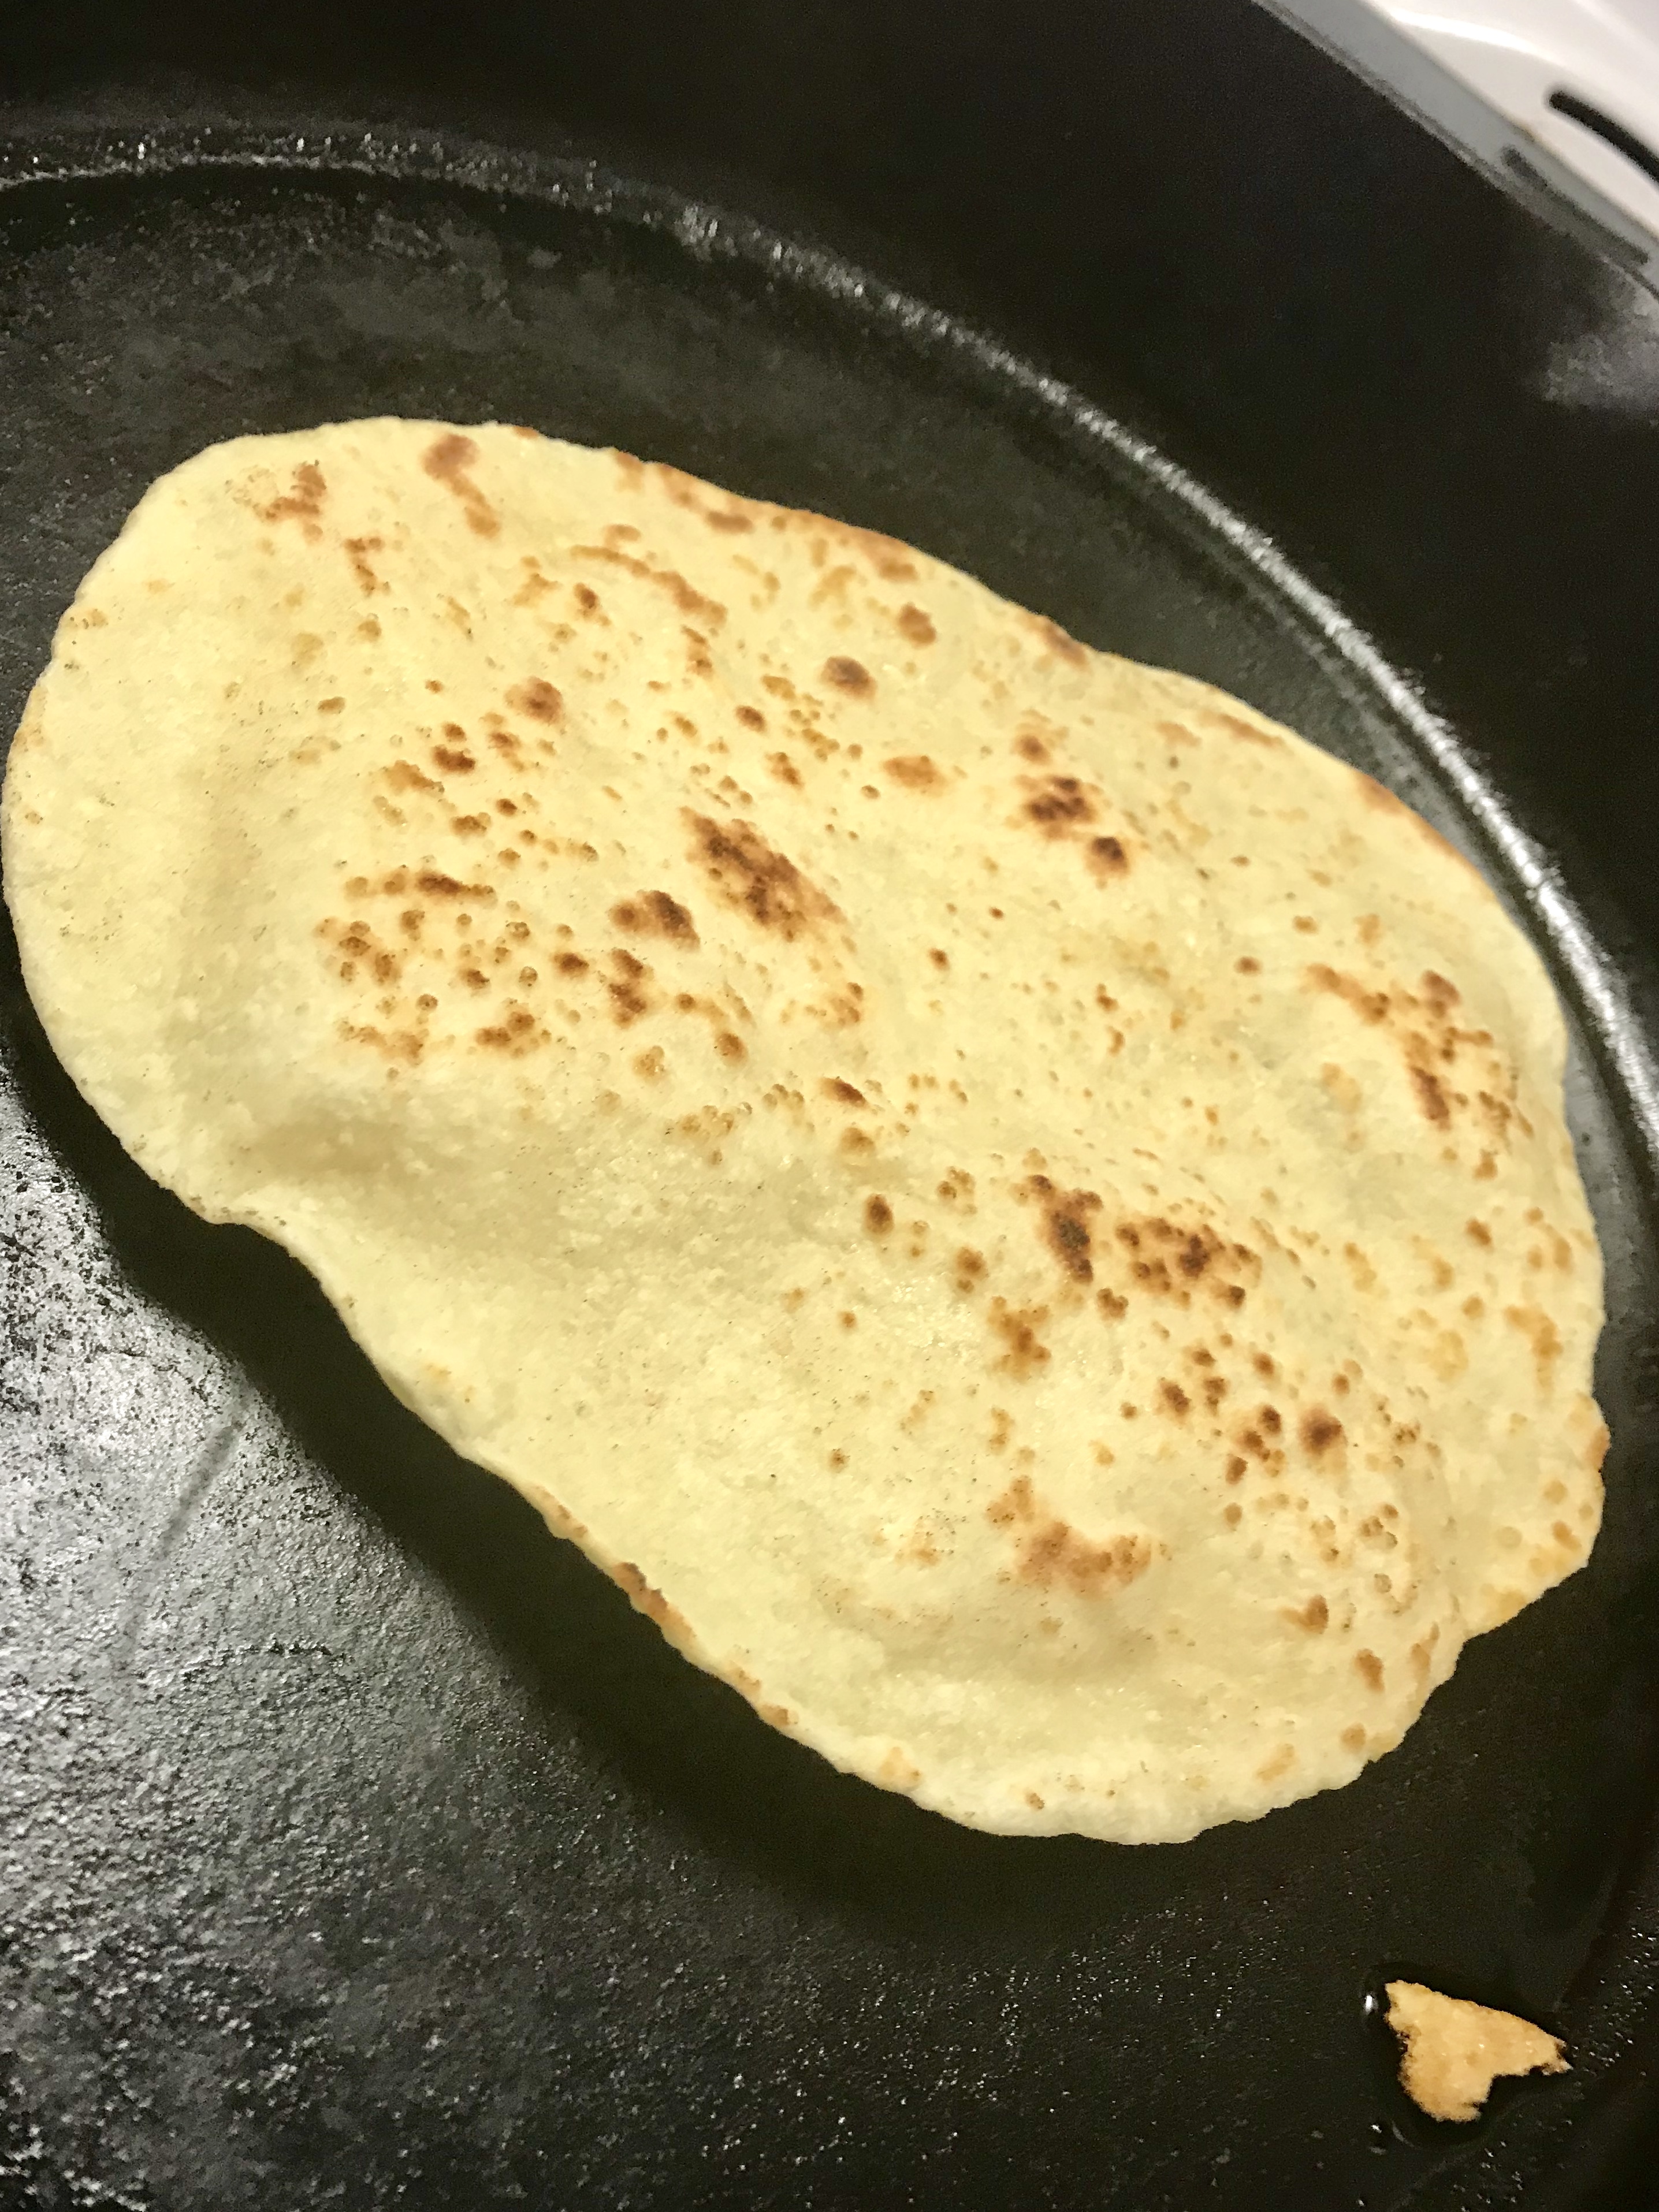
In making naan, I often stand over my cast iron pan, frustrated by trying to get nice char marks and yet still allowing the bread dough to be fully cooked inside without burning the outside. This often leaves me less than satisfied! This totally hands off approach yielded the softest naan and the breads were fully cooked while still having wee bits of crunchy dough around the edges and on the tops of the ones that puffed up like a pita.
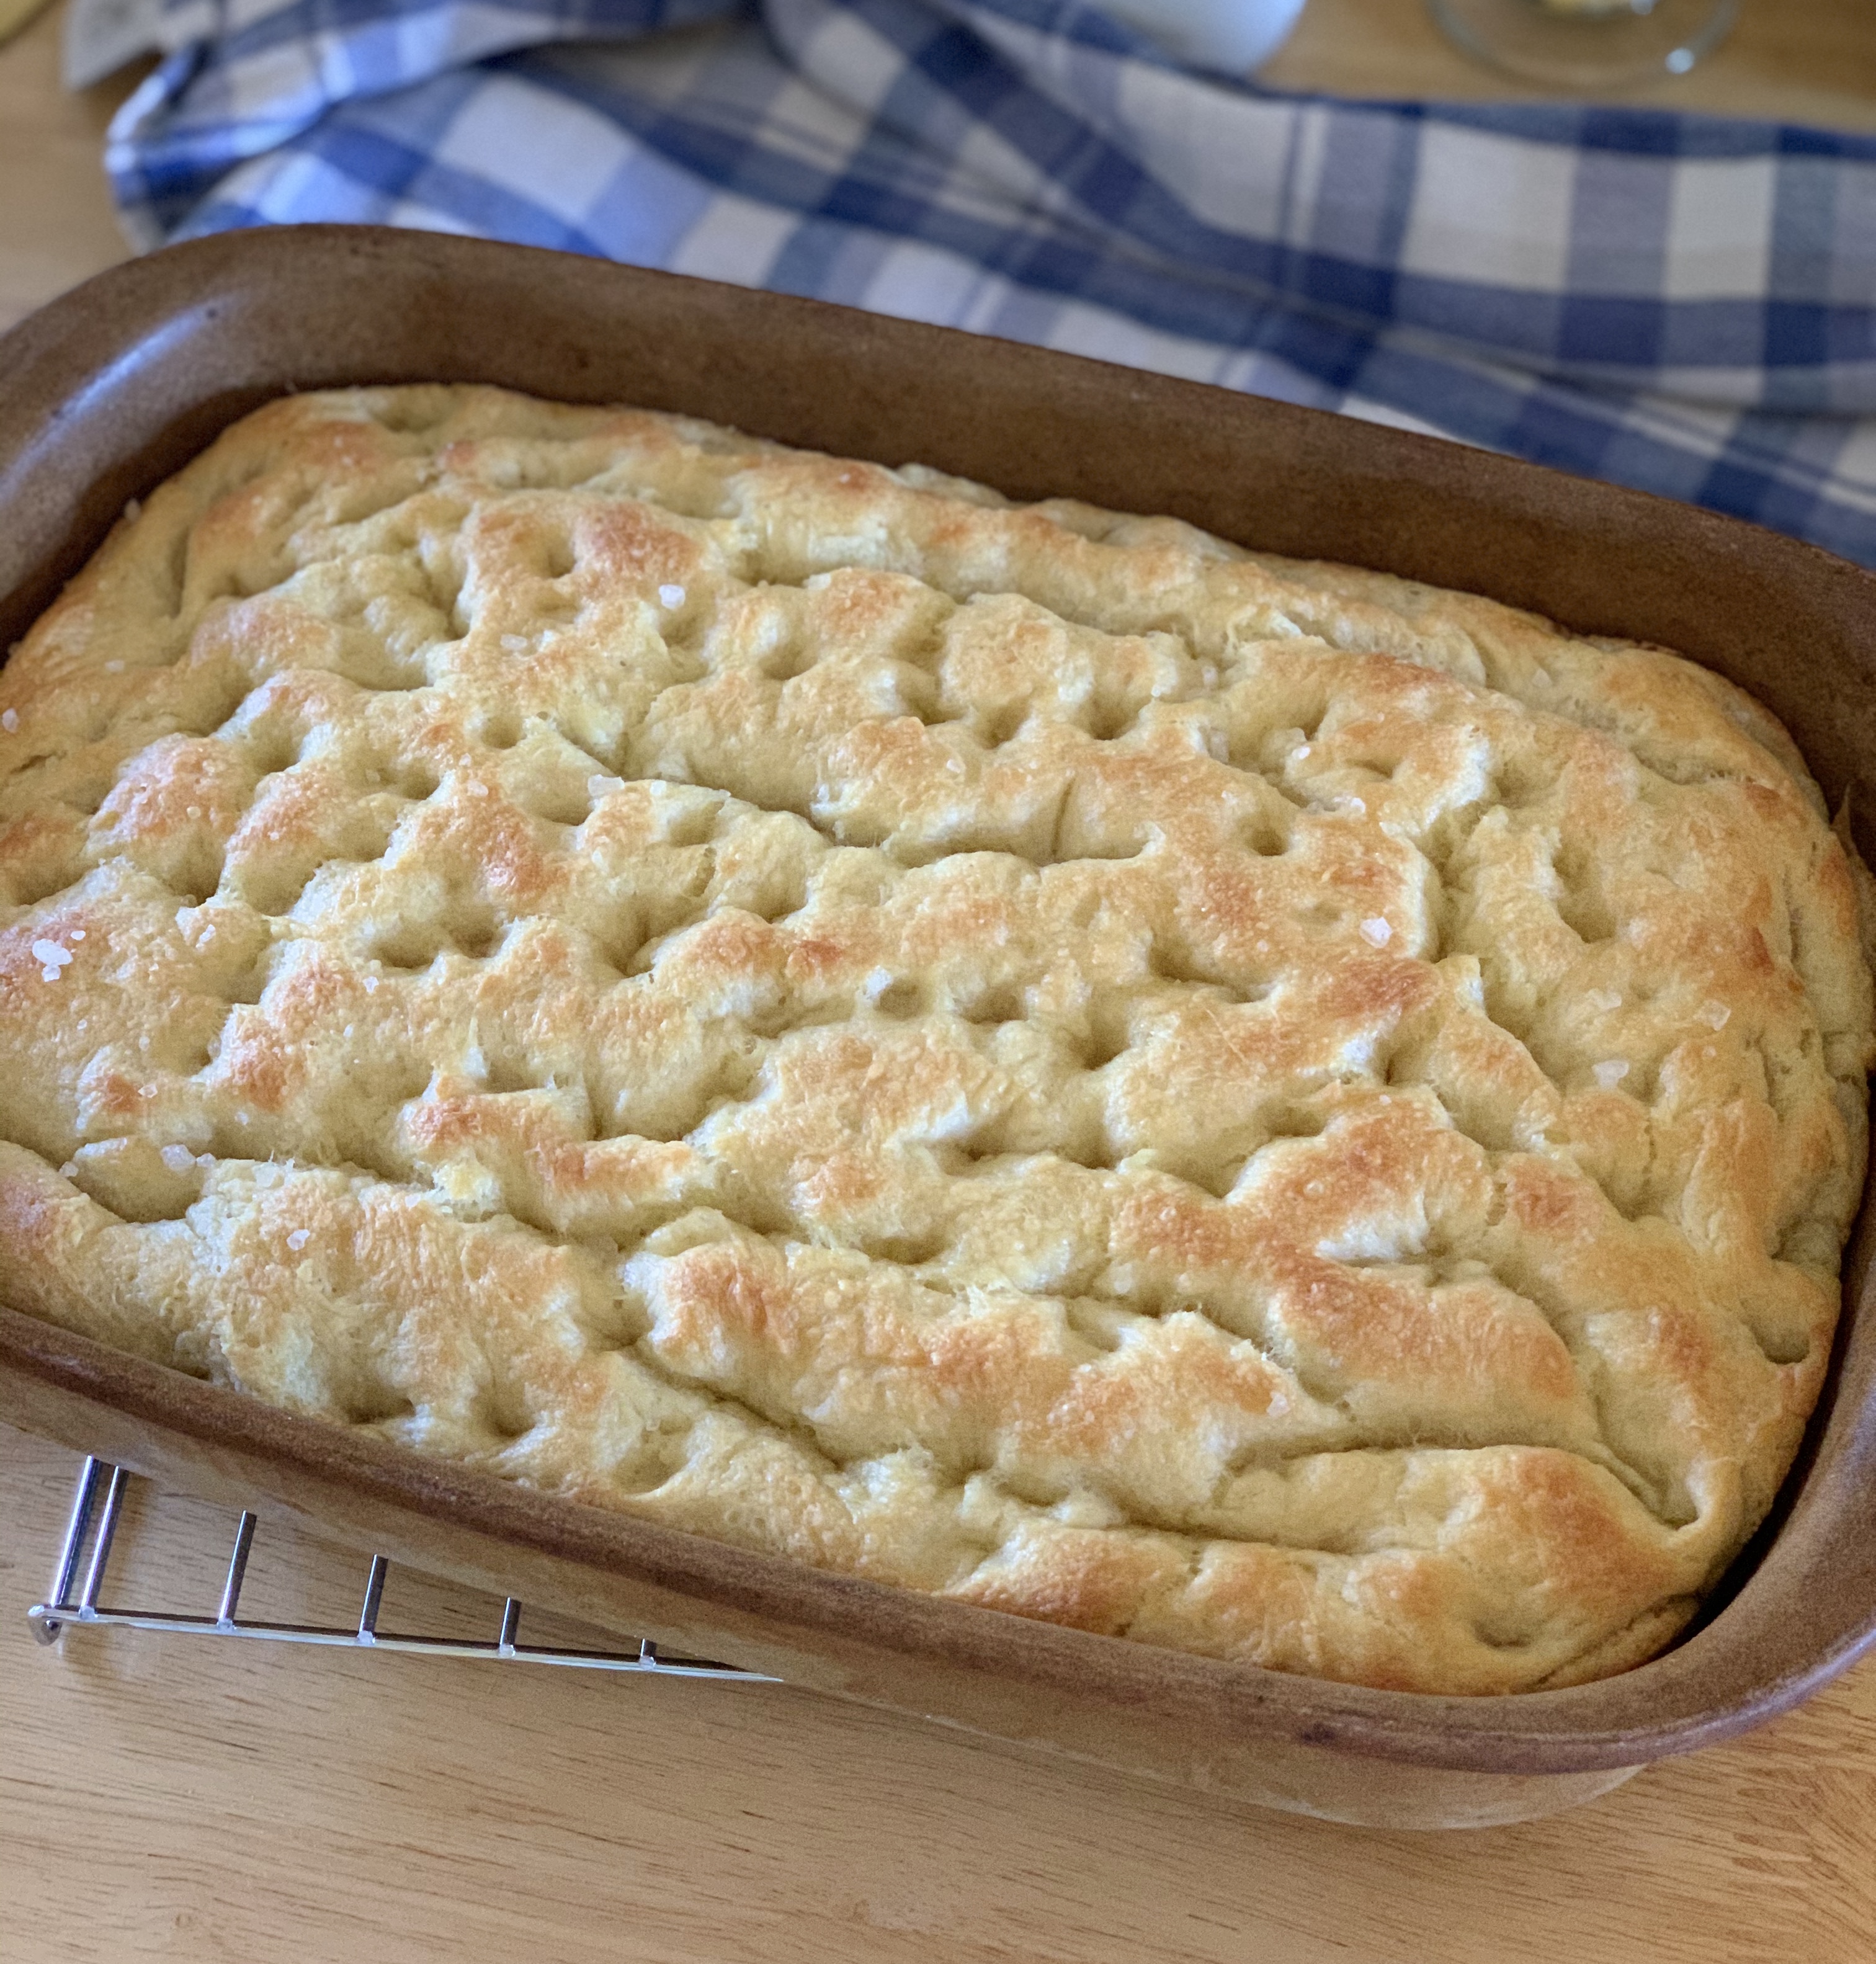
You are going to love this … soft, chewy, and the best focaccia you could possible imagine. Can’t you just smell it from the photo? Yum.
2 1/2 tsp active dry yeast (or 1 pack)
2 tsp honey
2 1/2 cups lukewarm water
1 tbsp kosher salt
5 cups all purpose flour
6 tbsp extra virgin olive oil – divided
4 tbsp butter
flaky sea salt
2-4 garlic cloves
Whisk 1¼-oz. envelope active dry yeast (about 2¼ tsp.), 2 tsp. honey, and 2½ cups lukewarm water in a medium bowl and let sit 5 minutes (it should foam or at least get creamy; if it doesn’t your yeast is dead and you should start again—check the expiration date!).
Add 5 cups (625 g) all-purpose flour and 1 Tbsp. kosher salt and mix with a rubber spatula until a shaggy dough forms and no dry streaks remain.
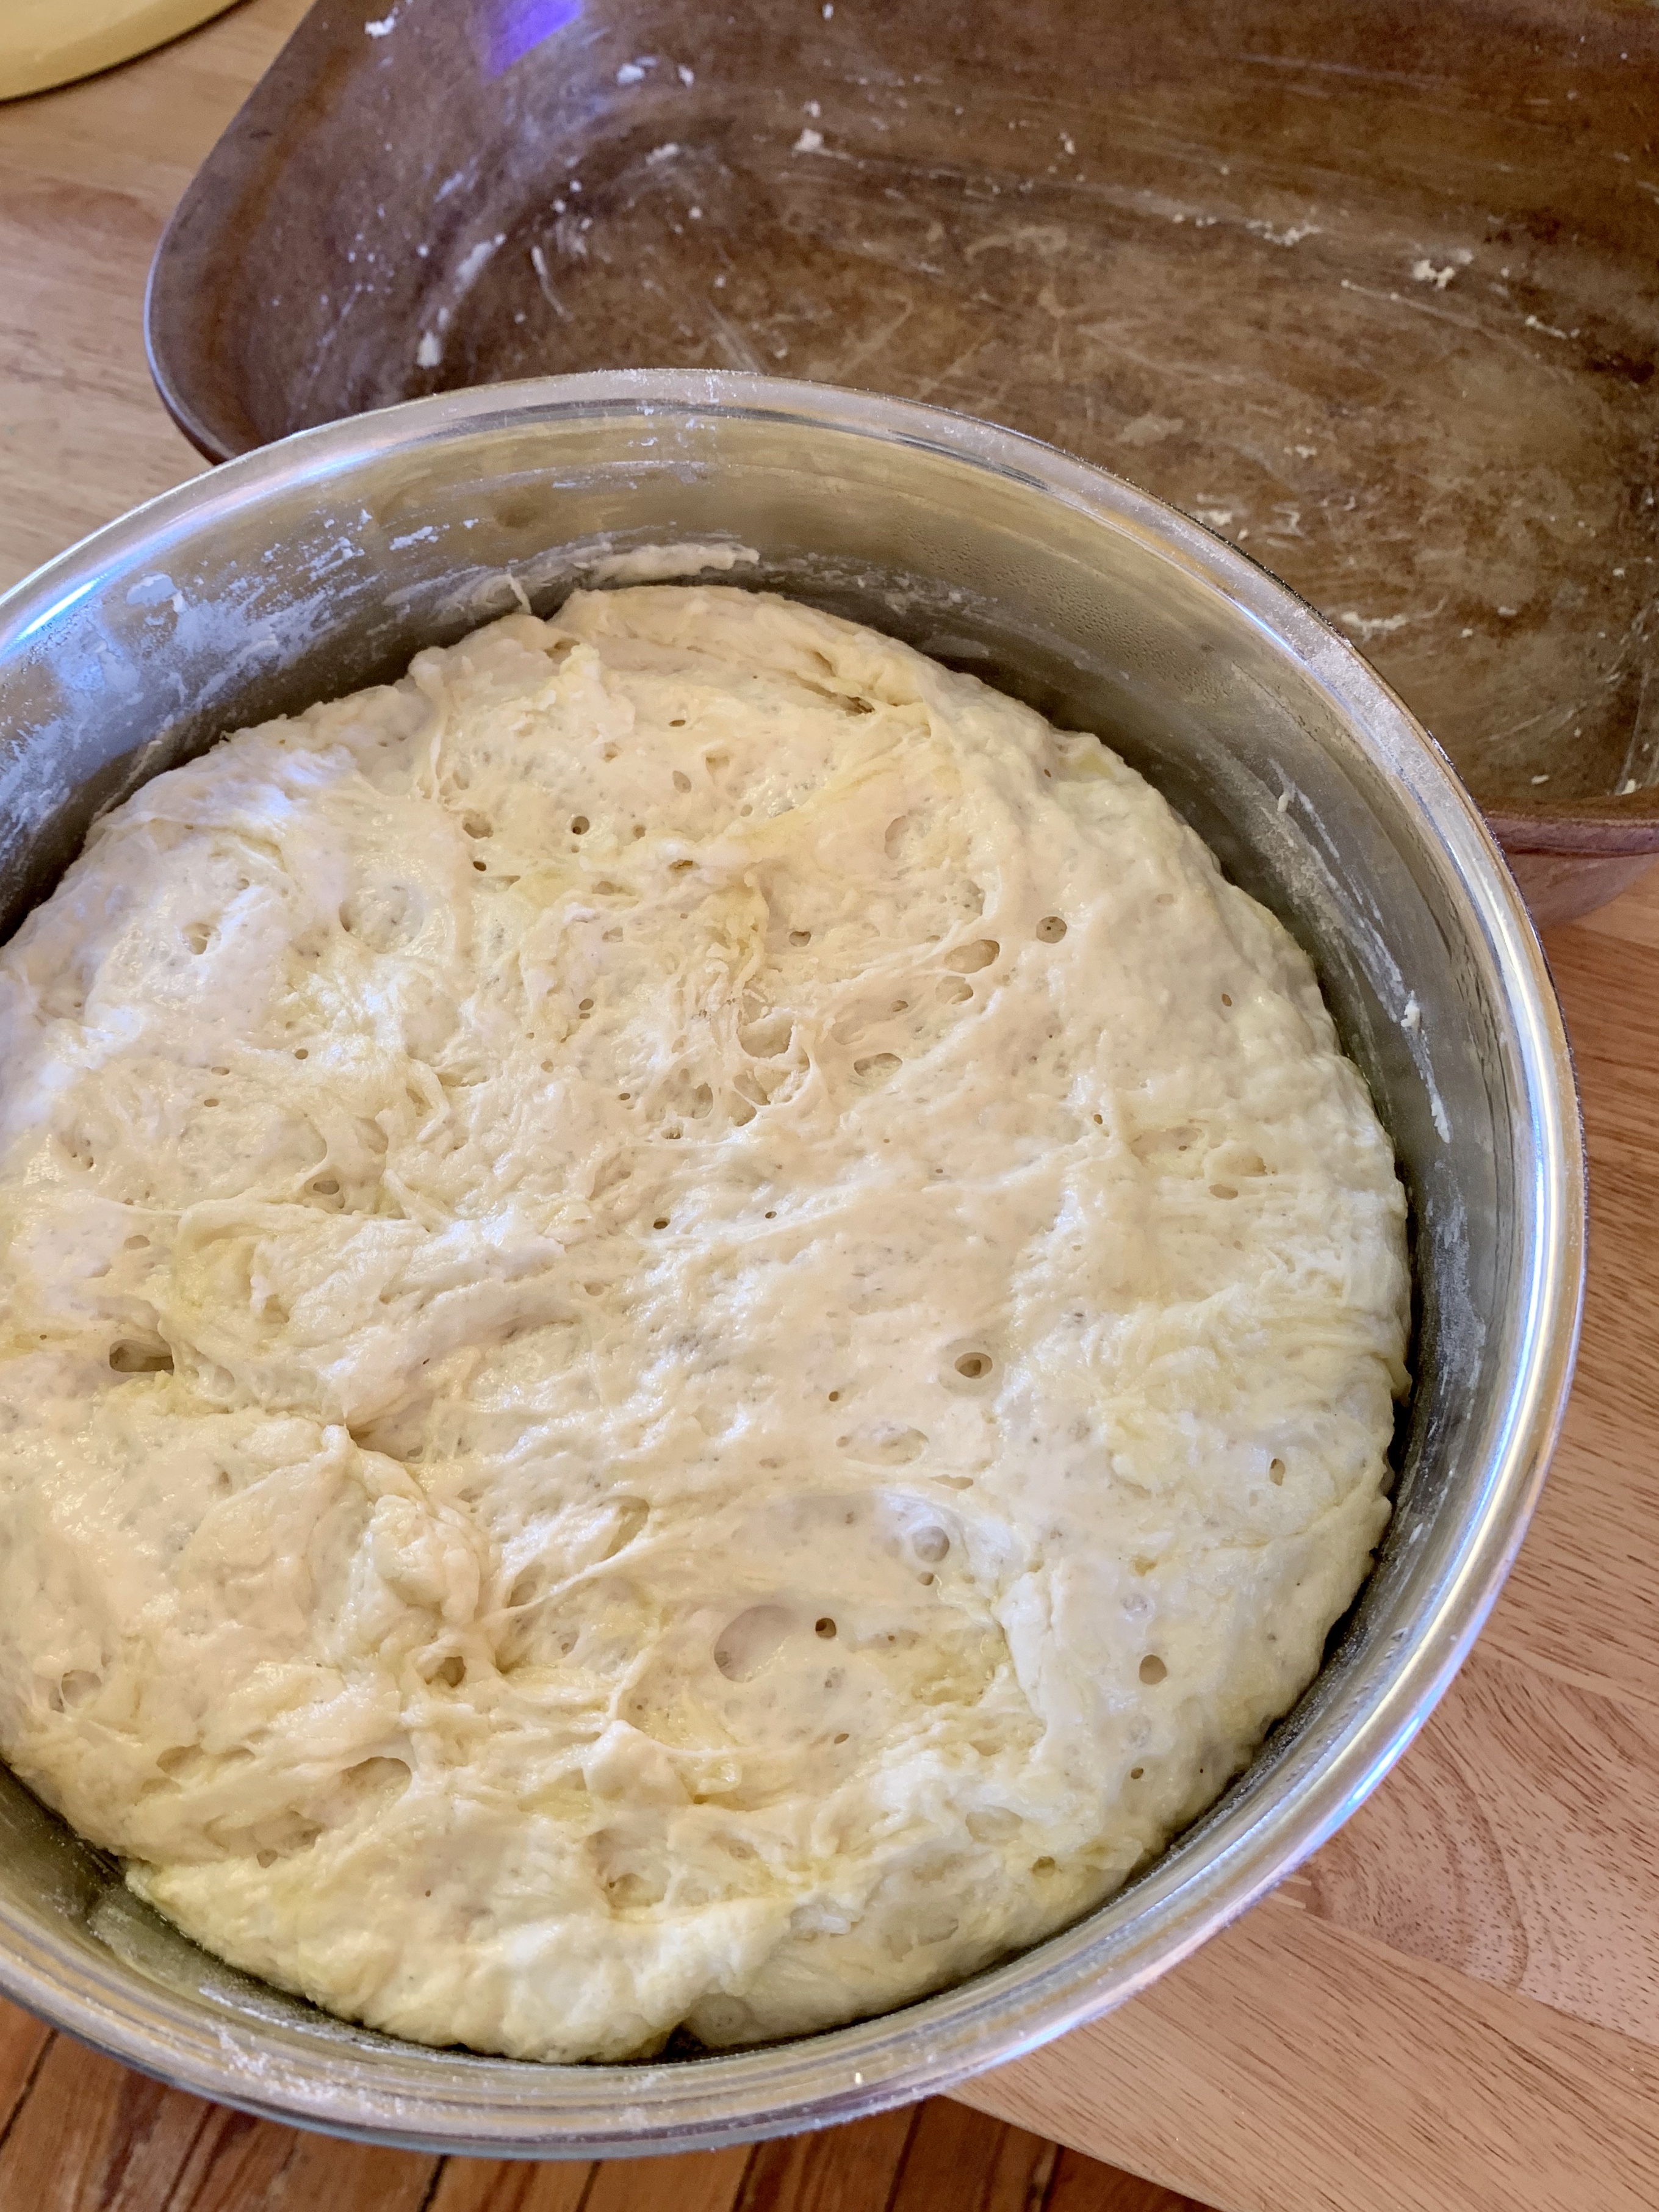
Pour 4 Tbsp. extra-virgin olive oil into a big bowl that will fit in your refrigerator. This puppy is going to rise! Transfer dough to bowl and turn to coat in oil. Cover with a silicone lid or plastic wrap and chill until dough is doubled in size (it should look very bubbly and alive), at least 8 hours and up to 1 day. If you’re in a rush, you can also let it rise at room temperature until doubled in size, 3–4 hours.
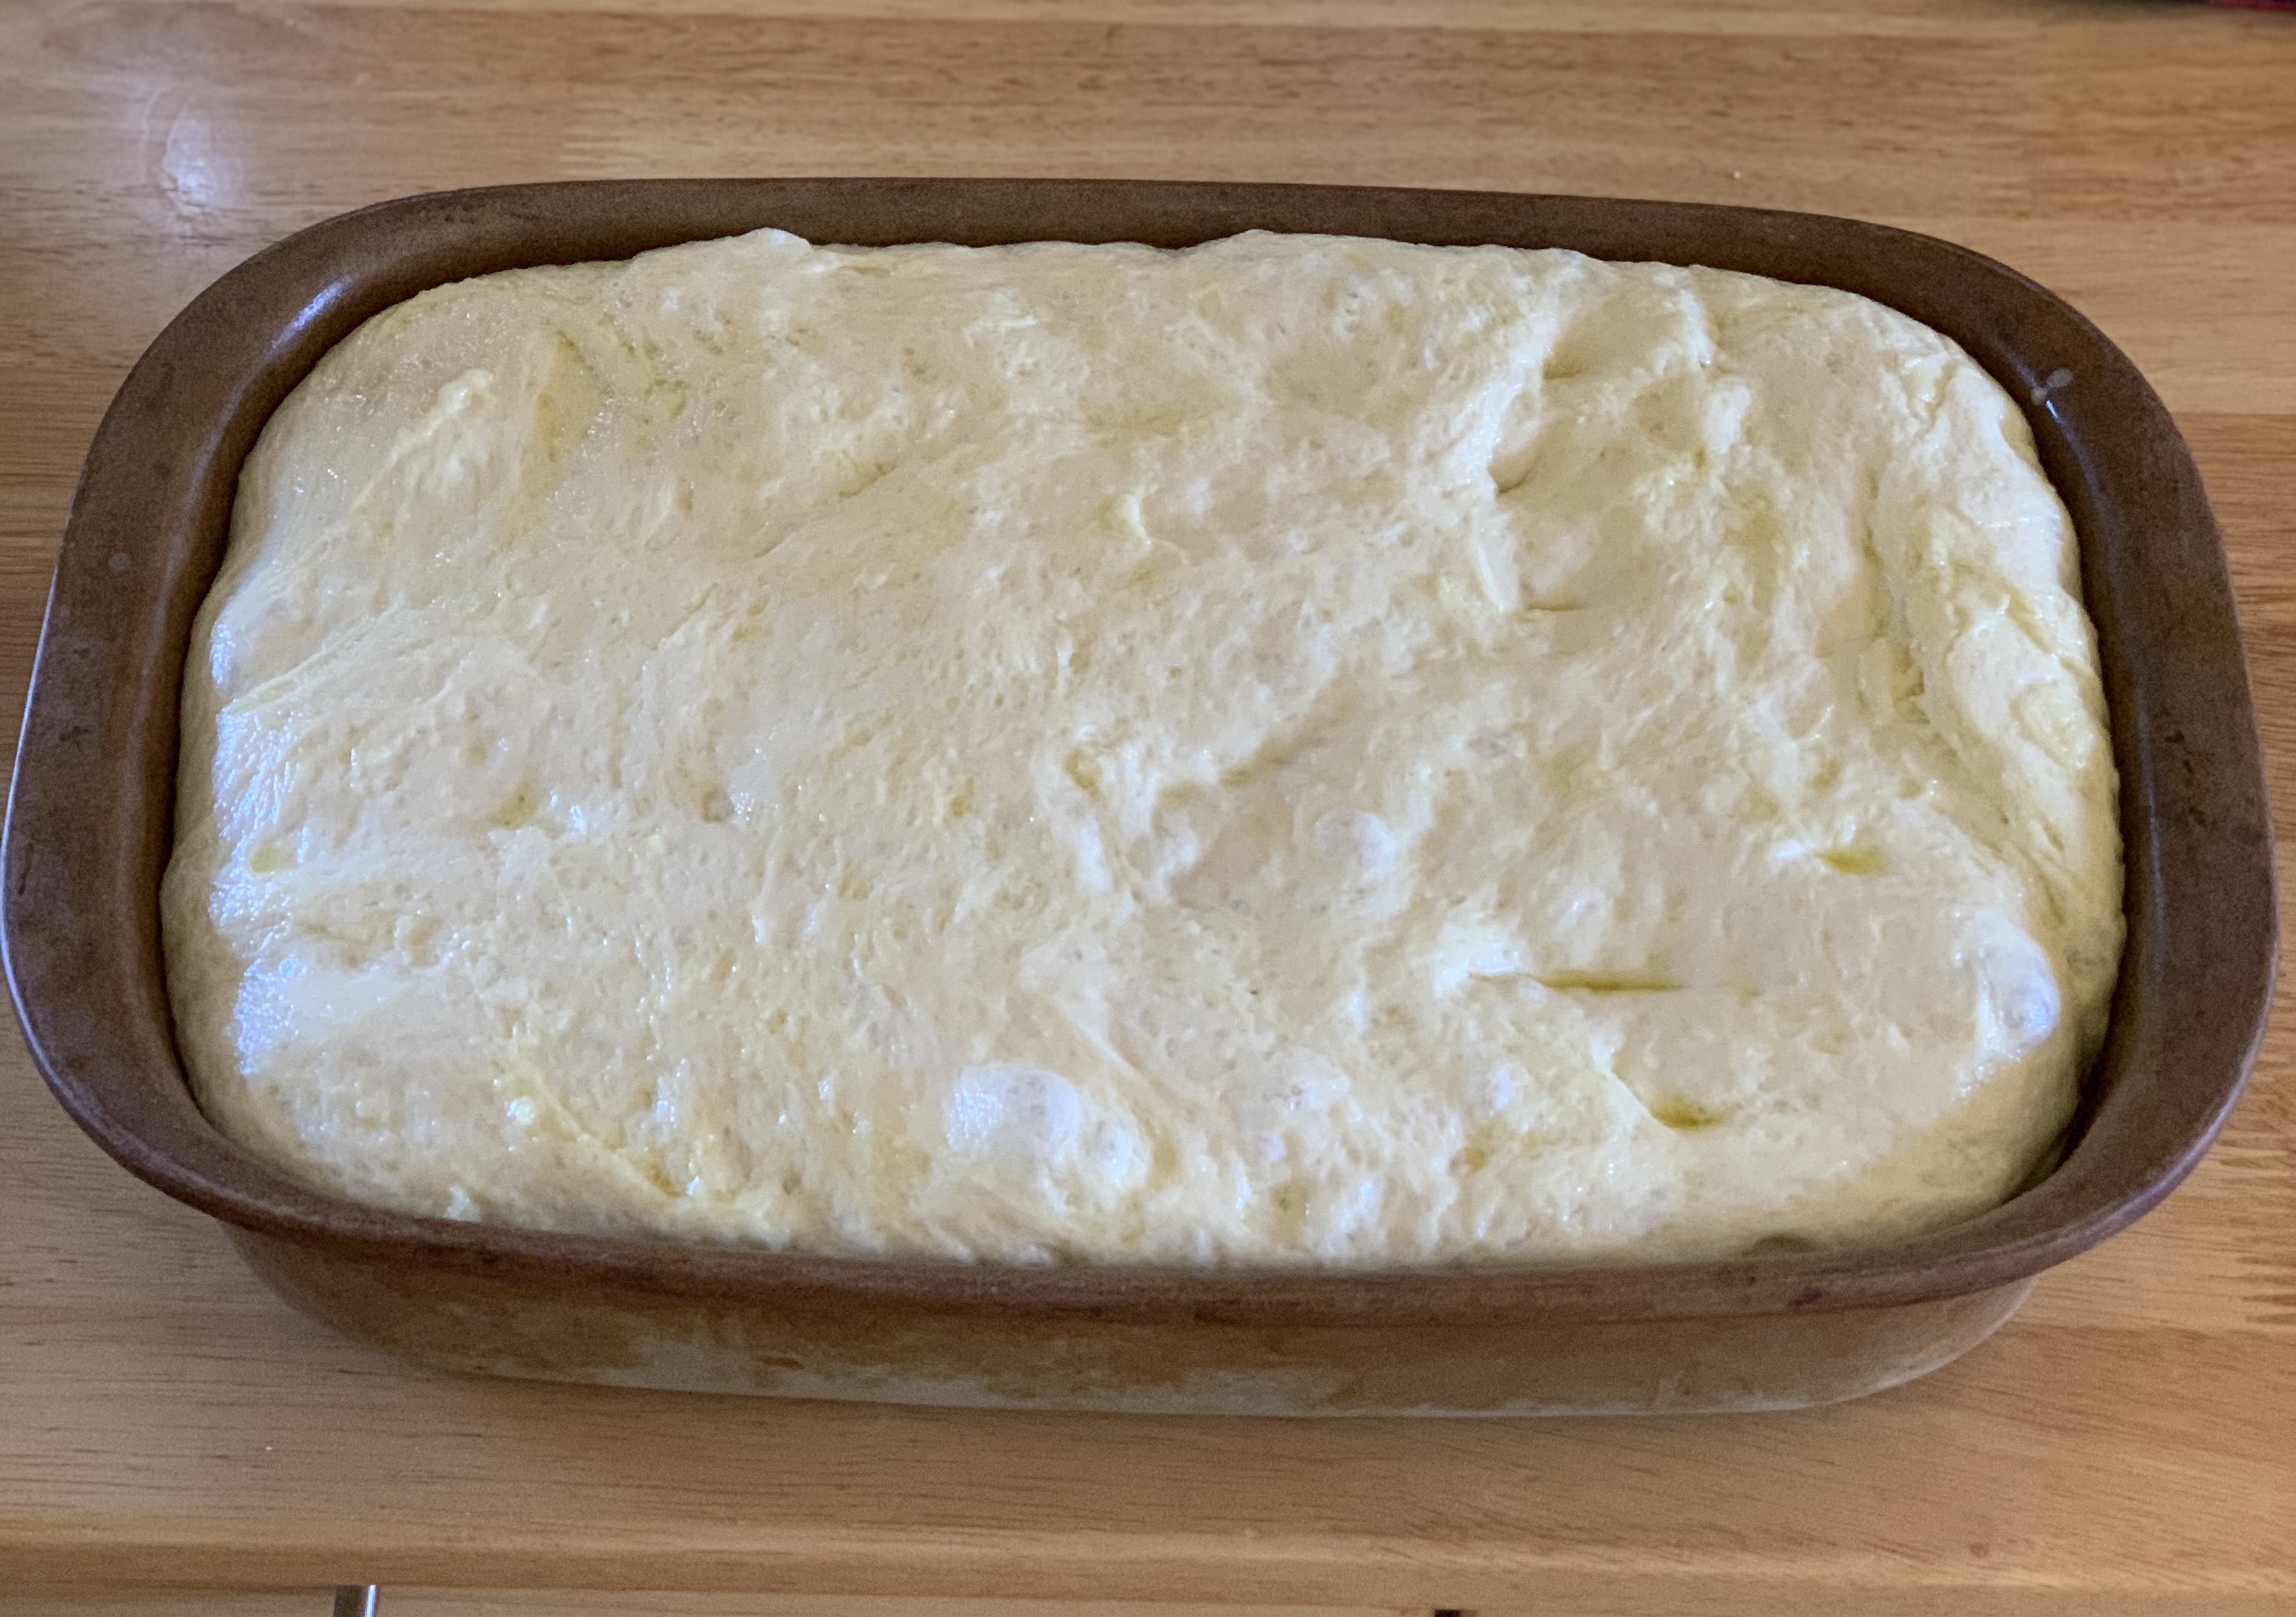
Generously butter a 13×9″ baking pan, for thicker focaccia that’s perfect for sandwiches, or an 18×13″ rimmed baking sheet, for focaccia that’s thinner, crispier, and great for snacking. The butter may seem superfluous, but it’ll ensure that your focaccia doesn’t stick. Pour 1 Tbsp. extra-virgin olive oil into center of pan. Keeping the dough in the bowl and using a fork in each hand, gather up edges of dough farthest from you and lift up and over into center of bowl. Give the bowl a quarter turn and repeat process. Do this 2 more times; you want to deflate dough while you form it into a rough ball.
Transfer dough to prepared pan. Pour any oil left in bowl over and turn dough to coat it in oil. Let rise, uncovered, in a dry, warm spot (like near a radiator or on top of the fridge or a preheating oven) until doubled in size, at least 1½ hours and up to 4 hours.
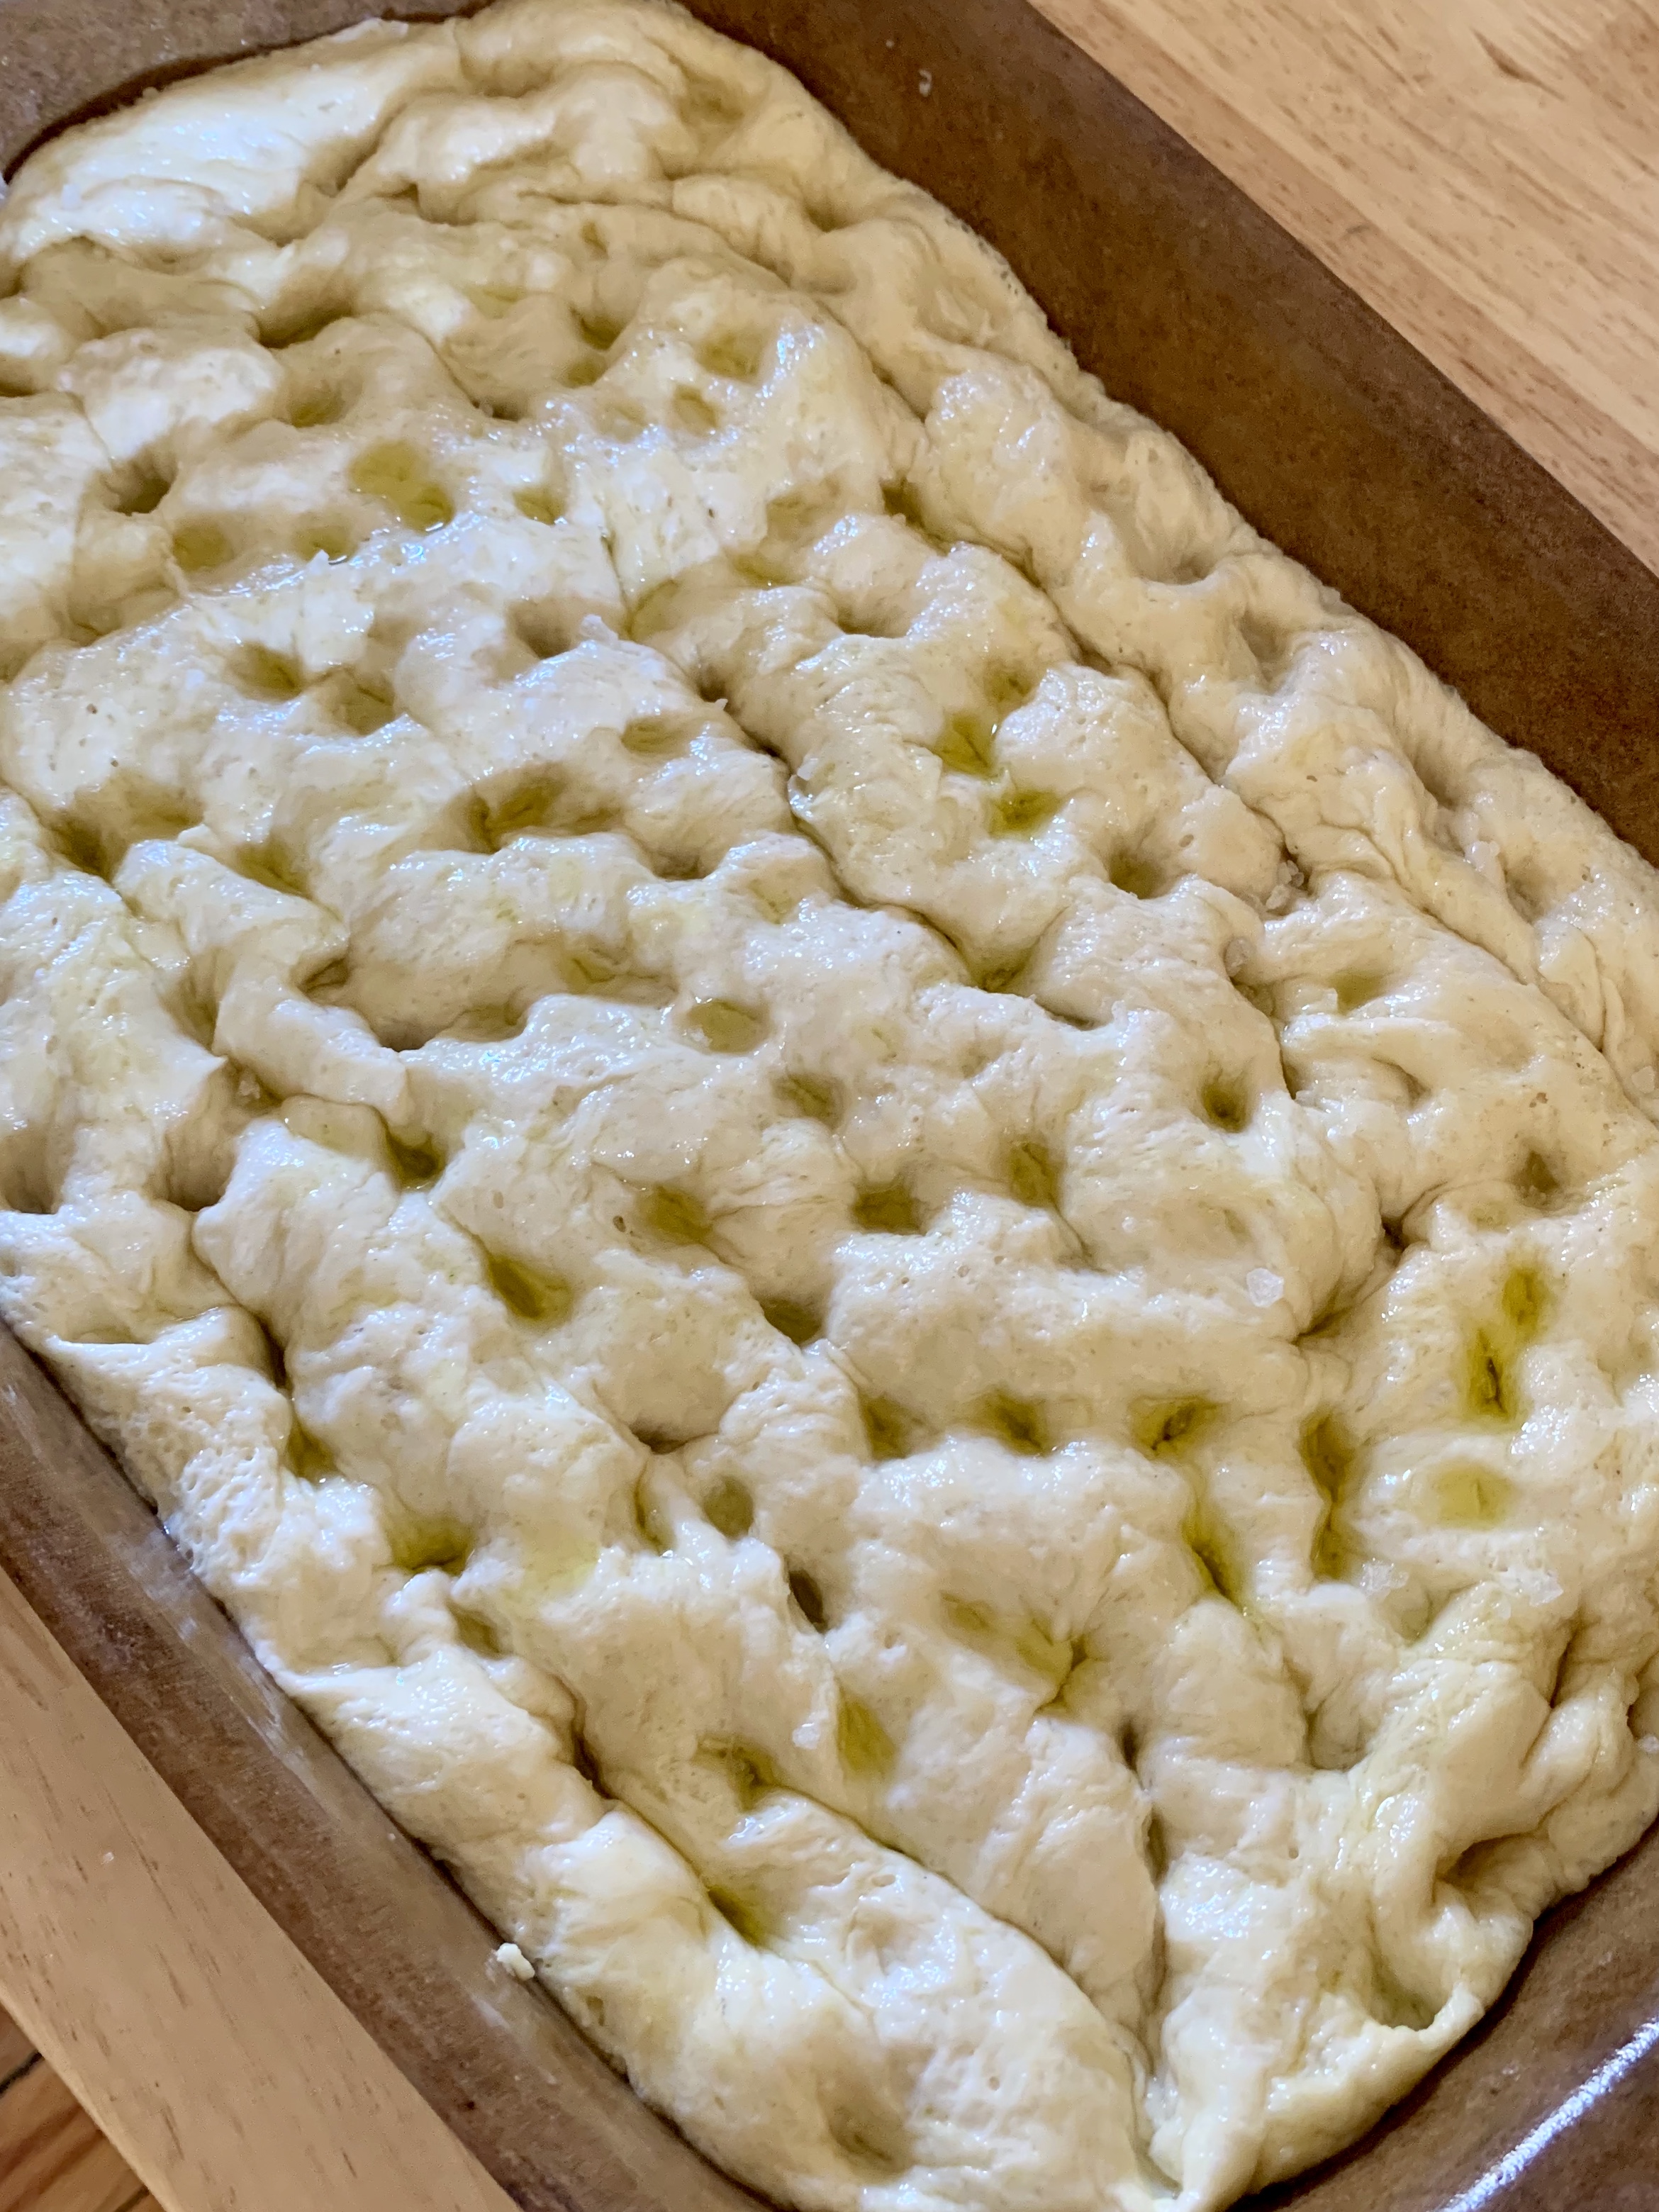
Place a rack in middle of oven; preheat to 450°. To see if the dough is ready, poke it with your finger. It should spring back slowly, leaving a small visible indentation. If it springs back quickly, the dough isn’t ready. (If at this point the dough is ready to bake but you aren’t, you can chill it up to 1 hour.) Lightly oil your hands. If using a rimmed baking sheet, gently stretch out dough to fill (you probably won’t need to do this if using a baking pan). Dimple focaccia all over with your fingers, like you’re aggressively playing the piano, creating very deep depressions in the dough (reach your fingers all the way to the bottom of the pan). Drizzle with remaining 1 Tbsp. extra-virgin olive oil and sprinkle with flaky sea salt. Bake focaccia until puffed and golden brown all over, 20–30 minutes.
Rising with bits of oil throughout, this little fella has filled the bowl!
It’s pretty darn cold outside today, but this is sitting with the sun streaming in the window and the radiator near …. it rose beautifully.
Just look, 2 hours later it is fluffy and puffed right to the brim.
This is the part where you could get as interesting as you like …. add olives, or rosemary, or little tomato slices ….
I stopped before this last step, just because I wasn’t sure the 12, 9 & 6 year olds at the table wanted the garlic …. but next time!!!
Hold off on this last step until you’re ready to serve the focaccia: Melt 4 Tbsp. unsalted butter in a small saucepan over medium heat. Remove from heat. Peel and grate in 2–4 garlic cloves with a Microplane (use 2 cloves if you’re garlic-shy or up to 4 if you love it). Return to medium heat and cook, stirring often, until garlic is just lightly toasted, 30–45 seconds. (Or, if you prefer raw garlic to toasted garlic, you can grate the garlic into the hot butter, off heat, then brush right away.)
Brush garlic-butter all over focaccia and slice into squares or rectangles.
Too much time on my hands …. the Covid- 19 Coronavirus has us all hunkered down in our homes …. look what happens when you can’t go anywhere …
I was afraid how things would look after baking, but it’s pretty good!
I’ve reposted this from Bon Appetit “Basically” as part of their baking series, it is amazing!!!
I love this risotto! It has just a hint of parmesan, rather than being driven by parmesan richness. It is creamy, and a delicious side dish. Add some grilled prawns and you’ve got a complete meal.
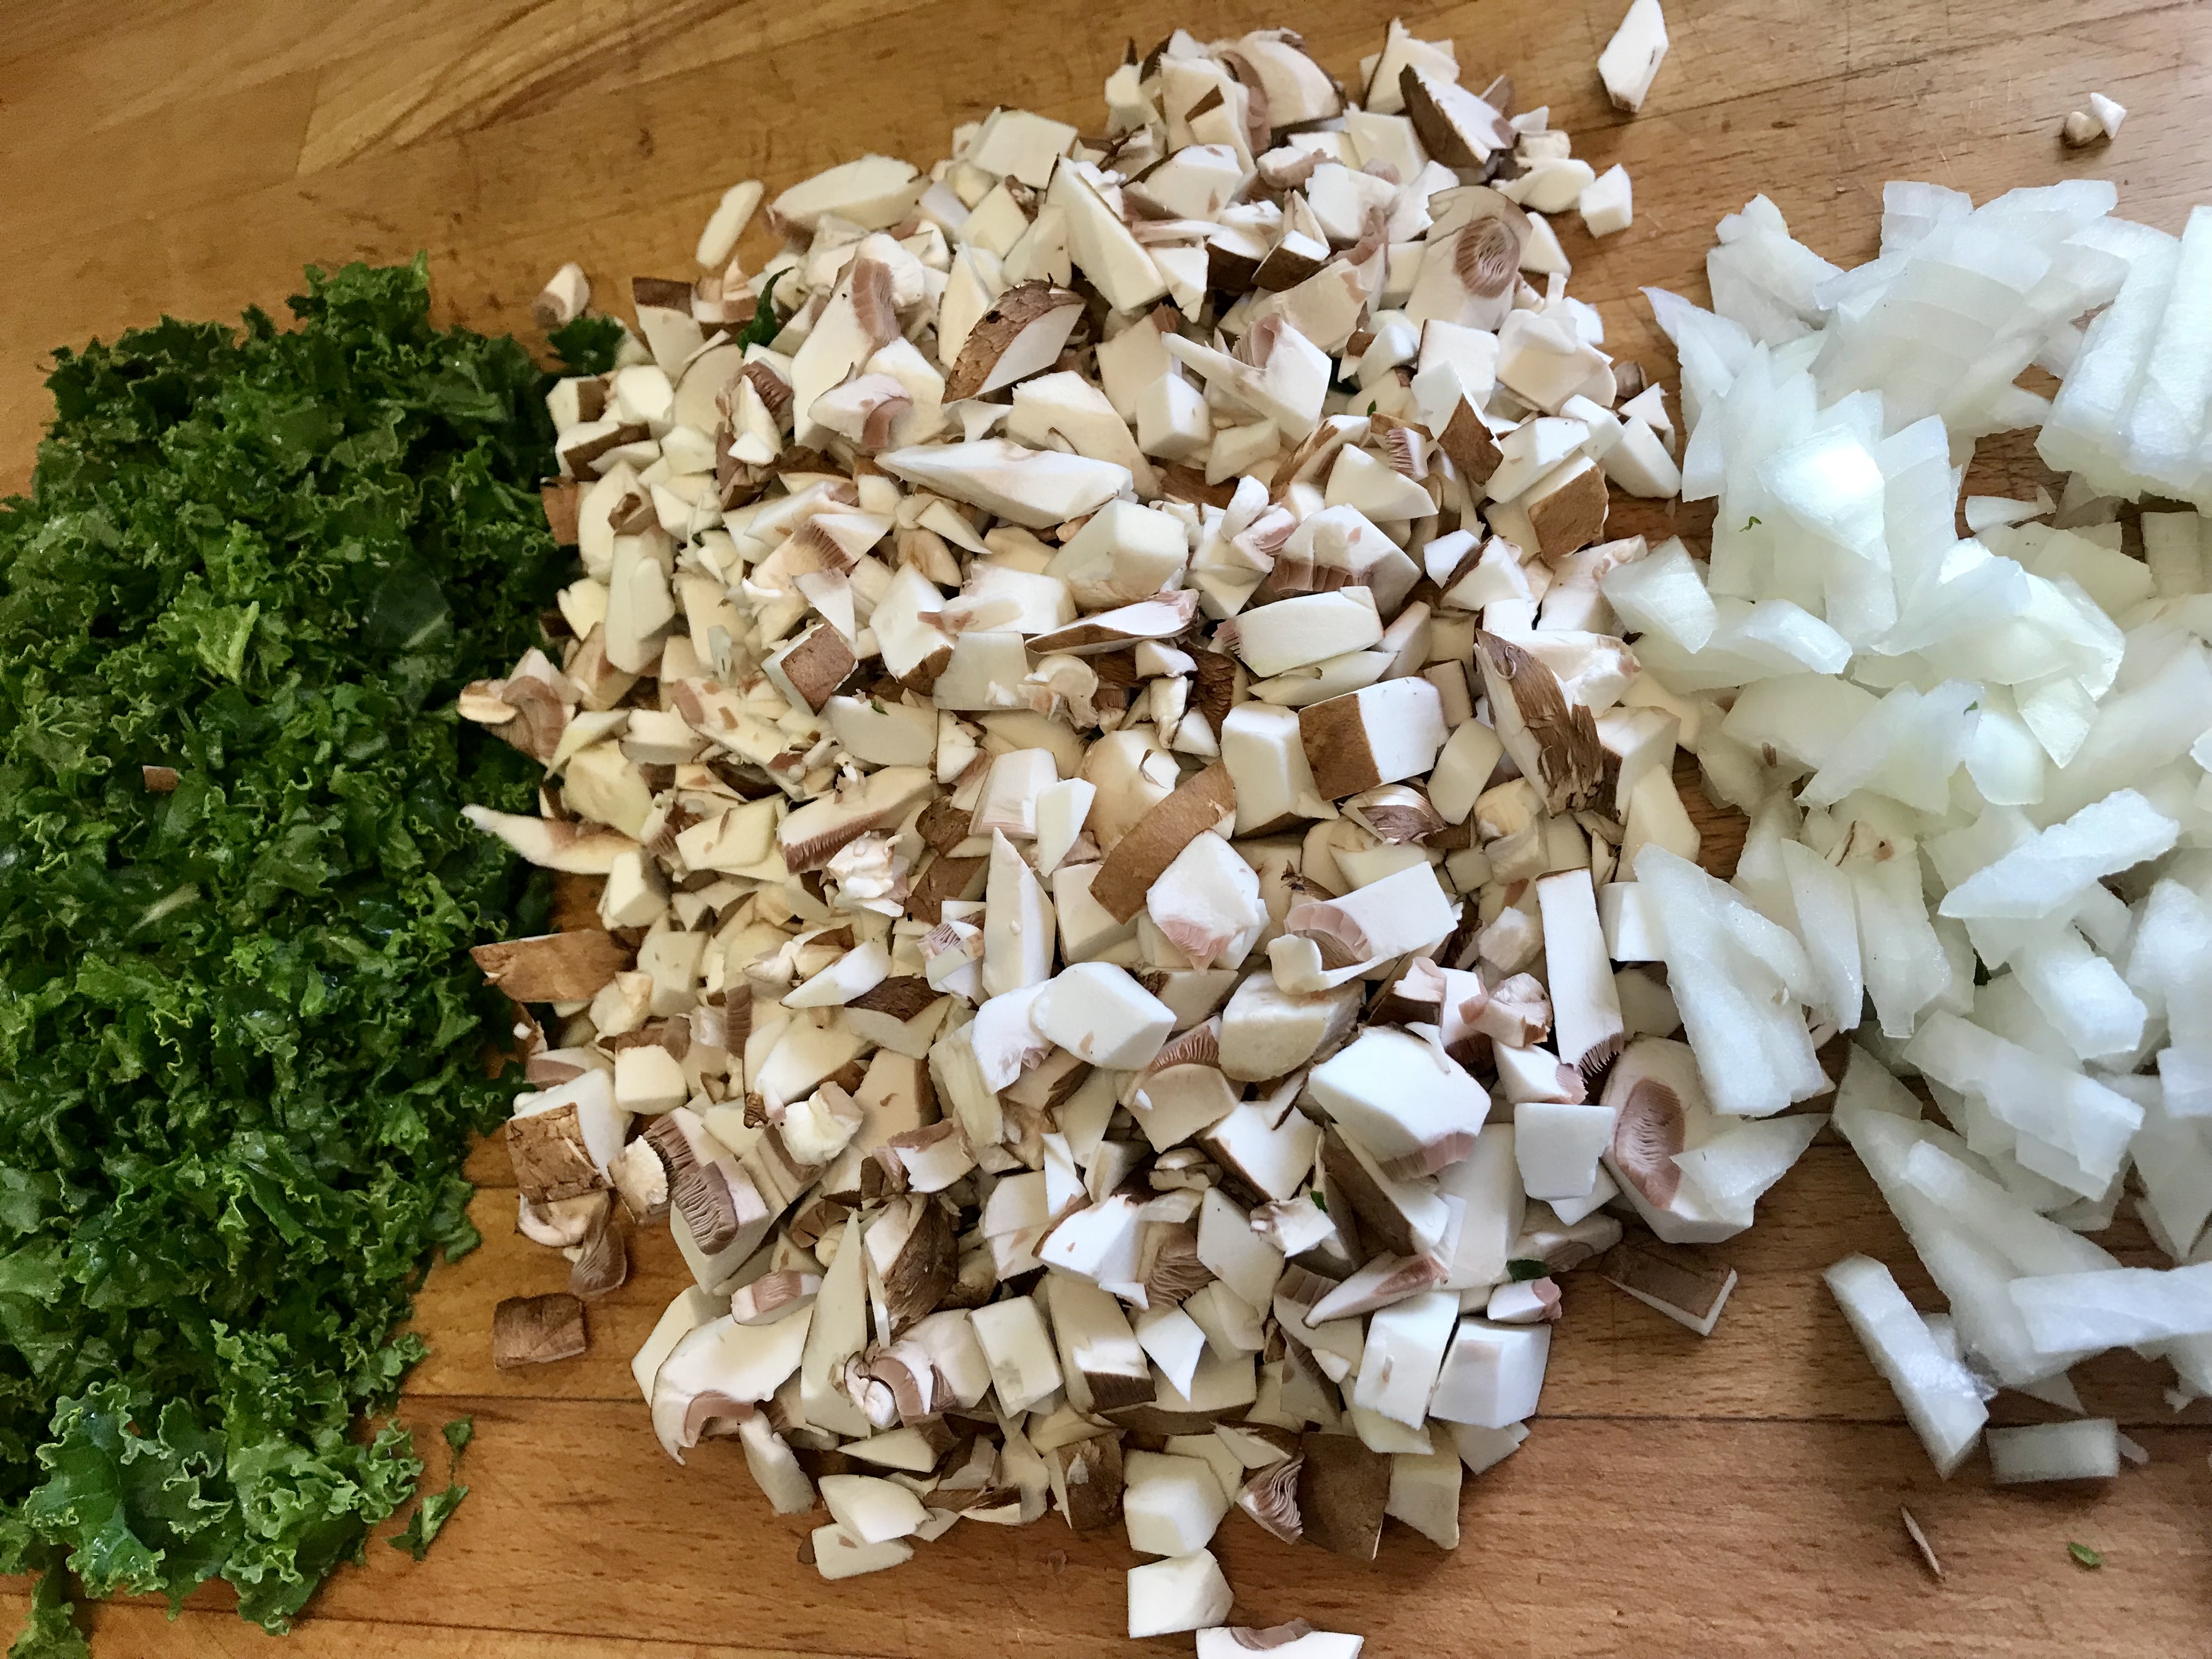
This creamy risotto packs a vegetable punch with loads of kale and mushrooms.
6 to 8 cups chicken broth
2 cups mushrooms
1 large shallot
1 bunch kale
2½ tablespoons butter
½ teaspoon kosher salt
1 ½ cups Arborio rice
¾ cup white wine or brandy
¾ cup Parmesan cheese
½ tsp kosher salt
Fresh ground pepper
Place broth in a medium sauce pan and heat to a simmer; reduce heat and keep warm.
Clean and chop the mushrooms and kale. Mince the shallot.
This photo may not show enough kale, but I usually have equal amounts of kale and mushrooms.
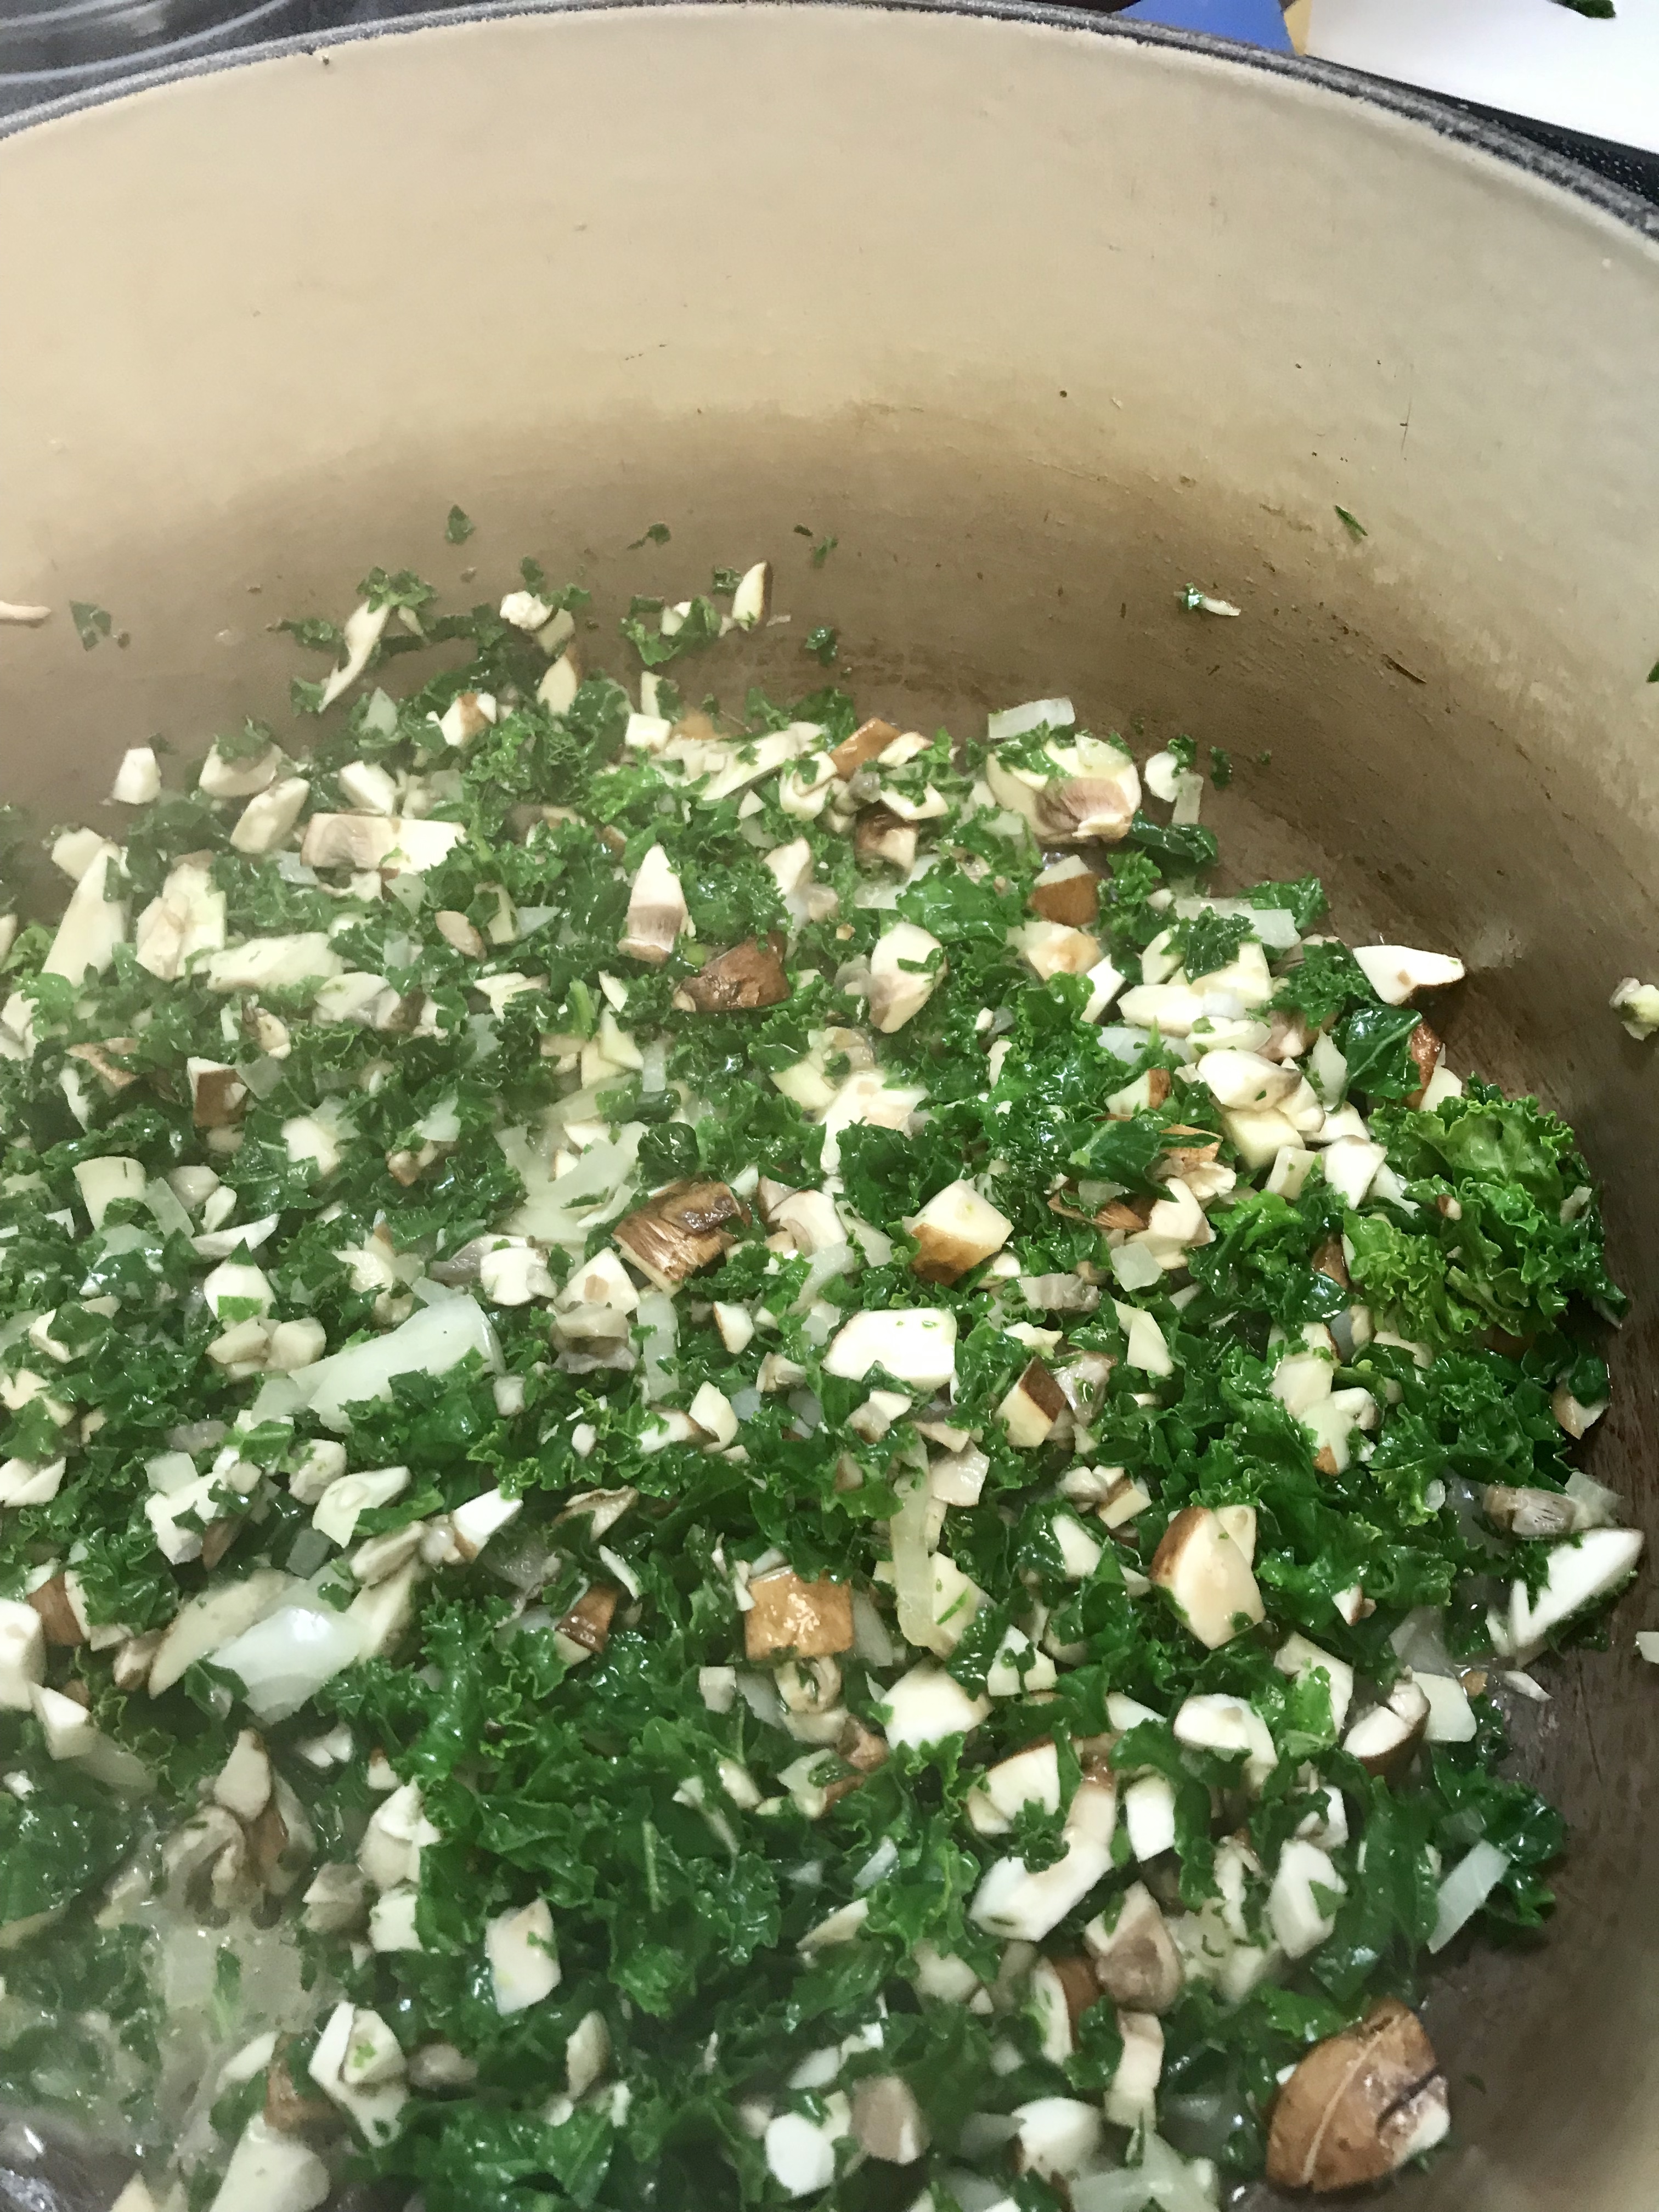
In a large heavy-bottomed skillet, pot or Dutch oven, heat 2½ tablespoons butter over medium high heat. Add the shallot, mushrooms, kale, and ½ teaspoon salt, reduce heat to medium, and cook until translucent, stirring often, about 3 minutes.
Love the bright kale against the earthy mushrooms.
Add 1½ cups Arborio rice and stir to combine, about 2 minutes. Increase heat to medium-high and add ¾ cup white wine. Cook, stirring, until liquid is almost evaporated, a few minutes.
At this point, you’re ready to start adding the broth. Add ½ cup warmed broth to skillet. Cook, stirring frequently, until broth is almost absorbed. Repeat, gradually adding broth ½ cup at a time and stirring, until rice is tender but still al dente and sauce is creamy (you may not need all the broth). The process should take about 20 to 25 minutes.
Stir in ¾ cup Parmesan cheese. Continue to stir until combined (or turn off the heat and cover the dish for a few minutes). Remove from heat and season to taste with kosher salt and pepper. Serve immediately, garnished with Parmesan cheese.
This is very flexible – tonight’s version included crimini and Portobello mushrooms, but you could use any variety you like. To make a vegetarian version use vegetable stock. Make sure you love the flavor of your stock, so important to the finished product. This will lose its creaminess if you can’t serve it right away, so keep a little of the warmed broth if you need to soften it up a bit.
Soft and supple, yet crunchy bits. Homemade naan can never be totally authentic without a tandoori oven, but you can come pretty close! I love the feel of this dough, and always make enough for leftovers, they heat up really well.
Just look at the way they puff up in my cast iron pan!
In a medium bowl, combine the yeast, sugar and water. Lightly whisk it all together, then let it sit for about 5 to 10 minutes or until the yeast dissolves and starts to foam.
To the same bowl, add the oil, yogurt, egg and whisk well. Set aside.
To the bowl of your mixer, combine the flour with the salt and garlic powder. Add the yeast mixture and mix for a couple minutes, until the dough comes clean from the sides of the bowl. If the dough is too wet, add a bit more flour, starting with a tablespoon at a time. The dough should be nice and soft but not sticky.
Your dough should feel soft and smooth, but not too sticky.
Place the dough in an oiled bowl and cover it with a clean kitchen towel or plastic wrap. Turn OFF your oven, place the bowl inside and allow to rise for about 30 minutes to 1 hour or until doubled in size. I use this trick all the time to speed up the rising time. Mine only took about 40 minutes, so the time depends on your yeast and your environment.
After it rises, cut the dough into 12 equal pieces and shape each piece into a small ball.
These little dough balls are so soft and supple, they roll out beautifully.
This variation included slivered green onions, we loved it. Don’t worry about the making the dough balls round, as long as it fits in your pan, and you can handle it, it works!
Heat a large cast iron skillet over medium-high heat and add about 1 tsp of olive oil. Roll out one ball at a time until it’s about 1/3 inch thick and about 5 inches in diameter. Add the piece of rolled dough to the hot skillet and cook for about 1 minute, the skillet should be very hot, so you’ll see bubbles forming as you cook the dough on the first side. Flip the dough and cook the other side until the bottom is golden.
Repeat with remaining dough until all of the pieces are cooked. Keep the naan covered in a towel so that it doesn’t dry out. When all of them are cooked, brush each one with the melted butter and garnish with some parsley.
Keep these covered and warm until ready for service.
Have you checked out the website “Jo Cooks” ?? She has some amazing recipes, and this is where I got this one from, I felt the texture was amazing, but I added just a bit more salt and some garlic powder.
Drizzle the finished hummus with your best olive oil and a sprinkling of paprika. A few toasted sesame seeds would be a great addition also. (I just didn’t think of it until I looked at my photos!)
1 (15-ounce) can chickpeas or 1 1/2 cups (250 grams) cooked chickpeas
1/4 cup (60 ml) fresh lemon juice (1 large lemon)
1/4 cup (60 ml) well-stirred tahini
1 small garlic clove, minced
2 tablespoons (30 ml) extra-virgin olive oil, plus more for serving
1/2 teaspoon ground cumin
Salt to taste
2 to 3 tablespoons (30 to 45 ml) ice water
Dash ground paprika, for serving
UPDATE: SINCE posting this originally, I’ve discovered a few more tricks.
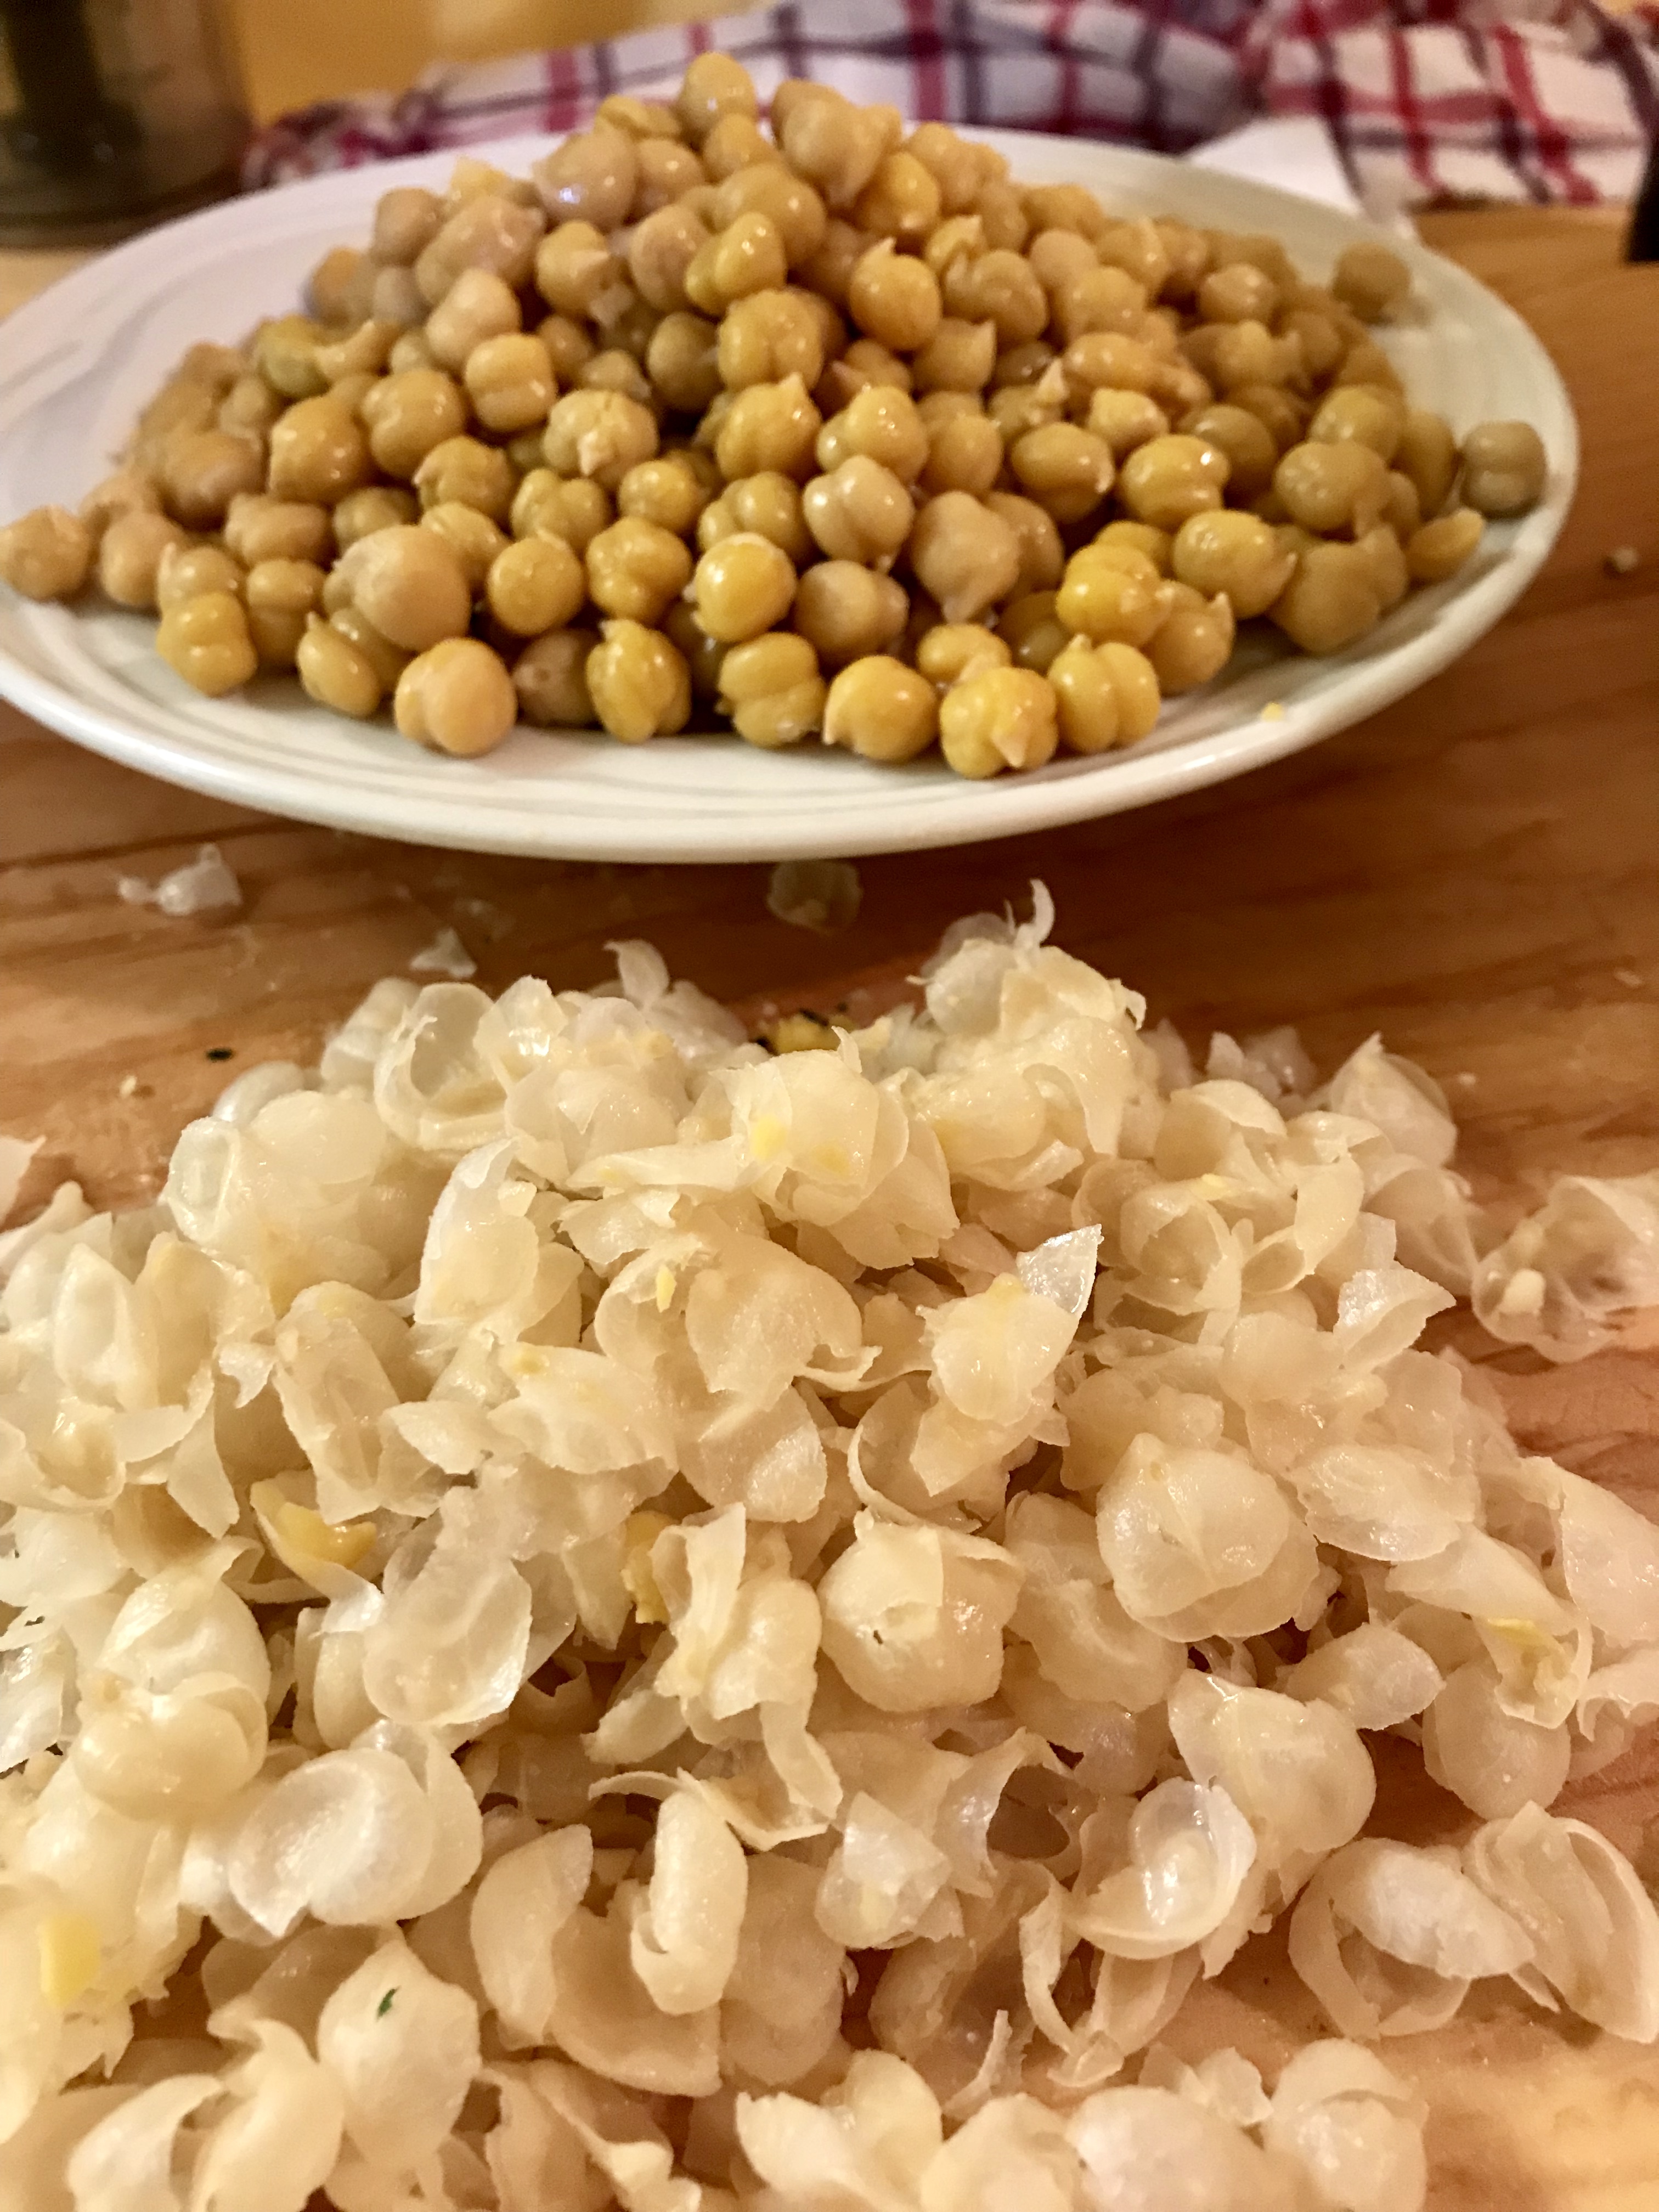
If you don’t have free hands for peeling the chickpeas, boil with 1/2 tsp baking soda per can for 20 minutes. Drain well and rinse with cold water – ready to go.
If you soak your garlic in the lemon juice for 10 minutes, and process that with the tahini at the first blending stage your garlic will have a much more mellow, smooth taste.
DIRECTIONS
In the bowl of a food processor, combine the tahini and lemon juice and process for 1 minute, scrape the sides and bottom of the bowl then process for 30 seconds more. This extra time helps “whip” or “cream” the tahini, making the hummus smooth and creamy.
Add the olive oil, minced garlic, cumin, and a 1/2 teaspoon of salt to the whipped tahini and lemon juice. Process for 30 seconds, scrape the sides and bottom of the bowl then process another 30 seconds or until well blended.
Open, drain, and rinse the chickpeas. Add half of the chickpeas to the food processor and process for 1 minute. Scrape sides and bottom of the bowl, then add remaining chickpeas and process until thick and quite smooth; 1 to 2 minutes.
I know, you are thinking “what goof peels chickpeas?” Me. Especially after Stella raved about the creamiest hummus she’d ever had. At 5 years old, this girl knows food. After that, how could I not peel my hummus. After all, even if it takes you 20 min to peel that can of chickpeas, haven’t you ever wasted 20 min on something less interesting??
Most likely the hummus will be too thick or still have tiny bits of chickpea. To fix this, with the food processor turned on, slowly add 2 to 3 tablespoons of water until you reach the perfect consistency.
Taste for salt and adjust as needed. Serve hummus with a drizzle of olive oil and dash of paprika. Store homemade hummus in an airtight container and refrigerate up to one week.
We served the hummus today with fresh vegetables as well as lightly seasoned and toasted pita wedges.
I heard a rumour that hummus made at home could be creamy, dreamy & simple, but every time I tried it I was less than satisfied. Sure, it was tasty …. but dreamy? No. So I hit the blogs looking for a trick, and “inspired taste” provided it. Look up the blog – Adam and Joanne have some amazing photos and descriptions, plus tips for cooking your own chickpeas and many other great ideas. I’ve made this recipe a few times now, exactly as written (except that I am that weirdo that doesn’t mind a 10 minute mindless activity like skinning chickpeas).
A few days later, my grand daughters Sloan and Stella were here, asking for a snack …. when I produced the vegetables I got a look ….. “Well Nana ……..do you have any of that amazing peeled chickpea hummus left? Could we please have some of that too?” That, my friends, is how foodies are born.