Fruit Pizza for Dessert!

Spring is here!  This fruit may not be in season here yet, and I can’t wait to make this when it is, but berries and mango are often available and you can use whatever fruit you like to make this refreshing dessert.  

The perfect cookie crust is tender but firm and a little crunchy – top that with the best of seasonal fruit on a creamy pudding bed and you’ve got a fabulous dessert.

COOKIE CRUST

  • 1 1/2 cup all-purpose flour
  •  1 tsp baking soda
  •  1/2 tsp baking powder
  •  1/4 tsp salt
  •  3/4 cup sugar
  • 1/2 cup butter unsalted, softened
  • 1 large egg
  • 1 tsp vanilla extract


INSTRUCTIONS

  • Preheat oven to 375 F degrees. Line a cookie sheet with parchment paper.
  • In a bowl mix together the all purpose flour, baking soda, baking powder and salt. Set aside.
  • In the bowl of your mixer add the sugar and butter and beat for a couple minutes until light and fluffy. Add egg and vanilla extract and continue mixing until the egg is fully incorporated. Add the flour and mix for an additional 2 minutes. Take the cookie dough and form it into a ball. Place it over the prepared baking sheet. Roll the ball into a round large cookie or any shape you prefer. You might need to add some more flour over your roll or over the cookie so that it doesn’t stick.The cookie should be at least 1/4 of an inch in thickness.
  • Bake the cookie for about 12 to 15 minutes or until edges are golden. Let it cool completely.

Make this cookie crust ahead of time – even a day ahead is fine, but be sure to let it cool down.

CREAMY CUSTARD

  • 3 tbsp corn starch
  • 1/4 cup white sugar
  • 1/4 tsp salt
  • 2 egg yolks, beaten
  • 2 cups whole milk
  • 1 tsp vanilla bean extract

In heavy bottom saucepan stir corn starch, sugar and salt together. Slowly add the beaten egg yolks and milk. Stir until thickened, remove from heat and add in the vanilla. Cover the top wth plastic wrap to avoid a skin forming and allow to cool completely.

(You can also do this in the microwave, but watch it! I’ve had it spill up and over more than a few times …..)

ASSEMBLY

Spread the cooled custard on the cold cookie crust. Arrange fruit of your choice to cover the custard and allow to set completely before serving.

Grandma’s Pizza Dough (Farmhouse)

Soft, tender & chewy crust …. layered with a few toppings, and this is just the best pizza! Today we had salami with cartelized onions, mozzarella, then ham, red peppers and black olives finished with feta. You can only do this if you have a crust hearty enough to handle it all.

Okay, maybe not my Grandma’s dough …. I’m pretty sure my Grandma never made a pizza in her life. Today’s Grams …. yes! This is also commonly called Farmhouse dough. I really don’t know where that originated, but if you try this you will find the most amazing dough for a deep dish pizza anywhere. Seriously. That’s a big claim to make, but this dough is soft, chewy and such a flavourful base for whatever you decide to build it with. Normally we do a variety of thin crust pizzas, but for cold nights, and only one pizza … this is killer!

Start the day prior to pizza baking!!!

Ingredients

  • 1 envelope active dry yeast (about 2¼ tsp.)
  • 2 Tbsp. plus ½ cup extra-virgin olive oil, plus more for bowl
  • 2 tsp. kosher salt
  • 4 cups all-purpose flour, divided, plus more for surface

MAKES ENOUGH DOUGH FOR 1 PIE


Preparation

Step 1. Stir together yeast and 1¾ cups warm water (105–110°) in the bowl of a stand mixer; let stand until yeast starts to foam, about 10 minutes.

Step 2. Mix in 2 Tbsp. oil, then salt and 2 cups flour. Attach dough hook and mix until just combined. Scrape down sides of bowl. Add another 2 cups flour, a cup at a time, mixing until incorporated and a shaggy dough forms, about 3 minutes.

Step 3  Increase speed to medium and mix until dough is soft and elastic and starts to pull away from sides of bowl, 5–6 minutes. It will still be somewhat sticky. Place dough in a lightly oiled bowl and cover with plastic wrap. Chill 24 hours.

Step 4  Coat an 18×13″ rimmed baking sheet with remaining ½ cup oil. Turn out dough onto a rimmed baking sheet and let sit 10 minutes to take off the chill. Gently and gradually stretch dough until it reaches edges and all 4 corners of baking sheet. (If dough springs back or is stiff to work with, let it rest a few minutes before continuing. You may need to let it rest more than once.)

Step 5  Cover dough on baking sheet tightly with plastic wrap and let sit in a warm place (but not too warm!—about 70° is ideal for yeast to grow) until it is puffed and full of air bubbles, 30–40 minutes.

These instructions are for a stand mixer, but feel free to do it by hand, just takes a little effort to do the kneading.

This recipe came straight from Bon Appetit, one of my favourite sources for recipes that never fail.  I’ve made it enough times now that I wanted to make sure to get it on the blog so I never lose this!
My stand mixer makes this pretty easy, but if you don’t have one, just go ahead and knead by yourself …. make sure to do so for 6-8 minutes though.
You will end up with this pillowy, soft ball of deliciousness. Make sure to stop while it is still slightly sticky or the dough will be too dry.
When you put it into the fridge it is shiny and smooth. Make sure to use a a container large enough for the dough to rise.
I like using this covered container, the dough rises enough to hit the lid and then continues to aerate, but the lid prevents it from spilling all over the fridge.
This recipe is enough for one large sheet pan, or 3 smaller pizzas. Just 2 of us at home now, so if I make this recipe – one pizza and a salad is great for dinner so you have 2 to put in the freezer for another night.
Delicious pizza sauce – lightly saute cherry tomato with a generous glug of olive oil, salt and pepper. When soft, blend up with basil and oregano …. taste and adjust with a little more salt and pepper if needed.
I usually cook this at 425 convection, and then slip it out of the pan and put it directly on the oven rack for the last few minutes to get the bottom crispier.

Sourdough Sandwich Bread

I love those round loaves of sourdough bread, crunchy crust, chewy interior with lots of holes …… but this is not one of them.  Sometimes I also just want a soft sandwich loaf with all the flavour of my sourdough breads.  This makes enough for 2 loaves.  I made one in a traditional loaf pan and the rest of the dough turned into the most amazing rolls I’ve ever come up with.

Soft sourdough 6

Ingredients

Levain

  • 1 cup + 1 tablespoon (128g) King Arthur Unbleached All-Purpose Flour
  • 1/2 cup + 1 tablespoon (128g) cool water (60° to 70°F)
  • 3 tablespoons (44g) ripe (fed) sourdough starter

Dough

  • 5 1/4 cups (631g)  Unbleached Bread Flour or  Unbleached All-Purpose Flour*
  • scant 6 tablespoons (50g) milk powder
  • 1/4 cup (50g) sugar
  • 2 1/2 teaspoons salt
  • 2 teaspoons instant yeast
  • 1/4 cup (4 tablespoons, 57g) unsalted butter, room temperature
  • 1 1/2 cups (340g) water (70° to 80°F)
  • all of the ripe levain
*All-purpose flour will produce a somewhat stickier dough.

Instructions

  1. To make the levain: Mix all of the levain ingredients together and place in a covered container with room for the levain to grow. It will almost double in size, and will take about 12 hours to ripen (ferment) at room temperature (70°F). When perfectly ripened, there’ll be large bubbles (mostly below the surface) creating a somewhat rippled effect. It’ll appear almost fluffy. If the levain is covered with a froth of tiny bubbles, it’s a bit over-ripened; but don’t worry, you can still use it.
  2. To make the dough: Mix and then knead together all of the dough ingredients, including the levain, to make a smooth, supple, and not overly sticky dough.
  3. Place the kneaded dough in a lightly greased bowl, cover the bowl, and let the dough rise for 1 to 2 hours, until doubled in size.
  4. Divide the dough in half, and shape each half into 8″ logs. Place the logs in two lightly greased 8 1/2″ x 4 1/2″ bread pans. Cover the pans with lightly greased plastic wrap (or a couple of plastic shower caps), and let the loaves rise until they’ve crowned about 1″ over the rim of the pan, about 1 to 2 hours.

Soft sourdough 4

Look at all this from just a few moments work!  I almost injured my arm I was so enthusiastically patting myself on the back.

This recipe yielded such a beautiful soft sandwich loaf for sure, but it was these rolls that stole the show.  The dough is tender and incredibly flavourful.

Soft Sourdough 1

It’s the same principal as a cinnamon bun – but savoury!  You can fill the roll with anything you like.  Today I used Black Forest ham, cut into small squares, and spicy Calabrese sausage cut into little strips along with kalamata olives and diced yellow pepper.

Today I got frustrated because I wasn’t able to use tomato sauce like the pizza roll I envisioned.  So, Plan B …… I defrosted one of my basil almond pesto blocks, stirred in a bit more olive oil and spread that over the dough.  In the end, it was the happiest of Plan B’s ever!  In fact I got so excited by how good it was smelling that I rolled it all up, forgetting to add cheese.  Oh well, another Plan B – cheese sprinkled over the top before baking.

Soft sourdough 3

A mixture of aged white cheddar and mozzarella graced the top of these rolls right before baking and it was just fabulous.

I’ve been reading a lot of the King Arthur Flour website recipes during my sourdough explorations, and this recipe also came from there.  We don’t have any of that particular flour around here, but I wonder how much difference that makes?  We do have Rogers Flour locally and that is what I have been using with great success.

Sourdough Pizza Dough

Starting a sourdough project means a lot of sourdough discard …. this is a brilliant way to use some of that discard.

Ingredients

  • 180 grams bread flour
  • 120 grams warm water
  • 60 gram active sourdough starter
  • 15 grams extra virgin olive oil
  • 5 grams sea salt
  • Gather the ingredients.

  • Add all of the ingredients to a medium bowl (a glass bowl is great because you will be able to observe bubbles from fermentation activity). Stir to thoroughly combine. The dough will look rough and shaggy and feel soft and sticky.

  • Cover bowl with a damp towel or plastic bag and rest for 20 minutes.

  • Then stretch and fold the dough, more or less as follows. Moisten your hand with a little water, scoop your hand underneath the dough and gently grasp one side of the lump. Lightly stretch the dough in your hand away from the main mass, then fold it over. Repeat this motion on different sides of the dough three or four more times.

  • Then flip the whole mass of dough such that the seams of your folds face down against the bottom of the bowl. You should notice that the shaggy dough becomes considerably more smooth, which is the goal.

  • Rest the dough for another 20 minutes, then stretch and fold again.

  • Cover once more and ferment for 3 to 4 hours at room temperature. Your dough will probably not rise significantly, but you should see bubbles forming on the surface and underneath (which you can observe if your dough is in a glass bowl). If you do not see bubbles, continue to ferment until you do.

  • Lightly flour a work surface. Invert the bowl above the floured area and wait for the dough to release itself from the bowl. Divide the dough in half. Using essentially the same technique as the stretch and fold earlier (minus the wet hands), shape the pieces into rounds.

  • Coat the inside of two round, one-pint storage containers (preferably with lids) with oil and place a dough ball seam-side down into each one. Cover with lids or plastic wrap.

  • Refrigerate for at least 24 hours before using. Dough kept in the refrigerator longer will continue to develop flavor and has a shelf life of a week or more.

  • To make pizza, remove the dough from the refrigerator and place on a well-floured surface. Coat the dough lightly all over with flour as well. With your hands, gently flatten and stretch the dough into a thin circle about 12 inches in diameter.

  • Add sauce and toppings as desired and bake according to your preferred method. Serve immediately.


    This recipe comes from http://www.thespruceeats.com – love it!


    Sourdough pizza dough

    Look at those little bubbles in there already – you know its going to be good.

    Sourdough pizza dough 1

    Set aside to rest – a minimum of 24 hours, and up to one week.

    Sourdough pizza 1

    Flour your hands to stretch the dough out … it is super soft and moves easily.

    Sourdough pizza 2

    This dough is soft, chewy and extremely tasty!


    This recipe makes enough for 2 small pizza shells …… not sure about your home, but that’s never enough for my household so make sure to double this recipe

Soft Dinner Buns

Buns 9

Admit it, you wish your house smelled this good right now!


April 1 is tomorrow, and that’s our Auntie Elsie’s birthday, or it would have been if she was still with us.  We miss her every day, and while I was busy thinking of her I felt that need to make some soft white dinner buns, the kind she used to bring to every family dinner as a treat.  This dough is soft and tasty, and the texture is perfect.  Pretty sure she would have been proud of this effort!

Buns 7

Step 1:

  • 1 1/2 cups boiling water
  • 6 tsp. honey
  • 6 tsp. butter
  • 2 tsp. salt

Combine the above ingredients in a large bowl and cool.

Step 2:

  • 1 1/2 cups lukewarm water (not too warm, you’ll kill the yeast)
  • 3 tsp. sugar
  • 2 Tbsp. fast rising yeast

Dissolve the water and sugar in a small bowl.  Sprinkle the yeast on top and let sit.

Step 3:

  • 2 eggs, well beaten
  • 6-7 cups unbleached white flour

Buns 1

Just waiting for this yeast to bloom a little more and I’ll be ready to start combining everything.

  • Mix the eggs into the first (Step 1) mixture once it has cooled to room temperature.
  • Add 1 cup of flour to this mixture and stir well.
  • Add the yeast mixture (Step 2) to the bowl and stir to incorporate.
  • Gradually add the remaining flour, cup by cup, until the dough gets too difficult to stir in the bowl.  At this point, on a floured surface (your counter), empty the dough and knead by hand until the dough is smooth and elastic, about 10 minutes.  You will need to keep the surface floured to prevent it from sticking.
  • Place the dough into a greased bowl, cover with a clean tea towel, and place in a draft-free warm area to rise.

buns 2

This dough is so soft, I can taste it already….

Buns 3

It’s true.  I’m that dork that has a re-usable cover for raising yeast dough.

  • Let the dough rise until doubled (about 40 minutes) and punch it down.  Repeat this process once.

Buns 4

Yes, the yeast and time has done it’s job.

Buns 5

Time to release the dough and form buns.

  • Preheat your oven to 350 F and grease two  9x 13 baking trays (the ones with the small sides).  You can use any shape of pan you want in actual fact.  Cut off pieces of dough that are approximately 1/2 cup in size (doesn’t have to be exact!) and form into buns.  I keep my fingers slightly floured and tuck the dough under as I stretch the dough to make it smooth on top, but you can use whatever technique you like!
  • Place the buns about a 1/2 inch apart on the greased pan, cover and let rise until doubled, about 30 minutes.

Buns 6

  • Bake for 15-20 minutes or until nicely browned.

Buns 8

Use this recipe for whatever you like!  Today I made mini pizza shells for the grandkids to make lunches with.  I call it the organic look when they aren’t all uniform in size and shape….


Buns 11

A tray of these is welcome at any dinner.

I thought I had Auntie Elsie’s original recipe, but couldn’t find it.  This recipe is from “Fraiche Nutrition” and if you haven’t been to her website, well – get on over there.  It is packed with delicious and nutritious recipes and tips.

Deep Dish Pizza – Chicago style

Chicago style deep dish pizza is an entirely different creation!  We traditionally make thin crust pizzas, with a light topping.  This situation calls for heavier amounts of all toppings, and naturally a heavier layer of dough.

Chicago 2

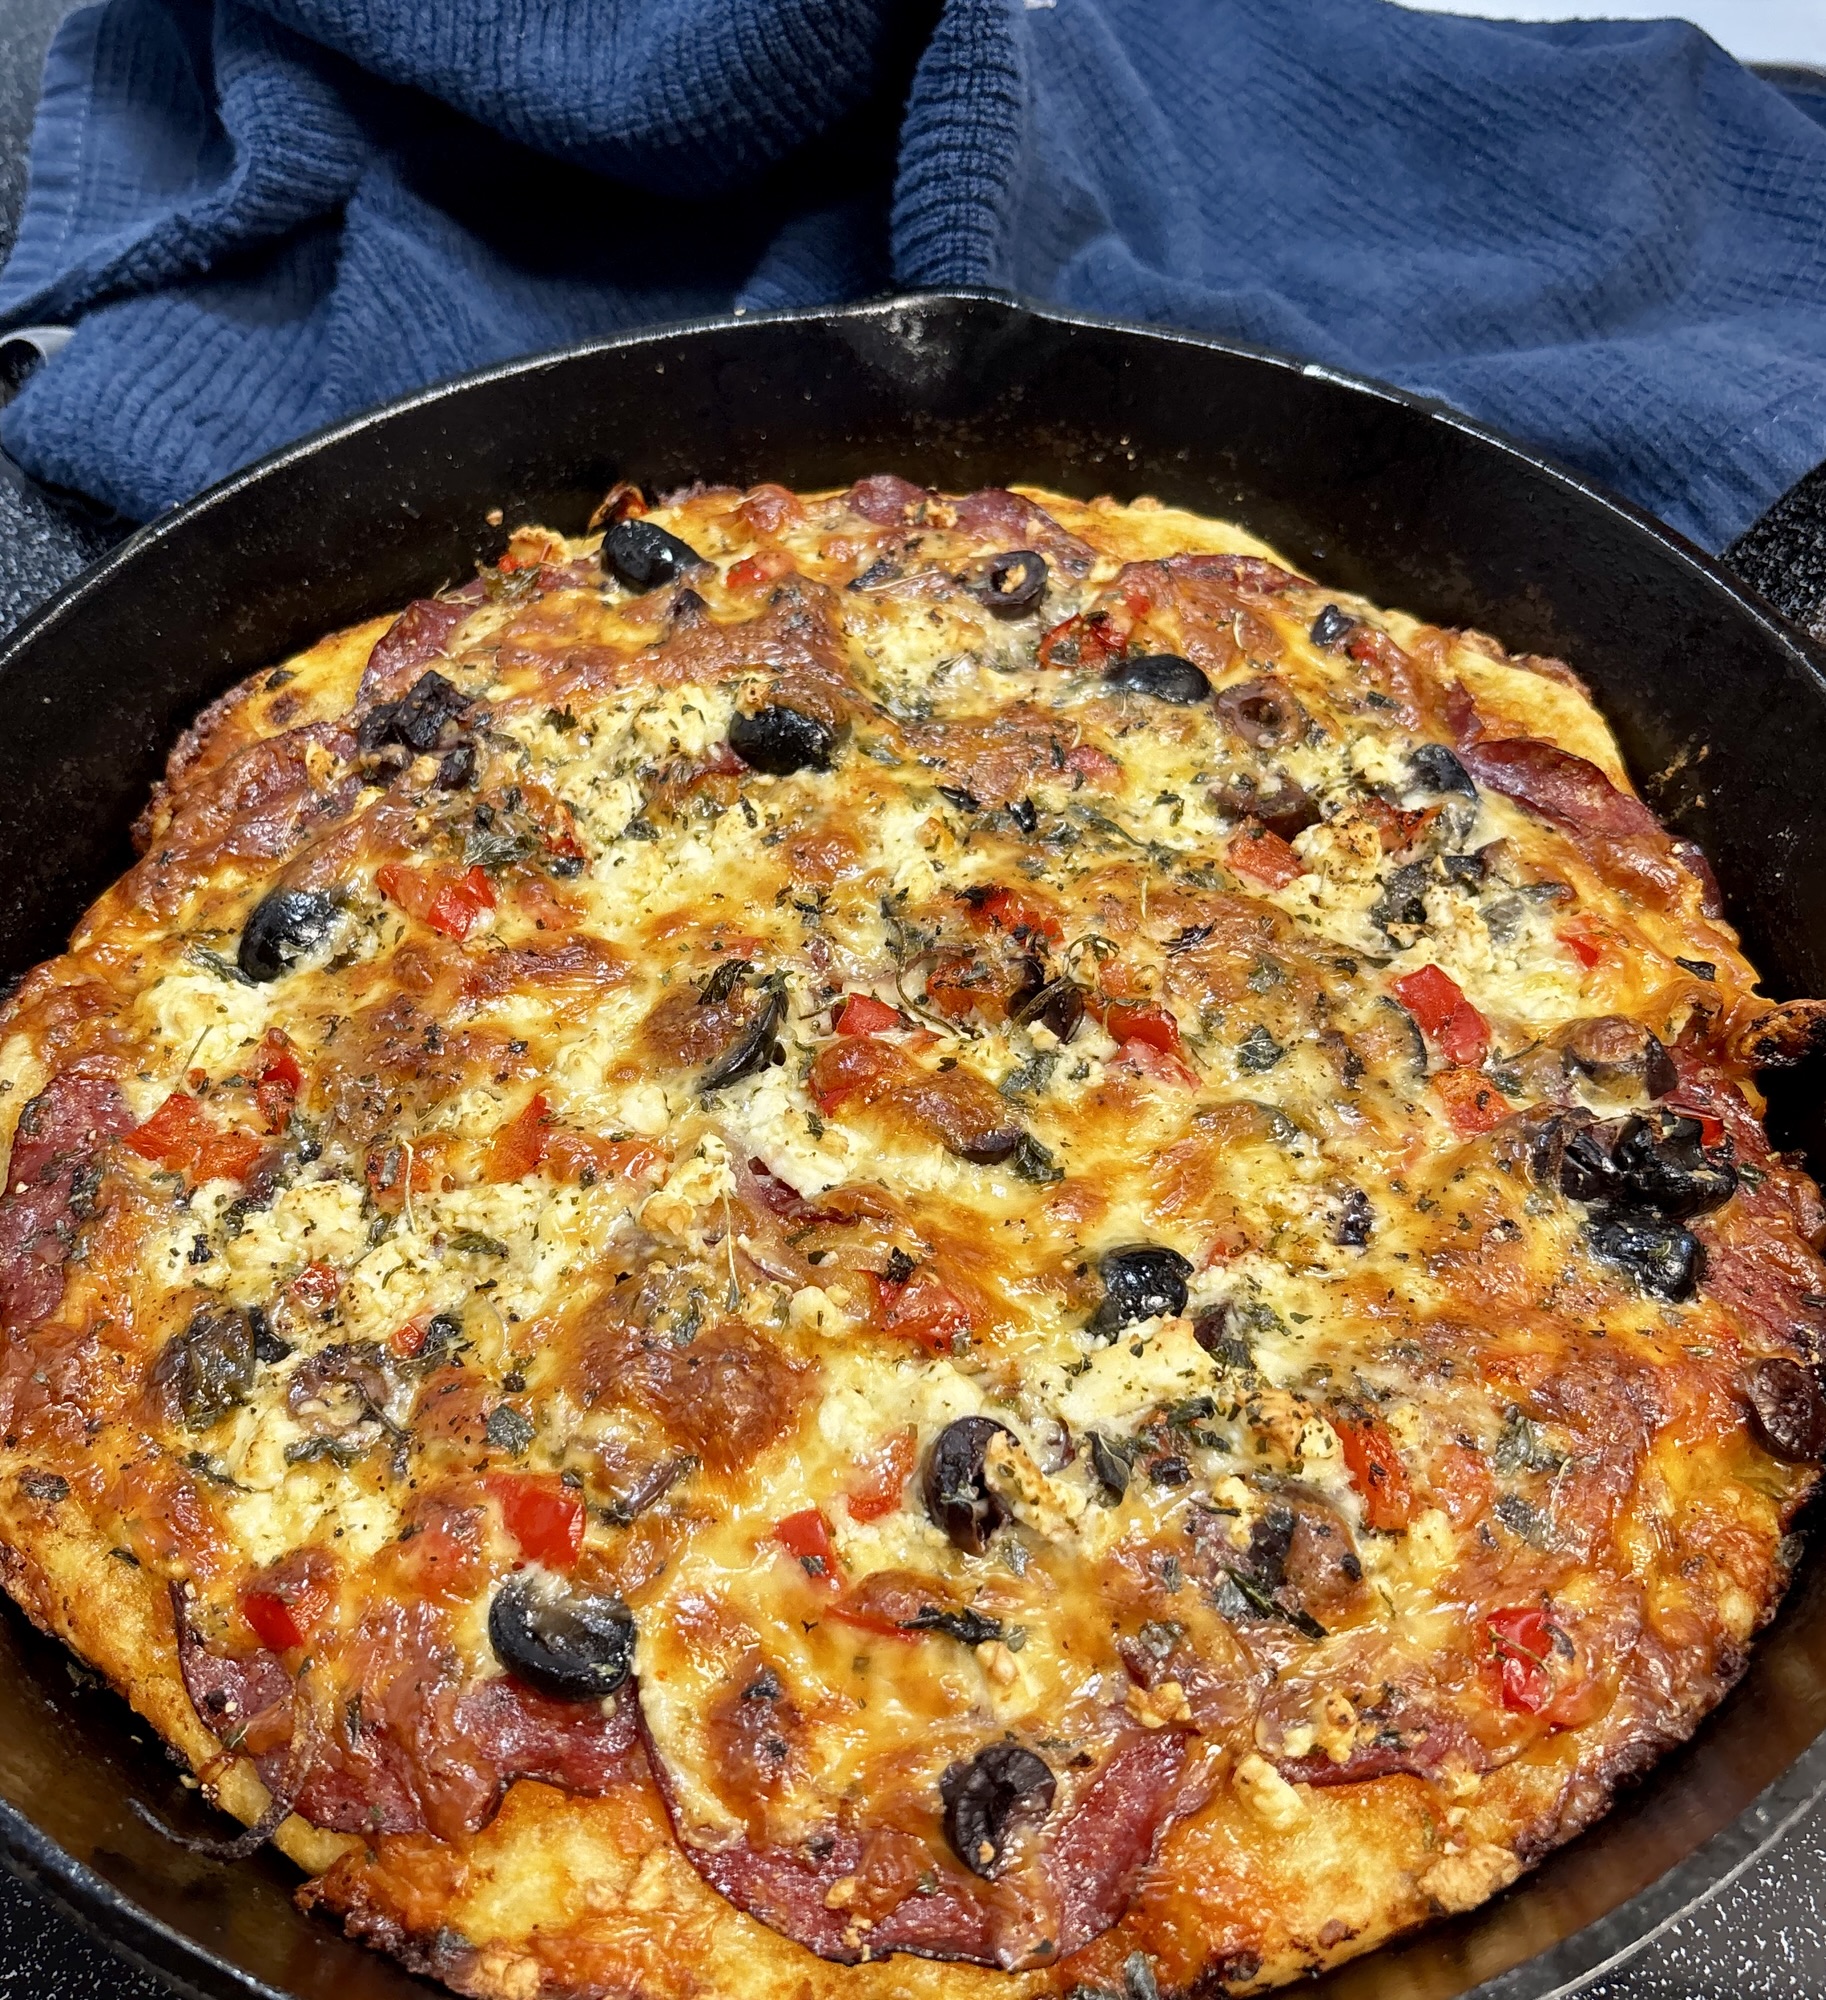
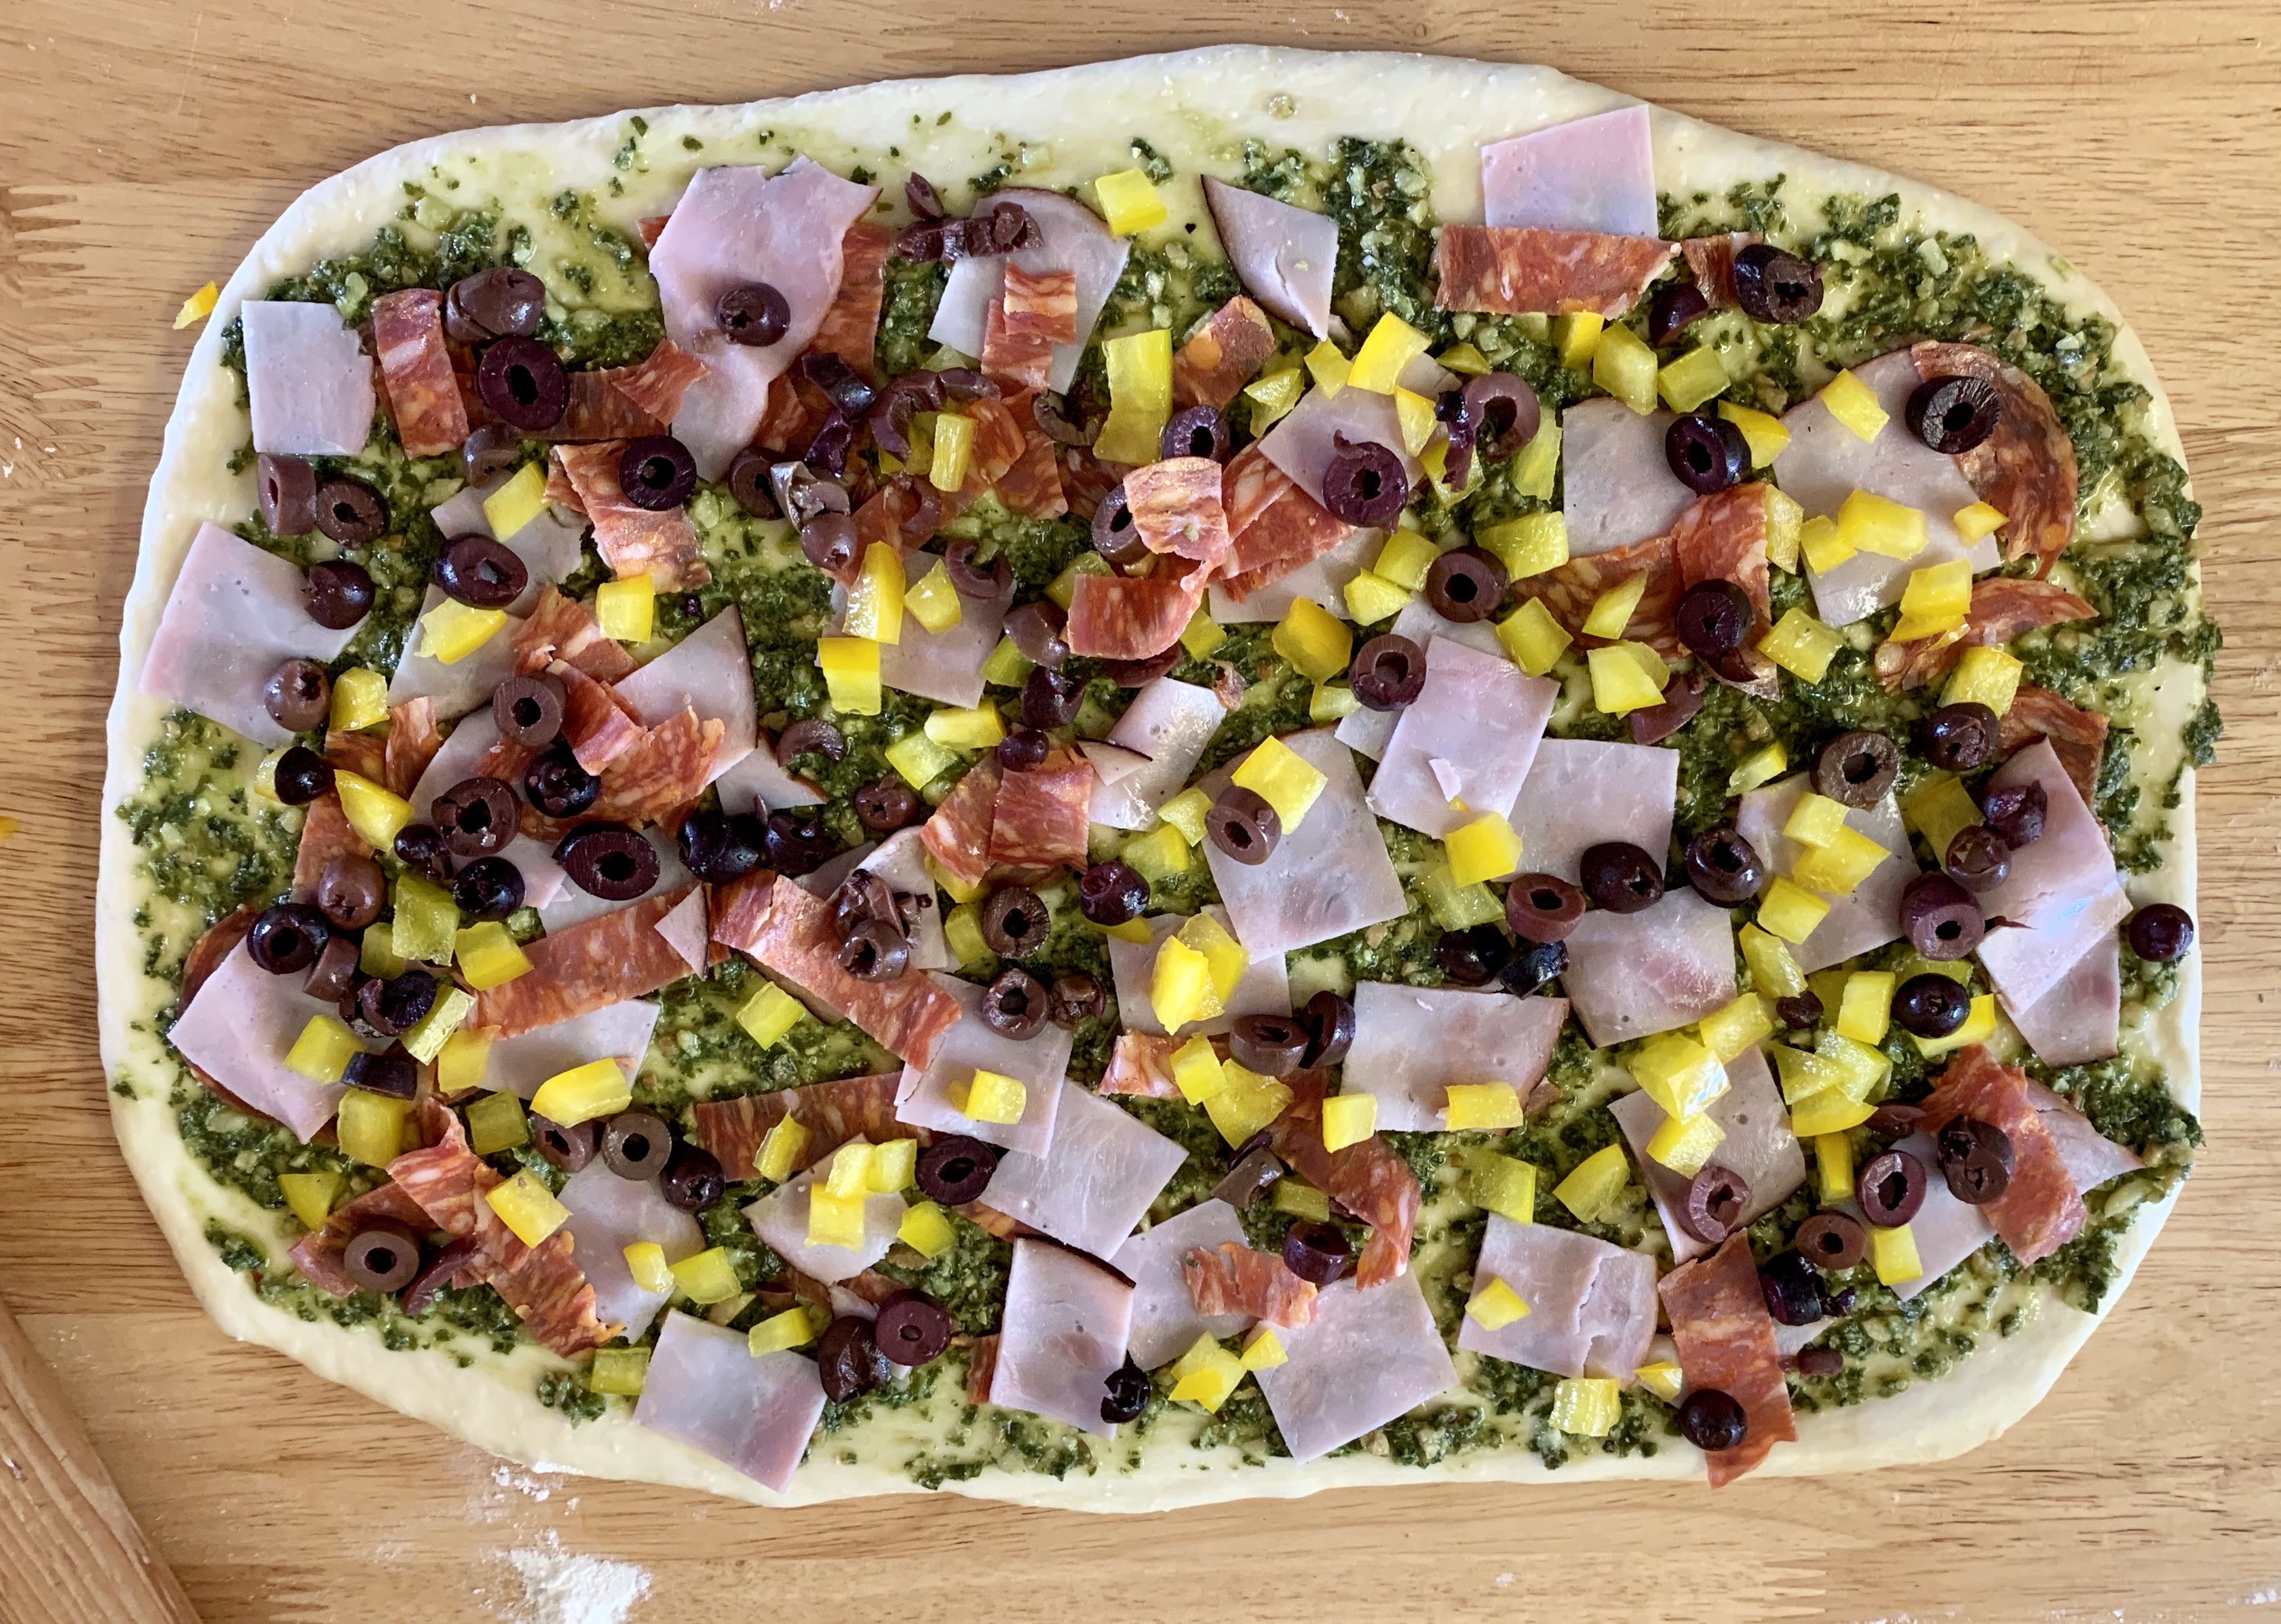
Ready for the oven, this dish features soft chewy dough, sweet & savoury toppings, and the tang of feta with olives – a little something for everyone.

The secret to having a dough that doesn’t get all soggy is in the layering.  DON’T PUT YOUR SAUCE RIGHT ON THE DOUGH!!!  That’s it, basically.

preheat oven to 400 and generously grease your cooking vessel with olive oil

PIZZA

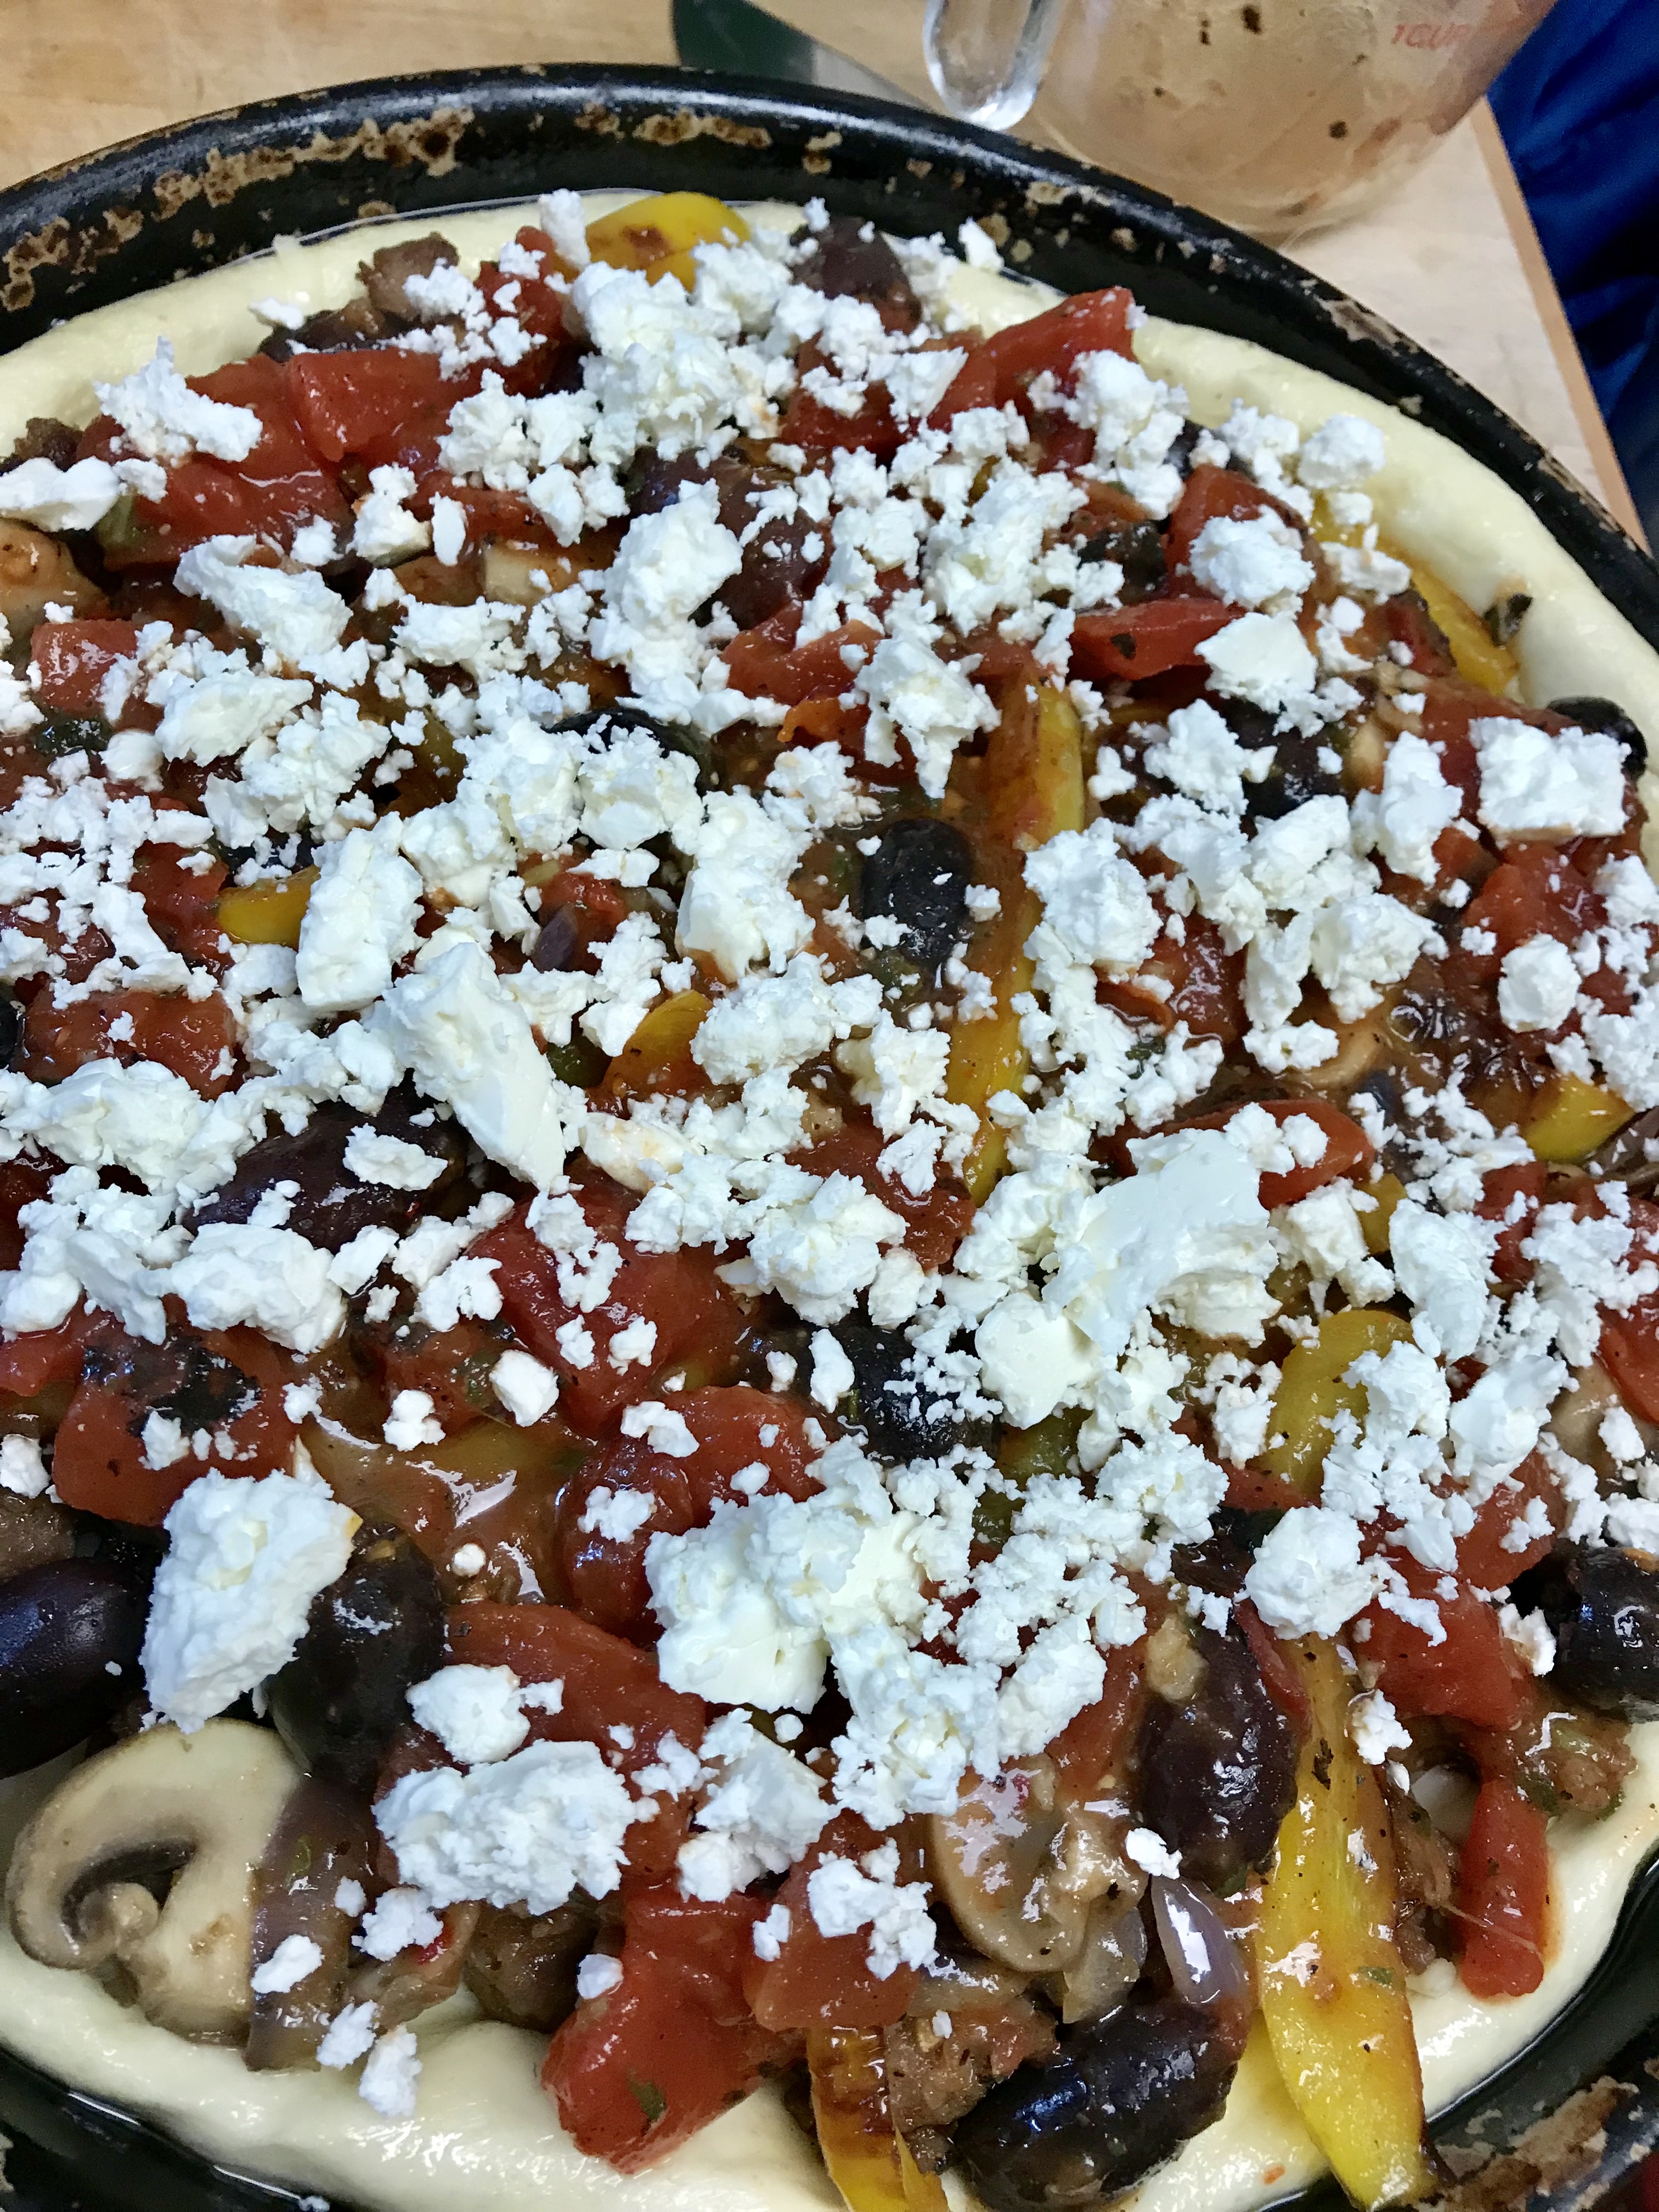
Prep everything ahead of assembling your pizza.  For this pizza I made 1 10″ deep dish creation consisting of:

  • 2 spicy Italian sausages, removed from casing and broke apart – cook until crispy on the edges.
  • 2 mild Italian sausages, (see above)
  • 1/2 cup sliced yellow pepper, flash fried until it has golden brown bits
  • 1/2 cup sliced red onion, sautéed until carmelized
  • 1/2 cup thickly sliced Crimini mushrooms, sautéed until browned and have lost some juice
  • handful of kalamata olives, (hopefully pitted)
  • handful of feta cheese, crumbled
  • mozzarella cheese, freshly grated

SAUCE

For one 10 “pizza:

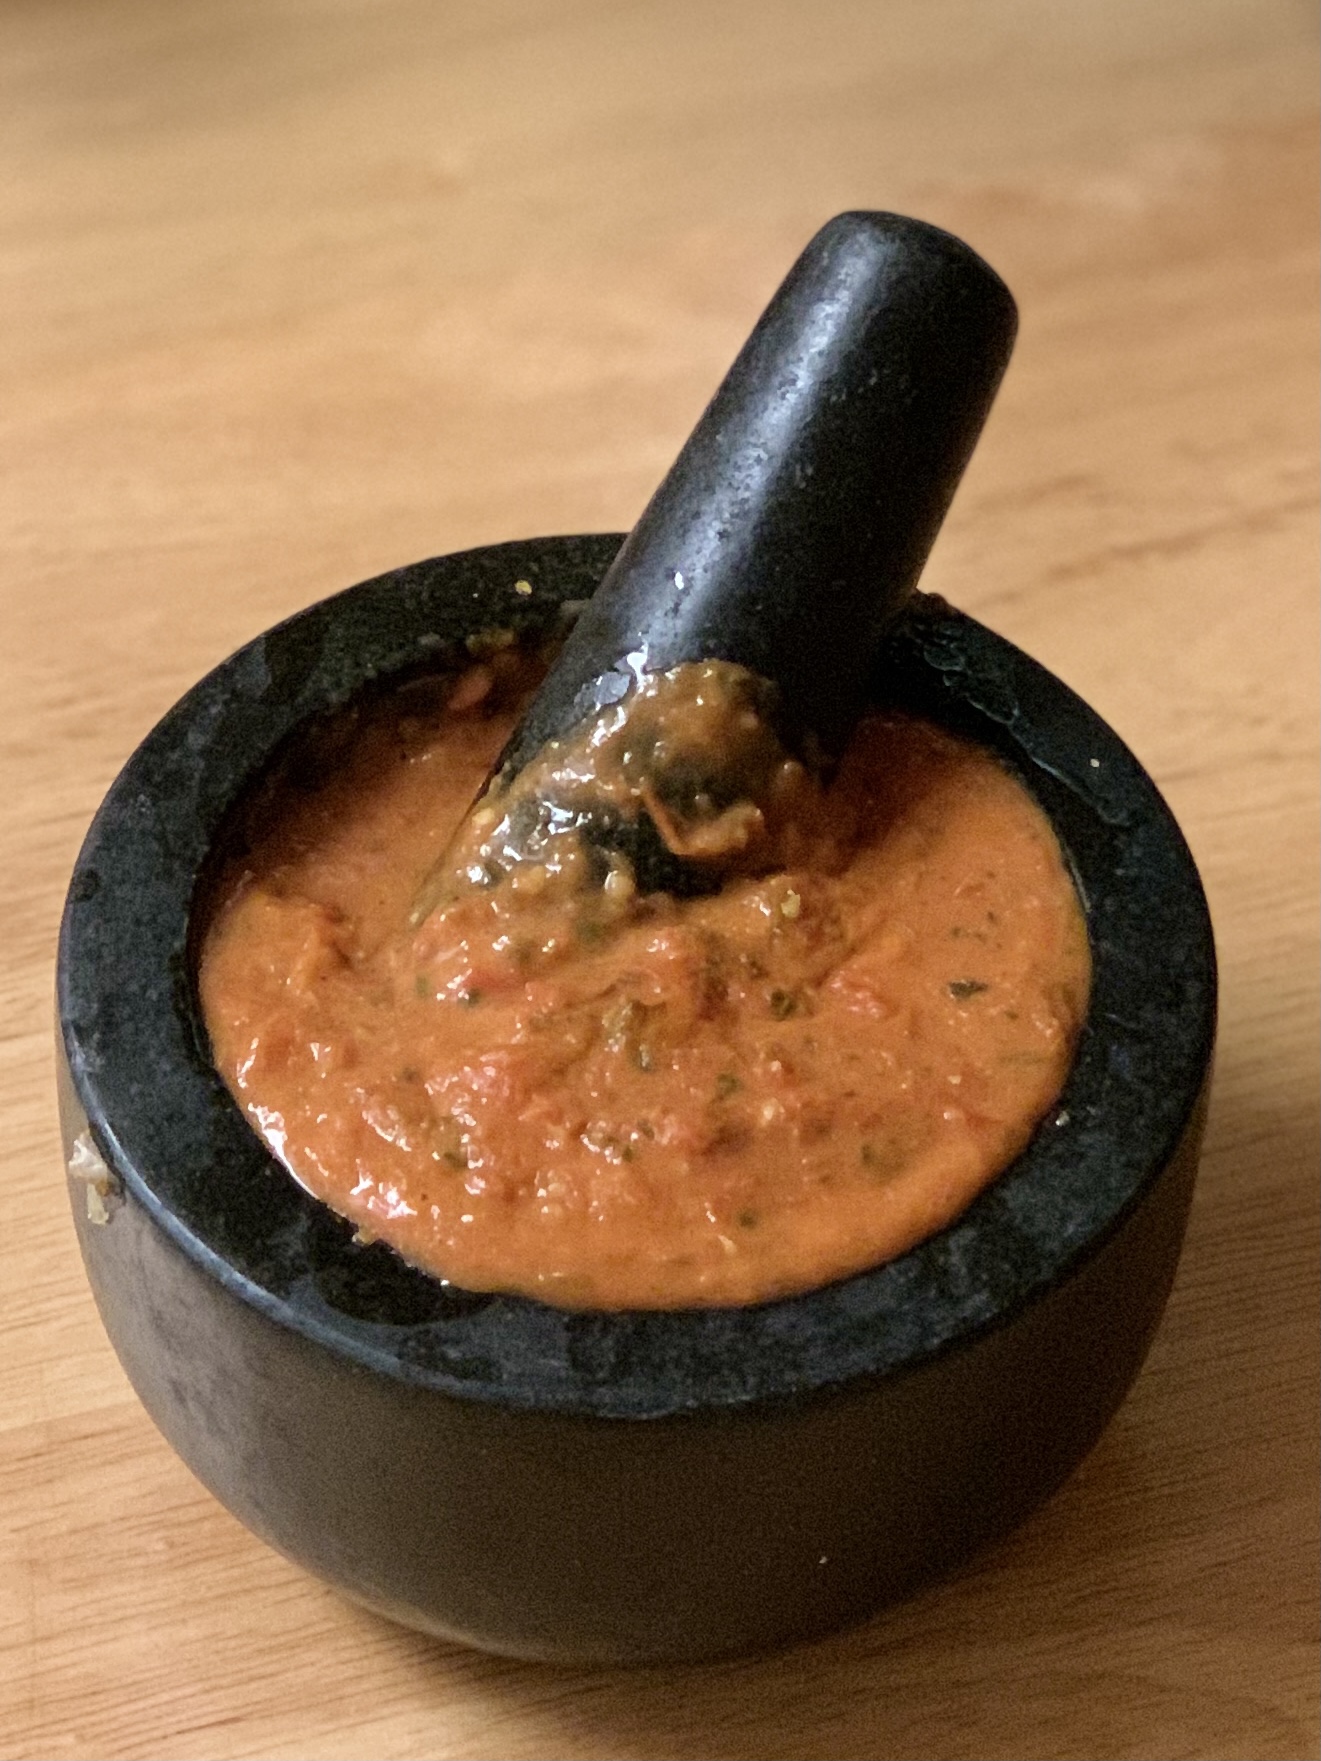
  • 1/2 can (about 1 cup) fire roasted canned tomatoes
  • 1 tbsp fresh basil (if, like me, you live in an area where this is not readily available, I use the tubes – they most closely replicate that fresh flavour)
  • 2 garlic cloves
  • salt and pepper to taste

I just stir this together as I like the chunks of tomato.

This whole thing is a lot easier if you buy pizza dough pre made, but when I get home from sitting at a desk all day and listening to people, I love the idea of working with dough.  Kind of like kitchen yoga, it washes away that day ….. (yes, I’ve been told that’s a bit odd but it beats drinking every night).  Or does it?

ASSEMBLY

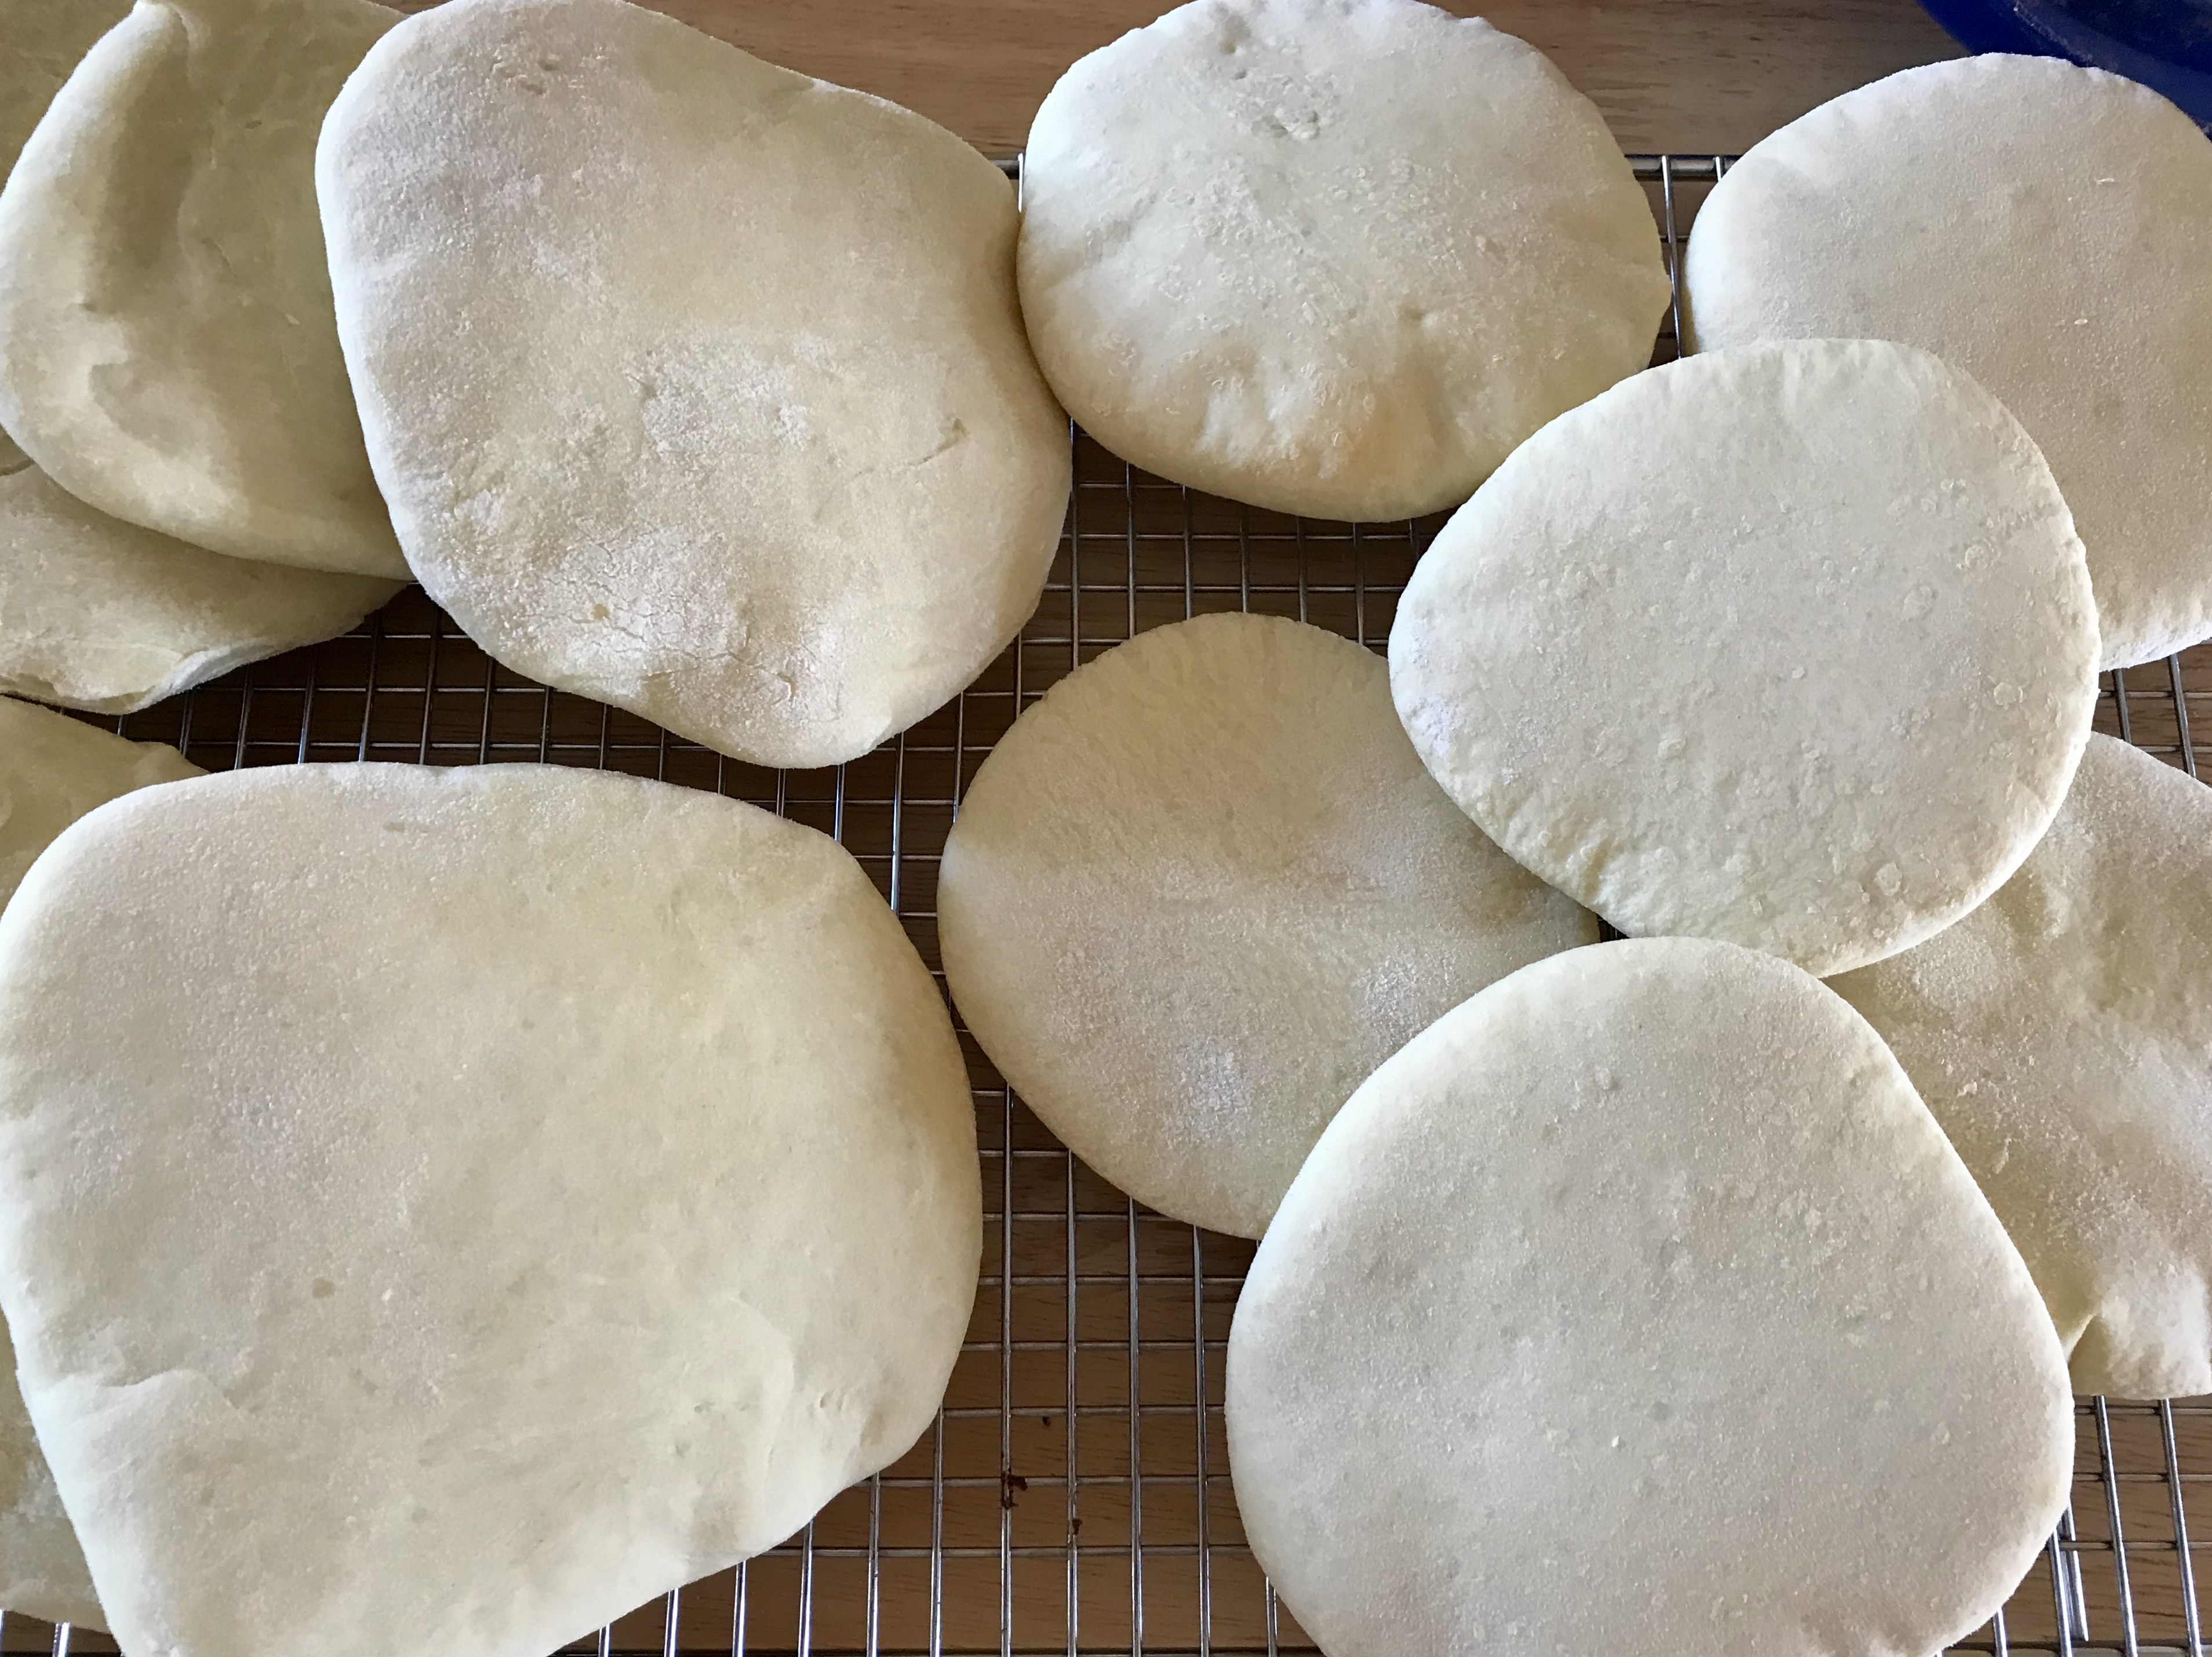
Lay your pizza dough in the cooking dish, and gently stretch it to go right to the edges, and up the sides.  Let it rest if it doesn’t go easily, it will once it has had a moment to chill out.  This may take a few rest periods, but get a generous amount of dough to behave and fill your dish as well as up the sides.

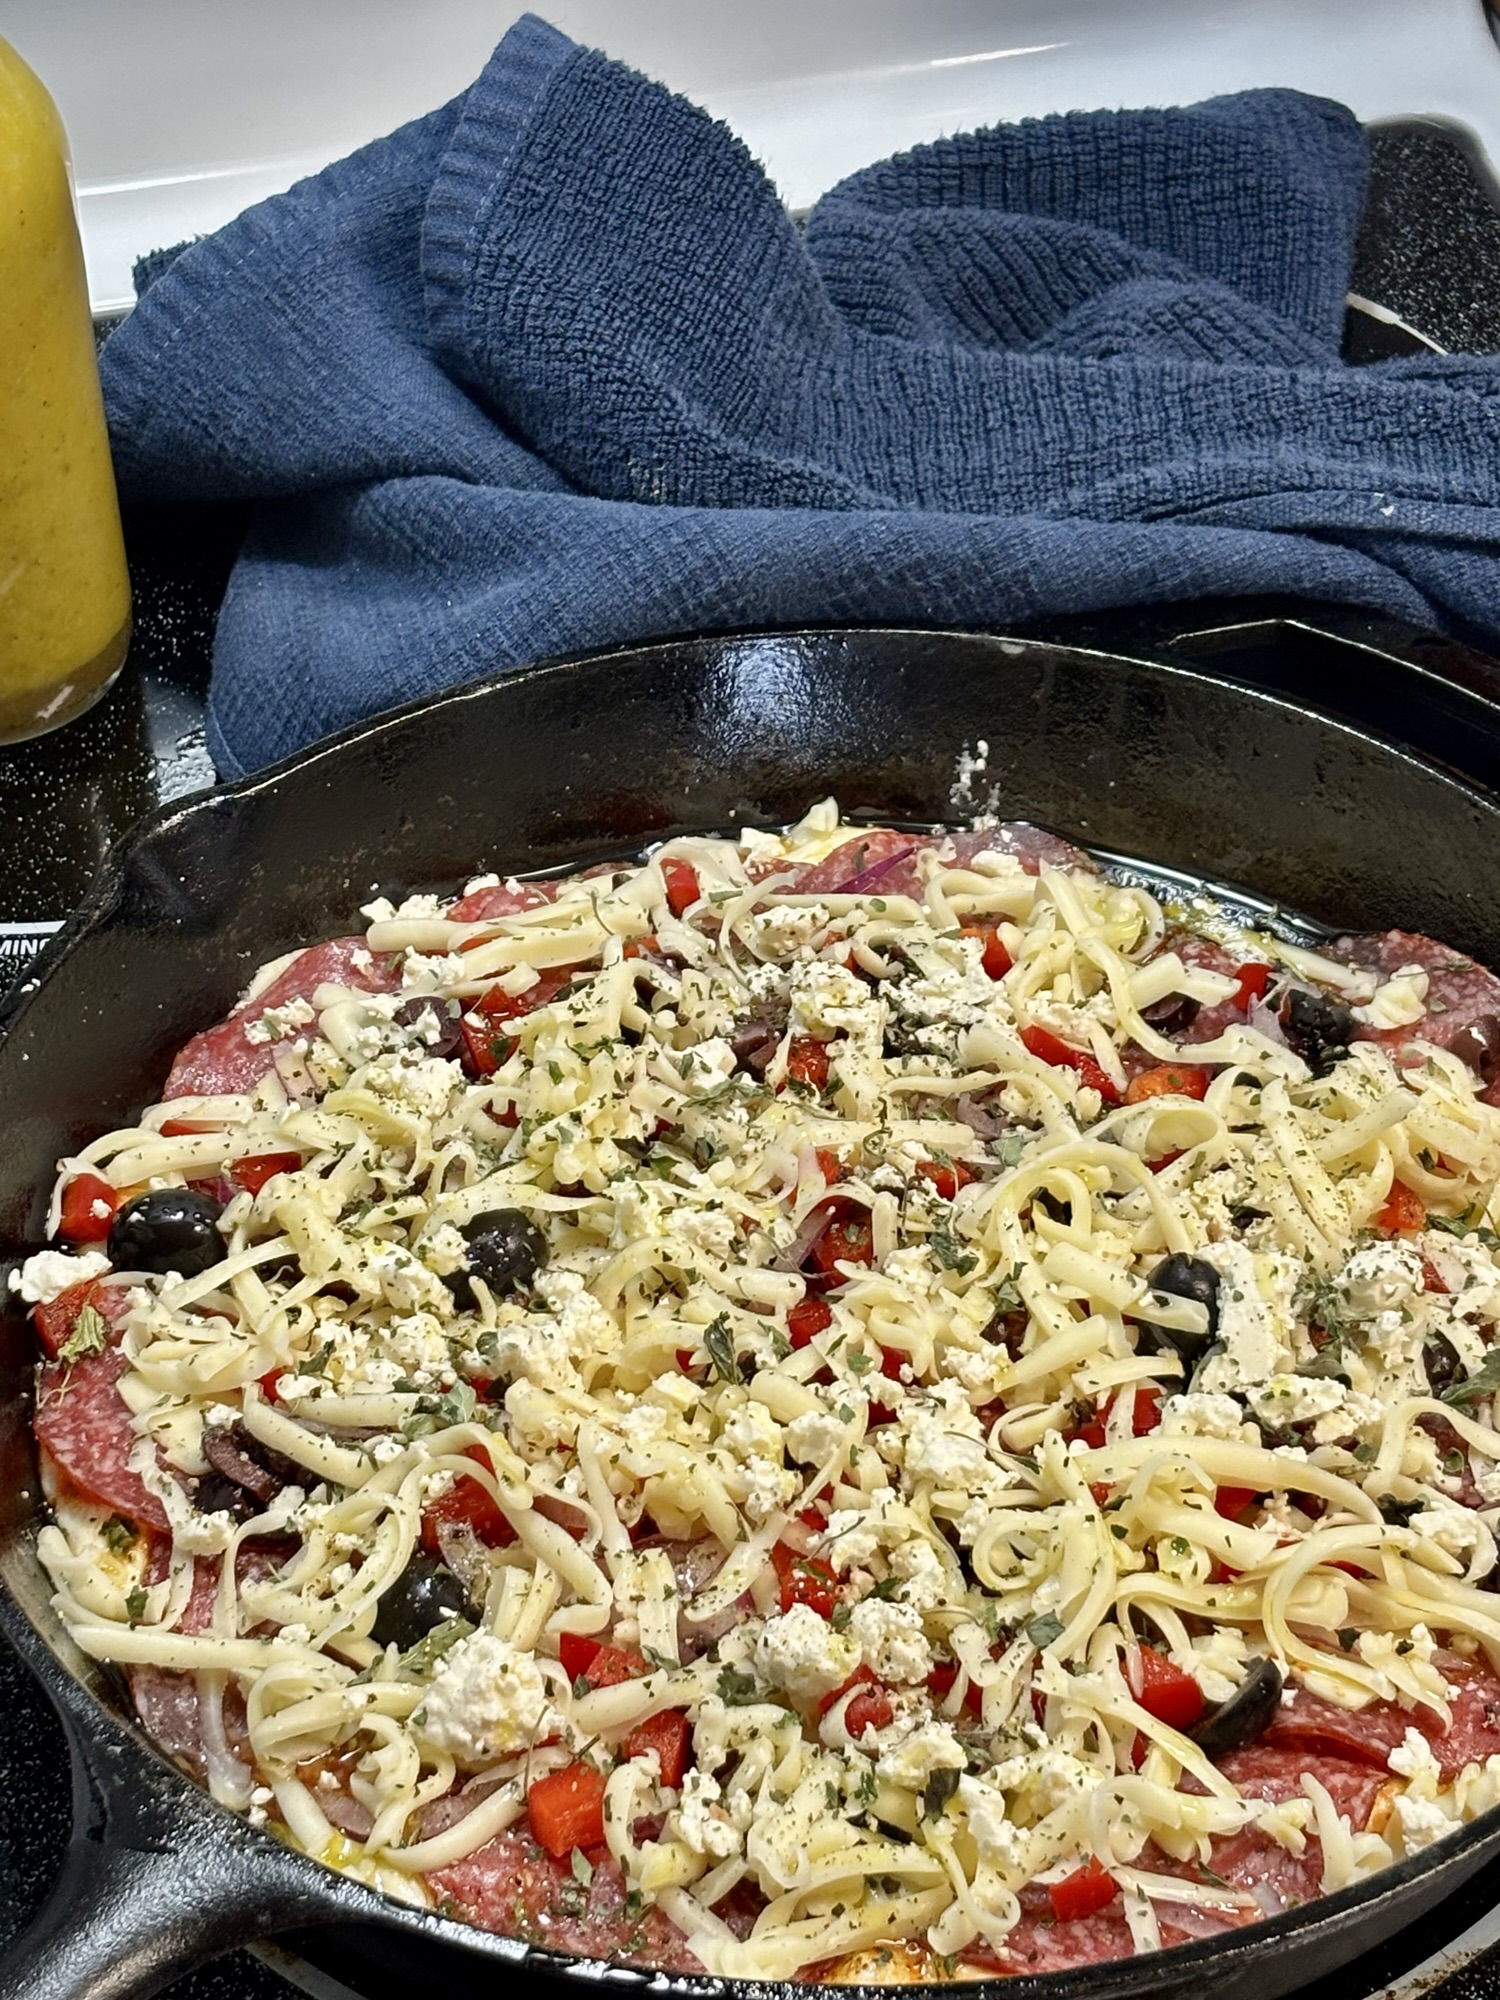
Cover the bottom of the dough with mozzarella.  Sprinkle over the cooked sausage meat, then the mushrooms and onions, and finally the peppers.  Spoon the sauce over this, and top with feta and kalamata olives.

Chicago 1

Get all your toppings ready while the dough is rising in a warm, draft free spot.

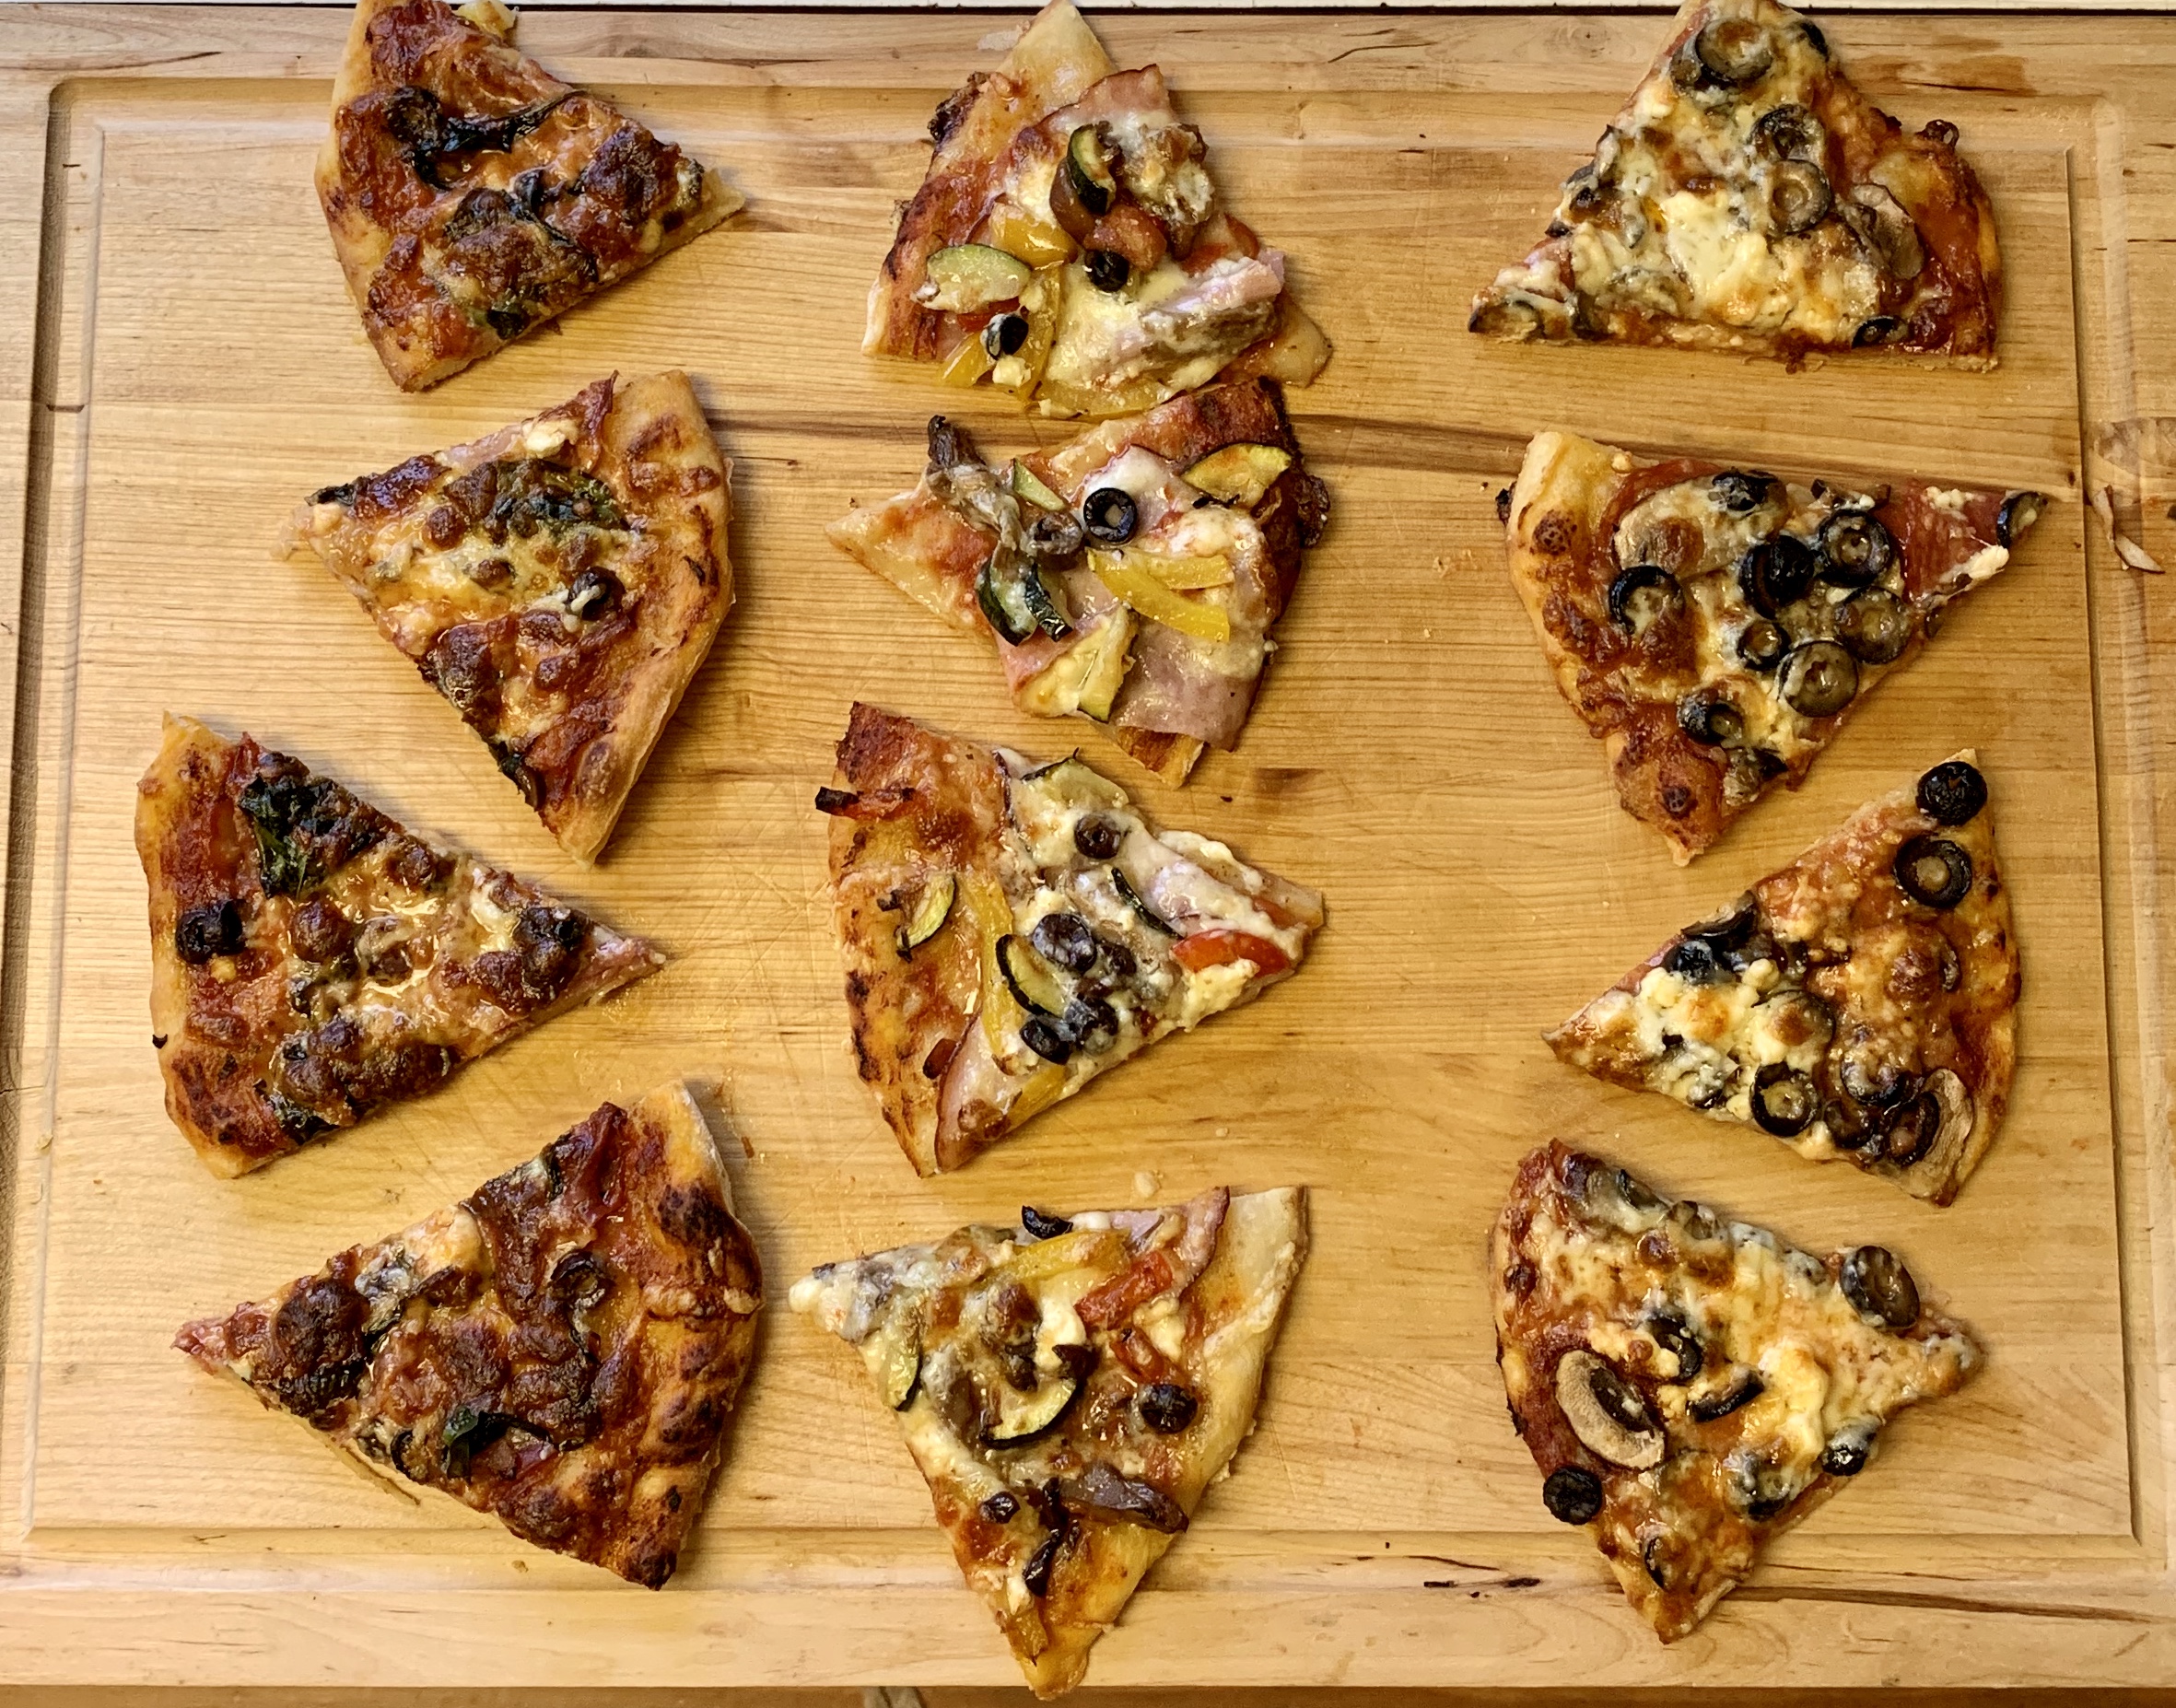
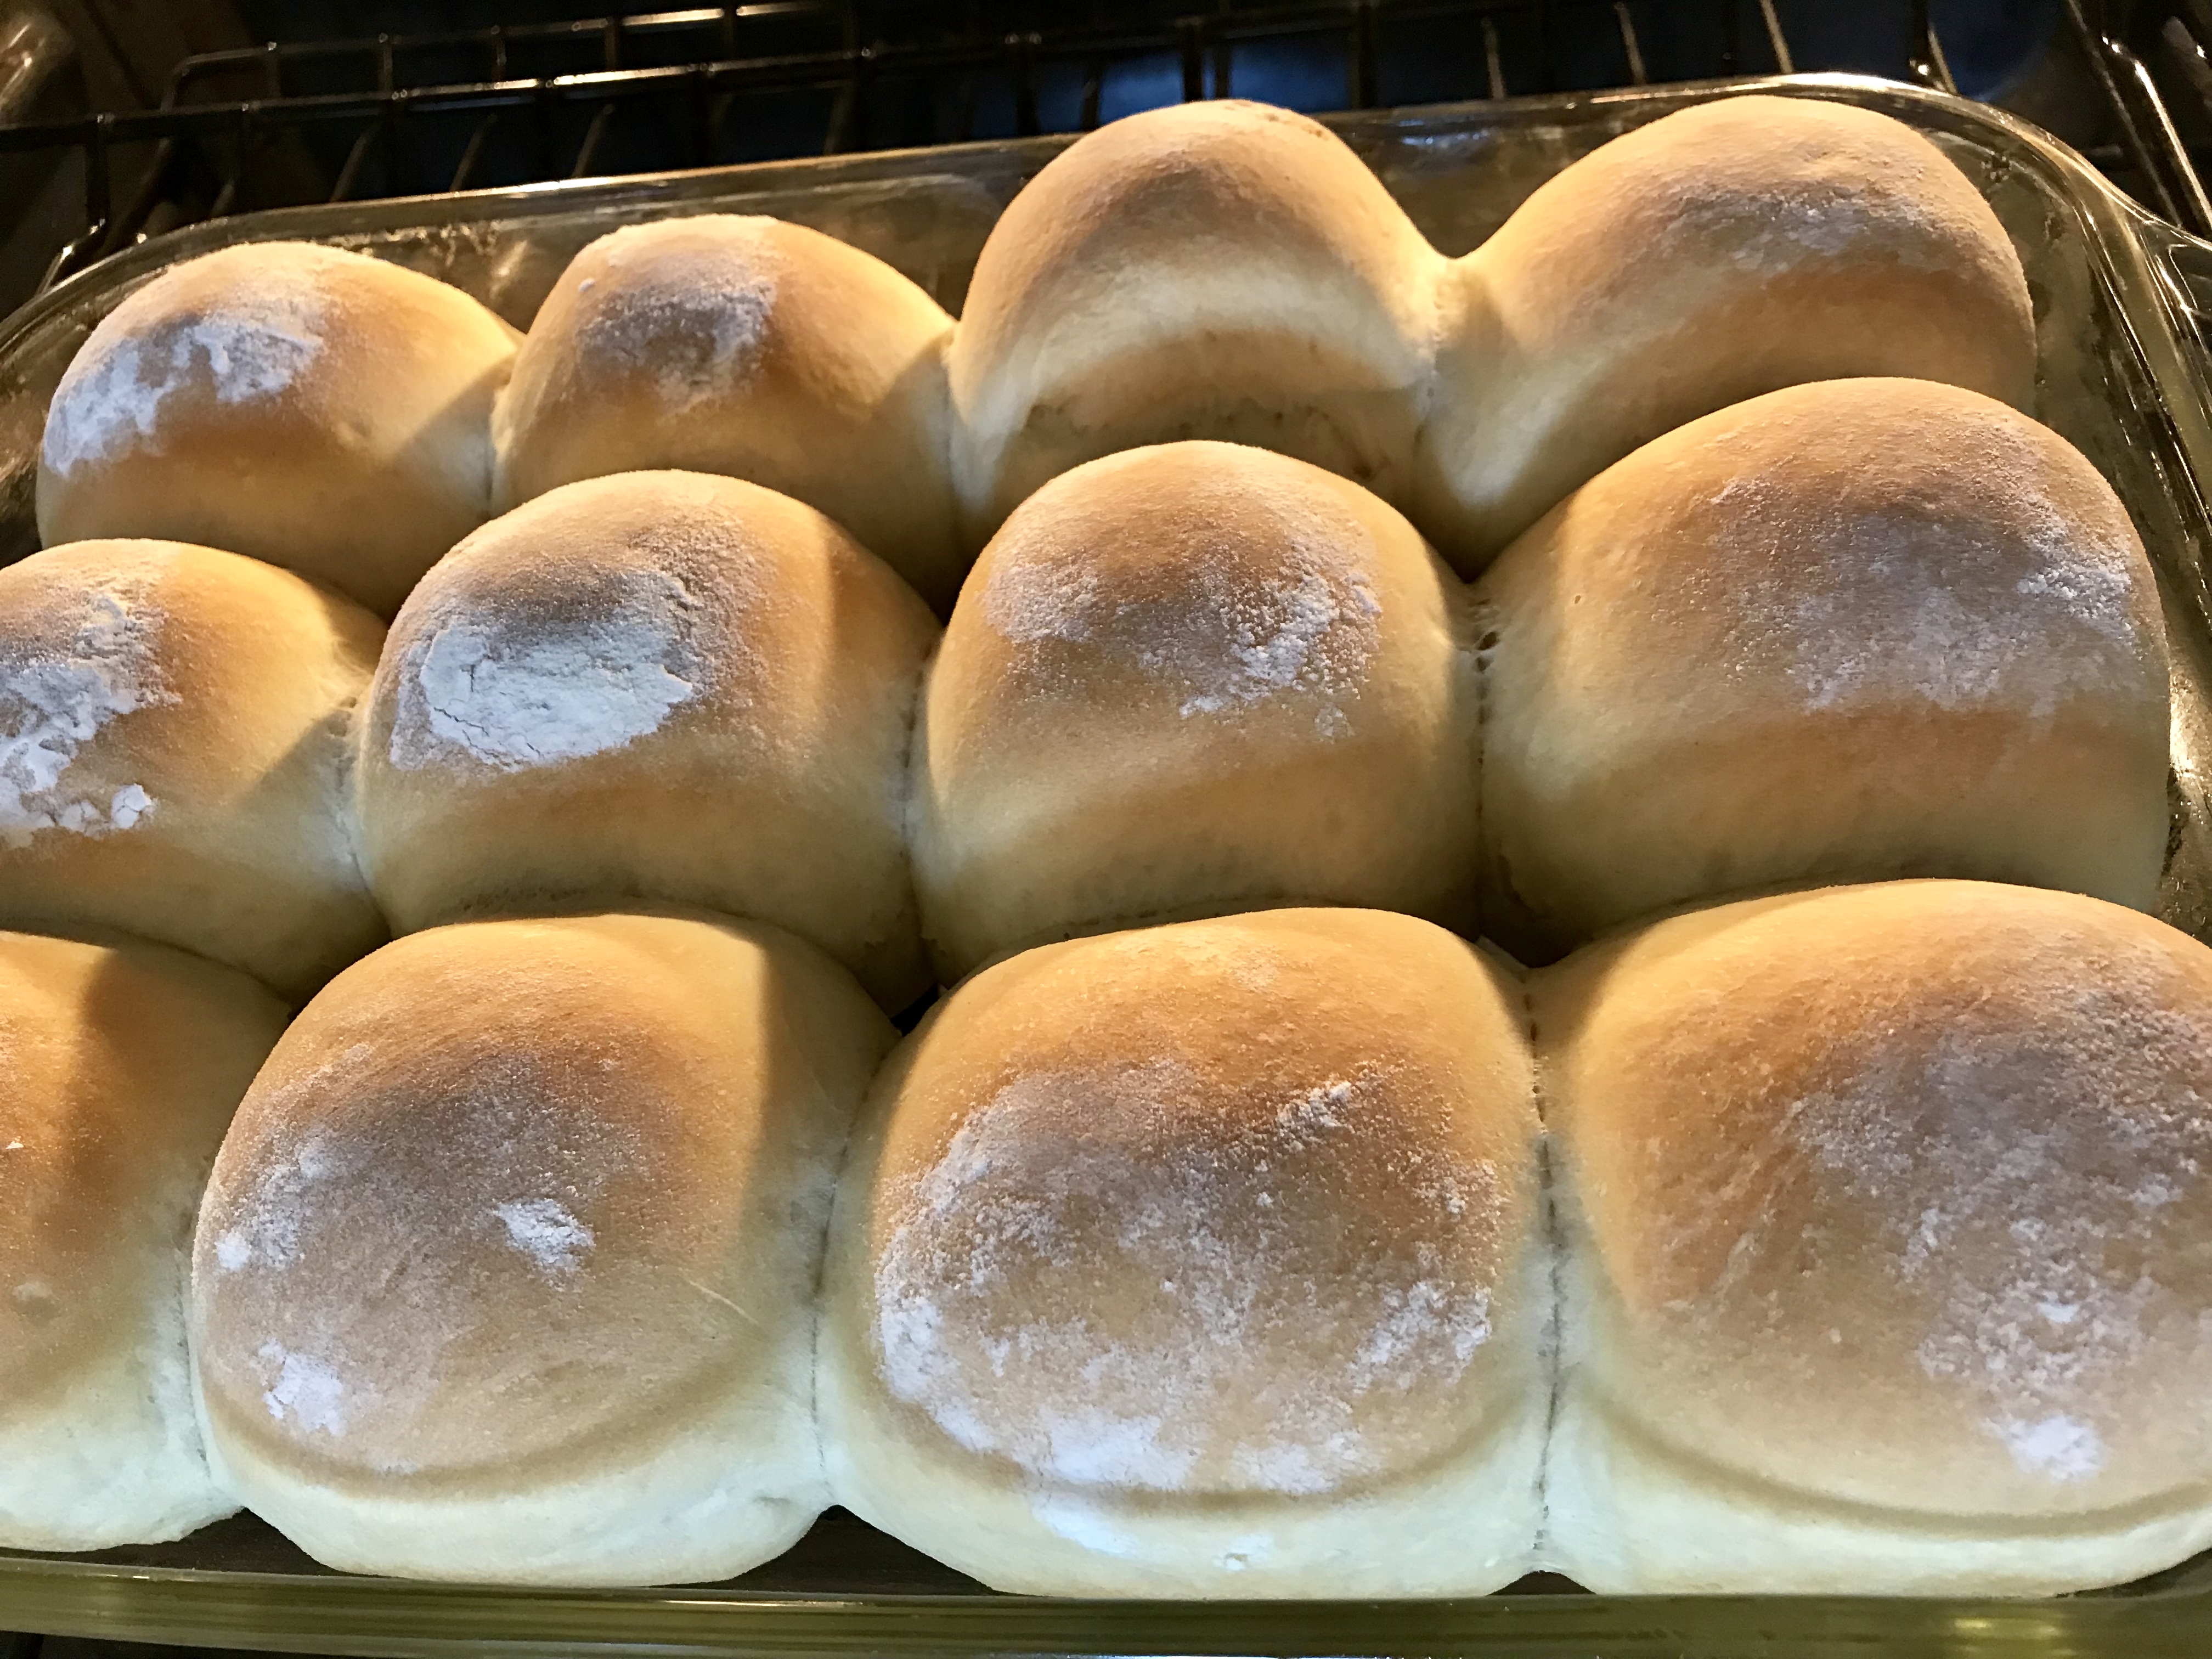
Bake at 400 until you see the crust nicely browned and bit of sauce bubbling around the toppings.  This will take anywhere from 20-30 minutes.

Chicago 4

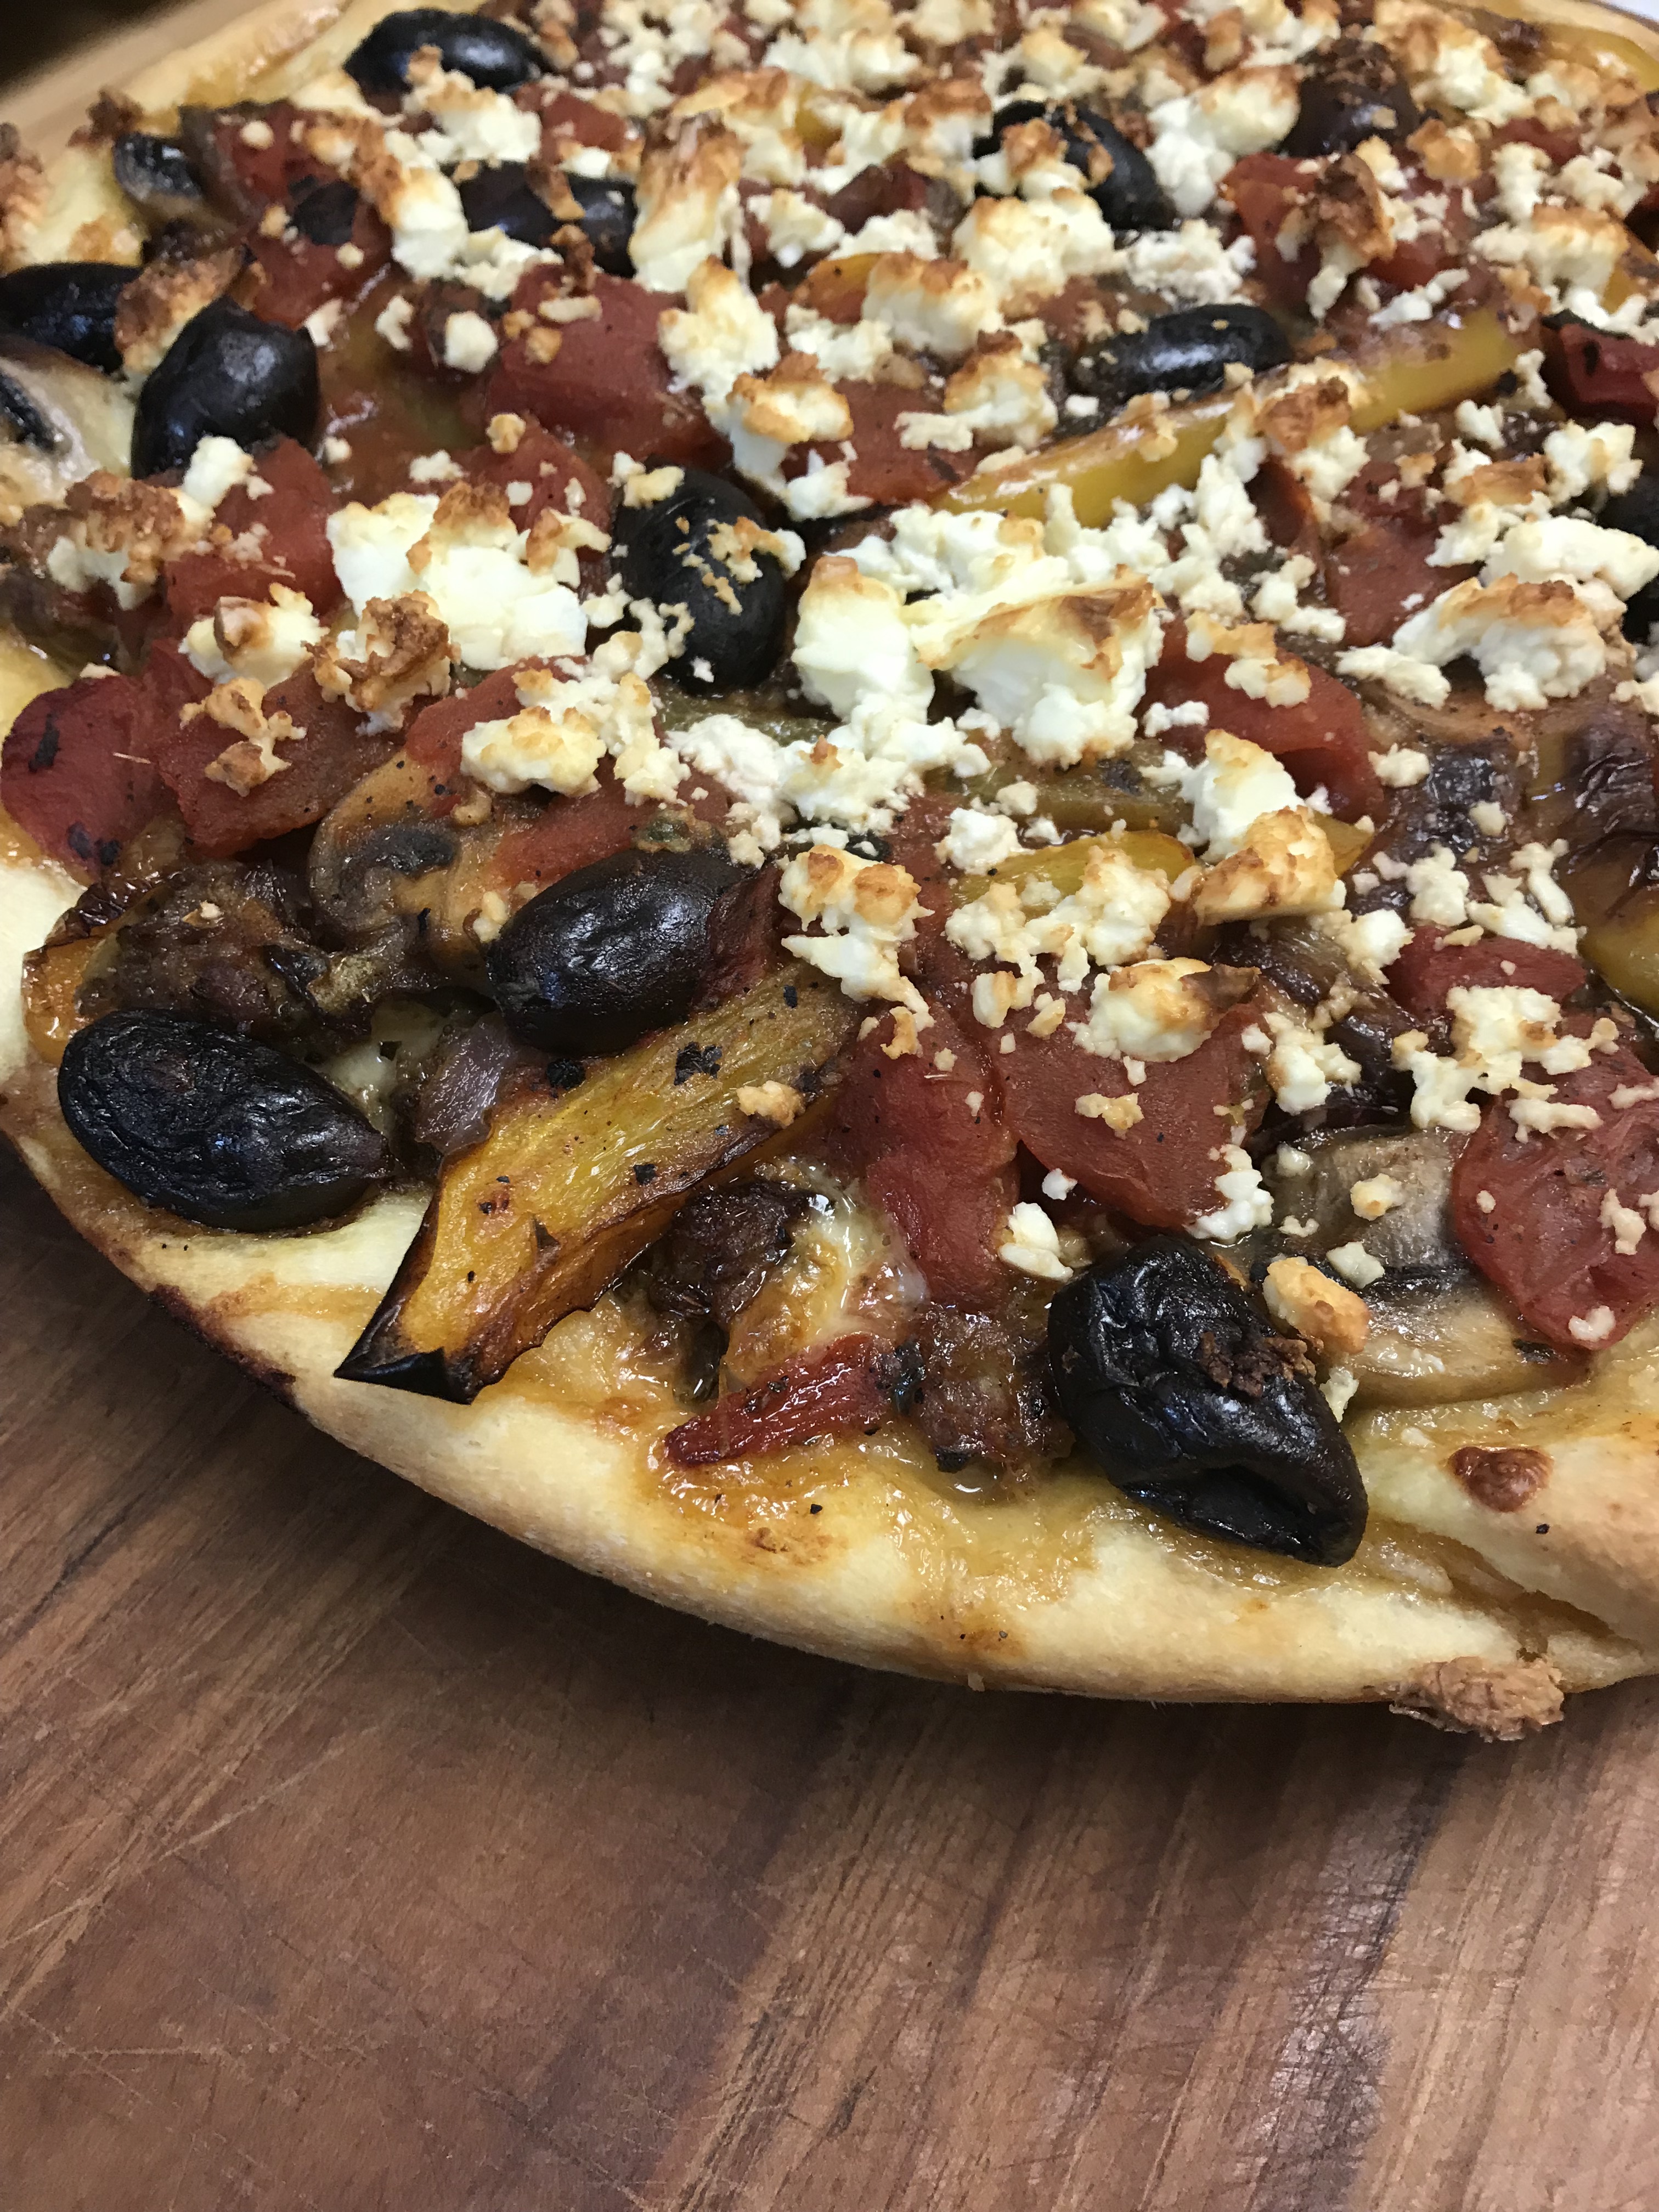
Make sure you allow it to sit, once out of the oven, for about 10-15 minutes so it retains its shape when you slice those pizza pies.

Chicago 3

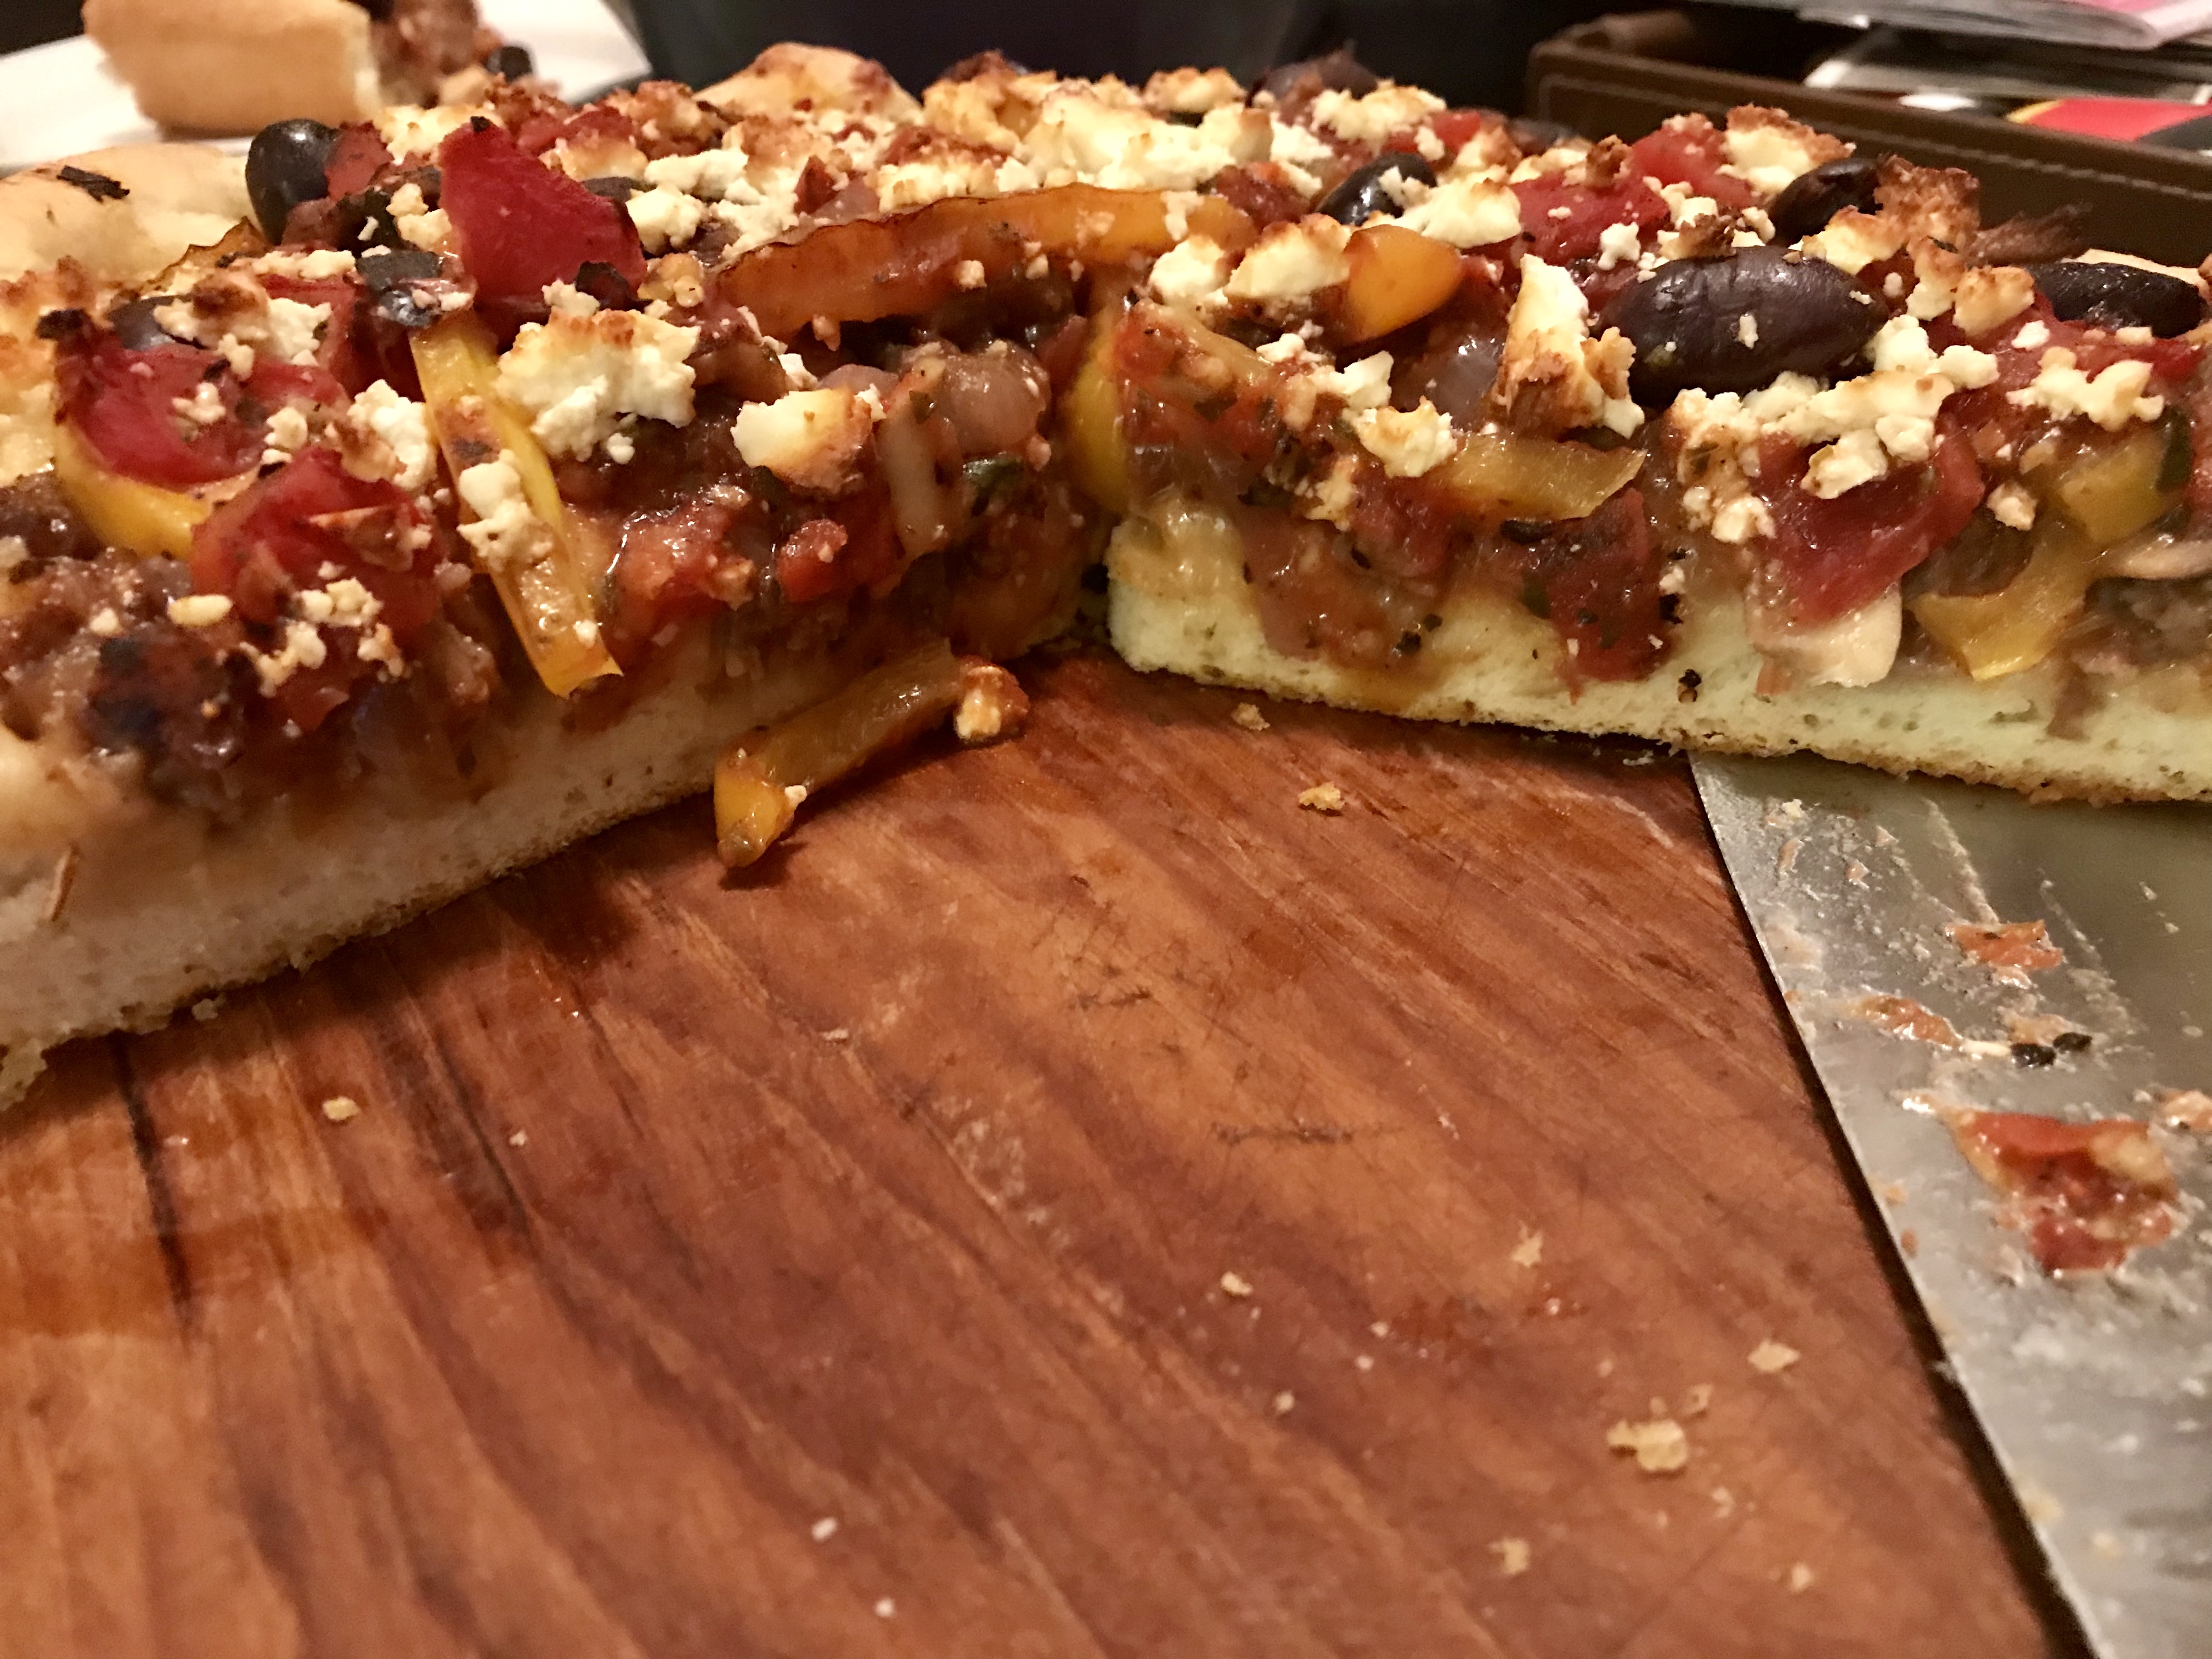
The perfect balance of tender dough and toppings.

PIZZA CRUST (if you are so inclined)

(makes 3 10″ deep dish pizzas)
Ingredients:

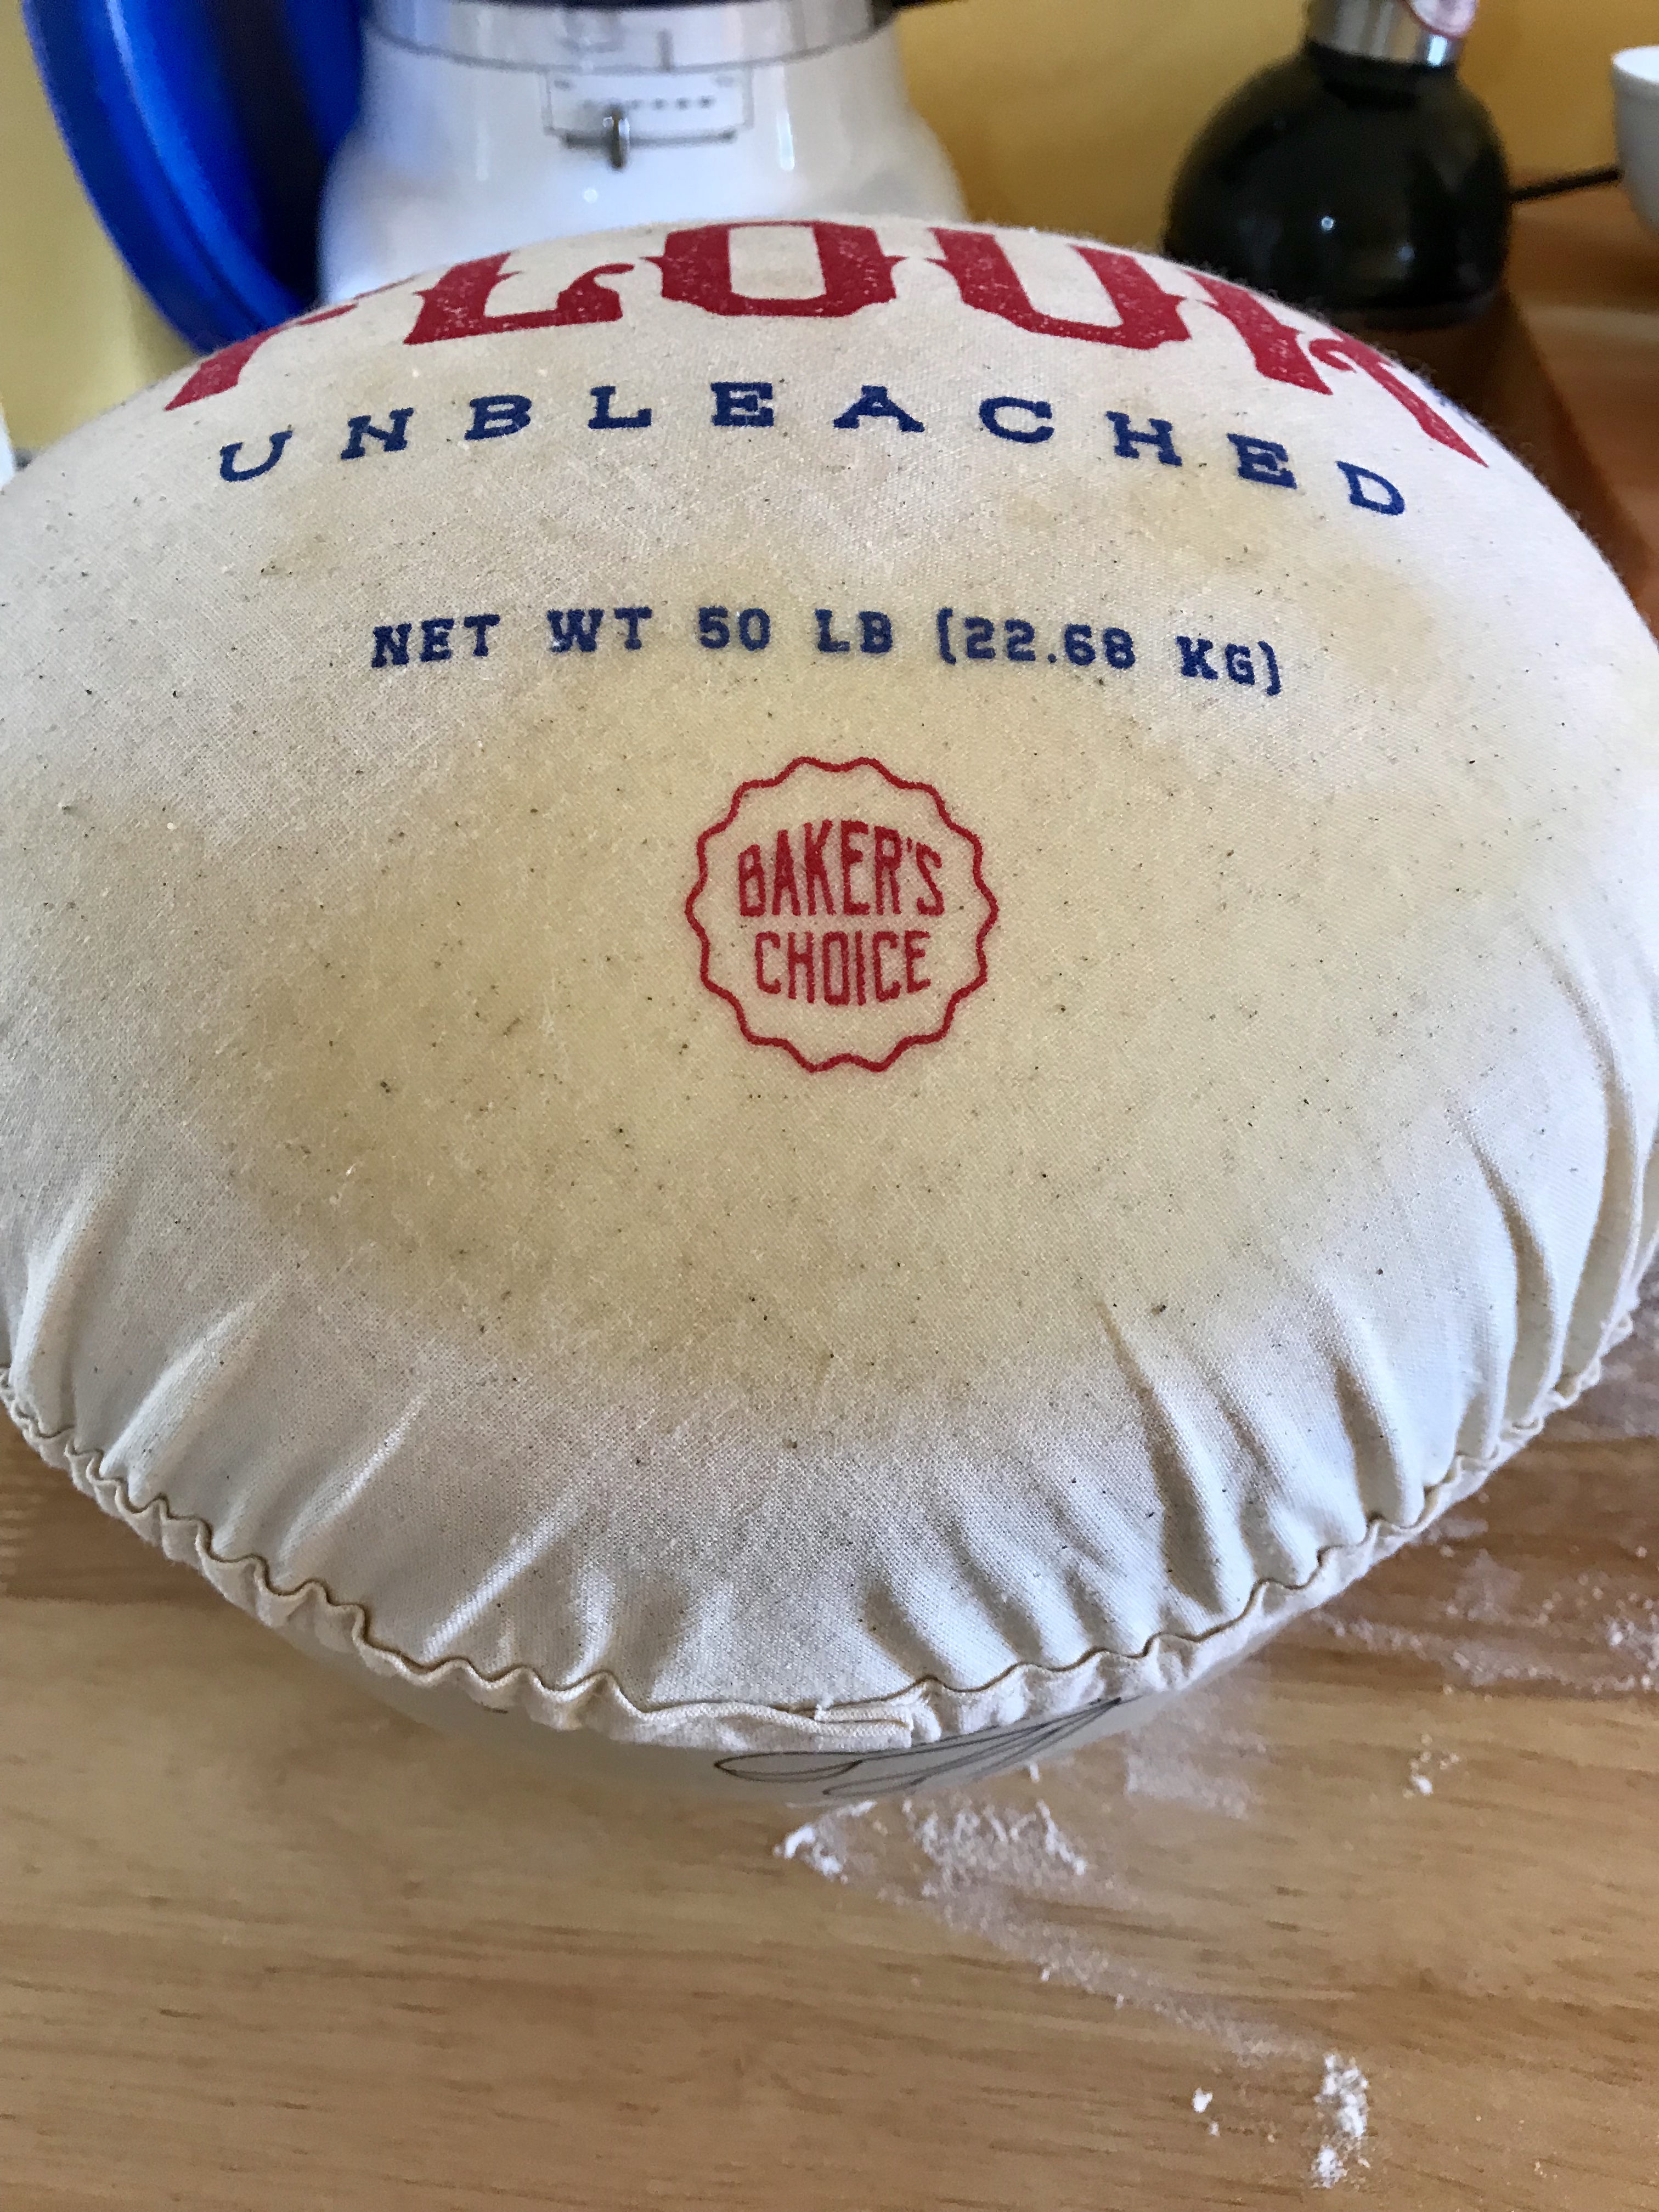
  • 750 g white flour (use Tipo ’00 flour if you can or a strong bread flour)
  • 200 g semolina flour
  • 2 ½ cups lukewarm water
  • 2 tsp. sugar
  • 1 Tbsp. (or 1 x 8 oz packages) yeast
  • 2 tsp. sea salt
  • 3 Tbsp. olive oil

Directions:

  1. Place your flour(s) and sea salt in a large bowl and whisk together. Create a well in the center.
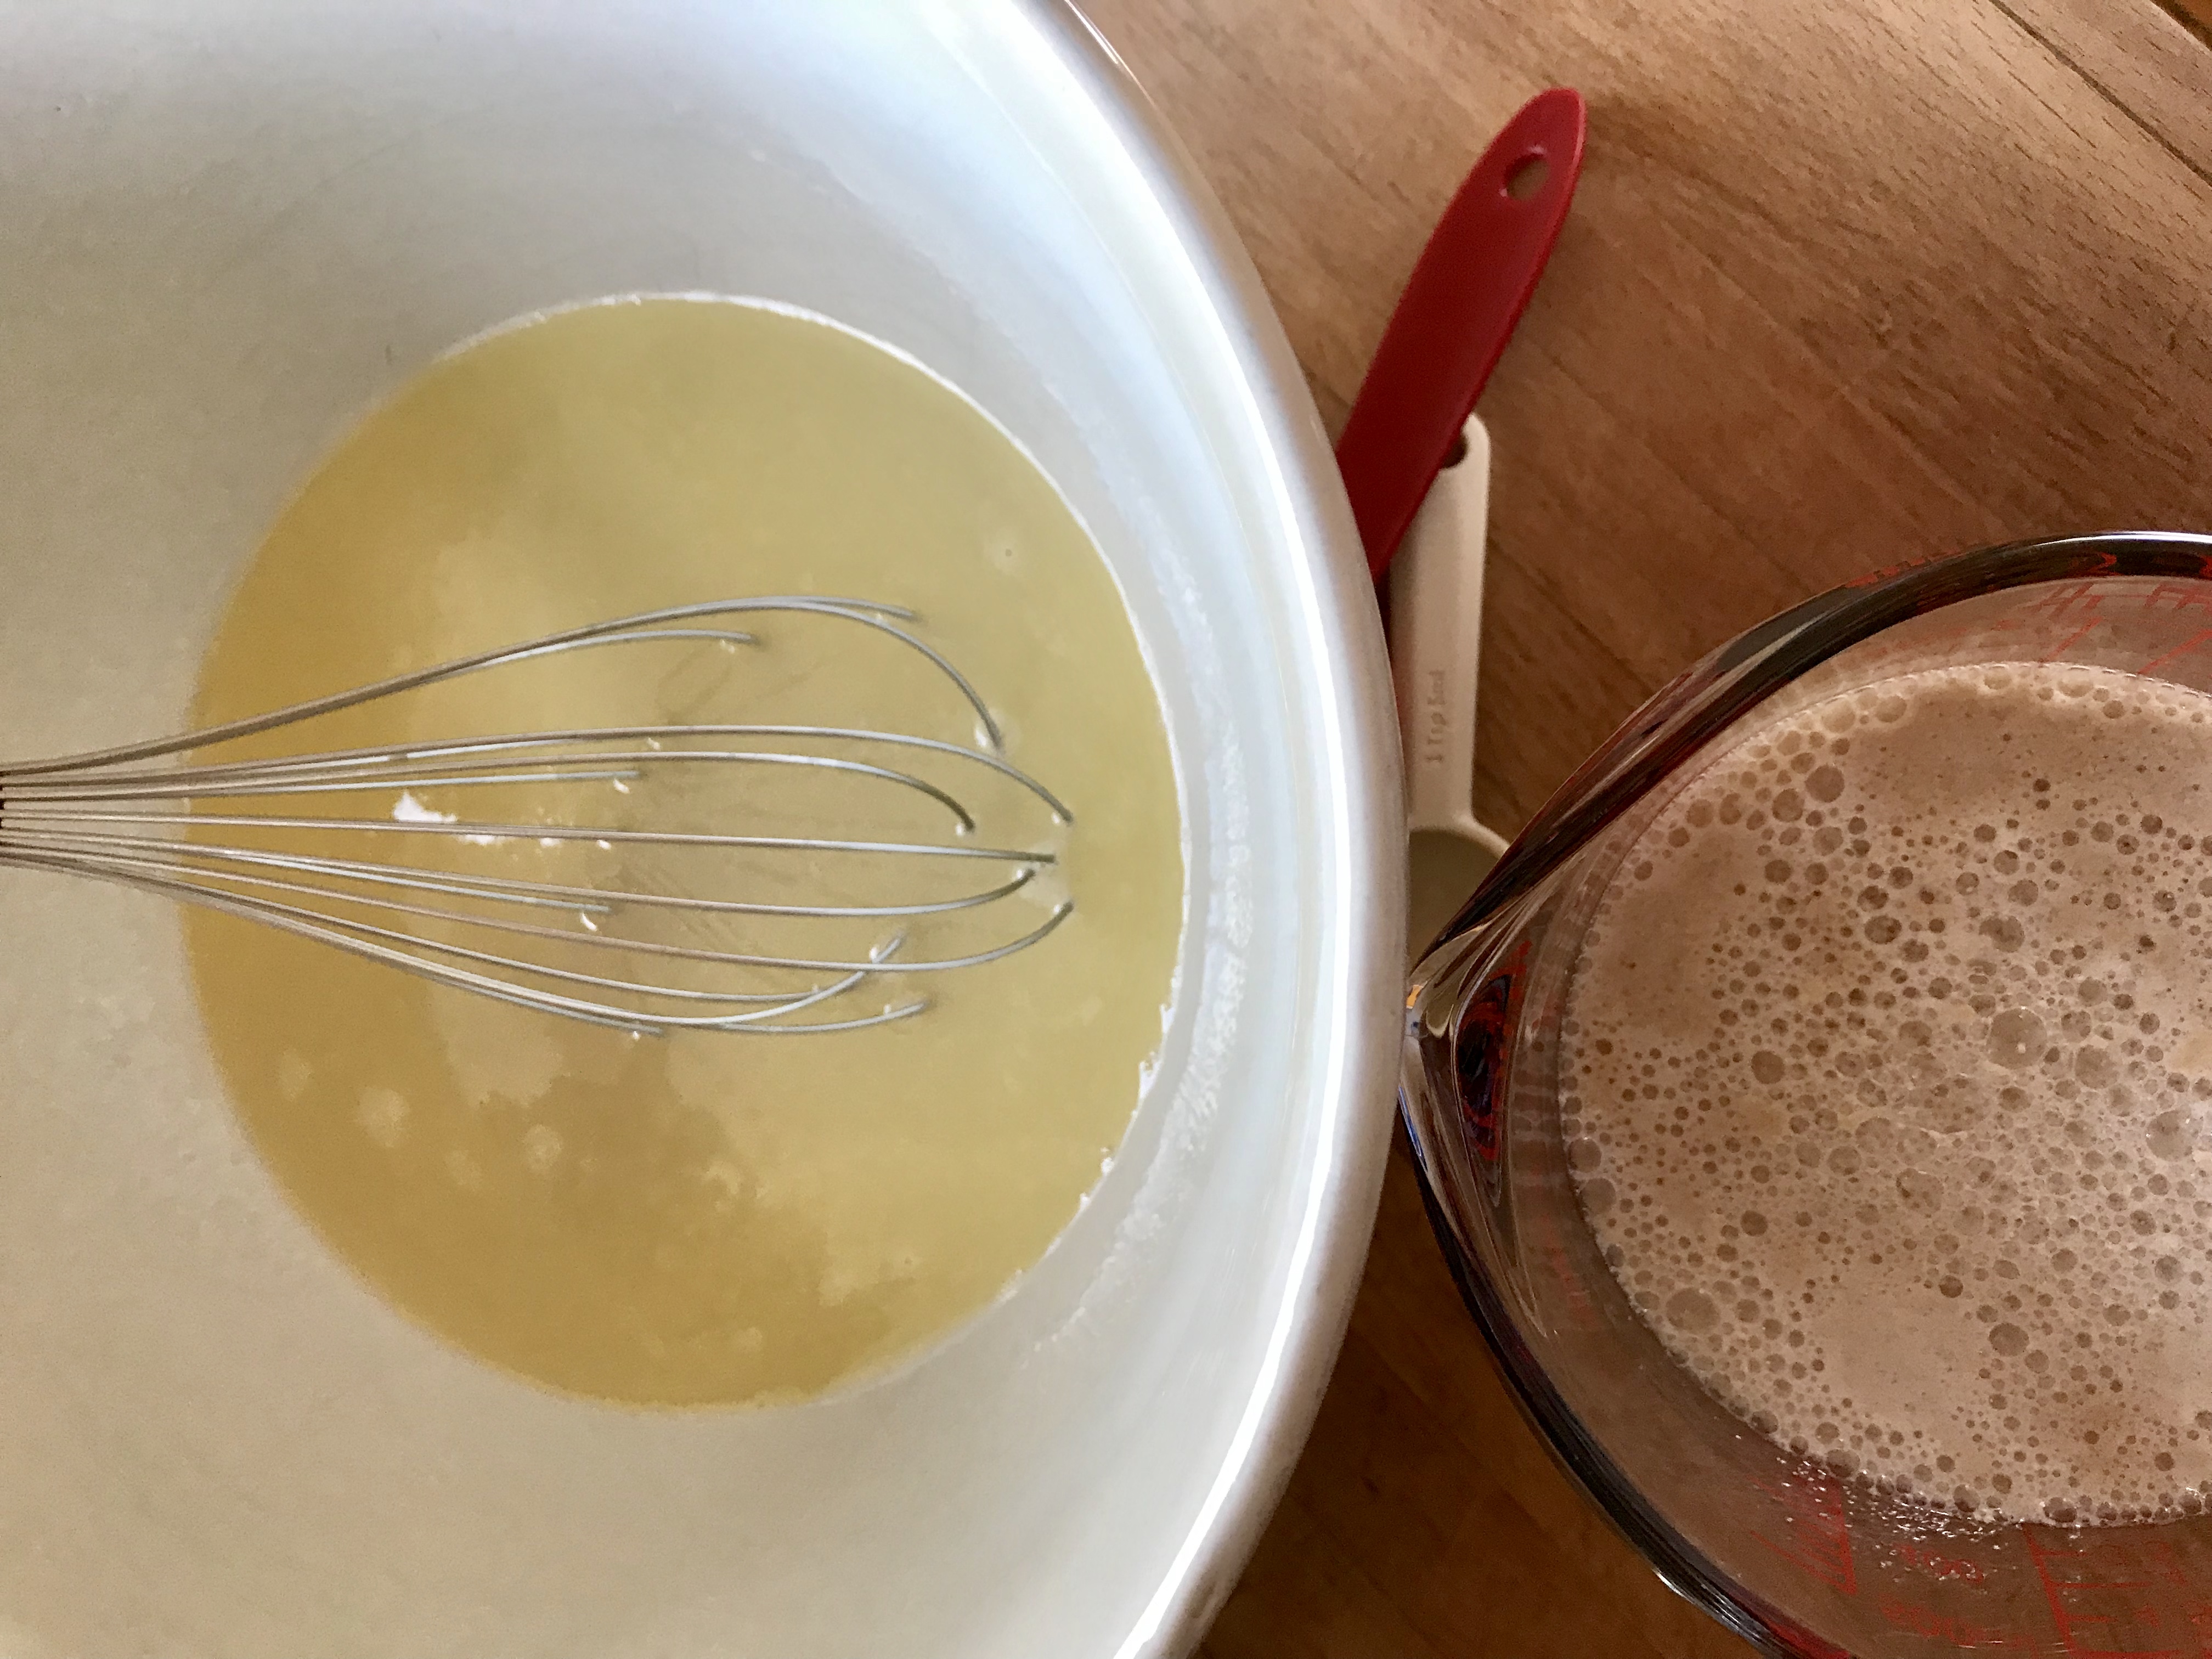
  2. In a large measuring cup, mix together your lukewarm water and sugar until the sugar dissolves. Sprinkle in the yeast and let it sit for approximately 5 minutes, until the yeast starts to ferment.
  3. Pour the water/sugar/yeast mixture into the well along with the olive oil and stir together with a fork or large spoon until it is well mixed. Once it becomes too difficult to mix together with your fork or spoon, sprinkle extra flour on the dough and your hands and mix with your hands until the dough comes together in a ball.
  4. Place the dough on a well-floured flat surface and knead, pushing the dough using the palms of your hands, for approximately 10 minutes, until the dough looks smooth and stretchy. You may need to add extra flour as you go, being careful not to add too much to keep the dough from being too stiff.
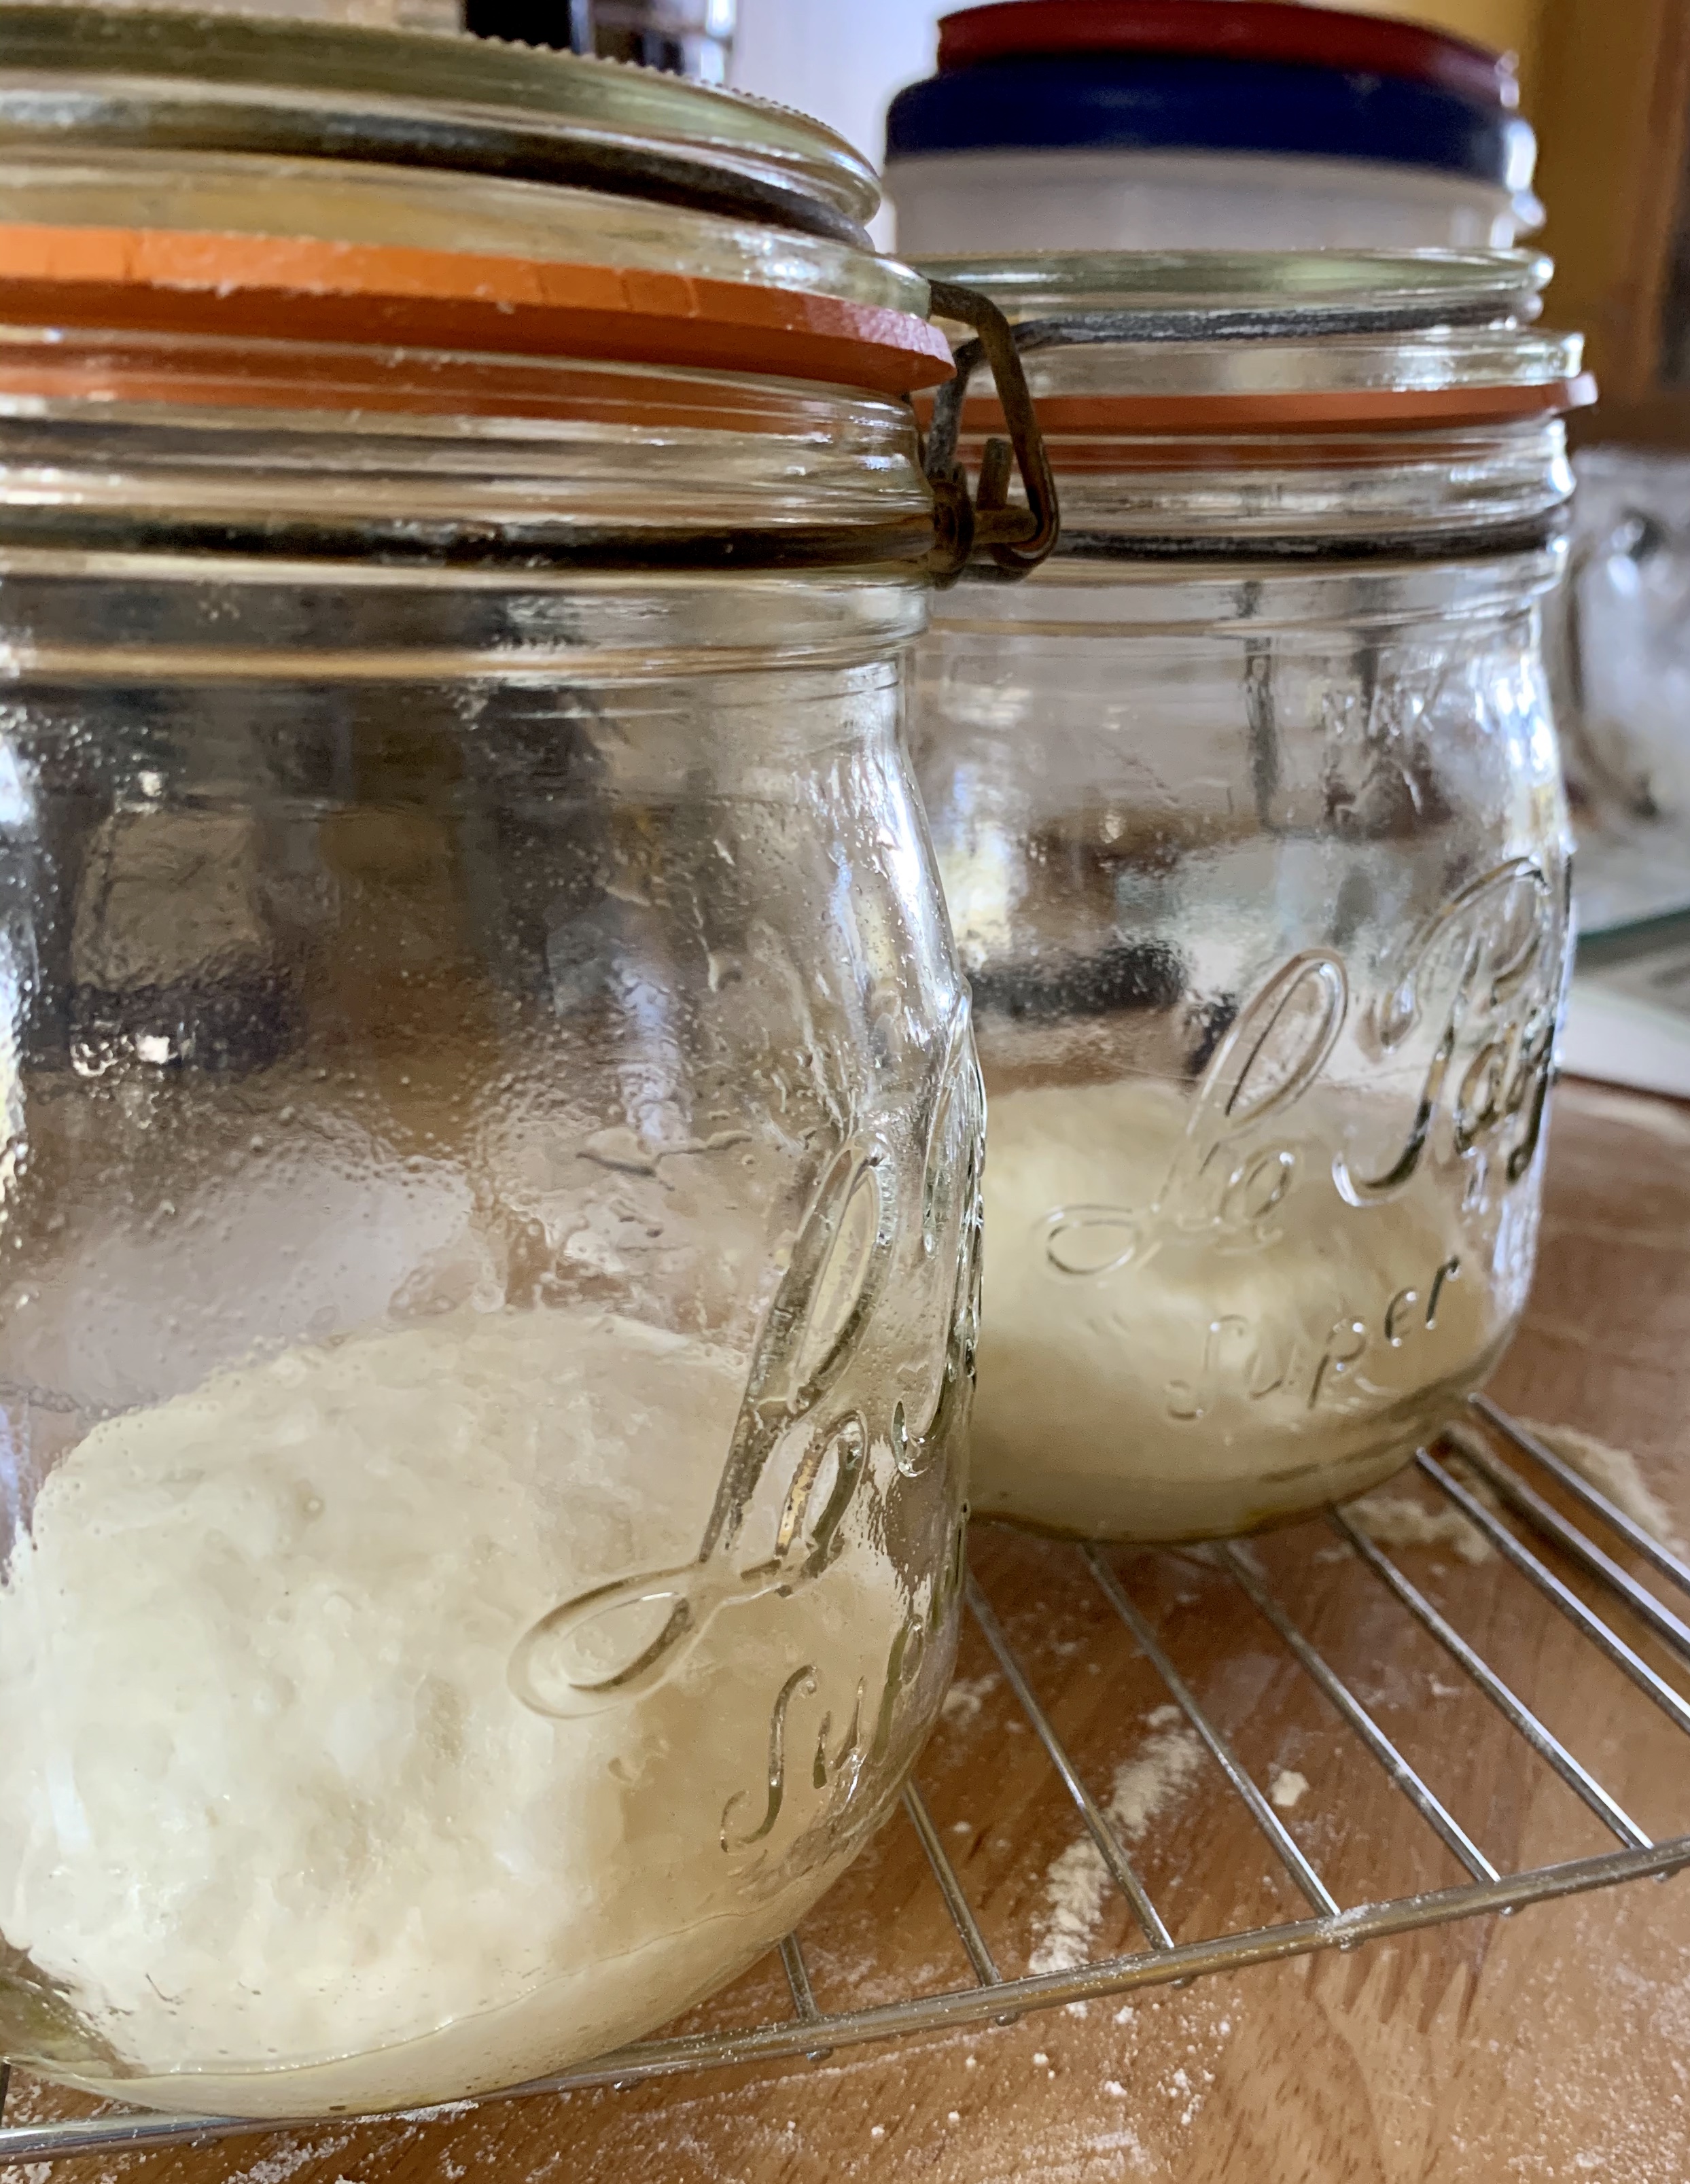
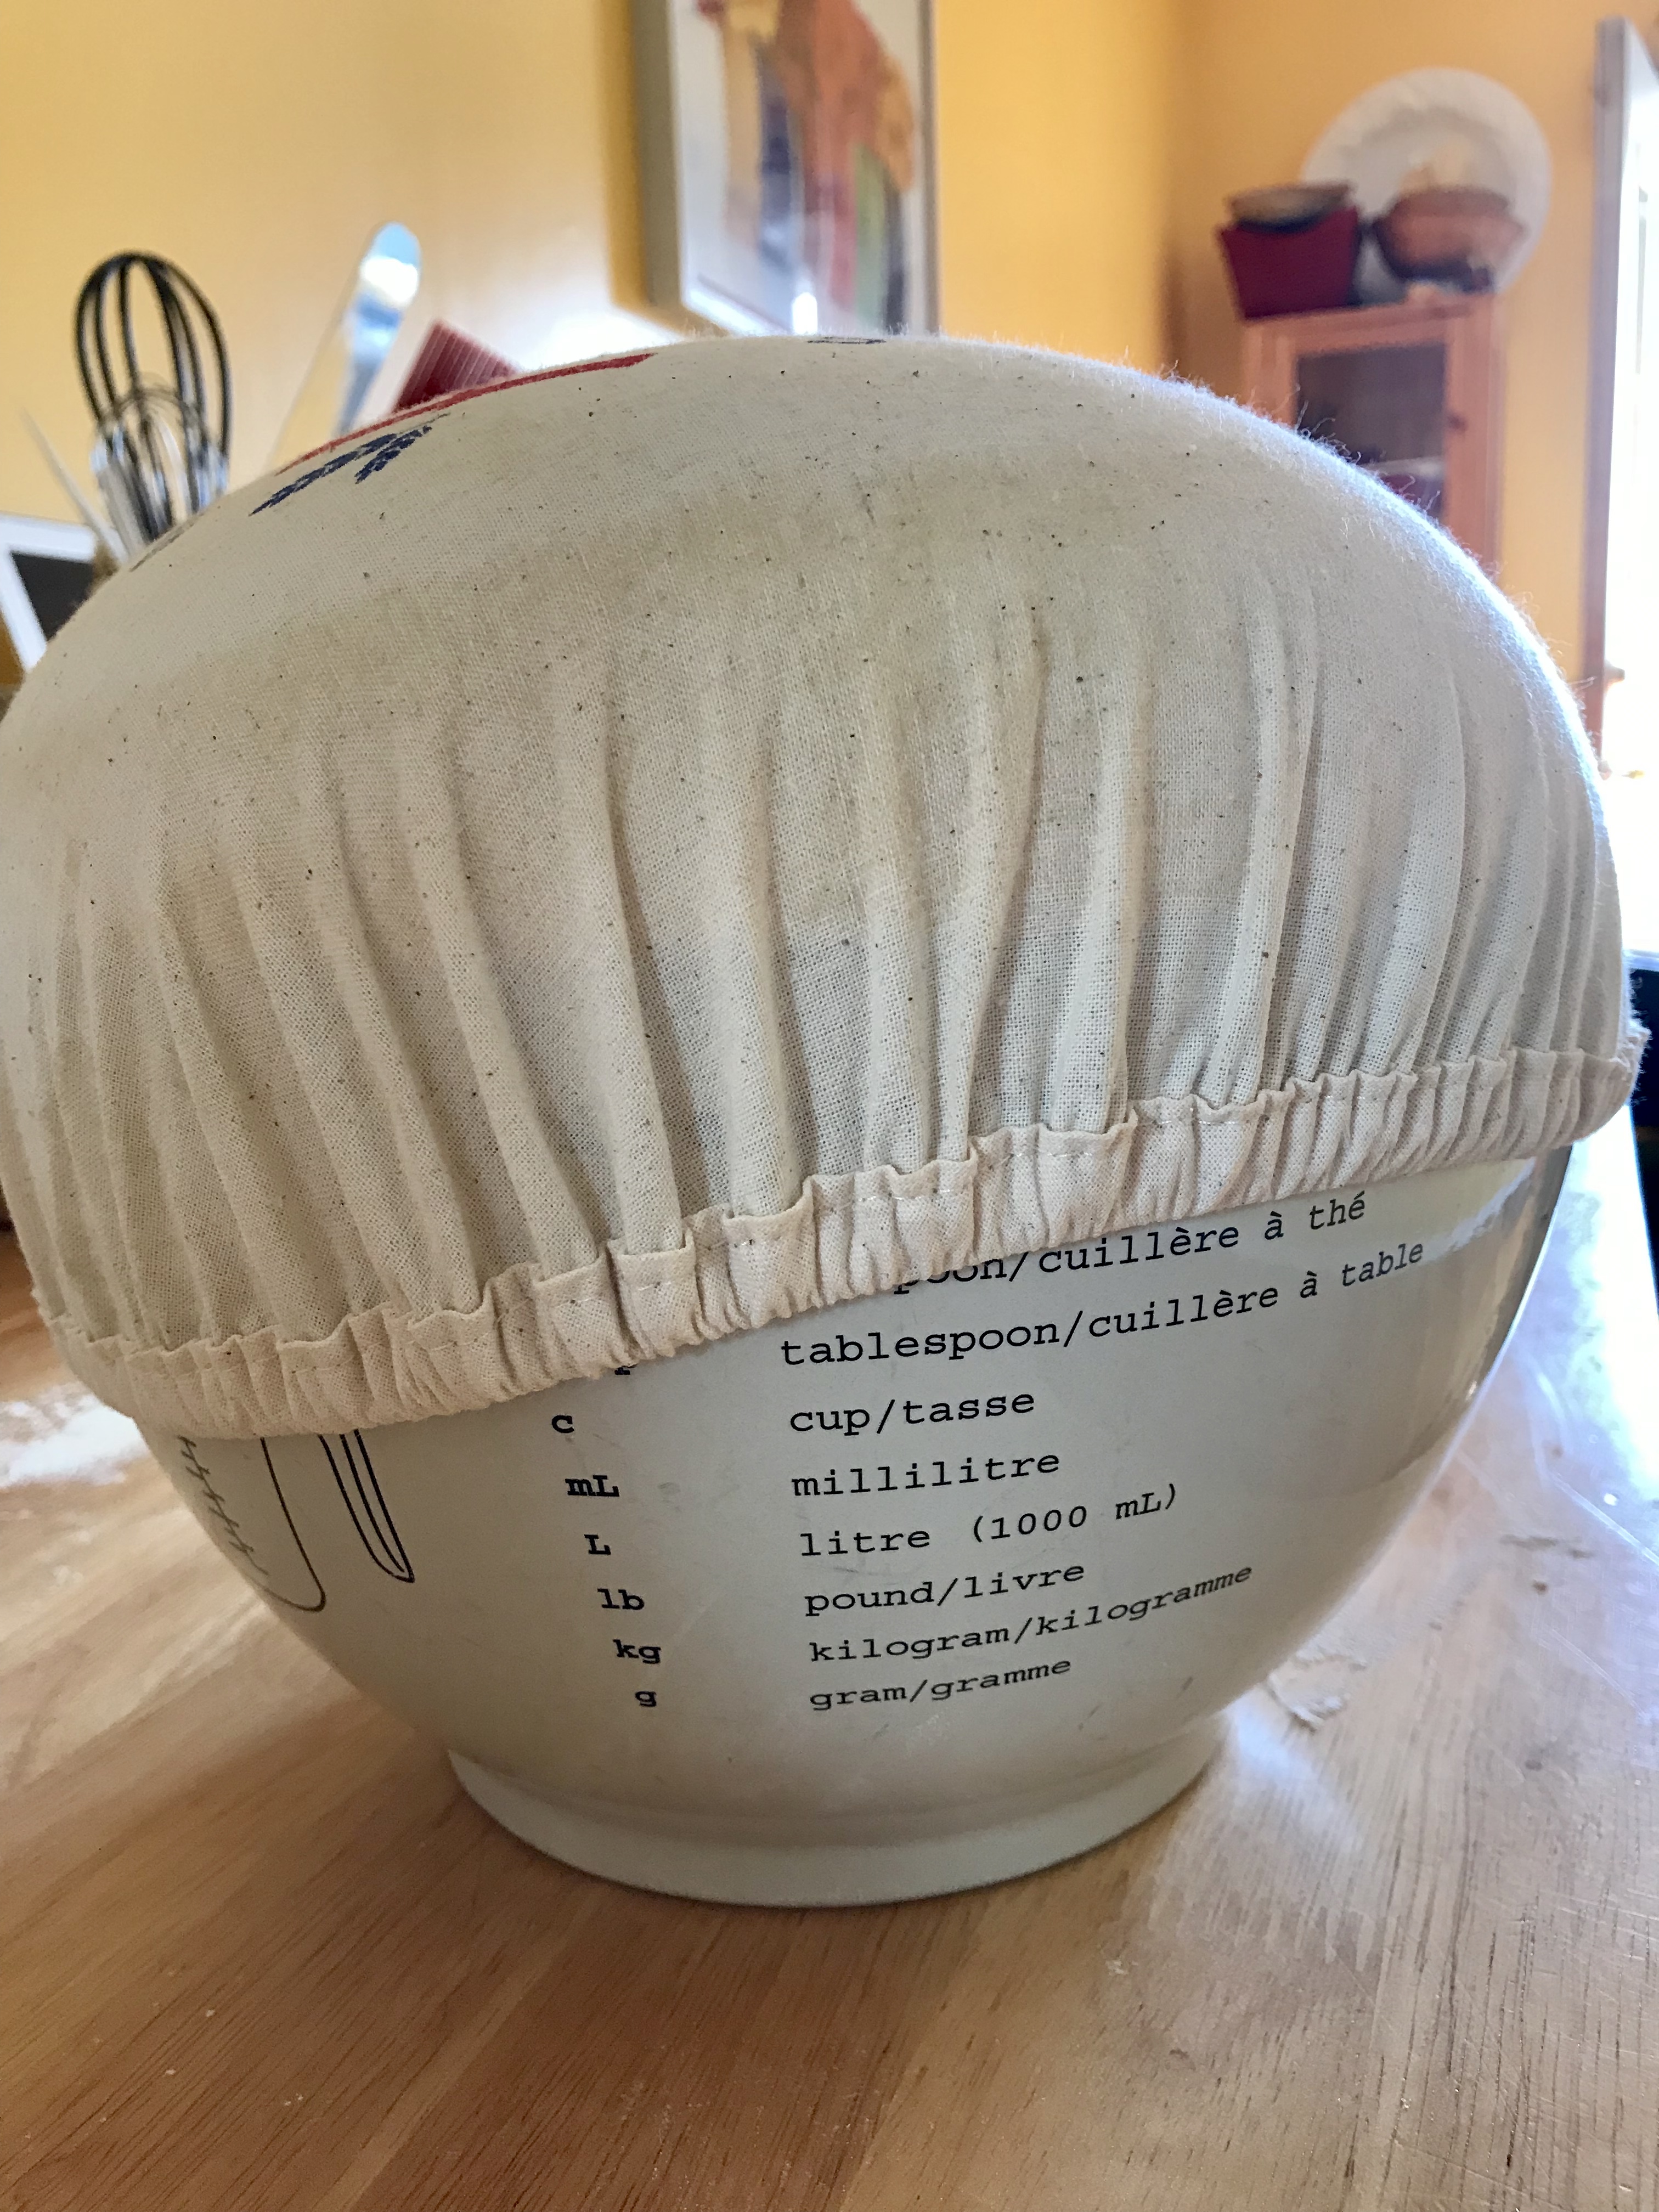
  5. Place the ball of dough in a large bowl coated with olive oil, dust the top of the dough with flour, and cover with a clean dish towel and place in a warm draft-free area for about an hour, until the dough has doubled in size. Punch the dough down.  At this point you can either refrigerate the dough overnight (or up to 2 days, covered with plastic wrap and occasionally punched down) or divide the dough into 3-4 portions (depending on how big you want your pizzas).  I highly recommend making your dough in advance and letting it sit in the fridge as the longer ‘proof’ really makes a difference.   Ensure that your pizza dough comes to room temperature before cooking (bring it out of the refrigerator 1-2 hours before you are ready to cook).
  6. You can also use this recipe for up to 8 small individual pizzas.