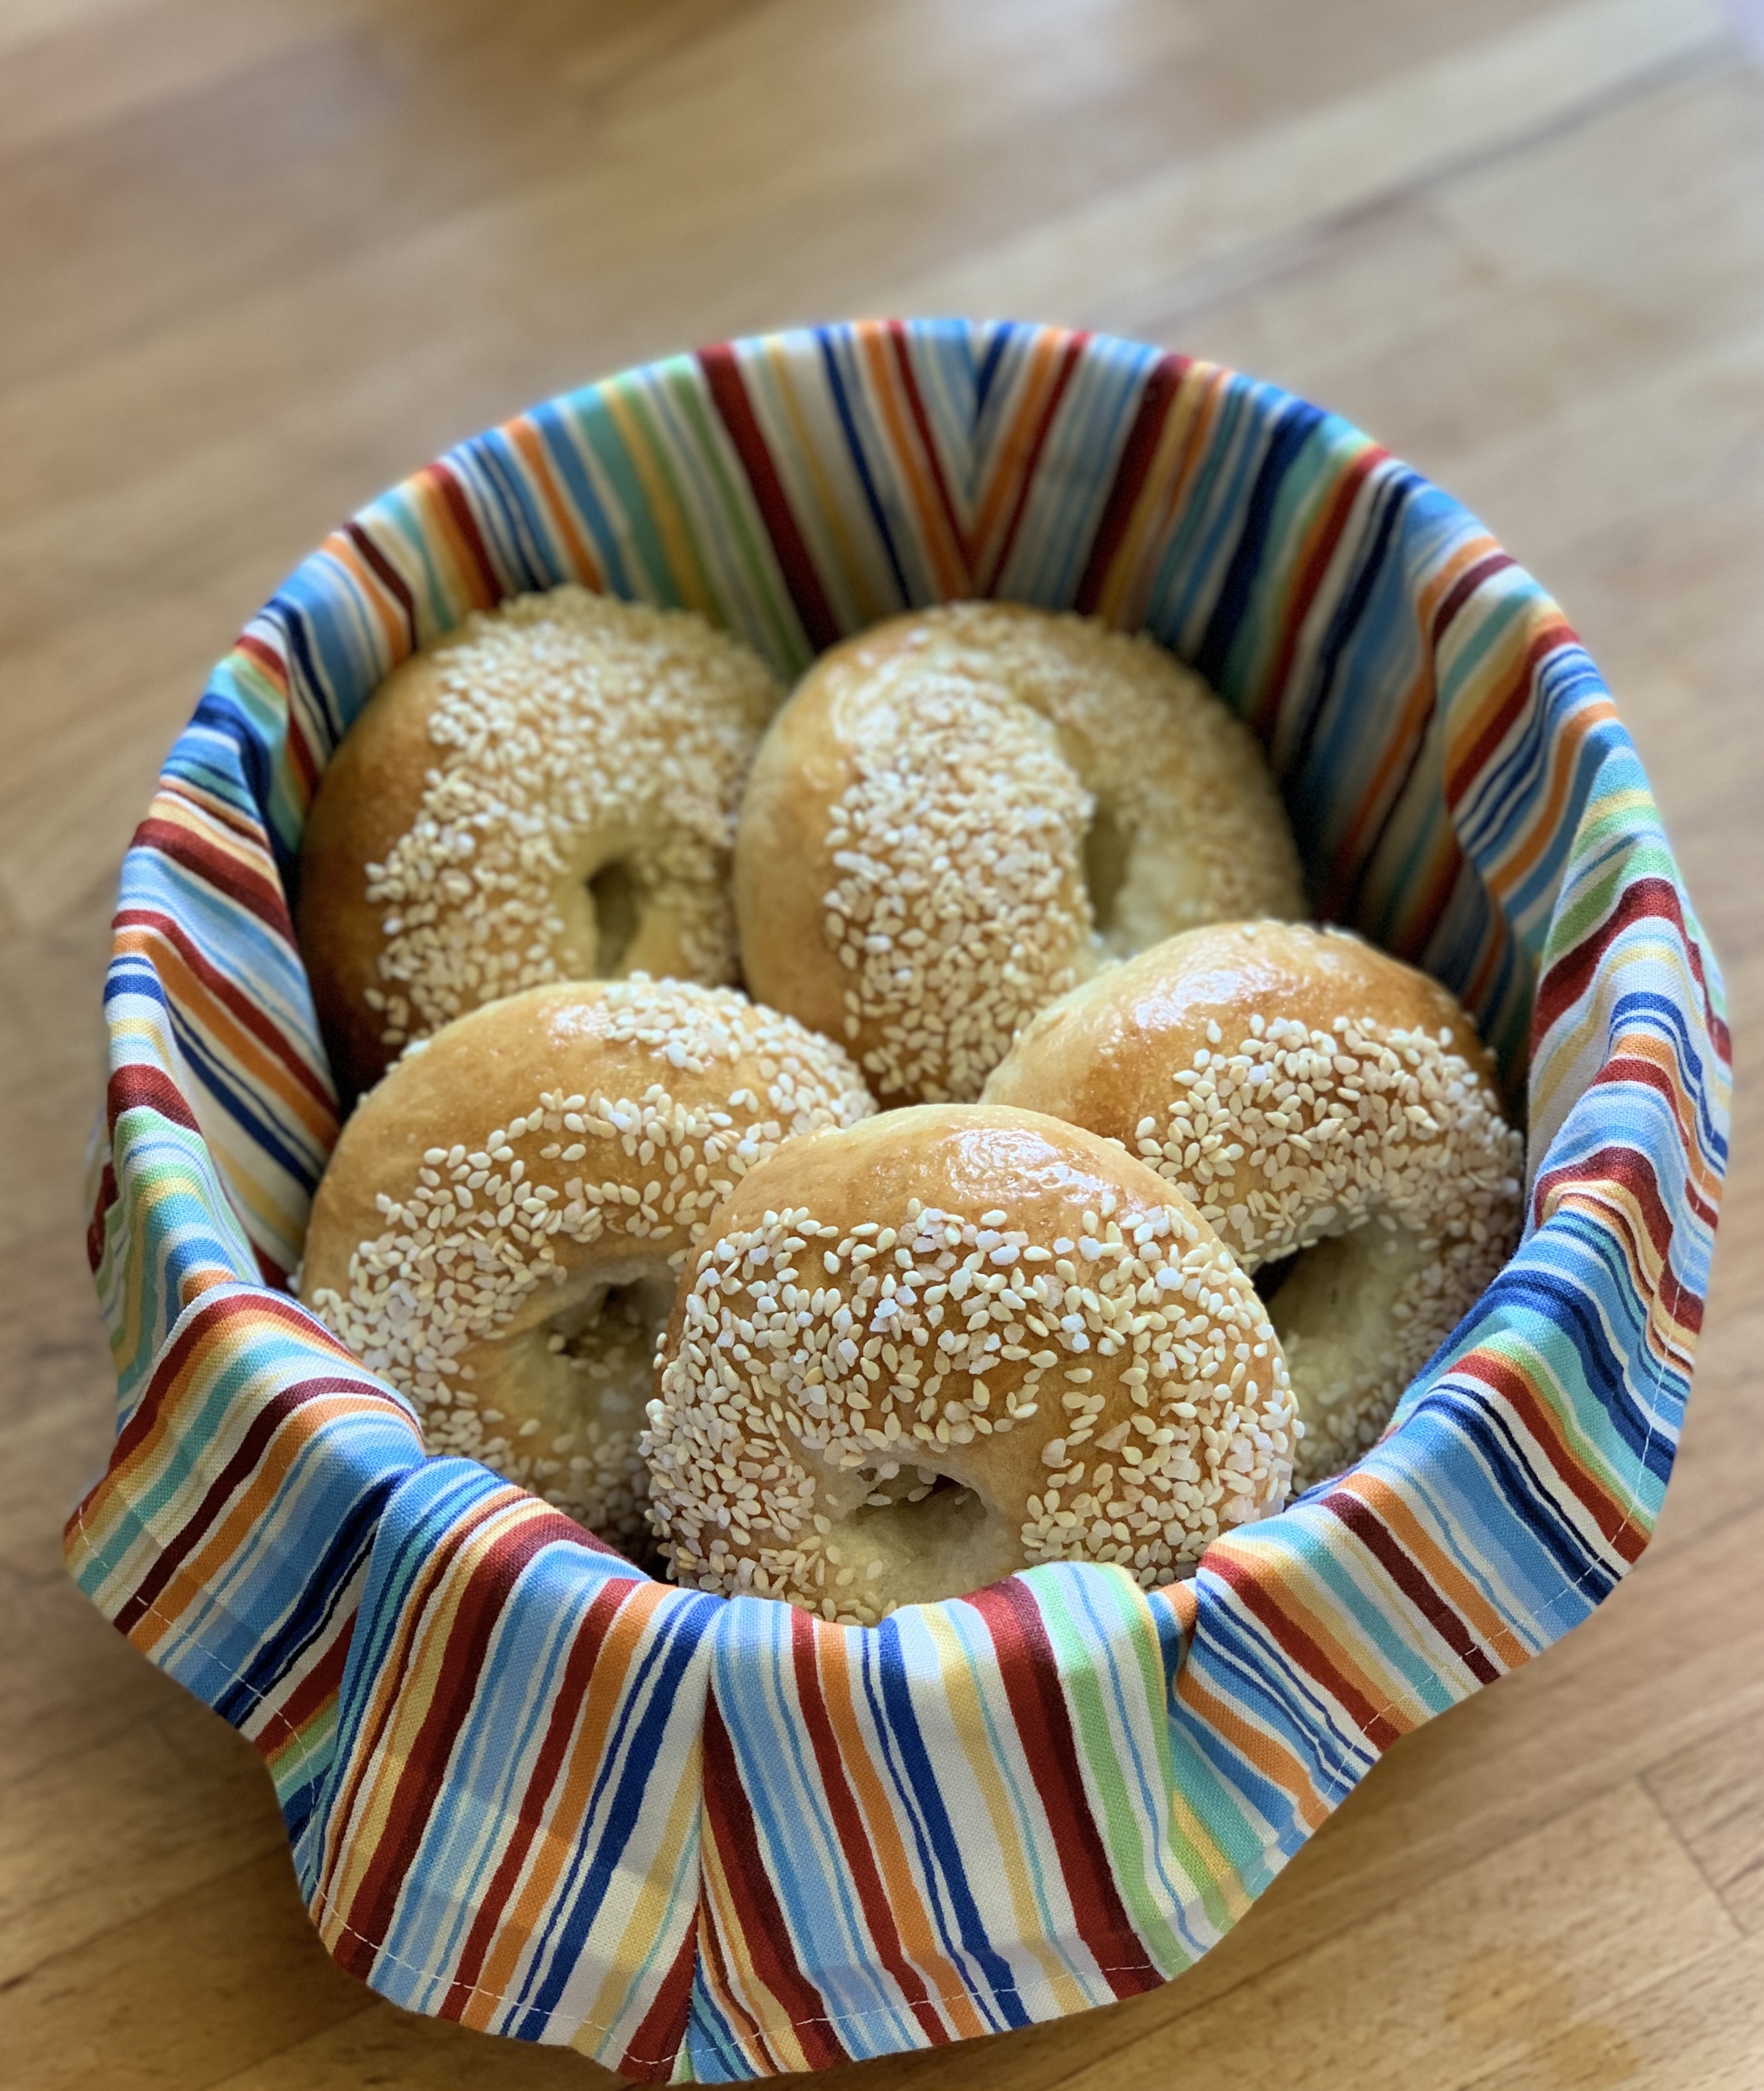
Sourdough Bagels! The best!

Absolutely perfect bagels. Tender inside with a light crust and so tasty!

BAGELS

  • 345g flour (AP or bread)
  • 220g water
  • 100g ripe starter
  • 1/2 tsp (4g) honey
  • 10g salt

BOILING & TOPPINGS

  • Large pot of water
  • 1/4 cup maple syrup
  • 1 egg
  • Sesame seeds
  • Poppy seeds
  • Everything bagel seasoning
  • Pretzel salt, etc. whatever you want!

INSTRUCTIONS

  1. Mix the honey & water to dissolve. Add the starter into the water and combine thoroughly with a whisk.
  2. Pour the water/starter/honey mixture into the flour bowl and mix by hand to combine (either with your hand or with a wooden spatula). Mix until you see no dry bits of flour. Cover and let rest for 1 hour.
  3. After 1 hour, sprinkle the salt on top and pinch it into the dough with lightly wet hands. Pull the dough around to create a smooth ball. Let rest for 1.5 hours. This dough is lower hydration, so you won’t need to build up as much structure. It’s mostly about time and letting the dough ferment.
  4. After 1.5 hours perform pull/folds all around the dough by stretching the dough up on one side and folding it back over into the center. Again, it helps to do this with wet hands. Do this on all sides until you have a smooth round of dough in the bowl. Cover and let rest for another 2 hours.
  5. After two hours have passed, it should be ready to go into the fridge for the night. No need to move it to a new container, just pop it right in. Timings will vary depending on the time of year, the temperature, humidity, strength of your starter, etc.
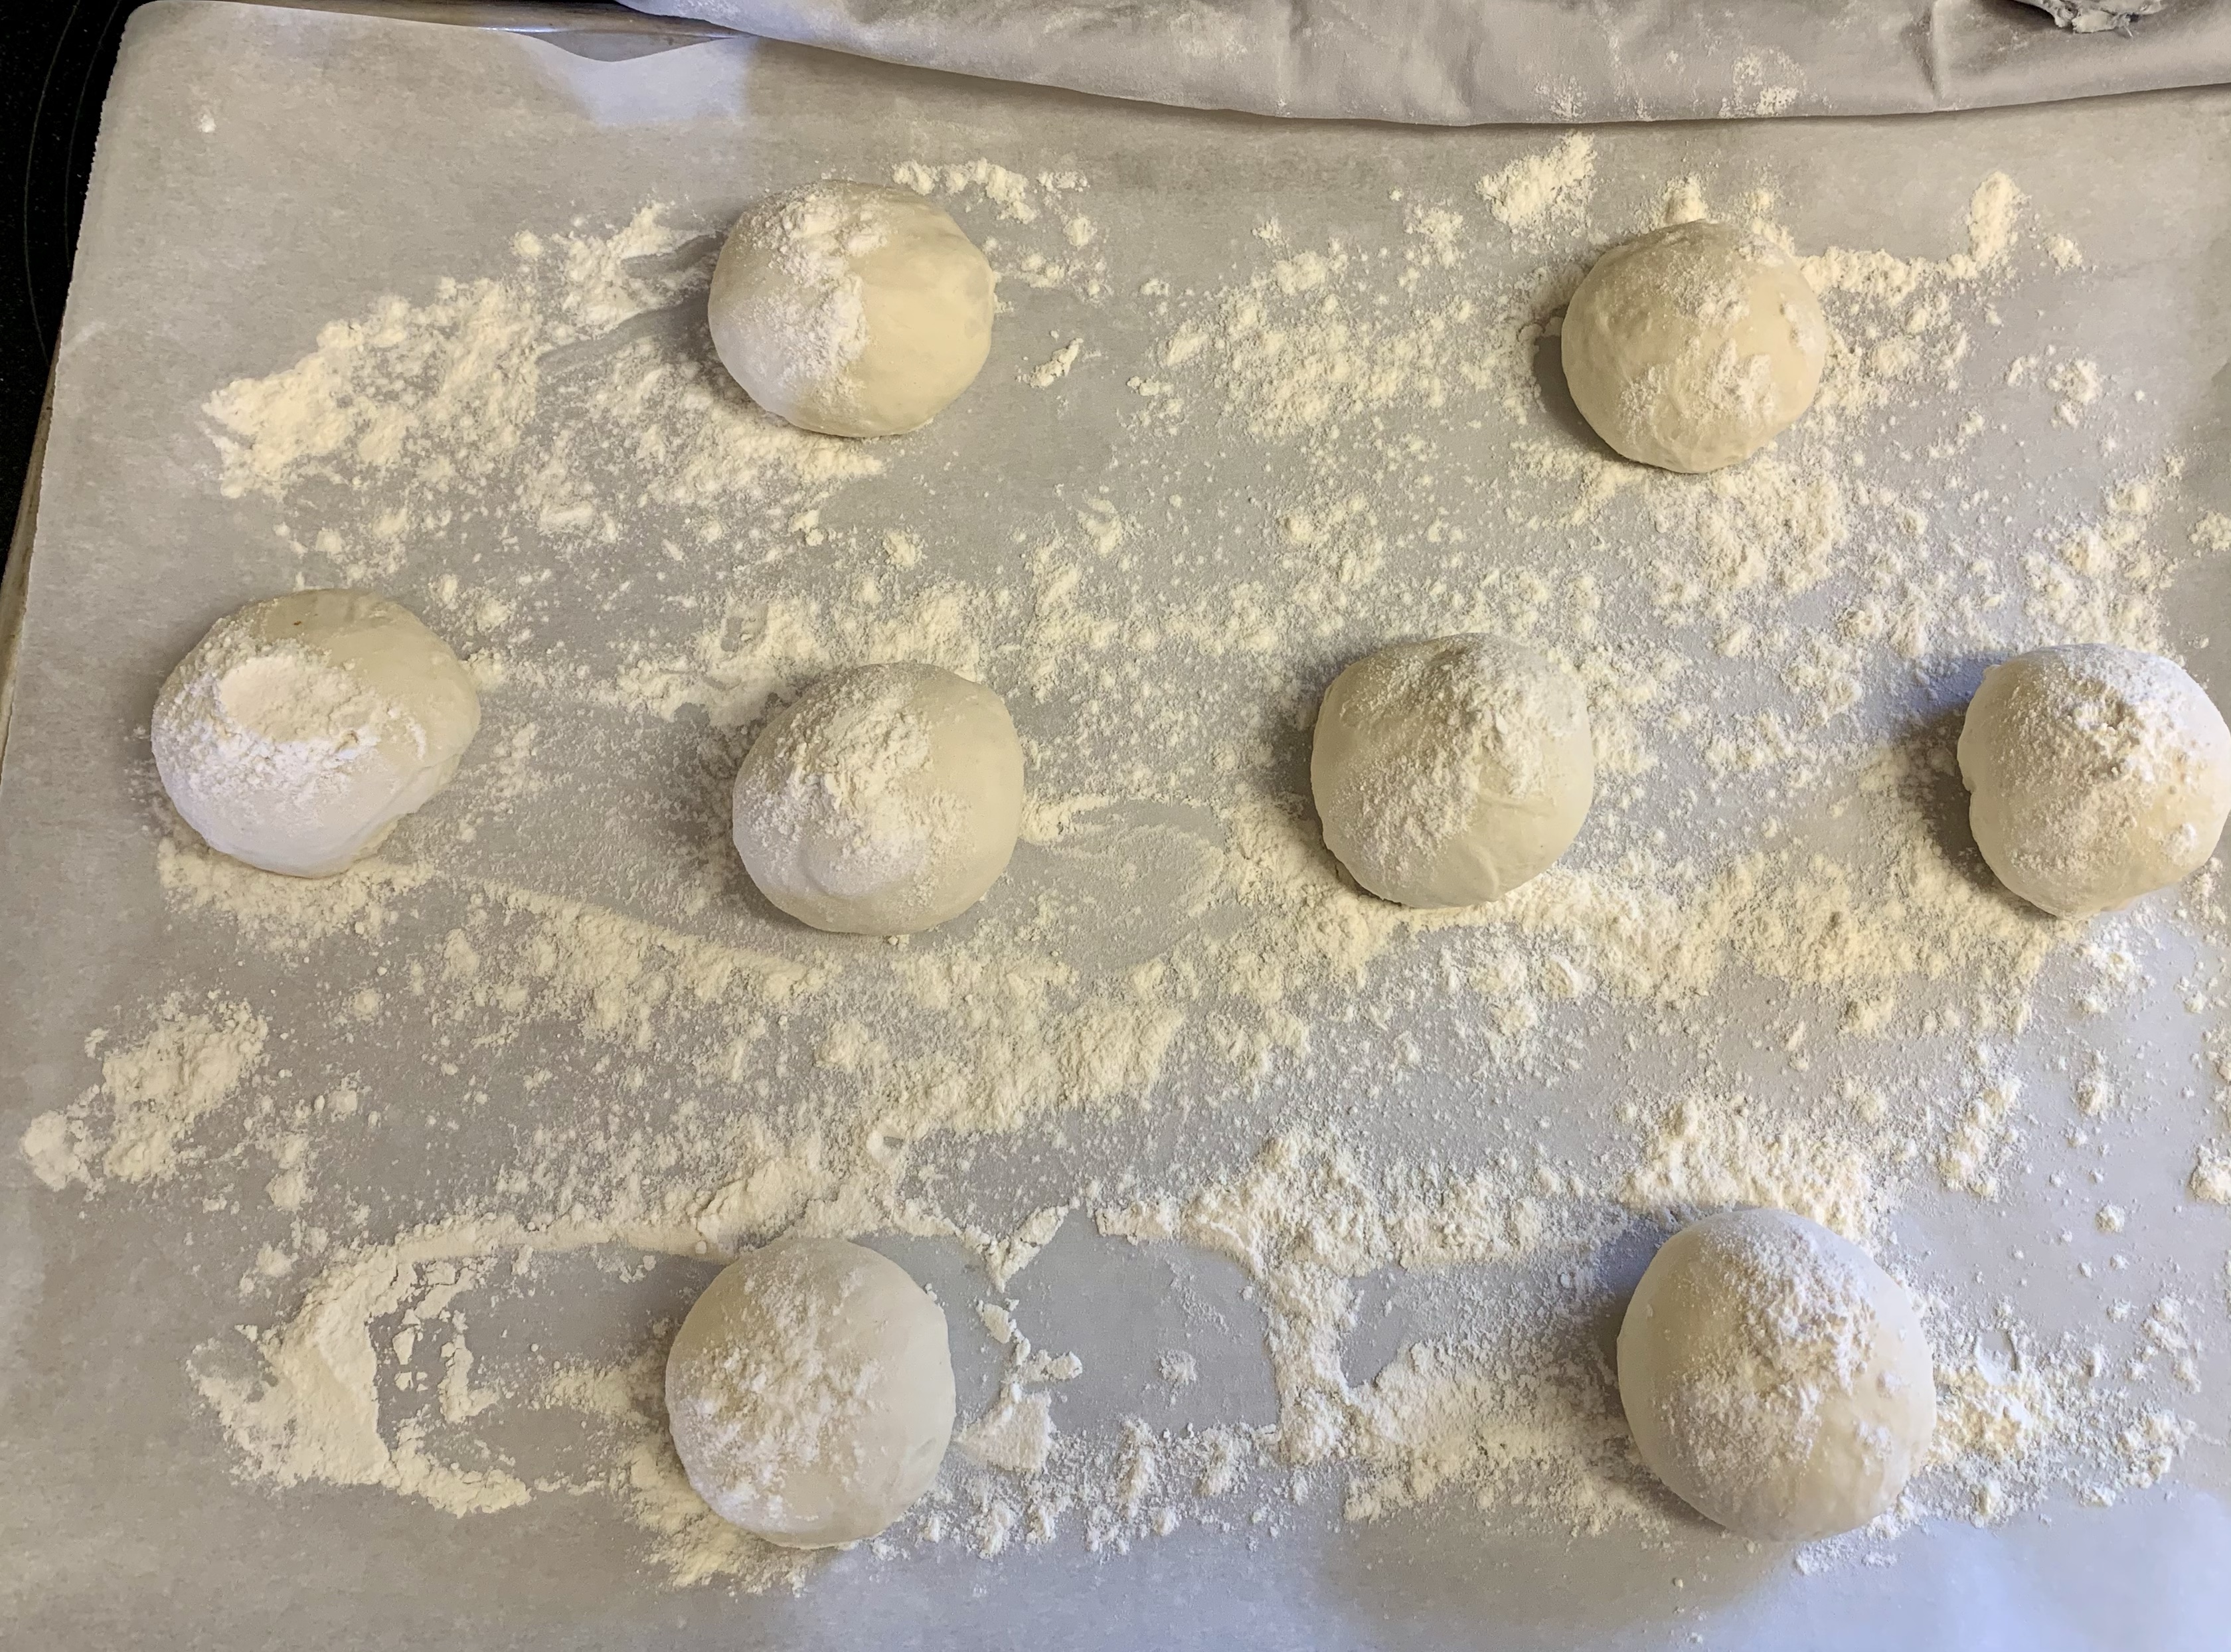
  6. In the morning, line a baking sheet pan with parchment paper and flour a work surface. Turn the dough out, gently press it into a flat-ish circle, & divide into 8 equal pieces.
  7. Shape each piece into a ball, pinching it up and then rolling it around a bit with the pinched/seam side down. Make little circles of flour on the parchment paper where each ball will sit, seam side down. Sprinkle a little flour on top of each dough ball, and then cover with plastic wrap, a damp linen, or place it into a giant plastic bag. Let them rest for about two hours.
  8. Pre-heat the oven to 425F. Bring a large pot of water + 1/4 cup maple syrup to a low boil. Uncover the bagel dough balls and get ready to shape them!
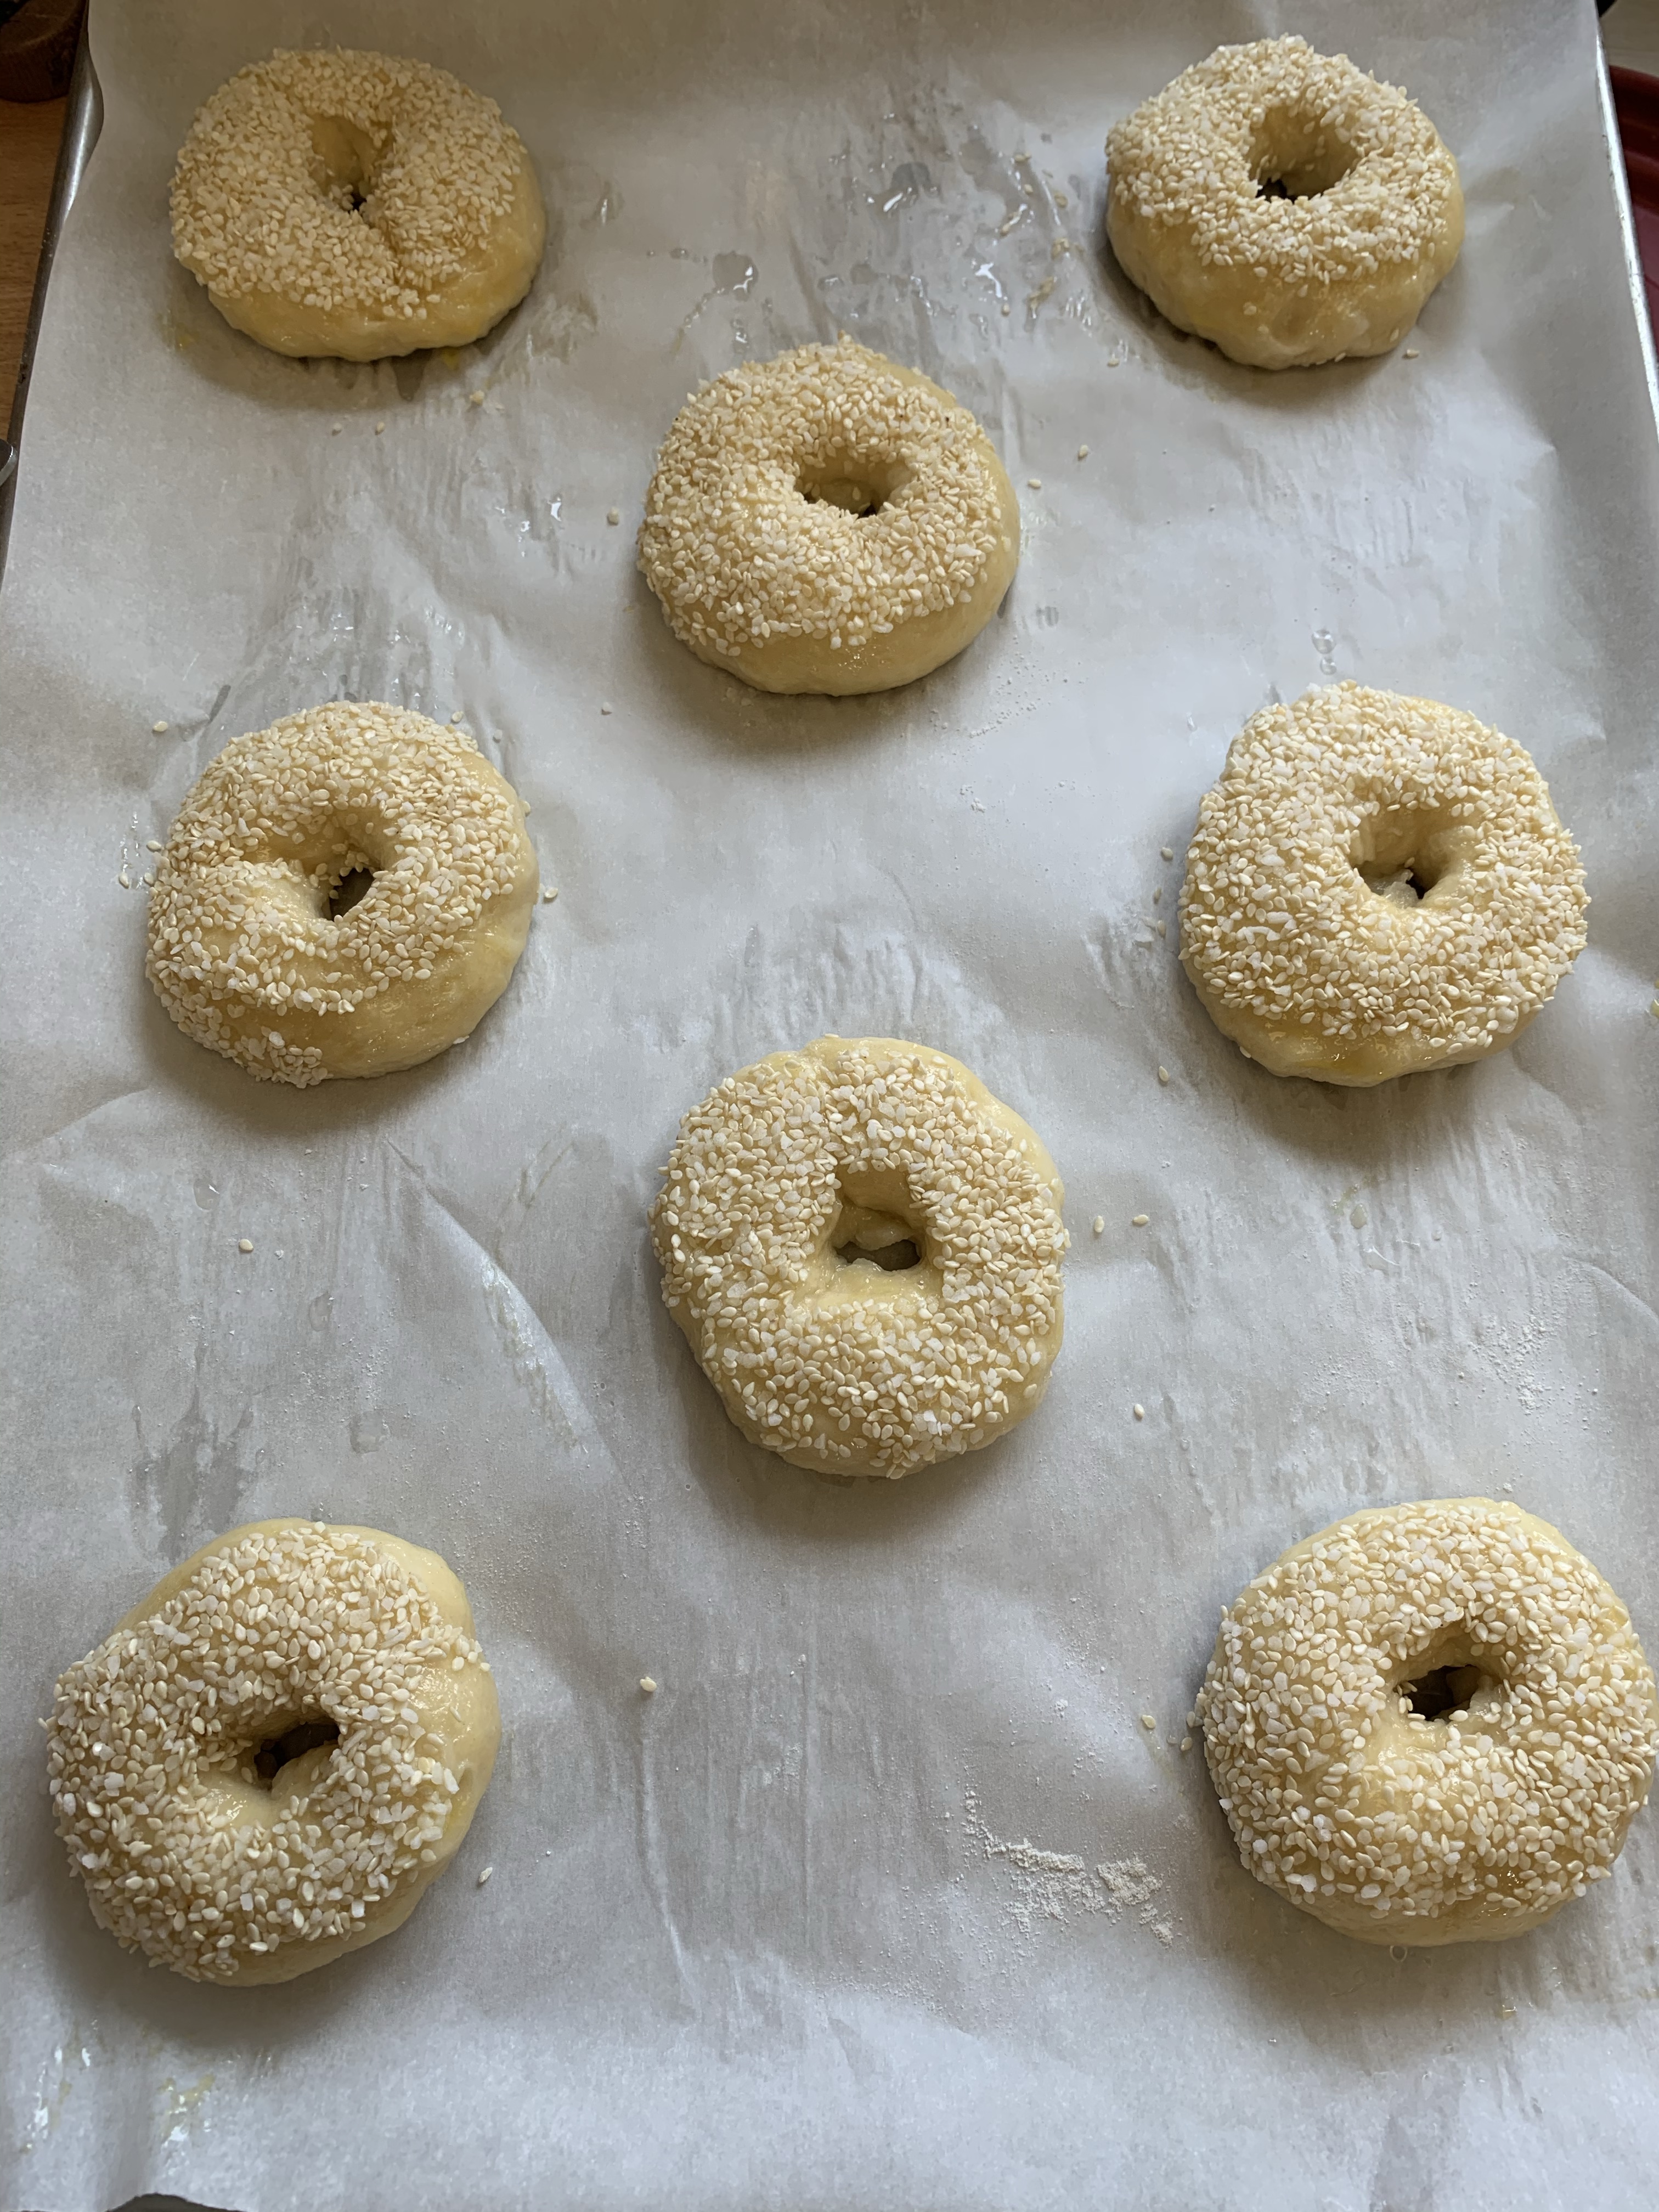
  9. To shape the bagels, flour your hands, pick up a dough ball and press your thumbs into the center top of the dough. Press all the way through until you form a hole in the center. Then with your other fingers under the dough, gently pull the inside of the bagel toward the outside, but don’t fully inside out the bagel.
  10. Once you’ve shaped all the bagels, bring the pot of water/maple syrup to a roiling boil. Carefully place two bagels at a time into the boiling water (“seam” side down) and let them poach for 30 seconds before flipping them over and letting them poach for another 30 seconds. Remove the bagels using a spider or slotted spoon. Let the excess water drip off before you place them down on the parchment paper again, the same side up as before (“seam” side down).
  11. Prepare an egg wash by beating 1 egg with 1 tbsp of water. Let the boiled bagels cool for a couple of minutes before brushing them with the egg wash. (If you don’t have eggs or are vegan, you can brush the bagels with a bit of non-dairy or dairy milk).
  12. Brush the egg wash (or milk) generously onto all the bagels, and then sprinkle toppings on OR pick up the bagels and dip them down into a shallow bowl full of toppings.
  13. Bake the bagels for 25-30 minutes at 425F. When you take them out, they might feel hard initially but will soften up as they cool. Immediately move them to a cooling rack and let them sit for about an hour.
  14. Slice and enjoy!!

This recipe came from the blog nokneadtoworry.com and it was perfect! Lots of recipes have malt syrups or powders but this recipe was so simple and yielded delicious bagels. Paulina has lots of tips and videos to help with whatever dough you are creating.

Out of the fridge and ready to take a 2 hour rest.
I couldn’t believe how good they look already.

Sourdough Pita

img_3526

Just look at those puffs!  I’m obviously a foodie weirdo given how exciting it is.

What??  Still with the sourdough posts?  I am still learning how versatile my sourdough can be, and these sourdough pitas were absolutely the best.  For the first time, with all my attempts at pita that puffed up beautifully – this recipe gave me a fantastic result. 8 pita, with 7 of them puffing up like a balloon and the 8th puffing up partially.


  • 1 cup (8 oz, 224g) active sourdough starter (100% hydration)
  • 1 cup (8 oz, 240 ml) warm water
  • 2 3/4 cups (13.75 oz, 385g) bread flour
  • 2 tablespoons (1 oz, 25g) olive oil
  • 1 tablespoon (1/2 oz, 14g) granulated sugar
  • 1 ½ teaspoons salt
  1. In the bowl of a stand mixer fitted with a paddle, or in a large mixing bowl, combine the starter, water, and 1 ½ cups of the flour. Mix until it forms a thick batter. Cover the bowl and set aside for 30-60 minutes.
  2. If using a stand mixer, switch to the dough hook. Add the olive oil, sugar and salt then mix to combine. With the mixer running on low, add the remaining flour. Mix until the dough begins to clean the bottom of the bowl and form a ball around the hook. If mixing by hand add flour until you can no longer stir, then turn the dough out onto a floured surface to finish by hand. Knead 5 minutes. Form the dough into a smooth ball.
  3. Put the dough into a lightly oiled bowl, turning once to coat the dough. Cover the bowl and set it aside at room temperature.
  4. After 30 minutes uncover the bowl, lift one side of the dough and fold it into the middle of the dough. Repeat with the other three sides of the dough then flip the dough over. You’re basically turning the dough inside-out to redistribute the yeast.
  5. Cover the bowl and after 30 minutes repeat the procedure. Cover the bowl and after 60 minutes repeat the procedure again. Cover the bowl and after 60 minutes the dough should be ready.  By now the dough should be lively, elastic and airy. If the dough is still sluggish give it another hour or two at room temperature.
  6. Cover the bowl tightly and refrigerate overnight (see note). Remove the bowl from the refrigerator in the morning and allow the dough to come to room temperature.
  7. Preheat the oven to 450°F. If you have a baking stone place it in the oven. If you don’t have a baking stone, place a baking sheet in the middle rack of the oven to preheat. If you have a dark colored baking sheet use that. A dark pan will absorb heat better than a light-colored pan, so the bread will bake faster and puff better.
  8. Divide the dough into 8 equal pieces and roll each piece into a ball. Use a rolling pin to roll two pitas to ¼” thick and 7”-8” around. If the dough springs back too much let it rest for 5 minutes and continue rolling.
  9. Immediately place the rounds on the preheated baking stone or baking sheet in the oven. Bake until they are puffed and the bottom is nicely browned, about 3-5 minutes. You don’t need to flip the bread. Remove the baked breads and wrap in a clean kitchen towel while you continue rolling and baking the pitas.
  10. The pitas are best the day they are made, but they also freeze very well.

img_3520

I did prep the night before, and this little ball of soft goodness sat on the counter for a couple of hours before retiring to the fridge for the night.

img_3521

Look at those delicate little air bubbles …… just what I was I was looking for.

img_3522

I think the secret to getting a puff is to not overwork the dough.  This amount of dough makes 8 pitas, roll each out to about 7″ and you will get the right thickness.

img_3523

I could have danced around the kitchen when I saw this puff!

img_3524

Steaming in the towel is part of the whole process.  The pita will collapse and stay ever so soft.

img_3525


This sourdough pita recipe came from baking-sense.com and if you want more information on how to create the perfect pita, just hop on over to that site.  I love how detailed their explanations are, complete with photos from every step.

Sourdough Sandwich Bread

I love those round loaves of sourdough bread, crunchy crust, chewy interior with lots of holes …… but this is not one of them.  Sometimes I also just want a soft sandwich loaf with all the flavour of my sourdough breads.  This makes enough for 2 loaves.  I made one in a traditional loaf pan and the rest of the dough turned into the most amazing rolls I’ve ever come up with.

Soft sourdough 6

Ingredients

Levain

  • 1 cup + 1 tablespoon (128g) King Arthur Unbleached All-Purpose Flour
  • 1/2 cup + 1 tablespoon (128g) cool water (60° to 70°F)
  • 3 tablespoons (44g) ripe (fed) sourdough starter

Dough

  • 5 1/4 cups (631g)  Unbleached Bread Flour or  Unbleached All-Purpose Flour*
  • scant 6 tablespoons (50g) milk powder
  • 1/4 cup (50g) sugar
  • 2 1/2 teaspoons salt
  • 2 teaspoons instant yeast
  • 1/4 cup (4 tablespoons, 57g) unsalted butter, room temperature
  • 1 1/2 cups (340g) water (70° to 80°F)
  • all of the ripe levain
*All-purpose flour will produce a somewhat stickier dough.

Instructions

  1. To make the levain: Mix all of the levain ingredients together and place in a covered container with room for the levain to grow. It will almost double in size, and will take about 12 hours to ripen (ferment) at room temperature (70°F). When perfectly ripened, there’ll be large bubbles (mostly below the surface) creating a somewhat rippled effect. It’ll appear almost fluffy. If the levain is covered with a froth of tiny bubbles, it’s a bit over-ripened; but don’t worry, you can still use it.
  2. To make the dough: Mix and then knead together all of the dough ingredients, including the levain, to make a smooth, supple, and not overly sticky dough.
  3. Place the kneaded dough in a lightly greased bowl, cover the bowl, and let the dough rise for 1 to 2 hours, until doubled in size.
  4. Divide the dough in half, and shape each half into 8″ logs. Place the logs in two lightly greased 8 1/2″ x 4 1/2″ bread pans. Cover the pans with lightly greased plastic wrap (or a couple of plastic shower caps), and let the loaves rise until they’ve crowned about 1″ over the rim of the pan, about 1 to 2 hours.

Soft sourdough 4

Look at all this from just a few moments work!  I almost injured my arm I was so enthusiastically patting myself on the back.

This recipe yielded such a beautiful soft sandwich loaf for sure, but it was these rolls that stole the show.  The dough is tender and incredibly flavourful.

Soft Sourdough 1

It’s the same principal as a cinnamon bun – but savoury!  You can fill the roll with anything you like.  Today I used Black Forest ham, cut into small squares, and spicy Calabrese sausage cut into little strips along with kalamata olives and diced yellow pepper.

Today I got frustrated because I wasn’t able to use tomato sauce like the pizza roll I envisioned.  So, Plan B …… I defrosted one of my basil almond pesto blocks, stirred in a bit more olive oil and spread that over the dough.  In the end, it was the happiest of Plan B’s ever!  In fact I got so excited by how good it was smelling that I rolled it all up, forgetting to add cheese.  Oh well, another Plan B – cheese sprinkled over the top before baking.

Soft sourdough 3

A mixture of aged white cheddar and mozzarella graced the top of these rolls right before baking and it was just fabulous.

I’ve been reading a lot of the King Arthur Flour website recipes during my sourdough explorations, and this recipe also came from there.  We don’t have any of that particular flour around here, but I wonder how much difference that makes?  We do have Rogers Flour locally and that is what I have been using with great success.

Olive Sourdough Loaf

Okay, my goodness …. you have to try this loaf.  Love kalamata olives any day of the week, but add them to a loaf of sourdough goodness, include some fresh garlic chunks and oregano right out of the garden and you have a sure fire winner.

olive loaf 6

I think it is the combination of sourdough starter with the yeast that creates the perfect crumb and texture for soft and delicious bread.

  • 1 cup (227g) sourdough starter, ripe (fed) or discard
  • 1 1/4 cups (283g) lukewarm water
  • 1/4 cup (50g) olive oil
  • 2 teaspoons instant yeast
  • 1 tablespoon sugar
  • 2 1/2 teaspoons salt
  • 2 cloves garlic, finely chopped
  • 1 tablespoon fresh oregano, finely chopped; or 1 1/2 teaspoons dried oregano
  • 4 1/2 to 4 3/4 cups (539g to 574g) Unbleached All-Purpose Flour
  • 1/2 to 3/4 cup (71g to 142g) drained, pitted, and coarsely chopped kalamata olives
  1. Combine all of the ingredients, except the olives, mixing and kneading to form a smooth dough then fold in the olives.
  2. Cover the dough, and allow it to rise until it’s doubled in size, about 90 minutes.
  3. Gently divide the dough in half; it’ll deflate somewhat.
  4. Shape each piece of dough into a round loaf. Place each loaf on a lightly greased or parchment-lined baking sheet.

olive loaf 3

Knead the olives in until the dough is soft, only slightly sticky to the touch, and smooth.

Olive loaf 1

This loaf came out of the oven looking irresistible.  It was amazing!


olive loaf 4

I was looking for a loaf shape today, so baked them in these pans.

olive loaf 5

Just look!  These olive loaves were absolutely perfect – the texture and flavour can’t be beat.

This recipe came from the King Arthur Flour website, and if you ever have any questions about baking, check out their website, they have everything.


Sourdough Pizza Dough

Starting a sourdough project means a lot of sourdough discard …. this is a brilliant way to use some of that discard.

Ingredients

  • 180 grams bread flour
  • 120 grams warm water
  • 60 gram active sourdough starter
  • 15 grams extra virgin olive oil
  • 5 grams sea salt
  • Gather the ingredients.

  • Add all of the ingredients to a medium bowl (a glass bowl is great because you will be able to observe bubbles from fermentation activity). Stir to thoroughly combine. The dough will look rough and shaggy and feel soft and sticky.

  • Cover bowl with a damp towel or plastic bag and rest for 20 minutes.

  • Then stretch and fold the dough, more or less as follows. Moisten your hand with a little water, scoop your hand underneath the dough and gently grasp one side of the lump. Lightly stretch the dough in your hand away from the main mass, then fold it over. Repeat this motion on different sides of the dough three or four more times.

  • Then flip the whole mass of dough such that the seams of your folds face down against the bottom of the bowl. You should notice that the shaggy dough becomes considerably more smooth, which is the goal.

  • Rest the dough for another 20 minutes, then stretch and fold again.

  • Cover once more and ferment for 3 to 4 hours at room temperature. Your dough will probably not rise significantly, but you should see bubbles forming on the surface and underneath (which you can observe if your dough is in a glass bowl). If you do not see bubbles, continue to ferment until you do.

  • Lightly flour a work surface. Invert the bowl above the floured area and wait for the dough to release itself from the bowl. Divide the dough in half. Using essentially the same technique as the stretch and fold earlier (minus the wet hands), shape the pieces into rounds.

  • Coat the inside of two round, one-pint storage containers (preferably with lids) with oil and place a dough ball seam-side down into each one. Cover with lids or plastic wrap.

  • Refrigerate for at least 24 hours before using. Dough kept in the refrigerator longer will continue to develop flavor and has a shelf life of a week or more.

  • To make pizza, remove the dough from the refrigerator and place on a well-floured surface. Coat the dough lightly all over with flour as well. With your hands, gently flatten and stretch the dough into a thin circle about 12 inches in diameter.

  • Add sauce and toppings as desired and bake according to your preferred method. Serve immediately.


    This recipe comes from http://www.thespruceeats.com – love it!


    Sourdough pizza dough

    Look at those little bubbles in there already – you know its going to be good.

    Sourdough pizza dough 1

    Set aside to rest – a minimum of 24 hours, and up to one week.

    Sourdough pizza 1

    Flour your hands to stretch the dough out … it is super soft and moves easily.

    Sourdough pizza 2

    This dough is soft, chewy and extremely tasty!


    This recipe makes enough for 2 small pizza shells …… not sure about your home, but that’s never enough for my household so make sure to double this recipe

Easy, authentic Sourdough Bread

It’s the 2020 Covid-19 pandemic, and like everybody else on Instagram, I’ve slipped down the rabbit hole of sourdough.  From initially thinking this is far too much work, don’t like being a slave to a starter, and ending up being a sourdough convert is very much a slippery slope folks, so don’t start unless you are prepared!  I’ve tried a variety of methods, and ended up with a variety of breads, all delicious, but this one … it’s going to be my house bread.   Chewy, dense, yet somehow light … it’s the perfect sourdough loaf.

Sourdough best

This loaf just made me happy, and when Sloan said she loved it, I was content.

  • 50 grams or bubbly sourdough starter, 1/4 cup
  • 350 gramswarm water (80° F)(1 ⅓ cups plus 2 tablespoons)
  • 500 grams bread flour (4 cups plus 2 tablespoons) You can use other flours, too: white unbleached flour, white whole wheat, or spelt. Whole wheat flour will be denser and won’t rise as much as white flour. For your first few loaves, you’ll have more success if you don’t use it. Don’t use gluten-free flours.
  • 9 grams finely ground sea salt ( 1½ teaspoons) or Himalayan salt

You need to make sure your sourdough starter is bubbly and ready to go. If it has not been fed recently then take a few spoonfuls of sourdough starter from your fridge and give it that much flour and water and let it ferment for 6 – 8 hours.

NIGHT PRIOR TO BAKING

Before bedtime (the night prior to baking), gather all your ingredients.

Close to your bedtime, add the bubbly sourdough starter and warm water to a ceramic bowl. Mix them together with a whisk until well combined.

Then add the flour and salt and combine together with a stiff spatula. You can also use your hands to get the flour fully incorporated. The dough will look a little scraggly, feel dense, and stick to your fingers. Try and scrape off as much dough from your hands as possible but don’t over mix it at this point. Then cover the bowl with plastic wrap for 30 minutes.

After 30 minutes, flour your hands and work the dough into a smooth ball. Do this by folding the dough over and pressing it into the center until the dough starts to turn into a smoother ball.

BAKING DAY

In the morning, use your spatula and gently pull the dough from the bowl onto a lightly floured work surface. Dust your hands with flour and start at the top and fold the dough over to the center, repeating on all sides (add more flour if needed).
Then flip the dough over and let it rest for 5-10 minutes.


Line an 8-inch bowl with a towel and dust generously with flour. Make sure your hands are still floured and pick up the dough and place it in the bowl with seam side up.

Cover the bowl and let it rest for 30 to 60 minutes. In the meantime, preheat your oven to 450 degrees. Cut a piece of parchment paper to fit your pot, leaving excess so you can grab the bread and take it out of the pot. Place your parchment paper over the bowl and invert the bowl to allow the bread to release onto the paper.

With a small razor blade or serrated knife, score the bread with four slashes.

Pick up the parchment and carefully place your bread in the pot.

Place the lid on the pot and place in the oven for 20 minutes. Then remove the lid and continue baking for 30 more minutes.

You can take it out of the pot and onto the rack to bake for 5 minutes longer to darken the bread if you’d like.

When bread is done, take bread out of pot and place on a wire rack to cool for about 20 minutes to an hour, although we often can’t wait to eat it! Store loaf in a bag on the counter, or this bread freezes beautifully

Sourdough best 2

Apparently the overnight rest helps to give the bread some volume, and more flavour, but also helps with the digestive properties – whatever the reason, it works!

Sourdough best 3

This bread was moist, tender and oh so delicious – it will be on repeat around here.

If you would like a little more guidance, lots of clear photos, and many sourdough tips, head on over to the site I got this recipe from – Cultured Food Life.