Steak & Rice bowl, Mexican style

Sliced steak, grilled vegetables, Mexican seasoned rice and a refreshing tomato cilantro garnish – top it all off with this Chipotle Honey Vinaigrette and you’ve got a winning dinner.


We love a good dinner bowl that packs a lot of flavour.  This dressing kicks everything up a notch with the combination of sweet, smoky and spicy.  I use it on everything, and tonight it did triple duty as a dressing to brush on vegetables before grilling, a marinade for the steak and then a drizzle over the completed dish.

  • 1/2 cup avocado oil
  • 1/4 cup freshly squeezed lime juice
  • 1 chipotle pepper in adobo sauce
  • 2 tbsp honey
  • 1 garlic clove
  • 1/2 tsp cumin
  • 1/2 tsp sea salt
  • freshly ground pepper to taste

Combine all ingredients in a blender and simply whizz it up until smooth and creamy.

RICE

In the same blender you used for the dressing, whiz up 1 tomato, 1 garlic clove, 1/2 tsp cumin, 1/2 tsp chicken stock and some minced cilantro stems.  Supplement that with water to give you enough for your usual ratio of water/rice.

VEGETABLES

Season the vegetables with the dressing above and grill until just cooked and still slightly crisp.

STEAK

Brush the steaks with a little of the dressing above and allow to sit at room temperature for 1 hour – Grill to desired temperature.  We like ours medium rare.

GARNISH

Quarter mini tomatoes and mince up cilantro.  Season to taste with salt and pepper, and give it all a squeeze of lime.


Pile it all on top of the rice and drizzle the dressing over – I guarantee you will be making this on repeat. Go ahead and buy the good steak – you don’t need much to complete your dinner.

I think this would work equally well with any protein you chose to make – and at this time of year when the vegetables are coming in strong locally it would make an amazing vegetarian meal if you just added more of a variety of vegetables. I missed grilling onions tonight and I think that would have added a great punch of flavour.

The vinaigrette came from Love and Lemons, a great website with so many amazing recipes.

Chipotle Vinaigrette

Is there anything better than a vinaigrette that you want to use on everything? I doubt it. We’ve used it to dress up grilled vegetables, served it drizzled over a Mexican steak bowl, and of course just as dressing for a simple salad. The added bonus is that this is the easiest dressing to make.

Use it in a variety of ways – today it was drizzled over a Mexican Steak Bowl, and it was perfect with the combination of sweet, smoky and spicy.
  • 1/2 cup avocado oil
  • 1/4 cup freshly squeezed lime juice
  • 1 chipotle pepper from a can of chipotle in adobo sauce
  • 2 tbsp honey
  • 1 garlic clove
  • 1/2 tsp cumin
  • 1/2 tsp sea salt
  • freshly ground black pepper to taste

The directions are embarrassingly easy ….. simply toss it all in a blender and let it whizz until everything is creamy and smooth. The combination of chipotle, honey and lime is brilliant.

Grilled steak and vegetables, served over a bed of Mexi style rice and garnished with a juicy fresh tomato and cilantro salad. This dressing is amazing.

This recipe came from the the Love and Lemons website, and you can be sure anything from Jeanine Donofrio is going to be delicious.

Amazing Flour Tortillas

Let me know if you find anything more appealing than a basket of fresh flour tortillas
  • 1 cup plus 2 tablespoons milk
  • 1/3 cup rendered lard, duck fat, vegetable shortening or unsalted butter 
  • 3 cups all-purpose flour, plus more for dusting 
  • 2 teaspoons baking powder 
  • 1 3/4 teaspoons kosher salt 

  1. Heat the milk in a small saucepan over medium heat until tiny bubbles start to form around the edges of the pan (the milk should be 180 degrees F), 4 to 5 minutes. Immediately remove from the heat and stir in the lard until melted. Let cool for 15 minutes.
  2. Meanwhile, whisk the flour, baking powder and salt in a large bowl until completely combined. Pour in the warm milk mixture and stir with a rubber spatula until a shaggy dough forms. 
  3. When cool enough to handle, knead the dough in the bowl until almost completely smooth, about 3 minutes; do not overwork, the dough should be soft and only slightly elastic and not sticky. Wrap in plastic and let rest at room temperature for 1 hour to relax dough. 
  4. Divide the dough into 16 balls about a scant 3 tablespoons each (or 46g.). Arrange the balls on a rimmed baking sheet and cover with a damp kitchen towel until ready to use.  
  5. Working with one dough ball at a time, roll out on a lightly floured surface to a 7-inch round. 
  6. Heat a medium cast-iron skillet or large griddle over medium-high heat.  
  7. Working with one at a time (unless using a large griddle), cook the tortillas, reducing the heat if they are getting dark too quickly, until air bubbles form on the surface and the bottom is brown in spots, about 30 seconds. Poke any large bubbles with a fork to release steam, flip the tortillas and cook until brown in spots on the other side, about 30 seconds. Stack and wrap the tortillas in a clean kitchen towel and keep warm. Repeat rolling and cooking the remaining dough balls.
This soft, supple dough was so easy to work with – 16 tortillas rolled out in 20 minutes.
Love the way the tortillas start to puff up – you just know deliciousness is coming.
Perfect!!!!!
Can NOT wait for family dinners to resume (damn you Covid), and I just know everybody is going to love these pork carnitas with fresh flour tortillas.
This soft flour tortilla is just perfect for wrapping up tender pork carnitas, pickled onions, avocado and cilantro. Don’t forget to squeeze lime over it all! The absolute best carnitas can be found in Michoacan, but we’ve found amazing carnitas at the mercado in Mexico City as well. Until we can travel again, we satisfy this craving at home.

Rick Andrew Martinez is my idol. His recipes are always amazing, and this one is no exception. By far it was the easiest recipe to work with and roll out, but what made this recipe SO amazing was the taste. Can’t be beat. Seriously, can’t be beat. I copied this recipe right from his post on Food Network, and if you want more amazing content just check out anything he does.

Coconut Shrimp

Couldn’t wait to dive into these. Every time I make them it surprises me how easy and how incredibly delicious they are.

Just like you get in the tropics….. minus the palm trees and ocean breeze. That dang Covid thing is still keeping us at home, during a time of the year when we’d so much rather be in the land of palm trees & sunshine, ocean bobbing and munching coconut shrimp. Never mind the beach, I’d happily settle for just being able to cuddle my granddaughters!!! Enough whining, here is the perfect recipe to make you feel like you’ve escaped to the beach.

  • 2 cups vegetable oil
  • 1 cup Panko bread crumbs
  • 1 cup unsweetened shredded coconut
  • 1 pound medium shrimp, peeled & deveined
  • 1/2 cup all purpose flour
  • 2 large eggs, beaten well (can just use egg white if you like)
  • salt and pepper to taste

Heat the oil in a large skillet or dutch oven over medium high heat (350-360 degrees)

Set up 3 dredging bowls:

  1. flour
  2. egg
  3. panko/coconut mixture

Season shrimp with salt and pepper, then working with one shrimp at a time, dredge through flour, then egg, then panko/coconut. Press into the panko mixture to make sure the shrimp are well coated. Set aside until you have them all coated.

Working in batches, add shrimp to hot oil and fry until golden brown, turning as necessary until they are crunchy and looking irresistible – around 3 minutes. Transfer to a paper towel lined plate.

Serve immediately with dipping sauce.

DIPPING SAUCE

  • 1/2 cup mayonnaise
  • 1/4 cup sweet chili sauce
  • 1-2 tbsp sriracha (or to taste)
  • juice of 1 lime
  • salt and pepper to taste

Mix well to combine. If you think of it, mix this ahead of time and set in fridge to allow flavours to meld beautifully.

I can’t promise you will smell the ocean when you make these, but it might make you feel a little better about staying home!

You can get these prepped ahead of time and just keep in the fridge until ready to fry.
Served tonight with rice and curried vegetables. This would disappear in a hurry if served as an appetizer also.

I originally got this recipe off Damn Delicious website, and she’s right – they are damn delicious! The dipping sauce is my own concoction and it’s yummy!!

Carne Asada

Missing Mexico right about now, so these Carne Asada tacos were just perfect!

Carne Asada 4

Carne Asada is one of those quintessential Mexican dishes …. pretty simple really, meat and a tortilla shell.  Make it exceptional by adding pickled onions and a fresh pico de gallo, and I promise – everything will look bright and cheerful!

Ingredients

  • 2 limes juiced
  • 4 cloves garlic crushed
  • 1/2 cup orange juice
  • 1 cup chopped fresh cilantro
  • 1/2 teaspoon salt
  • 1/4 teaspoon black pepper
  • 1/4 cup vegetable oil
  • 1 jalapeno minced
  • 2 tablespoons white vinegar
  • 2 pounds flank or skirt steak

Instructions

  • In a large resealable bag, combine lime juice, crushed garlic, orange juice, cilantro, salt, pepper, vegetable oil, jalapeno, and vinegar. Squeeze it around to mix it up.
  • Put the entire flank steak into the resealable bag. Seal it up tight. Make sure all the meat is exposed to the marinade, squishing the bag around to coat. Refrigerate for at least 2 hours, or overnight.
  • Heat an outdoor grill to high heat.
  • Remove the flank steak from the marinade, and discard excess marinade. Cook on the grill for 7 to 10 minutes per side.
  • Once done, remove from heat and let rest 10 minutes. Slice against the grain, and serve.

We love to serve this with fresh, homemade flour tortillas (my flour tortilla game is way stronger than my corn tortilla game ….. so far)

Carne Asada

You won’t believe it, but the rib eye steak was on sale, not the flank …. so that is what I used.  It was incredible.  All the citrus shows up in the marinade, and you can still taste it in the grilled steak, but it doesn’t overpower the meat.

Carne Asada 1

Grilled to perfection, moist and juicy inside – this steak is the best bite.  Just hope some gets to the table for the tortillas.

Carne Asada 2

Just look at how moist that steak looks.  Yum.

carne Asada 3

Place it all out on the table, and let the family make their own plates.  Smiles all around!


The “stay at home chef” adapted this recipe from one of my favourite chefs – Rick Bayless.  This is so easy to do at home and gives you the flavour you might expect from sitting in a Mexican cantina ….. not only that, it is easy!

Lamb Barbacoa

lamb barbacoa 4

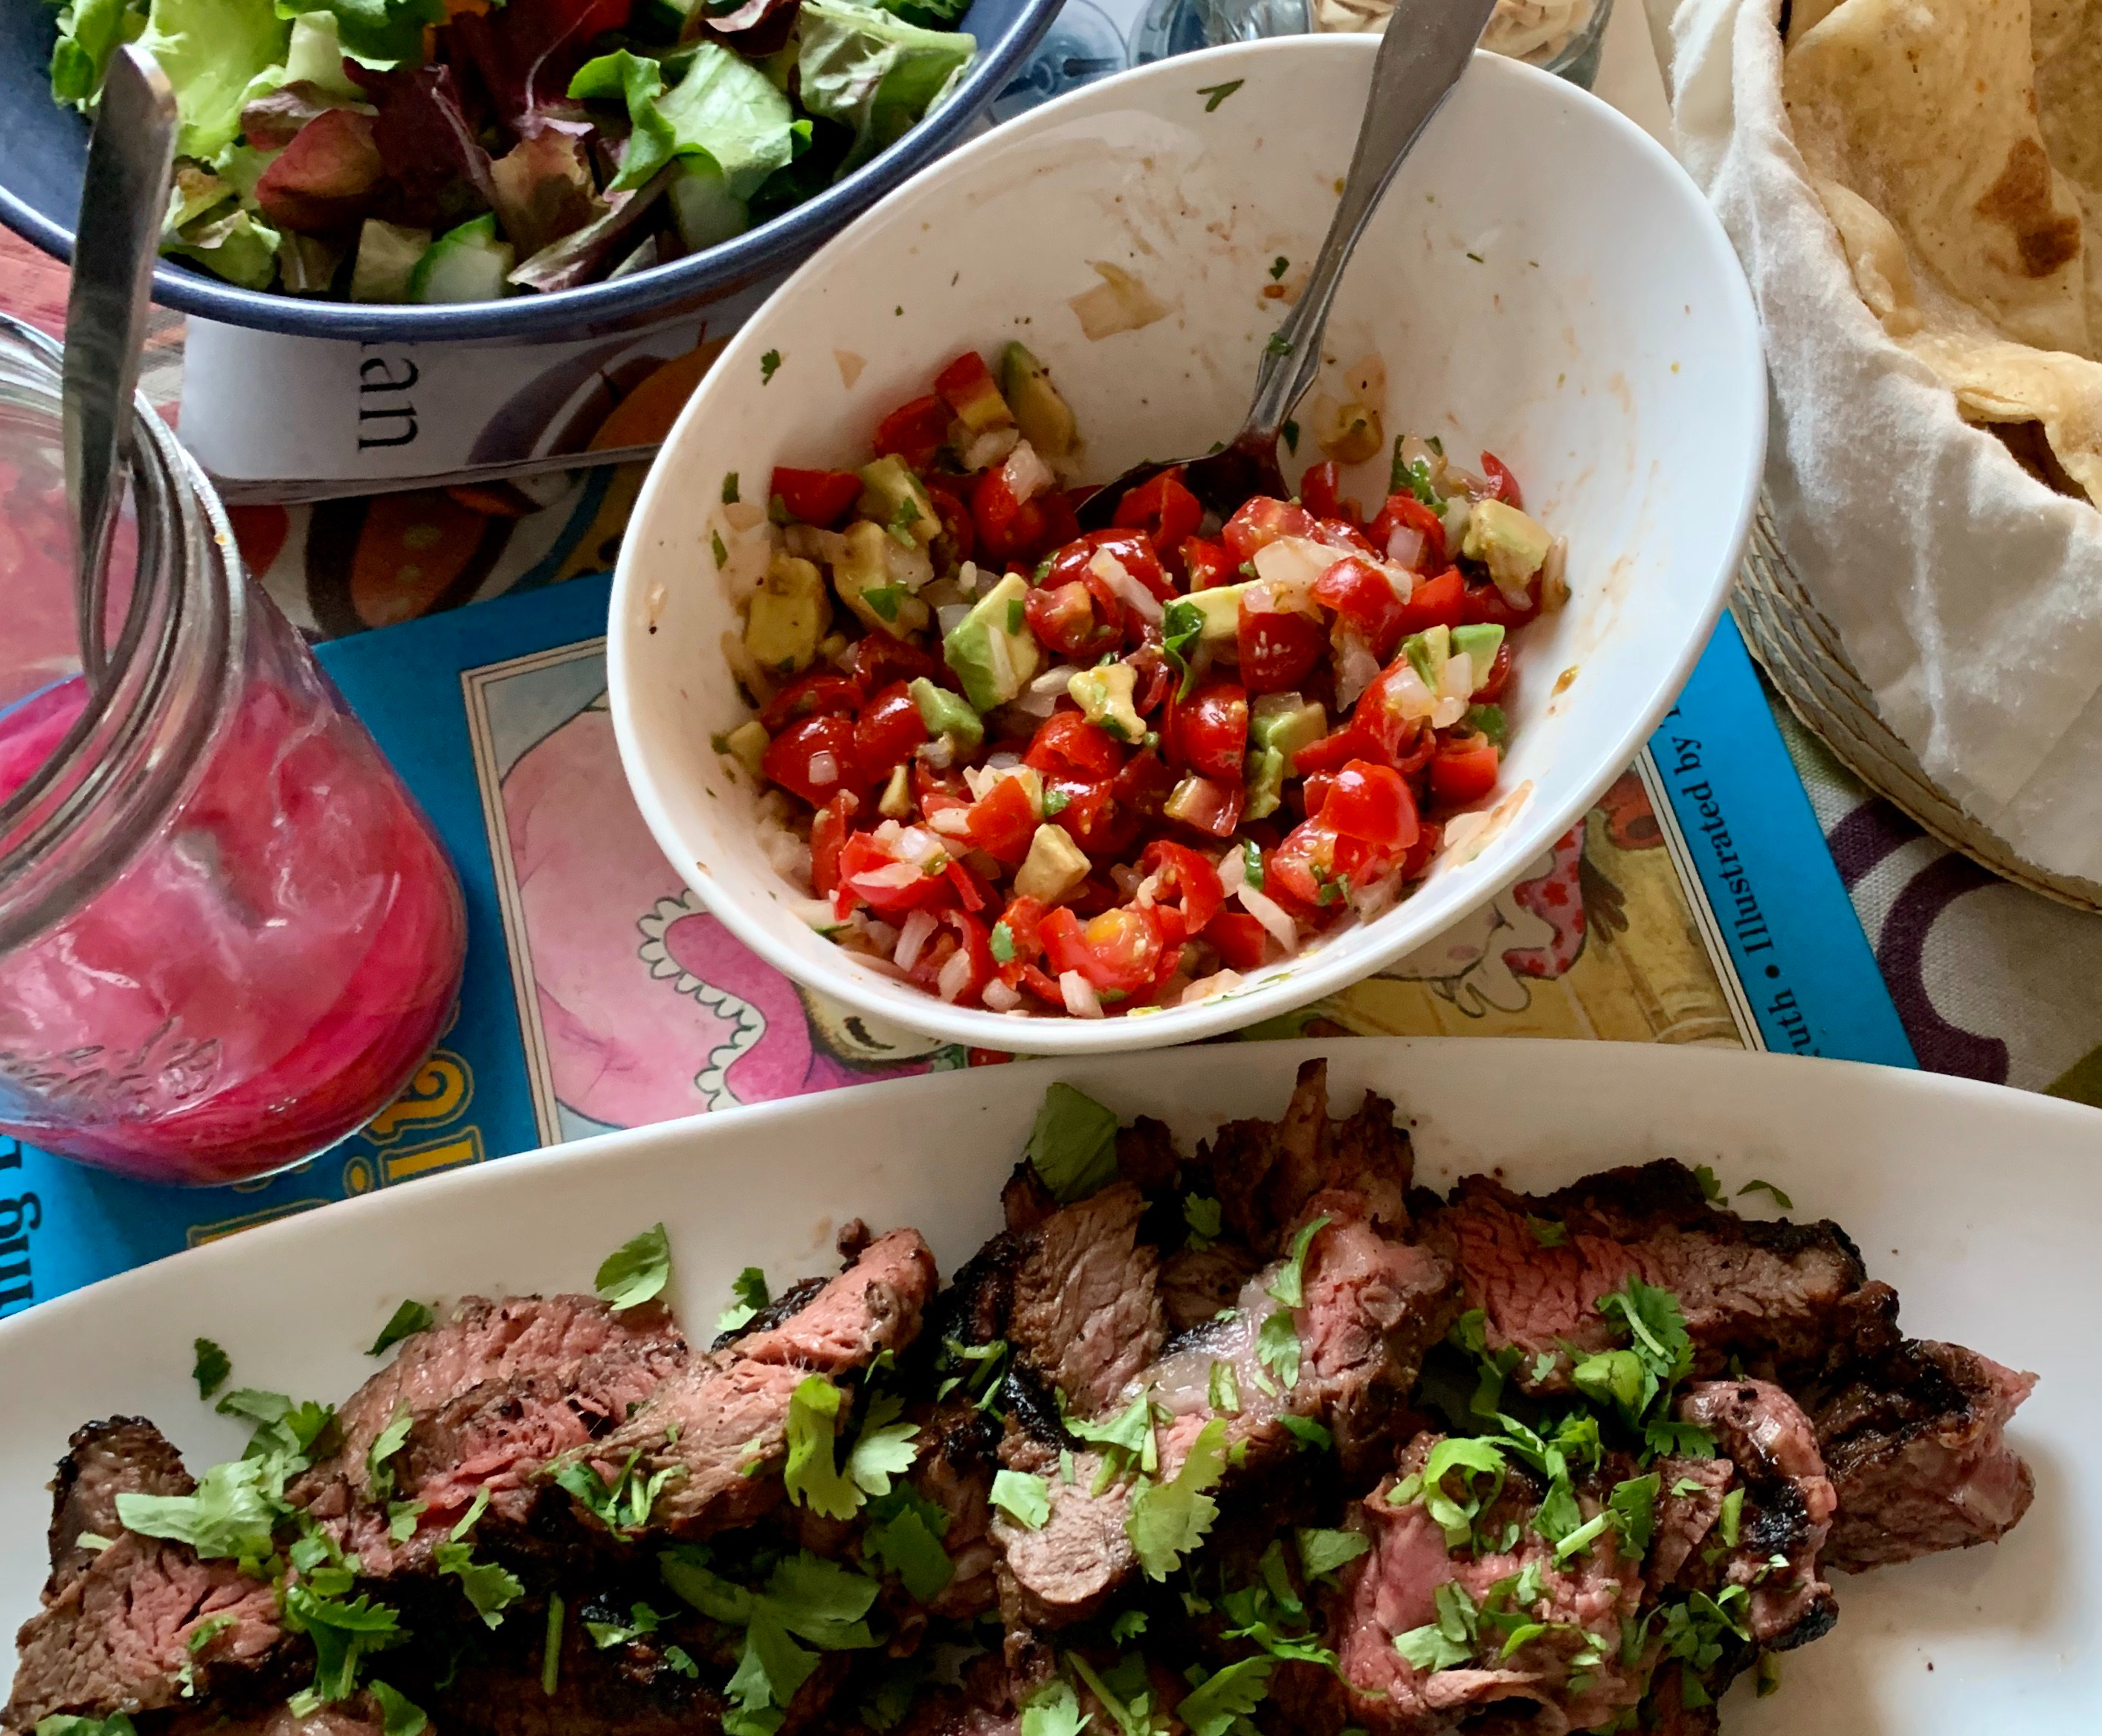
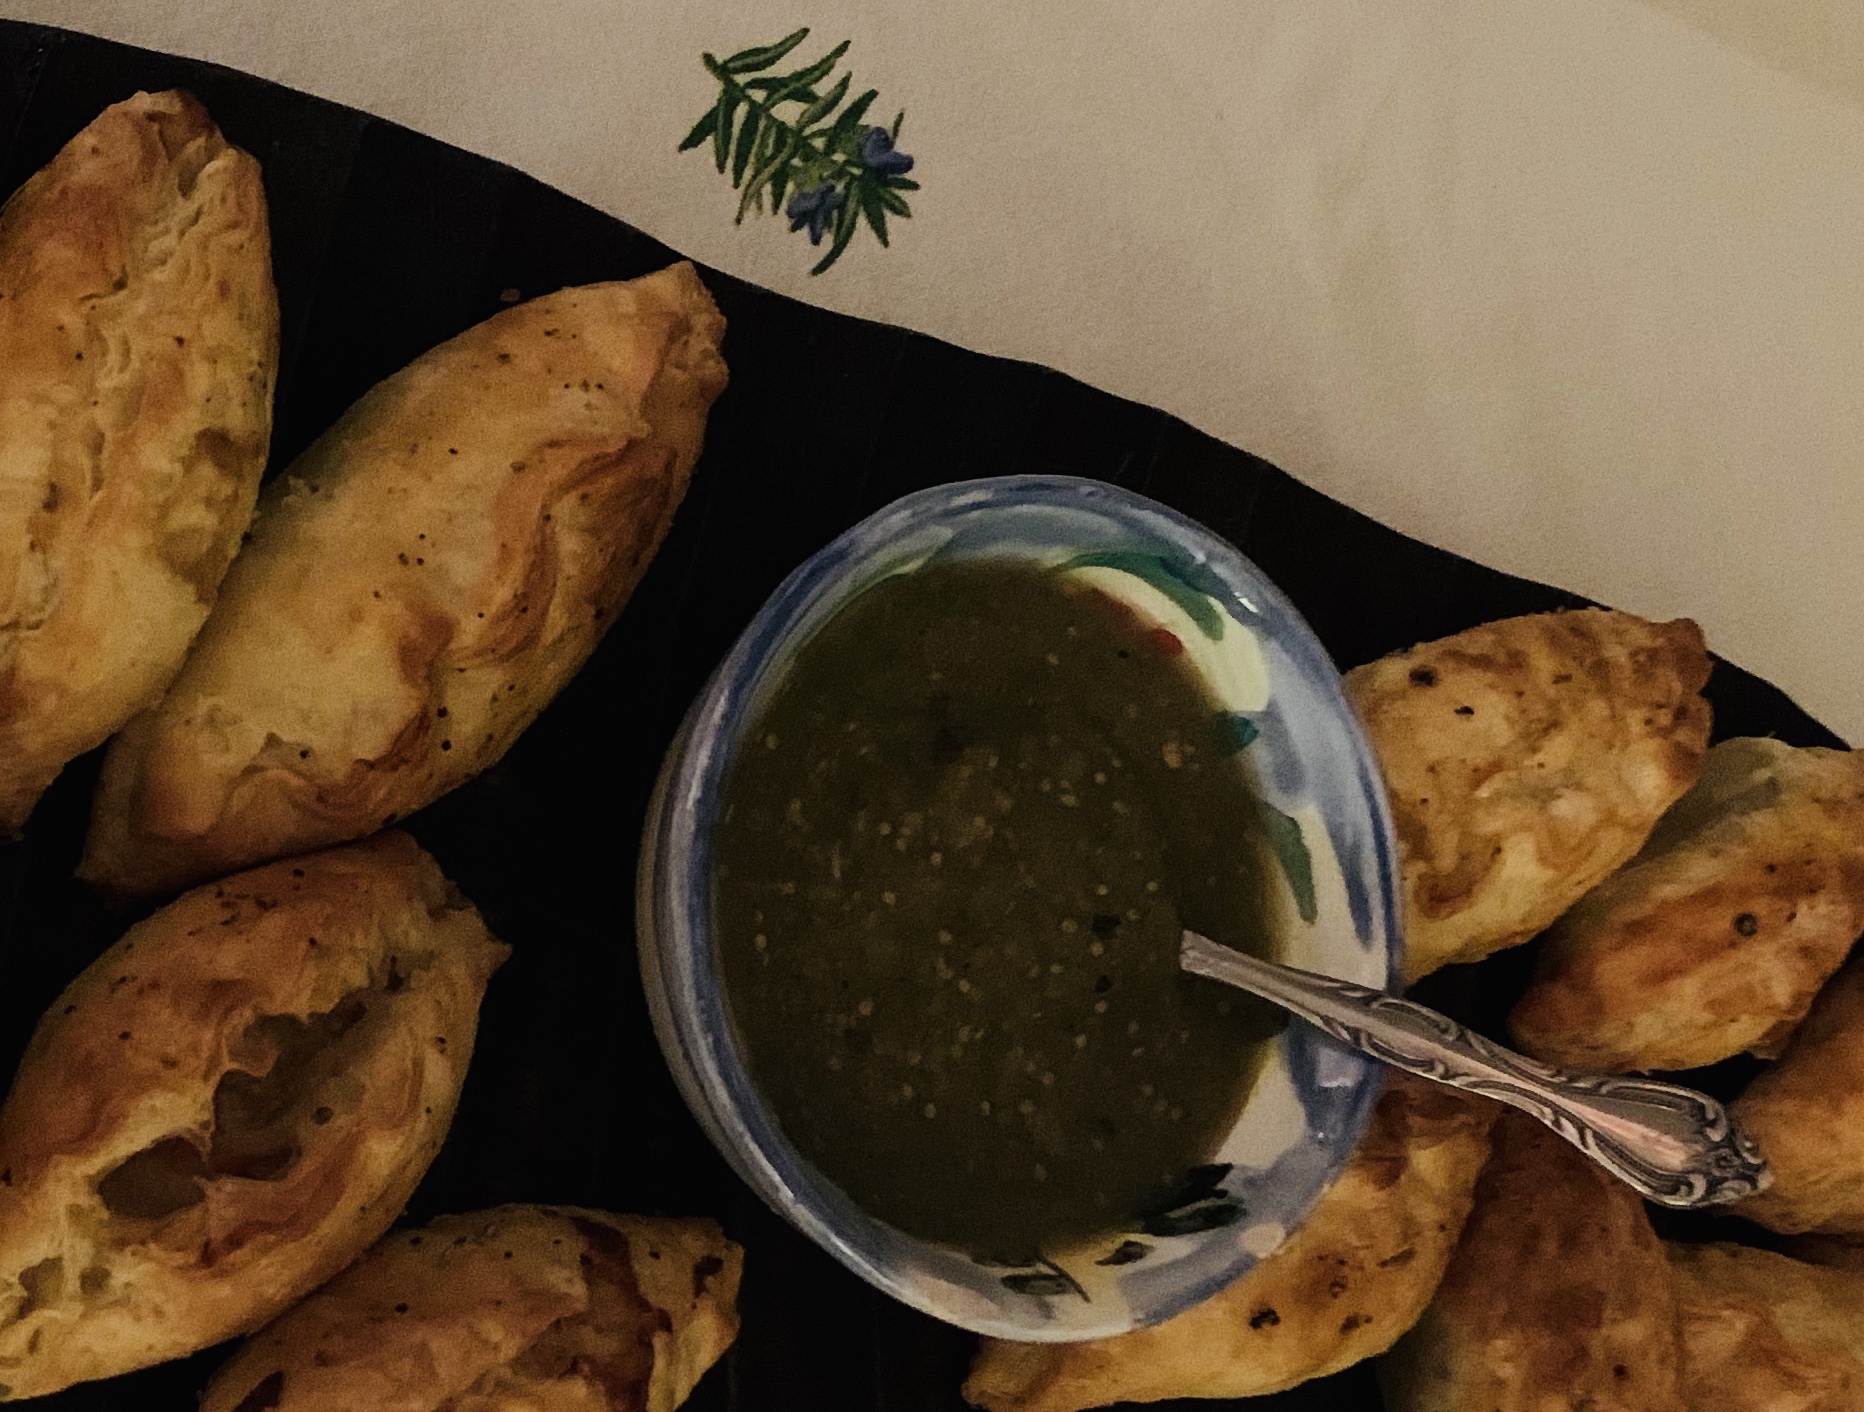
Pretty simply delicious.  Feels just like you are at a roadside stand or a local Mercado in Mexico.  Serve with a salad and dinner is ready.

I wasn’t really sure what I wanted to do with the pack of frozen lamb stew meat in my freezer …… This turned out to be perfect!  It helps that whenever we come home from Mexico we bring dried peppers so I always have a good stock on hand.  The only thing I didn’t have, in fact, was the agave leaf, or banana leaf.  I’m sure it will add another dimension of flavour when I try that, but honestly this was just fantastic without.

FOR THE LAMB

  • 12-inch chunk of an agave leaf (penca de maguey) or 1 large banana leaf, optional
  • tablespoons vegetable oil
  • 3 pounds boneless lamb shoulder (you could also use beef or pork – marinade works with either)
  • 12-ounce bottle of beer (optional but I love this!)
  • Salt

FOR THE MARINADE

  • 2 dried guajillo chiles, stemmed, seeded and torn into large pieces
  • 2 dried ancho chiles, stemmed, seeded and torn into large pieces
  • 3 garlic cloves, peeled and roughly chopped
  • tablespoon cider vinegar
  • tablespoon dark brown sugar
  • teaspoon salt
  • 1 canned chipotle in adobo sauce
  • 1/4 teaspoon ground cinnamon, preferably Mexican canela
  • 1/2 teaspoon dried Mexican oregano

FOR SERVING

  • Your favorite hot sauce or salsa
  • A little chopped white onion or pickled red onions
  • A handful of cilantro leaves

This recipe came from Rick Bayless, and I have copied it here exactly as he posted it, but I’ve added my changes in the bold Italic font.

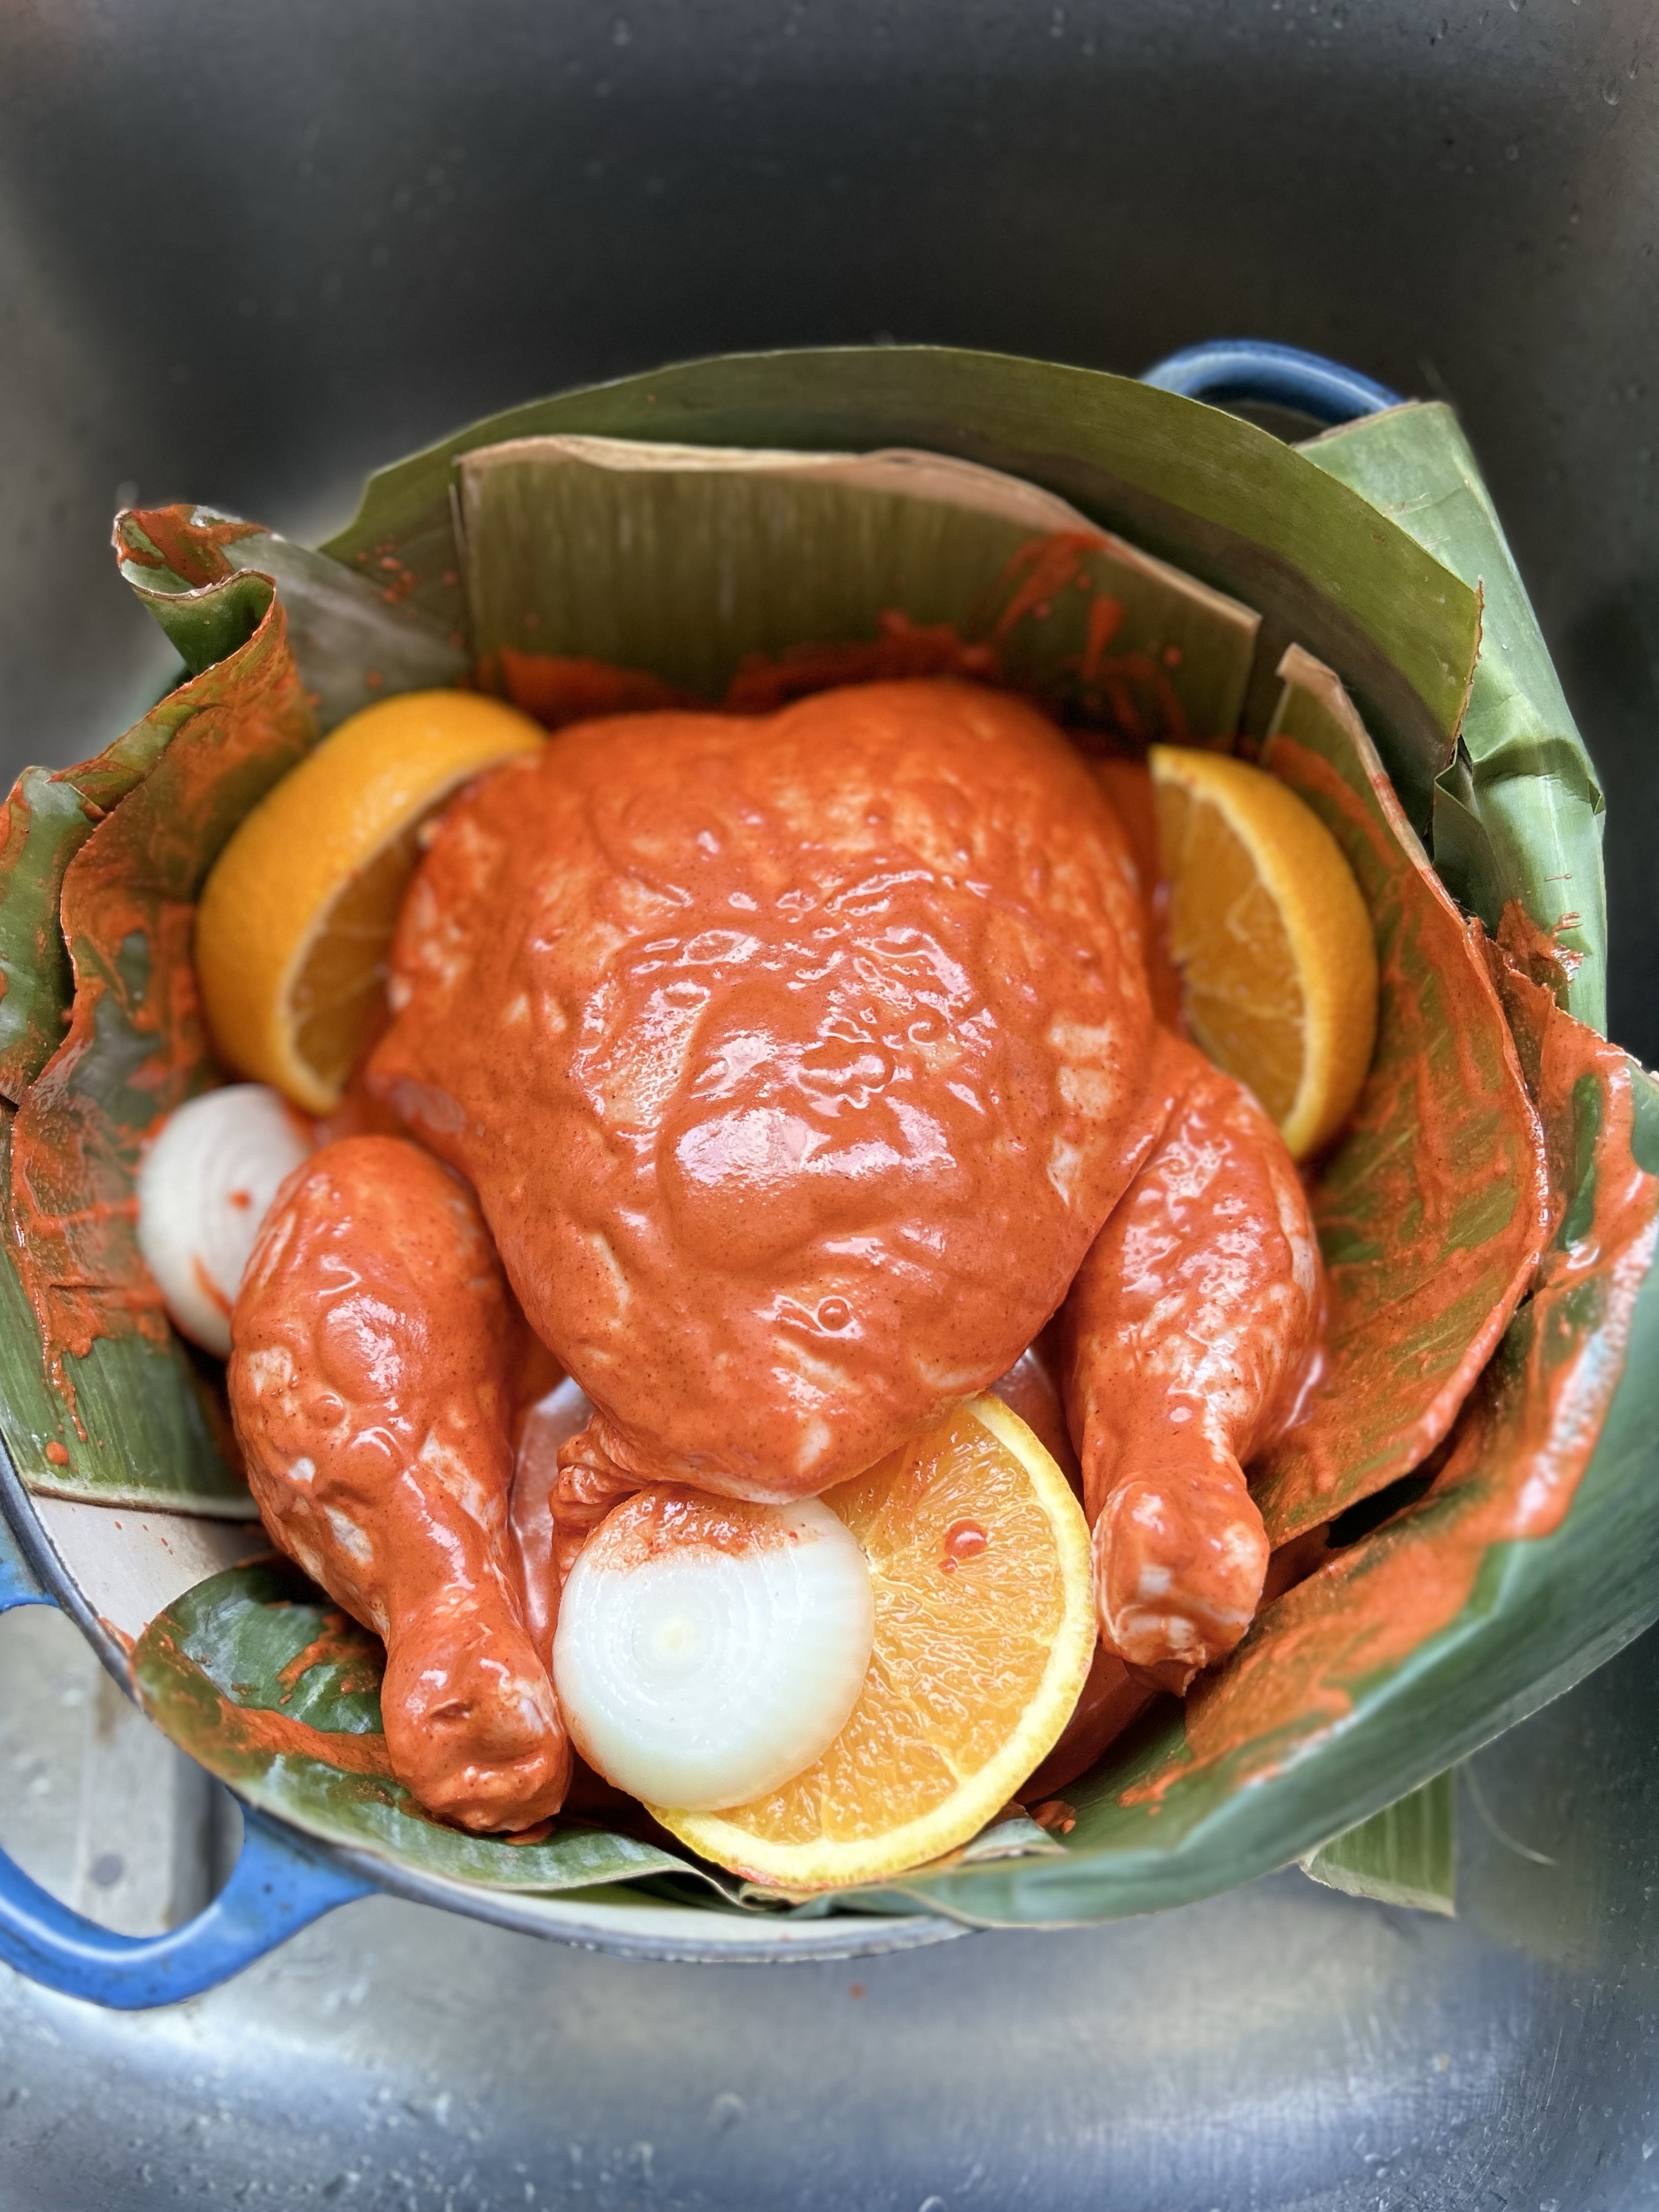
Roast the agave leaf being careful not to touch the exposed flesh of the agave) over an open flame, turning every few minutes until pliable and charred, 10 to 15 minutes, depending on the thickness.  (If using a banana leaf, run it briefly over an open flame to soften it.)  Cut into 3 pieces.  We are in the midst of Covid-19 pandemic, so I wasn’t about to run out to the store and try to buy agave leaf or banana leaf (the closest we can get to either of these is frozen banana leaf).  I just left this part out.

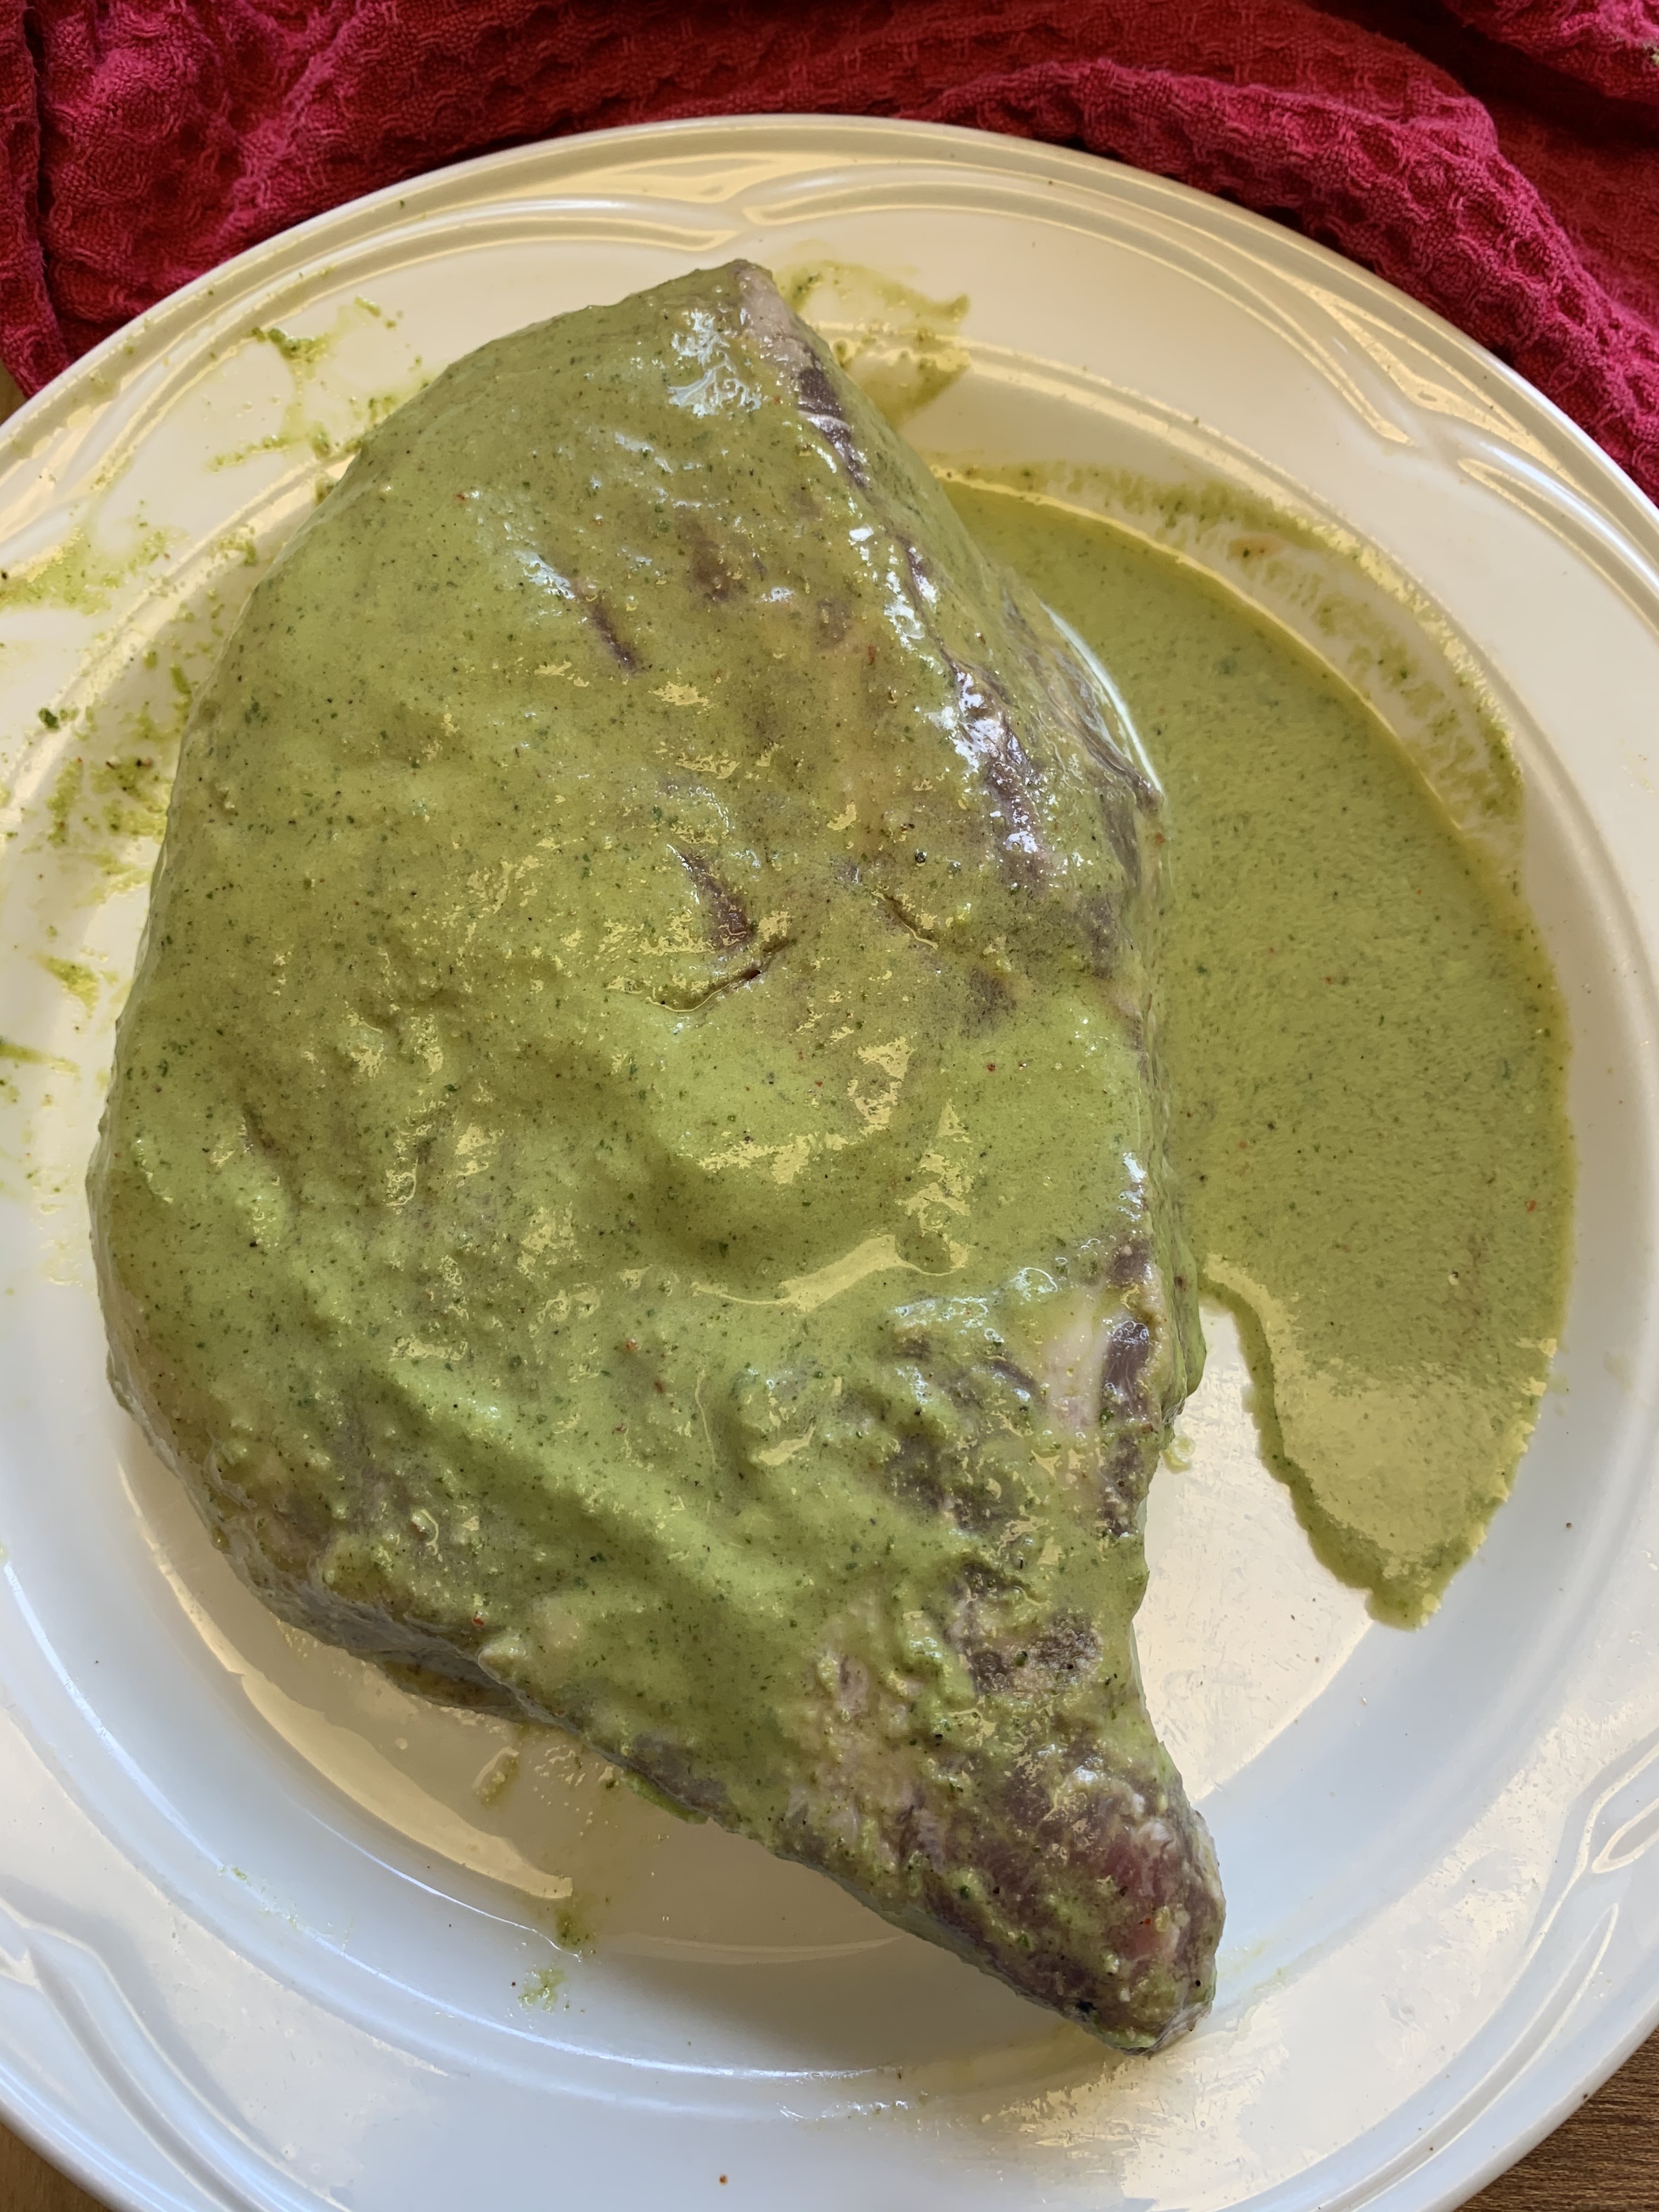
In the stovetop-safe insert of your slow cooker or in a very large (12-inch) skillet, heat the oil over medium-high.  Pat the lamb dry with a paper towel, sprinkle generously with salt and lay it in the insert of skillet.  Cook, turning occasionally, until richly brown on all sides, about 10 minutes.  Fit the insert into the machine or transfer the meat to the slow cooker.

Combine all the marinade ingredients in a blender with 2 cups of water and blend to a smooth puree.  Pour through a medium mesh strainer into the slow cooker. Nestle the pieces of agave leaf or banana leaf under and around the meat and pour the beer over the top, if you are using them.  Cover and turn on the slow cooker to high.  Your barbacoa  will be done in about 6 hours, though you can hold it for longer. (My slow-cooker can be programmed to switch from high after 6 hours to a “keep warm” temperature for up to another 6 hours. Some slow cookers click to “keep warm” automatically; others need to be switched manually.). I put the seasonings and the torn chile peppers into the blender along with hot water, and allowed it to sit for about 20 minutes before blending. This allowed the peppers to soften nicely and they blended up very smoothly.

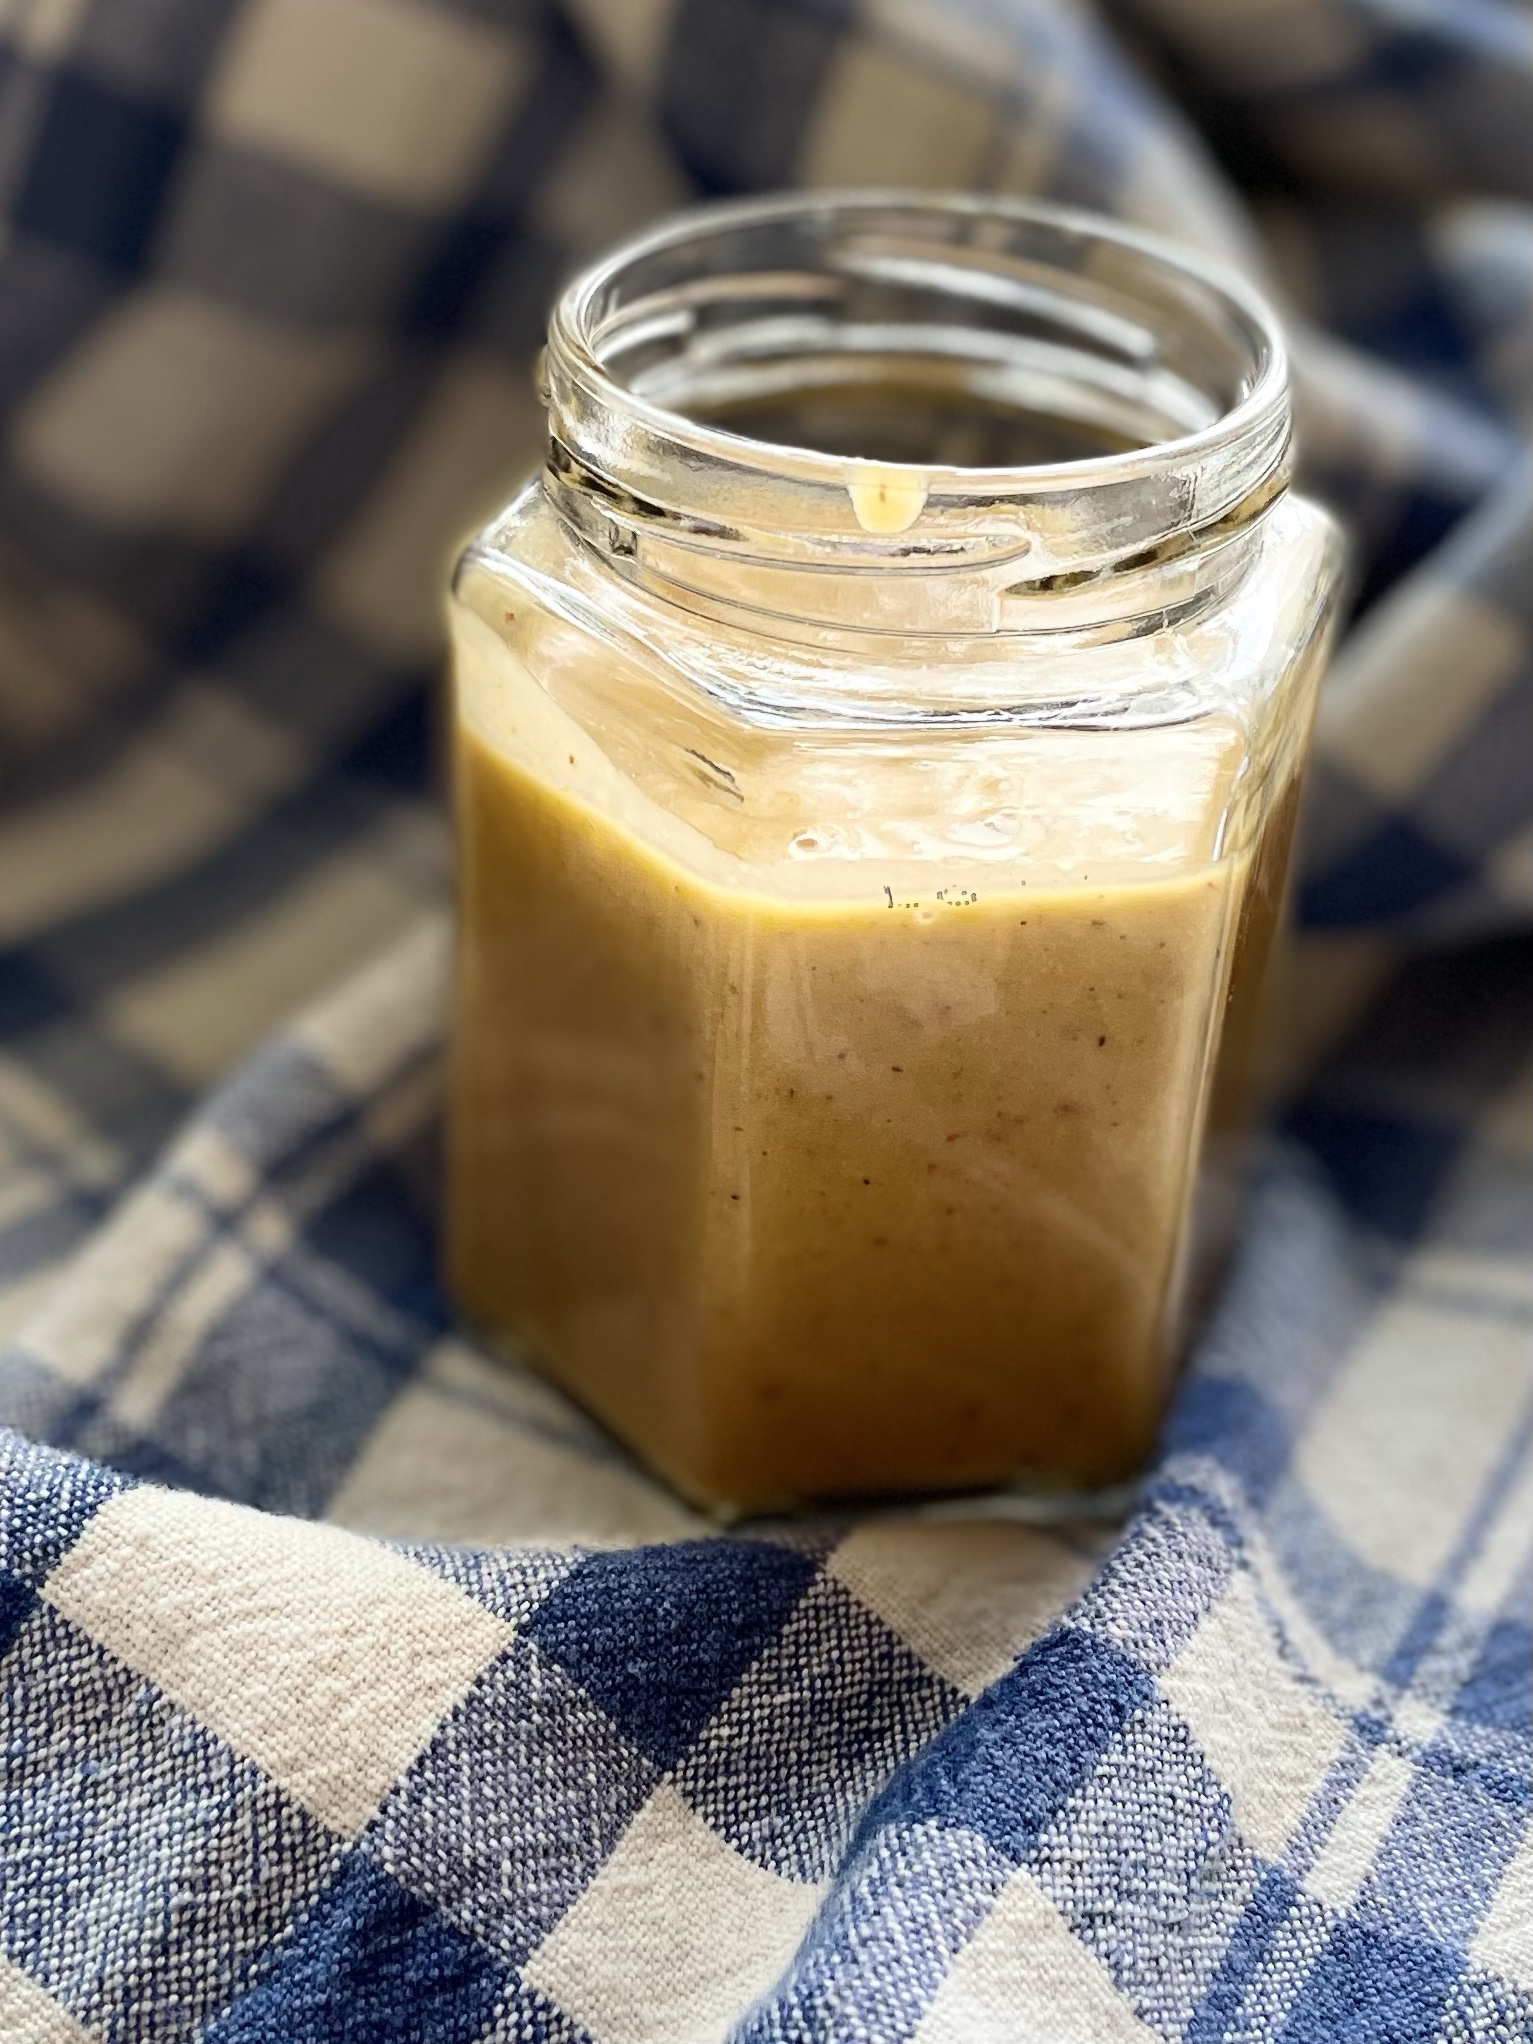
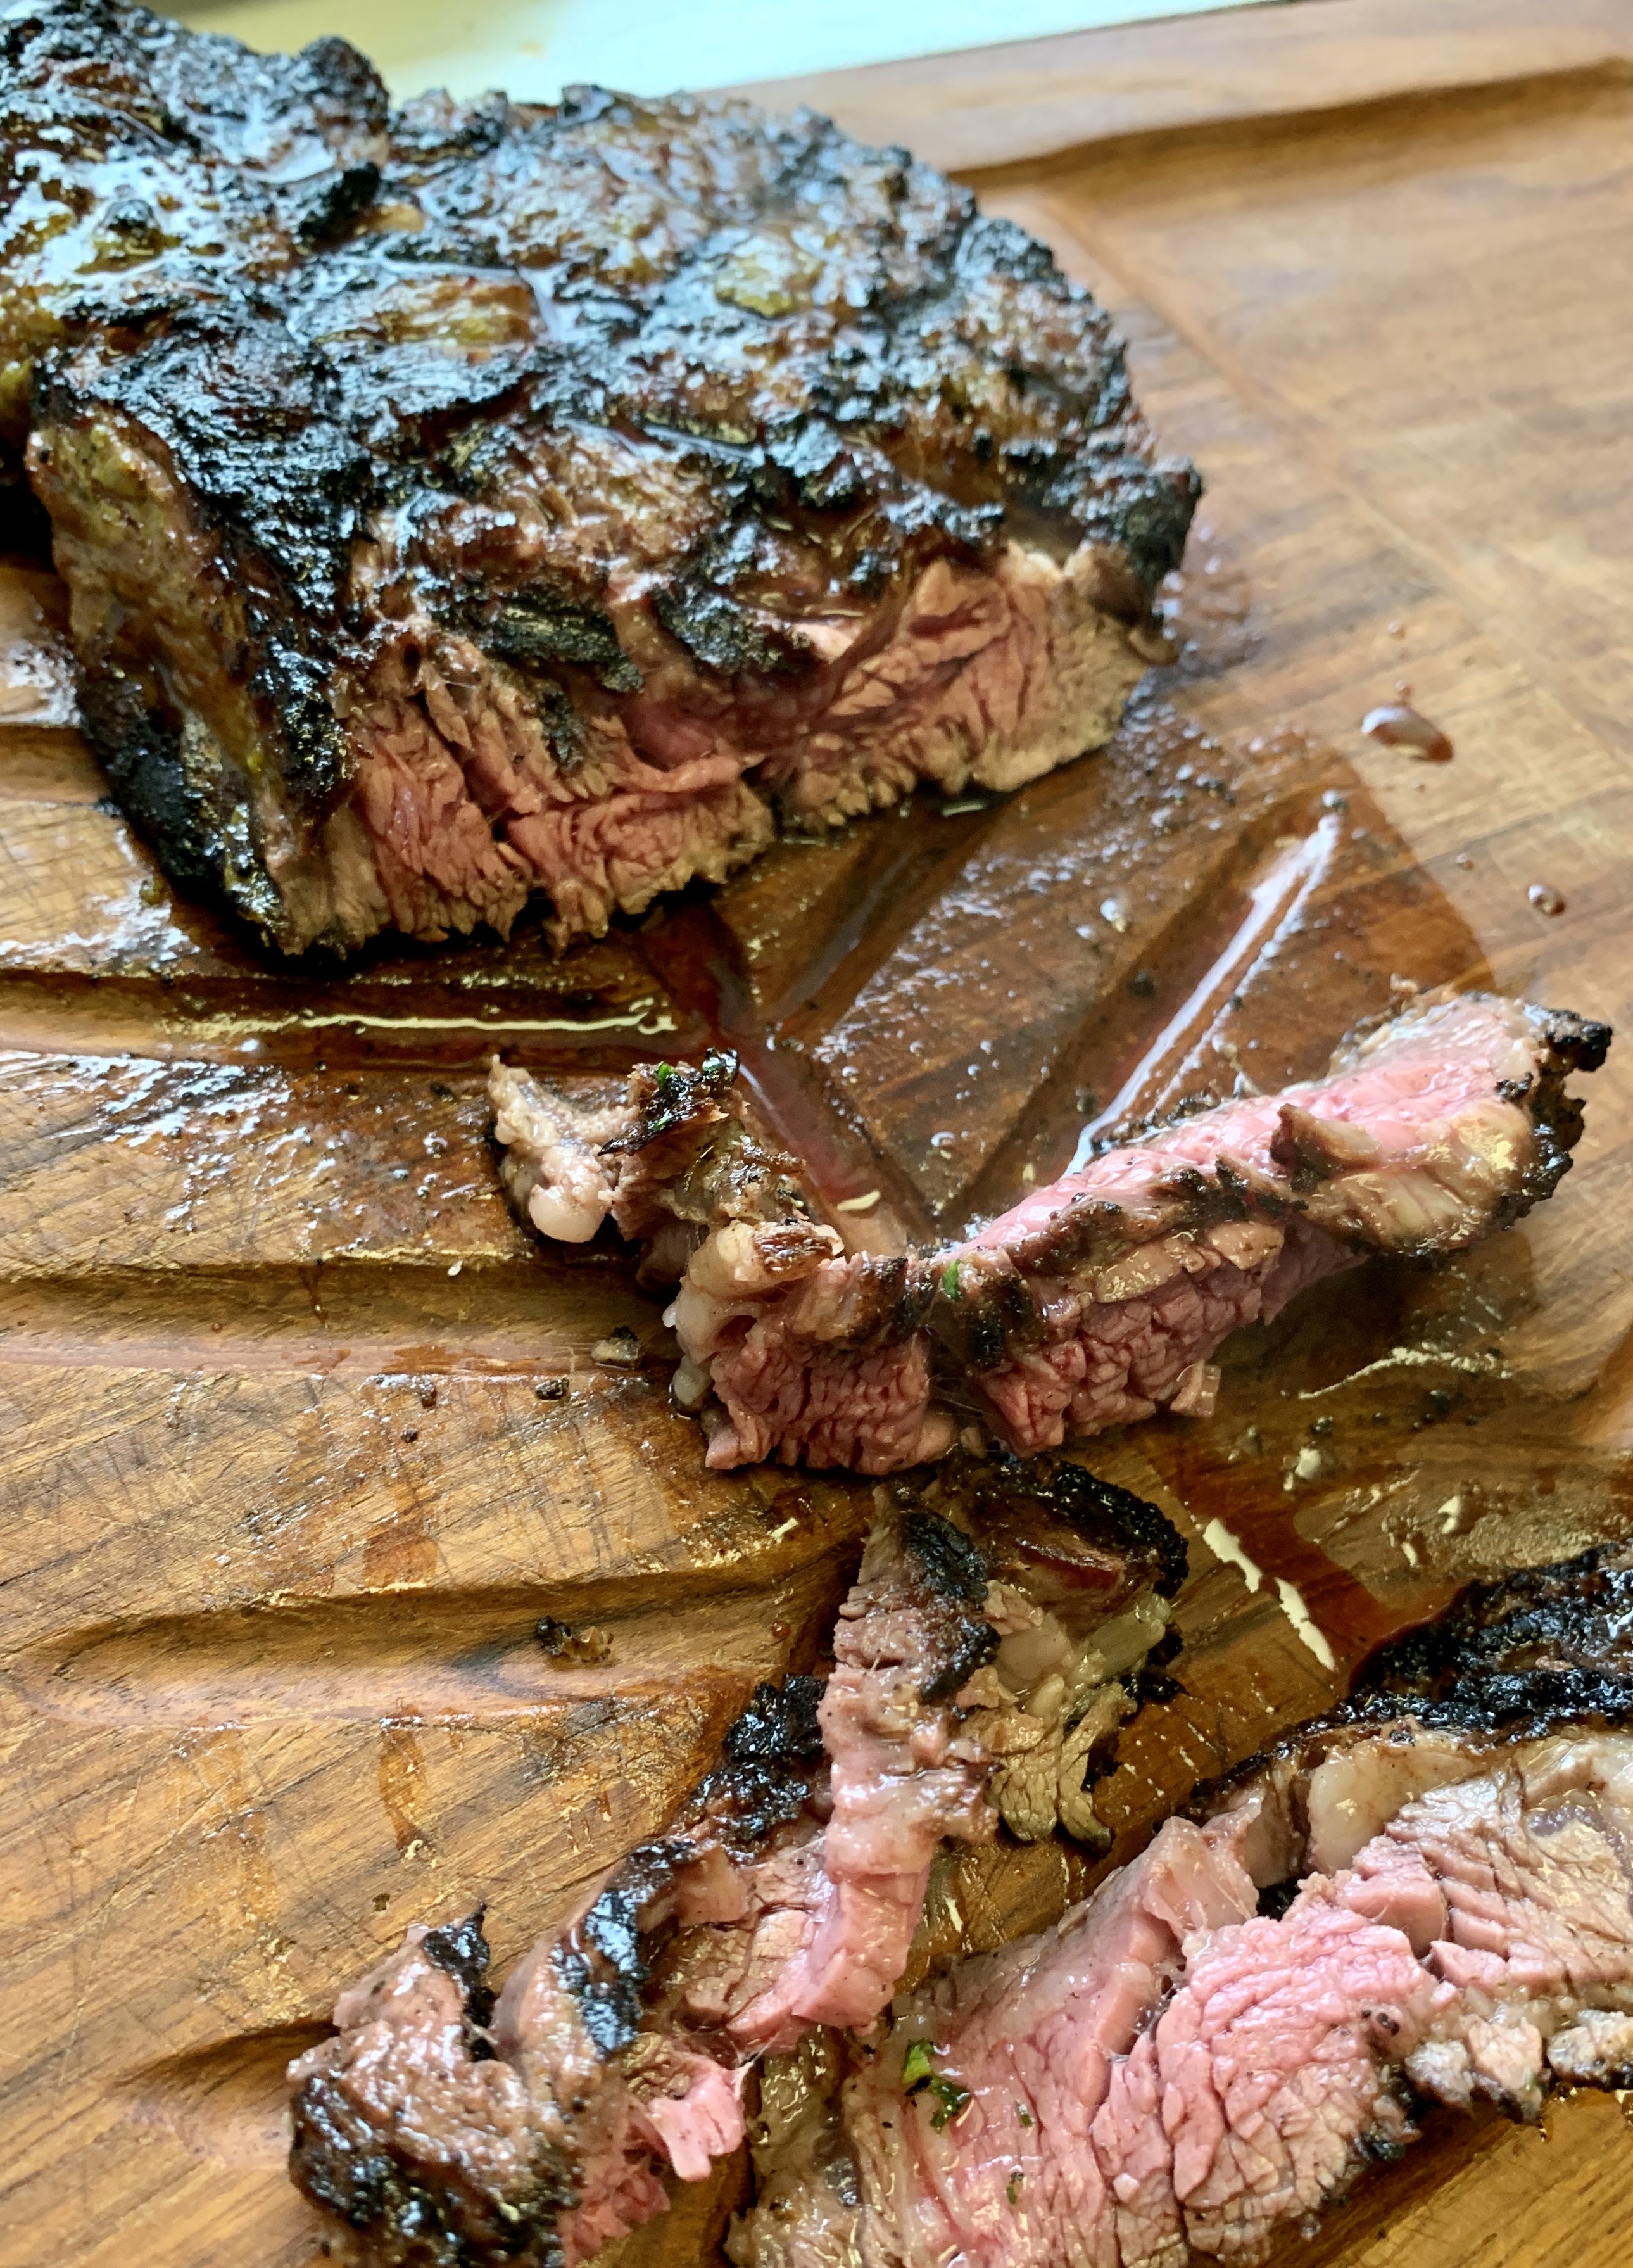
Given that we are just “at home” these days, I didn’t use the slow cooker, but browned the meat well before adding it to a heavy cast iron dutch oven, covering with the marinade and slowly roasting at 275 for about 3 hours.  Honestly, I prefer this method most of the time anyway as it allows for the sauce to be richer.

lamb barbacoa 3

Just look at how rich that sauce is …. I don’t find the same result in a slow cooker.

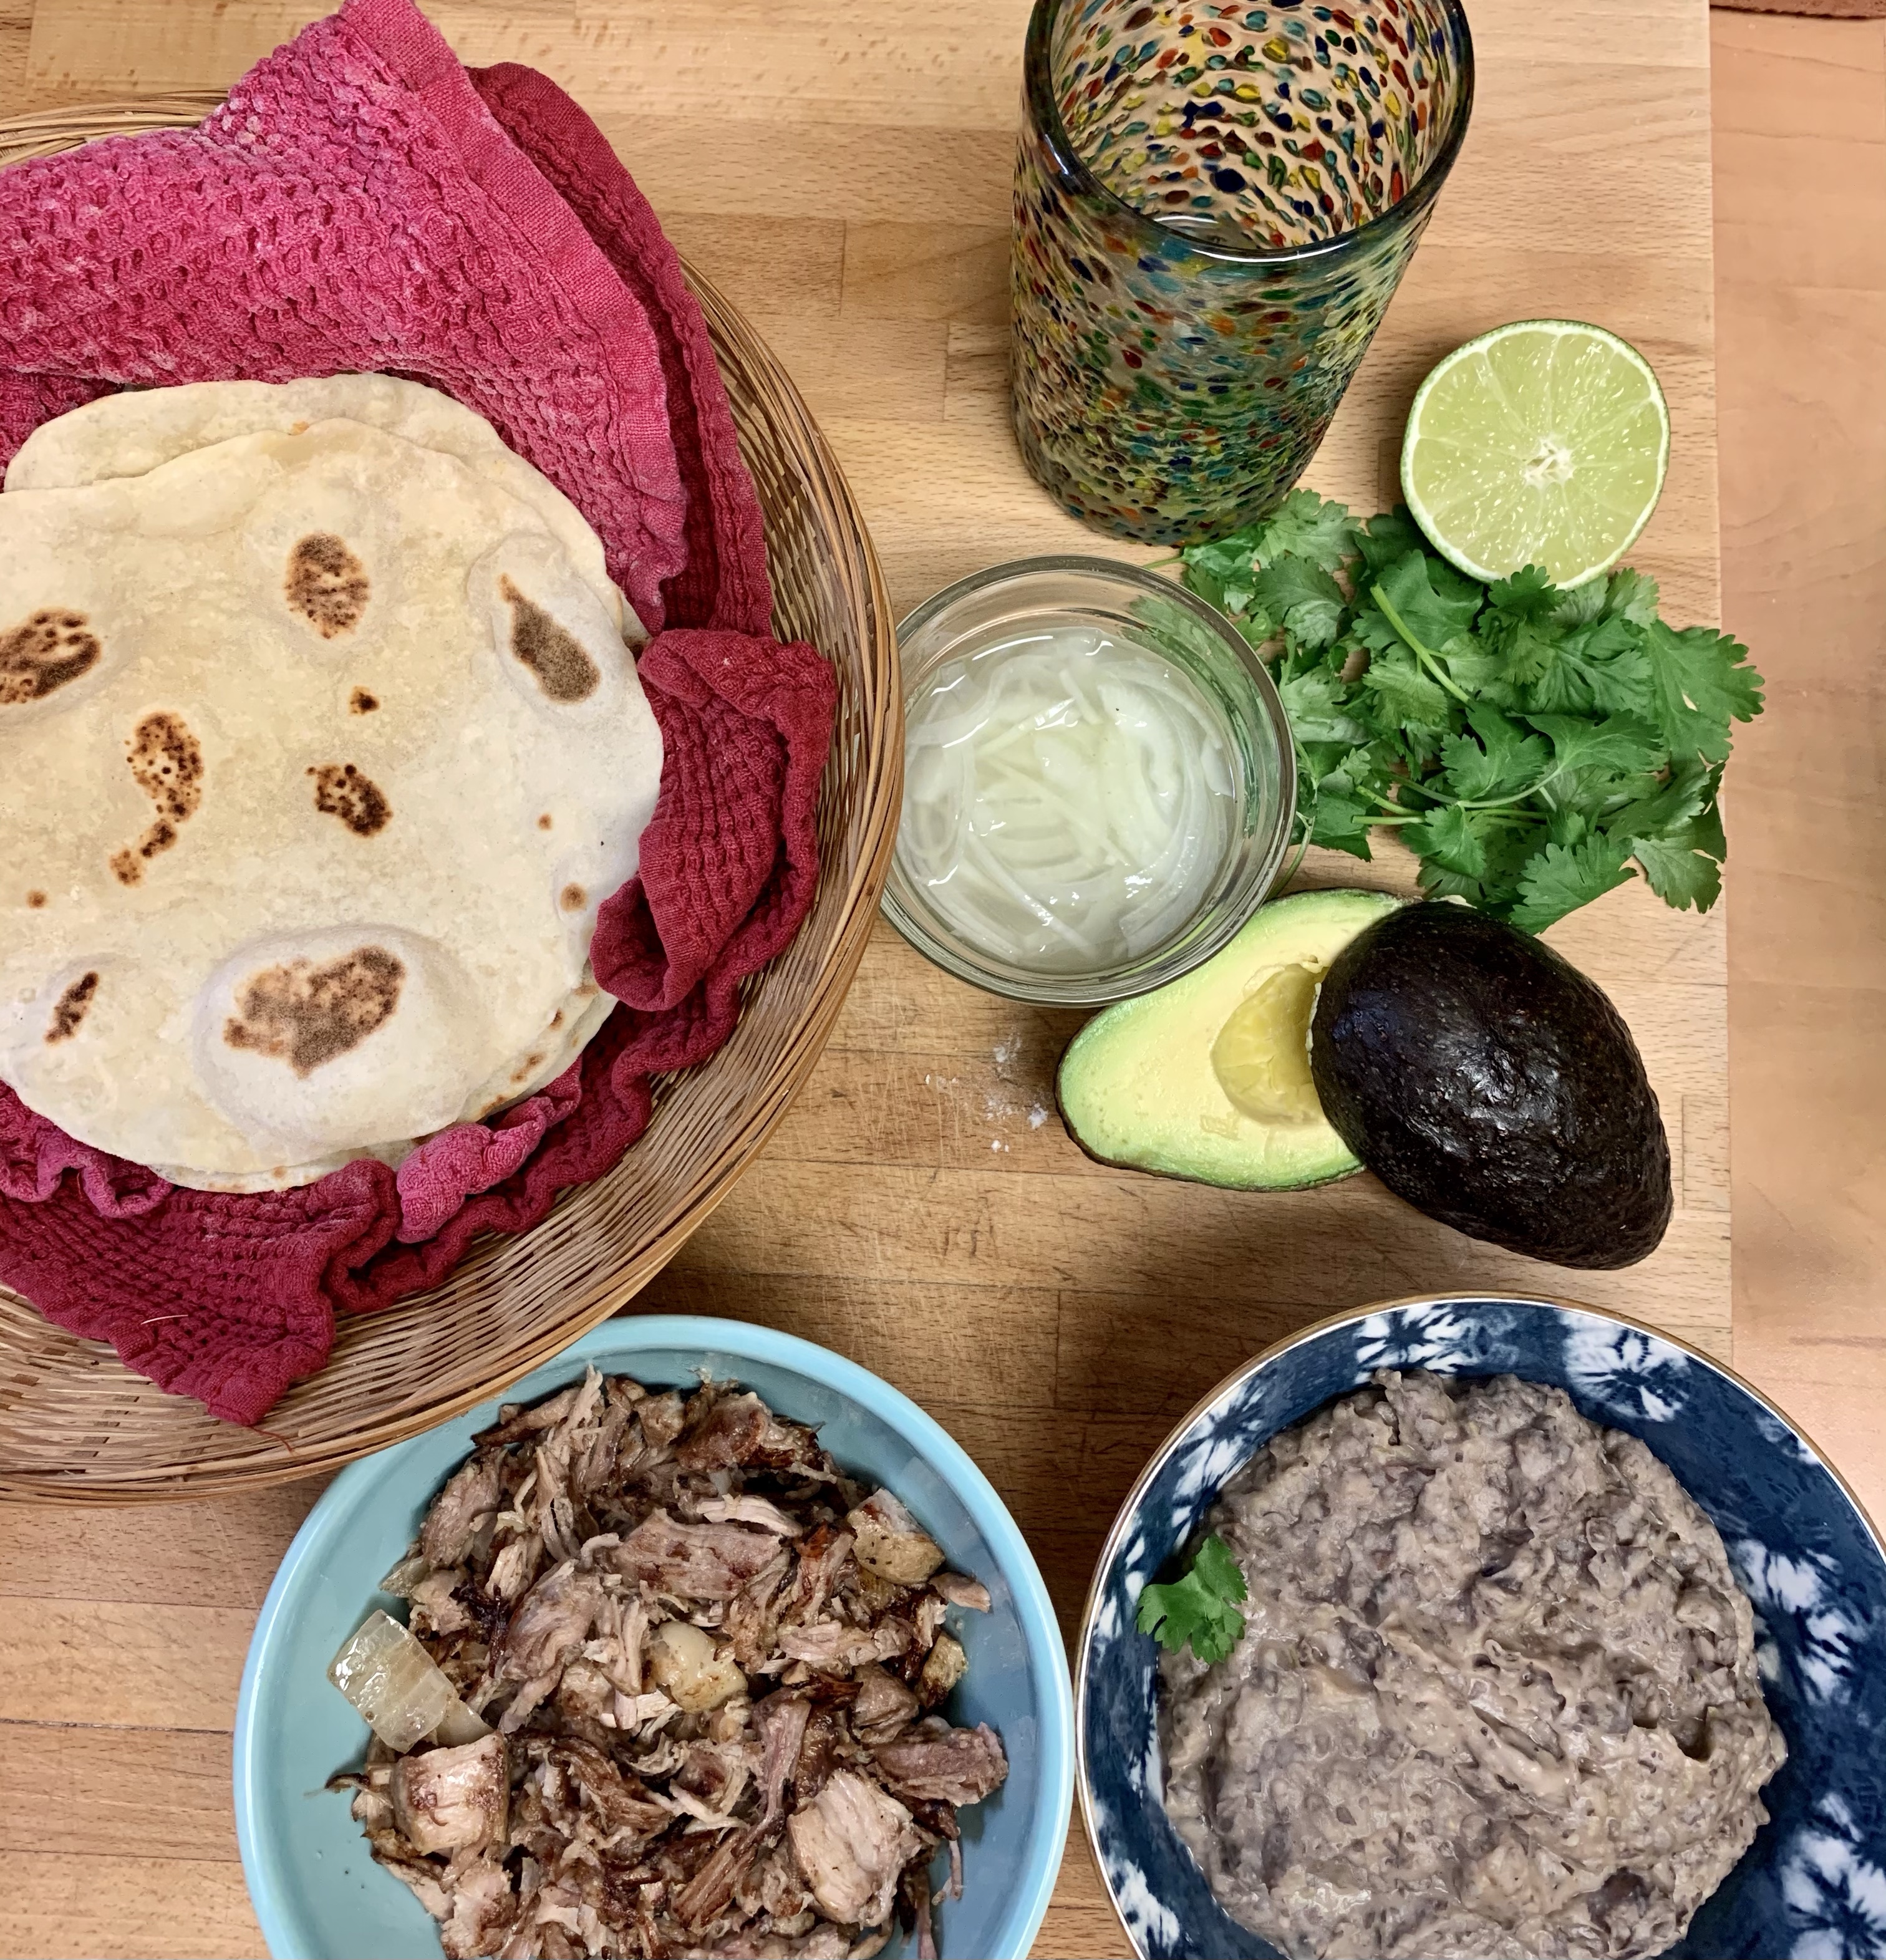
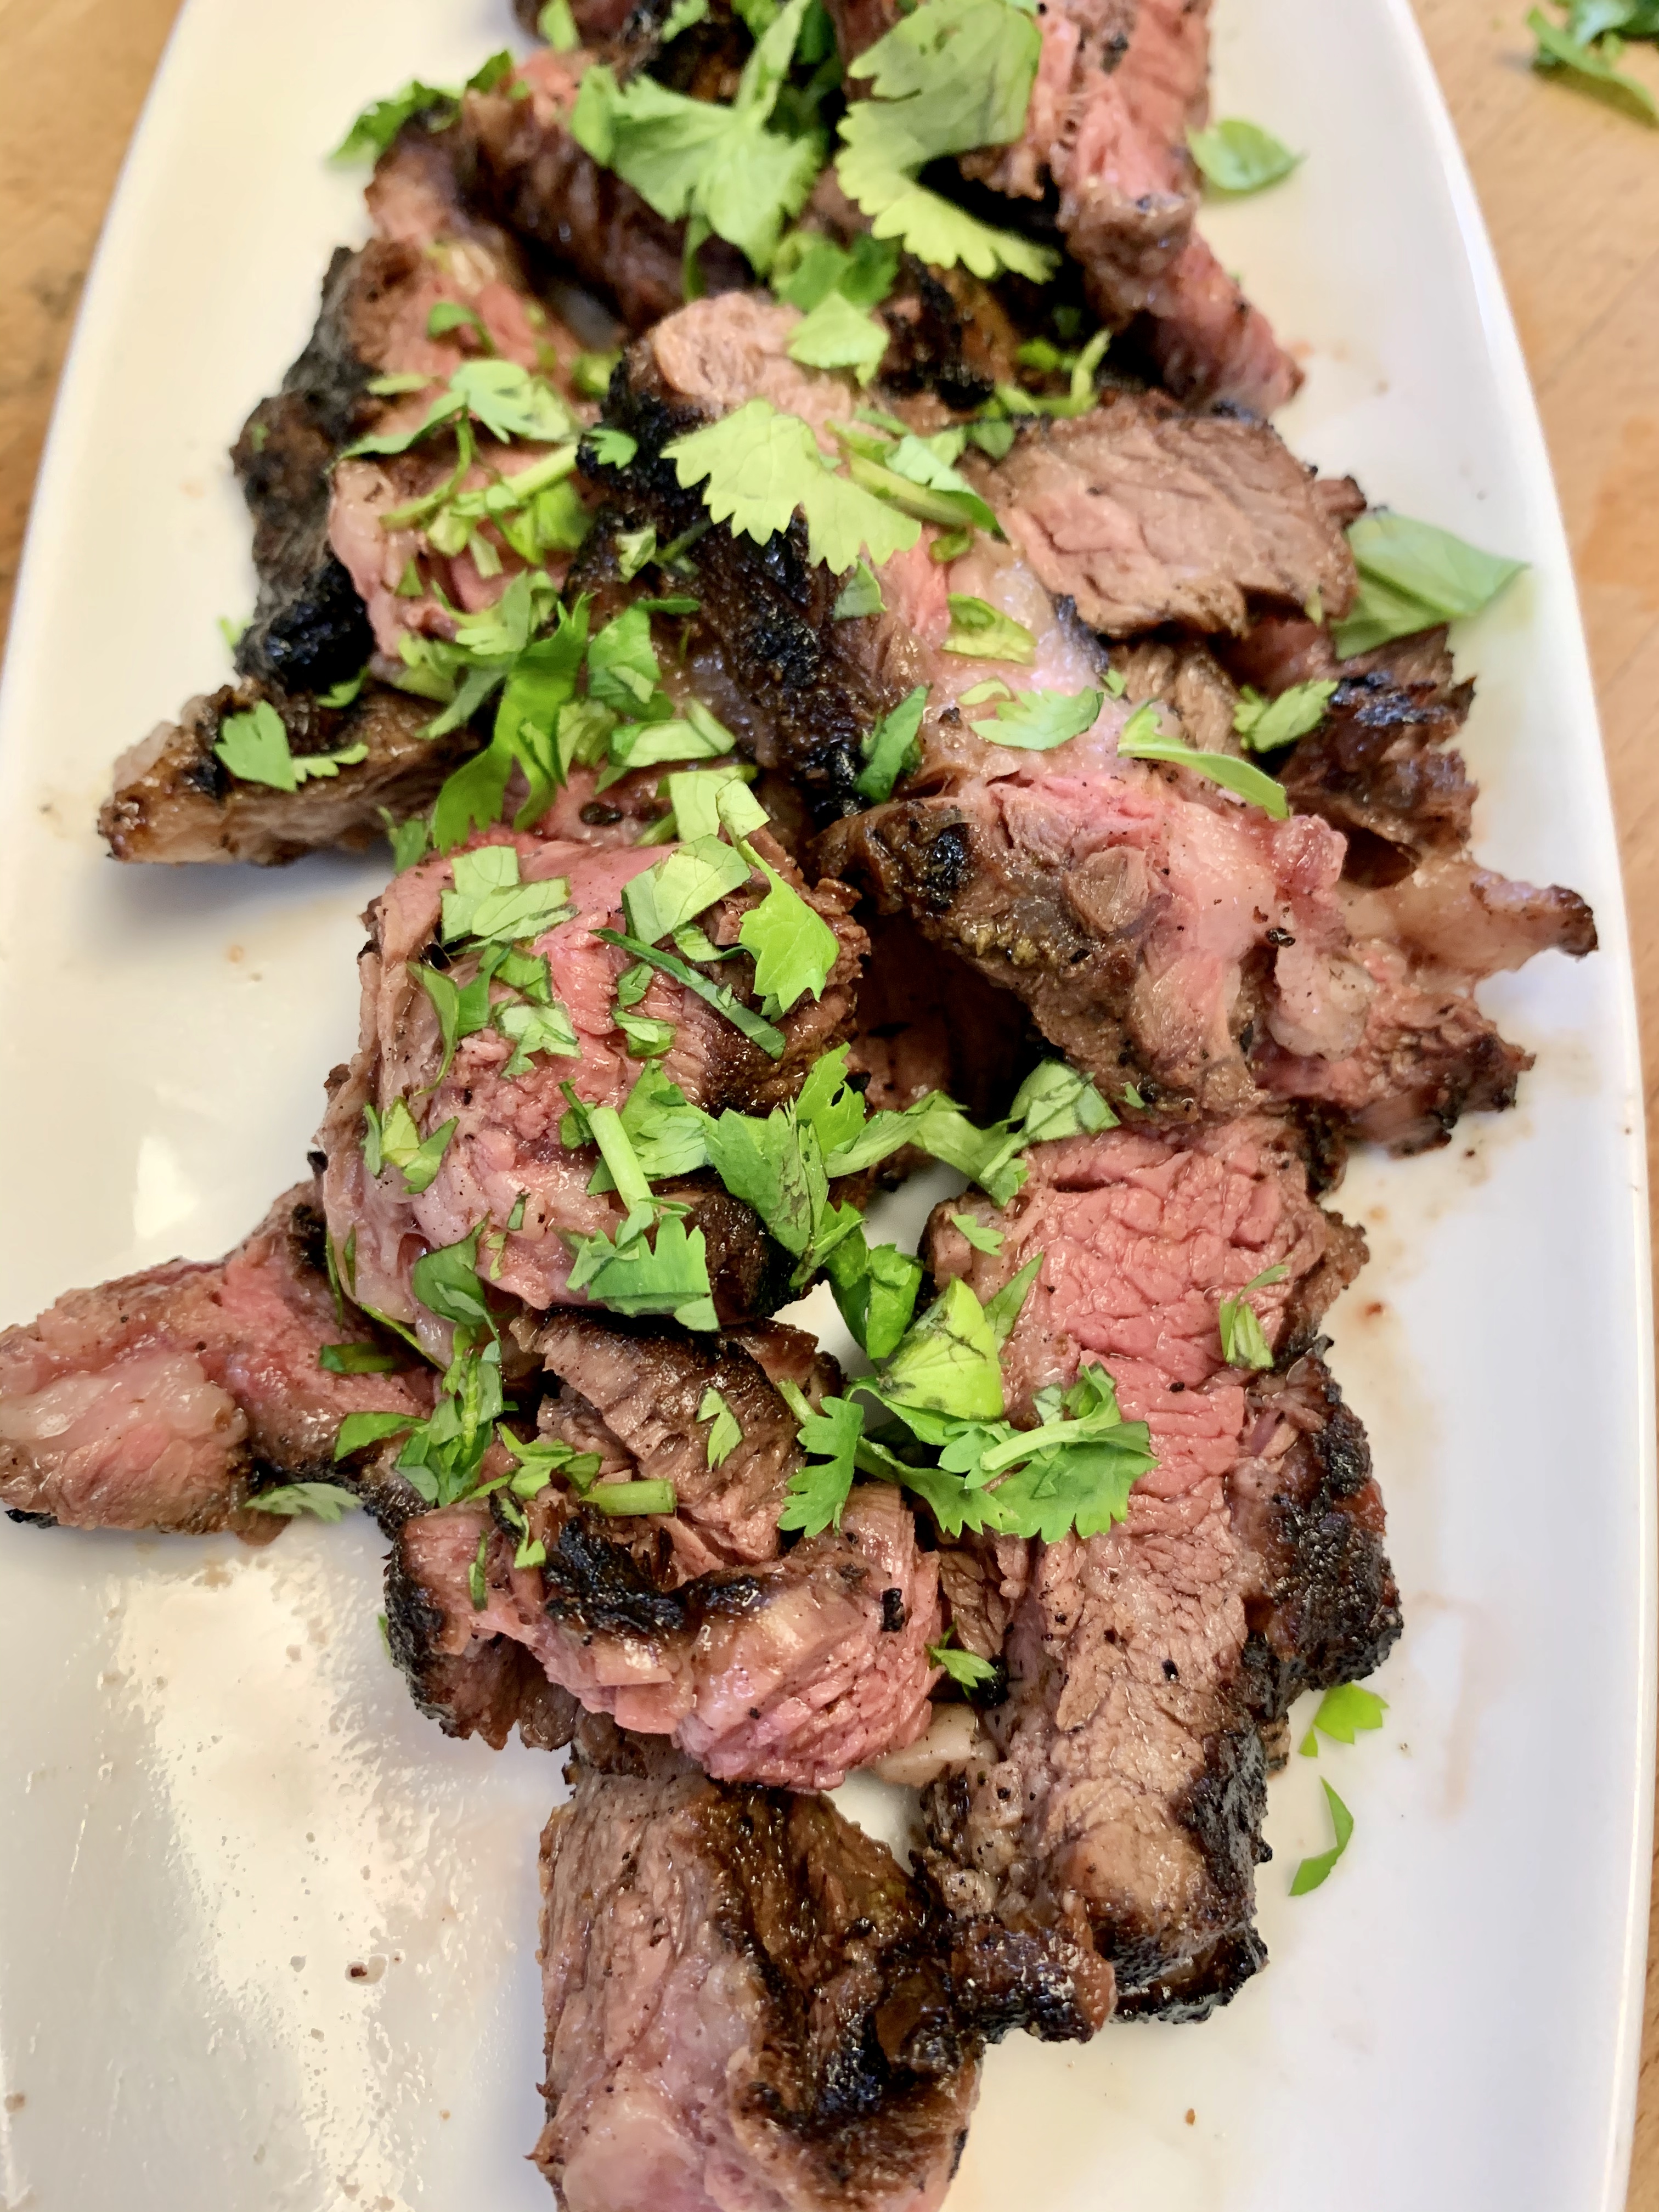
When you are ready to serve, coarsely shred the lamb and arrange it on a warm platter.  Skim any fat from the sauce that remains in the slow cooker, then taste it.  If you feel it would be better with a more concentrated flavor, pour it into a medium saucepan or remove the insert and set it over high heat.  Boil for a few minutes to reduce that quantity, then taste and season with salt if it needs it. Spoon as much as you like over the lamb or beef.  (I like to sprinkle coarse salt over the meat at this point.)  Serve the barbacoa with the hot sauce or salsa, onion and cilantro.  Grab some tortillas, if you like, and you’re ready to make some delicious tacos.

lamb barbacoa 2

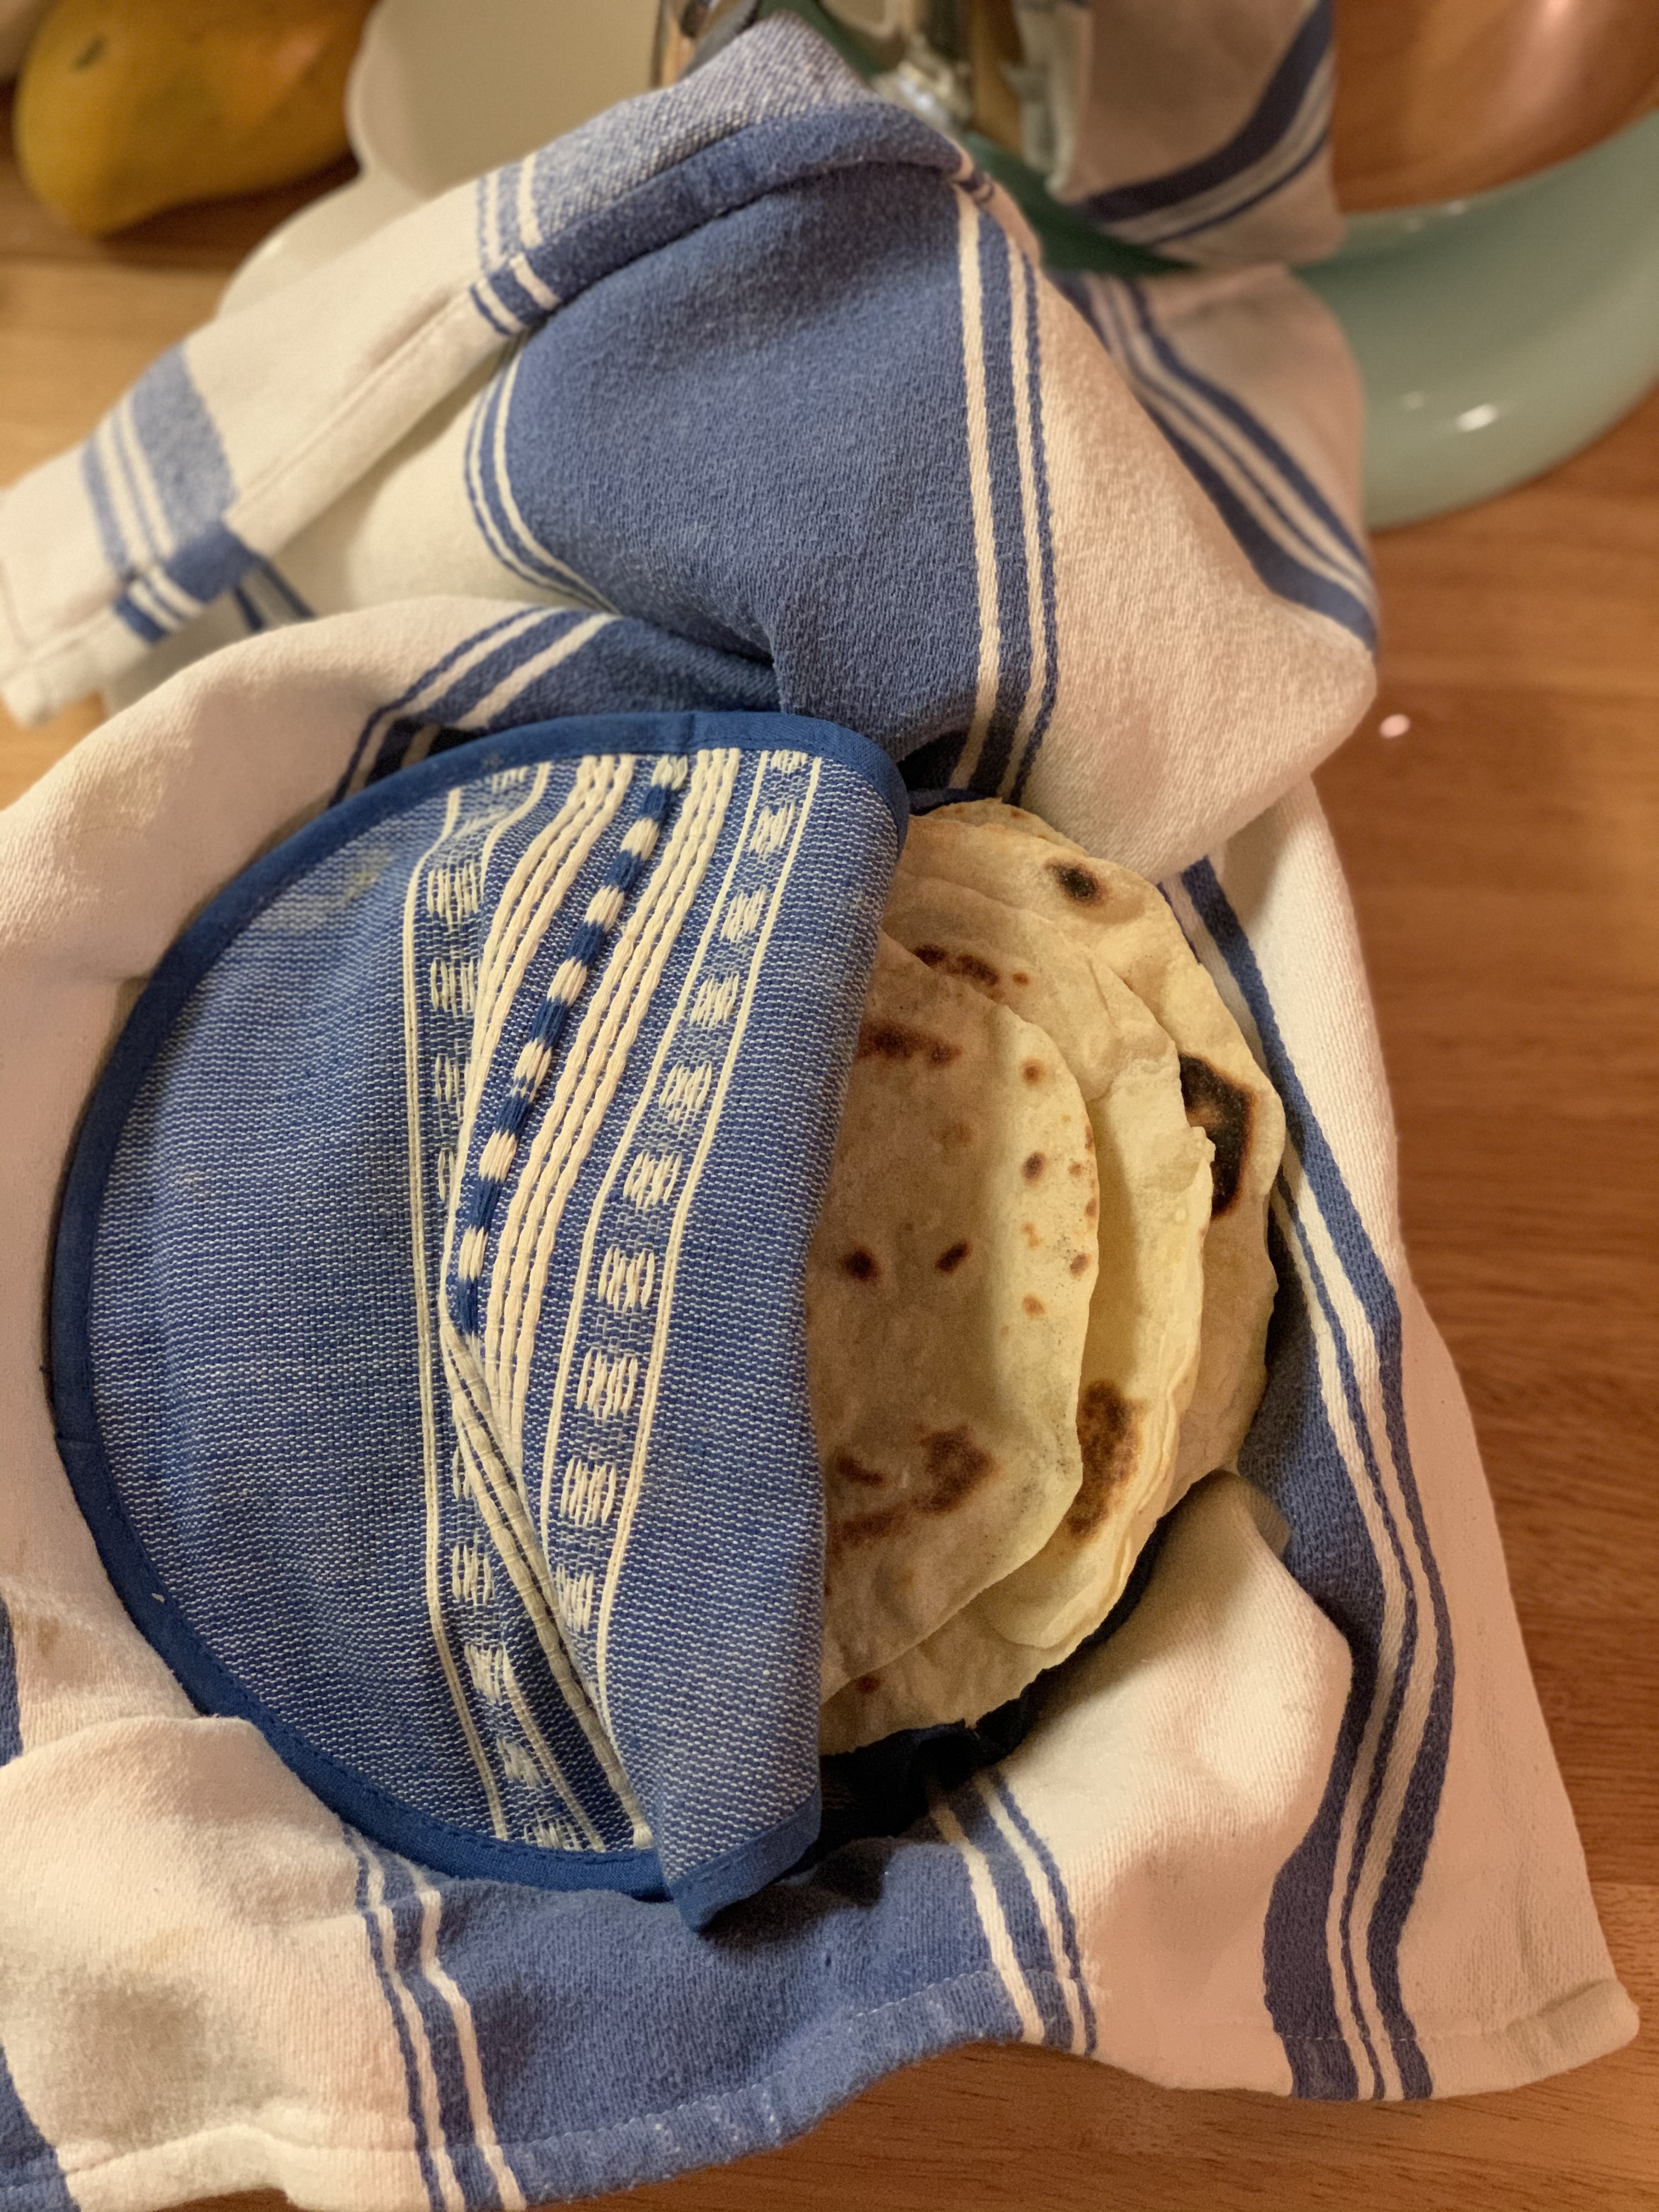
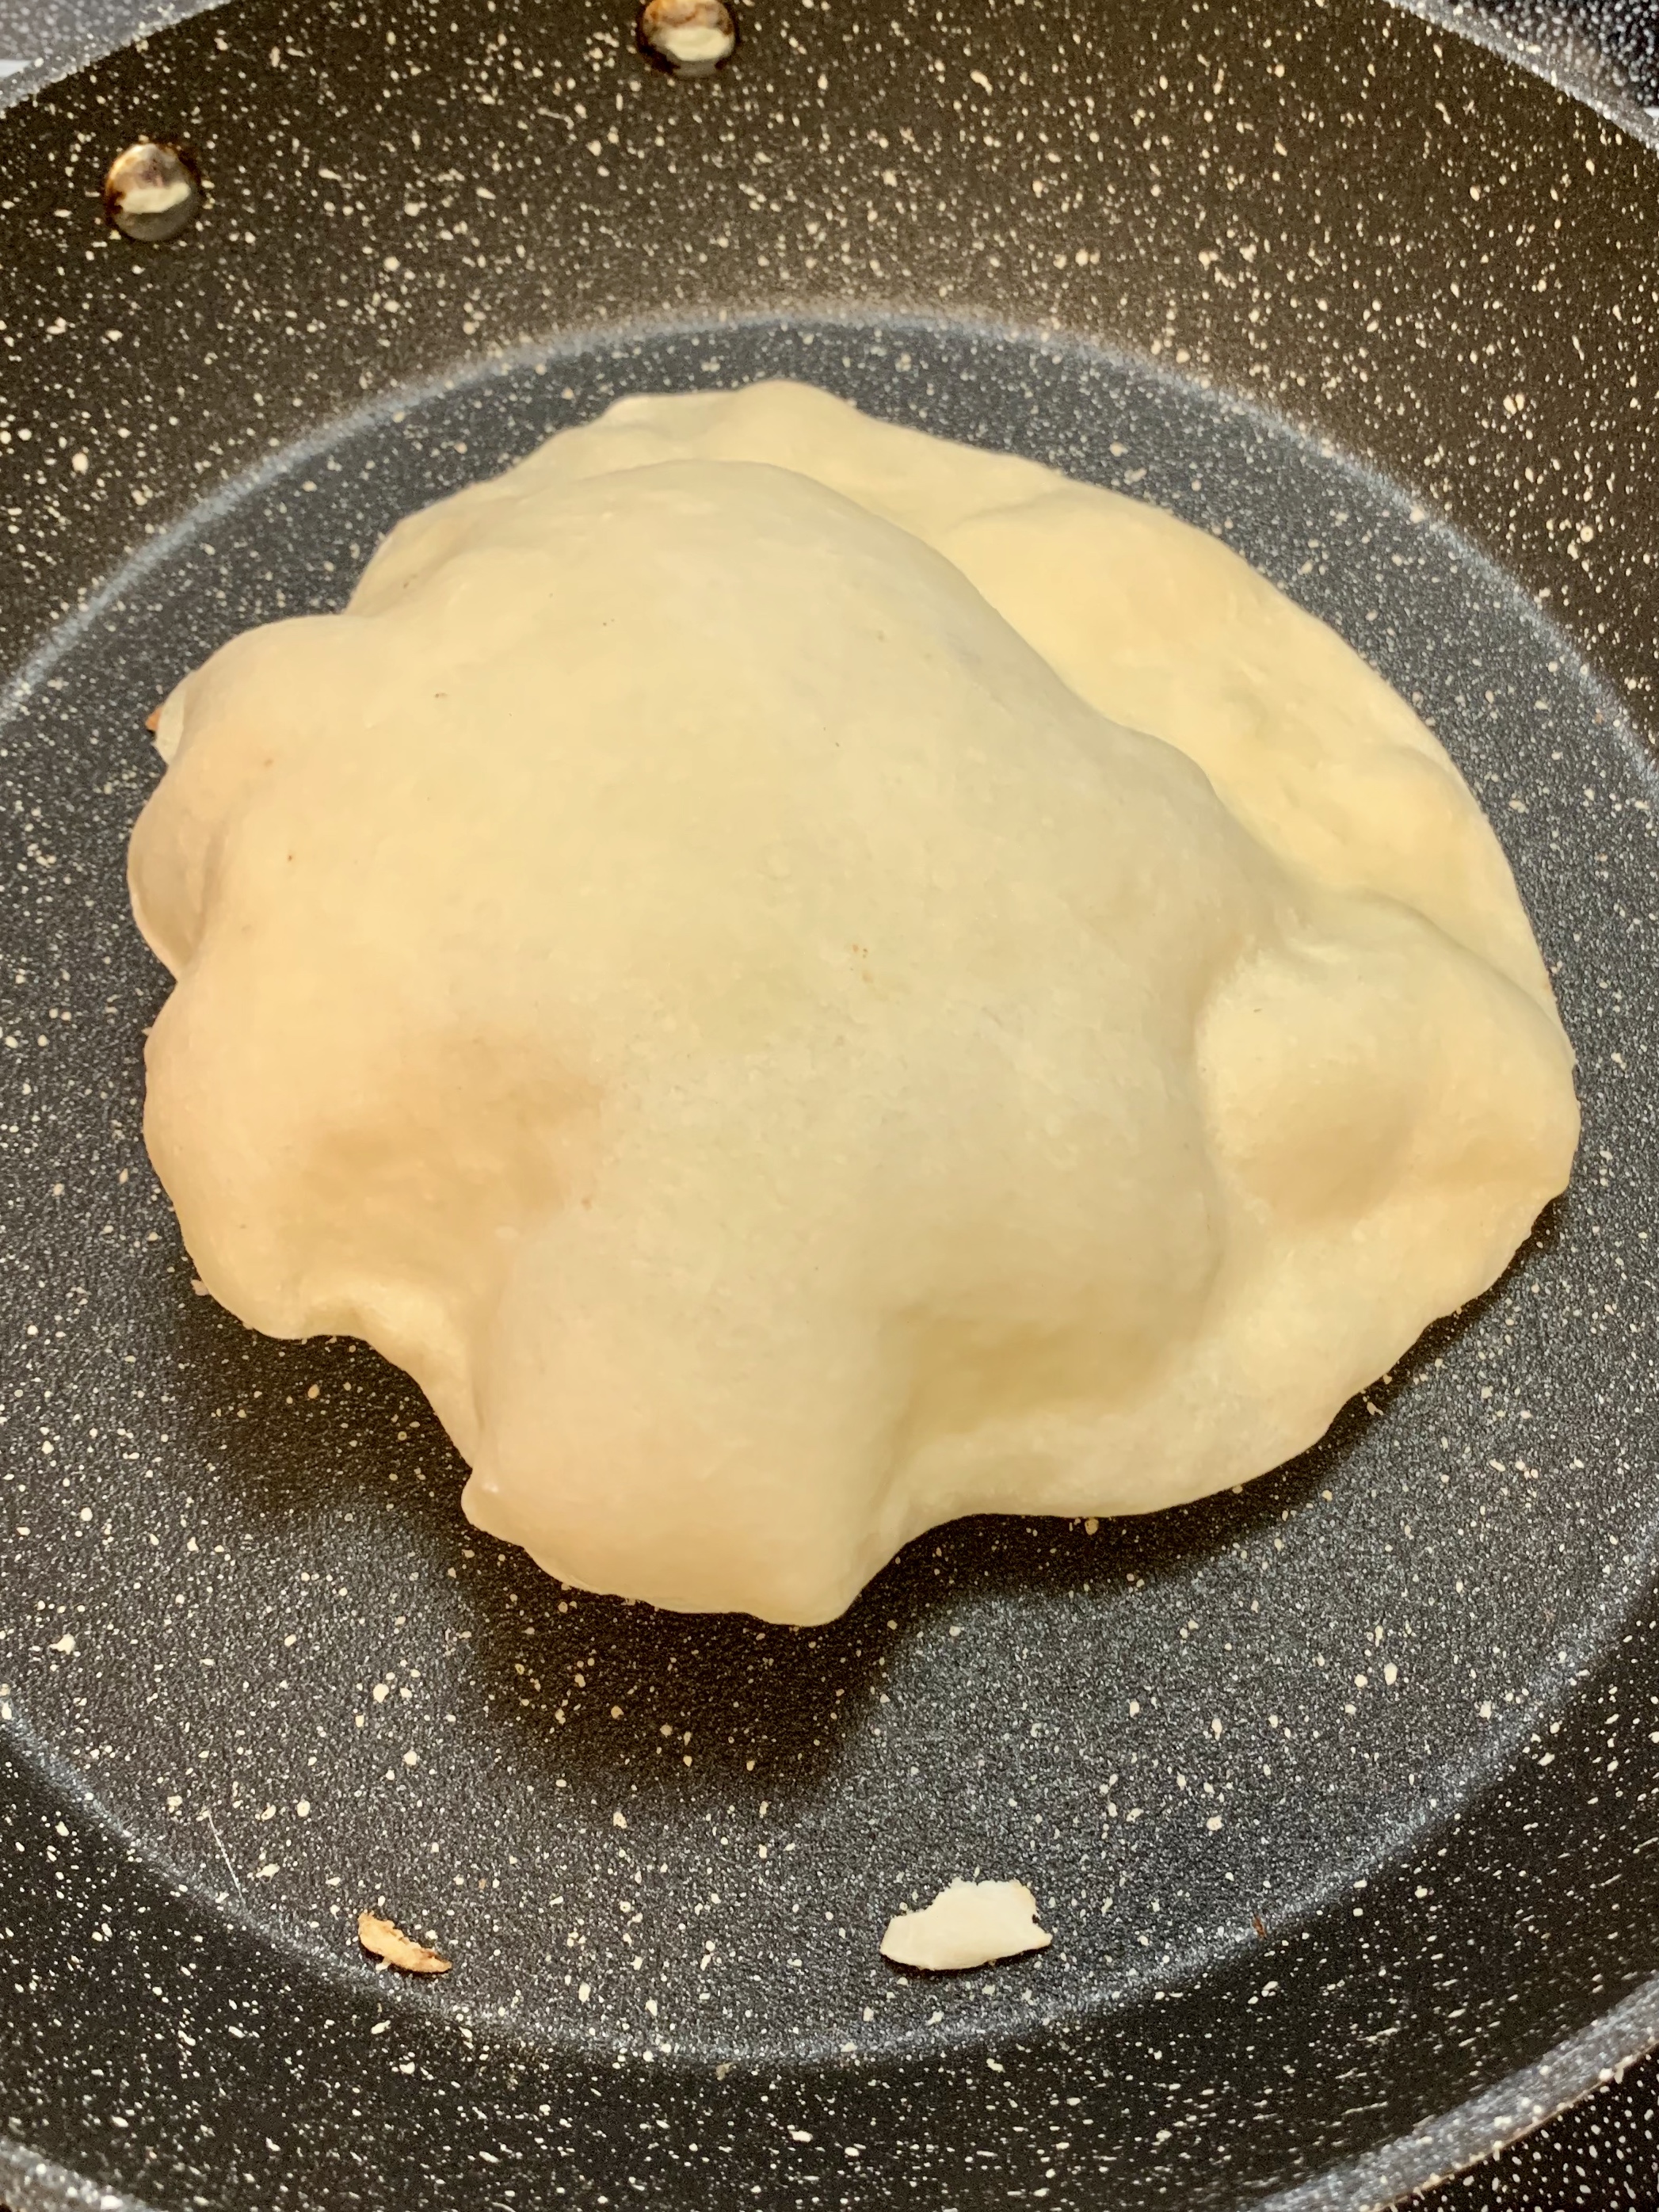
Needless to say, it isn’t necessary to make your own tortillas, but I love doing it.  I’m still struggling with getting my corn tortillas worthy of being a Mexican Abuela, but my flour tortilla game is strong!!  On Saturday mornings at one of our favourite mercados in Mexico City we have found the absolute B E S T pork carnitas.  This is the only spot we’ve ever seen this done, but they are making their tortillas loaded with herbs, so I tried that today.  Pretty successful, if I do say so myself.  I just kept adding herbs until it looked and smelled about right.

Lamb barbacoa 1

Most people come home from Mexico with decor, or tequila …… we bring home tortilla baskets, dried chile peppers and mezcal to make barbecue sauce.

Flour Tortillas with bacon fat

Flour tortillas 1

Sunday dinner.  Warm, fresh tortillas. Life is good.

Yes, that’s right.  BACON FAT.  So good, you will wonder why you haven’t done it before.  In Mexico pork is featured in so many ways, all good.  (Ever had carnitas??). Well, these tortillas are so darn good Stella told me that I needed to get them on the blog right away, as this is the 2nd time (in her 6 L O N G years) that she has been instrumental in the whole rolling/cooking process and if a 6 year old can do this – so can you!  Effort vs reward is huge.  Stella gets the rolling going and Sloan (at 9) is in charge of the stove and cooking them.  They both know just when to turn the tortillas with the right amount of bubbling and browning going on.

SO EASY!

  • 3 cups all purpose flour
  • 1 1/2 tsp salt
  • 1/4 cup bacon fat (cold)\
  • 1 cup warm water

Stir flour and salt together, then work in the cold bacon fat with your fingers.  Slowly add the water and work until a cohesive dough forms.  Not sticking together?  Add a bit more water.  Too sticky?  Add a bit more flour …. You get it.  Knead until you have a soft but firm dough – cover and allow to rest for 30-60 minutes.  (or as long as you need it to)

Divide this into 12-14 pieces and roll into balls.  Let sit for a few minutes to allow the dough to rest – this makes it much easier to roll.  (keep covered)

Roll until super thin – and cook on a dry hot skillet.  Every stovetop is different and you may sacrifice the first couple to the frypan, but thats okay, once you realize your perfect temperature you are good to go.

Cook for approximately 1 minute on the first side and you will see bubbles form.  Only flip when you peek underneath and see brown spots appearing.  Flip it over and continue cooking until you get more of those lovely brown spots.  On my stovetop (flat ceramic) I can’t cook it higher than 5 (or medium) otherwise things burn before cooking through but experiment with your own surface.

Keep warm in a covered container as the steaming also helps with the cooking process.

This recipe serves 6.  If you aren’t feeding 6, then just keep the dough in the fridge and pinch off enough to make yourself a couple tortillas a day!

Flour tortillas 3

Stella is 6 and she’s already done this a couple of times, at her insistence this recipe is going on the blog so we all remember it.  Big sister Sloan is making the guacamole in the background before stepping over to the stove to keep the cooking going.

Flour tortillas 4

Just look at those bubbles forming – we all get excited!  (yes, I know, kitchen geeks)

Flour tortillas 2

This is exactly what you are looking for.  Heaven in a wrap.

Tonight we served carne asada with these tortillas, and it was amazing.

Honestly …. you really don’t like pork?  (sorry Meg & Amy). Use store bought lard or shortening.

Ceviche

Step 1

In a 1 1/2-quart glass or stainless steel bowl, combine the fish, lime juice and onion. Use enough juice to cover the fish and allow it to float freely; too little juice means unevenly “cooked” fish. Cover and refrigerate for about 4 hours, until a cube of fish no longer looks raw when broken open. Drain in a colander.

Step 2

In a large bowl, mix together the tomatoes, green chiles, cilantro, olives and optional olive oil. Stir in the fish and season with salt, usually about 1/2 teaspoon. Add the orange juice or sugar. Cover and refrigerate if not serving immediately. Just before serving, gently stir in the diced avocado.

Make Ahead

Working ahead: The fish may be marinated a day in advance; after about 4 hours, when the fish is “cooked,” drain it so that it won’t become too tangy. For the freshest flavor, add the flavorings to the fish no more than a couple of hours before serving.
This recipe came courtesy of my Food and Wine Magazine – another superb recipe from Rick Bayless.

Empanadas

Most cultures have a pastry/hand pie like this one ….. empanadas are famous in many countries, but I’ve only had the pleasure of eating them in Mexico so that is what I have fashioned these after.  They can be deep fried, but I prefer baking them for fluffy, flaky pastry and creamy filling.  Extra bonus points for the way your house smells while they are baking!

Empanada 1

In today’s version I used chicken, onion & red pepper, topped with a chunk of jalapeño havarti.  The tomatillo salsa was delicious for dipping!

Empanadas are such a treat.  These will give you flaky pastry, and a creamy tasty filling.

Make sure when you roll out your dough that you do it a little thinner than you would for a pie – you want to make sure you have a good ratio of filling to crust.

Empanada 2

Saute onions and garlic until softened, then add red pepper and cook for only a couple more minutes.  Stir in cooked shredded chicken and season to taste.  In this version, I added a couple of tablespoons of tomatillo salsa, and then topped with jalapeño havarti cheese for an extra bit of kick and creaminess.

Other suggestions for empanada filling:

  • ground meat seasoned with taco spices, topped with Oaxaca string cheese
  • leftover pulled pork and pickled red onions
  • wilted spinach, sautéed mushrooms and feta cheese
  • go sweet with fruit, cinnamon and a bit of vanilla

I’ve included my pastry recipe here, but if you aren’t into making your own pastry go ahead and use a prepared frozen pie shell.  Just take it out and roll it a bit thinner.

Cut your pastry into rounds, brush beaten egg around the outside and then put about a tablespoon or two of filling in the middle, add some cheese on top.  You will want enough filling so that your ratio of stuffing to pastry is tasty.  Fold edges up together and press to seal.  Set them on a baking sheet and pinch/crimp the top to make sure it is well sealed.

Brush beaten egg over the top of the sealed empanada, and then poke a hole so steam can escape and the pastry doesn’t leak too much of your goods outside the shell.

Bake at 375 for 25-30 minutes until golden brown.  You can also freeze them on a cookie sheet at this point and bake later, from frozen.  Just bake a little longer.

Empanada 3

Oh, these were G O O D.  Before baking season the tops with salt and pepper.

Everybody loves flaky pie crust – but people are divided on whether to use shortening, lard or butter.  Through trial and error, I think I have found the best of them all – by combining lard and butter.  Try it ….. so light and flaky – you will love it.

  • 1 egg
  • 1 tbsp vinegar
  • 3/4 tsp salt
  • 3 cups white flour
  • 3/4 cup cold vegetable lard or (if you prefer) shortening
  • 3/4 cup cold butter
  • 5 tbsp very cold water
  • Lightly beat egg and vinegar

Whisk flour and salt

Using a pastry blender or 2 knives, cut in lard/butter until pea sized.  Add very cold water to egg and vinegar mixture.  Make a hole in the center of the flour blend and stir in the egg/vinegar/water combination.  Work just until pastry comes together – adding slightly more liquid if it doesn’t, and if it is too wet, add a wee bit more flour.  Work together just until it all comes into a solid mass.  Knead very lightly on floured surface.  Wrap tightly and put in the fridge for at least 40 minutes.

Roll on lightly floured board until just thin enough to use for pie dough.

This recipe makes enough for 1 smaller pie (top and bottom) or a large deep dish pie crust bottom.

Mexican Pickled Vegetables (Escabeche)

Escabeche 1

Today’s version included potato slices, onions, carrots, cauliflower and zucchini.

Have you ever noticed those bowls of pickled vegetables at every taco stand you’ve been to in Mexico?  They are easy to make at home, fantastic to have in the fridge and add a flavourful zip to any side dish (or pizza!).  This recipe is perfect, feel free to use whatever vegetables you have on hand ….. I’d skip broccoli though as I have found that it doesn’t keep either it’s bright colour or crunch.

Ingredients

  • 8-10 jalapenos
  • 3 carrots
  • 1 onion
  • 4-6 cloves of garlic
  • olive oil
  • 1.5 cups white vinegar
  • 1 cup water
  • 1 Tablespoon salt (Kosher or sea salt)
  • 1/2 teaspoon oregano (use Mexican if you have it)
  • 1/2 teaspoon cumin seeds
  • 8-10 cracked peppercorns
  • 1 bay leaf

Instructions

  • Give the jalapenos a rinse and then cut into 1/4 inch slices.
  • Peel the carrots and cut into 1/4 inch slices
  • Peel and quarter the onion, chopping into thin slices
  • Peel and roughly chop the garlic
  • Heat a dollop of oil in a medium sized sauce pan on medium-high heat
  • Saute the onion and garlic for a few minutes
  • Add the jalapenos, carrots and the spices: ½ teaspoon oregano, ½ teaspoon cumin seeds, 8-10 black peppercorns, 1 bay leaf.
  • Briefly saute and then add 1.5 cups white vinegar, 1 cup water, and 1 Tablespoon sea salt
  • Bring to a boil and then reduce heat to a simmer
  • Simmer for 10-15 minutes or until the jalapenos turn army green
  • Fill each jar with the veggies and top with the brine
  • Store in an airtight container in the fridge
  • The jalapenos and carrots will have most of their flavor after a few hours of resting in the brine

I’ve tried a few recipes now from a blog …. “Mexican please”, and they are all great!  This is no exception.  I don’t use quite that many jalapeños (usually 2-3 large ones) and I also put in whatever vegetables I have on hand, cauliflower, zucchini, radish etc.  Just make sure to not overcook the more delicate vegetables.  For items like cauliflower and zucchini I only add them to the cooking liquid for a couple of minutes.  Be mindful of the amount of liquid you have and make sure you have enough to cover the vegetables once you get them into your pickling jars.  It is okay to top up with a bit more vinegar or water if need be.