Veal Scallopini

Need a quick dinner idea?  Here you go, you’re welcome!  This veal is quick cooking, and for such a short amount of effort you won’t believe how much you are going to love it!

Veal Scallopini 6

Served with tender fettuccine noodles and sautéed vegetables you’ve got a quick easy dinner that packs a flavourful punch.

Ingredients

  • 2 lb. (about 12) veal cutlets, also called scaloppine, pounded until 14” thick
  • Kosher salt and freshly ground black pepper, to taste
  • 12 cup flour
  • 1/2 cup panko crumbs
  • 4 tbsp. unsalted butter
  • 2 tbsp. olive oil
  • 12 cup dry white wine
  • 1 14 cups chicken stock
  • 1 lemon, thinly sliced
  • 1 tbsp. fresh lemon juice
  • 14 cup capers, drained
  • 2 tbsp. chopped parsley

Instructions

Season veal with salt and pepper and dredge in flour, shaking off excess.
Veal Scallopini 1
Heat 2 tbsp. butter and oil in a 12″ skillet over medium-high heat. Working in batches, add veal, and cook, turning once, until golden brown, about 3 minutes.
Veal Scallopini 3
Veal Ascallopini 4
Transfer to a serving platter, and set aside.
Veal Scallopini 2

Have everything ready to go when you remove the veal from the skillet, it goes quickly at this point.  And … yes, make sure the wine you use is something you would be happy to drink!

Add wine to skillet, and cook, scraping bottom of pan until reduced by half, about 3 minutes. Add stock and lemon slices, and bring to a boil; cook until reduced by half, about 8 minutes. Add remaining butter, juice, capers, and parsley, and season with salt and pepper.
Veal Scallopini 5
Pour sauce over veal and serve.


No Knead Bread, it’s a miracle!

This bread will make you look like a kitchen boss, make no mistake about it.  While you will find recipes everywhere for this ….. and they all tell you to let the dough sit for anywhere from 12-18 hours I am here to tell you you can fake it with as much time as you’ve got!  Yes, you may get a “better” result in that length of time, but throw it together the same afternoon you want to eat it and it will still be a miracle.

bread

You want to know how forgiving this is?  Stella said we needed bread with the spaghetti we were having for dinner ………. so today I tossed it all together about 3:30, let it sit for an hour, and then proceeded with the baking.  It was still amazing!!

I’ve been studying these recipes for no knead bread, mistrusting the whole concept.  After all, generally speaking I do things the long way …. you know that, right?  I think of my kitchen time as yoga, peaceful, calming and S L O W ….. Well, this hit all those boxes except for the slow part …. but it worked so well with a late night dinner. Tuesdays the grandkids have gymnastics, and I don’t get home from taking them until after 6.  So, beef stew leftovers just cried for something special like this to elevate dinner.  The night before I prepped the dough (took all of maybe 5 minutes) and forgot about it until after gymnastics.  Pop it into the oven and you won’t believe the results.

No Knead bread 5

Craggy and crusty on the outside, delicate and textured inside.  I’m hooked.

  • 3 cups all purpose flour
  • 1 1/2 teaspoons salt
  • 1/2 teaspoon instant yeast
  • 1 1/2 cups room temperature water
  1. DOUGH PREP: In a large mixing bowl, whisk the flour, salt, and yeast together until mixed. Stir in the water until a chunky, thick dough forms. If it needs a little more water, add a few more tablespoons, just enough to get it barely wet throughout. It’s gonna look scrappy and weird and you’re going to question me on whether or not this will work, but it will. Cover the mixing bowl with plastic wrap and let it rest for 12-18 hours at room temperature. Overnight is ideal here, kids.
Miracle no Knead bread

That’s it folks!  Stir in the room temperature water to your dry ingredients, and let it sit.  Sure doesn’t look pretty here, but just wait …..

No knead bread 2

Look what happens after it sits overnight!  Soft dough, little bubbles all over and through it.


  1. PREP FOR BAKING: When you’re ready to bake, preheat the oven to 450. Stick a 6 quart enamel coated cast iron Lodge Dutch Oven (or similar) in the oven for about 30 minutes to heat. At this point, the dough should be big and puffy and pretty loose, with little bubbles in it. Gently scrape the dough out onto a well-floured surface. (Remember: NO KNEAD.) Gently shape it into a ball with flour on the outside, set on a piece of parchment, and cover with plastic while your pan heats up.
No Knead bread 3

Prep …. ha ha …. today that consists of tossing a little flour onto a piece of parchment paper, and then gently turn out your dough onto the flour.  Roll it around just so that flour gets all over the surface, and under the dough.  Leave it on the parchment, and gently lift the whole package by the parchment and set it into the heated pan.


  1. BAKE: Remove the plastic from the dough. Lift the dough and parchment together into the pan so the parchment lines the bottom of the hot pan (be careful not to touch the pan since it’s very hot). Bake, covered, for 30 minutes. Remove the cover and bake another 10-15 minutes to get the exterior nice and golden brown and crispy. Voila! Done. Miracle no-knead bread, you boss you.
No Knead bread 4

Just a little peek of it in the dutch oven ….. I was DYING until I could peek.

No Knead 7

Oh my …. the flavour and texture of this bread were out of this world – we loved it.

No Knead 8

Do yourself a favour, and make bread!  This really will make you feel like a boss, go for it!  I recently bought a loaf of bread from a specialty bakery.  It was $7.00 a loaf, and while we thought it was great, try this for pennies …. just as delicious!

AJ's buckwheat

I know I’ve mentioned how easy and flexible this recipe is, but now I’m going to let you know how versatile!  This beautiful loaf was made by my friend AJ, with 50% buckwheat flour.  It’s gorgeous, and just makes me want to try other variations.  Thanks AJ!


I’ve reprinted this recipe from “Pinch of Yum” after studying these recipes for months!  Seems so strange to think of a bread that doesn’t require kneading, but this couldn’t be easier, and results in a great loaf of bread.  While the entire text portion is lifted from “Pinch of Yum” I’ve taken my own photos, and I’m hooked on the whole idea.  Thanks!

Caesar Salad

Caesar salad 3

Love the textures of a great Caesar salad – contrasting fresh crisp greens, crunchy bacon and croutons, soft parmesan and a creamy dressing.

Everybody needs a great Caesar dressing in their kitchen, try this one and adjust to your families taste.  My grandkids don’t love garlic, so when they are over I usually go light on the garlic cloves but that’s totally up to you!

  • 1 egg (or 1/4 cup mayonnaise)
  • juice of 1/2 lemon
  • 1-3 cloves garlic
  • 2 anchovy fillets (packed in oil)
  • 1 tbsp Worcestershire sauce
  • 1 tbsp dijon mustard
  • 1-2 tbsp red wine vinegar
  • pinch of sugar
  • 1/2 tsp salt
  • 1/2 tsp pepper
  • 1/2 – 3/4 cup oil (I like to use a combo of vegetable oil and really good extra virgin olive oil)
  • dash hot sauce (totally optional)

Combine all ingredients except oil in jar or blender.  Shake/blend really well until smooth, and slowly add oil until emulsified.  Taste and adjust for salt and pepper, adding more if necessary.

Caesar salad 1

Everybody helps make dinner around here, and Stella is learning the fine points of knife work!  Don’t worry, she quickly learned to rest the knife against her knuckles to avoid trimming her fingers……

Caesar salad 2

Assembling that cheese grater has all Sloan’s attention.

  • Wash your lettuce leaves and spin dry (you can do this ahead of time, wrap in clean kitchen towel and keep in fridge until ready to use, it really crisps up the lettuce)
  • Cook bacon until crisp and crumble.
  • Toss stale bread chunks in olive oil and a bit of salt and pepper and toast until dry and crunchy.  (This is also a great place to use dried herbs, and some garlic powder)
  • Grate Parmesan cheese

Toss lettuce pieces in very large bowl with the bacon, croutons and parmesan cheese.  Just before serving toss with dressing just until everything has a delicious coating.  Taste and squeeze a bit of lemon over if you like.

This easily goes from a side dish to a whole meal if you serve Caesar salad with grilled chicken or shrimp, and a side of garlic toast.


Cake Donuts with Fruit Glaze

Delish

These fun little donuts are delicious!  So easy to make, and even quicker to bake.  The toppings can be anything you like to suit the occasion.

I bought silicone donut molds to bake with, and they are so much fun!  This recipe comes together quickly, and bakes even faster.  Whatever you top them with, they are sure to be a winner.  Today I did a raspberry glaze and an orange peach glaze, but I included a few others here.

Realistically you can make any toppings you like, next time I might do chocolate with toasted nuts on top ….

Ingredients

  • 1 3/4 cups all-purpose flour
  • 1 cup granulated sugar
  • 3/4 teaspoon kosher salt
  • 1 teaspoon baking powder
  • 1/2 teaspoon baking soda
  • 1 large egg
  • 1/2 cup buttermilk
  • 1/4 cup flavorless oil, like canola or vegetable
  • 1 teaspoon vanilla extract
  • 1/4 cup water
  • Sprinkles for decorating

Special equipment:

a 12-cavity donut pan and a piping bag

  • To make the donuts: preheat the oven to 375 degrees F.
  • Coat a 12-cavity donut pan with cooking spray and set aside.
  • Whisk together the flour, sugar, salt, baking powder and baking soda in a large bowl.
  • Cake Donuts 1

    Always whisk your dry ingredients together first, that way you can use the same whisk for the wet ingredients.

  • Whisk together the egg, buttermilk, oil, vanilla and water in a medium bowl.
  • Cake Donuts 2

    Yes, I’m often a bit generous with my vanilla ……

  • Whisk the wet mixture into the dry mixture and stir to combine.
  • Fill a piping bag with the batter and pipe the batter into the donut pans, filling each cavity halfway. This could get a little messy.
  • Cake Donuts 3

    I used a ziplock bag and just snipped the end off.

    Cake Donuts 5

  • Bake until a toothpick inserted into a donut comes out clean, about 12-14 minutes.
  • Check your oven at 12 minutes, if a toothpick comes out clean, you are done.
  • Cool in the pan for 5 minutes. Remove to a rack and cool completely.
  • Cake Donuts 6

    I think I might have overfilled these a touch, as they did get a little lip on them.

  • To decorate the donuts, dip them halfway into the glaze and then allow excess glaze to drip off. Sprinkle the tops with a little fun and enjoy.

Have you seen “Girl Meets Farm”?  It is on Food Network and features Molly Yeh.  Her recipes are easy to follow, usually contain simple ingredients and I love everything I’ve tried.  This recipe is from her “baby shower” episode.

Cake Donuts 7

Here are some glaze suggestions, also from that episode:

  • Orange Glaze:

    1. Combine the confectioners’ sugar, honey and 4 tablespoons of the juice in a bowl. Add more juice little by little until the mixture is spreadable (you might not need the full remaining tablespoon). It should be quite thick yet spreadable.

    Rhubarb Glaze:

    1. Put the rhubarb, granulated sugar and 1/2 cup water into a small pot on a stovetop. Bring to a boil, then reduce to a simmer. Cook until the sugar is dissolved and the rhubarb is tender, about 10 minutes. Remove from the heat and allow to cool slightly. Pour into a blender and puree until smooth, then transfer to a bowl. Add confectioners’ sugar as needed for taste and consistency.

    Blueberry Glaze:

    1. Put the blueberries, granulated sugar and 1/4 cup water into a small pot on a stovetop and cook over medium heat. Bring to a boil then reduce to a simmer. Simmer until the berries have burst and the sugar is dissolved, about 10 minutes. Remove from the heat and allow to cool slightly. Pour into a blender and puree until smooth. Pour into a small bowl, straining if necessary, then add the confectioners’ sugar. Whisk to combine, adding more confectioners’ sugar as needed for taste and consistency.

Cafe de Paris Beurre

Cafe de Paris 8

How to enhance an already perfect medium rare steak?  Cafe de Paris Beurre.  It’s that easy.

What’s that, you say????  Only the most amazing flavour packed umami bomb you will ever create.  Don’t be alarmed by the list of ingredients.  This makes a whack of butter, which you can give away to your best of friends, or stash in your freezer to pull out when needed.

INGREDIENTS

  • 1 pound, 5 ounces unsalted butter, softened
  • 1 ounce ketchup
  • 3 teaspoons Dijon mustard
  • 1/2 ounce capers, rinsed
  • 2 ounces shallots, finely diced
  • 1 tablespoon flat leaf parsley, finely chopped
  • 1 tablespoon chives, snipped
  • 1 teaspoon dried marjoram
  • 1 teaspoon dill, finely chopped
  • 1 teaspoon finely chopped thyme leaves
  • 1/2 teaspoon tarragon leaves
  • 1/2 teaspoon rosemary leaves, finely chopped
  • 1 clove garlic, finely chopped
  • 8 anchovy fillets, rinsed and finely chopped
  • 1 tablespoon brandy
  • 1 tablespoon madeira
  • 1 teaspoon worcestershire sauce
  • 1/2 teaspoon paprika
  • 1/2 teaspoon curry powder
  • 1/4 teaspoon Cayenne powder
  • juice of one lemon
  • zest of 1/2 lemon
  • zest of 1/4 Orange
  • 2 teaspoons sea salt
Cafe de Paris 5

Just a few of the many ingredients needed.

Cafe de Paris 3

Okay, it might not look appetizing right now, but it smells incredible …


DIRECTIONS

  1. In a large bowl, beat the butter by hand or use an electric mixer set to slow speed, until it has a slightly creamy texture.
  2. In a separate bowl, combine all the other ingredients and mix thoroughly. Add this mixture to the butter and beat again until all the ingredients are completely combined.
  3. Place a double thickness of foil, about 12 inches long, on a flat surface and line with a similar-sized piece of silicone paper. Spread half the butter along one of the foil edges and roll up to form a long sausage shape — roll it with your hands like a rolling pin to get a tidy shape and eliminate any air pockets. Twist the ends to seal. You can also use plastic kitchen wrap, which I did this time.  Repeat this process with the remaining butter. Place in the fridge to chill before use.
  4. To use, slice a ½ inch thick disc of butter and place on top of a grilled steak (or a steamed spud). Traditionally, the steak is placed back under a hot grill (broiler) to soften and brown the butter, but I don’t reckon you need to do this, just let it melt from the heat of the steak.
  5. The butter can be stored in an airtight container in the fridge for a few weeks or in the freezer for several months.
Cafe de Paris 4

Ready to roll into logs and pop in the freezer (or gift bags!)

Cafe de Paris 6

Don’t just think of steaks, top any chicken or fish dish, or use it in place of garlic butter on bread.

Cafe de Paris Beurre 1

I tried out quite a few recipes I found, and this one from Food Republic, is the definite winner, and the most like a butter topped steak we had a “Red Door” in Whistler.  If you aren’t a meat lover, don’t even worry – it’s just amazing on vegetables, scrambled eggs or melted and drizzled over popcorn!


Grilled mushrooms on a cedar plank

As the snow drifts by the window I’m dreaming of making these again ….. smoky from the grill and cedar plank, and bursting with creamy cheesy goodness.

Grilled Mushrooms:Cedar Plank

  • 25 to 30 small cremini mushrooms (about 650 g), stemmed
  • 2 cup grated Asiago or Parmesan cheese
  • 1/2 cup water-packed artichoke hearts (about 2), drained, finely chopped and patted dry
  • 1/4 cup cream cheese , softened
  • 1/4 cup finely chopped green olives
  • 1 egg , lightly beaten
  • 1 clove garlic , grated
  • 1/2 teaspoon pepper
  • 2 tablespoons coarsely chopped fresh Italian parsley

To take these over the top, sprinkle with toasted and chopped hazelnuts, they add such a delightful crunch …. as you can see in this photo I didn’t have any handy this time!

Soak one 12- x 7-inch untreated cedar plank in water for 30 minutes or up to 24 hours. Meanwhile, using tip of spoon, gently scrape out mushroom gills to widen cavities.

In bowl, stir together Asiago, artichokes, cream cheese, olives, egg, garlic and pepper. Spoon 1 tbsp filling into each mushroom cap, pressing to flatten slightly.

Arrange on cedar plank, filling side up. Top with hazelnuts, if using, or you can always substitute toasted Panko crumbs.  Place plank on grill over medium-high heat; close lid and grill until mushrooms are tender and filling is bubbly, 15 to 20 minutes.

Sprinkle with parsley. Serve on plank on heat-resistant surface or transfer to platter.


If barbecuing isn’t an option for you this can also be done in the oven …. 425 for 20 minutes.

Moroccan Chicken with Olives & Artichokes

Moroccan chicken 2

Ingredients

  • 2 Meyer lemons (or sub 1 regular lemon/1 orange)
  • 1 tablespoon olive oil
  • 1 large onion, halved, thinly sliced
  • 2 garlic cloves, pressed
  • 1 tablespoon paprika
  • 2 teaspoons ground cumin
  • 1 teaspoon ground cinnamon
  • 1 teaspoon ground ginger
  • 2 cups chicken broth
  • 8 – 10 boneless skinless chicken thighs
  • 1/2 cup green olives
  • 1/2 cup quartered (canned) artichokes
  • fresh thyme sprigs (you could use whatever herb you have on hand)

Garnish

  • minced parsley
  • slivered green onions
  • lemon slice


Cut 1 lemon into 8 wedges. Squeeze enough juice from second lemon to measure 2 tablespoons; set wedges and juice aside. Heat oil in large skillet over medium-high heat. Add onion and sprinkle with salt and pepper; sauté until golden brown, about 8 minutes. Add next 5 ingredients; stir 1 minute. Add broth; bring to boil. Sprinkle chicken with salt and pepper; add to skillet. Add lemon wedges.

Moroccan chicken 1

I made this with whatever was in the fridge – and that did not include Meyer lemons!  Meyer lemons are quite a bit sweeter, so if you don’t have them, use equal portions of regular lemons and oranges to get the right balance.

Cover, reduce heat to medium-low, and simmer until chicken is cooked through, turning occasionally, 20 minutes (or so). Transfer chicken to platter.   Taste!!!  Every lemon could have a different acid content and you don’t want this to be more than a lovely, subtle lemon flavour.   Add olives, artichokes and (if needed) 2 tablespoons lemon juice to skillet. Increase heat to high; boil uncovered to thicken slightly, about 5 minutes. Season with salt and pepper. Pour over chicken.

Tonight we served it with saffron rice and beautiful fresh soft handmade pita bread.

Pita bread


Prosciutto wrapped stone fruit

Prosciutto & peaches grilled

I prefer nectarines, or slightly underripe peaches. Make sure your fruit is not overly ripe or it will become mushy on the grill.

These little gems are one of my most requested appetizers …. and looking at all that snow outside makes me think fondly of summer days.  The only time I make this is when stone fruit is in season, and we can grill.

Prosciutto & peaches

Ready for the grill

Ingredients

  • stone fruit, pitted & quartered (you can cut them into 6 pieces if they are large)
  • goats cheese
  • prosciutto
  • apricot jam (optional)
  • pepper (freshly cracked)

Once fruit is prepared, place a tablespoon or so of goat cheese on a section, and wrap with a piece of prosciutto.

If you want to use the apricot jam, brush over pieces right before they hit the grill.  I’ve used it, or olive oil, or nothing and we love them anyway they are done.  Grill just until the prosciutto crisps up a bit and has grill marks.  Sprinkle with cracked pepper and enjoy.

Homemade Pita Bread

Pita bread

Pitas 3

Can you even imagine the joy when these pita’s puff up like this?  It’s a wondrous sight.

Pitas 4

Puffed, tender and delicious.  Make some hummus to enjoy or serve with dinner as a flatbread, or stuff with your own fixings.  You will be really happy you tried this.

Before you even read this recipe I have to give you full disclosure that it is copied, completely, from Deb at Smitten Kitchen.  She has some amazing recipes, all created in her tiny New York kitchen, and if you haven’t visited her website yet, you must.  This is one of those recipes that I didn’t even have to tweak, we loved it.  


  • 3 cups plus a scant 1/4 cup (455 grams) all-purpose or bread flour
  • 2 teaspoons (13 grams) fine sea or table salt
  • 2 teaspoons (6 to 7 grams) instant yeast
  • 2 tablespoons (30 grams) olive oil
  • 1 1/4 cups (295 grams) water, at room temperature
About 1 1/2 hours before shaping, or for best flavor development, 8 hours to 3 days ahead, mix the dough:
Mixer method: In the bowl of a stand mixer, combine all the ingredients with the paddle attachment just until flour is moistened, then switch to the dough hook. Knead for 10 minutes at low/medium speed. The dough should clean the bowl and be very soft and smooth and just a little sticky to the touch. You can add a little flour or water if necessary, but when I use the weights above, I haven’t found this necessary.
Mix by hand: In a large bowl, combine all the ingredients except for a scant 1/4 cup of the flour. With a wooden spoon or your hand, mix until all the flour is moistened. Knead the dough in the bowl until it comes together, then sprinkle a little of the reserved flour onto the counter and scrape the dough onto it. Knead the dough for 5 minutes, adding as little of the reserved flour as possible; it’s going to be very sticky. Invert your empty bowl over it and allow it to rest for 5 to 20 minutes, then knead the dough another 5 to 10 minutes, until it’s soft a little sticky to the touch.

Let the dough rise: Scrape the dough into a large oiled bowl. Press it down and coat the top with a little oil too. Cover the container with a lid or plastic wrap. With a piece of tape, mark the side of the container at approximately where double the height of the dough would be. Let the dough rise at room temperature for 1 1/2 hours, or in the fridge overnight (or up to 3 days), until doubled.

Pitas 5

This little ball of dough doesn’t look like much now, but just let it sit for a while ….

Pitas 6

LOOK!  After sitting on the counter for a few hours (you can use it after an hour or so) the dough has more than doubled and ready to be turned into rounds.

To bake pitas in the oven: Preheat your oven to 475°F 20 minutes before baking. Have an oven shelf at the lowest level and place a baking stone, cast-iron skillet, or baking sheet on it before preheating. Do not oil the skillet or baking sheet.

Shape the dough: Cut the dough into 8 or 12 pieces. Work with one piece at a time, on a lightly floured counter, with lightly floured hands, shape each piece into a ball and then flatten it into a disk. Cover the dough with oiled plastic and allow it to rest for 20 minutes at room temperature.

Pitas 1

If you’ve got a 5 year old around, put them to work.  Stella did a great job forming balls and flattening them for their 20 minute rest.


Roll each disk into a circle a little under 1/4 inch thick. Allow them to rest, uncovered, for 10 minutes before baking. Spritz lightly with water while resting.

Pitas 2

I don’t have a spritz bottle, so just brushed them lightly with a water moistened pastry brush.

Bake the pita: Quickly place 1 piece of dough directly on the stone or in the skillet or on the baking sheet, and bake for 3 to 4 minutes (less for small ones, longer for big ones). The pita should be completely puffed but not beginning to brown. The dough will not puff well if it is not moist enough. See how the pita puffs, then, if necessary, spray each remaining piece with additional water before baking.

Proceed with the remaining dough, baking 3 or 4 pieces at a time if using a stone or baking sheet. using a pancake turner, transfer the pita breads to a clean towel, to stay soft and warm. Allow the oven to reheat for 5 minutes between batches. The pitas can be reheated for about 30 seconds in a hot oven before serving.

To cook the pitas on the stove top: Heat a griddle or cast-iron skillet over medium heat. Lightly, very thinly, grease the surface and cook the pitas one at a time. Cook for about 30 seconds, then rotate the dough slightly (about a quarter-turn) and continue cooking for 1 to 2 minutes more. Small surface bubbles slowly grow to larger ones, and then eventually “find each other” merge and that becomes your big balloon pocket. Make additional small rotations if the process stagnates. The entire cooking process for each pita should be about 3 minutes.

Whole wheat variation: For a whole wheat version, use half whole wheat and half white flour, or you can make these entirely with white whole wheat flour — for this last option, you’ll need 1/4 cup extra water.

Mushroom Turnovers

Turnovers 12

One of my old time favourite appetizers, I’m not sure why I haven’t made these lately, but so glad mushrooms needed to be eaten, giving us a bite this delicious.

Preheat oven to 425 degrees.

  • 1 8 ounce pack cream cheese, softened
  • 1/2 cup unsalted butter, softened, plus 3 tbsp for the mushroom onion mixture
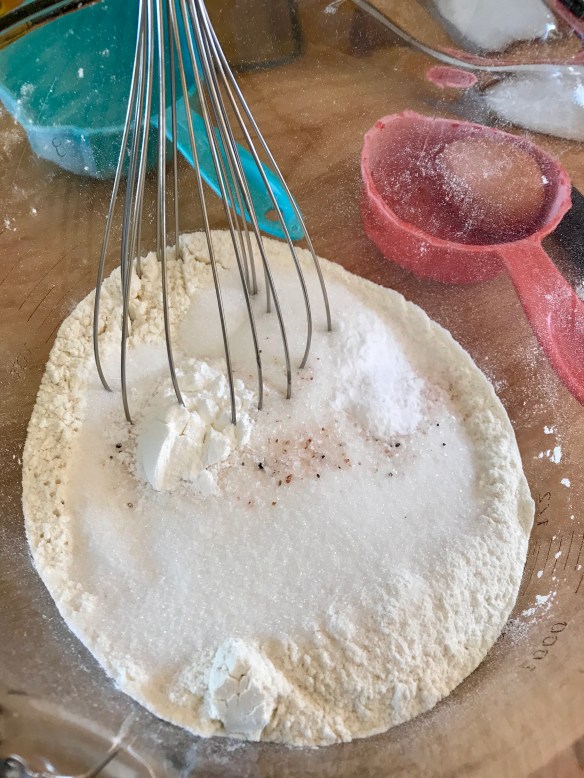
  • 1 1/2 cups all purpose flour
  • 1/2 pound mushrooms, finely diced (should yield about 3 cups once diced)
  • 1 cup finely diced onion
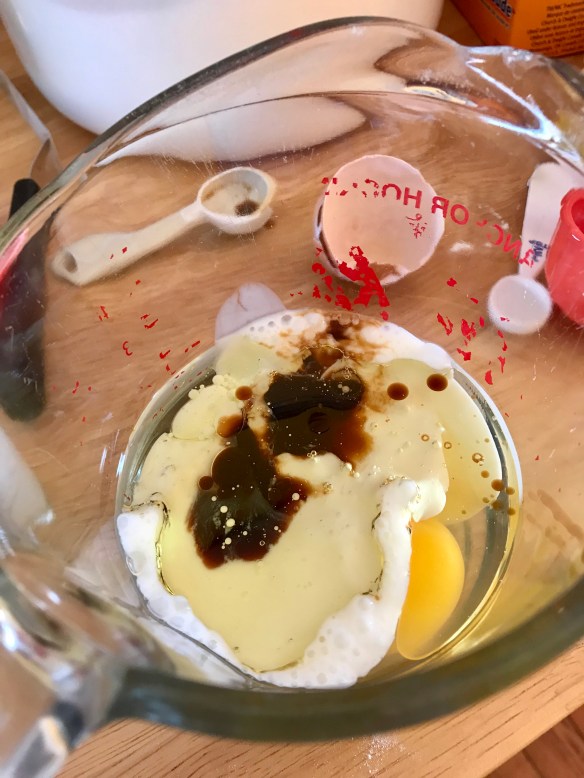
  • 1/4 cup sour cream
  • 1 tsp salt
  • 1 tsp fresh thyme leaves
  • 2 tbsp flour
  • 1 egg, beaten

At least 2 hours prior to serving:

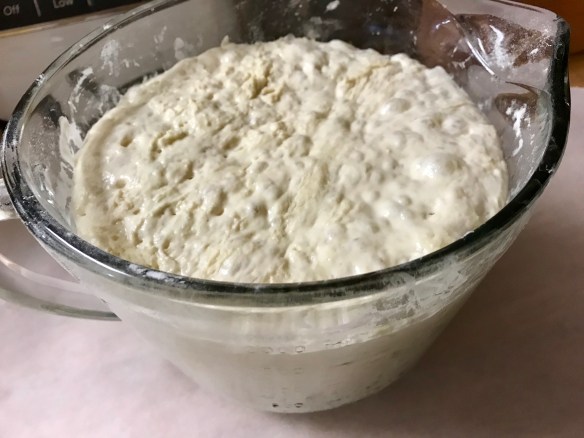
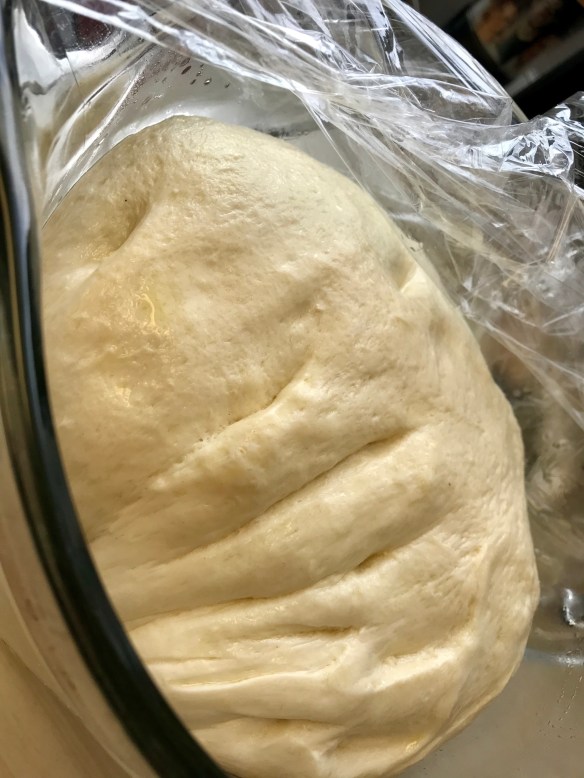
in large bowl or the bowl of your stand mixer combine the 1/2 cup butter and cream cheese until smooth and well blended.

Gradually stir in the flour until just combined.  Gently knead in a bit more flour only if it is too sticky to handle.  Shape into a ball, wrap in plastic and refrigerate for at least an hour.

Turnovers 3

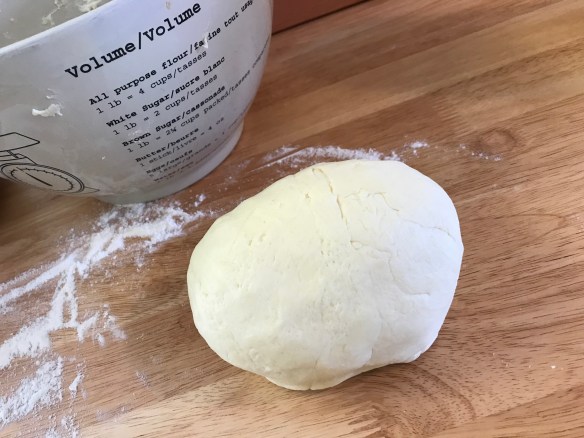
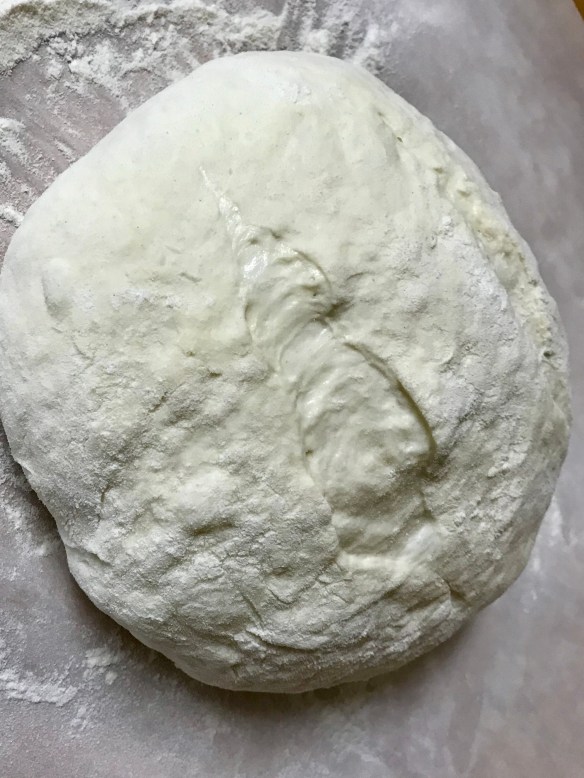
I love the way this dough feels, so soft and supple that it is also very forgiving.

Turnovers 4

Any type of mushroom works with this recipe, but we were happy to put these Crimini mushrooms to good use when friends cleaned out their fridge prior to a trip.                            Thanks Keith and Jean!


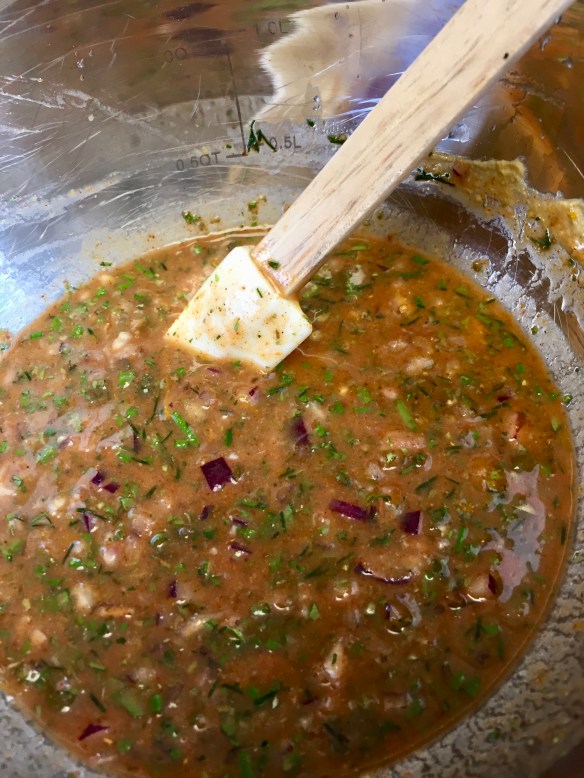
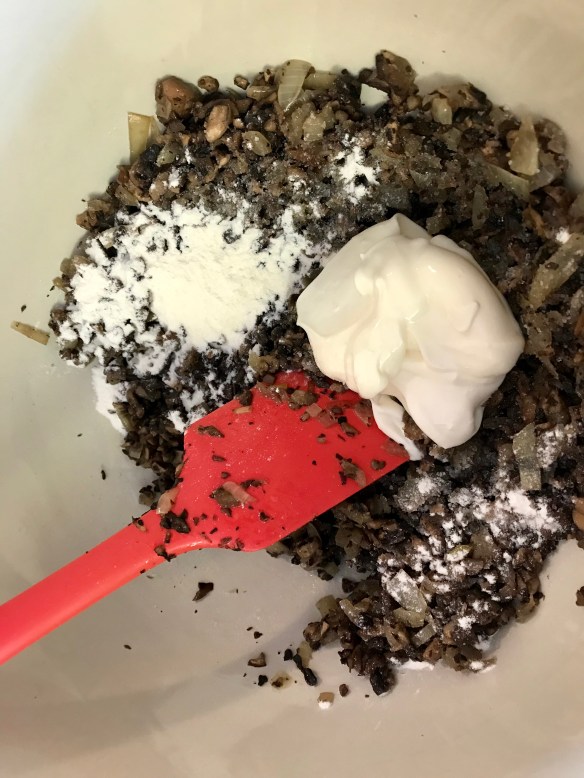
Meanwhile, in frying pan over medium heat, melt 3 tbsp butter and saute mushrooms and onions until tender, stirring occasionally.  Allow to cool, then stir in the salt, thyme, sour cream and 2 tbsp flour.

Turnovers 5

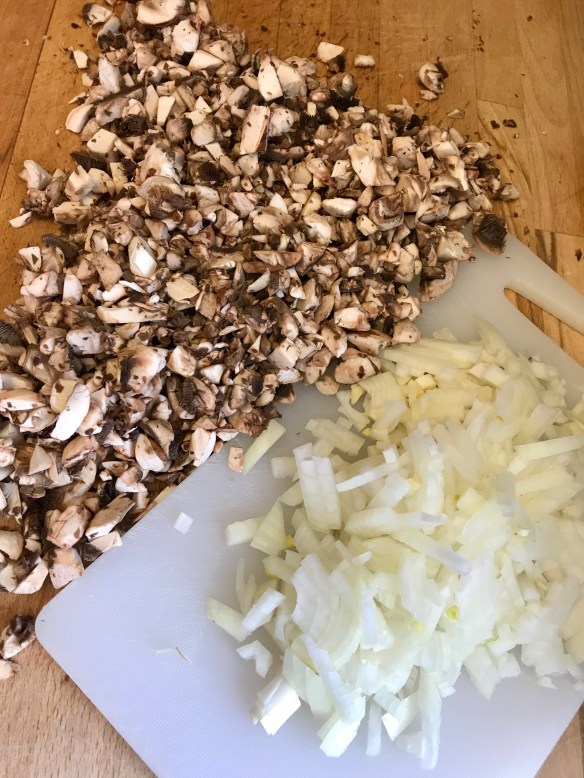
I love these silicone cutting boards for food like onions, garlic or meat.  When it goes in the dishwasher I don’t have to worry about my next item smelling funky or carrying germs.

Turnovers 6

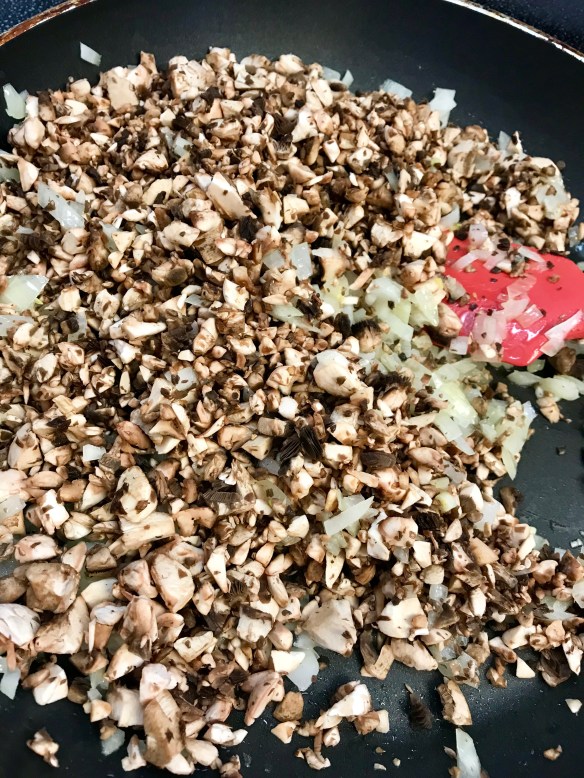
Cook just until the mushrooms have released their moisture, and the pan dries out a bit.

Turnovers 7

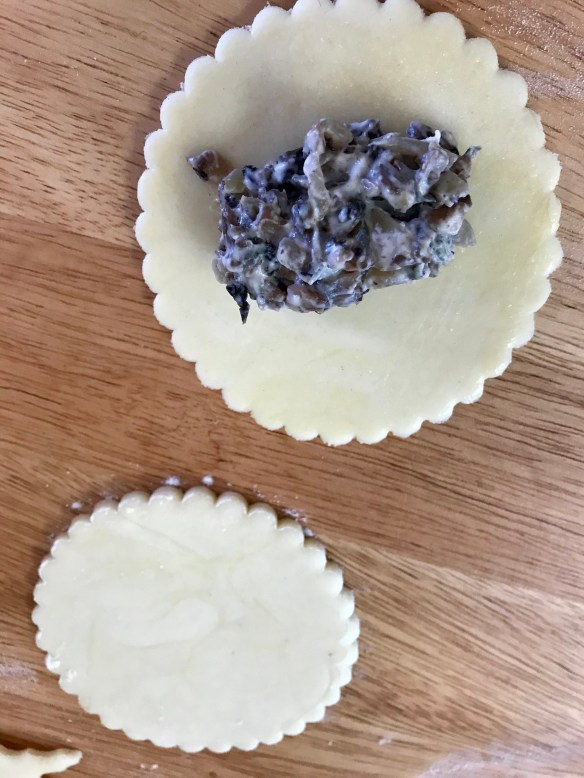
Cut your dough ball in half, and work with 1/2 at a time, keeping the 2nd ball wrapped.  On a floured work surface roll out dough to about 1/8″ thickness and cut out circles (my cutter is about 2 1/2″ across).

Turnovers 8

Turnovrs 9

When you pinch the edges together make sure you can easily do so, otherwise remove a bit so the turnovers done burst.


Onto one half of each dough circle place a tsp of mushroom mixture. Brush edges of circles with some of the beaten egg, fold dough over filling.  Do not overfill or they will burst during cooking and you will lose all that flavour.  With a fork firmly press edges together to seal.  Place on cookie sheet, either non stick or with parchment or silicone lining.  Brush with remaining egg yolk and prick the top with the tines of your fork.

Turnovers 10

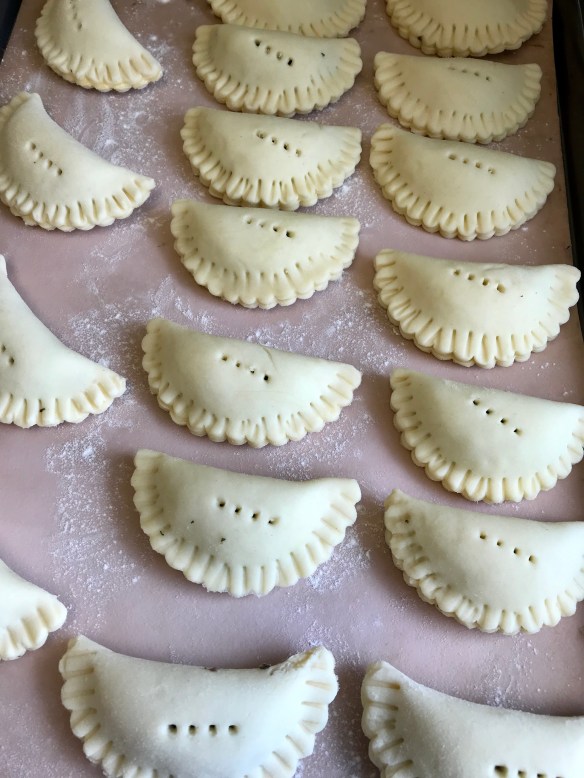
These freeze really well (before cooking).  Once you have pierced the tops of the turnovers, put tray in freezer until the turnovers have frozen solid.  Carefully remove and store in air proof container in deep freeze until ready to serve.  Brush with egg wash right before baking, and allow them to bake a little longer.

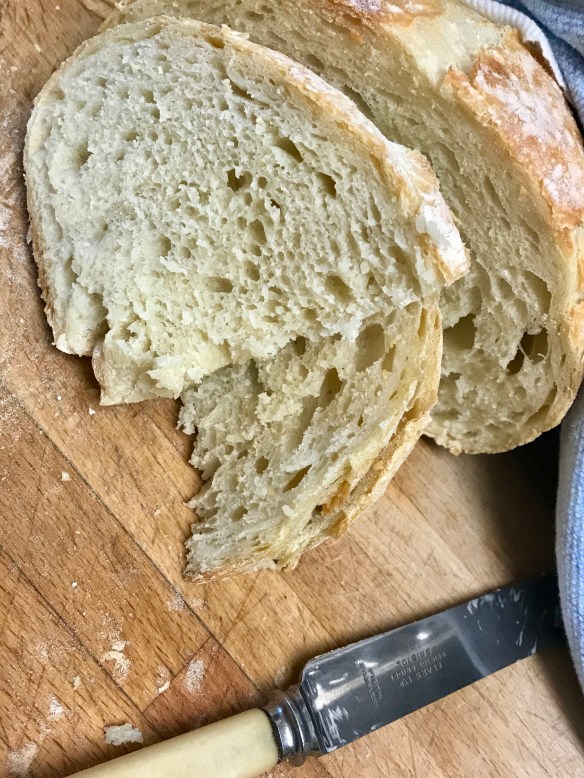
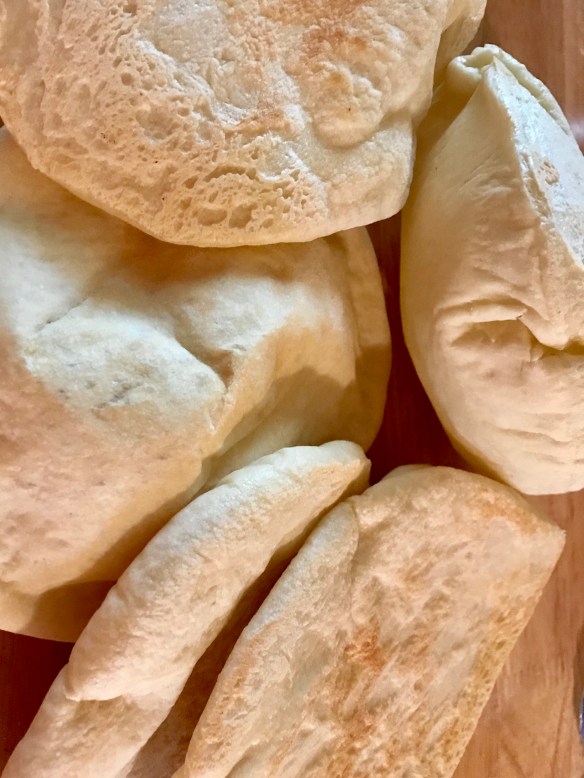
Bake for 13-15 minutes @ 425, until golden brown and glossy.  Remove from the oven, and allow to cool (if you can) before serving.

Turnovers 11

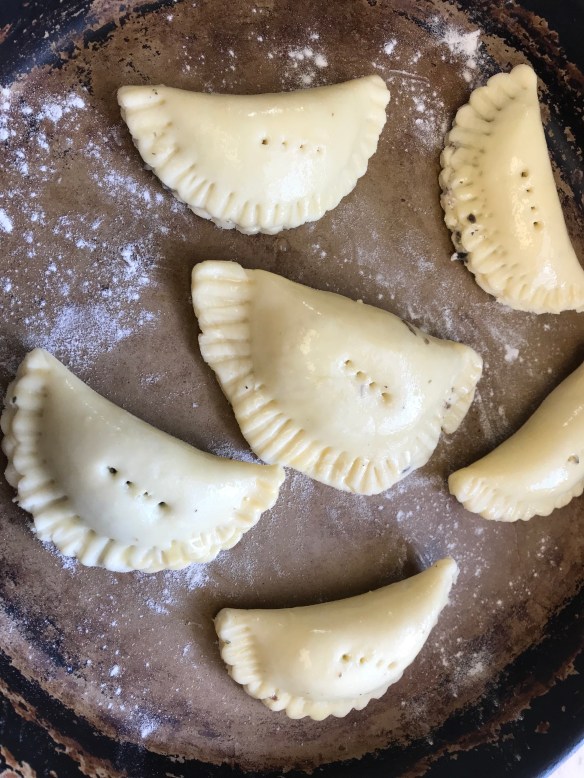
Brushed with an egg wash prior to hitting the oven, you will be rewarded for the task by the aroma filling your kitchen.  It won’t be easy to wait for them to cool before biting in.