Perfect & Quick Yeast Loaf

Sloan and Stella requested garlic bread to go with spaghetti and meatballs, and I can’t blame them.  With no intentions of running to town, I looked up a recipe for a quick, easy yeast bread that didn’t require over night resting and this one was just perfect.

img_3441

This one recipe makes two loaves, enjoy one for dinner tonight and treat someone to the other!

Ingredients

  • 1 tablespoon active dry yeast
  • 1 tablespoon sugar
  • 1 tablespoon salt
  • 2 cups warm water not over 110°F
  • 5 1/2 to 6 cups All-Purpose Flour
  • cornmeal or flour for dusting
  • boiling water

Instructions

  • In a large bowl mix together the yeast, sugar, salt and water. Let this stand until the yeast is dissolved. Gradually add the flour, one cup at a time to the liquid and mix thoroughly until the dough pulls away from the sides of the bowl. Turn the dough out onto a floured surface to knead. (This may be a little messy, but don’t give up!)
  • Knead It: Fold the far edge of the dough back over on itself towards you. Press into the dough with the heels of your hands and push away. After each push, rotate the dough 90°. Repeat this process in a rhythmic, rocking motion for 5 minutes, sprinkling only enough flour on your kneading surface to prevent sticking. Let the dough rest while you scrape out and grease the mixing bowl with a few drops of olive oil (preferred) or non stick baking spray. Knead the dough again for 2 to 3 minutes.
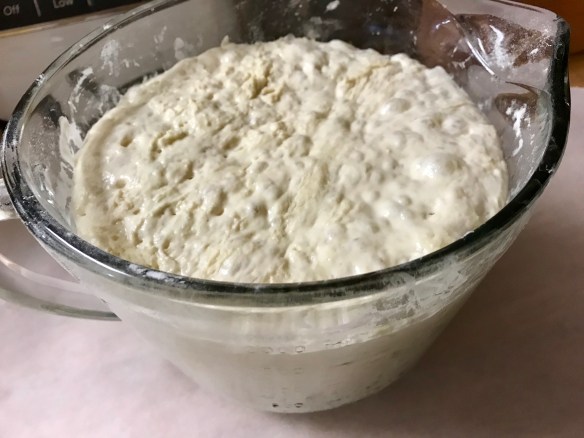
  • Let It Rise: Return the dough to the bowl and turn it over once to grease the top. Cover with a damp towel and keep warm until the dough doubles in bulk, about 1 to 2 hours.
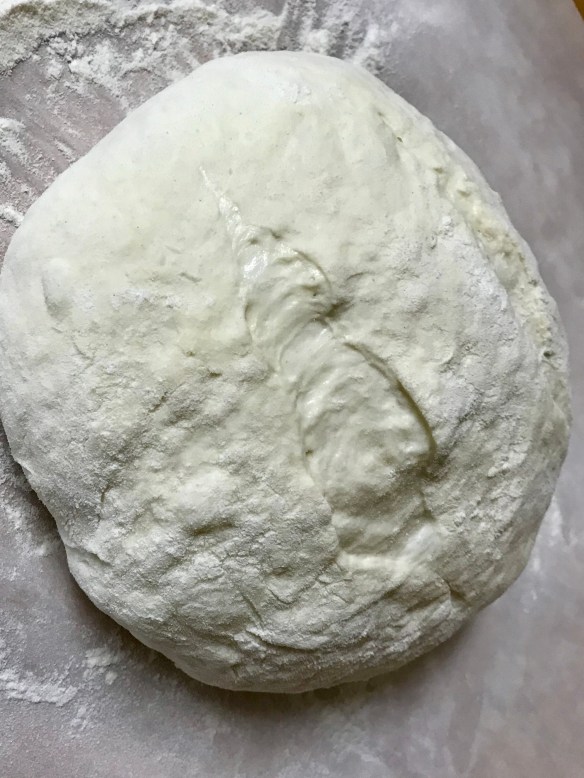
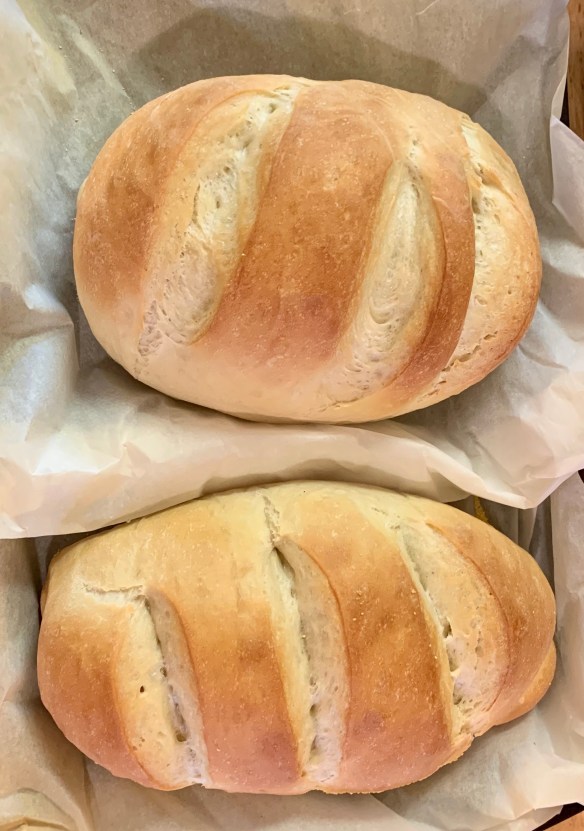
  • Shape it: Punch down the dough with your fist and briefly knead out any air bubbles. Cut the dough in half and shape into two Italian- or French-style loaves. Place the loaves on a cookie sheet generously sprinkled with cornmeal. Let the loaves rest for 5 minutes.

Bake it:

  • Lightly slash the tops of the loaves 3 or more times diagonally and lightly brush or spray them with cold water.
  • Place an aluminum roasting pan on the bottom of the oven. Fill 1″ deep with boiling water. Slide loaves onto baking stone* in a cold oven. Bake at 400°F for 35 to 45 minutes, until the loaves are golden brown and sounds hollow when tapped.

Alternate method:

  • For a lighter, crustier bread, let your shaped loaves rise for 45 minutes. Preheat the oven and roasting pan with water to 500°F for 15 minutes. Brush the loaves with cold water, place in the oven and bake for 10 minutes. Lower the temperature to 400°F and bake for 10 more minutes. Remove from the oven and place on a cooling rack.  Let cool for at least 30 minutes before slicing.
  • * If you don’t have a baking stone, you are welcome to try using a flat cookie sheet. Please note your bread will not have as nice of a crisp crust.
61308930847__59fe78c7-49d7-4825-8d56-7816064dd64a

Any project is better when you’ve got Stella helping!

img_3459

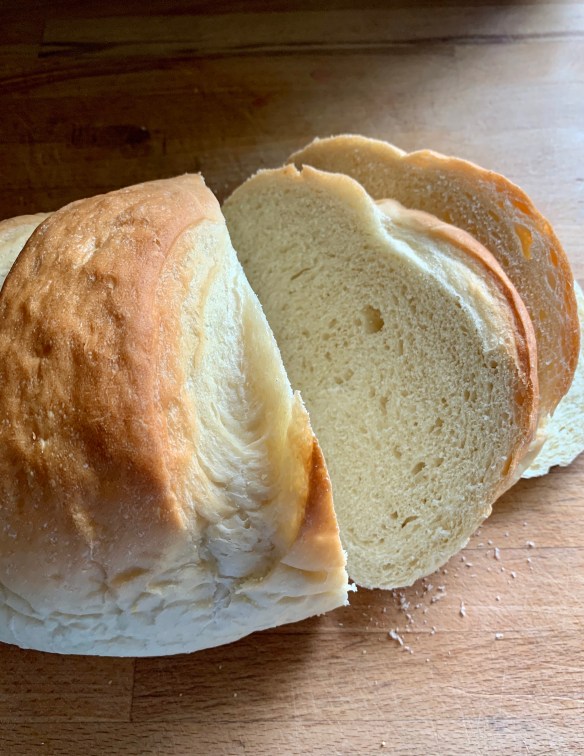
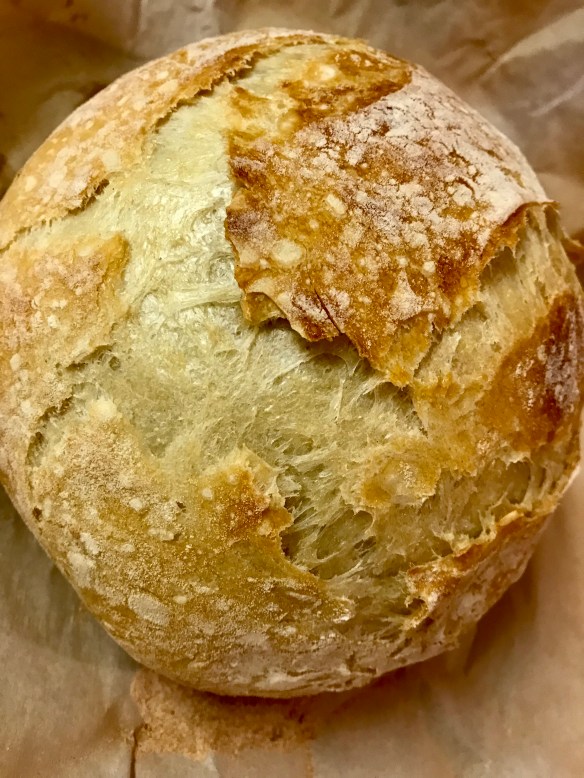
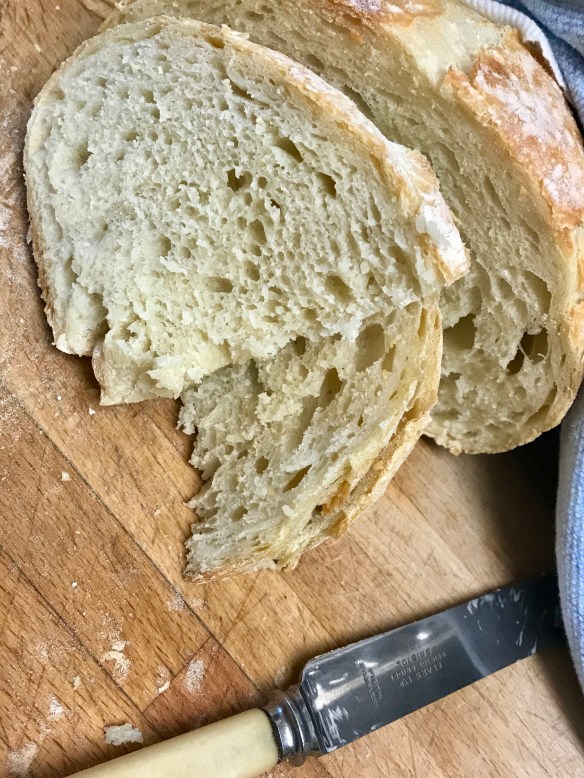
A nice crumb, and not too crusty, this bread is ideal for when you haven’t planned it out early in the day or with sourdough, the day before!

Sloan

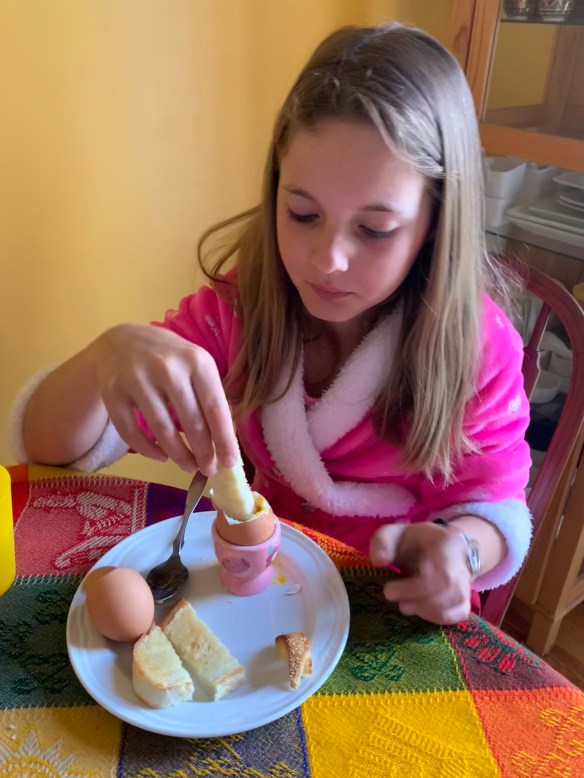
Toasted up, Sloan thought it was delicious dipped in her soft boiled eggs the next morning.


I found this on a site called gatherforbread.com and it fit the bill perfectly for deciding I wanted a French style bread the same day I needed it!  No overnight resting and so quick and easy to make, the results made it seem like I had worked a lot harder!  While not a true French or Italian loaf, it is similar and we thought it was just as good for toasting the next day.

No Knead Bread, it’s a miracle!

This bread will make you look like a kitchen boss, make no mistake about it.  While you will find recipes everywhere for this ….. and they all tell you to let the dough sit for anywhere from 12-18 hours I am here to tell you you can fake it with as much time as you’ve got!  Yes, you may get a “better” result in that length of time, but throw it together the same afternoon you want to eat it and it will still be a miracle.

bread

You want to know how forgiving this is?  Stella said we needed bread with the spaghetti we were having for dinner ………. so today I tossed it all together about 3:30, let it sit for an hour, and then proceeded with the baking.  It was still amazing!!

I’ve been studying these recipes for no knead bread, mistrusting the whole concept.  After all, generally speaking I do things the long way …. you know that, right?  I think of my kitchen time as yoga, peaceful, calming and S L O W ….. Well, this hit all those boxes except for the slow part …. but it worked so well with a late night dinner. Tuesdays the grandkids have gymnastics, and I don’t get home from taking them until after 6.  So, beef stew leftovers just cried for something special like this to elevate dinner.  The night before I prepped the dough (took all of maybe 5 minutes) and forgot about it until after gymnastics.  Pop it into the oven and you won’t believe the results.

No Knead bread 5

Craggy and crusty on the outside, delicate and textured inside.  I’m hooked.

  • 3 cups all purpose flour
  • 1 1/2 teaspoons salt
  • 1/2 teaspoon instant yeast
  • 1 1/2 cups room temperature water
  1. DOUGH PREP: In a large mixing bowl, whisk the flour, salt, and yeast together until mixed. Stir in the water until a chunky, thick dough forms. If it needs a little more water, add a few more tablespoons, just enough to get it barely wet throughout. It’s gonna look scrappy and weird and you’re going to question me on whether or not this will work, but it will. Cover the mixing bowl with plastic wrap and let it rest for 12-18 hours at room temperature. Overnight is ideal here, kids.
Miracle no Knead bread

That’s it folks!  Stir in the room temperature water to your dry ingredients, and let it sit.  Sure doesn’t look pretty here, but just wait …..

No knead bread 2

Look what happens after it sits overnight!  Soft dough, little bubbles all over and through it.


  1. PREP FOR BAKING: When you’re ready to bake, preheat the oven to 450. Stick a 6 quart enamel coated cast iron Lodge Dutch Oven (or similar) in the oven for about 30 minutes to heat. At this point, the dough should be big and puffy and pretty loose, with little bubbles in it. Gently scrape the dough out onto a well-floured surface. (Remember: NO KNEAD.) Gently shape it into a ball with flour on the outside, set on a piece of parchment, and cover with plastic while your pan heats up.
No Knead bread 3

Prep …. ha ha …. today that consists of tossing a little flour onto a piece of parchment paper, and then gently turn out your dough onto the flour.  Roll it around just so that flour gets all over the surface, and under the dough.  Leave it on the parchment, and gently lift the whole package by the parchment and set it into the heated pan.


  1. BAKE: Remove the plastic from the dough. Lift the dough and parchment together into the pan so the parchment lines the bottom of the hot pan (be careful not to touch the pan since it’s very hot). Bake, covered, for 30 minutes. Remove the cover and bake another 10-15 minutes to get the exterior nice and golden brown and crispy. Voila! Done. Miracle no-knead bread, you boss you.
No Knead bread 4

Just a little peek of it in the dutch oven ….. I was DYING until I could peek.

No Knead 7

Oh my …. the flavour and texture of this bread were out of this world – we loved it.

No Knead 8

Do yourself a favour, and make bread!  This really will make you feel like a boss, go for it!  I recently bought a loaf of bread from a specialty bakery.  It was $7.00 a loaf, and while we thought it was great, try this for pennies …. just as delicious!

AJ's buckwheat

I know I’ve mentioned how easy and flexible this recipe is, but now I’m going to let you know how versatile!  This beautiful loaf was made by my friend AJ, with 50% buckwheat flour.  It’s gorgeous, and just makes me want to try other variations.  Thanks AJ!


I’ve reprinted this recipe from “Pinch of Yum” after studying these recipes for months!  Seems so strange to think of a bread that doesn’t require kneading, but this couldn’t be easier, and results in a great loaf of bread.  While the entire text portion is lifted from “Pinch of Yum” I’ve taken my own photos, and I’m hooked on the whole idea.  Thanks!