Pumpkin Cheesecake with Ginger Crust & Caramel Sauce

I will tell you right away, this isn’t quick.  However, it is worth every moment you spend …. and after all, isn’t making a special dessert like this worth it?  After all, it is a labour of love!

Ingredients

For the Crust

  • 7-1/2 ounces gingersnaps (or 1-1/2 cups finely ground gingersnap crumbs)
  • 1/4 cup granulated sugar
  • 5 tablespoons unsalted butter, melted

For the Filling

  • 1 15-ounce can pumpkin (such as Libby’s)
  • 1-1/3 cups granulated sugar
  • 1 teaspoon ground cinnamon
  • 1/2 teaspoon ground ginger
  • 1/4 teaspoon ground nutmeg
  • 1/4 teaspoon ground cloves
  • 1/2 teaspoon salt
  • 1 cup heavy cream, cold
  • 1-1/2 pounds (three 8-ounce packages) cream cheese, room temperature
  • 5 large eggs, room temperature

For Caramel Sauce

  • 1 cup sugar
  • 2 tablespoons light corn syrup
  • 2 tablespoons water
  • 1/8 teaspoon lemon juice
  • 1/2 cup heavy cream, plus more if necessary
  • 1 tablespoon unsalted butter

Instructions

For the Crust

  1. Preheat the oven to 325 degrees. Wrap a 9-inch springform pan twice with aluminum foil (preferably heavy duty). Take care to pull the foil all the way up the sides so that water cannot seep in from the water bath. Spray the bottom and sides of the pan with nonstick cooking spray. Pulse the crackers (or crumbs) and sugar in a food processor fitted with the metal blade until finely ground. Add the butter and pulse a few times to combine. Dump the moistened crumbs into the prepared pan and, using a measuring cup or glass, press into an even layer. Bake until fragrant and set, about 15 minutes. Cool on a wire rack while you prepare the filling.

For the Filling

  1. Bring about 4 quarts of water to a simmer in a tea kettle (this will be used for the water bath). In a small, heavy saucepan, stir together the pumpkin, sugar, cinnamon, ginger, nutmeg, cloves and salt. Over medium heat, bring the mixture to a sputter, stirring constantly. Reduce the heat to medium-low and cook, stirring constantly, for 5 minutes, until thick, bronzed and shiny. Scrape the mixture into a large food processor fitted with the metal blade and process for 1 minute with the feed tube open.
  2. With the motor running, add the cold cream. Add the cream cheese (cut into chunks) and process for about 30 seconds, scraping the sides if necessary, or until smoothly incorporated. Add the eggs and process for about 5 seconds or just until incorporated (do not overmix!).
  3. Set the cake pan in a large roasting pan. Pour the batter into the cooled crust, and then pour enough boiling water into the large roasting pan to come about halfway up side of the cake pan. Bake until the cake is just set, about 1-1/2 hours. If it jiggles, it’s not done. CAREFULLY remove the roasting pan from the oven and set on a wire rack. Use a paring knife to loosen the cake from the sides of the pan. Cool until the water is just warm, about 45 minutes. Remove the springform pan from the water bath, discard the foil and set on a wire rack. Continue to cool at room temperature until barely warm, about 3 hours. Cover with plastic wrap and refrigerate until chilled, at least 4 hours or overnight.

For the Caramel Sauce

  1. Stir the sugar, corn syrup, water and lemon juice together in a 2-cup microwave-safe measuring cup or medium glass bowl. Microwave until the caramel is pale yellow, or just barely starting to take on some color, 4-8 minutes (depending on the strength of your microwave). It’s fine to stop and open the microwave to check often; just don’t let it get too dark or it will burn. Let the caramel sit for about 5 minutes — it will gradually turn a rich amber color. (If after five minutes, it’s not dark enough, place it back in the microwave for thirty seconds or so, then let it darken again. If it gets too dark, start over.)
  2. In the meantime, heat the cream in the microwave until hot. Once the caramel reaches the right color, add the hot cream a few tablespoons at a time. It will bubble up intensely, but won’t overflow. After you’ve added all the cream, stir to incorporate then add the butter. Add more cream if the mixture seems too thick. Once the caramel cools, you can store it in your fridge.

For Serving

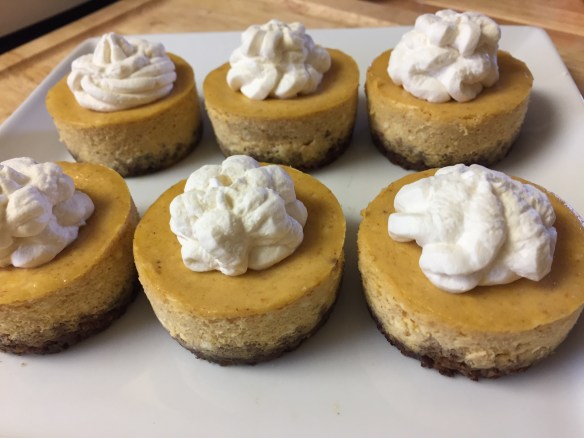
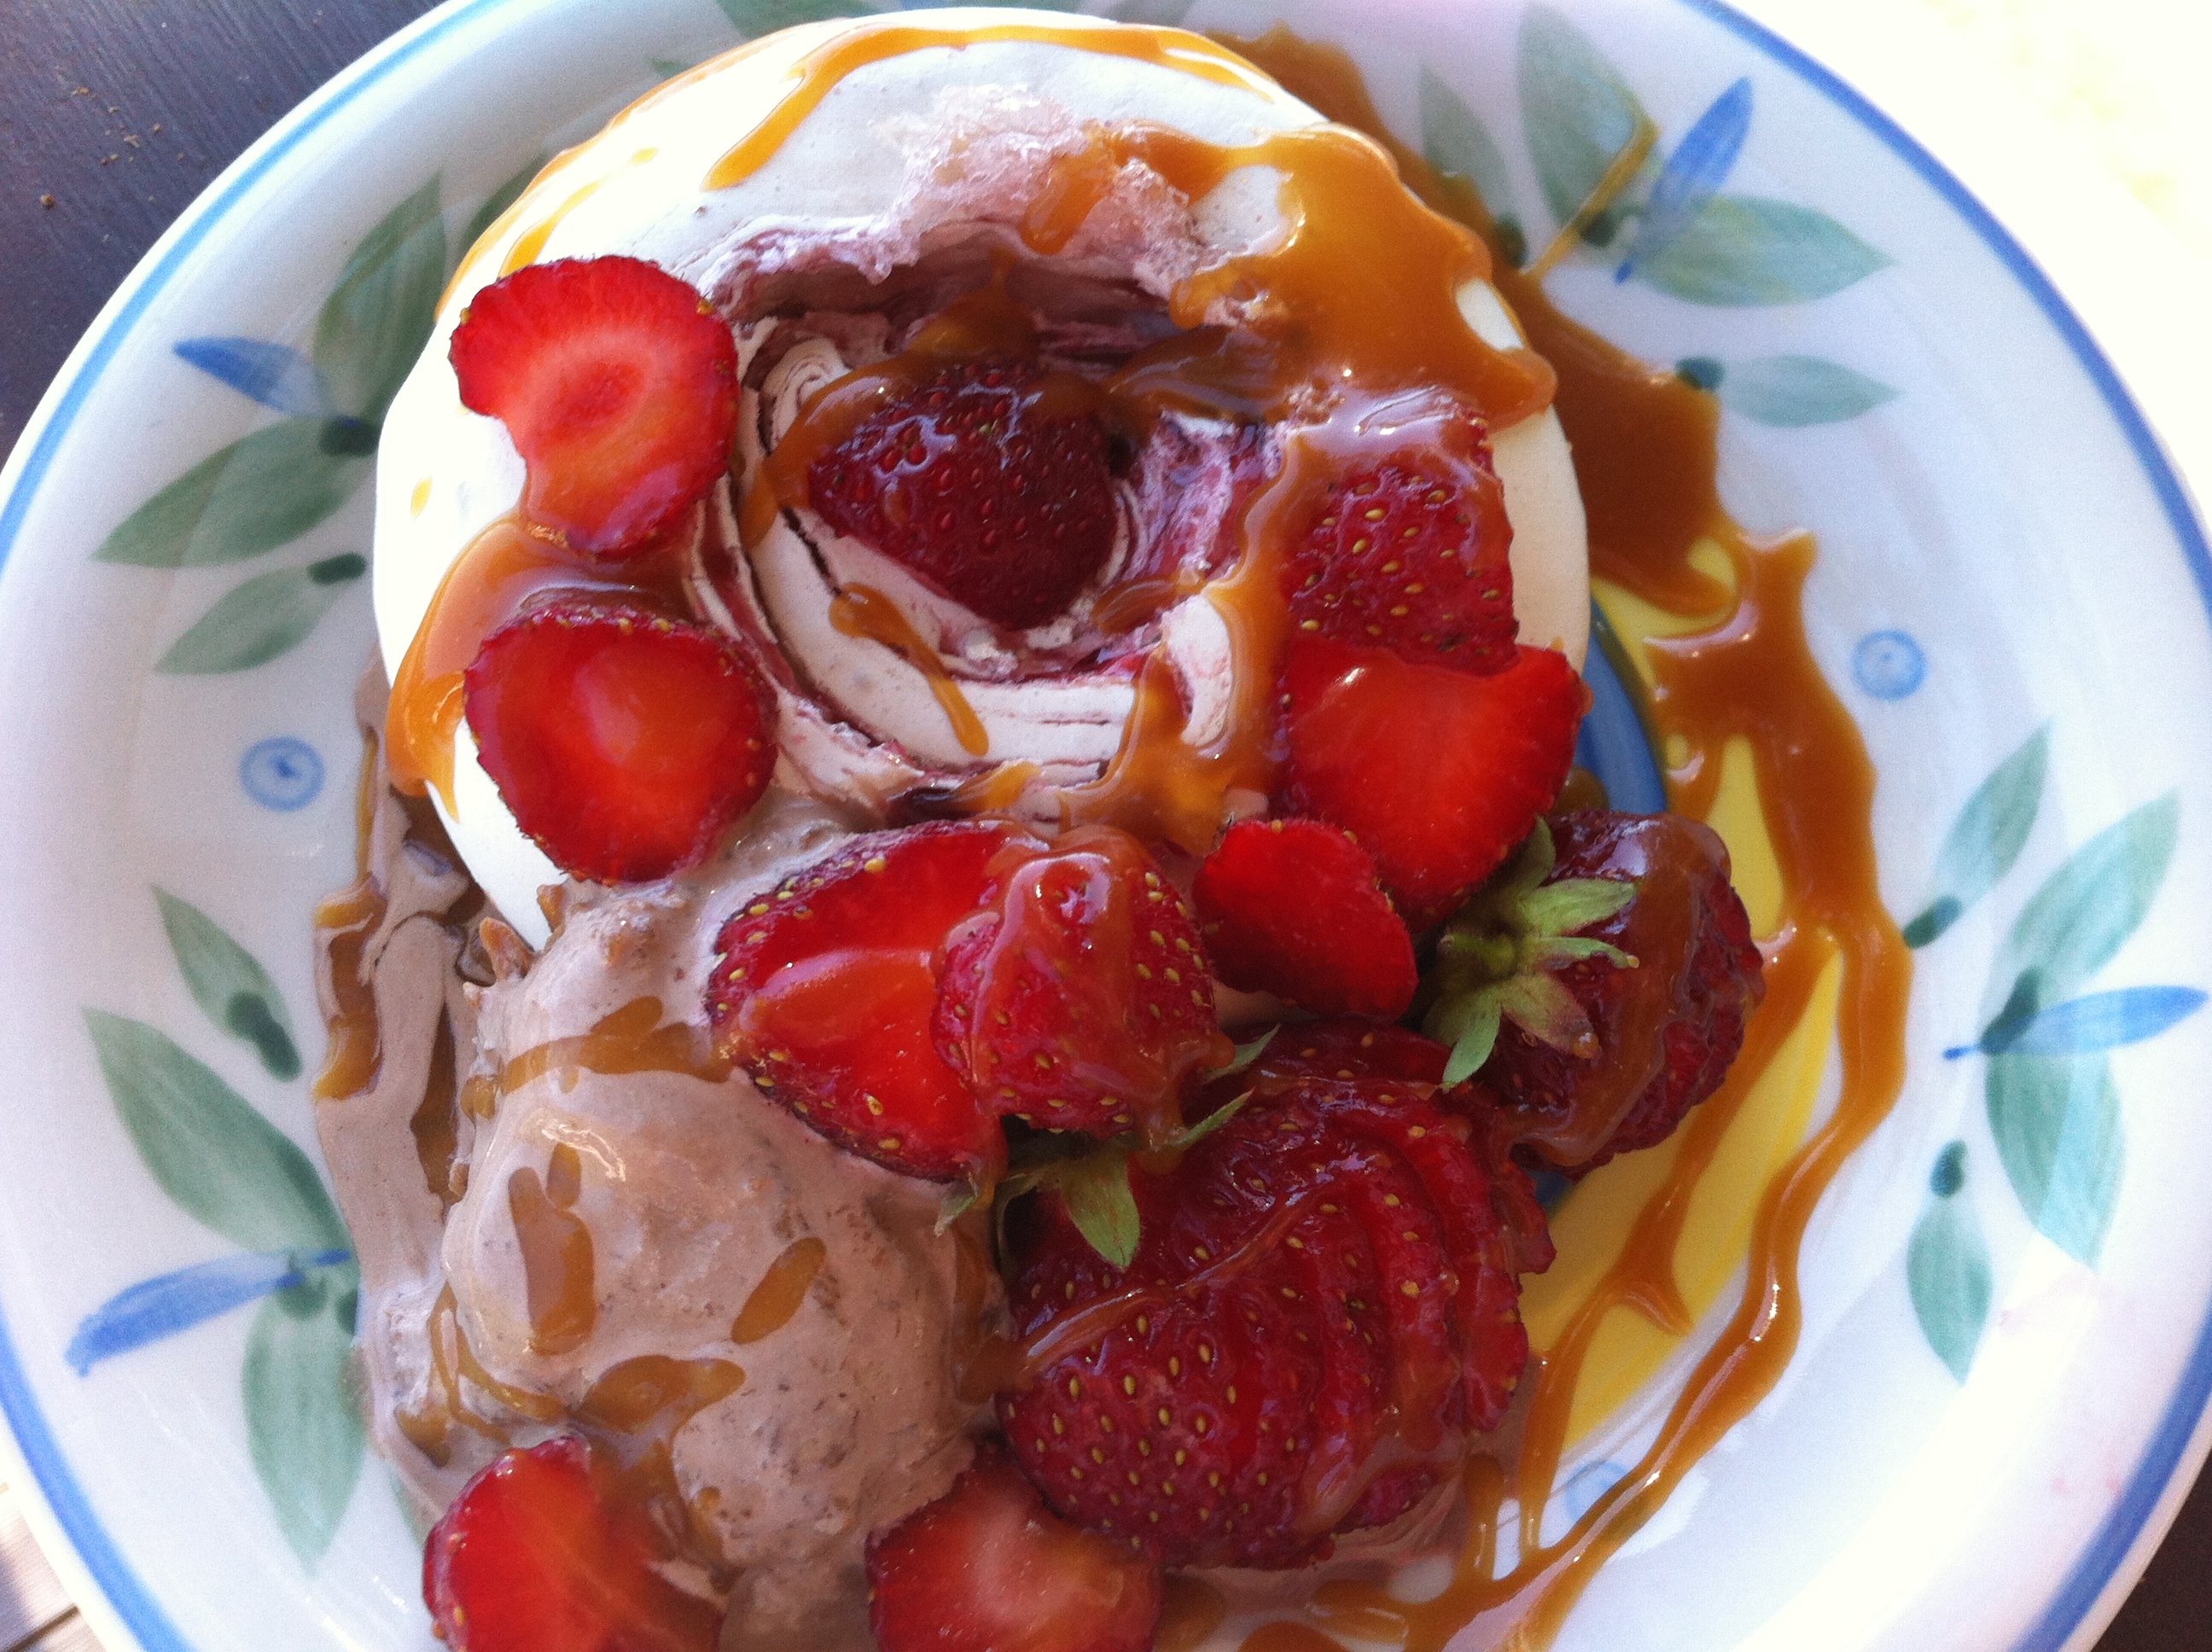
  1. Remove the outer ring from the springform pan. Slide a thin metal spatula between the crust and pan bottom to loosen, then slide the cheesecake onto a serving platter. (Alternatively, you can keep it on the pan bottom.) If there is condensation on the top of the cheesecake, blot it gently with a flat paper towel. Let the cheesecake stand at room temperature for about 30 minutes, then cut it into wedges. Warm up the caramel sauce in the microwave (it stiffens in the fridge). If it’s too thick, add more heavy cream to thin it out. Drizzle the caramel sauce over each piece of cheesecake and top with a dollop of sweetened whipped cream if desired.
  2. Note: You’ll need a large food processor — preferably with a 12-cup capacity — to make the filling (you can also use an 11-cup, but you may have a bit of leakage). If you don’t have one, it’s fine to use a Kitchenaid Mixer or electric beaters for the filling and a small food processor for the crust.

Mini Pumpkin Cheesecake Bites

Delicious!  Not only do these look pretty darn cute on a serving platter, you will love how they taste.  A couple quick bites of pure pumpkin cheesecake heaven ….

pumpkin-cheesecake-minis

INGREDIENTS:

For the crust:
8 gingersnap cookies
1 graham cracker rectangle
1/4 cup chopped pecans
1 1/2 tsp brown sugar
1/8 tsp salt
1 1/2 TBSP melted butter

For the cheesecakes:
1 package (8 oz.) cream cheese, room temperature
1/4 cup + 2 Tablespoons granulated sugar
1/2 cup pumpkin puree
1 large egg
2 teaspoons heavy cream
1/2 tsp vanilla extract
1/2 tsp cinnamon
1/4 tsp nutmeg
1/8 tsp ginger

For whipped cream topping:
1 cup heavy cream
1 TBSP powdered sugar
1/4 tsp vanilla extract

DIRECTIONS:

Preheat oven to 350 degrees F. Arrange oven rack in the lower third of your oven. Lightly grease a 12-cup mini cheesecake pan or mini muffin pan with nonstick cooking spray.

In the bowl of a food processor, grind all ingredients for crust (except for melted butter) until mixture resembles coarse crumbs. Add melted butter and process until crumbs resemble wet sand. Press mixture by the tablespoon (1/2 Tbsp. if using a mini muffin pan) into each cheesecake/muffin pan cup*. Bake for 10 minutes.

Meanwhile, prepare cheesecake. In a large bowl, beat cream cheese, sugar and pumpkin puree with an electric mixer on medium speed until smooth. Mix in egg, heavy cream, vanilla, cinnamon, nutmeg and ginger until just combined. Evenly pour filling over each crust. Bake for 20 minutes. Remove from oven and cool in pan for 20 minutes. Refrigerate at least 1 hour before removing cheesecakes from pan.

Remove cheesecakes from pan by gently running a blunt knife around the edges of each cheesecake and popping out.

Before serving, prepare whipped cream. Beat heavy cream, sugar and vanilla in a medium bowl with an electric mixer on medium-high speed, until stiff peaks form. Refrigerate until ready to dollop on top of cheesecakes.

If these get past your original serving, refrigerate the rest until they disappear!

Peach Sorbet

Some days the creamy smooth texture of homemade ice cream, made with peaches ripe and still warm from the sun is exactly what I’d like …. other times the bright and fresh taste of peach sorbet is ideal.  It is so refreshing that it is like an icy peach.

Fresh peaches

Peaches right off the tree can’t be beat!

At this time of year, I like to have simple syrup made and cold in the fridge so it is ready to go whenever the fruit is bursting with flavour.  It’s called simple syrup for a reason – just bring equal parts water and white sugar to a boil, allow sugar to dissolve completely and remove from the heat.  Stir well and keep in the fridge.

My kitchenaid mixer gets a lot of use, and the ice cream maker bowl attachment was a brilliant purchase.

Puree about 2 pounds of fresh peaches (you want to end up with about 5 cups of peach puree.  Stir in the juice of 1 lemon and a dash of salt.  Allow to completely chill in the fridge before pulling out your ice cream maker.

Combine peach & lemon puree, 1 1/2 cups simple syrup and stir in 1 tsp vanilla paste.

With the bowl of your ice cream maker turning already, slowly pour in the mixture and allow your mixer to do the work – usually it takes about 20 minutes, but this can vary depending on the temperature of your peach puree, and the temperature in the kitchen.  Once the mixture looks smooth and thickened, put it into a clean container in the freezer to firm up.


IMG_9227


Raspberry Peach Pecan Galette

This recipe works really well with any berry or fruit – the pecans give the pie crust a rich, nutty, crunchy texture and flavour. Really – what is a galette? An easy way to make a pie!

Ready for the oven, this raspberry peach galette looks delicious already.

Ready for the oven, this raspberry peach galette looks delicious already.

DOUGH
1/2 cup pecans (toasted)
1 cup plus 2 TBSP flour
2 tsp raw sugar
1/2 tsp kosher salt
1/4 tsp cinnamon
1/2 cup (1 stick) very cold unsalted butter (in small pieces)

FILLING
2 cups raspberries
1 peach
2 tbsp cornstarch
1 1/2 tsp freshly squeezed lemon juice
1/4 cup sugar, plus a bit more to sprinkle on crust
2 tbsp milk or heavy cream

Preheat oven to 375

Once your pecans have been toasted, and cooled – pulse in food processor until they are a coarse crumble. Add flour, sugar, salt and cinnamon. Pulse just until combined. Add butter pieces and pulse just until mixture looks like a coarse crumble – a few pea sized bits are great. Transfer mixture to a large bowl and drizzle in 4 tbsp ice water and mix. If necessary add another tablespoon of water just until it comes together. Gently pat the dough into a circle, cover with plastic wrap and allow to sit in fridge for at least 1 hour. (it will keep in the fridge for 2 days or you can freeze it for a month)

Toss raspberries, cornstarch, lemon juice and 1/4 cup sugar in bowl.

Roll out dough on a lightly floured surface to a 12″ round. Carefully put on a parchment lined baking sheet.
Mound fruit mixture into centre of dough, leaving about 2″ around the edge. Fold edges over, overlapping slightly.

Brush dough with milk or cream and sprinkle raw sugar over.

Peel, and slice peach – in the center opening, arrange peach slices.

Bake until crust is dark golden brown and filling is bubbling – at least 45 minutes.

Fruit bubbling and oozing, crust golden brown ….. difficult to wait for it to cool before slicing!

Fruit bubbling and oozing, crust golden brown ….. difficult to wait for it to cool before slicing!

Allow to cool before slicing.

Peaches and raspberries were ripe and ready at the same time this year, so I served this with a yummy peach bursting sorbet …..

FullSizeRender-5

Raspberry Meringues with Salted Caramel Sauce

These make the most delightful tasty dessert – thanks to my friend Jean for preparing these for our Annual Canada Day visit!!!

The strawberries in the garden were ripe so we added a few to this treat, along with just a wee scoop of ice cream ….

The strawberries in the garden were ripe so we added a few to this treat, along with just a wee scoop of ice cream ….

These definitely need to be prepared ahead of time but the actual work is pretty easy.

4 egg whites
1 1/2 cups caster (or superfine) sugar
1/2 cup seedless raspberry jam
1 cup white sugar
1/4 cup unsalted butter, cubed
1/2 cup heavy cream
1 tsp fleur del sel
1 cup raspberries

Preheat oven to 200 F

MERINGUES:

In bowl of mixer, beat egg whites just until soft peaks form before increasing the speed, adding the superfine sugar slowly – a bit at a time – until fully incorporated. Whip at high speed until all the sugar dissolves and the mixture takes on a shiny, glossy look and nice stiff peaks form up.

Drop a teaspoon of the jam into a small section of the egg white mixture – swirl and and scoop a heaped tablespoon onto a parchment lined baking sheet. Repeat with another teaspoon of the jam, and a bit more of the meringue mixture until you have 12 meringues.

Bake in the centre of the oven for 2 1/2 hours. Leave in the oven to cool off and dry out overnight.

SALTED CARAMEL SAUCE

Heat white sugar in medium size, heavy bottom saucepan over medium-high heat. Use a wooden spoon, and stir a LOT while this is going on, and don’t worry – it will harden and clump as the sugar melts. DO NOT STIR ONCE THE SUGAR STARTS TO CARMELIZE. Quickly stir in the butter, cream and fleur del del (or a flaky sea salt). Let simmer for 1 minute, then transfer to a heatproof bowl and allow to cool completely.

This caramel sauce keeps really well in the fridge, and is amazing on pretty much anything.

ASSEMBLY

Place meringue on plate, lightly drizzle with salted caramel sauce and sprinkle with raspberries – perfection!

Orange Cranberry Muffins

These muffins are delicious, light, fresh and so so simple!

Orange Cranberry Muffins

Combine:
1 1/2 cups flour
3/4 cup white sugar
1/2 tsp salt
1 tsp baking soda
1 tsp baking powder
1/2 tsp cinnamon

Set aside – and in either a blender (or bullet) mix together;
1 orange, cut into segments (remove the zest first and set aside)
1/2 cup oil
1/2 cup milk
1 egg

Blend well, and then stir gently into dry ingredients with:

1/2 cup chopped dried cranberries
zest of 1 orange

Stir only until combined – then put into muffin tins.

Makes about 14-16 depending on size.

Bake at 400 for 12-15 minutes. Check them at 12 …

You could easily substitute the cranberries for dried blueberries or raisins – go ahead and experiment.

Banana Chocolate Chip Cake

This cake just keeps getting better – didn’t have quite enough banana, but I had made some apple sauce for baby Stella Rose, just enough to bump up the fruit to the 3 cups – so moist and delicious!

Chatty Kathy's avatarchattykathychatsandcooks

P1110037 P1100740 This was one of those favorite school box recipes. The kids loved it for years – and it was one of Meghan’s favorites so when she got married this year, I made it once again and it was just as popular.

1 cup butter

2 cups sugar

2 large eggs

1 tsp vanilla

3 cups bananas

3 cups flour

2 tsp baking powder

2 tsp baking soda

1 tsp cinnamon

1 cup sour cream

1/2 cup brown sugar

1 1/2 cup chocolate chips

Cream butter and sugar.  Add eggs, one at a time – beating well with each until the battery is light, creamy and fluffy.  Add vanilla and banana.  Mix until smooth. 

Combine flour, baking powder and baking soda.  Add to butter, egg, banana mixture alternately with the sour cream. 

Combine brown sugar and cinnamon

Spread half in a greased and floured 9×13 baking pan. Sprinkle half the brown sugar, cinnamon mixture over…

View original post 79 more words

Mexican Chocolate Snow Caps

These delicious little bites were waiting for Hayley, Sloan, Stella and I when we arrived at big sister Meghan’s house – you can’t have just one!  She made them as peppermint, and they are fabulous.  Gluten free too!


Image

8 oz semi sweet chocolate, chopped

2 tbsp butter

1 1/4 cup ground almonds

1/4 tsp salt

2 large eggs (room temperature)

1/2 cup white sugar

1 tsp ancho chile powder 

1/2 tsp cinnamon

Sifted icing sugar to roll cookies

In a heatproof bowl (over pan of gently simmering water) melt chocolate and butter, stirring until smooth.  Remove from heat.  Stir in almonds and salt.

in a mixing bowl, whisk eggs and sugar until pale and thickened, about 2 minutes.  Add in chocolate mixture and spices.  Fold until well blended.  Cover and put in the fridge until very firm – about 3 hours.

Preheat oven to 350.  Line 2 baking sheets with parchment paper.  Form dough into 1 1/4″ balls.  Roll balls in icing sugar.  

Place 2″ apart on trays.  Bake until puffed, starting to crack on top and the edges are firm – about 12 minutes.

So easy to switch these up and make them into Peppermint Caps – substitute the chile powder and cinnamon for 1 tsp peppermint extract.

Chocolate Butter Cream Icing

Pictured here on a moist delicious chocolate cake made with applesauce and buttermilk, it is a perfect (not too sweet) topping. Go ahead and mix it up though – instead of chocolate use raspberry jam for flavoring!

Chocolate Butter Cream Icing

1 cup salted butter

1/2 cup unsweetened cocoa powder

3 one ounce squares of melted semi sweet chocolate (make sure to cool it!)

1/2 tsp instant coffee

1-2 tbsp cream

3 – 3 3/4 cups icing sugar

Melt chocolate squares in microwave carefully, until they are smooth – stir and set asdie to cool

Whip the butter until light anf fluffy

Add cocoa powder, beating well

WHEN CHOCOLATE IS COOL, add to butter

Add instant coffe to 1 tbsp cream, then add to butter mixture

Now, add in enough icing sugar, 1 cup at a time until you have reached the consistency you are looking for – fabulous!

Chocolate Cake (your new favorite!)

This cake is enough on it’s own, so moist and delicious with the buttermilk and applesauce – with a little chocolate butter cream icing on top, but if you are feeling fancy, go ahead and dress it up!  I have photos of this cake a couple of ways – always a hit!

Moist Delicious Chocolate Cake
2 cups butter milk (If you don’t have any buttermilk use regular milk, adding 2 tsp vinegar per cup)

1 cup apple sauce

2/3 cup oil

2 eggs

2 tsp vanilla

Blend well and set aside

In a separate bowl sift together:

2 cups flour

2 cups sugar

1 cup cocoa powder

2 tsp baking soda

Gently stir dry ingredients into wet, do not overmix.  When combined, pour into prepared (greased and floured)  baking dish –  9 x 13 baking pan, or 2 layer cake rounds.

Bake at 350 for 35 minutes – check to make sure it is well set before removing from oven.

When I want to fancy this up and make a special occasion cake, I like to use a vanilla cream in between the layers, and also pipe it on top with fruit and a dusting of icing sugar. (Vanilla cream is featured on my Boston Cream Pie recipe) 

I was really fortunate to get this recipe from Gayle – our office works closely with hers, and as a treat, she dropped off this cake to us one day … we were all hooked!