Buttermilk Brined Roast Chicken

Chicken 2

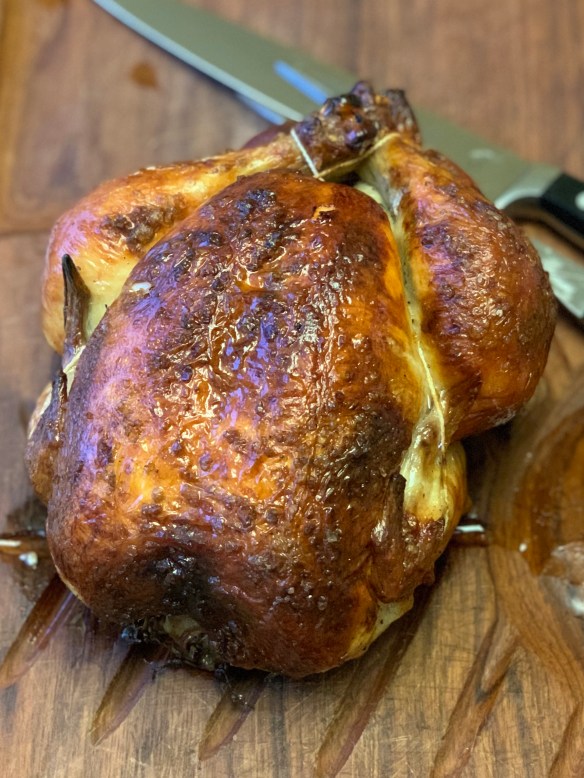
Ohhhh – the skin ….. for those crispy skin lovers this chicken is a dream!  Best part of all, is that it protects the most deliciously moist chicken underneath.

I’ve been roasting chickens for a LONG time …… I rarely use a recipe, but with the isolation going on around Covid 19 I thought it was time to branch out and try something new.  This appeared in one of my Food & Wine magazines and I was pretty excited to give it a try.  Naturally with the isolation and reduced shopping I had to improvise.  I had a few dried morels, so used those in place of the porcini, and only had fresh thyme, so used that in place of the rosemary.  I also didn’t have quite that much buttermilk left, but just topped up the container with water to cover the chicken.  I followed the recipe method exactly though, and even though it took longer to cook in my oven …. more like an hour and a half, the result was worth the wait.

  • Kosher salt
  • 11 garlic cloves—9 smashed, 
2 thinly sliced
  • 2 tablespoons sugar
  • 2 tablespoons chopped rosemary or 
5 Douglas fir sprigs
  • 1 bay leaf
  • 1/2 cup dried porcini mushrooms
  • 1 quart buttermilk
  • One 3 1/2-pound whole chicken
  • 1 teaspoon unsalted butter, softened
  • 2 tablespoons extra-virgin olive oil
Step 1

In a medium saucepan, combine 
1/4 cup of salt with the smashed garlic, the sugar, rosemary, bay leaf and 
2 cups of water. Bring to a simmer, stirring to dissolve the salt and sugar. 
Transfer the mixture to a very large bowl and stir in 2 cups of cold water.

Step 2

In a spice grinder, grind the mushrooms to a powder. (You should have about 
3 tablespoons.) Whisk the porcini powder and buttermilk into the salt mixture. Place the chicken in the buttermilk 
brine, cover with plastic wrap and refrigerate for at least 6 hours or up to 12 hours.

Step 3

Preheat the oven to 425°. Remove 
the chicken from the brine and pat dry; 
discard the brine. Tuck the wing 
tips behind the breasts, tie the legs with kitchen twine and set the chicken, 
breast side up, in a rack over a roasting pan. Season all over with salt.

Step 4

Roast the chicken for 15 minutes. Brush the butter all over the chicken, then return it to the oven and roast 
for about 45 minutes longer, until an instant-read thermometer inserted 
in the thickest part of the thigh registers 165°. Transfer to a cutting board and let rest for 15 minutes.

Step 5

Meanwhile, in a small skillet, simmer the olive oil with the sliced garlic over moderately high heat, stirring occasionally, until the garlic just starts to brown and the oil is hot and fragrant, about 
3 minutes. Remove the skillet from the heat and let cool.

Step 6

Carve the chicken and arrange the pieces on a platter. Brush with some of the garlic oil and serve right away, 
passing the remaining oil at the table.

Chicken 1

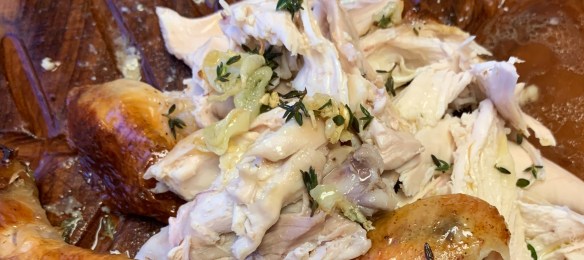
No fancy presentation here, just the most delectable chicken drizzled with the garlic oil.

I copied this right out of my Food & Wine magazine, so it’s only fair to also let you know where it comes from!

Chefs Evan and Sarah Rich of RT Rotisserie in San Francisco make the very best chicken. They use a buttermilk brine that includes umami powder, garlic and Douglas fir—a signature ingredient from their flagship restaurant, Rich Table, that they forage themselves. In this adaptation, the chicken is roasted in the oven, and the brine is made with buttermilk, dried porcini, garlic and rosemary, though if you have access to Douglas fir sprigs, feel free to use them.

chicken 3

Resting the chicken is so important.  Tent it loosely with foil and allow it to sit for at least 15 minutes, this allows the juices to remain in the chicken – it’s worth it, I promise.

The ingredients and method are entirely out of Food & Wine, but the photos are my own!

Braised Lamb Shanks

On a fall day the aroma of lamb shanks fills our home with warmth and goodness – a perfect Sunday dinner for the family….

Braised Lamb Shanks

Braised Lamb Shanks

4 lamb shanks
1/2 cup flour
1 tsp salt
1 tsp pepper
1/4 cup olive oil
2 onions, diced
4 cloves garlic
1 1/2 cup celery, diced
1 1/2 cup red wine (seriously – you must use a wine you would be happy to drink!!)
1 28 oz can tomatoes
2 carrots, diced
2 cups beef stock
2 tbsp tomato paste
2 bay leaves
2 tsp fresh thyme
1 sprig rosemary

Garnish: chopped fresh parsley

Mix flour with salt and pepper,
Dredge lamb shanks in flour mixture
Heat oil in large, heavy bottomed ovenproof pot – medium high heat
Add lamb shanks and brown on all sides – set aside when done
Turn down to medium heat and add onions, celery and garlic. Saute until soft and translucent
Add wine to pan and stir up the bits stuck to the bottom of the pan (little flavour packets!)
Add tomatoes, carrots, beef stock, tomato paste, bay leaves and herbs. Stir well
Return browned lamb shanks to pot, covering them with the liquid
Braise – covered – in a 325 oven for at least 2 1/2 hours – maybe 3, turning the shanks half way. You can tell the shanks are done when the meat is about to fall off the bone.

Remove meat and herbs from pot – set aside – use an immersion blender to puree the of the sauce into a smooth gravy.

Set lamb shanks into a serving dish – pour gravy over and garnish with fresh parsley.

Mustard Crusted Prime Rib with Roasted Onions

I love a good prime rib roast – such a treat.  Mustard and beef are perfect together, add a little horseradish in there and the house will smell amazing.

Sunday dinner treat - the house smells amazing!

Sunday dinner treat – the house smells amazing!


For about a 5 pound prime rib roast:

2 generous heaped tablespoons Dijon mustard

1 generous heaped tablespoon horseradish

2 cloves minced garlic

1 tsp kosher salt

1 tsp freshly cracked black pepper

1 tbsp. mustard seeds (lightly toasted first – and cracked)

finely minced parsley

blend all this together with 1 tbsp. good quality olive oil

Season prime rib with salt and pepper, then rub the mustard all over the surfaces of the rib.  Allow to rest on the counter to bring the roast to room temperature before roasting.


Quarter 4 medium size onions, and scatter around the roast – drizzle with olive oil and any of the remaining mustard mixture.

Gently massaged with mustard horseradish rub and ready for the oven.

Gently massaged with mustard horseradish rub and ready for the oven.

Preheat oven to 450 degrees.  Place roast in oven and roast for 20 minutes – then turn oven down to 350 and continue roasting – anywhere from 1-2 1/2 more hours depending on the size of your prime rib (you can also use this method with any other good quality cut of beef that does not require low slow roasting). Right about the same time the onions should be tender, sweet and so delicious.

Please make sure to use your meat thermometer – there is no point in overcooking a beautiful cut of beef!  (for medium rare it should take about 20-25 min per pound)

Yorkshire Pudding

P1110046

After trying a variety of different Yorkshire Pudding recipes, this old fashioned one became my favorite.  It always turns out, and is very simple, so go ahead and give it a try.

14 TBSP flour

1/2 cup whole milk

1/2 cup water

2 eggs

1/2 tsp salt

Have all ingredients sitting on the counter for a few hours before you begin – if everything is at room temperature first it will make them puff up beautifully!

Preheat oven to 375 – put 1 tsp of canola oil into each of the muffin tins, and set pan in oven to heat while you mix the ingredients.

Lightly beat eggs, add milk and water.  Sift flour and salt.  Beat into egg mixture, beating well until smooth – NO lumps …

By this time your muffin tin will be hot and almost at the smoking point and your oven preheated.

Remove muffin tin carefully from oven and set on a safe – solid – heat proof surface.  Carefully (but quickly) add 1/4 cup of mixture to each muffin tin.

Return to oven and cook for about 40-45 minutes.  DO NOT OPEN YOUR OVEN.

They will puff up – turn golden, and be a perfect complement to most dinners, but especially to everybody’s favorite Sunday dinner – roast beef.

When they are cooked, I like to just lift them out slightly and rotate them so they are still in the muffin tins resting, but on an angle so air is getting at all sides – this keeps them nice and crisp.