Unknown's avatar

About Chatty Kathy

Living in the beautiful Okanagan Valley in BC, we have an abundance of fresh food to cook with, and believe me, I do! We have 5 daughters, 3 grand daughters, and lots of honorary daughters ...I love cooking for family and friends and they all keep me busy in the kitchen. Here is hoping that this blog will allow my entire family to access those recipes they ask for, and maybe even enjoy a few travel photos!

Mexican Pickled Vegetables (Escabeche)

Escabeche 1

Today’s version included potato slices, onions, carrots, cauliflower and zucchini.

Have you ever noticed those bowls of pickled vegetables at every taco stand you’ve been to in Mexico?  They are easy to make at home, fantastic to have in the fridge and add a flavourful zip to any side dish (or pizza!).  This recipe is perfect, feel free to use whatever vegetables you have on hand ….. I’d skip broccoli though as I have found that it doesn’t keep either it’s bright colour or crunch.

Ingredients

  • 8-10 jalapenos
  • 3 carrots
  • 1 onion
  • 4-6 cloves of garlic
  • olive oil
  • 1.5 cups white vinegar
  • 1 cup water
  • 1 Tablespoon salt (Kosher or sea salt)
  • 1/2 teaspoon oregano (use Mexican if you have it)
  • 1/2 teaspoon cumin seeds
  • 8-10 cracked peppercorns
  • 1 bay leaf

Instructions

  • Give the jalapenos a rinse and then cut into 1/4 inch slices.
  • Peel the carrots and cut into 1/4 inch slices
  • Peel and quarter the onion, chopping into thin slices
  • Peel and roughly chop the garlic
  • Heat a dollop of oil in a medium sized sauce pan on medium-high heat
  • Saute the onion and garlic for a few minutes
  • Add the jalapenos, carrots and the spices: ½ teaspoon oregano, ½ teaspoon cumin seeds, 8-10 black peppercorns, 1 bay leaf.
  • Briefly saute and then add 1.5 cups white vinegar, 1 cup water, and 1 Tablespoon sea salt
  • Bring to a boil and then reduce heat to a simmer
  • Simmer for 10-15 minutes or until the jalapenos turn army green
  • Fill each jar with the veggies and top with the brine
  • Store in an airtight container in the fridge
  • The jalapenos and carrots will have most of their flavor after a few hours of resting in the brine

I’ve tried a few recipes now from a blog …. “Mexican please”, and they are all great!  This is no exception.  I don’t use quite that many jalapeños (usually 2-3 large ones) and I also put in whatever vegetables I have on hand, cauliflower, zucchini, radish etc.  Just make sure to not overcook the more delicate vegetables.  For items like cauliflower and zucchini I only add them to the cooking liquid for a couple of minutes.  Be mindful of the amount of liquid you have and make sure you have enough to cover the vegetables once you get them into your pickling jars.  It is okay to top up with a bit more vinegar or water if need be.

Japanese Nabe (Hot Pot)

How to describe this?  It’s really not a recipe – just ingredients and an idea of how to put it all together.  Our friend Tom made this the other day and I was immediately hooked.  How can something that just looks so simple end up feeling immensely satisfying and ever so delicious??

Nabe 1

Looks like a pile in a pot ….. right?  But, oh so good!  I could eat this on a weekly basis!


The base of this broth is as simple as the kombu you create it with.  Add about a 6 inch piece to 8 cups of water, let it sit for about 15-30 minutes, and then bring to a boil and allow to simmer until the kombu softens.  Some recipes will say to remove it at this point, but I didn’t, and we ate it – a bit chewy but still good!

Prepare all your vegetables while the kombu softens.  and broth simmers.

Keep the vegetables in groups according to how long it takes them to cook.  i.e., cabbage takes longer than snap peas!

I used:

  • savoy cabbage
  • carrots
  • sweet peppers
  • snap peas
  • bok choy
  • red onion
  • asparagus
  • bean sprouts

For a protein I used chicken breast and tofu.  The sky is the limit here, you can easily use whatever you like – just be aware of how long it will take to cook it, and put it in at the right time.  The last thing you want is soggy veg.

Nabe 3

Prepped and ready to go.

Nabe 2

If you have a pint sized helper like Stella, she will add the vegetables in the right order and keep everything moving.  That is teriyaki chicken beside her, and it was fantastic too.

For serving you need:

  • Ponzu (citrus soy sauce)
  • chili oil
  • toasted sesame seeds
  • thinly sliced green onions
  • cilantro, roughly chopped
  • Goma Shabu Sesame Sauce (I don’t have that one …yet)

Prepare Udon noodles while the sauce simmers.

The main objective here is not calling it a noodle bowl.  They finish off the show.  If you have individual mini bowls then each person can have their little assortment of the above condiments and sauces.  Traditionally you would ladle the veg & protein into your bowl, accepting the small bit of broth that comes with it.  You can either dress your bowl with the above, or dredge each bite in the accompaniments – your choice.  The pure joy in this comes from adding your finishing touches so everybody has it just they way they like.  When everybody is finished, then you add the noodles to the hot broth.  Once again, traditionally this would be on the table with a heating vessel to keep everything hot but I found it was warm enough to stir in the cooked noodles once we had finished eating the first “course”.  Those noodles are such a delightful way to finish slurping up your meal.

Shopping List:

  • assortment of veg
  • protein of choice
  • udon noodles (I like frozen best, if you can’t get fresh – over dried)
  • condiment toppings …… ponzu, sesame sauce, chili oil, sesame seeds, cilantro & green onion
  • kombu
Nabe 5

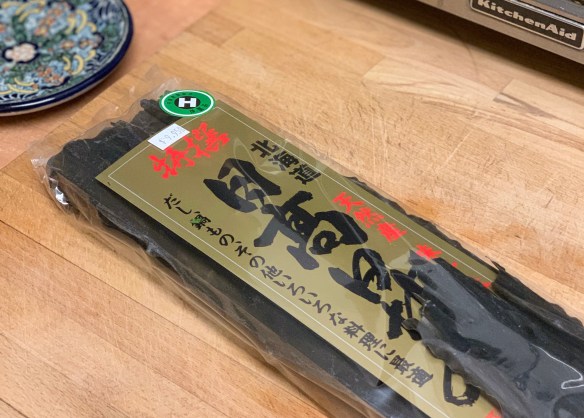
This is the dried kombu I found – you only need about 1/2 of one piece to go with 8 cups of water.


Tom’s Teriyaki Chicken

teriyaki chicken 6

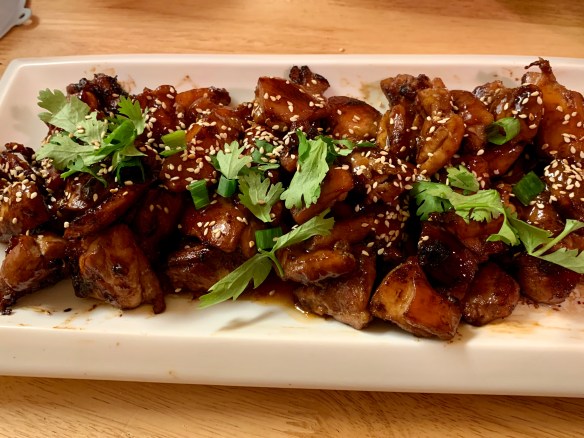
This teriyaki chicken hits all the notes, crispy bits of carmelized chicken, sweet and salty,  tender and juicy – give it a try, you will love it.

Thanks go to our friend Tom for this simple teriyaki marinade that is as perfect as it is easy.  Works well with any protein, just to make it even simpler for you.

Marinade:

  • 1 cup soy sauce (reduced sodium)
  • 1/4-1/3 cup white sugar
  • 1 golf ball size knob of ginger, grated or finely minced.

Combine and stir until sugar has dissolved.

2 pounds of bonelesss, skinless chicken thighs – cut into bite size pieces

Garnish:

  • green onions, thinly sliced
  • sesame seeds, toasted until golden brown

Marinate the chicken in the teriyaki sauce for at least an hour and up to overnight.  Remove from marinade and place in hot saute pan.  Do not overcrowd the pan or the chicken will just steam rather than get nice crusty bits of caramelization.  Allow to cook, without disturbing, until you see the colour start to change on top of the chicken and the chicken releases easily from the pan to turn over.

Serve with rice and your favourite greens.

Teriyaki chicken 1

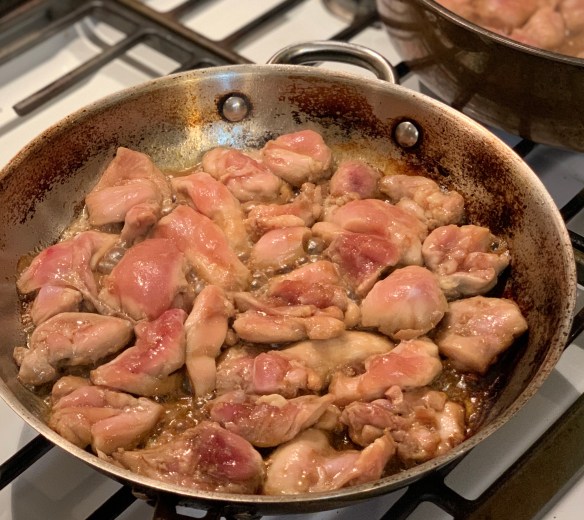
See the marinade bubbling up beneath the chicken?  That’s going to get all glossy and give the chicken nice little bits of delicious caramelization – don’t disturb it while this is happening.

teriyaki chicken 2

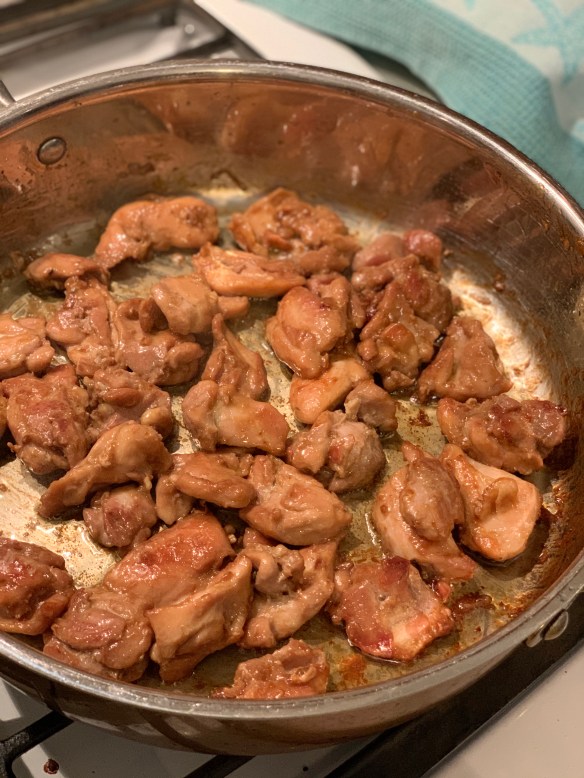
You can see some of the browned bits – that is pure gold.

Teriyaki 3

If you’d like a little extra to drizzle over, make a little sauce without the ginger and allow it to thicken.  Adds a fantastic bit of sweet and salty flavour.

Drizzle:

  • 1 cup water
  • 1/2 cup soya sauce
  • 1/4 cup white sugar
  • 1 tbsp corn starch

Combine the water, soya sauce and sugar, stir until sugar has dissolved.  Add in the corn starch and cook over medium heat until sauce has come to a boil and allow it to reduce slightly.  (Corn starch as a thickener has to boil or you will still taste the corn starch!)

Teriyaki 2

Tonight’s dish was a teriyaki bowl – utilizing a combination of chicken thigh and chicken breast with a little shredded carrot for crunch and cilantro for brightness.

Realistically you could use this recipe for any protein you like, or make it with a large assortment of vegetables for a vegetarian dish.  The teriyaki sauce is the star!

Creamy Cucumber Herb Salad Dressing

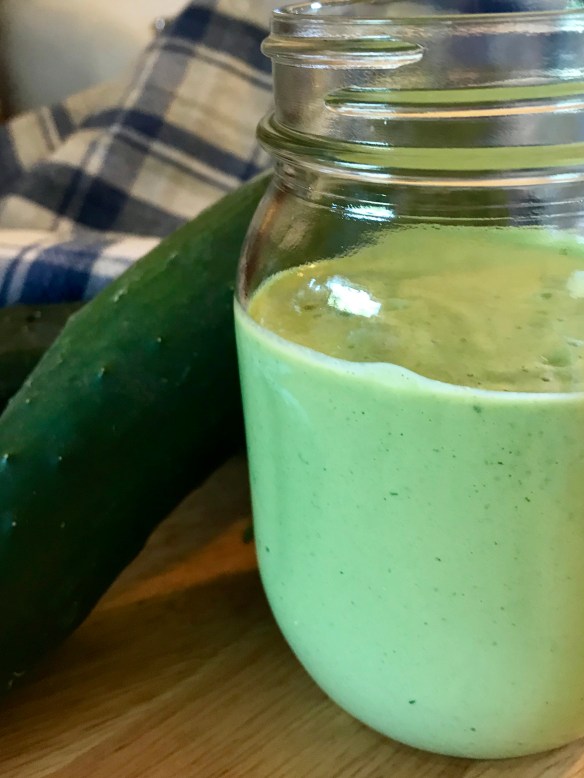
Creamy Cucumber dressing 2

We used to love going to a small restaurant in Mexico City, no name on the building and just a few wooden chairs and tables on the sidewalk … but oh … the food!  For 99 pesos we received an amazing set menu with four courses and it was always fantastic.  The chef moved on … (we spotted him at another place finally).  If I could remember the name of his new spot I’d definitely give you a recommendation to try it!  Anyhow … what was I saying … oh of course … this is a salad dressing recipe.  He made this incredible creamy cucumber salad dressing that was divine.  I asked him the recipe and he gave me the basic idea but claimed the key was the sea salt he used.  We walked miles looking for the store he told us to go to, without success.  Eventually, on another trip we found the salt  (from Cuyutlan), and have continued to pick it up every time we go to Mexico City!  I’ve finally hit the right ingredients here and this is delicious.

  • 1 cup chopped cucumber
  • 3/4 cup plain greek yogurt
  • 1 tbsp mayonnaise
  • 1 tbsp freshly squeezed lemon juice
  • handful of fresh herbs (I used basil, parsley and oregano)
  • 1 garlic scape
  • 1 tsp sea salt
  • 1/4 tsp white pepper

Roughly chop the herbs and cucumber and place in blender, then add the rest of the ingredients.  Give it a really good whiz until smooth and creamy.  Depending on how juicy your cucumber is, you can thin it out a bit with milk or buttermilk if needed.

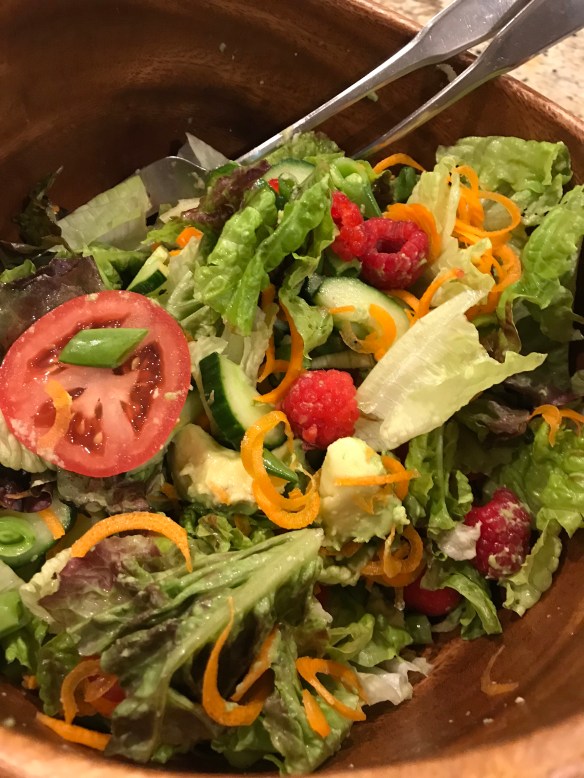
Tossed Salad

This is delicious tossed with your favourite salad, roasted and room temperature vegetables or as a dipping sauce.

Swedish Meatballs

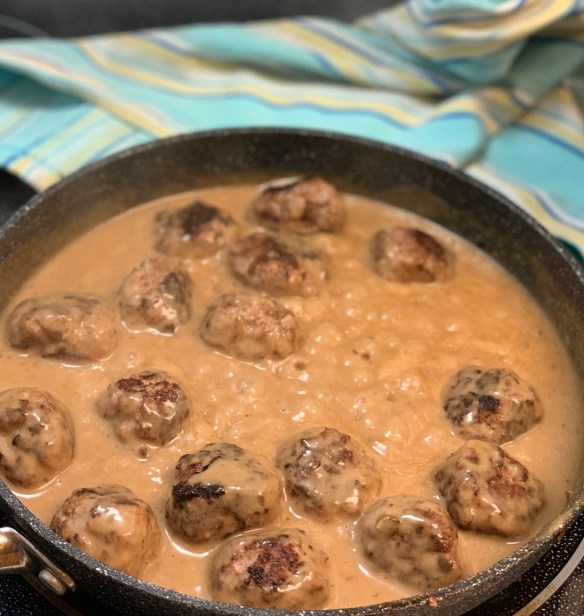
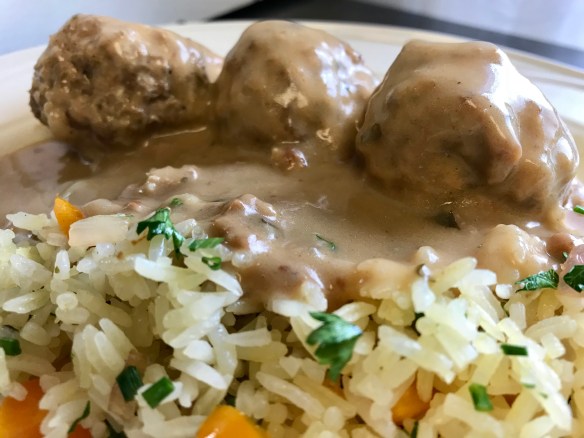
Oh man, these meatballs are just the ticket for a cool evening – they are so tender and moist – like maybe the best meatballs ever??

Swedish meatballs 2

These meatballs are moist, tender and so delicious – you won’t miss Ikea at all.

Meatballs

  • 1/2 cup panko crumbs
  • 2 tbsp butter unsalted
  • 1 medium onion chopped
  • 1 lb ground pork
  • 1 lb ground beef
  • 2 egg yolks
  • 1/2 tsp salt or to taste
  • 1/2 tsp pepper or to taste
  • 1/4 tsp ground nutmeg
  • 1/4 tsp ground allspice
  • vegetable oil for frying meatballs

Gravy

  • 6 tbsp butter unsalted
  • 1/3 cup all-purpose flour
  • 4 cups chicken broth low sodium, or beef broth
  • 1 tsp Worcestershire sauce
  • 1/4 tsp salt or to taste
  • 1/4 tsp pepper or to taste
  • 3/4 cup sour cream
  • Melt the butter in a skillet, then add the onions and a bit of salt. Cook the onions until soft, about 3 minutes.
  • Add the ground pork, ground beef, onions, egg yolks, salt, pepper, nutmeg and allspice to the bowl with the panko. Mix the meat mixture well using your clean hands. Shape the meat into 1 inch meatballs.
  • In a skillet heat some vegetable oil. Add the meatballs and fry until golden all around, about 7 minutes, but not cooked all the way through. Repeat with all meatballs.
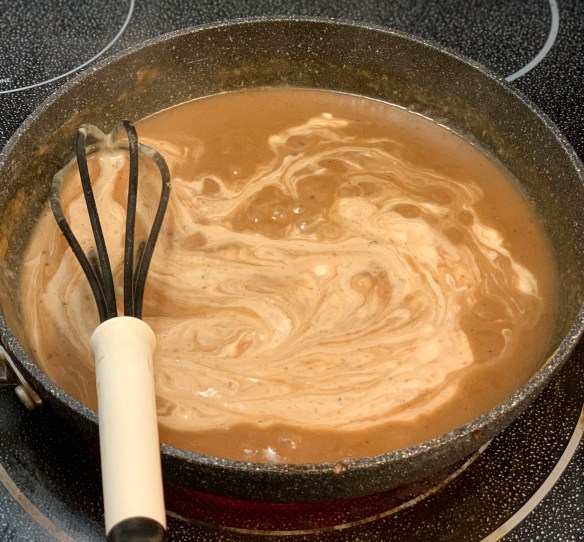
  • To make the gravy melt the butter in a clean skillet. Add the flour to the pan and whisk well. Add the broth with the Worcestershire sauce and continue whisking. Season with salt and pepper and other spices if preferred. As the flour cooks the gravy should thicken. Whisk in the sour cream. Bring the gravy to a boil then add the meatballs to it and cook for another 15 to 20 minutes, stirring occasionally to ensure meatballs don’t stick to bottom of pan.
  • Garnish with parsley. Serve warm over mashed potatoes, buttered noodles or rice.
swedish meatballs 4

Brown on all sides, but don’t cook all the way through, let the gravy simmer do that job.

Swedish meatballs 3

Gently stir in the sour cream and then return the meatballs to the sauce.

swedish meatballs 5

Simmer the meatballs gently until cooked through, then garnish with parsley.

Swedish meatballs 1


Pumpkin Donuts with Maple Glaze

Need a quick dessert?  Not tired of pumpkin yet?  Here you go – ready for the oven in about 10 minutes, and the glaze just takes minutes.  Not only will the house smell amazing, dessert will be awesome!

Pumpkin donuts 1

Spend a few dollars and buy yourself a silicone donut mold, I’ve had so much fun with it!

Doughnuts:

  • 2 cups all-purpose flour
  • 2 teaspoons pumpkin pie spice
  • 2 teaspoons baking powder
  • 1 teaspoon kosher salt
  • One 15-ounce can pumpkin puree
  • 1 1/2 cups sugar
  • 1/3 cup vegetable oil
  • 4 tablespoons (1/2 stick) unsalted butter, melted
  • 1 teaspoon vanilla extract
  • 3 large eggs
  1. For the doughnuts: Preheat the oven to 350 degrees F.
  2. Whisk the flour, pumpkin pie spice, baking powder and salt together in a medium bowl.
  3. Beat the pumpkin puree, sugar, vegetable oil, butter, vanilla and eggs and together in another large bowl until smooth.
  4. Add the flour mixture to the pumpkin mixture and beat until just combined.
  5. Fill three 6-cup nonstick doughnut pans with the batter so that each mold is almost full. Smooth the tops with a moistened finger.  (I always put my batter into a ziplock bag and pipe it into the molds, so much easier, and way less messy)
  6. Bake the doughnuts until a wooden pick inserted into the center comes out clean, about 15 minutes. Invert the doughnuts onto a cooling rack.

(I never seem to have pumpkin pie spice, so you can easily mix up 1 tsp cinnamon, 1/2 tsp ground ginger and 1/4 tsp each of cloves and freshly ground nutmeg to equal the 2 tsp)

pumpkin donuts 3

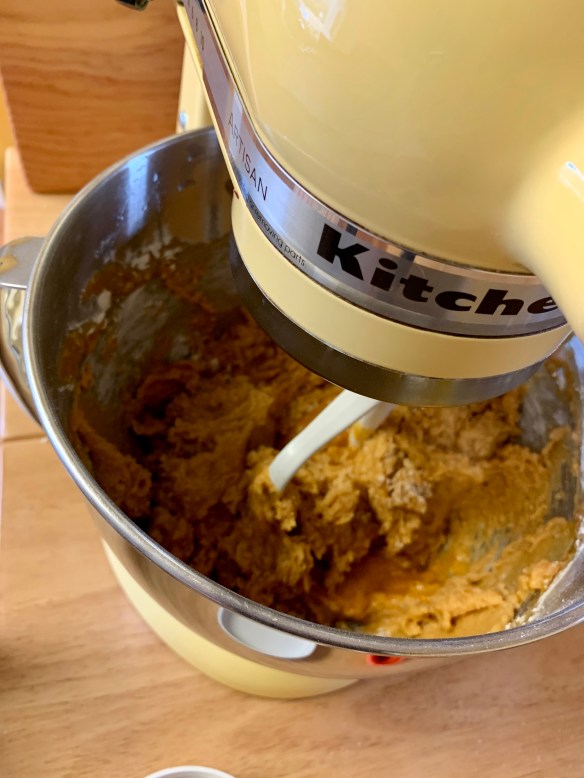
Dry ingredients whisked, and the wet stuff in my stand mixer, but you could easily do it all by hand, it only takes a few minutes to come together.

pumpkin donuts 2

pumpkin donuts 4

Once you get it all together, don’t overtax!  Just enough to bring it all together.


Glaze:

  • 1/4 cup unsalted butter
  • 1/2 cup pure maple syrup
  • 1 cup sifted confectioners’ sugar (this is important – gets rid of lumps!)
  • optional: 1/2 teaspoon maple extract

Heat butter and maple syrup in small sauce pan, just until butter is melted.  Quickly whisk in the sifted confectioners’ (icing) sugar until smooth.

It is best if you make this before the donuts as that allows the glaze to thicken slightly.

Dip the slightly cooled donuts in the glaze and allow to cool.  Best served that day, but no one is going to complain about a day old donut!  This makes enough to generously DOUBLE DIP about 12 donuts.  Seriously, go for the double dip, that maple glaze is killer good and courtesy of Sally’s Baking Addiction – check out her blog, all her recipes are great.

The donuts however, come from Valerie Bertinelli’s show and I’ve never had a fail on one of her recipes – they are so good and usually pretty quick to make.

Thai Halibut Curry

Thai halibut curry 4

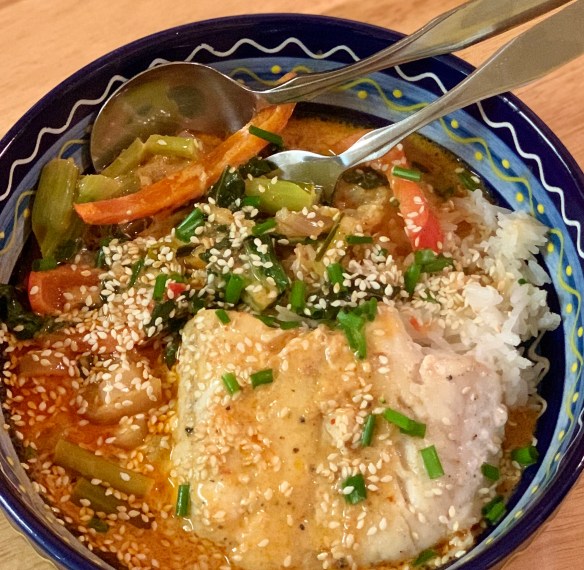
I made this today with Penang curry paste, which is my current fave, but it would be equally delicious with your fave curry paste.

This is one of the easiest, quickest curries I make.  Amazingly, it is also one of the tastiest!  We make it with halibut, but you could just as easily make it a vegetarian dinner or cook any protein you like to make the complete meal.

  • 6 four ounce halibut pieces
  • peanut oil (or any neutral oil)
  • 1 can coconut milk
  • 1/2 cup sliced shallot
  • 1 tsp minced garlic
  • 1 tsp minced ginger
  • 1 tbsp (heaped) curry paste
  • 1 tbsp roasted red chili sauce
  • 2 tbsp brown sugar
  • 2 green onions, thinly sliced
  • juice of 1 fresh lime
  • 2 tbsp (dry) white wine
  • salt & pepper to taste

Season halibut with salt and pepper.  Fry in hot oil on each side for 2 minutes each … then set aside.

In the same pan, saute shallot, garlic, ginger, curry paste and chili paste.  Cook for one minute just to allow the flavours to wake up.  Add one can coconut milk, brown sugar, lime juice, and simmer until it has reduced by half.  Depending on how fresh your curry paste is, you may need more paste.  I also find that curry paste varies a lot by brand so please make sure you taste it to be sure you have enough curry flavour.

Taste …. does it need salt and pepper?  If so, add to taste.

Now is time to add the vegetables if you are going to make this a one dish meal:

I’ve made this in so many ways:

  • on a sheet pan, roast cauliflower, patty pan squash &  chicken thigh pieces
  • on a saute pan, cook shrimp just until pink and cooked through
  • saute bits of pork tenderloin with snap peas and peppers
  • saute tofu and mushrooms in garlic butter

Or simply add any vegetable you like:

  • bok choy
  • broccoli
  • red pepper
  • snap peas

No matter how you do it, this curry sauce enhances anything you come up with!  Serve with jasmine rice, your protein of choice and this amazingly delicious curry poured over top.

Garnish with slivered green onions and toasted sesame seeds.

Thai halibut curry

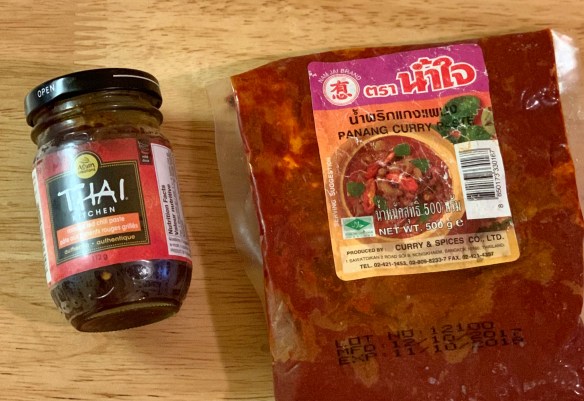
The brand of curry is my favourite …. it is the same as the packs I brought home from Thailand, and I always look for it.  The “Thai Kitchen” chili paste is the best mistake I’ve made ….. didn’t have reading glasses on and thought I was buying red curry paste …. I love it, and add it to so many curry dishes, it just adds so much punch.

thai halibut curry 2

Throw in whatever vegetables you like. Today I used bok choy and red pepper from Farmers Market, and the last little broccoli floret I had in the fridge.

Thai halibut curry 3

Sear halibut on both sides.  (Or just use whatever protein you have on hand)  I like that this curry dish is poured over the halibut, keeps the curry fresher tasting somehow.


Lemon Artichoke Pasta


Lemon Artichoke Pasta

Have you ever seen artichokes growing in the field?  Well, maybe it isn’t a big deal to Californian’s……  It took a few miles before we realized that was what we were seeing but ever since we cooked some fresh artichokes (Thanks Meghan)  I can’t stop adding them to everything. This quick and easy pasta dish is bright and refreshing – dinner ready in 20 minutes!

  • 2-1/2 teaspoons salt, divided
  • 1 pack angel hair/capellini pasta
  • 3 tablespoons butter
  • 1/2 cup thinly sliced shallots
  • 1 can (14 ounces) water-packed quartered artichoke hearts, well drained
  • 1/2 cup minced sun dried tomatoes
  • 2 garlic cloves, minced
  • 1 cup crumbled feta cheese
  • 1/2 cup sliced kalamata olives
  • 2 cups fresh spinach
  • 2 tablespoons minced fresh parsley
  • 1 tablespoon grated lemon zest
  • 2 to 3 tablespoons lemon juice
  • 1/3 cup shaved Parmesan cheese
  • freshly ground black pepper

This recipe makes enough to serve 2-4 people.  4 as a side, 2 as a main meal

Angel hair pasta cooks very quickly (4 minutes) to prepare the artichoke sauce first and allow it to sit while you cook the pasta.

Saute the shallots in the melted butter, adding the artichoke hearts, sun dried tomatoes, and garlic as soon as the onions have softened.  When heated through add the olives, parsley, lemon zest and lemon juice.  Set aside while the pasta cooks.

As soon as the pasta is cooked, pull it out of the boiling water and drop it into the lemon artichoke sauce, allowing some of the pasta water to drip into the pan also.  Stir in the spinach and let the warm pasta wilt the spinach.  Add feta and serve with fresh ground pepper and parmesan shavings to garnish.


Profiterole Cream Puffs

Cream Puffs 1

I love bite sized desserts!  So great to be able to get a taste of each, especially after a big dinner.  These mini cream puffs, and mini pumpkin cheesecake bites finished off Thanksgiving dinner just the right way.  Enjoy!

  • 1/2 cup water
  • 1/2 stick (1/4 cup) unsalted butter
  • 1/4 tsp salt
  • 1/2 cup all purpose flour
  • 2 eggs
  • pinch of ground cinnamon

Preheat oven to 400

Line a baking sheet with parchment paper

Profiteroles are actually quite simple, very few ingredients and easy enough to prepare … but the technique is important.

In a small sauce pan bring the water, butter and salt to a boil.  Reduce the heat and add the flour all at once …quickly start vigorously with a wooden spoon until it pulls away from the side of the pan, has a slightly shiny sheen to it and has formed a ball.  Turn it into a mixing bowl and beat in the eggs, one at a time.  This is the important part.  Beat that first egg in until it has fully incorporated.  You can either beat it in with your wooden spoon or if you don’t feel energetic enough, use a hand held beater.  When the batter is smooth, start on the second egg.  Beat again (vigorously) and stir in the bit of cinnamon.

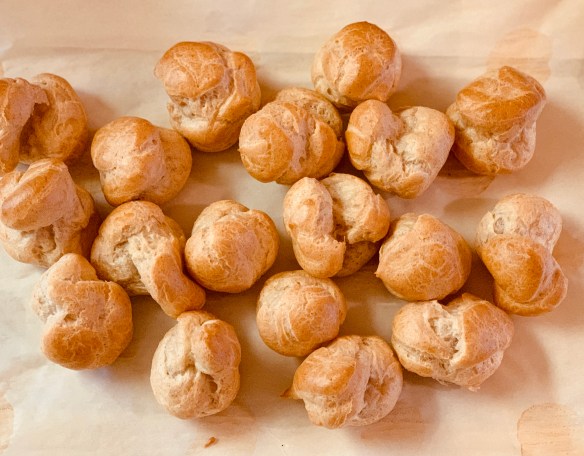
Transfer the mixture to a pastry bag or ziplock.  Pipe onto prepared baking sheet.  Today I made them little mini’s to fill with cream and top with chocolate.  This mixture will make about 16 mini’s, but you can make them as big as you like.  Make sure you leave a fair bit of space around them as they do grow.

Bake for 20-25 minutes, rotating halfway through.

Once these have cooked and are completely cool they are ready for filling.  I ended up putting my custard into a piping bag and using a long tip to fill them before topping with chocolate.

Today I used my creamy custard to fill them, and then topped with a chocolate ganache.  What a hit!

You could also split them in half and serve with ice cream and warm chocolate fudge sauce …..

CREAMY CUSTARD FILLING 

  • 2 cups milk
  • 1/4 tsp salt
  • 1/4 cup sugar
  • 2 egg yolks
  • 3 tbsp cornstarch

In heavy saucepan, whisk all ingredients until incorporated very well then cook over medium-low heat until mixture thickens and boils, about 20 minutes.  Boil 1 minute stirring frequently.  Remove from heat and stir in 1 tsp vanilla.

I have also done this part in the microwave – stir every 2 minutes until mixture has thickened well.  Make sure you use a large bowl as the mixture will raise and lower several times while it cooks.

Cover right on the surface of the pudding with saran until cool, but not set, about 30 minutes.

CHOCOLATE ICING

  • 2 squares semisweet chocolate
  • 1 tbsp butter or margarine
  • 1/2 cup icing sugar
  • 2-3 tbsp milk

In heavy saucepan over low heat, melt chocolate and butter.  Remove saucepan from heat.  With wire whisk beat in 1/2 cup icing sugar and 2-3 tbsp milk until smooth and easy spreading consistency.

Cream Puffs 4

I ended up with some pretty funny shapes because I went back and added a bit more to each “blob” so I’d recommend only piping once for each profiterole.

Cream Puffs 2

Dry, and ready for filling …. see what I mean about the funny shapes?  ha ha

Cream Puffs 3

Dr Pepper Glazed Ham

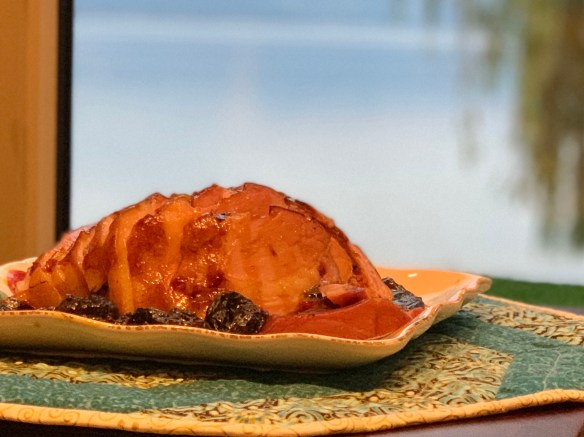
Dr Pepper ham

Got family (or friends that are family) coming for a festive dinner?  Or just a Sunday cook up?  This ham is always moist, juicy and so delicious.  As much as the kids love chicken, when this is on the menu also, they return for more ham!

Ingredients

  • One 10-pound, bone-in smoked ham, skin removed and fat trimmed to 1/4 inch
  • 3 cups Dr Pepper (not diet)
  • 2 cups water
  • 1/2 cup pitted prunes
  • 1/3 cup yellow mustard
  • 1/3 cup light brown sugar
  • 2 tablespoons cider vinegar

1 1/2 teaspoons cornstarch mixed with 2 tablespoons of water

How to Make It

Step 1

Preheat the oven to 325° and position a rack in the bottom third of the oven. Set the smoked ham in a large roasting pan. Score a 1/4-inch-deep crosshatch pattern into the fat at 2-inch intervals. Pour 2 cups of the Dr Pepper and the 2 cups of water into the pan and roast the ham for about 2 1/2 hours, until an instant-read thermometer inserted in the thickest part of the ham registers 120°. Increase the oven temperature to 425°.

Step 2

Meanwhile, in a medium saucepan, simmer the prunes in the remaining 1 cup of Dr Pepper until they are plump and the liquid is slightly reduced, about 10 minutes. Using a slotted spoon, transfer the prunes to a small bowl and cover with plastic wrap. Whisk the mustard, brown sugar and vinegar into the liquid in the saucepan and boil until very thick and syrupy, about 5 minutes.

Step 3

Drizzle the syrupy glaze over the ham and roast until glossy, 20 minutes. Carefully transfer the ham to a cutting board.

Step 4

Pour the pan juices into the saucepan and spoon off the fat. Boil the sauce until reduced to 2 cups, 10 minutes. Whisk in the cornstarch slurry and the prunes and bring to a boil. Simmer the sauce until thickened, 2 minutes. Slice the ham and serve with the Dr Pepper sauce.

Note:  I have a mustard sauce I’ve been making for years, which I also make and combine it with this sauce …. that is the key to having lots of juicy, tasty sauce to drizzle over.

Kathy’s Mustard Sauce:

  1. 1/3 cup white vinegar
  2. 1/3 cup white sugar
  3. 1 tbsp dry mustard powder
  4. 1 tbsp butter
  5. 1 beaten egg, set aside.

In small sauce pan bring vinegar, sugar, mustard and butter to a boil.  Remove from heat and EVER SO SLOWLY drizzle into the beaten egg, whisking as you go.  When it is all incorporated, return to the heat and stir as it thickens.  Remove from heat, and stir into the Dr. Pepper sauce.

Dr Pepper ham 2

Another bonus to this recipe?  Today we had a smaller group so I bought a double smoked boneless ham and cooked it at 275 until the internal temperature was 120.  Carried on with the rest of the recipe, and it was perfect.

Years ago Rob and Mandy gave us a subscription for Food and Wine Magazine … this recipe is from those issues, and I know the ham is a fave in their home too!