Chicken Pot Pie

Chicken Pot Pie 2

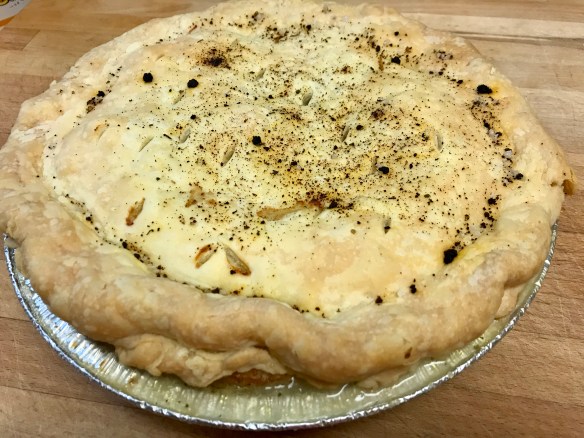
See the sauce bubbling out the side?  That’s what you are looking for.  Crust is golden, now just try and wait while it sets up a bit …. no judgement if you can’t!  I promise it is delicious.

Fall ….. it just makes me want to bake, and roast, and toast.  This chicken pot pie recipe is a staple around here.  You can make it as easy as “pie” by purchasing pre-made pastry shells or make your own – either way, this pie is flaky, tender and bursting with bites of chicken and vegetable goodness.  Serve with a tossed salad and dinner is ready.

Preheat oven to 400

  • 2 pastry shells
  • 2 cups cooked chicken (use leftovers or a rotisserie chicken for simplicity)
  • olive oil
  • 1 small onion
  • 1 garlic clove
  • 2 tbsp flour
  • 1/4 tsp pepper
  • 1 tsp salt
  • 2 cups chicken stock
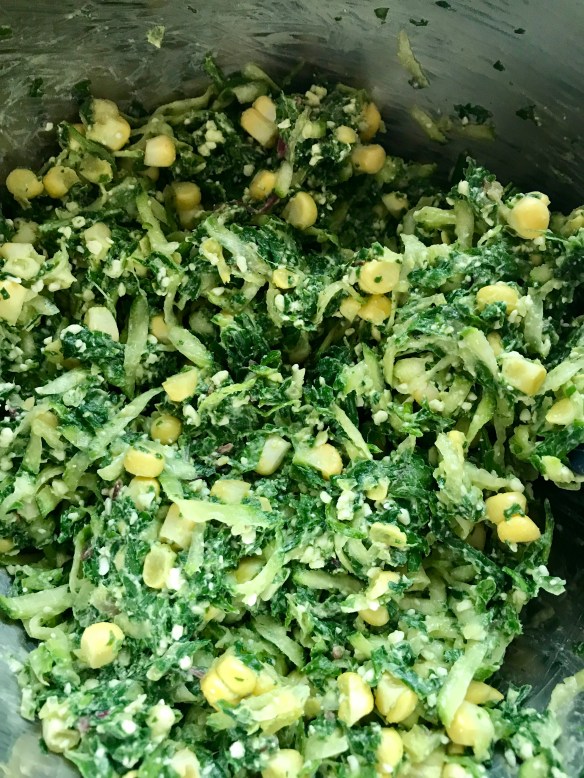
  • diced vegetables – your choice and about 2 cups worth of:
  • sweet peppers
  • celery
  • carrots
  • peas (not in my house, neither of us like cooked peas)
  • zucchini
  • corn
  • green beans
  • a generous handful of herbs, I like thyme, basil, oregano and parsley
  • salt and pepper

Brush one pie shell with beaten egg white, sprinkle with sea salt and bake at 400 for 8-10 minutes, just until starting to turn golden brown.  Remove from oven and allow to cool.

pie shell

I find if you pre-bake the bottom crust, brushed with beaten egg white, the pastry stays flaky.  Sprinkle a little sea salt on for that extra bit of crunch.  I think you can see here that my bottom crust was in the freezer, thank you Tenderflake pastry!

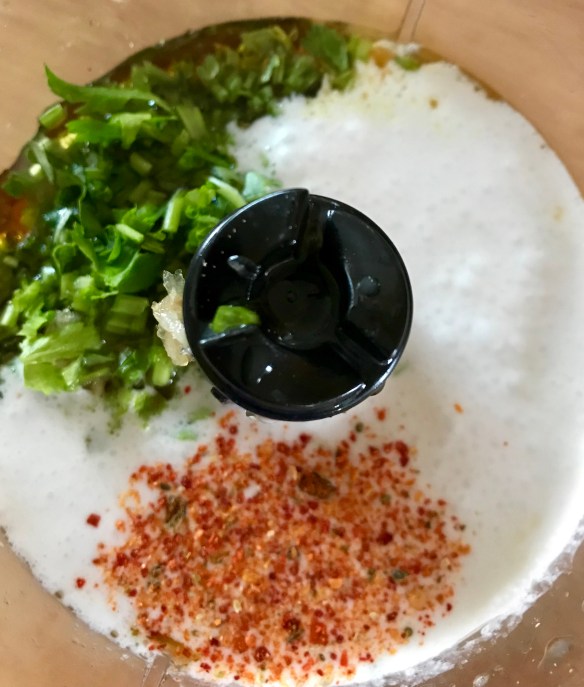
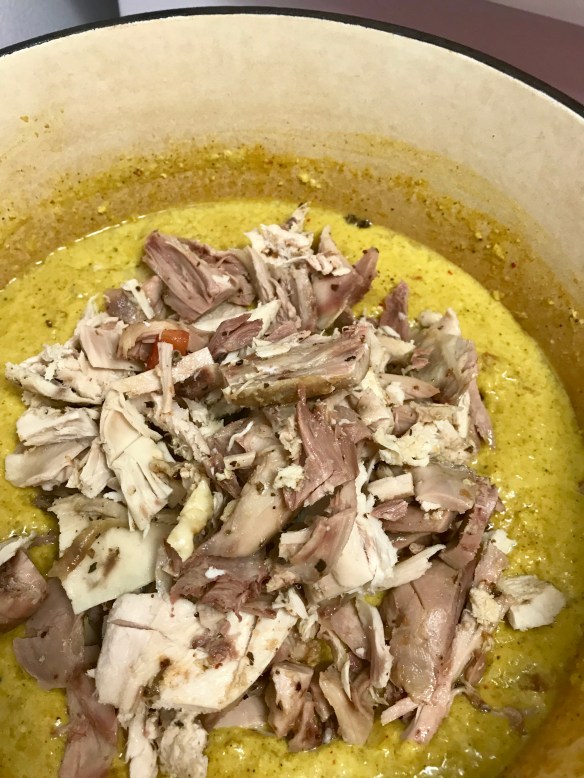
In saucepan heat olive oil, then stir in onion.  Stir until just translucent and add in the garlic clove.  If celery is one of your chosen vegetables, add it now too.  Allow to saute for a few minutes until just starting to become tender.  Add the flour and create a thick paste, letting the flour cook for a minute in order to remove that “floury” taste.  Gradually stir in the chicken stock, just a bit at a time until it is all incorporated and your sauce is starting to thicken.  Stir in the rest of your vegetables, taste and season with salt and pepper, and set aside.

Pour the chicken & vegetable mixture into the prebaked pie shell, and cover with the 2nd pastry shell.  If you’ve purchased pre made pastry, just squish and squiggle it around a bit and play with the edges, nobody will ever know you didn’t make it!

chicken pot pie

The top crust was a pastry shell I had in the freezer, probably leftover from an apple pie day!

TIP:  If you are vegetarian, or just feel like a vegetarian meal, this is so easy to do!  Just omit the chicken and use a LOT more veg.  Instead of chicken stock use a vegetable stock.  Your results will be ever so delicious …. you’re welcome!

Sprinkle the top with a bit more salt and pepper, some Italian herbs and either paprika or a bit of dried roasted red pepper.  (yes, we do our own dried seasonings with the surplus of vegetables in the field)

Put the whole pie in the oven (I’ve learned to have a foil dripping sheet below it…..) and cook for 15 minutes at 400, then lower the oven to 350 and cook for about 40-50 minutes, until you see the sauce bubbling out the side and the pie looks golden brown.

If your pie is looking golden brown, but not yet bubbling out the sides, loosely lay a sheet of tin foil over the pie until you see that bubbling action.

Make sure you let it sit for 15-20 minutes after it comes out of the oven, that allows it to set a bit.  Not that it tastes any less wonderful if it is running all over your plate ……..

chicken pot pie 3

See what I mean?  We couldn’t wait the 15 minutes, but it was delicious.  By the time we came back for seconds it had set up and made nice even slices.  Amazing either way!

Roasted Broccoli with Lemon Tahini Drizzle

Roasted broccoli gets some really nice crackly bits, which just means more flavour.  This recipe stands on it’s own for a vegetarian dish, by treating the stalks with my pulled pork dry rub before roasting.

Roasted Broccoli with Tahini Drizzle

I forgot this time, but the broccoli looks even better with a sprinkle of toasted sesame seeds.


Tahini Drizzle

  • Salt and black pepper
  • 1 tbsp tahini
  • 1½ tsp honey
  • 2 tsp lemon juice
  • 1 small garlic clove, peeled and crushed
  • 1/2 tsp roasted sesame oil
  • 1 tbsp olive oil


Dry Rub (I usually like to keep a jar of this ready made, for all sorts of uses)

1 tbsp ground cumin
1 tbsp garlic powder
1 tbsp onion powder
1 tbsp chili powder
1 tbsp cayenne pepper
1 tbsp salt
1 tbsp ground pepper
1 tbsp paprika
1/2 cup brown sugar

Wash broccoli and separate into stems.  Give broccoli a generous shake of the dry rub.

Roast at 400 degrees just until you see little crispy bits appearing, turn and roast a bit more.  At 400 this should take about 20 minutes, but you can adjust with any temperature you need your oven at.  If you are like me, with only one oven, sometimes it is working extra hard to produce dinner!

Arrange broccoli on serving platter and drizzle with tahini sauce.

Massaman Curry

I’ve had a bit of a love for Penang curry lately, but tonight Massaman won the battle.  In no way is this totally authentic, since I wasn’t planning to put either carrots or potatoes in and those are both always found in Massaman curry.  Served with Sticky Thai chicken wings and jasmine rice this made a fantastic dinner, quick and easy but oh so tasty.

Massaman Curry

Tonight this was a vegetarian dish with cauliflower, broccoli and bok choy but you could easily add a protein if you like.  In Thai lessons we learned to add thinly sliced meat and then NOT stir it until it is cooked through.

Thai chicken curries are so simple to make, and come together very quickly.

Get everything ready first and when its time to cook it will happen before you know it!

  • 1/2 cup onion, roughly chopped (in Thailand, every cooking class I took had us cutting 1/2 an onion into 6 pieces)
  • 1 large garlic clove, sliced
  • 1 tbsp each minced ginger and lemongrass
  • 2 tbsp Massaman curry paste
  • 1 can coconut milk (don’t use the lite version)
  • 3-4 cups assorted vegetables, in bite size pieces

Mix together and set aside: 2 tbsp each fresh lime juice, fish sauce and brown sugar

Heat peanut oil in saucepan until shimmering and add onion pieces, stir until slightly softened and add garlic, ginger, lemongrass and curry paste.  Saute to bring out the flavours in the curry and aromatics.  Add coconut milk and stir well.  Add vegetables and cook just until crisp tender.  Stir in the lime juice, fish sauce and brown sugar.

Thai food should have a great balance of sweet, spicy, salty & tangy.  If this doesn’t yet, keep making adjustments until it does!


Sticky Thai Chicken Wings

Thai Chicken Wings

Not my first Thai chicken recipe, and I’m sure it won’t be the last, but loved the tart, slightly sweet and hint of spice these wings provided.  Get out the napkins!

3 pounds chicken wings, drums and tips separated

1/2 tbsp sea salt flakes

MARINADE

  • 3/4 cup Thai sweet chili sauce
  • 3 tbsp brown sugar
  • 1/4 cup soy sauce
  • 4 tbsp rice wine vinegar
  • 3 tbsp fish sauce
  • 2 tbsp lime juice
  • 1 tbsp minced or grated garlic
  • 1 tbsp minced or grated ginger
  • 1 tbsp minced lemongrass
  • 1 tbsp sesame oil

GARNISH

  • fresh cilantro, roughly chopped
  • sesame seeds
  • green onions, sliced

Mix all marinade ingredients together and pour half over chicken wings.  Allow to marinate for 30 minutes, up to overnight.  Put the rest of the marinade in a small saucepan and bring to a boil over medium heat.  Reduce by about half and set aside.

Preheat oven to 400

Lightly grease, or line a baking sheet with parchment paper.  Put wings on baking sheet in a single layer.

Roast for 20 minutes, then remove and toss in a bit of reduced marinade.  Sprinkle sesame seeds & sea salt over and roast for a further 20 minutes until shiny and crispy.

Garnish with cilantro, green onion and more sesame seeds.

Tonkatsu Sauce

Who knew tonkatsu sauce was so easy to make?  We were lucky enough to get some Japanese chow mein from the Japanese bazaar, and it seemed a perfect time to cook up a pork cutlet with tonkatsu sauce.

Pork cutlet with Tonkatsu

Japanese chow mein is such a treat, I love the way it tastes crunchy with the lightest of seasonings.  It goes so well with many dishes.  Tonight we served it alongside the pork cutlet with tonkatsu and bok choy with peppers and lemon tahini sauce.

  • 1 tbsp ketchup
  • 1 tbsp Worcestershire sauce
  • 2 tsp oyster sauce
  • 1/2 tsp hot chili oil

Whisk together and adjust to your liking.  Traditionalists will use 1 tsp sugar instead of the chili oil but we really like the additional bite of heat.


Lemon Tahini Bok Choy & Peppers

Lemon Tahini Bok Choy & Peppers

This is a vegan recipe!  I know, maybe not that big a deal to some people but I’m sort of a carnivore.  This is so delicious it can be served alongside pretty much any dish you enjoy.  Truthfully, my carnivorous tendencies are changing, albeit slowly.  My mind set is still that I think of what meat or protein I want to cook, then I work the rest of the meal around that.  However …. I’ve noticed that ever so slowly, my meat or protein is shrinking.  Tonight I served this veg dish along with pork cutlet and tonkatsu sauce.  A 3 ounce pork cutlet served both my husband and I, without either of us feeling like anything was missing …. changes are coming and we are right on board.

SAUCE – serves about 4

  • 1 tsp toasted sesame oil (plus extra for cooking)
  • 2 tbsp tahini paste
  • 1 lemon, juiced (start with 2 tbsp)
  • 1/4 tsp chili flakes
  • 2 tbsp water
  • 1/2 tsp salt
  • 1 clove garlic, minced
  • bok choy, onion, red pepper
  • toasted sesame seeds for garnish

To make sauce, whisk together all ingredients until smooth, taste and adjust seasonings.  It is hard to correct if you have used to much lemon, so start with 2 tbsp and if you like it “lemony”, add a bit more.

Lemon Tahini Bok Choy

Wash veg thoroughly, (those bok choy have a tendency to hide grit).

Heat fry or sauce pan, add onion, and saute lightly, add bok choy and peppers, drizzle with a bit of extra sesame oil.  Cook for 4-6 minutes, just until crisp tender.

Remove from heat and drizzle sauce over top, then sprinkle with sesame seeds.

Thai Grilled Chicken

Thai grilled chicken should be moist, flavourful, and make you want more …. this is it.

Thai Chicken

This chicken.  So moist and delicious.  The dipping sauce takes it over the top!


  • 2 lb / 1 kg chicken thigh fillets (skinless, boneless) 


  • Use whatever chicken you have, or prefer, this amount of marinade worked with 2 boneless chicken breasts, cut into pieces and pounded equal thickness.  I reserved some of the marinade and kept it to serve as a dipping sauce, it was incredible.
Marinade
  • 1 large lemongrass stalk , white part only very finely chopped (about 2 tbsp) If you live in an area like we do, fresh lemongrass is not always easy to come by, and in that case, I use 1 tbsp lemongrass powder)
  • 1 tbsp garlic , minced
  • 2 tbsp lime juice
  • 1 tsp chili flakes
  • 3 tbsp fish sauce
  • 1 tsp sesame oil
  • 1/4 cup chopped cilantro
  • 3 tbsp brown sugar or palm sugar
  • 1/2 cup coconut milk

Mix all marinade ingredients together, reserve 1/2 of it, and and add chicken to the rest.  Marinade overnight, or for at least an hour …. (I had an hour and it turned out really well!)

Serve the chicken with the reserved marinade.

Thai chicken

put all the marinade ingredients into the bowl of a food processor, and give it a good whiz ….


Grill chicken until just cooked through, and serve with dipping sauce.

Indian Spiced Chicken Korma

This rich Indian sauce is packed with enough spices and layers of flavour, you will want extra rice or naan bread to mop up every bit of sauce left on your plate.
Korma 8
  • 2 white onions, peeled and cut into quarters
  • 6 cloves garlic, peeled
  • 4 teaspoons curry powder
  • 2 teaspoons ground turmeric
  • 2 teaspoons garam masala
  • 1 teaspoon ground coriander seed
  • 1 teaspoon salt
  • 1 teaspoon black pepper
  • 1/2 teaspoon cinnamon
  • 1/2 teaspoon cumin
  • 1/4 teaspoon ground cardamom
  • 1/8 teaspoon freshly grated nutmeg
  • 3 tablespoons extra virgin olive oil
  • 3 large tomatoes, diced small
  • 1 tablespoon freshly grated ginger root
  • 1/2 cup ground raw almonds
  • 1 cup unsweetened canned coconut milk
  • 1 1/2 cups plain low-fat yogurt
  • 1/2 a small red chili, de-seeded and minced (dried or fresh)
  • 1 tablespoon brown sugar (packed)
  • 8 boneless skinless chicken thighs, cut into bite size pieces

(or – see below for other options to replace chicken thighs)

Korma 7

Key to making a dish like this is to have all your ingredients ready at hand.  Here I’ve blended all the dry spice together so it is ready to be stirred in at the moment I need it.

Korma 2

Chefs call this “mis en place”, which simply means having everything ready to go, BEFORE you start cooking at all.  It sure does make things smoother!

Instructions

  • Place the onions, garlic, and 1 cup of water in the bowl of a blender. Puree until smooth.
  • Measure out the spices (curry powder through nutmeg) into a small bowl.
  • In a large saucepan heat 3 tablespoons of olive oil over medium heat. Once the oil is shimmering, add the pureed onion mixture and cook for a 2-3 minutes, stirring constantly, until it begins to darken in color.

Korma 6

  • Add the tomatoes, ginger, ground almonds, coconut milk, yogurt, red chili, pre-measured spices, and brown sugar. Stir well.

Turn the heat down to low and simmer 30 minutes. Cut the chicken into bite-sized pieces and add to the pan; simmer for an additional 15 minutes. 

Korma 4

I had roasted a whole chicken the day before and felt like this Korma would be the perfect way to eat it all up the next day.  Use a rotisserie chicken for a quick dinner if you don’t have leftover chicken on hand.  Honestly, when we eat out, we usually order lamb korma, so you could just as easily use any protein of your choice – or go vegetarian and stir a bunch of fresh vegetables in.

Korma 3

Served today with homemade naan and the best crispiest crunchiest vegetable pakora!

Garden Fritters

IMG_5383

Make enough of these and it is a total meal, or use as an appetizer or side dish, either way, you are going to love these intense vegetable fritters.


I’m having a fritter moment.  It seems like a magical way of getting pounds of vegetables eaten up in record time, just when it is all at the peak of freshness, and who doesn’t love that?  I had to call these garden fritters, due to the tangle of grated zucchini, the wilted swiss chard, the crunchy pop of corn kernels fresh off the cob ….  Now just add to that a bunch of herbs, some garlic and a bit of cheese.  In today’s version I used feta and a bit of cumin.

If you make fritters just a few times you will quickly realize you don’t really need a recipe, but here is my general guideline:

  • 4 cups of vegetables
  • 1 clove of garlic (completely variable depending on your garlic love)
  • 1 egg
  • 1/2 cup flour
  • 1/2 tsp baking powder
  • salt, pepper and seasonings to taste

Now – once you’ve got  this far, just use your imagination with seasonings, and/or any cheese you decide to add.  Cheese certainly isn’t necessary, just adds another level of tasty goodness.

IMG_5380

These fritters have grated zucchini, lightly wilted swiss chard, corn kernels cut off a fresh cob, and herbs of parsley and chives.  One garlic clove and a bit of cumin with some feta cheese crumbled in created an intensely mouthwatering fritter.

A cast iron frying pan works best but any non stick pan will work well.  Lightly coat with oil, and on medium heat drop in dollops of the mixture.  Fry until golden brown and cooked through, about 3-4 min per side.

IMG_5381

HEAD’S UP – these delicious little kernels of corn will actually pop and sizzle like crazy in the oil – be prepared for the splatter.

I served these with a dip resembling tsatsiki:

  • 1/2 cup mayonnaise
  • 1 garlic clove
  • 1/3 cup grated cucumber
  • 1 tsp basil
  • 1 tsp dill weed
  • 1 tsp lemon juice
  • salt & pepper to taste

Zucchini Fritters

This recipe came directly from Smitten Kitchen (another wordpress site) and strangely enough (for me) I didn’t change it!

Zucchini Fritters 2

Crispy craggy bits of zucchini are a great contrast to the creamy aioli dip.


1 pound (about 2 medium) zucchini
1 teaspoon coarse or Kosher salt, plus extra to taste
2 scallions, split lengthwise and sliced thin
1 large egg, lightly beaten
Freshly ground black pepper
1/2 cup all-purpose flour
1/2 teaspoon baking powder
Olive or another oil of your choice, for frying

Preheat oven to 200 degrees. Have a baking sheet ready.

Trim ends off zucchini and grate them either on the large holes of a box grater or, if you have one, using the shredding blade of a food processor. The latter is my favorite as I’m convinced it creates the coarsest and most rope-like strands and frankly, I like my fritters to look like mops.

Zucchini fritters 3

In a large bowl, toss zucchini with 1 teaspoon coarse salt and set aside for 10 minutes. Wring out the zucchini in one of the following ways: pressing it against the holes of a colander with a wooden spoon to extract the water, squeezing out small handfuls at a time, or wrapping it up in a clean dishtowel or piece of cheese cloth and wringing away. You’ll be shocked (I was!) by the amount of liquid you’ll lose, but this is a good thing as it will save the fritters from sogginess.

Return deflated mass of zucchini shreds to bowl. Taste and if you think it could benefit from more salt (most rinses down the drain), add a little bit more; we found 1/4 teaspoon more just right. Stir in scallions, egg and some freshly ground black pepper. In a tiny dish, stir together flour and baking powder, then stir the mixture into the zucchini batter.

In a large heavy skillet — cast iron is dreamy here — heat 2 tablespoons of oil over medium-high heat until shimmering. Drop small bunches of the zucchini mixture onto the skillet only a few at a time so they don’t become crowded and lightly nudge them flatter with the back of your spatula. Cook the fritters over moderately high heat until the edges underneath are golden, about 3 to 4 minutes. If you find this happening too quickly, reduce the heat to medium. Flip the fritters and fry them on the other side until browned underneath again, about 2 to 3 minutes more. Drain briefly on paper towels then transfer to baking sheet and then into the warm oven until needed. Repeat process, keeping the pan well-oiled, with remaining batter. I like to make sure that the fritters have at least 10 minutes in the oven to finish setting and getting extra crisp.

Zucchini Fritters 1

Creamy Lemon Aioli

  • 1/2 cup good quality mayonnaise
  • 1 tbsp fresh squeezed lemon juice
  • 1 tbsp minced basil
  • salt and pepper to taste

Blend it all together, and allow to sit in the fridge until fritters are ready.