Mapo Eggplant

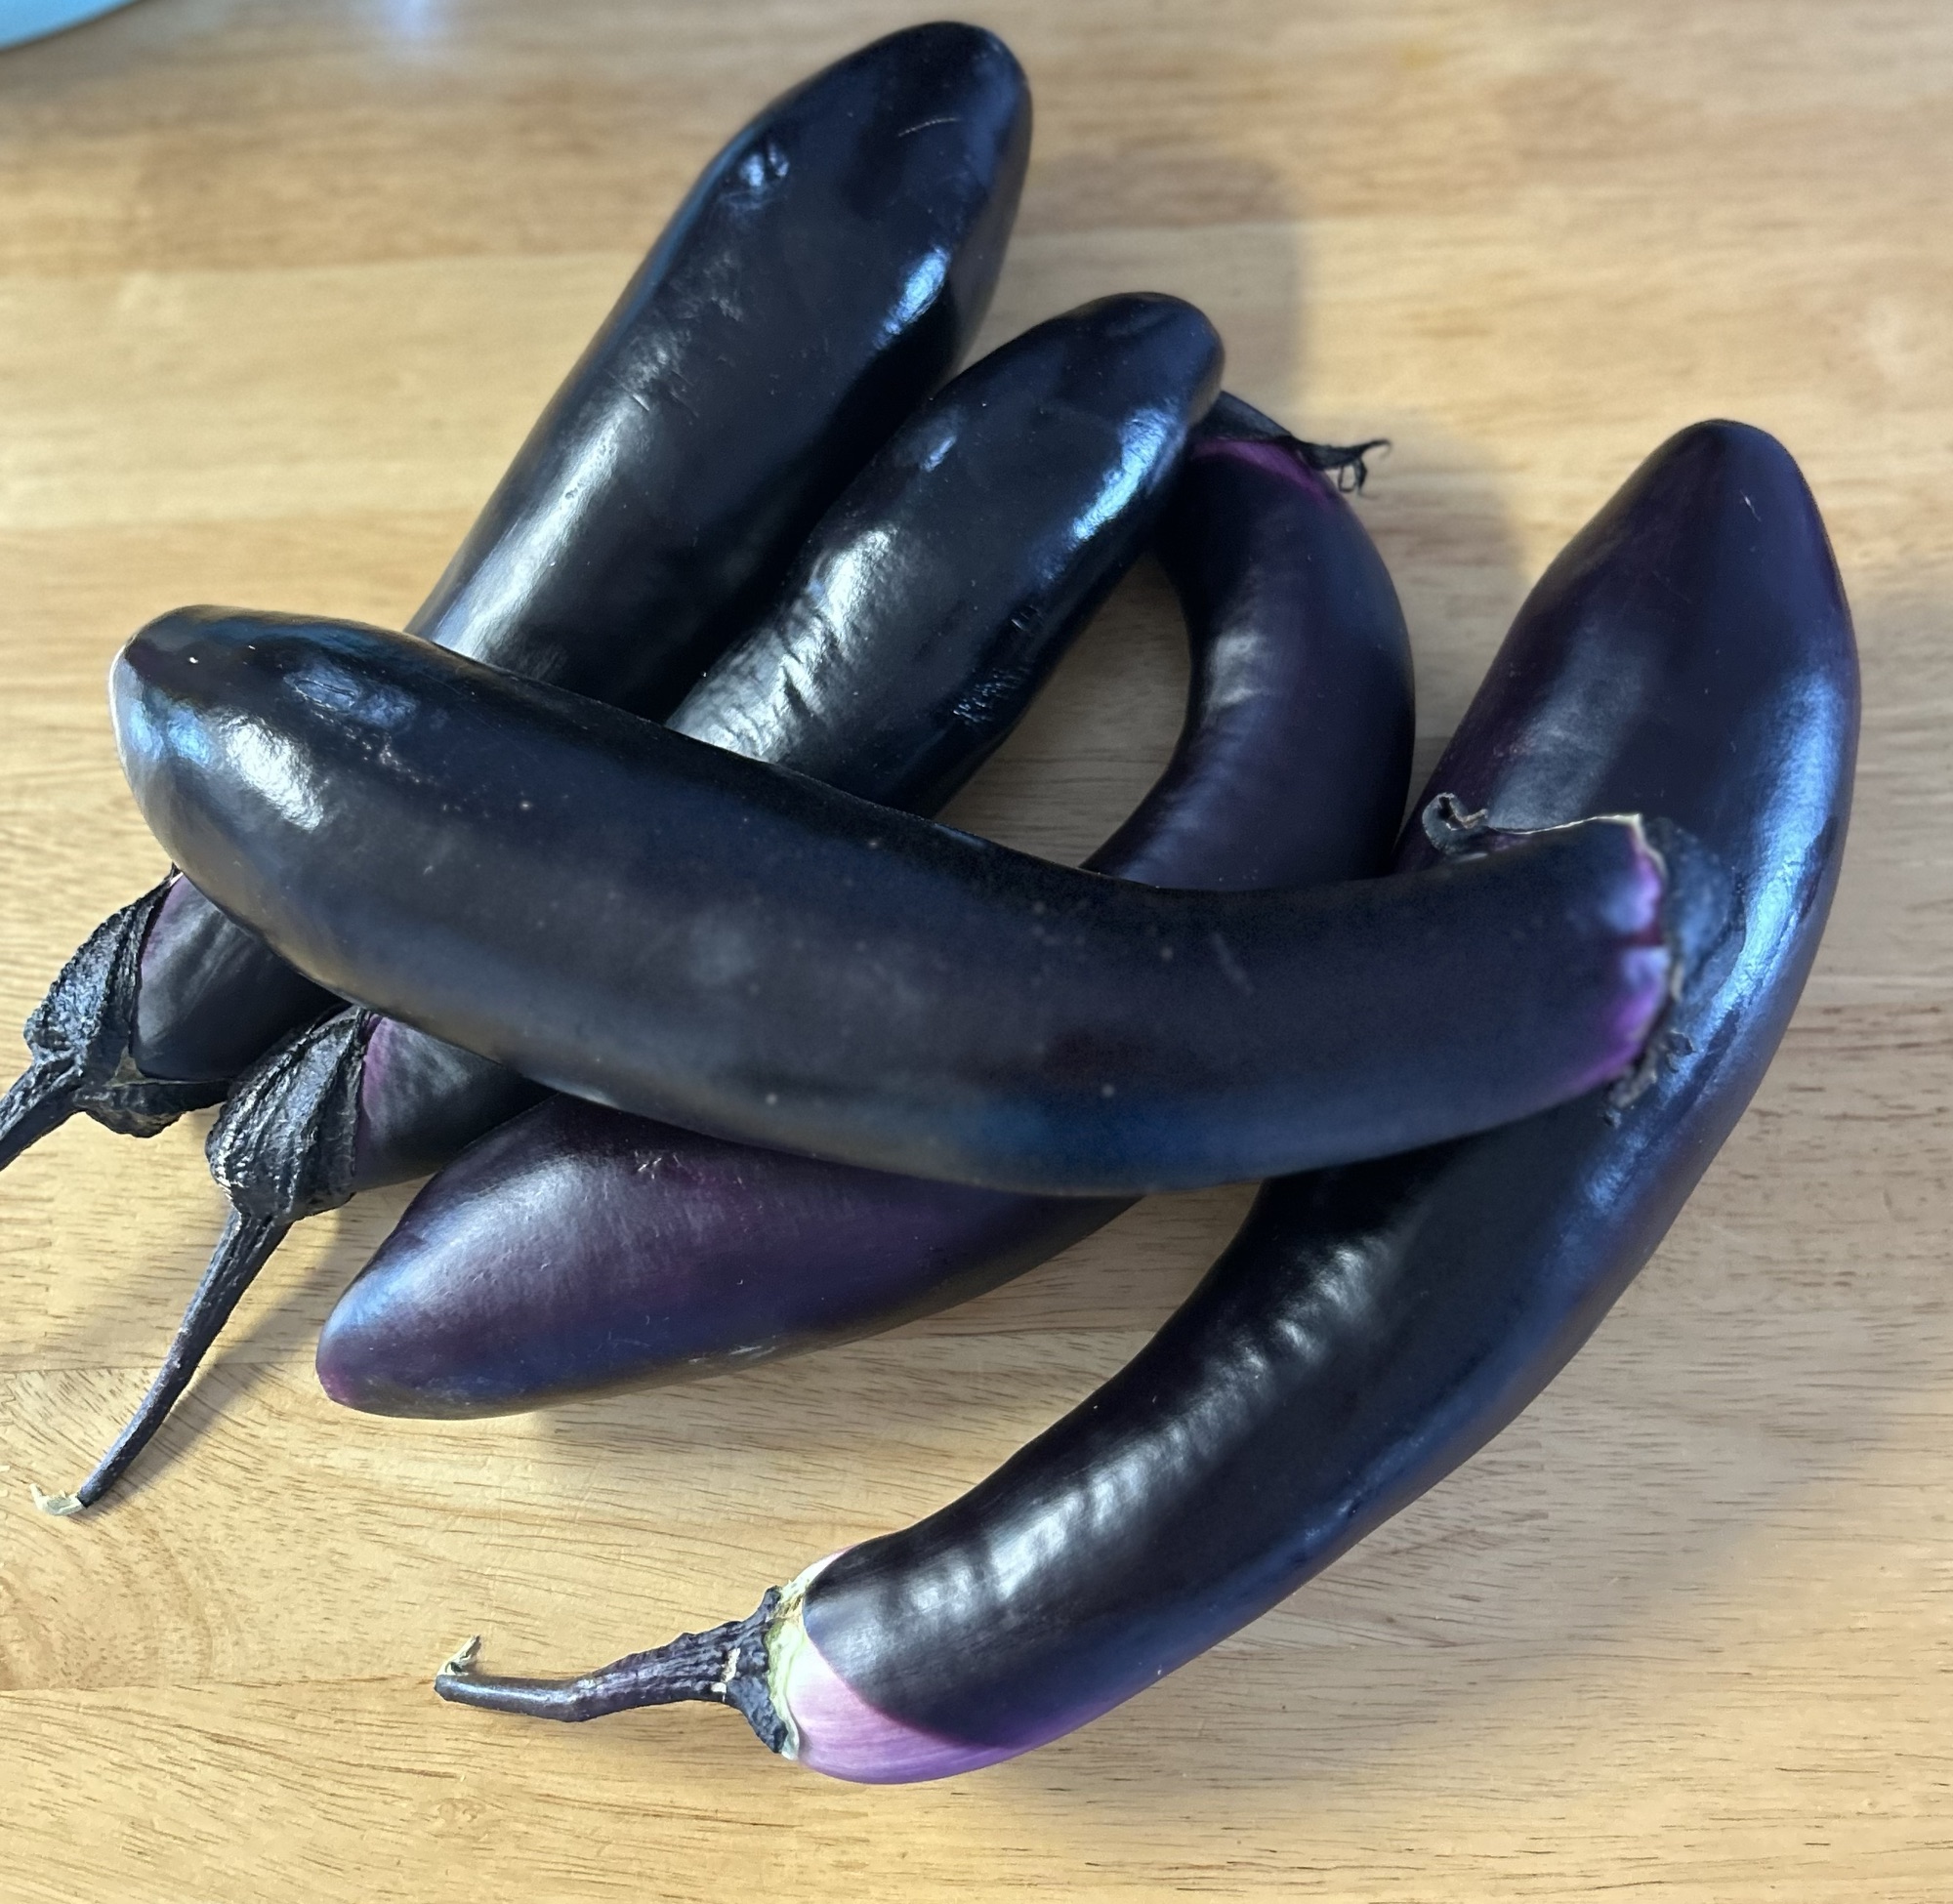
You can tell how much I’m enjoying eggplant right now.  A little chopping, and assembling ingredients gives you one of the best low effort/high flavour dinners, and likely to be in the rotation as long as the eggplant is growing out the back door!  If you love Mapo Tofu, you are going to really enjoy this – the eggplant gets so creamy and sucks up all the flavour in the sauce.

img_3243

I roasted some cauliflower tossed with white miso paste, chile sauce, and olive oil – great to have a bit of a crunchy contrast – next time I might also scatter a few roasted peanuts over as garnish.

PORK

  • 12 ounces ground pork
  • 3 tsp water
  • 2 tsp Shaoxing wine (or sake)
  • 1 1/2 tsp cornstarch
  • 1/4 tsp baking soda
  • 1/4 tsp white pepper

Mix all ingredients together and allow to marinate while you do the rest of the prep.

INGREDIENTS

  • 2 long Japanese eggplant (can use round eggplant but peel if the skin is too tough)
  • vegetable oil
  • 1/4 cup minced garlic
  • 1/4 cup minced ginger
  • 2 tsp Szechaun pepper (finely ground)
  • 1/4 cup black bean sauce
  • 1 1/2 cup chicken stock
  • 2 tsp sugar
  • 1 tsp toasted sesame oil
  • 2 tbsp chile crunch (optional)
  • 2 tsp corn starch mixed with 1/4 cup water for slurry

GARNISH

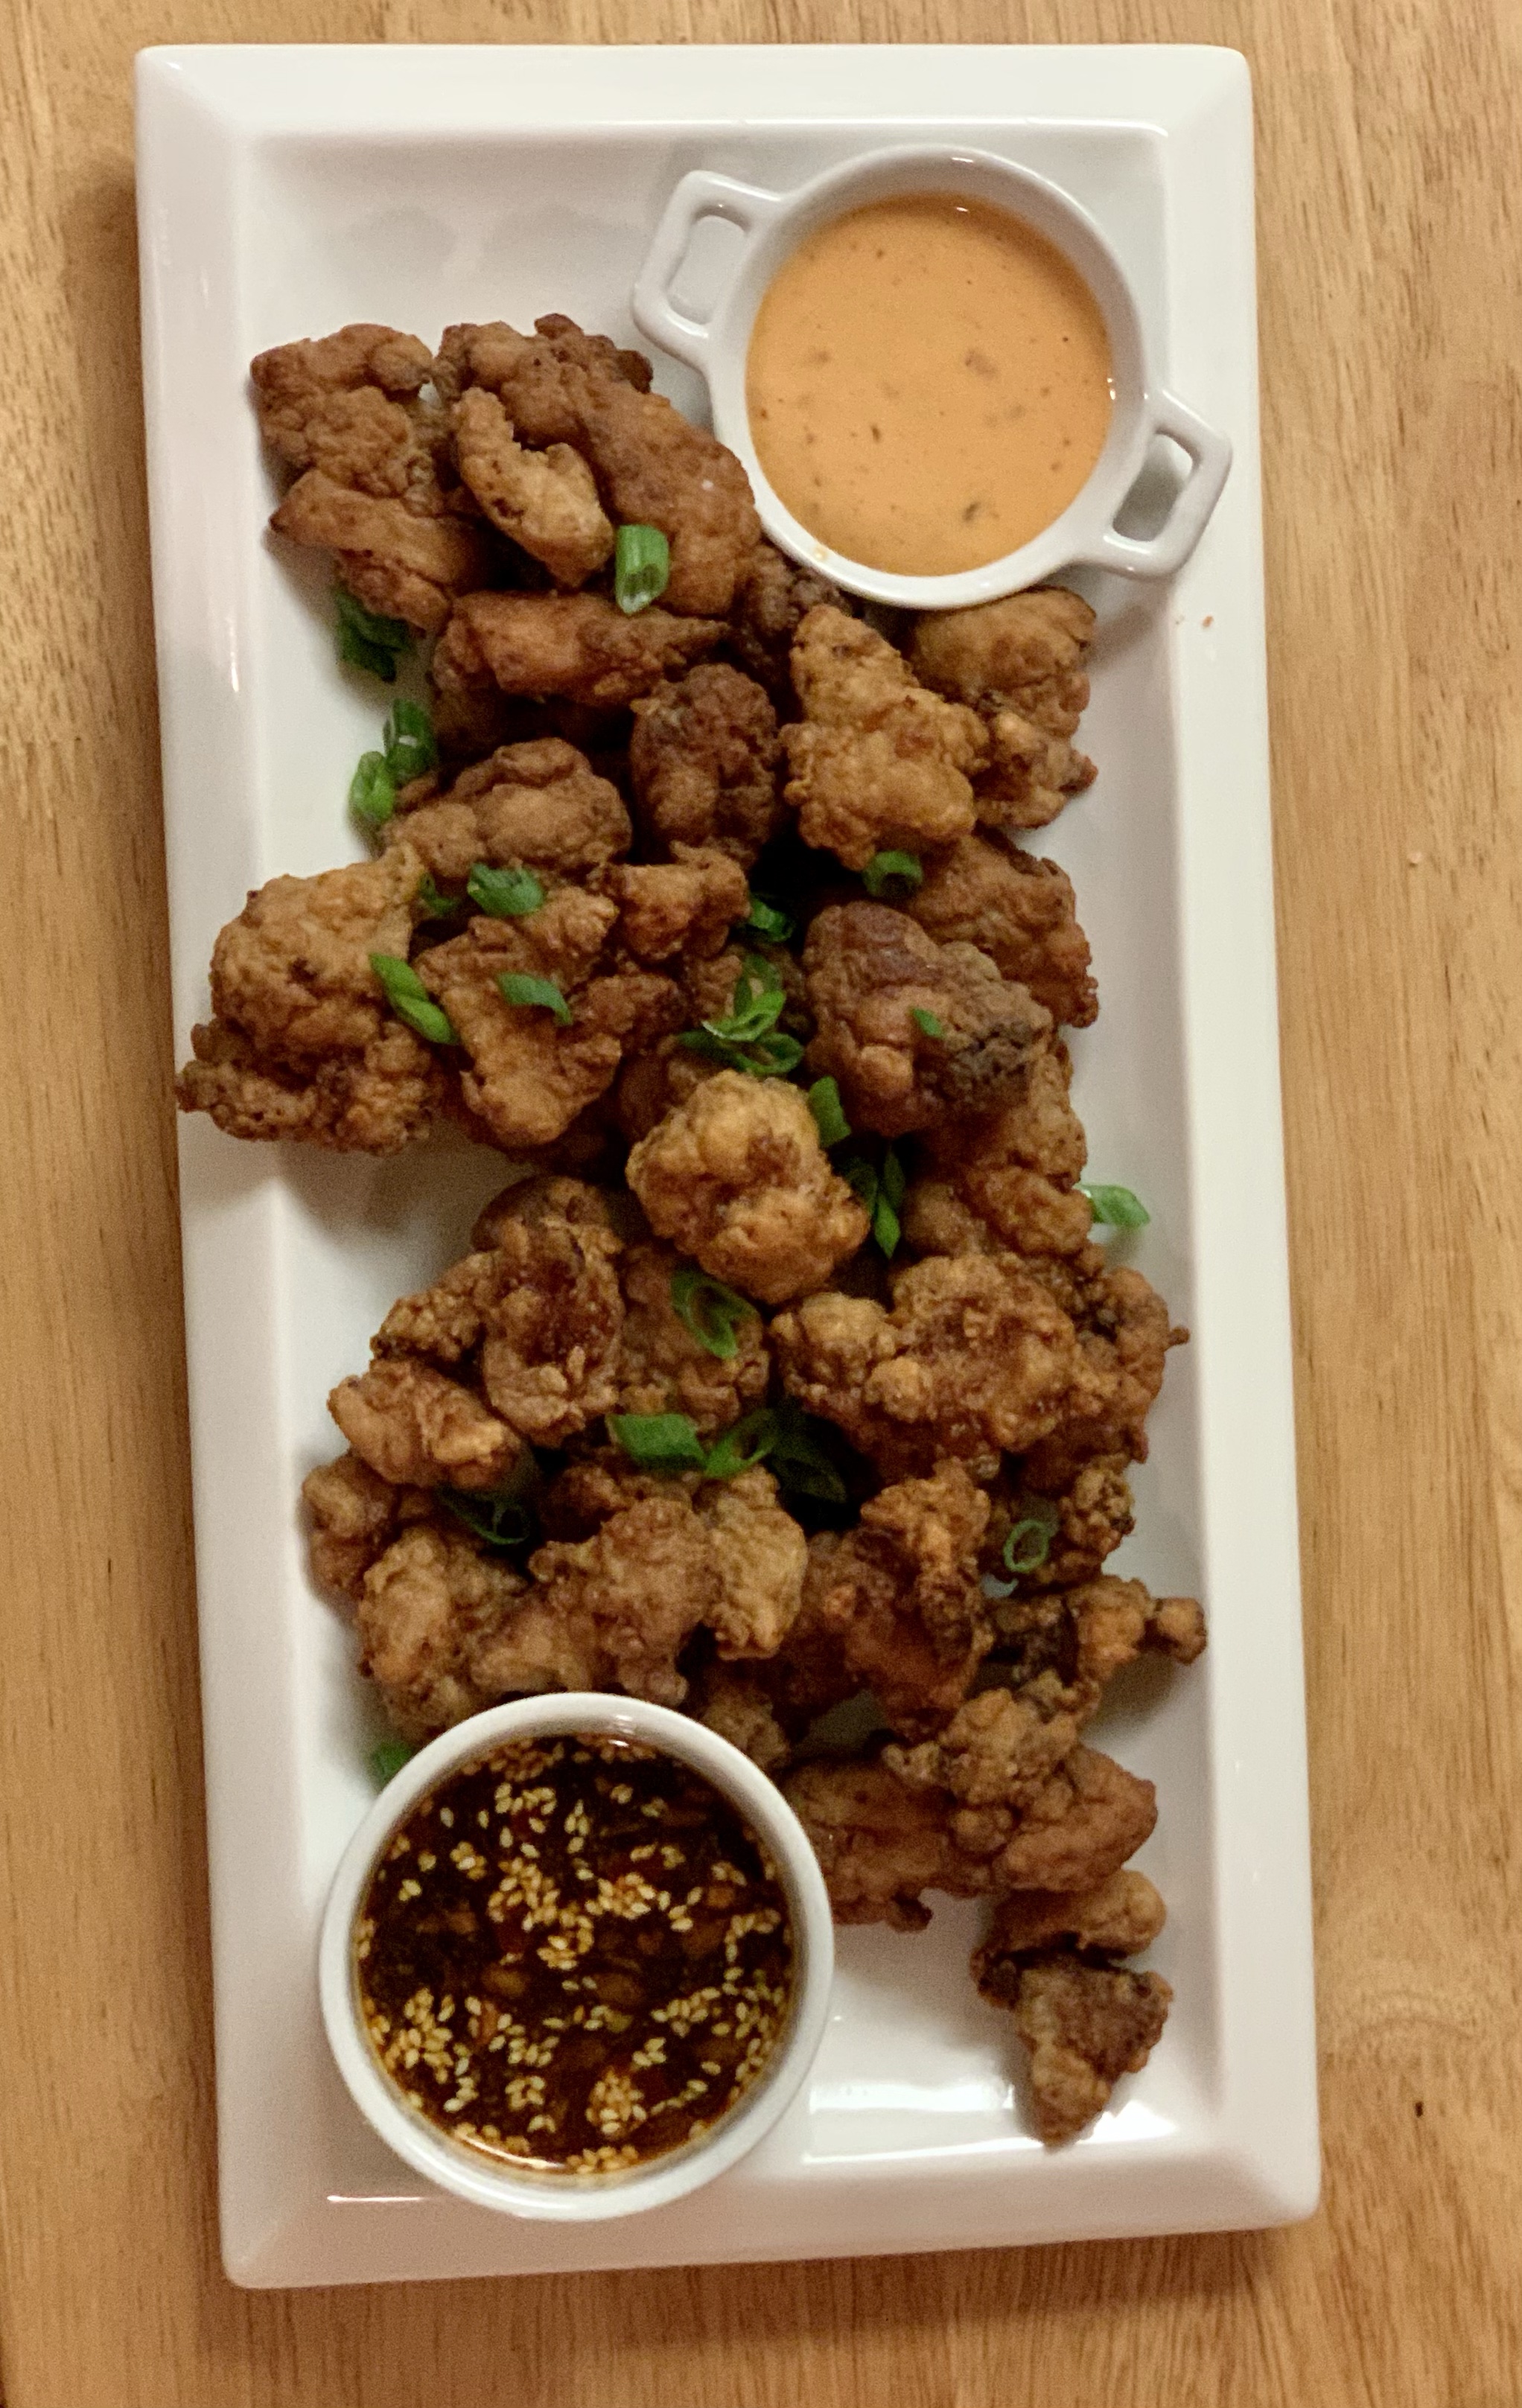
sliced scallions and roasted sesame seeds

METHOD

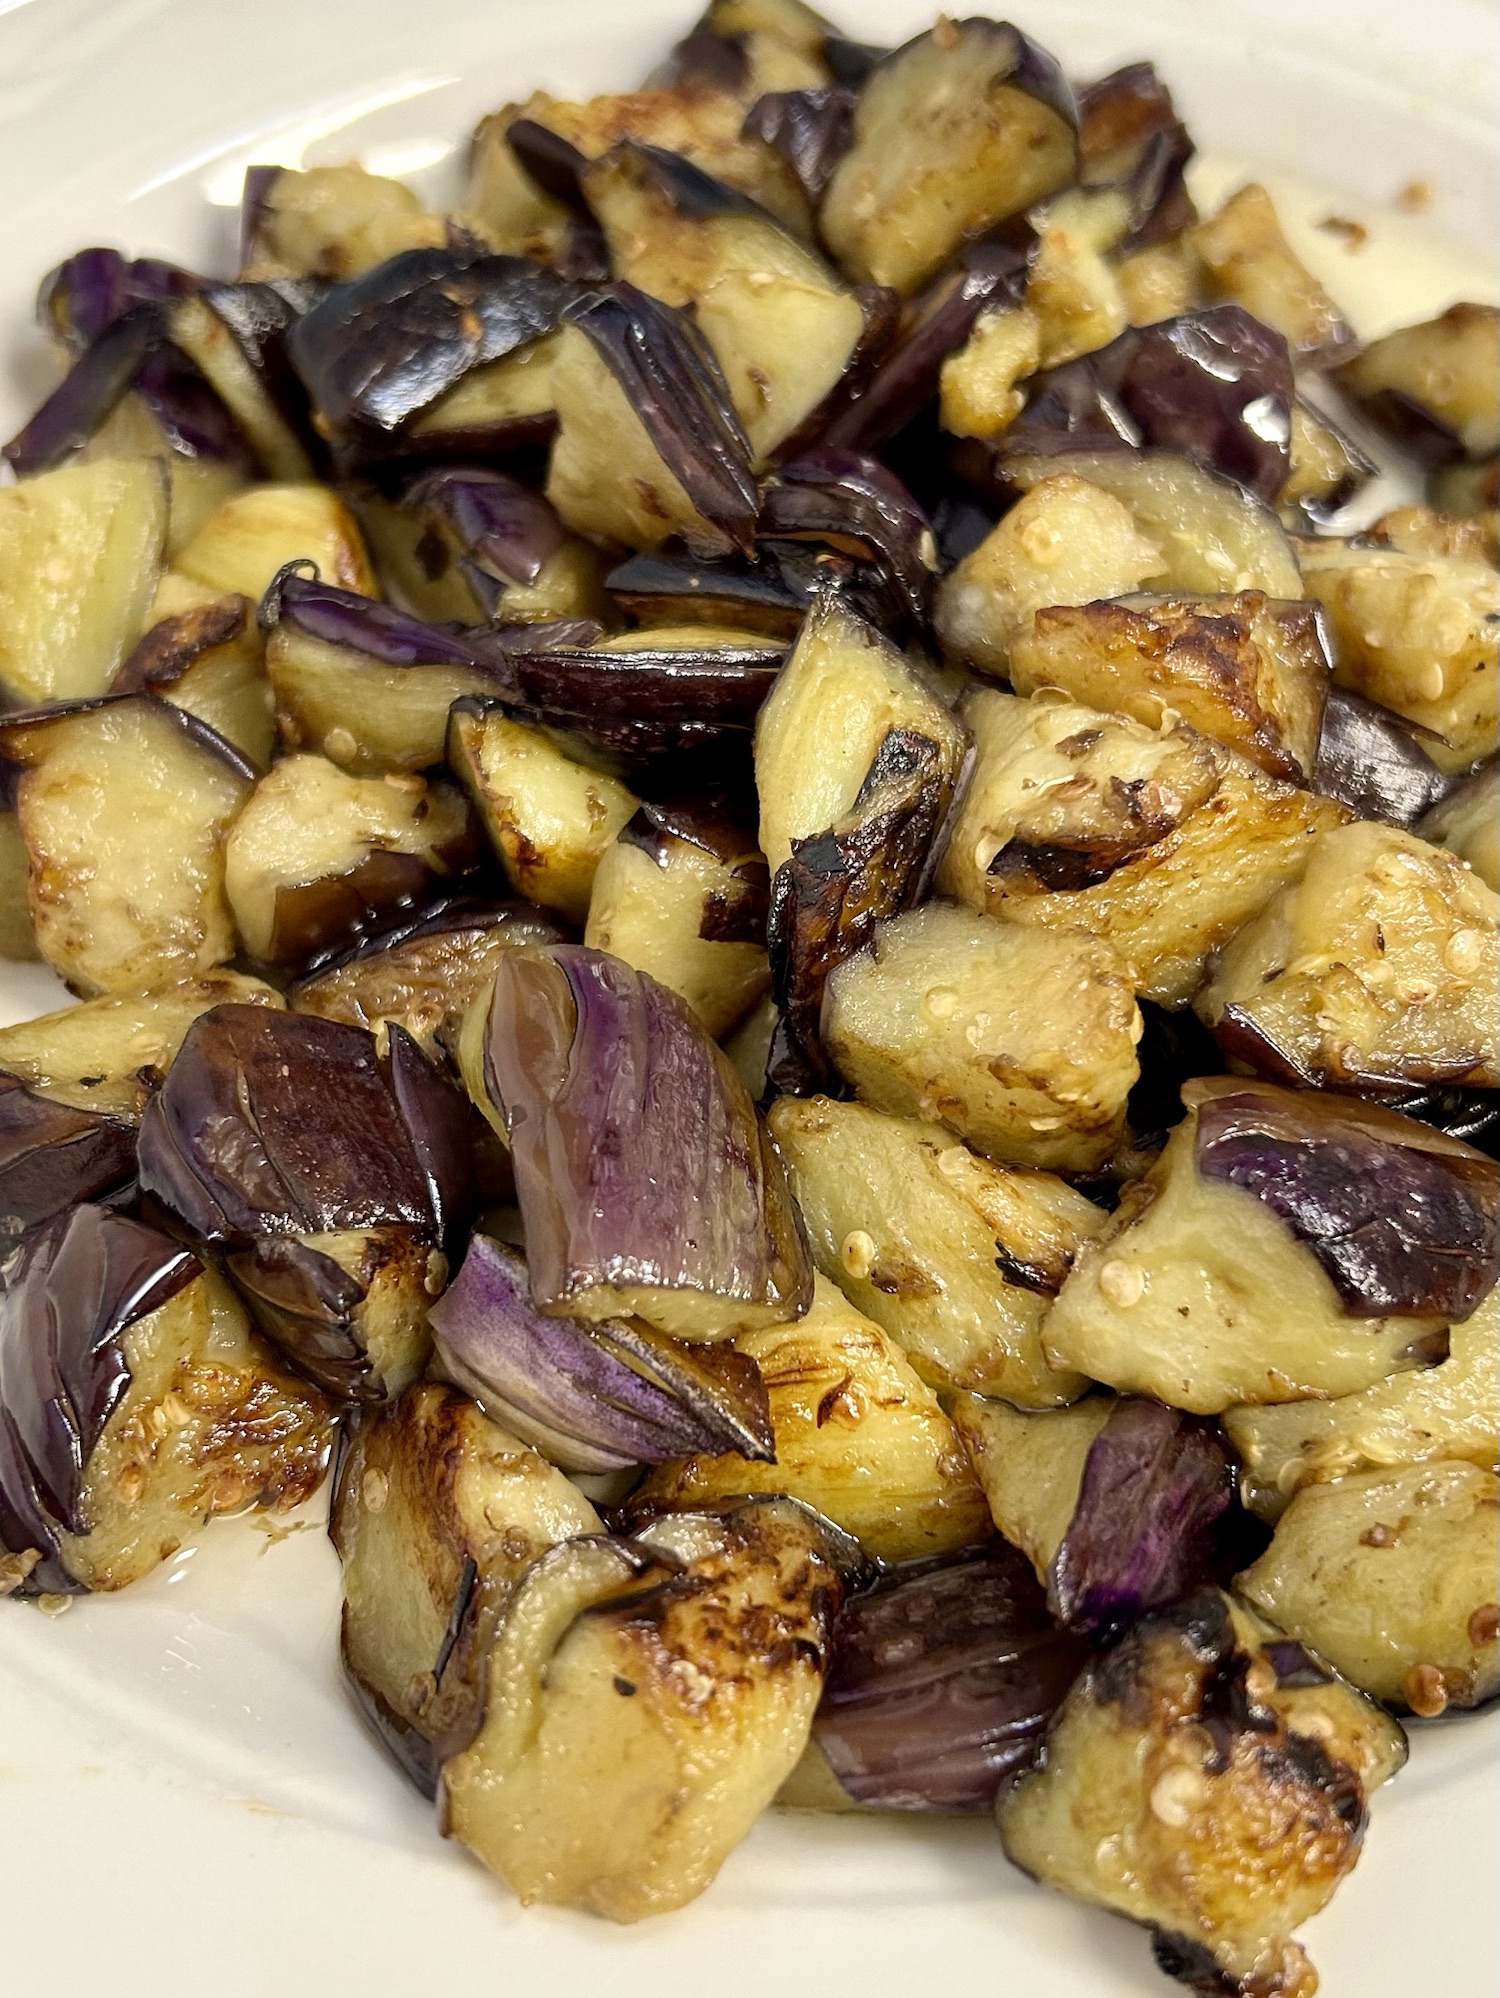
Just before you start cooking, cut the eggplant lengthwise and then into smaller (triangle?) pieces.  If you do this too early, they will discolor.

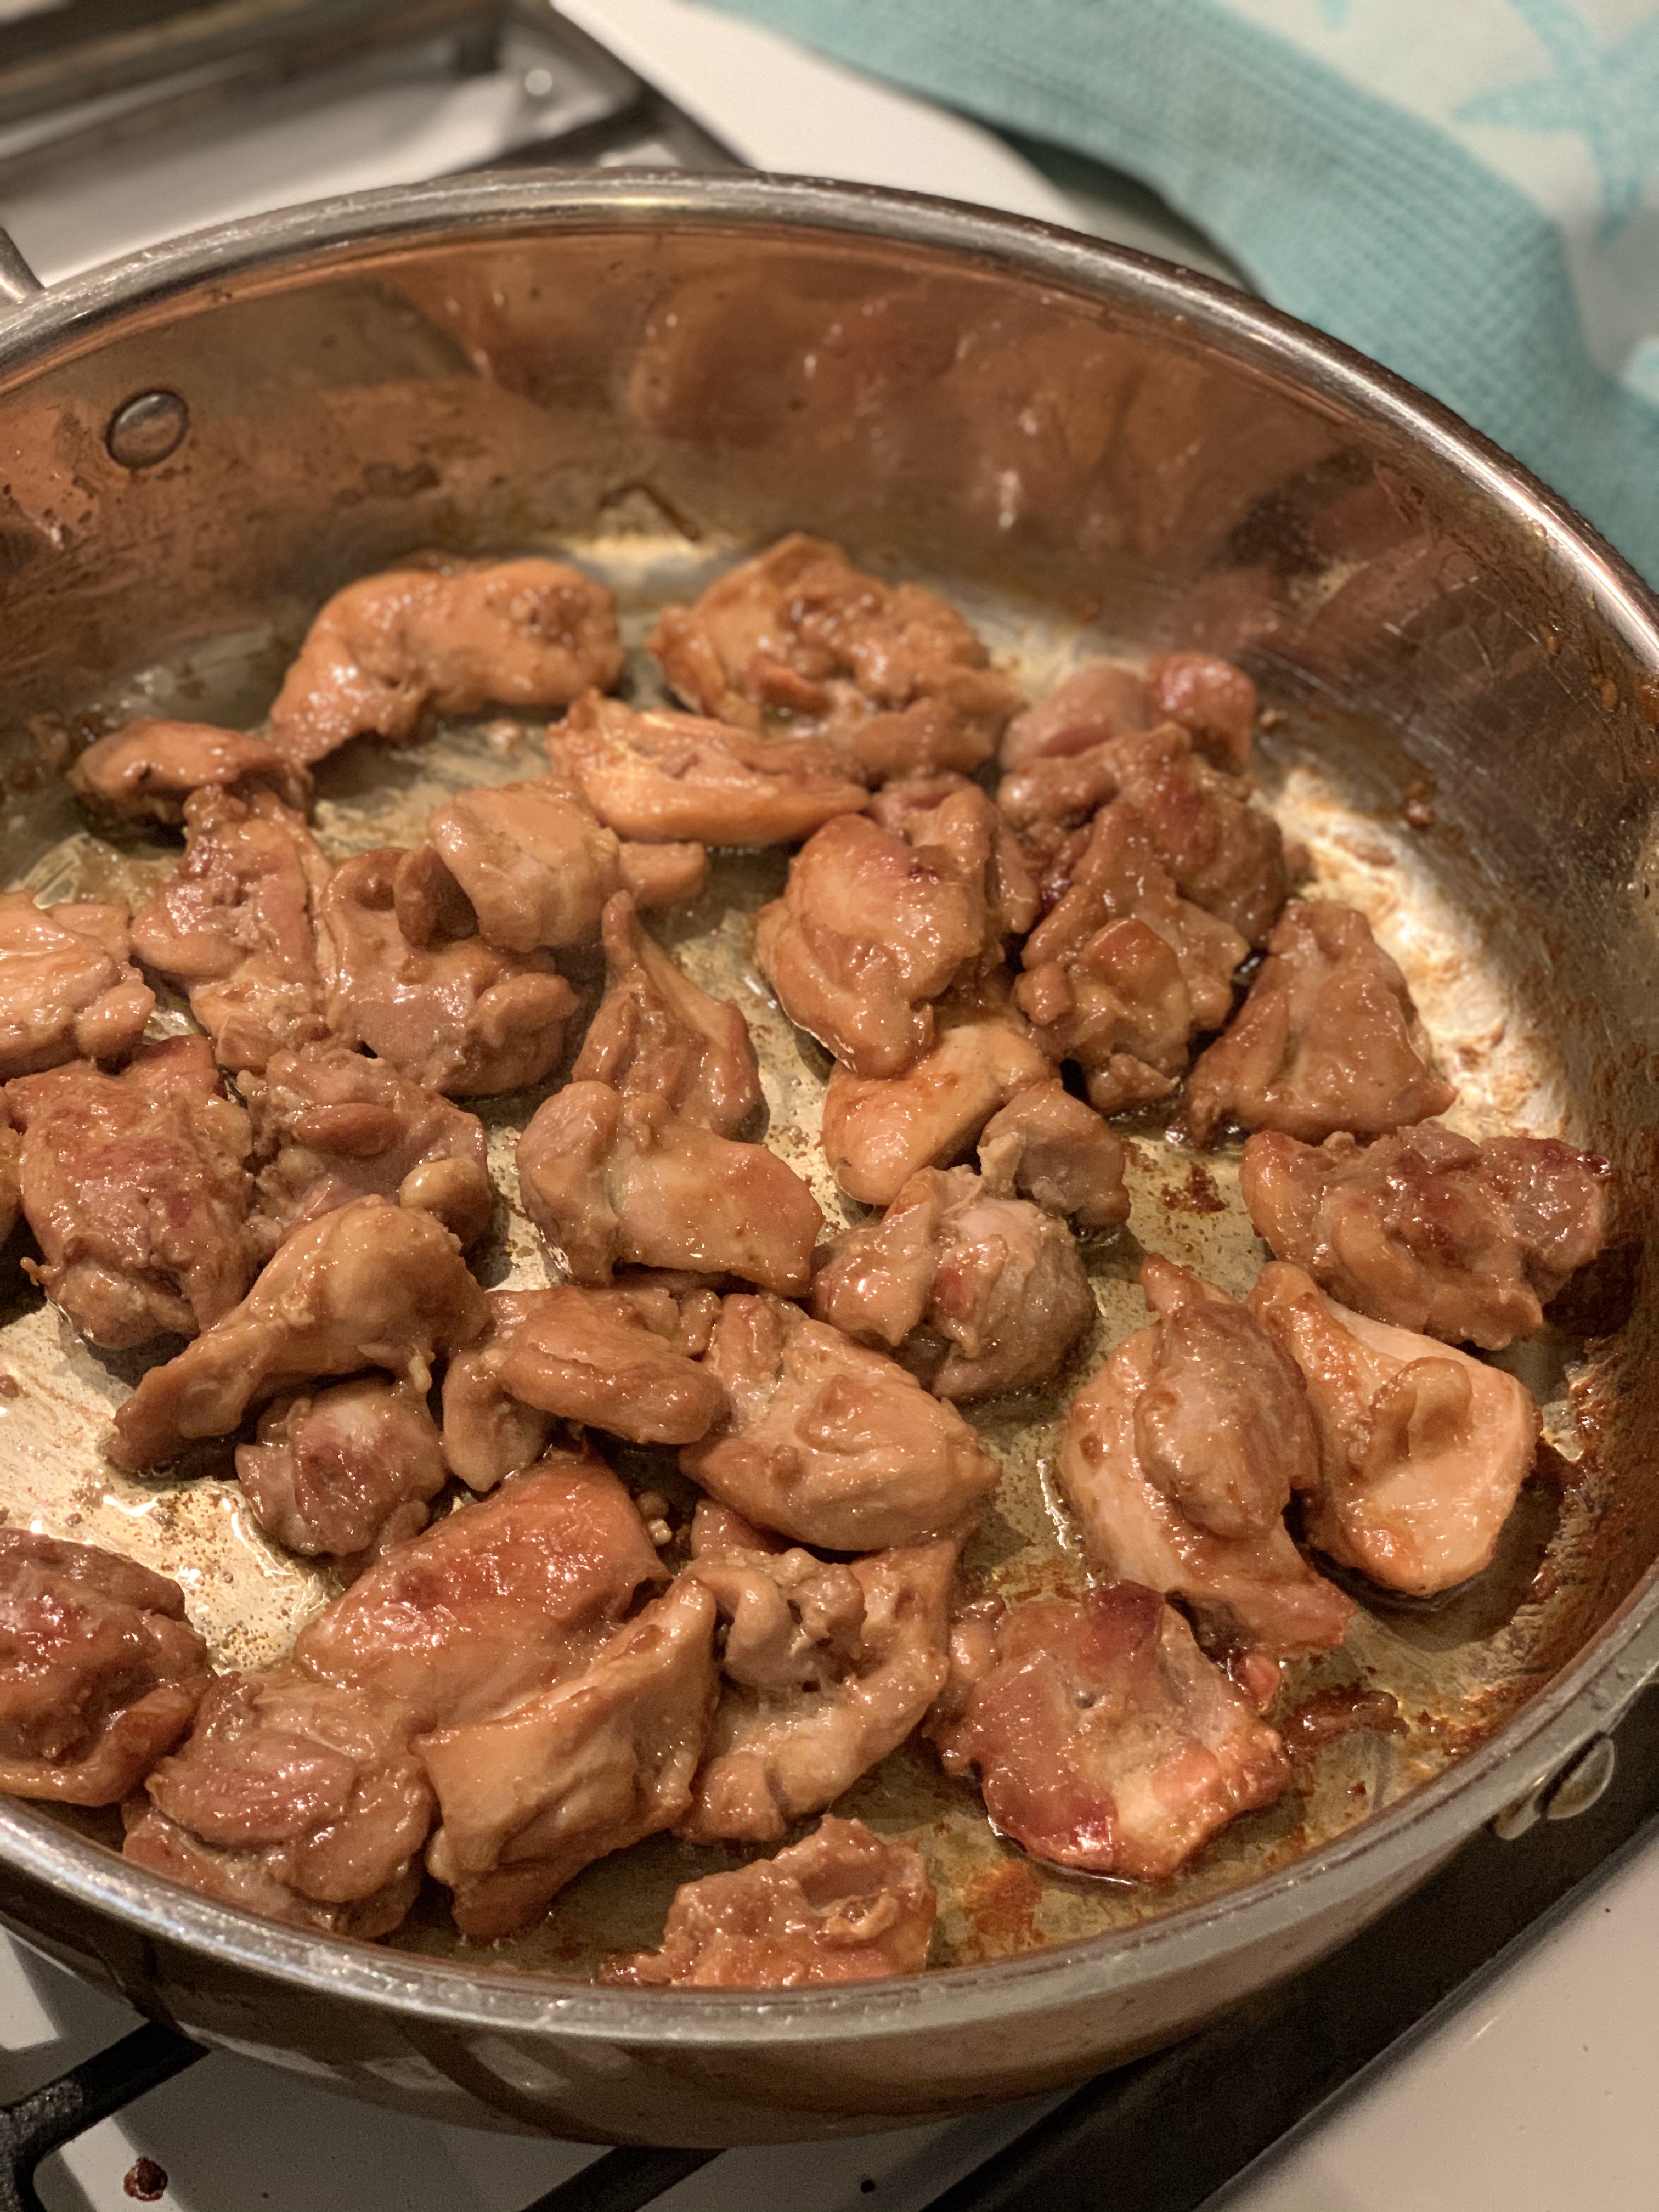
Heat wok over med high heat, and when it is starting to smoke add the eggplant in a single layer (do in batches if you have to).  Allow to sit undisturbed until you get some color on the eggplant pieces and then stir them up, and allow to caramelize a bit on all sides.  

After you’ve cooked all the eggplant, add 2 tbsp oil to the wok and saute the ginger for a minute, just until it starts to soften, then add the garlic.  Fry just until fragrant, (watch carefully, burnt garlic is bitter!).

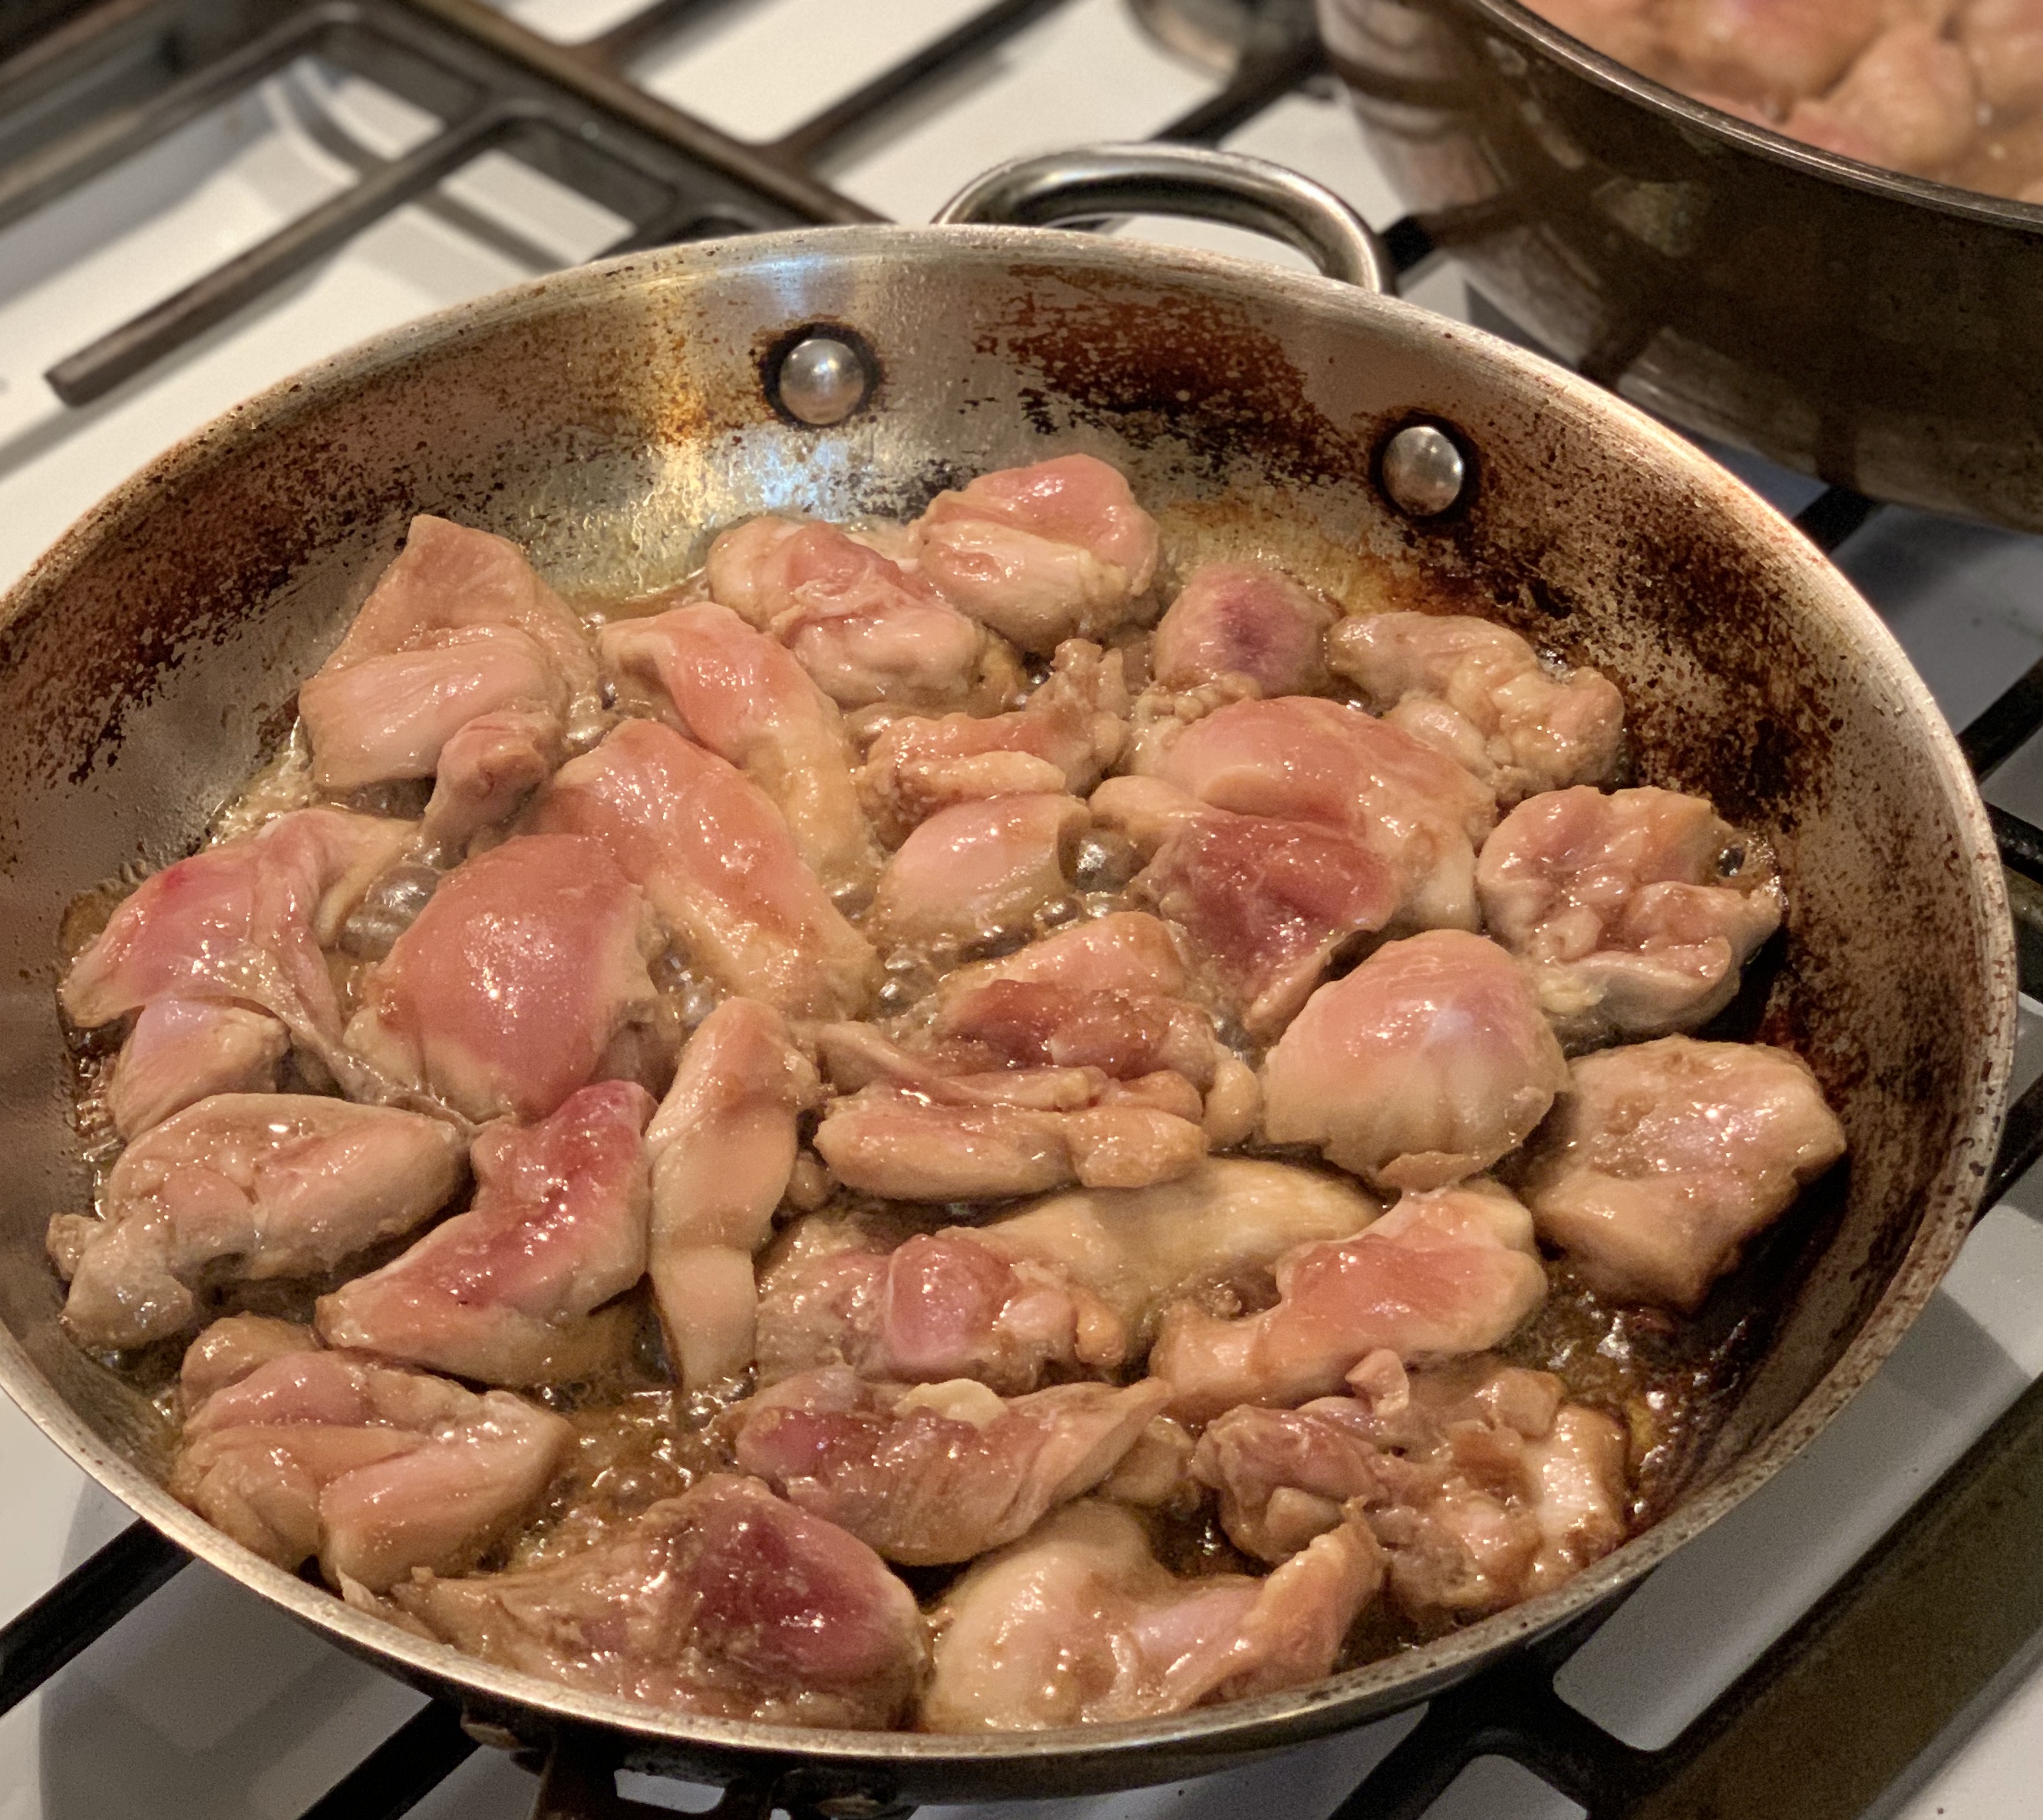
Add the pork mixture and stir fry until it has been cooked through and lightly caramelized in bits.

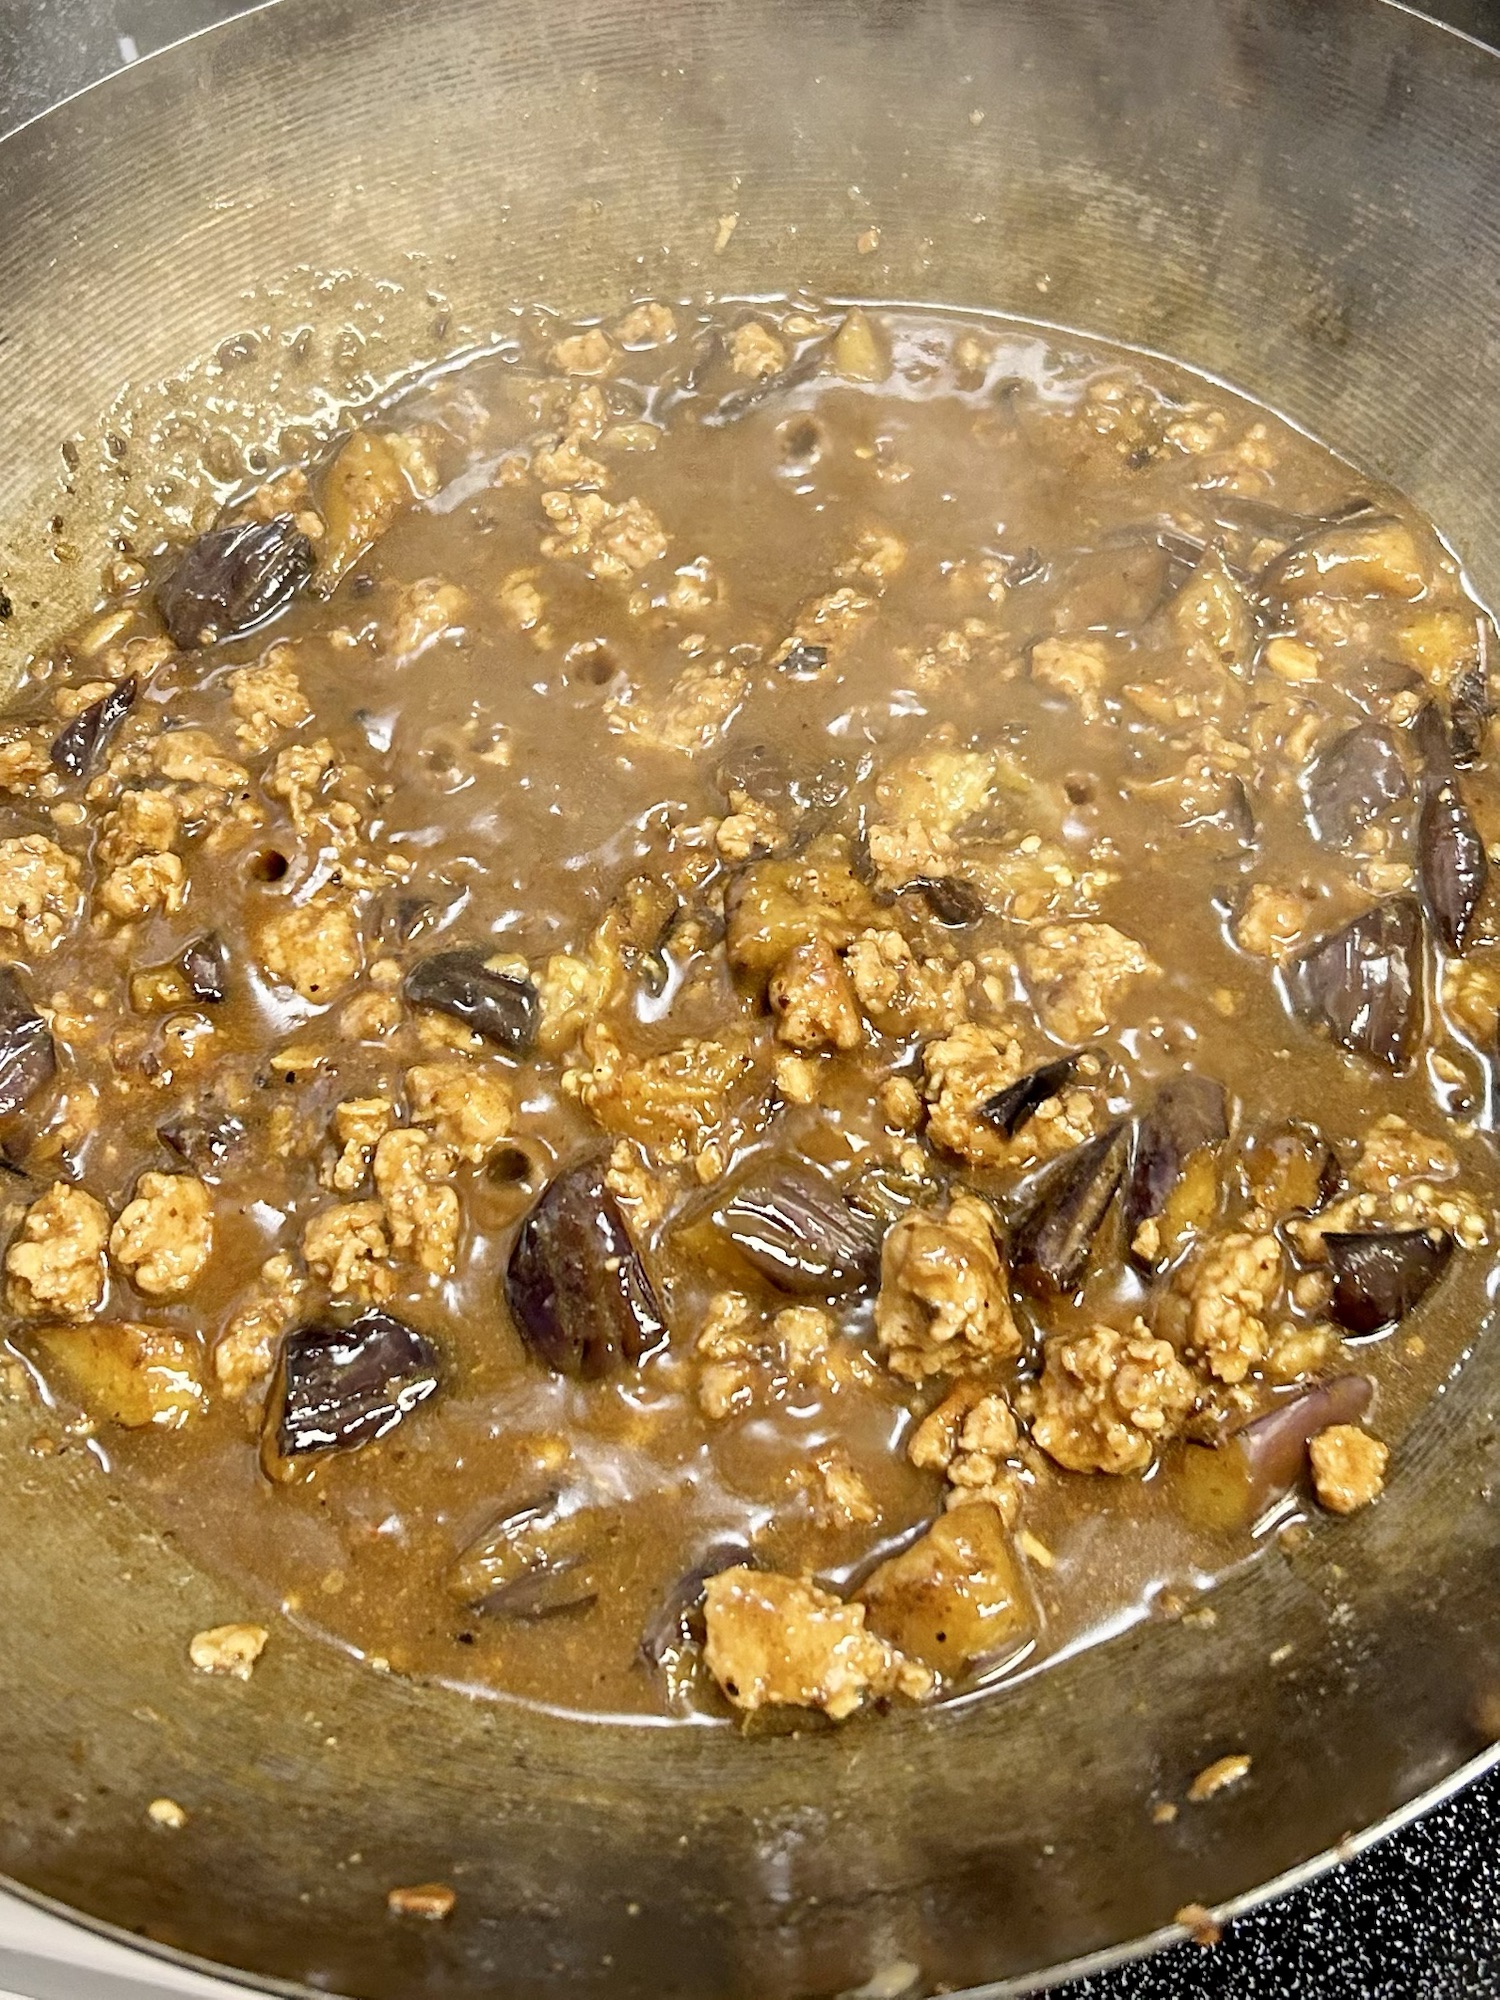
Stir in the pepper and the black bean sauce.  Cook for one minute until it is bubbling, and add the chicken stock, chiile crisp (if you are using it), sugar and sesame oil.

Add the eggplant to the mixture and stir well.  Once it is all combined and boiling again, stir in the cornstarch slurry and just allow it to thicken and get nice and glossy.

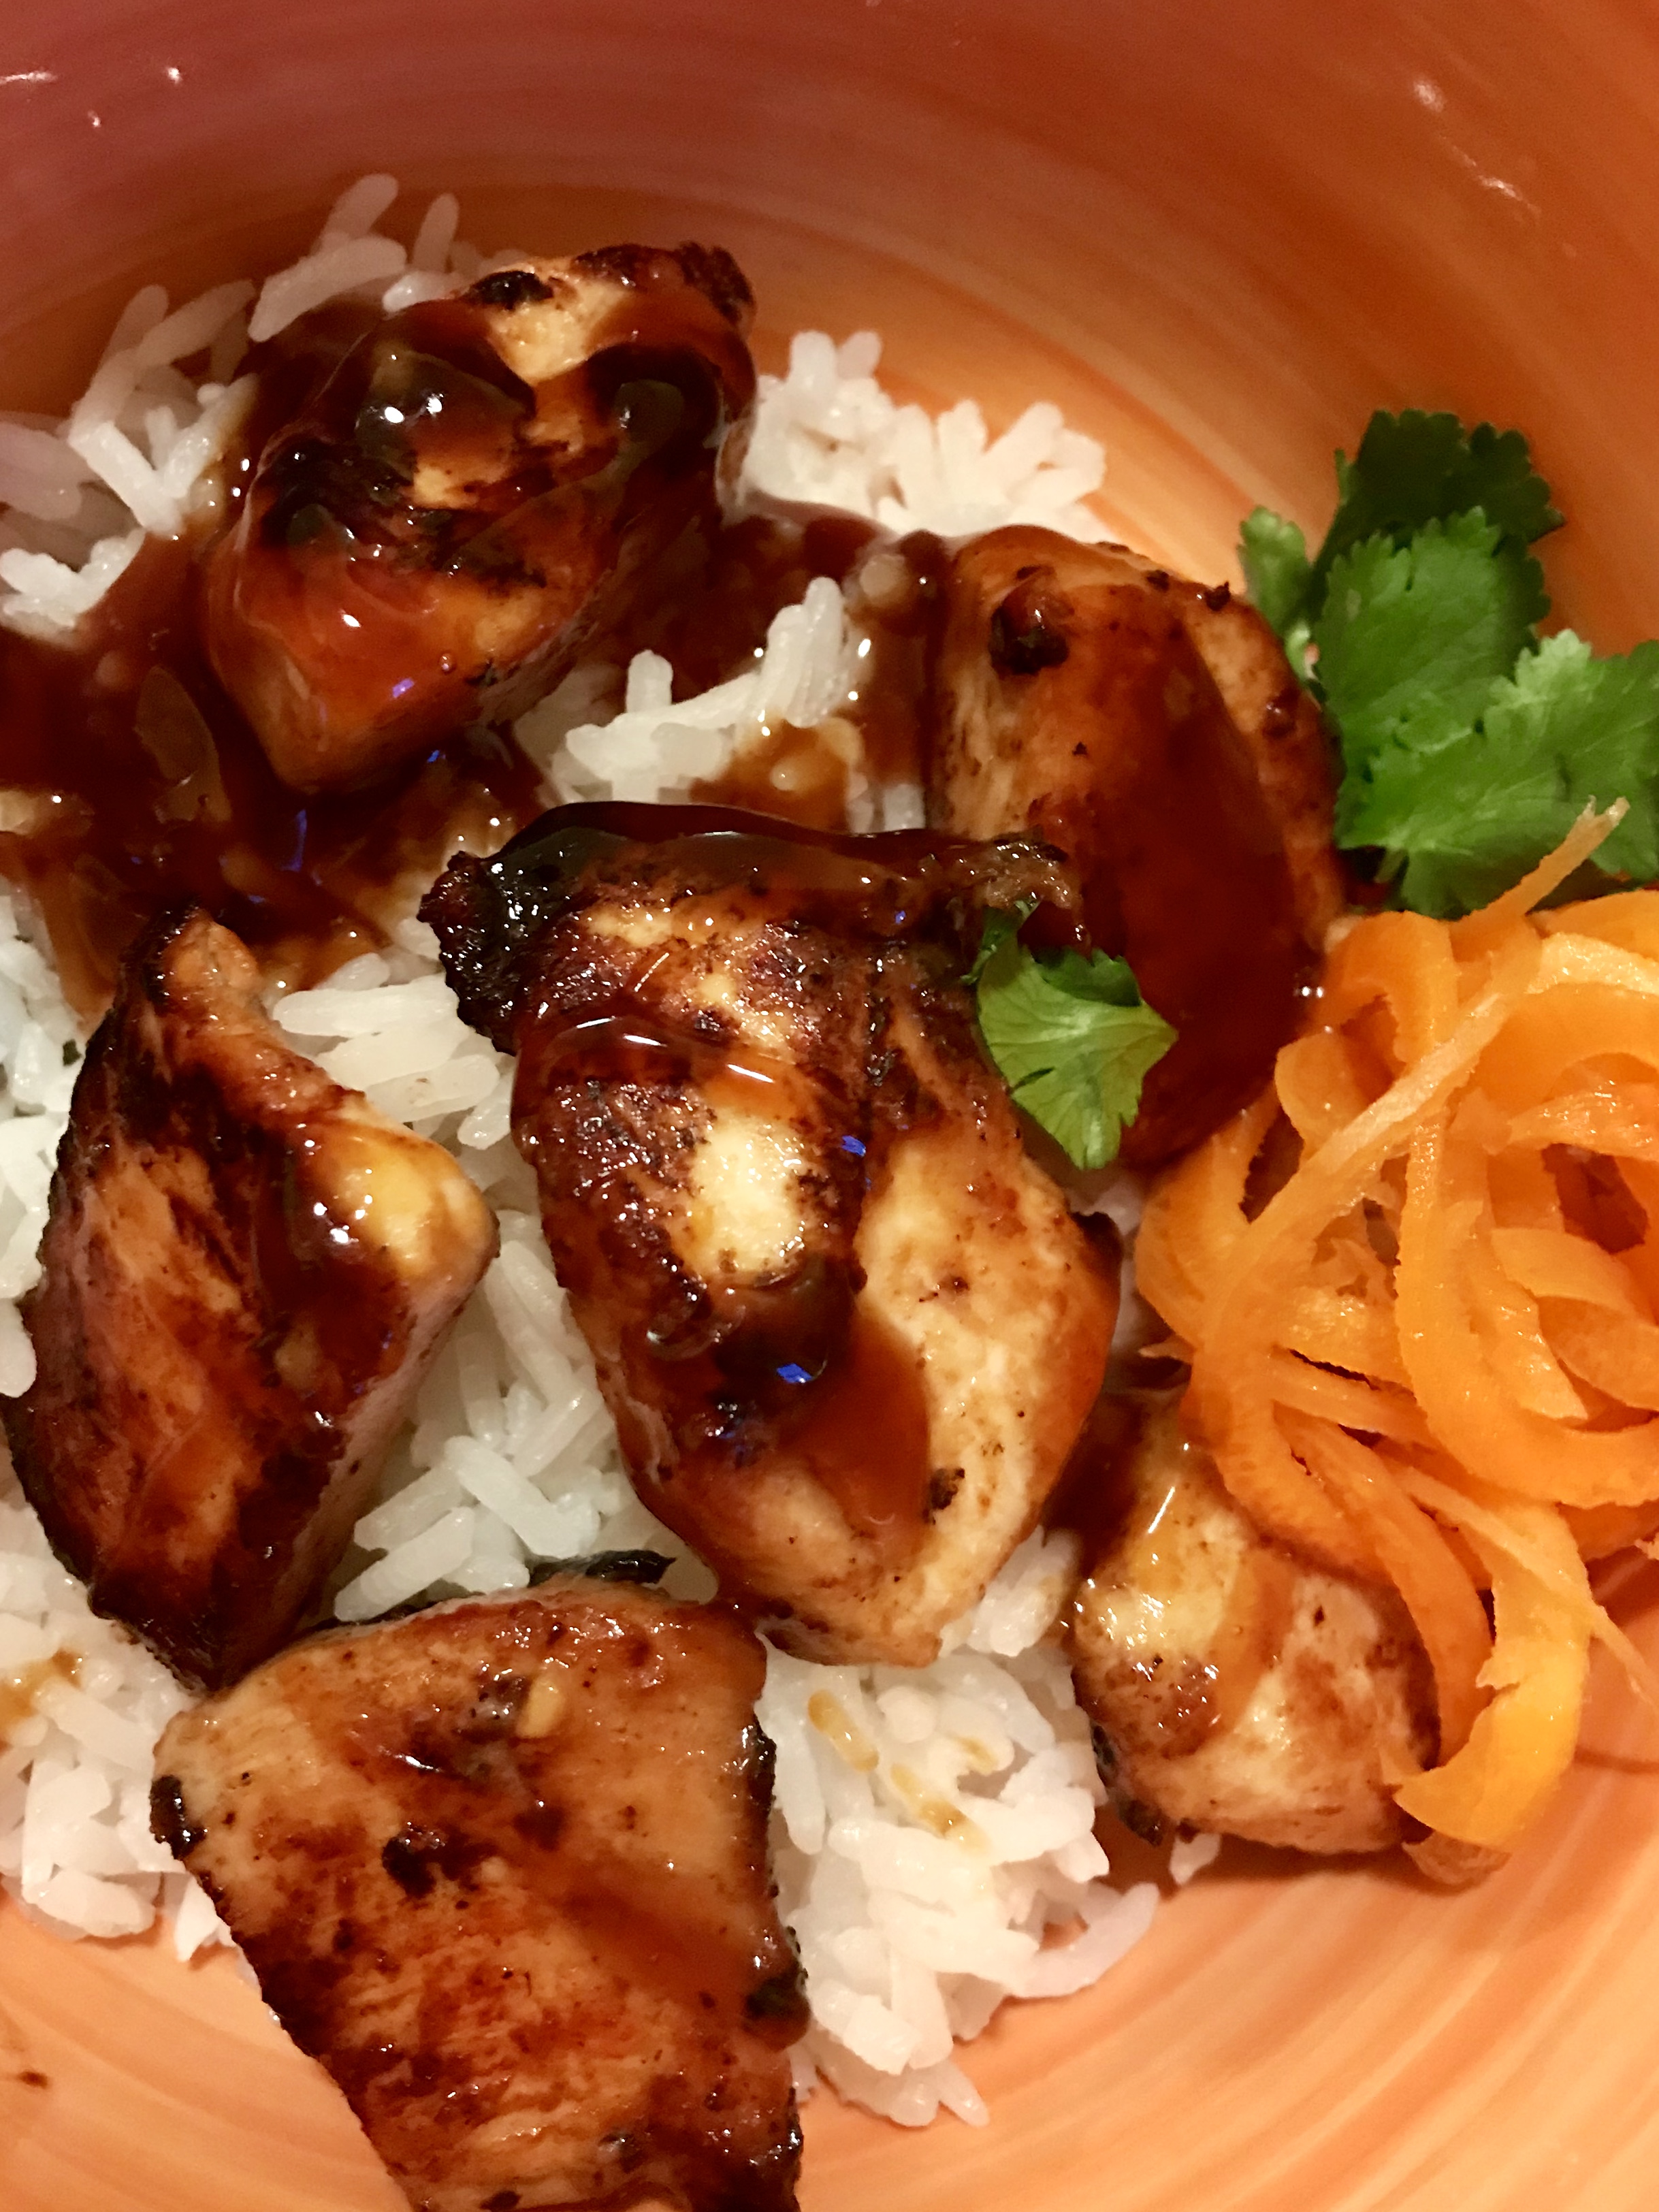
Serve over fluffy white rice, garnished with green onions and toasted sesame seeds.

If you want to make this gluten free use sake or dry sherry in place of the Shaoxing wine, use gluten free chicken stock, and make sure your black bean sauce is gluten ffree (it is hard to find!).

Look how soft and creamy the eggplant is – addictive!
Cook pork crumbles until crispy in spots
Look at this happy wok, bubbling away – and smelling incredible.

EGGPLANT & TOFU WITH BLACK PEPPER

My garden is overflowing with Japanese eggplant right now and I couldn’t be happier about that. I’ve got enough that I’ve had to move on from my usual go to of miso/soy grilled eggplant and try other preparations. This is a sure fire winner, a quick and easy one dish meal, and served with rice a very complete meal. Never fear, I still made a salad ….. I think by now Grant is disappointed when salad doesn’t show up for dinner.

These beauties are delicious 😋 I’m late to learning a love for eggplant but making up for it now!

  • 14-ounce package extra-firm tofu
  • Neutral oil for roasting (I use safflower)
  • 1 tablespoon cornstarch
  • 3/4 to 1 pound eggplant
  • Kosher salt
  • 3 to 4 tablespoons unsalted butter (the higher amount is slightly more rich)
  • 1 heaped cup thinly sliced shallots or 1 medium white or red onion, thinly sliced
  • 5 garlic cloves, peeled, crushed
  • 2 tablespoons finely chopped ginger
  • 1/2 cup low-sodium soy sauce
  • 1 tablespoon granulated or brown sugar
  • 1 tablespoon crushed or very coarsely ground black pepper, and more to taste
  • Rice, for serving
  • Chile-garlic sauce, crispy chili oil, or sriracha for serving

Heat oven to 425 degrees F. Drain tofu and place on a few layers of paper towel with more over it; set aside for 5 minutes, or until needed. Drizzle 3 tablespoons oil over your largest baking sheet and place it on the oven to get very hot while you get everything else ready. Trim eggplant and cut eggplant into 1-inch pieces. In a large bowl toss with 1 tablespoon oil and a few pinches of salt. Remove hot pan from oven and spread eggplant over half to 2/3 the pan. Cut tofu into 1-inch cubes. Toss gently in empty bowl with cornstarch and a couple pinches of salt until coated. Spread on empty part of baking sheet.

Roast tofu and eggplant in oven for 20 minutes to start. After 20 minutes, use your thinnest spatula to gently separate the tofu from the pan and flip to crisp and brown on the other side, about another 10 minutes. Do the same with the eggplant. At 30 minutes, the tofu should be crisp and browned and the eggplant should be roasted and tender. If needed, cook it for 5 more minutes.

I have a number of sources for amazing Asian cooking, Kenji Lopez Alt, Andrea Nguyen, Just One Cookbook, The Woks of Life, but in a surprising turn, this came from another of my all time favorite bloggers, Deb Perelman of Smitten Kitchen. I’ve never had a fail from any of her recipes, and if you want to truly be entertained, hop on over to her blog for the full write up, and more of her wit.

Vegetable Pancakes

Stella was insistent that I get my recipe for vegetable pancakes on the blog right away so she could make them at home with Hayley!  Such a quick, easy and delicious way to have a meal on the table in minutes, these are great for lunch, dinner or snacking.  I usually make a pile and they warm up quickly in the toaster oven.  They are a bit of a mash up of Korean pajeon, Japanese Okonomiyaki and Chinese scallion pancakes (even a bit like my zucchini fritters!)

I will get a better photo, but Stella didn’t want me to wait, she loved them so much!
  • 1/2 cup all purpose flour (once Stella was diagnosed with celiac, we used Gluten Free Flour)
  • 1/2 cup potato starch or cornstarch
  • 1/2 tsp baking powder
  • 1/2 tsp Chinese 5 spice powder (optional but we liked it)
  • 1 tsp sea salt
  • 1 egg
  • 3/4 cup very cold water
  • 4-6 cups very thinly sliced or julienned vegetables

oil for frying

Whisk dry ingredients together, then stir in egg and water. Add in all your vegetables and stir just to combine. You only need enough batter to hold the vegetables together.

Preheat oven to 300 to keep the pancakes warm as you cook them.

Heat oil in frying pan, and drop in 1/4 cup amounts, flattening them out slightly. Cook for 3-5 minutes on each side until golden brown and crispy. You will have to do this in batches, so keep them warm in a 300 oven until you have them all fried. Don’t crowd the pan or they will steam rather than fry.

I first tried this recipe as Korean pancakes, adding some chopped kimchi as well as a bit of the juice, but ended up using it for many different vegetables.

Serve with dipping sauce:

  • 1/4 cup soya sauce
  • 1-2 tbsp rice vinegar
  • 1/2 tsp sesame oil (I like toasted)
  • 1/2 tsp sugar
  • 1/2 tsp hot sauce or chili crisp (such as sriracha)

Stir together and set aside for service. Taste and adjust for your personal preference.

Use whatever vegetables you have in your fridge! It really is a fridge clean out in the best possible way.
Make sure you don’t crowd the pan – it takes very little oil.
Flip when nice and crispy, and a golden brown.
These ones had fresh shrimp and lots of chives.
Another day, another batch

Chicken Karaage

How can chicken so crunchy be this tender? Try it and see.

One of our favourites to order in a Japanese restaurant, this is just as good as restaurant quality. Don’t get me wrong, whenever we can go out to restaurants again (post Covid) I will still be delighted to sit in a booth and order ….. but for now I can at least satisfy my cravings. It is also one of Sloan and Stella’s favourites to order and I just know when we can gather around the Sunday dinner table again this will be requested.

  • 1 lb chicken thighs cut 1 inch pieces
  • 1/4 cup corn starch or potato starch
  • 1/4 cup flour
  • 4 cups canola oil
  • 3 tbsp soy sauce
  • 4 tbsp mirin (sub Sake if you have it)
  • 2 tbsp minced garlic
  • 2 tbsp minced ginger

Reserve the starch and flour for just prior to frying up. Combine soy sauce, miring, garlic and ginger in either a sealable plastic bag or bowl with lid. Stir in the chicken pieces and set aside. You can either do this earlier in the day or at late as 20 minutes before dinner – I find it very flexible.

Heat your oil to 350, if you don’t have a thermometer, just stick a chopstick in – if it sizzles happily, then it is time to add your chicken.

Toss the starch and flour together, then toss with chicken. It doesn’t matter if the coating is uneven, it just means more texture.

Add about 1/3 of the chicken at a time to wok – do not overcrowd. Any time you overcrowd when you are frying it reduces the temperature of the oil and that leads to greasy fried food! Keep the chicken moving while in the wok, and remove when golden brown. Sprinkle immediately with salt. Keeping the cooked pieces in a 200 degree oven allows them to retain their crispness while you do the remaining 2 batches.

DIPPING SAUCES – I’ve given two options because that’s the way I like it!

CREAMY

  • 1/2 cup Kewpie Mayonnaise
  • 3 tbsp sriracha
  • 3 tbsp soy sauce
  • 3 tbsp sweet chili sauce

SOY

  • 3 tbsp soy sauce
  • 3 tbsp rice vinegar
  • 1 tsp sesame oil
  • 1 tbsp toasted sesame seeds
  • chili oil to taste
This well used wok is perfect. Of course, you can use a deep fryer if you have it handy, but I like the wok just fine for this, and it encourages me to fry only small amounts at a time. Be sure to strain and reserve your oil for use another day!
Love having the option of two sauces – everybody gets their own little sauce dipping bowl and dip away!
Definitely not as many vegetables as we normally get onto our plates, but this Japanese dinner was so tasty! I even made my own gyoza wrappers and that’s a story for another day…..

The BEST Miso Soup

I gotta say ….. hard to make a bowl of miso soup look exciting … but here it is, the best ever! I didn’t have any seaweed at home so added a few spinach leaves. Delicious!
  • 2 teaspoons dashi granules 
  • 4 cups water 
  • 3 tablespoons miso paste 
  • 1 (8 ounce) package silken tofu, diced 
  • 2 green onions, sliced diagonally into 1/2 inch piece

In a medium saucepan over medium-high heat, combine dashi granules and water; bring to a boil. Reduce heat to medium, and whisk in the miso paste. Stir in tofu. Separate the layers of the green onions, and add them to the soup. Simmer gently for 2 to 3 minutes before serving.

I think the key to this is the dashi. You can easily make your own dashi at home – just look up a few YouTube videos, but for the amount I use, keep some granules in the freezer and it is ready whenever I need it.

We followed the miso sop with these tasty Japanese dishes ….. chicken karaage with 2 dipping sauces, pork and cabbage gyoza and garlic soy snap peas. Goes without saying that a Japanese inspired dinner needs a serving of rice!

I often serve Miso soup to accompany a few other dishes, and this makes it very easy to prep a bit earlier and just leave it simmering – don’t add the tofu or green onions until closer to serving time.

Spicy Miso Chicken Ramen

By spicy, I mean as spicy as you like …. me? Not so spicy. I’ve also been “burnt” a few times by my chili flakes. They are made from our homegrown dried chili peppers and they pack some heat!

Add in whatever vegetables you like – this crispy chicken katsu was perfect with tonights broccolini, snap peas, mushrooms and red peppers.


INGREDIENTS

  • 3 strips thick-cut bacon, chopped
  • 6 cloves garlic, finely chopped or grated
  • 2 medium shallots, finely chopped
  • 1 inch fresh ginger, thinly sliced
  • 1/2-1 teaspoon chili flakes
  • 6-8 cups low sodium chicken broth (or vegetable if you like)
  • 3/4 cup coconut milk
  • 1/4 cup soy sauce (I like low sodium)
  • 1/4 cup miso paste
  • 2-4 tablespoons chile paste(I use Gochujang)
  • 4 squares Ramen noodles
  • 4 cups baby spinach, chopped
  • 2-3 mini bok choy
  • 1 tablespoon sesame oil (toasted is best)
  • soft or hard boiled eggs, for serving (optional, and not in my house)
  • Toasted nori sheets, sesame seeds, green onions, and chili oil, for serving 

CHICKEN KATSU 

  • 4 chicken cutlets, or 2 boneless chicken breasts, sliced in half horizontally
  • 1 cup panko bread crumbs
  • 3 tablespoons toasted sesame seeds
  • kosher salt & freshly ground pepper

INSTRUCTIONS

  1. 1. Heat a large Dutch oven over medium-high heat. Add the bacon and cook until crisp, about 5 minutes. Add the garlic, shallots, ginger, and red pepper flakes. Cook, stirring occasionally, until caramelized, about 3 minutes. Pour in the broth, milk, and soy sauce, then whisk in the miso and chili paste. Reduce the heat to medium-low and simmer 10 minutes.
  2. 2. Meanwhile, make the Katsu. Place the Panko and sesame seeds in a shallow bowl. Season with salt & pepper. Dredge both sides of the chicken through the Panko, pressing to adhere by using your fist to really pound the crumbs in. Place the chicken on a plate.3. Heat a few tablespoons of oil in a large skillet over medium-high. Add the chicken and cook until golden brown, 3-4 minutes. Flip the chicken and cook until golden brown on the other side, about 3-4 minutes. Transfer to a cutting board and season with salt. Slice into thin strips.
  3. I use this same fry pan to saute the bok choy just until slightly softened. Wipe out most of the oil and it will be perfect, soaking up the sesame seeds left behind by the chicken.
  4. 4. To the soup, stir in the noodles, spinach, and sesame oil. Let sit 5 minutes or until the noodles are soft. (or precook your noodles)
  5. 5. To serve, divide the noodles between bowls and ladle over the soup back overtop. Add the chicken and bok choy. Top as desired with eggs, green onions, sesame seeds, and chili oil. Serve immediately.

I’m not going to pretend this is authentic Japanese Ramen ….. this is perfect for the home cook, it delivers on so many levels, flavour, simplicity and comfort! (to start) We aren’t fond of eggs in our house, so we always leave those off, but if you love eggs, make sure to add. Jade, this is perfect for your newly laying hens and those beautiful eggs they are producing.

Get everything chopped while you crisp up the bacon. You could omit the bacon, but I think it is a quick, week night hack for getting that traditional flavour of pork belly into a ramen dish.
Saute it all up until those onion bits begin to caramelize. See my gorgeous wooden utensil? Hayley made that and it makes cooking more fun.
Today’s version of vegetables and toppings. Use whatever you have on hand! We have enough for two nights, so I think my next dinner I will omit the chicken katsu, and serve with prawn & vegetable tempura.
Adding the sesame seeds to the panko gives the chicken lots of flavour and extra crunch.
I like to use the same pan – remove the excess oil, leaving the sesame seeds and bits of panko, then sauté the vegetables until tender but still have some crunch.
Another night …. another selection of vegetables.
Tonight we served this with green onion pancakes, and my toasted sesame vinaigrette.

This recipe came from Half Baked Harvest ….Tieghan calls it a 30 minute dish, let me know if that works out for you …. it sure didn’t for me! If I had to, it might be faster but after a day of desk work I don’t mind taking my time. Hop on over to her website if you haven’t already, she not only has fabulous recipes, she has lots of tips and videos to make sure your home meals aren’t getting boring during this “stay at home” Covid rut!

Japanese Nabe (Hot Pot)

How to describe this?  It’s really not a recipe – just ingredients and an idea of how to put it all together.  Our friend Tom made this the other day and I was immediately hooked.  How can something that just looks so simple end up feeling immensely satisfying and ever so delicious??

Nabe 1

Looks like a pile in a pot ….. right?  But, oh so good!  I could eat this on a weekly basis!


The base of this broth is as simple as the kombu you create it with.  Add about a 6 inch piece to 8 cups of water, let it sit for about 15-30 minutes, and then bring to a boil and allow to simmer until the kombu softens.  Some recipes will say to remove it at this point, but I didn’t, and we ate it – a bit chewy but still good!

Prepare all your vegetables while the kombu softens.  and broth simmers.

Keep the vegetables in groups according to how long it takes them to cook.  i.e., cabbage takes longer than snap peas!

I used:

  • savoy cabbage
  • carrots
  • sweet peppers
  • snap peas
  • bok choy
  • red onion
  • asparagus
  • bean sprouts

For a protein I used chicken breast and tofu.  The sky is the limit here, you can easily use whatever you like – just be aware of how long it will take to cook it, and put it in at the right time.  The last thing you want is soggy veg.

Nabe 3

Prepped and ready to go.

Nabe 2

If you have a pint sized helper like Stella, she will add the vegetables in the right order and keep everything moving.  That is teriyaki chicken beside her, and it was fantastic too.

For serving you need:

  • Ponzu (citrus soy sauce)
  • chili oil
  • toasted sesame seeds
  • thinly sliced green onions
  • cilantro, roughly chopped
  • Goma Shabu Sesame Sauce (I don’t have that one …yet)

Prepare Udon noodles while the sauce simmers.

The main objective here is not calling it a noodle bowl.  They finish off the show.  If you have individual mini bowls then each person can have their little assortment of the above condiments and sauces.  Traditionally you would ladle the veg & protein into your bowl, accepting the small bit of broth that comes with it.  You can either dress your bowl with the above, or dredge each bite in the accompaniments – your choice.  The pure joy in this comes from adding your finishing touches so everybody has it just they way they like.  When everybody is finished, then you add the noodles to the hot broth.  Once again, traditionally this would be on the table with a heating vessel to keep everything hot but I found it was warm enough to stir in the cooked noodles once we had finished eating the first “course”.  Those noodles are such a delightful way to finish slurping up your meal.

Shopping List:

  • assortment of veg
  • protein of choice
  • udon noodles (I like frozen best, if you can’t get fresh – over dried)
  • condiment toppings …… ponzu, sesame sauce, chili oil, sesame seeds, cilantro & green onion
  • kombu

Nabe 5

This is the dried kombu I found – you only need about 1/2 of one piece to go with 8 cups of water.


Tom’s Teriyaki Chicken

teriyaki chicken 6

This teriyaki chicken hits all the notes, crispy bits of carmelized chicken, sweet and salty,  tender and juicy – give it a try, you will love it.

Thanks go to our friend Tom for this simple teriyaki marinade that is as perfect as it is easy.  Works well with any protein, just to make it even simpler for you.

Marinade:

  • 1 cup soy sauce (reduced sodium)
  • 1/4-1/3 cup white sugar
  • 1 golf ball size knob of ginger, grated or finely minced.

Combine and stir until sugar has dissolved.

2 pounds of bonelesss, skinless chicken thighs – cut into bite size pieces

Garnish:

  • green onions, thinly sliced
  • sesame seeds, toasted until golden brown

Marinate the chicken in the teriyaki sauce for at least an hour and up to overnight.  Remove from marinade and place in hot saute pan.  Do not overcrowd the pan or the chicken will just steam rather than get nice crusty bits of caramelization.  Allow to cook, without disturbing, until you see the colour start to change on top of the chicken and the chicken releases easily from the pan to turn over.

Serve with rice and your favourite greens.

Teriyaki chicken 1

See the marinade bubbling up beneath the chicken?  That’s going to get all glossy and give the chicken nice little bits of delicious caramelization – don’t disturb it while this is happening.

teriyaki chicken 2

You can see some of the browned bits – that is pure gold.

Teriyaki 3

If you’d like a little extra to drizzle over, make a little sauce without the ginger and allow it to thicken.  Adds a fantastic bit of sweet and salty flavour.

Drizzle:

  • 1 cup water
  • 1/2 cup soya sauce
  • 1/4 cup white sugar
  • 1 tbsp corn starch

Combine the water, soya sauce and sugar, stir until sugar has dissolved.  Add in the corn starch and cook over medium heat until sauce has come to a boil and allow it to reduce slightly.  (Corn starch as a thickener has to boil or you will still taste the corn starch!)

Teriyaki 2

Tonight’s dish was a teriyaki bowl – utilizing a combination of chicken thigh and chicken breast with a little shredded carrot for crunch and cilantro for brightness.

Realistically you could use this recipe for any protein you like, or make it with a large assortment of vegetables for a vegetarian dish.  The teriyaki sauce is the star!

Scallion Pancakes

Scallion Pancake 9

Crispy, flaky and little crunches of salt – perfection.

We fell in love with Scallion Pancakes at Mad Mango Cafe in Kelowna, served with an amazing laksa.  That’s a little bite of heaven.  Ever since, I’ve looked up a few recipes, and never quite had the courage to try making them.  Tonight’s menu included a chicken laksa, and just on a whim, decided to give these scallion pancakes a go.  I found this recipe on the “Serious Eats” website, and I didn’t change a thing.  They were far quicker and easier to make than I thought, and FAR exceeded our expectations.  If you have fun playing with dough, make sure to give this a try.

Ingredients

  • 2 cups all-purpose flour, plus extra for dusting work surface
  • 1 tsp kosher salt
  • 1 cup boiling water
  • Up to 1/4 cup toasted sesame seed oil
  • 2 cups thinly sliced scallion greens
  • flaky sea salt

Oil for frying

Salt for garnish

Directions

Place flour & salt in bowl of food processor. With processor running, slowly drizzle in about 3/4  cup of boiling water. Process for 15 seconds. If dough does not come together and ride around the blade, drizzle in more water a tablespoon at a time until it just comes together. Transfer to a floured work surface and knead a few times to form a smooth ball. Transfer to a bowl, cover with a damp towel or plastic wrap, and allow to rest for 30 minutes at room temperature, or up to overnight in the fridge.  (If you don’t have a food processor, just mix the dough together by hand and knead until smooth and soft)

Divide dough into four even pieces and roll each into a smooth ball. Working one ball at a time, roll out into a disk roughly 8-inches in diameter on a lightly floured surface.

Scallion Pancake 1

Okay, so my dough ball isn’t exactly a perfect circle, but that’s okay, it will get there.

Using a pastry brush, paint a very thin layer of sesame oil over the top of the disk. Roll disk up like a jelly roll, then twist roll into a tight spiral, tucking the end underneath. Flatten gently with your hand, then re-roll into an 8-inch disk.

Scallion Pancake 2

See?  What did I tell you, looks like a circle now!  Gently flatten with your hand, then start to roll.

Paint with another layer or sesame oil, sprinkle with 1/2 cup scallions, a sprinkle of flaky sea salt, and roll up like a jelly roll again. Twist into a spiral, flatten gently, and re-roll into a 7-inch disk. Repeat steps two and three with remaining pancakes.

Scallion Pancake 3

Scallion Pancake 4

Scallion Pancake 5

Make sure to brush on just a very delicate layer of sesame oil – if you get too much on there the oil will start to pop out when you roll the dough.

Heat oil in an 8-inch nonstick or cast-iron over medium-high heat until shimmering and carefully slip pancake into the hot oil. Cook, shaking the pan gently until first side is an even golden brown, about 2 minutes.

Scallion Pancake 6

Scallion Pancake 7

Just look at that flaky crust!

Scallion Pancake 8

As soon as you remove the pancake from the oil, immediately sprinkle with a little sea salt.

Carefully flip with a spatula or tongs (be careful not to splash the oil), and continue to cook, shaking pan gently, until second side is even golden brown, about 2 minutes longer. Transfer to a paper towel-lined plate to drain. Season with salt, cut into 6 wedges. Serve immediately with sauce for dipping.  Repeat with remaining 3 pancakes.

Dipping Sauce

  • 2 tablespoons soy sauce
  • 2 tablespoons Chinkiang or rice wine vinegar
  • 1 tablespoon finely sliced scallion greens
  • 1/2 teaspoon grated fresh ginger
  • 2 teaspoons sugar

Combine all ingredients, and set aside at room temperature.

Tonkatsu Sauce

Who knew tonkatsu sauce was so easy to make?  We were lucky enough to get some Japanese chow mein from the Japanese bazaar, and it seemed a perfect time to cook up a pork cutlet with tonkatsu sauce.

Pork cutlet with Tonkatsu

Japanese chow mein is such a treat, I love the way it tastes crunchy with the lightest of seasonings.  It goes so well with many dishes.  Tonight we served it alongside the pork cutlet with tonkatsu and bok choy with peppers and lemon tahini sauce.

  • 1 tbsp ketchup
  • 1 tbsp Worcestershire sauce
  • 2 tsp oyster sauce
  • 1/2 tsp hot chili oil

Whisk together and adjust to your liking.  Traditionalists will use 1 tsp sugar instead of the chili oil but we really like the additional bite of heat.