Chocolate Chunk Zucchini Loaf

Still trying to use up zucchini???  Here is a winner, hints of my Mexican Chocolate cake in this loaf, with a bit of cinnamon added to the chocolate and coffee flavours.  If any loaf recipe uses up 2 cups of zucchini it has to be healthy, right??

Chocolate Chunk Zucchini Loaf 2INGREDIENTS

  • 1/2 cup melted unsalted butter
  • 3/4 cup brown sugar (packed)
  • 2 large eggs
  • 1 tsp vanilla extract
  • 1 2/3 cups all purpose flour
  • 1/3 cup cocoa powder
  • 3/4 tsp salt
  • 1/2 tsp baking soda
  • 1/2 tsp baking powder
  • 1/2 tsp cinnamon
  • 1/2 tsp espresso powder (instant)
  • 2 cups shredded zucchini (squeeze all the moisture out)
  • 1 cup good quality chocolate chips

Preheat oven to 350 degrees F.  Grease and line a loaf pan with parchment paper.  (you don’t have to do this step but I like the way it helps remove the loaf from the pan cleanly)

METHOD

Grate your zucchini and allow it to sit while you do everything else, so important to remove the excess liquid.

Chocolate Chunk Zucchini Loaf

In a large mixing bowl stir the brown sugar into the melted butter and mix until all the sugar has dissolved, then add the eggs one at a time.  It is really important to add the sugar before the egg so you don’t cook the egg!  Stir in the vanilla and set aside.

In a separate bowl combine flour, cocoa powder, baking powder, baking soda, salt, cinnamon, espresso. Whisk to make sure it is all blended together.

Stir dry ingredients into the brown sugar mixture until just combined.  Gently fold in the zucchini and the chocolate.

Chocolate Chunk Zucchini Loaf 3

This makes a VERY thick mixture, but don’t worry, it will be moist and delicious.

Turn into the prepared loaf pan and bake for 50-60 minutes.  Test at 50 to see if an inserted toothpick comes out clean.

Rest for 15 minutes after taking it out of the oven, then removed from the loaf pan and  allow to cool down for at least an hour before slicing.

Coconut Zucchini Bread

Looking for a new way to use up some of that never ending zucchini that keeps showing up in your garden?  This is it … so moist and tender with enough coconut that you get a bit of crunch in every bite.

Coconut Zucchini 3

I keep a cinnamon/sugar mix in a jar – sprinkle it over your loaf before baking and you will be guaranteed an extra crispy loaf top.

  • 1 1/2 cups all purpose flour
  • 1/2 tsp baking soda
  • 1/2 tsp baking powder
  • 1/2 tsp salt
  • 1/2 tsp cinnamon
  • 1/4 tsp nutmeg
  • 1 1/2 cups shredded zucchini (make sure to drain well and squeeze out extra moisture)
  • 1/2 cup brown sugar
  • 1/4 cup white sugar
  • 1/4 cup melted coconut oil
  • 1/2 cup Greek yogurt (at room temperature)
  • 1 tsp vanilla extract
  • 1 large egg (room temperature)
  • 1 cup shredded unsweetened coconut

Preheat oven to 350 degrees F and grease a 9 x 5 inch loaf pan.  I like to set in parchment paper also for easier removal.  Run it the length of the pan with a little sticking out each end – easy to grab and keep the loaf whole as you lift it out to cool.

In a mixing bowl, sift or whisk together the flour, baking soda, baking powder, salt, cinnamon and nutmeg.

In another bowl combine sugars, coconut oil, yogurt, egg and vanilla.  Blend and stir in zucchini.

Coconut Zucchini 1

Add the wet ingredients to the dry bowl, and stir JUST until combined.  Do not overmix.  Gently stir in the coconut.

Pour batter into loaf pan and smooth the top.  Bake for 50-60 minutes.  Use a toothpick to test, make sure it comes out clean before you remove the loaf from the oven.  Let your zucchini bread rest in the loaf pan for 10 minutes before removing and setting it on a rack to completely cool.

Coconut Zucchini 2

The combination of yogurt and coconut oil makes this loaf so moist you won’t even notice there isn’t any butter in the recipe, or need to put it on after!


Sparkle Birthday Cake

It is Stella’s 5th birthday today and she wanted a horse cake.  Hmm.  A horse cake?  Well, Hayley found a photo to work with, and I found an amazing cake recipe on “smittenkitchen”, so we were off to the races.  A few hours later and I think we are all really happy with the results!

IMG_5445

Our original inspiration photo had more of a smooth finish, but we wanted this to look like the horse Stella rides – Artie.  Pretty confetti sprinkles inside and it’s a perfect 5 year old birthday cake for a very special grand daughter.

If you haven’t been to the Smitten Kitchen website yet, do yourself a favour and hop on over for a visit.  Deb Perelman has great recipes, both her own and sourced from other cookbooks, they never fail.  She calls this one confetti birthday cake, and it is easy to see why.  Those little bursts of colour just make the cake look like a party already!

IMG_5463

So hard to believe Stella is 5 already!

IMG_5450

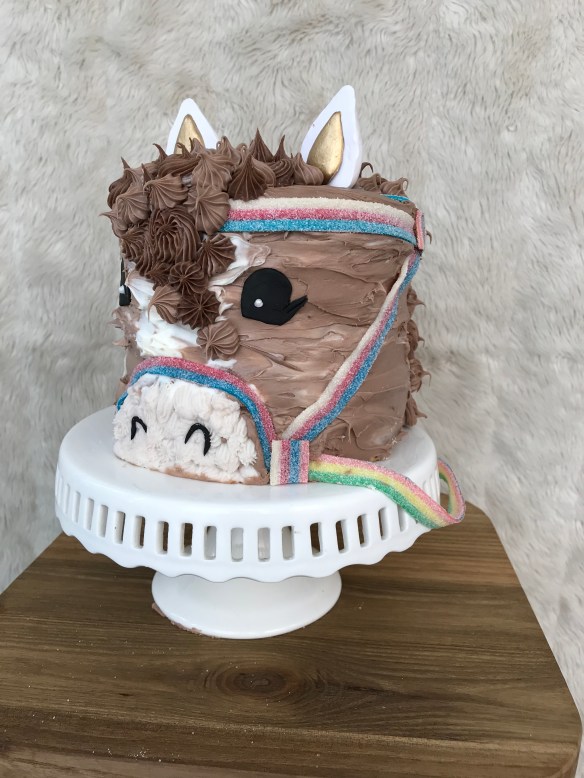
Even the bridle turned out really well!

IMG_5447

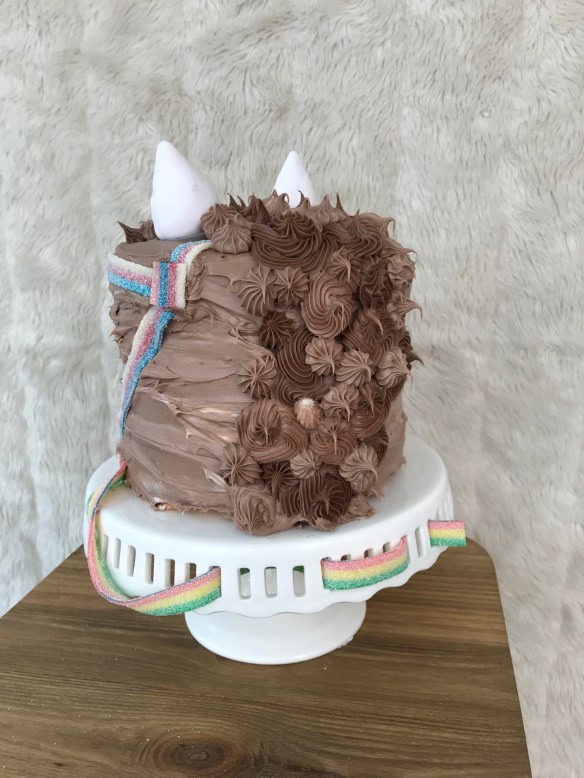
We were suitably impressed with how well Hayley created the mane.

IMG_5438

It’s working, this is looking pretty good!


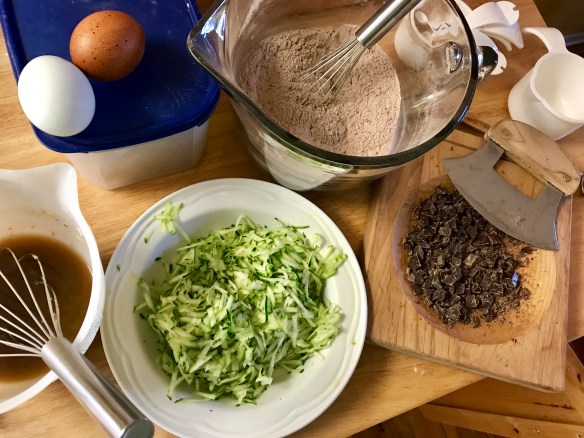
All right, sorry, enough of the horse cake photos, you are no doubt looking for the recipe! We just had so much fun creating it.  One of the joys with this recipe is that you only use one bowl, and it takes about 5 minutes to put together.


IMG_5481

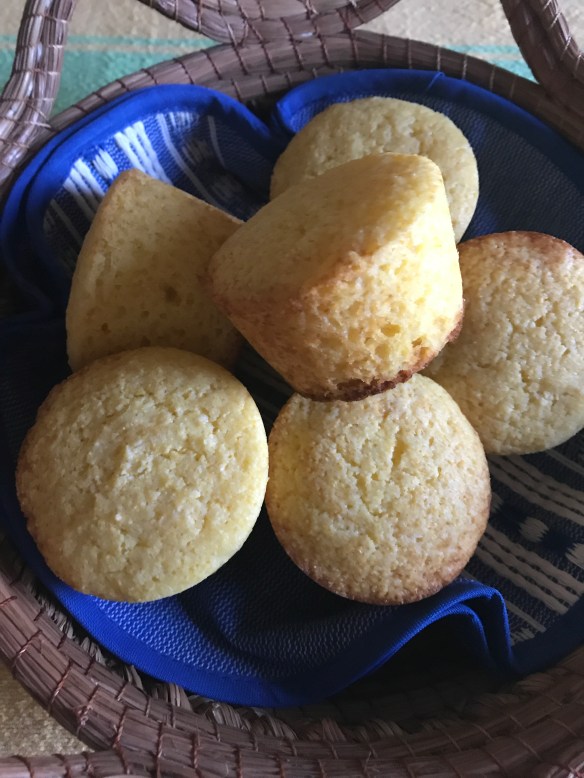
This time, I used 1 whole egg instead of egg whites, and used the batter for filling ice cream cone cups, they bake up perfectly into 9 hand held cake cones.  Gently fold in the sprinkles.

CAKE
  • 1/2 cup (115 grams or 4 ounces) unsalted butter, at room temperature
  • 2/3 cups (130 grams) granulated sugar
  • 1/2 teaspoon kosher salt
  • 2 large egg whites
  • 1/2 teaspoon vanilla extract
  • 1/2 cup (120 ml) buttermilk
  • 1 teaspoon baking powder
  • 2 tablespoons (16 grams) cornstarch
  • 1 cup (130 grams) all-purpose flour
  • 1/4 cup rainbow sprinkles

Preheat oven: To 350 degrees F. Line the bottom of an 8×8-inch square or 9-inch round cake pan with parchment paper and coat the bottom and sides with nonstick spray or butter.

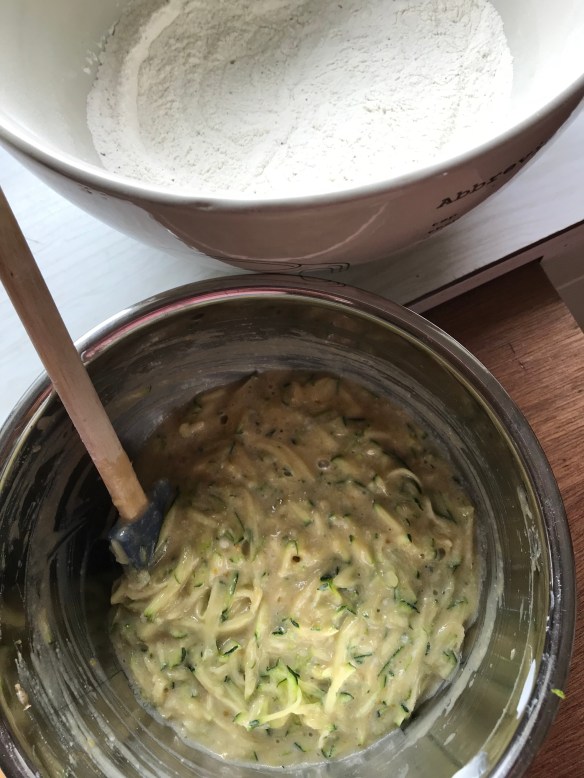
Make cake: Beat butter, sugar, and salt together in a medium bowl. Add egg whites, one at a time, beating until combined and slightly fluffy. Add vanilla and buttermilk and beat to combine. The mixture will instantly look like cottage cheese and you will be sure it’s ruined but I promise it is not. Add baking powder and cornstarch and beat very well to combine. Scrape down sides of bowl and beat one second more. Add flour and mix just until it disappears. Use a rubber scraper to gently fold in sprinkles.

IMG_5424

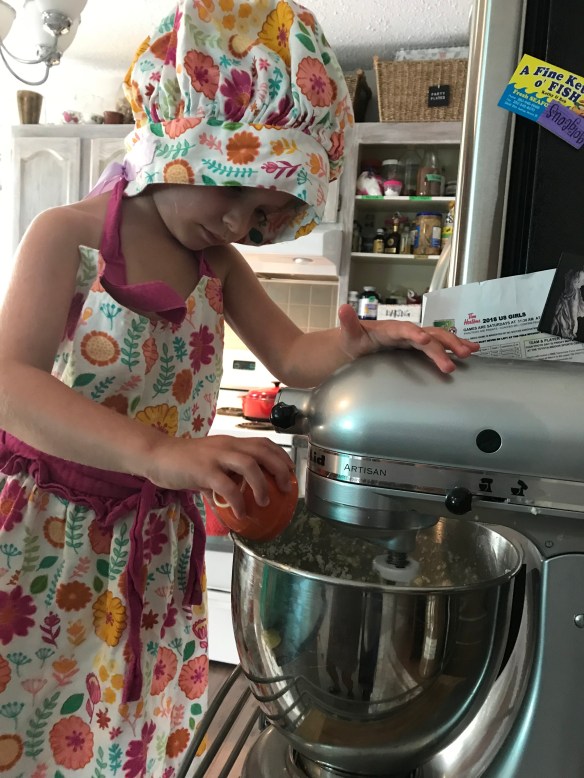
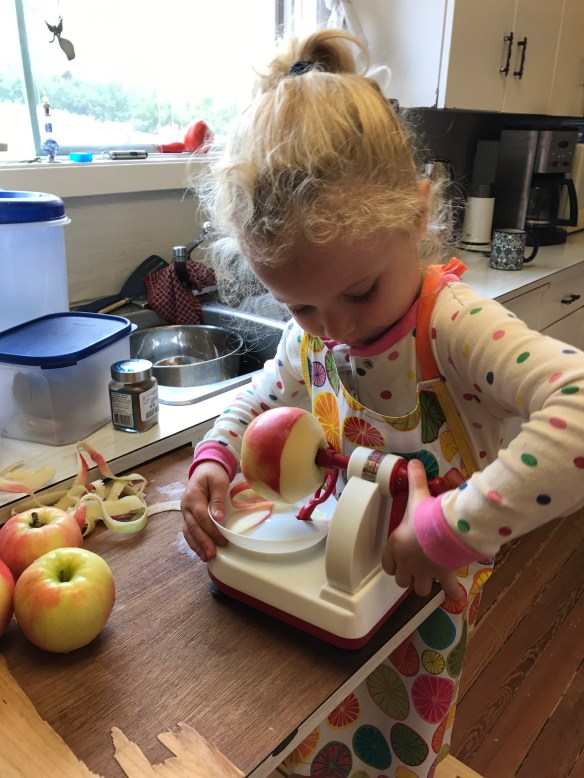
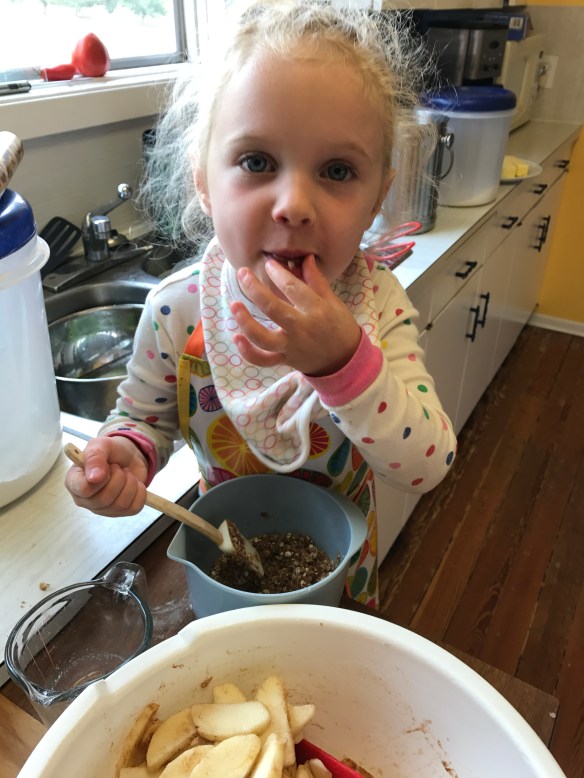
It’s definitely a help to have a baker as cute as this 5 year old.


Bake cake: Spread batter in prepared pan and smooth the top. Bake for 20 minutes, or until a toothpick inserted into the center of the cake comes out batter-free. Let cool in pan on cooling rack for 5 minutes, then run a knife around the side to loosen the cake, flip it out onto the cooling rack, and slide the cooling rack into the freezer until cake is cool, about 10 to 15 minutes.

(If you don’t have buttermilk, just put 1 tsp lemon juice or vinegar into a 1/2 cup measuring vessel and fill to that mark with milk – allow to sit for 10 min and gently stir.)

IMG_5482

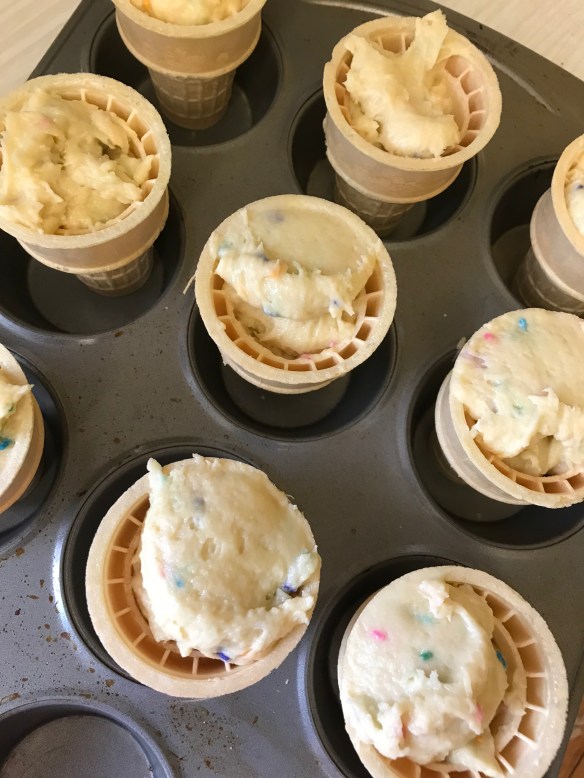
I used a whole egg for these instead of egg white, just because I wasn’t really concerned about pure white batter.  Simply stand the empty cones in a muffin tin and scoop in the batter.  Bake for 18-20 minutes at 350.

IMG_5483

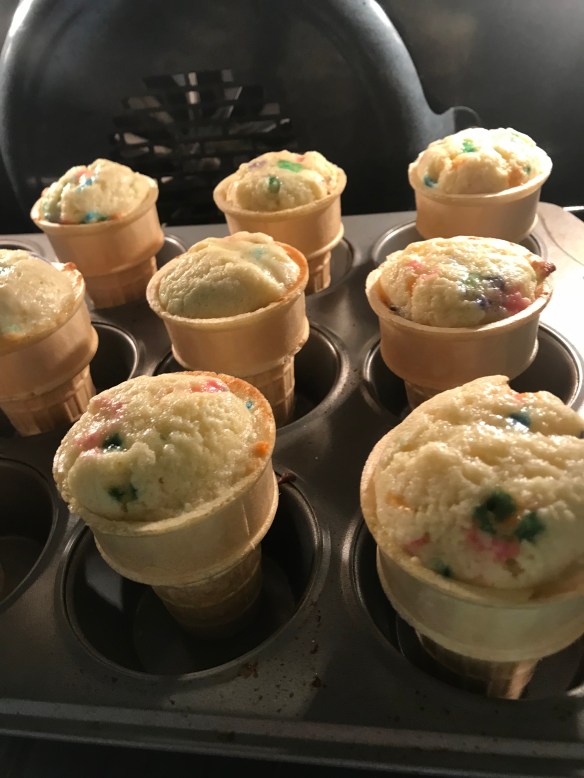
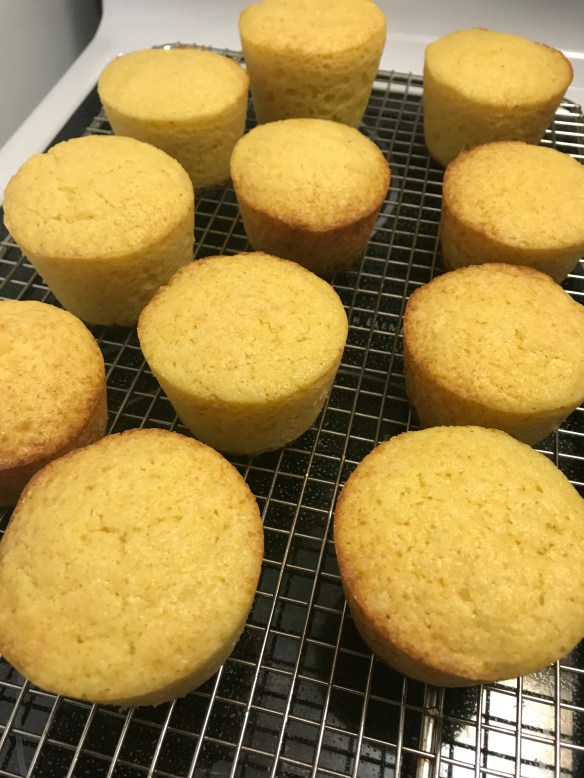
Look at them puffing up so nicely in the cones – kids love these and they are perfect for a birthday party.

IMG_5485

All baked up and ready to be topped with either icing or ice cream, a hit with the kids either way.


Strawberry Rhubarb Galette

The perfect way to celebrate the arrival of summer weather is when the rhubarb is ripe at the same time as strawberries!  Take the tartness of rhubarb with the sweetness of the strawberry and you have a winning combination.

Galette 1

I used my flaky pastry recipe (with egg and vinegar) to create this one … and in case you are wondering what the threads of lighter colour are …. I had a soft apple in the fridge so it got added to the pie.  Delicious!

Have you ever made a galette?  It’s really just a fancy name for a very easy, lazy way of making a pie.  If you aren’t a fan of making your own pastry dough, then just buy a frozen pre made pie crust, tip it out of the tin pie plate and carry on …. if you roll over the edges to take away that little crimped evidence of a premade shell you don’t even have to admit this to anyone!

Preheat oven to 400.

Line a large baking sheet with parchment paper.  On a lightly floured surface roll out your pastry to about 1/8″ thickness.  Place on baking sheet (it will hang over the edge).  Put this in the fridge for about 10 minutes while you prep the fruit.

  • 1 pint strawberries, thickly sliced
  • 1 pound very refresh rhubarb stalks, cut into 1/2″ thickness (or frozen sliced rhubarb)
  • 1/2 – 3/4 cup sugar, to taste
  • 2 tbsp flour
  • 2 tsp fresh lemon juice
  • 1 tsp pure vanilla bean paste

To finish you will need:

  • butter
  • milk
  • raw sugar

In a large bowl toss the strawberries and rhubarb with the sugar, flour, lemon juice and vanilla.  Spread on the prepared pastry to within 2″ of the edge.  Fold the edges, pleating at about 2″ intervals.  BE REALLY CAREFUL HERE ….. warning is from experience.  If you don’t carefully create these pleats, (sealing as you go) enough to hold the fruit there will be a breakout, and that mess is not pretty!  

Galette 2

Brush the edges of the pastry with milk and sprinkle with raw sugar.

Dot the filling with butter.  Bake the galette in the centre of the oven for 1 hot, or until the fruit is bubbling and the pastry is golden brown.  Allow to cool before cutting.

Galette

THIS is what happened when I didn’t seal the edges of my pleats together …. really, you should have seen me trying to get the half baked effort off the sheet pan and into something that would hold the juices better, BEFORE it all ran away.  Still tasted delicious, just somewhat messier, but a galette is meant to be free form anyway, right???


NOTE – If you are using fresh rhubarb, remember that the leaves are toxic!  Be sure to trim them to remove any leaf.

Mini Lemon Cheesecake

Easter means brighter, fresher desserts, and this fits that description perfectly.  Ideal for brunch, lunch or dinner, these are a real treat.  I found the recipe on “Live Well Bake Often”, and, unusually for me ….. I didn’t change a thing!

Mini Lemon Cheesecake

When spring is peaking around the corner, I immediately think of lighter, fresher desserts …. and usually lemon figures in there somewhere!  These light, lemony cheesecakes topped with fresh whipped cream and berries are an ideal way to finish off dinner.

Cheesecake graham crumb

If you have a mini cheesecake pan, that would be ideal, but this straight sided silicone muffin tin I had worked perfectly.

For the crust:
  • 6 full-sheets (90 grams) graham crackers (or ¾ cup graham cracker crumbs)
  • 3 tablespoons (45 grams) butter, melted
  • 2 tablespoons (25 grams) granulated sugar
Graham crumb 2

It’s important to get the crumbs settled smoothly into the bottom of the tin, and I used the bottom of a small glass to get it all flattened out.

To make the crust:
  1. Preheat oven to 325°F. Spray each cavity of a 12-count mini cheesecake pan well with nonstick cooking spray and set aside. (or silicone muffin pan).  If you want to use a traditional muffin tin I would recommend using liners for easier removal.
  2. Add the graham crackers to a blender or food processor and process until you have fine crumbs. Scoop the crumbs into a mixing bowl, add the melted butter and sugar, and mix until everything is well combined. Evenly distribute the mixture between all 12 cavities in the mini cheesecake pan, making sure to press each one down firmly into one even layer. Bake at 325°F for 5 minutes, remove from the oven, and set aside to cool. Keep oven temperature at 325°F.
Mini cheesecake

These muffin tins used 1/4 cup of the cheesecake batter to make the perfect little mini cheesecake.

For the lemon cheesecake filling:
  • 12-ounces brick-style cream cheese, softened to room temperature
  • ½ cup (100 grams) granulated sugar
  • 3 tablespoons (45 ml) fresh lemon juice
  • Zest of one lemon
  • 1 teaspoon pure vanilla extract
  • 1 large egg, room temperature
  • 1 large egg yolk, room temperature
To make the cheesecake filling:
  1. In the bowl of a stand mixer fitted with the paddle attachment, or in a large mixing bowl using an electric mixer, beat the cream cheese until smooth. Add in the granulated sugar and mix until well combined. Add the lemon juice, lemon zest, and vanilla extract until well combined. Scrape down the sides of the bowl if needed, then mix in the egg and egg yolk on low speed until just combined.
  2. Evenly distribute the cheesecake filling between all 12 cavities of the mini cheesecake pan (or muffin pan) and return to the oven. Bake at 325°F for 17-20 minutes or until the tops of the cheesecakes are set.
  3. Remove from the oven and allow to cool at room temperature for at least 1 hour. Cover tightly with plastic wrap and transfer to the refrigerator to chill for at least 3-4 hours or overnight. Once the cheesecakes are chilled, remove them from the pan. Top with whipped cream and fresh berries if desired, serve, and enjoy!


Moist & Delicious Banana Bread

Everybody family has a favourite banana bread, but you may want to give this one a try!  So moist and delicious, and to seal the deal, it is super easy and quick.  If you are in a hurry, just make the recipe into muffins and they will be ready in 20 minutes.


  1. 1/2 cup butter, room temperature
  2. 1/2 cup white sugar
  3. 1/2 cup brown sugar
  4. 2 eggs,  lightly beaten
  5. 1 tsp vanilla
  6. 3 bananas, mashed (4 if they are small)
  7. 1 1/2 cups all purpose flour
  8. 1 tsp baking soda  
  9. 1/2 tsp salt
  10. 1/2 tsp cinnamon


DIRECTIONS

  1. Preheat oven to 350º.
  2. Cream together butter and sugar.
  3. Add eggs, vanilla and crushed bananas.
  4. Combine well.
  5. Sift together flour, cinnamon, soda and salt. Add to creamed mixture.
  6. Mix just until combined. Do not overmix.
  7. Pour into greased and floured loaf pan.
  8. Sprinkle raw sugar mixed with cinnamon over top.
  9. Bake at 350 degrees for 55 minutes.

Variations:  (add at the end)

chopped walnuts, or chocolate chips, or (even better) a few chocolate chips and a few Skor bits

Fresh Cranberry Lemon Drop Cookies

These buttery little morsels are a great combination of shortbread richness with the tart hint of cranberry and lemon.  When I had the first one I thought …. Hmmmm, okay, they are good but maybe not my favourite cookie  –  however, next thing I knew I was reaching for a second cookie and now I just can’t stop.

Cranberry Lemon cookies 1

INGREDIENTS

  • 2 1/4 cups all purpose flour
  • 1/2 tsp baking powder
  • 1/2 tsp salt
  • 3/4 cup white sugar
  • 2 Tbsp lemon zest
  • 1 cup unsalted butter at room temperature
  • 1 egg
  • 1 tsp vanilla extract
  • 1 cup fresh cranberries, diced finely

LEMON GLAZE

  • 1/3 cup powdered icing sugar
  • 1 Tbsp lemon juice

In a medium size bowl combine the flour, baking powder and salt.  Set aside.

In a large bowl rub the lemon zest into the sugar until moist and fragrant.  Add the butter to the lemon sugar and beat until light and fluffy, go for at least 3-5 minutes.  Add the egg and vanilla, mixing until smooth and creamy.

Add the flour mixture, mixing until just incorporated.  Fold in the cranberries by hand.

Cover and chill for at least 30 minutes.

Preheat oven to 350 F.  Gently form the dough into small balls and bake for 13-15 minutes on parchment lined cookie sheets.  They spread out a little but not too much so you can put quite a few on each cookie sheet.

Cranberry Lemon 2

Diced fresh cranberries give these little lemon balls a pretty pop of colour.

Let cookies cool slightly before moving them to a rack to cool completely.

To make the glaze, mix the powdered sugar and lemon juice together and drizzle over completely cooled cookies.  I used a pastry brush for this step to allow the whole top to get a shiny finish.  Watch your glaze mixture carefully, you just want it loose enough to brush or drizzle with either clumping or just running off the cookie.

Orange Gingerbread Cookies

The first time I tasted these orange ginger cookies, I knew we needed the recipe!  Thanks Courtney for supplying that courtesy of Nana Patti Collins ….. just wait until you try these.

Orange Ginger 1

Preheat oven to 365 F.

  • 1 cup soft butter
  • 1 1/2 cups sugar
  • 1 egg
  • 4 tsp orange peel
  • 2 tbsp corn syrup
  • 3 cups all purpose flour
  • 2 tsp baking soda
  • 2 tsp cinnamon
  • 1 tsp ginger
  • 1/2 tsp salt
  • 1/2 tsp cloves

Cream butter & sugar until light and fluffy, add egg, orange peel & corn syrup.

Sift dry ingredients together and add gradually to creamed mixture.

Orange Ginger 2

Wrap and chill in the fridge for at least 30 minutes.

Orange Ginger 3

Roll between sheets of parchment paper (to 1/4″ thickness”) and cut.  (or form into a log and chill to slice and bake) These cookies do spread out quite a bit so leave lots of room between each one.

Bake at 365 for 9 minutes.

Cornbread Muffins

I’ve tried a few corn muffins or corn bread, but so often they turn out a little dry or too grainy.  These were absolutely perfect, so moist and delicious with the taste of the corn.  I found the recipe on “Once Upon a Chef” and for the first time, didn’t tweak a thing!

corn muffins 2

Light and fluffy, moist and delicious – what more could you want from a cornbread muffin?

Ingredients

  • 3/4 cup yellow cornmeal
  • 1-1/4 cups all-purpose flour, spooned into measuring cup and leveled-off
  • 1 tablespoon baking powder
  • 1/2 cup sugar
  • 1 teaspoon salt
  • 2 large eggs
  • 2 tablespoons honey
  • 3/4 cup milk (preferably whole but low-fat works too)
  • 1 stick (1/2 cup) unsalted butter, melted and cooled

Instructions

  1. Preheat the oven to 350°Fdegrees. Line a muffin pan with paper liners or spray with non-stick cooking spray. (I prefer to use non-stick cooking spray so the muffins get nice and crisp on the edges.)
  2. In a large bowl, whisk together the cornmeal, flour, baking powder, sugar and salt.
  3. In a separate bowl, break up the eggs with a whisk. Whisk in the honey and then the milk. Add the milk mixture and melted butter to the dry ingredients. Stir until just blended. Do not overmix; it’s okay if there are a few lumps. Spoon the batter evenly into the prepared muffin pan, filling each cup almost full. Bake for 17-20 minutes, or until the tops are set and golden. Cool the muffins for a few minutes in the pan, then serve warm.
corn muffins 1

I served these with a slightly spicy chipotle beef stew, so I didn’t want any extra spice here, but next time I might try mixing in a little jalapeño and gouda cheese …… yum.

Apple Pie Cookie Bars

apple pie bars 5

Combine an apple pie with shortbread bars and you have this winner!  I found this recipe in my latest Food Network magazine, from Ina Garden, and I’ve already made it twice.  The first time without the nuts so that the kids can take it in school lunches.

  • For the Crust
  • 1 pound (4 sticks) unsalted butter, at room temperature
  • ¾ cup granulated sugar
  • ½ cup light brown sugar, lightly packed
  • 2 teaspoons pure vanilla extract
  • 4 cups all-purpose flour
  • 1½ teaspoons kosher salt
  • ½ cup chopped walnuts
  • 1 teaspoon ground cinnamon
apple pie bars 4

Make sure your little helper has fun!  Stella loves working in the kitchen with Nana…

  • For the Apple Filling
  • 1½ pounds Granny Smith apples, peeled, quartered, cored, and sliced 1/8 inch thick (3 large)
  • 1½ pounds Golden Delicious apples, peeled, quartered, cored, and sliced 1/8 inch thick (3 large)
  • 2 tablespoons freshly squeezed lemon juice
  • ¼ cup granulated sugar
  • 1 teaspoon ground cinnamon
  • 1/8 teaspoon ground nutmeg
  • 4 tablespoons (½ stick) unsalted butter

Apple pie bars 1

Preheat the oven to 375 degrees.

For the crust, place the butter, granulated sugar, brown sugar, and vanilla in the bowl of an electric mixer fitted with the paddle attachment and beat on medium speed for 2 minutes, until light and creamy. Sift the flour and salt together and, with the mixer on low, slowly add to the butter-sugar mixture, beating until combined. Scatter two-thirds of the dough in clumps in a 9 × 13-inch baking pan and press it lightly with floured hands on the bottom and ½ inch up the sides. Refrigerate for 20 minutes. Bake for 18 to 20 minutes, until the crust is golden brown, and set aside to cool.

Meanwhile, put the mixing bowl with the remaining dough back on the mixer, add the walnuts and cinnamon, and mix on low speed to combine. Set aside.

Reduce the oven to 350 degrees.

For the filling, combine the Granny Smith and Golden Delicious apples and lemon juice in a very large bowl. Add the granulated sugar, cinnamon, and nutmeg and mix well. Melt the butter in a large (10-inch-diameter) pot, add the apples, and simmer over medium to medium-low heat, stirring often, for 12 to 15 minutes, until the apples are tender and the liquid has mostly evaporated. Spread the apples evenly over the crust, leaving a ½-inch border.

apple pie bars 3

Pinch medium pieces of the remaining dough with your fingers and drop them evenly on top of the apples (they will not be covered).

apple pie bars 2

Make sure you taste …….. Stella already knows this, here she decided to add a few oats and more cinnamon to the topping mix ….. it was a hit!

Bake for 25 to 30 minutes, until the topping is browned. Cool completely and cut into bars.