Unknown's avatar

About Chatty Kathy

Living in the beautiful Okanagan Valley in BC, we have an abundance of fresh food to cook with, and believe me, I do! We have 5 daughters, 3 grand daughters, and lots of honorary daughters ...I love cooking for family and friends and they all keep me busy in the kitchen. Here is hoping that this blog will allow my entire family to access those recipes they ask for, and maybe even enjoy a few travel photos!

Four Star Focaccia

I would give it 5 stars, but I am well known for being humble ….

hot focaccia with fresh rosemary, carmelized red onions, garlic slices - topped with maldon sea salt and freshly cracked pepper

hot focaccia with fresh rosemary, carmelized red onions, garlic slices – topped with maldon sea salt and freshly cracked pepper

  • 2 tsp rapid rising dry yeast
  • 1 cup warm water
  • 2 tbsp sugar
  • 3 1/2 cups flour
  • 1 tbsp coarse salt
  • 1/4 cup olive oil

This recipe is designed for a standing mixer – but you can easily adapt it to do by hand.

Warm the bowl of your standing mixer by letting it sit filled with warm water for a few minutes.  Drain, put in the 1 cup warm water, add 2 tbsp sugar, stir well and add in the yeast.  Give a light stir and let sit for at least 3 minutes, until you see the yeast starting to foam.  Turn on the stand mixer – low setting, and dissolve the salt in a cup with 2 tbsp hot water – when dissolved add to yeast mixture with the olive oil.  Gradually – in a steady but slow stream – add the flour.  Start with 3 1/2 cups of flour, and add a wee bit more if it is too sticky.  Once the dough is holding together, turn the mixer up to medium and allow it to knead for 10 minutes.

Turn onto a lightly floured surface and hand knead it a few times, until you have a smooth, soft, pliable dough.  Grease a bowl lightly, turn the dough to coat and allow to rise in a warm place – covered with a damp tea towel or saran.  When it has doubled in size (aprox 45 minutes) turn onto a clean surface and stretch it lightly to be about 1/2 in thick and an oblong shape.  Allow to rest for a few minutes, and then put that on to an oiled baking sheet (I like clay).  Cover with saran and allow to rest for 15 minutes.

Give the dough a gentle massage with good quality olive oil, and with your fingertips gently press indentations in the surface, then cover with seasonings to complement the rest of your meal:

fresh rosemary

sliced garlicP1100268

carmelized red onions

fresh herbs

parmesan cheese

Then sprinkle with freshly ground pepper and large flake salt.

For this batch I doubled the recipe, and stretched it to be about 3/4-1 inch high before allowing it to rest. 

Bake at 400 for around 15-20 minutes.

This makes the best focaccia I have ever had – the dough is a fantastic texture, and gets so nice and crispy on the outside with the olive oil coating.  Use your imagination with toppings, and it will soon be a hit in your house too.  So easy to make!

Ready for the oven – this one is to go with Cacio el Pepe pasta tonight …. it is studded throughout with green onions and fresh Kampot pepper, then dusted with more green onions, feta, tomatoes and fresh cracked Kampot pepper.

Mac N Cheese

I have been making lasagne without pre boiling my pasta noodles for years now, so why did it take so long to try it with elbow macaroni?  Not sure, but I will always do it that way now!  Give this a try and let me know what you think.  

Mac n Cheese

1/2 cup unsalted butter, divided

1/4 cup flour

3 cups milk

1 tbsp kosher salt

1/2 tsp freshly ground black pepper

1 tbsp dijon mustard

1 lb (450 gms) elbow macaroni

2 cups shredded cheddar cheese, divided

2 garlic cloves, chopped

1 cup panko or home made bread crumbs

2 tbsp chopped flat leaf parsley

Preheat oven to 400.  Melt 1/4 cup butter in large saucepan over medium high heat.  Add flour, and mustard,  cook, whisking constantly for 1 minute to allow the flour and butter to brown slightly.  Slowly whisk in milk until you have a smooth consistency.  Add 3 cups water and bring to a boil.  Reduce heat to a simmer and cook, whisking often until you have a thin but glossy sauce. (around 10 min)  Stir in 1 tbsp kosher salt and 1/2 tsp freshly ground pepper.

Toss dry, uncooked pasta with 1 1/2 cups grated cheese and put in 13 x 9 x 2″ baking dish.  Pour sauce over – do not stir – and cover with foil.  Bake for at least 20 minutes – check to see if the pasta is almost cooked through.

Melt 1/4 cup butter in fry pan, stir in garlic – saute lightly and toss with bread crumbs and panko until lightly browned.

Sprinkle remaining 1/2 cup of cheese over pasta, then top with bread crumb/garlic mixture.  Return to the oven for another 10 minutes or so until top is bubbling and golden brown.

This is the basic recipe – I’m pretty sure you won’t be pre-cooking your pasta before baking your own mac and cheese again!

Tonight’s version of this included:

aged white cheddar cheese and smoked gouda cheese

cubed cooked chicken

diced roasted red pepper

capers

whole grape tomatoes

The whole family loved it, and you can adapt this very easily to any leftovers or cravings in your household.  

Fancy Fudge Sauce

We have been using this same recipe for our warm fudge sauce for years, and the girls (all 5 of them) call it fancy … they love it, and we have used it on everything!  I am sure it will also become a favourite in your house too!

2/3 cup white sugar

1/2 cup cocoa powder

1/2 cup water

1/2 cup butter

1 tsp vanilla

Whisk sugar and cocoa, gradually adding in water.  Stir over medium high heat until mixture comes to a full boil, then gently boil for a few minutes until slightly thickened.  Remove from heat and stir in butter and vanilla.

For microwave:  Heat sugar, cocoa and water in microwave safe bowl on high until mixture comes to a boil.  Stir well and microwave on medium for 4-5 minutes, stirring every 2 minutes.  Remove from heat and stir in butter and vanilla.

This sauce stays soft when poured over ice cream – to have it hot just gently warm it up before using.  Keeps well in the fridge (if you can make it last!).

Best Brownies

It seems hard to believe, but my oldest daughter is 33 years old now, and this brownie recipe is from the girl’s elementary school cookbook … still our favourite!

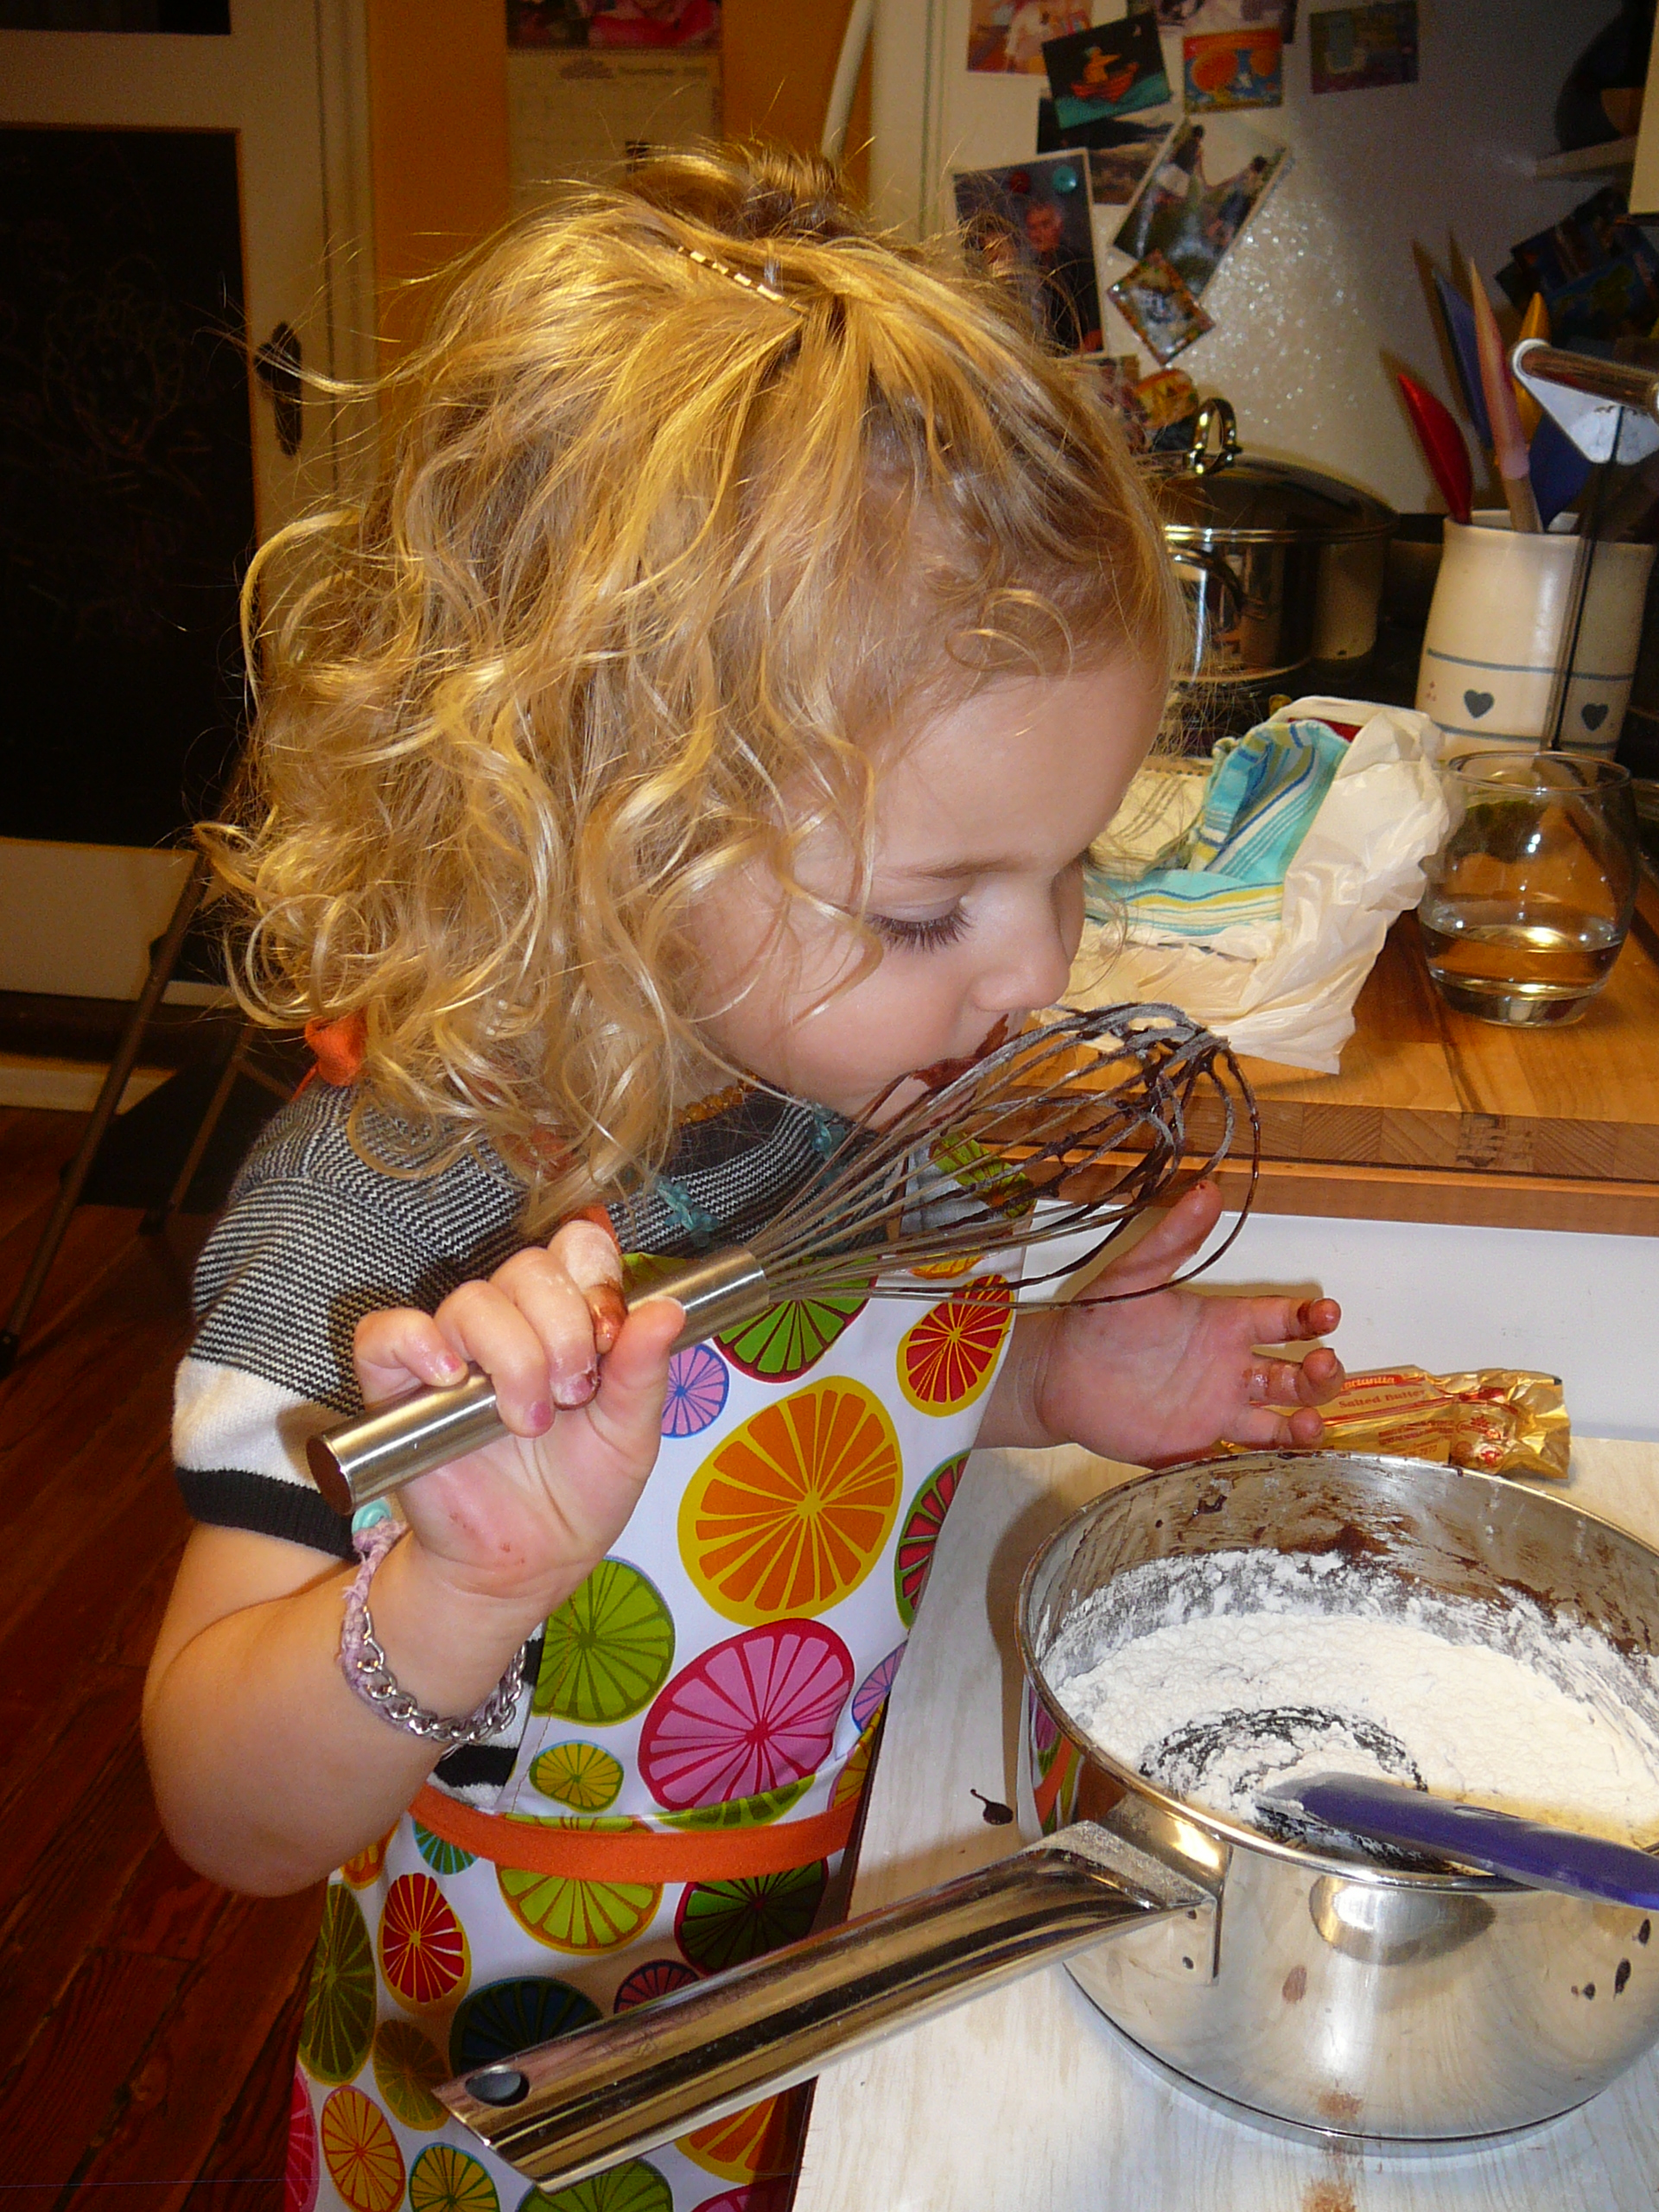
a pint sized helper is only going to make these brownies taste better

1/2 cup plus 2 tbsp butter

1 cup white sugar

6 tbsp cocoa powder

3/4 cup flour

1/2 cup chopped walnuts (optional)

2 eggs

1 tsp vanilla

Preheat oven to 350 degrees.  In medium saucepan, melt the butter and cocoa.  Remove from heat, stir in sugar.  Blend in eggs, one at a time, mixing well after eat.  Add vanilla, flour and nuts.  Stir well.  Spread into a greased 8 x 8 x 2 pan.

Bake at 350 for 30 minutes.  Be careful not to overbake. Remove from heat as soon as a toothpick inserted in center comes out clean and the brownies are starting to pull away from the edges of the baking pan.

If you want an extra hit of chocolatey goodness, as soon as it comes out of the oven sprinkle a generous layer of chocolate chips over and allow to sit long enough for the chips to melt …. spread and smooth with a knife or offset spatula.  Allow to cool slightly and cut up – they won’t last long!  In order to turn this into dessert, serve warm with ice cream, and my Fancy Fudge Sauce drizzled over top.

p.s.  did I mention how easy clean up is with only the one pot to wash???

Honey Mustard Chicken

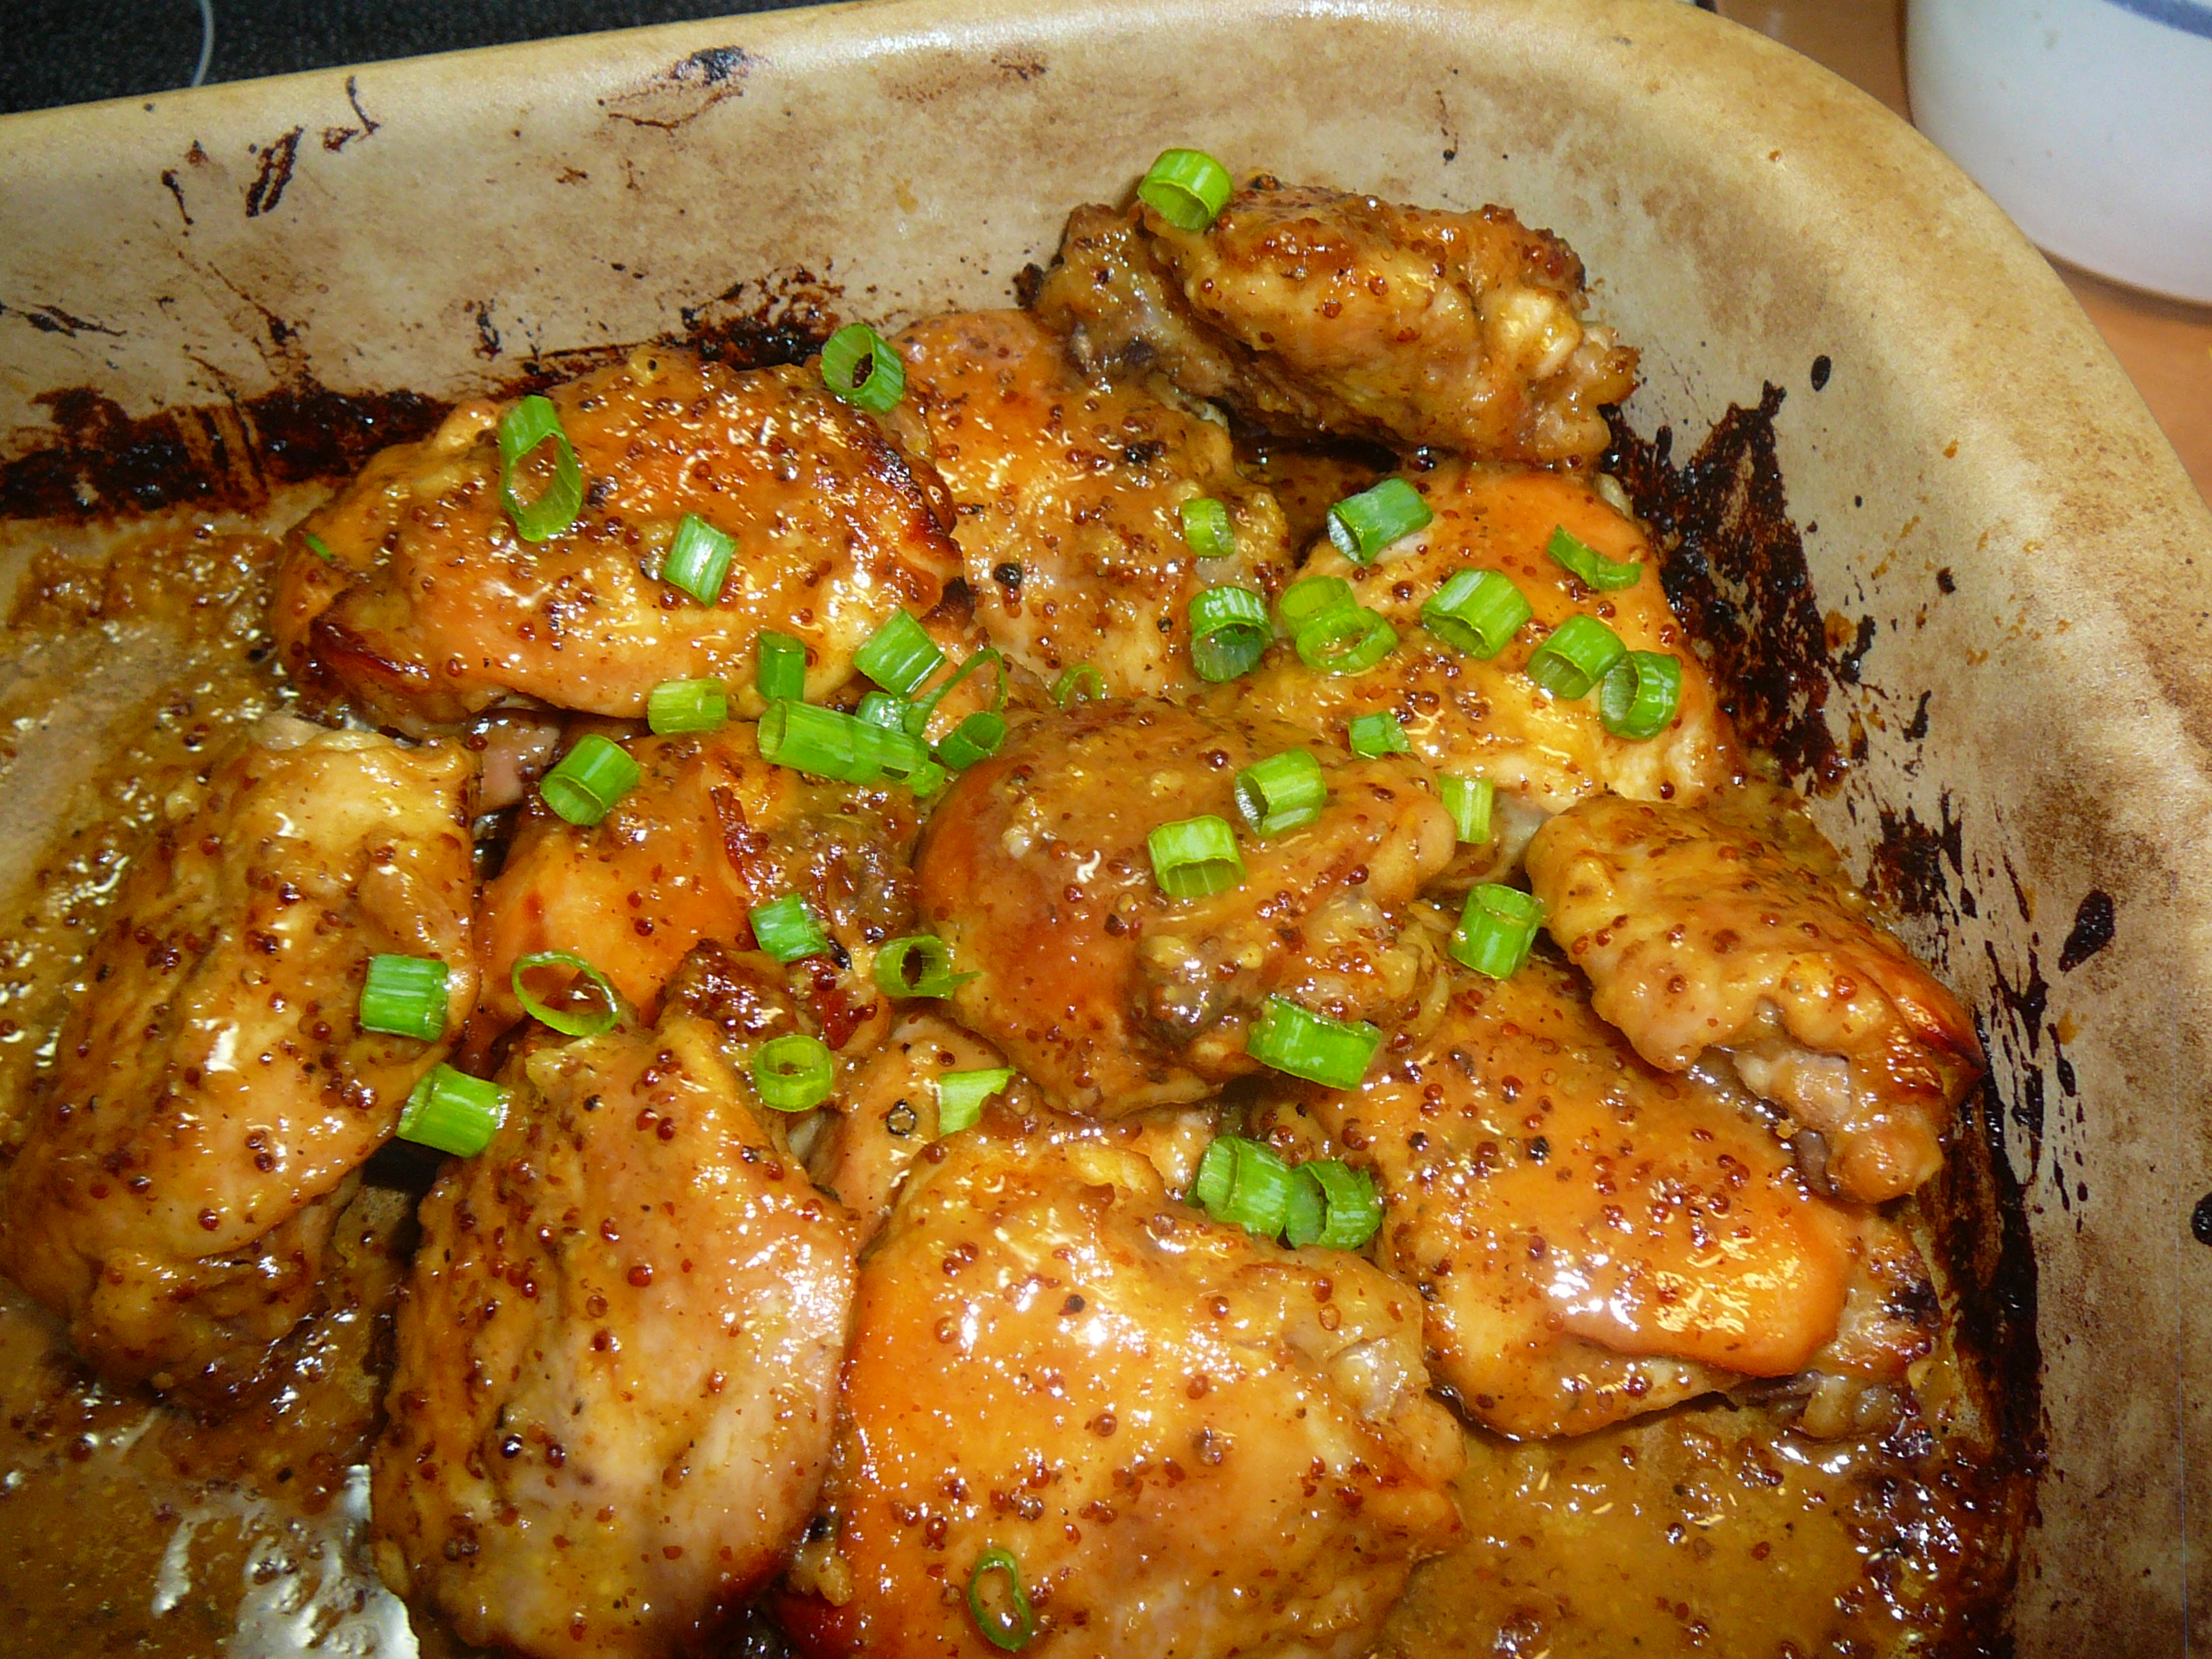
I love using chicken thighs (either boneless, skinless or bone in, skin on!!)  for this – they are so full of flavour – and don’t take very long to cook!

Garnish with thinly sliced spring onions for a bit of color

12-14 small chicken thighs (bone in tastes great, but boneless if you prefer)

Preheat oven to 375 degrees

  • 3 tbsp melted butter
  • 3 tbsp honey
  • 2 tbsp each:  dijon mustard and grainy mustard
  • 1 tbsp yellow deli mustard
  • 2 garlic cloves, minced
  • zest and juice of 1/2 lemon
  • 1 tsp kosher salt
  • 1 tsp freshly ground black pepper

Place chicken in baking dish, and combine the rest of the ingredients in small bowl.  Stir well and drizzle over chicken – rubbing and turning the chicken to coat well.  Finish with bone (or under side) up.  Roast for 20 minutes, turn chicken and roast for a further 20 minutes, basting with the honey mustard mixture again for the last 10 minutes.  Depending on the size of the chicken thighs, they might take longer to cook.  It is important for them to cook long enough to get this delicious bit of carmelization on the chicken – yum yum yum.

If you have used skinless, the chicken will still get a nice roasted, browned finish to it, but if you have kept the skin on, it will be irresistible!!

Hand made Gnocchi

These delightful little mini pillows of deliciousness are so fluffy and simple to make – easily ready to become your new favorite recipe!!

Bake 3 russet potatoes until tender all the way through and allow to rest until cool enough to handle.

When cool enough either put them through a potato ricer, or grate them into a large bowl.  Add 1/2 tsp sea salt and 1/2 tsp freshly ground pepper and toss lightly with 1 3/4 cups flour and a grating of fresh nutmeg. (don’t worry if you don’t have fresh nutmeg – use 1/8 tsp of ground)

Lightly beat 2 eggs with 2 tbsp olive oil, and then stir into flour/potato mixture.  Mix gently until all is blended, and knead in another 1/2 cup flour.  Your dough should be soft and supple, easy to work with and not too sticky.

If you have trouble either way – just add either a bit more flour if it is too sticky, or a bit of oil if it is too dry.

Divide this mixture into 4 balls.  Roll each ball into a long skinny rope (snake if kids are helping!). Cut along length into pieces about 3/4 in each.  Dust lightly with flour.

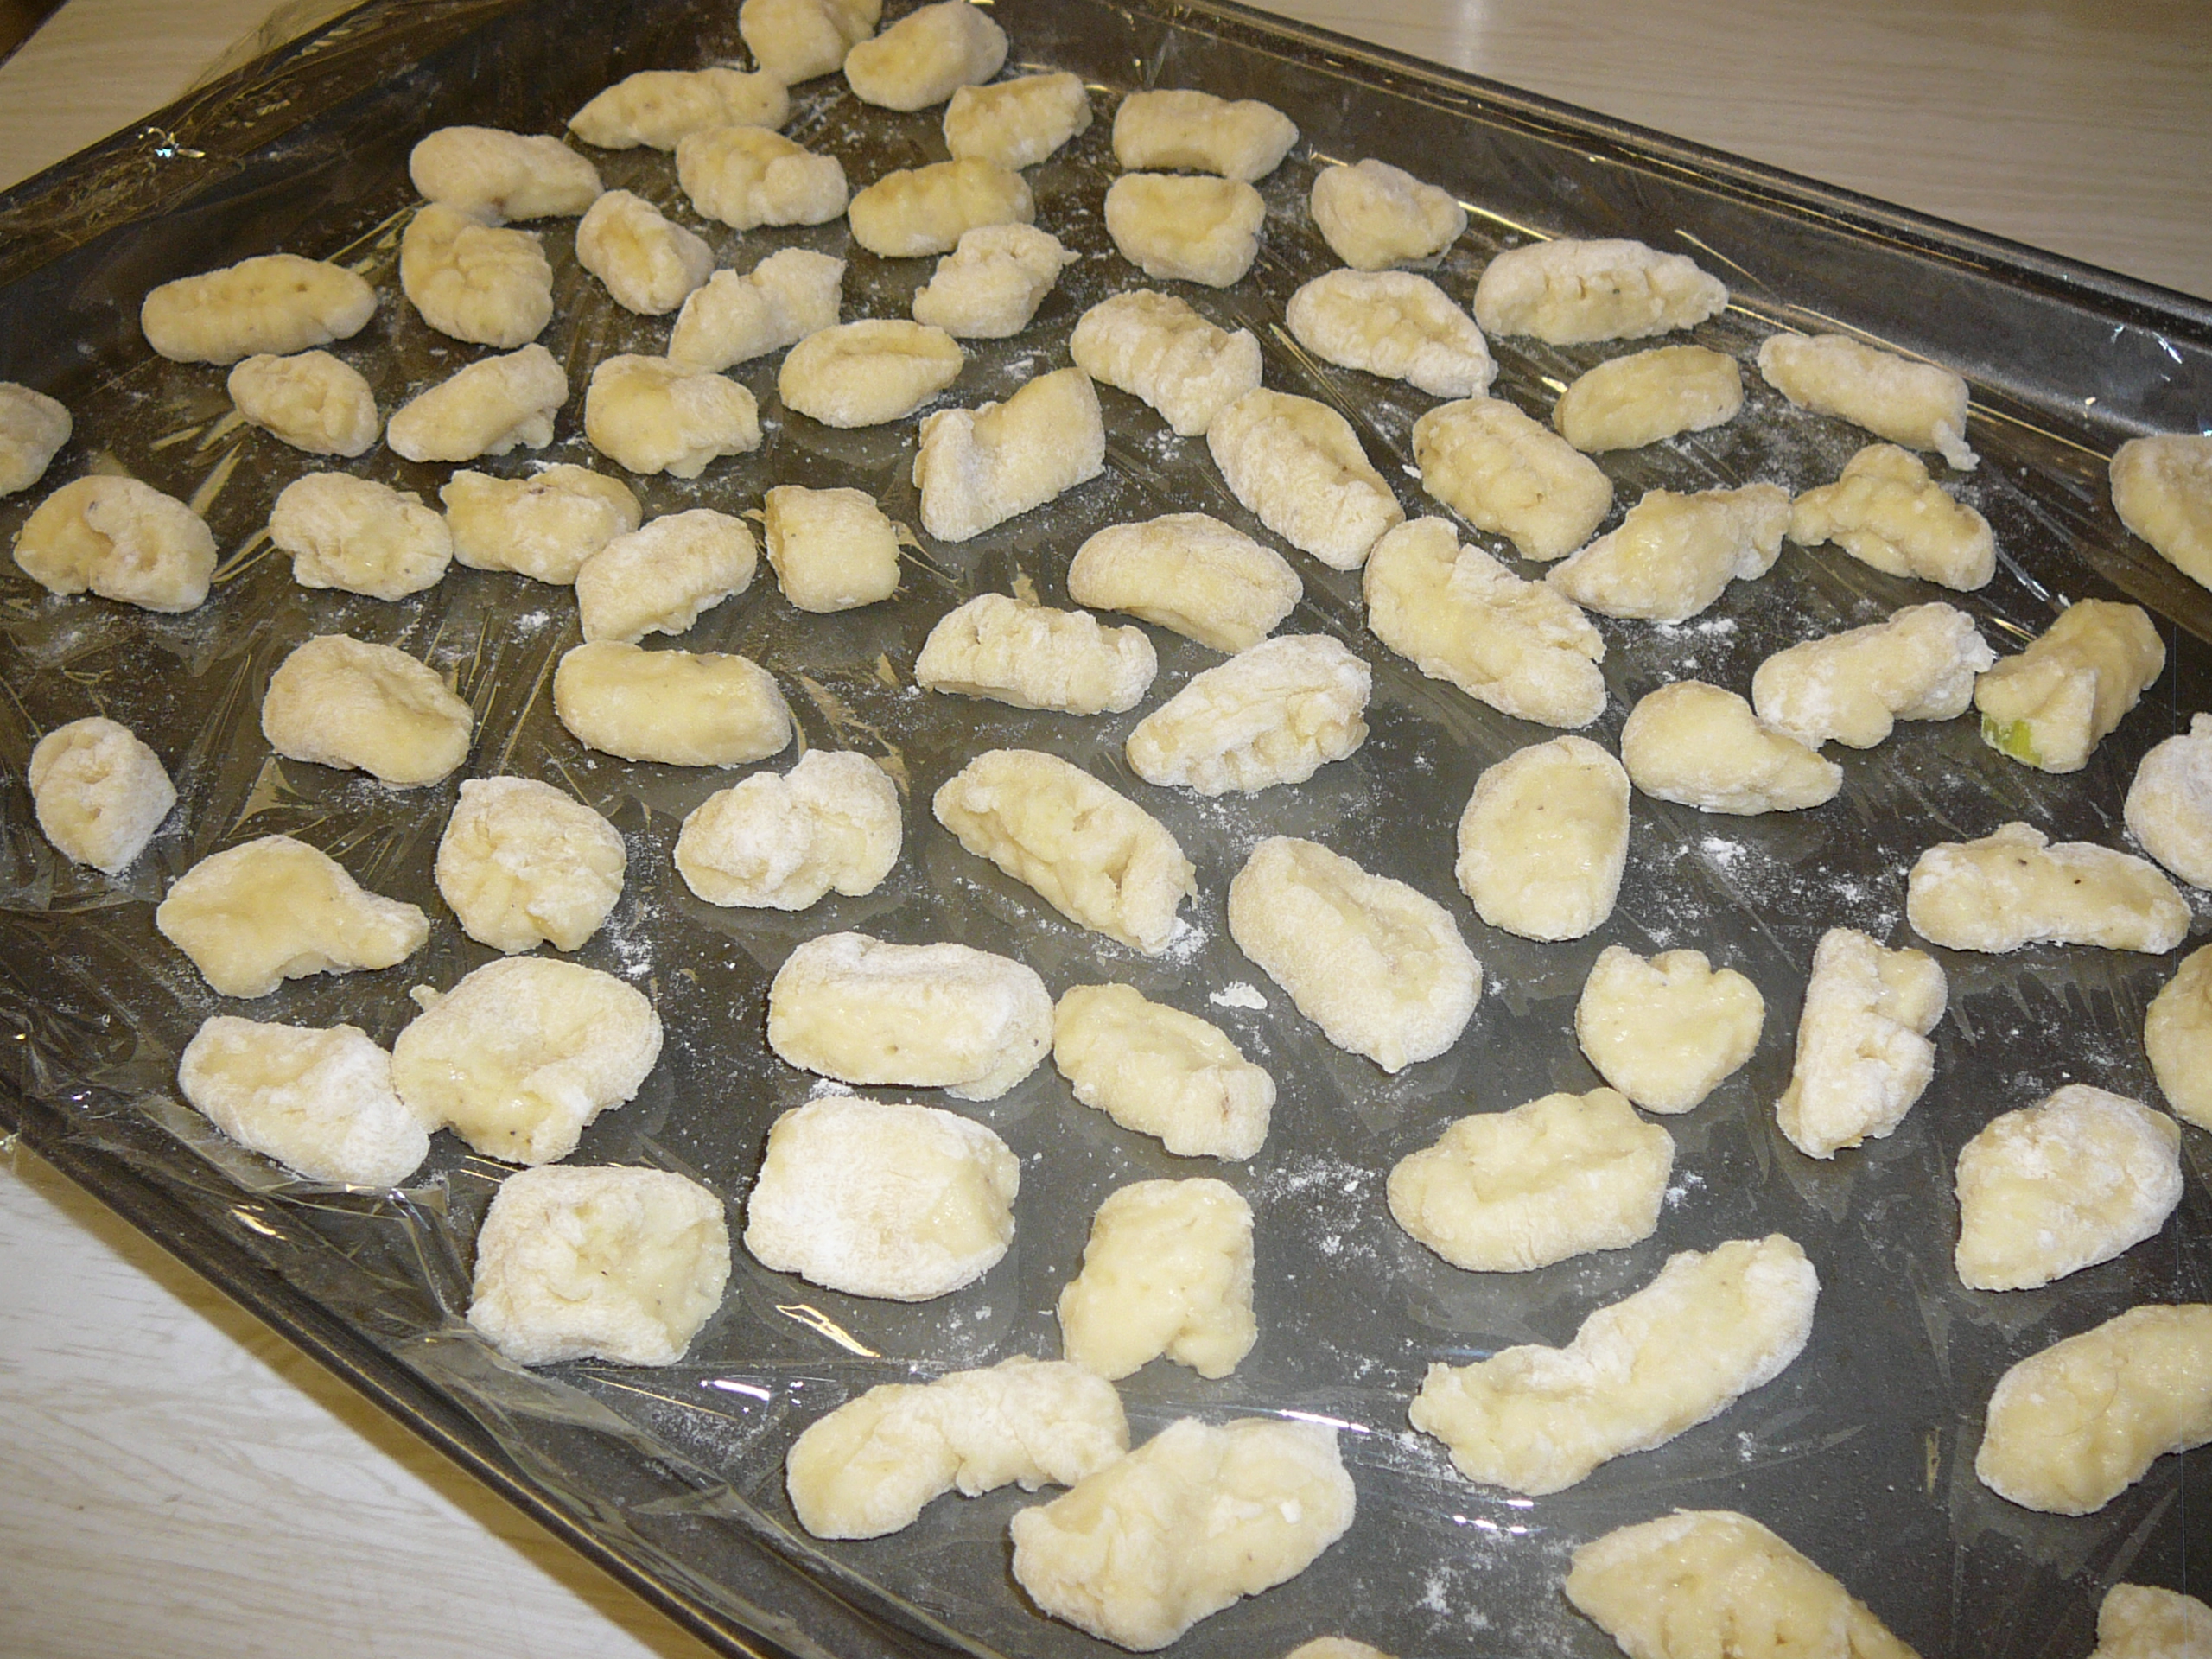
Keep a bit of flour handy – continue dusting your hand with it so the gnocchi doesn’t stick.  Take a fork, and dust it with flour.  Turn it upside down in your hand and roll the gnocchi down the tines of the fork.  Set aside until ready to cook.

When you have all the gnocchi rolled out – and remember that they don’t need to look perfect – you are ready to cook them.

Hand made gnocchi – they don’t have to be perfect – just delicious any shape you get – neither Joe Bastianich or Mario Batali are going to criticize your form!!

Boil a HUGE pot of water – when it comes to a boil toss in a generous amount of salt.

At this point drop the gnocchi in the boiling water – it will return to the top when it is ready – let it bounce around for a moment and you are ready.

Really the gnocchi is great to eat just as is – toss it with melted butter, sprinkle with salt and pepper – delish.

HOWEVER …. if you really want to kick it up a level:

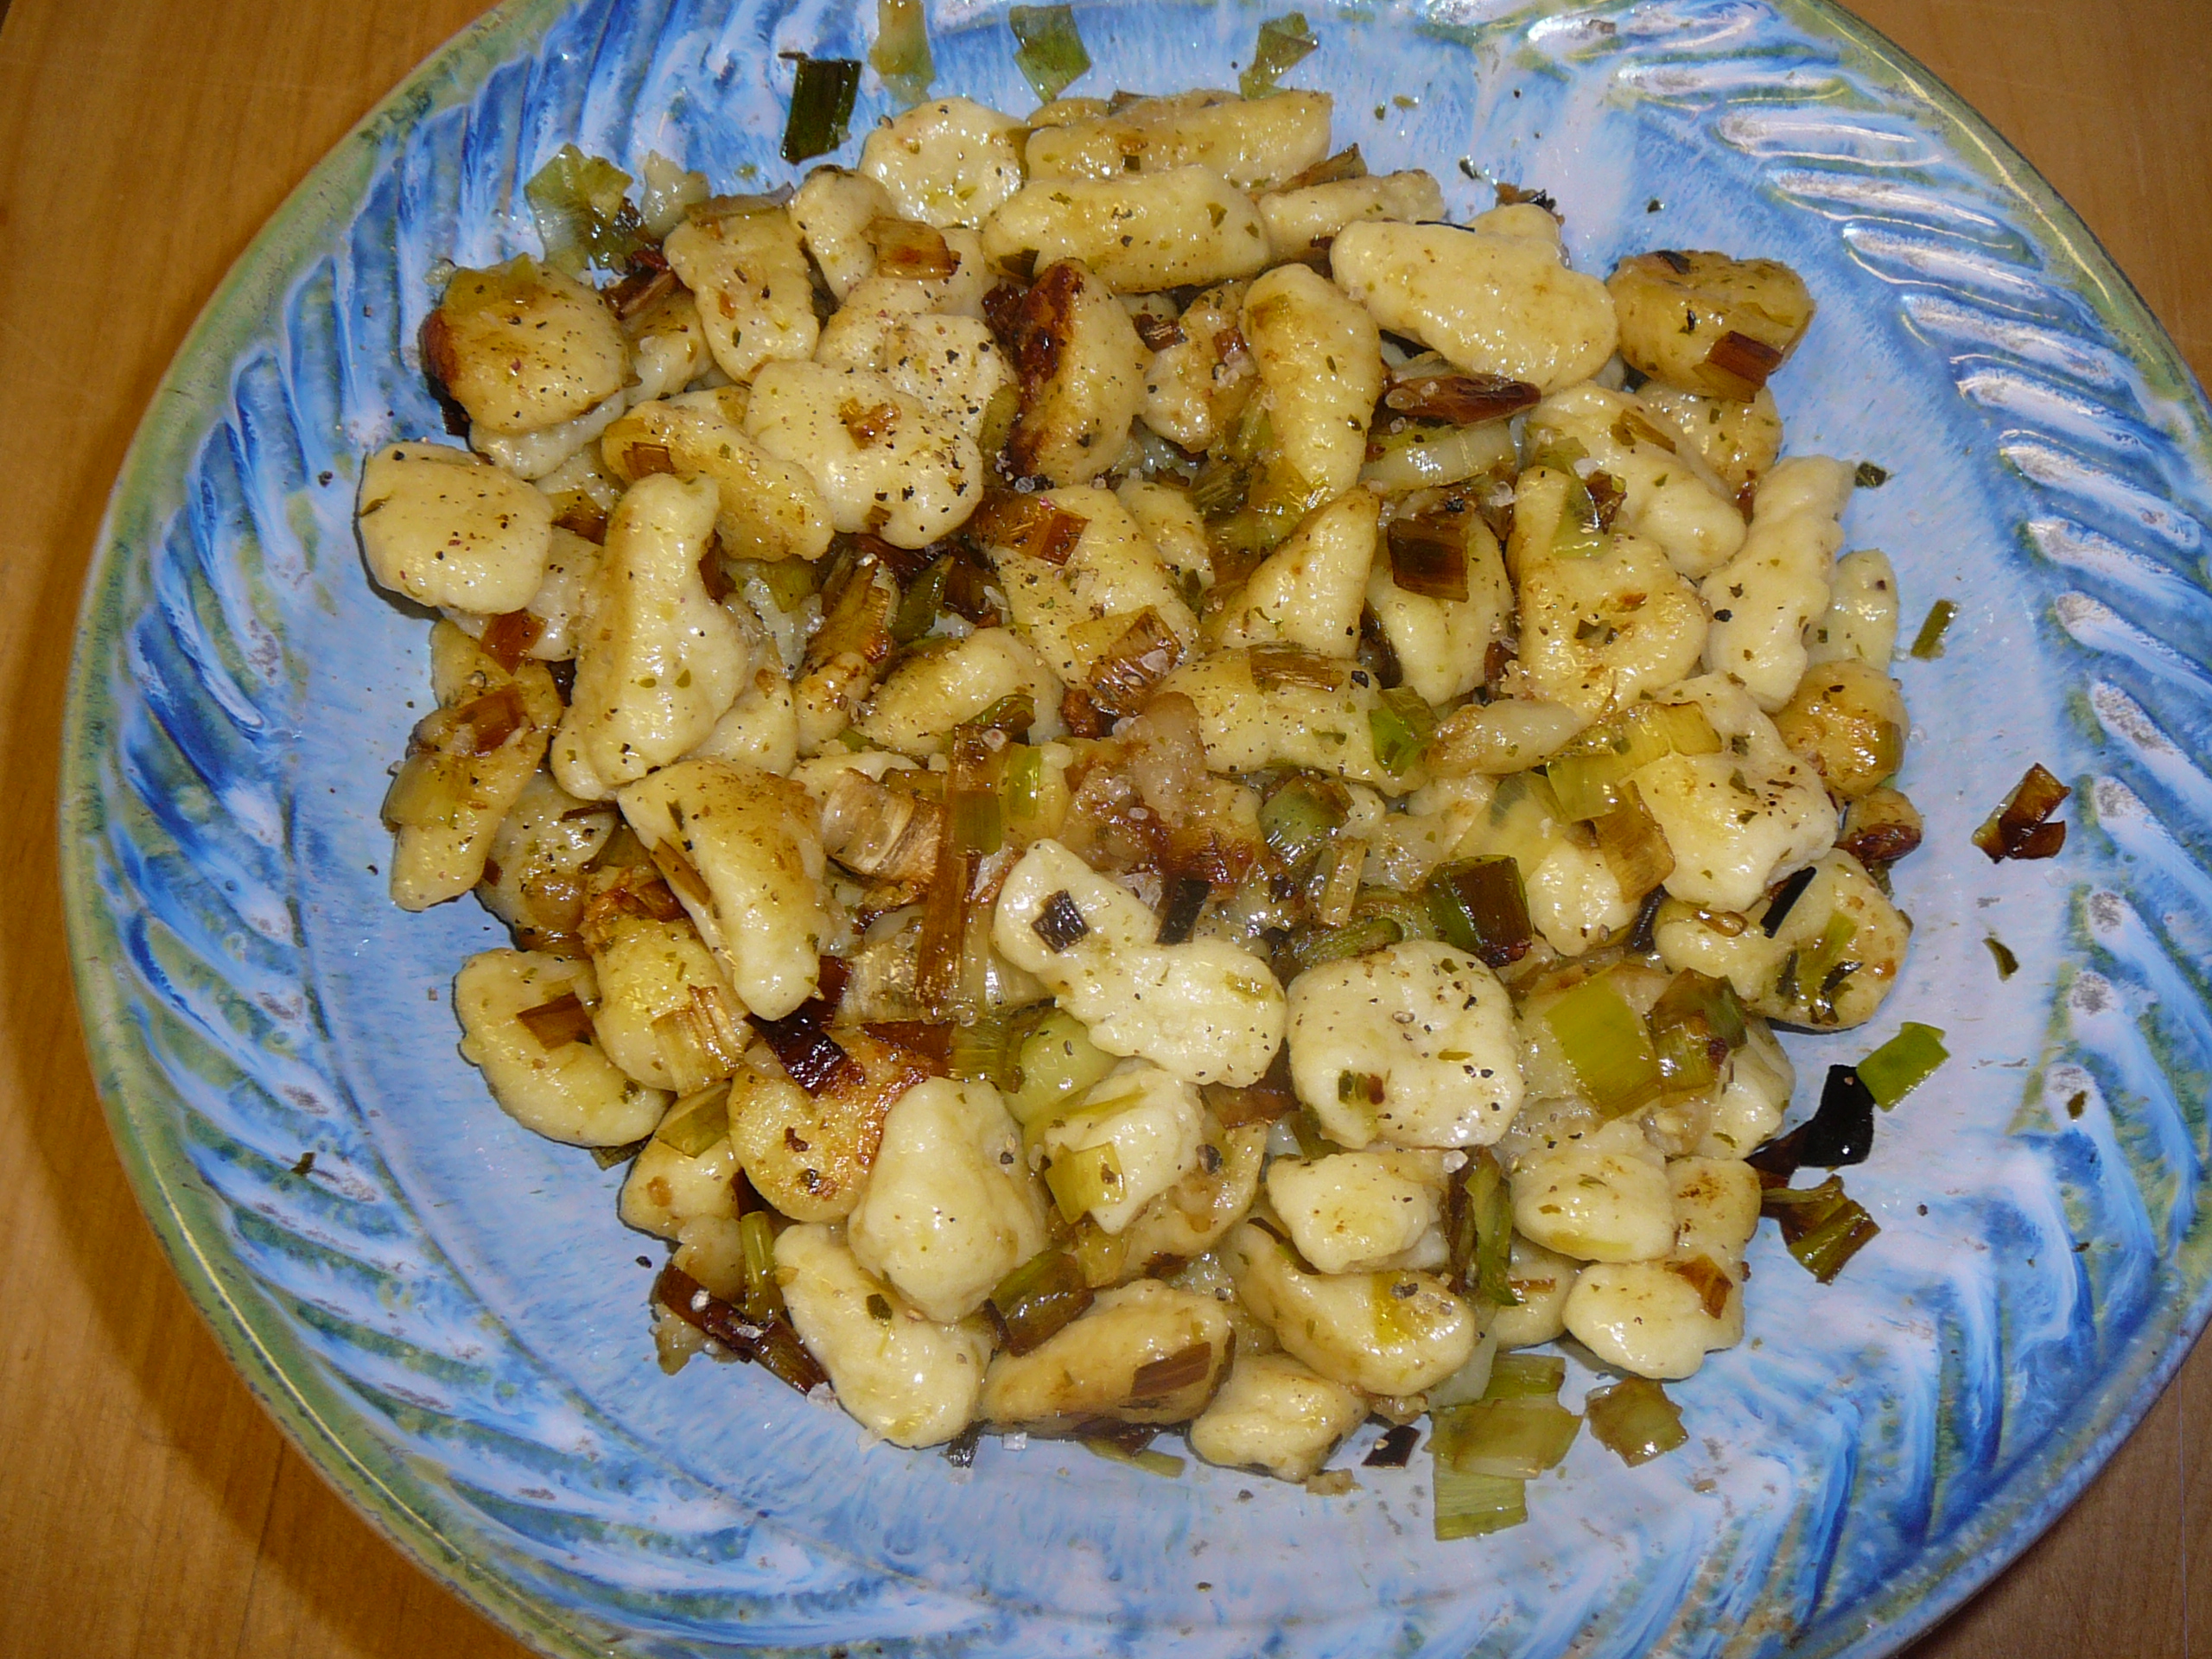
In a heavy bottom pan (like cast iron) heat 1 tbsp each butter and olive oil – stir the white parts of 2 leeks, and 2 garlic cloves until just tender.  When the pot is really hot, push the leek mixture to one side, and drop the just boiled gnocchi onto the hot pan in small batches.  As they crisp up push them over into the leek mixture and toss in the pan – using your hot spot to continue crisping up small batches of the gnocchi.  Sprinkle with fresh herbs, salt and pepper and I guarantee you will love it!

Barbacoa (Mexican Beef Tacos)

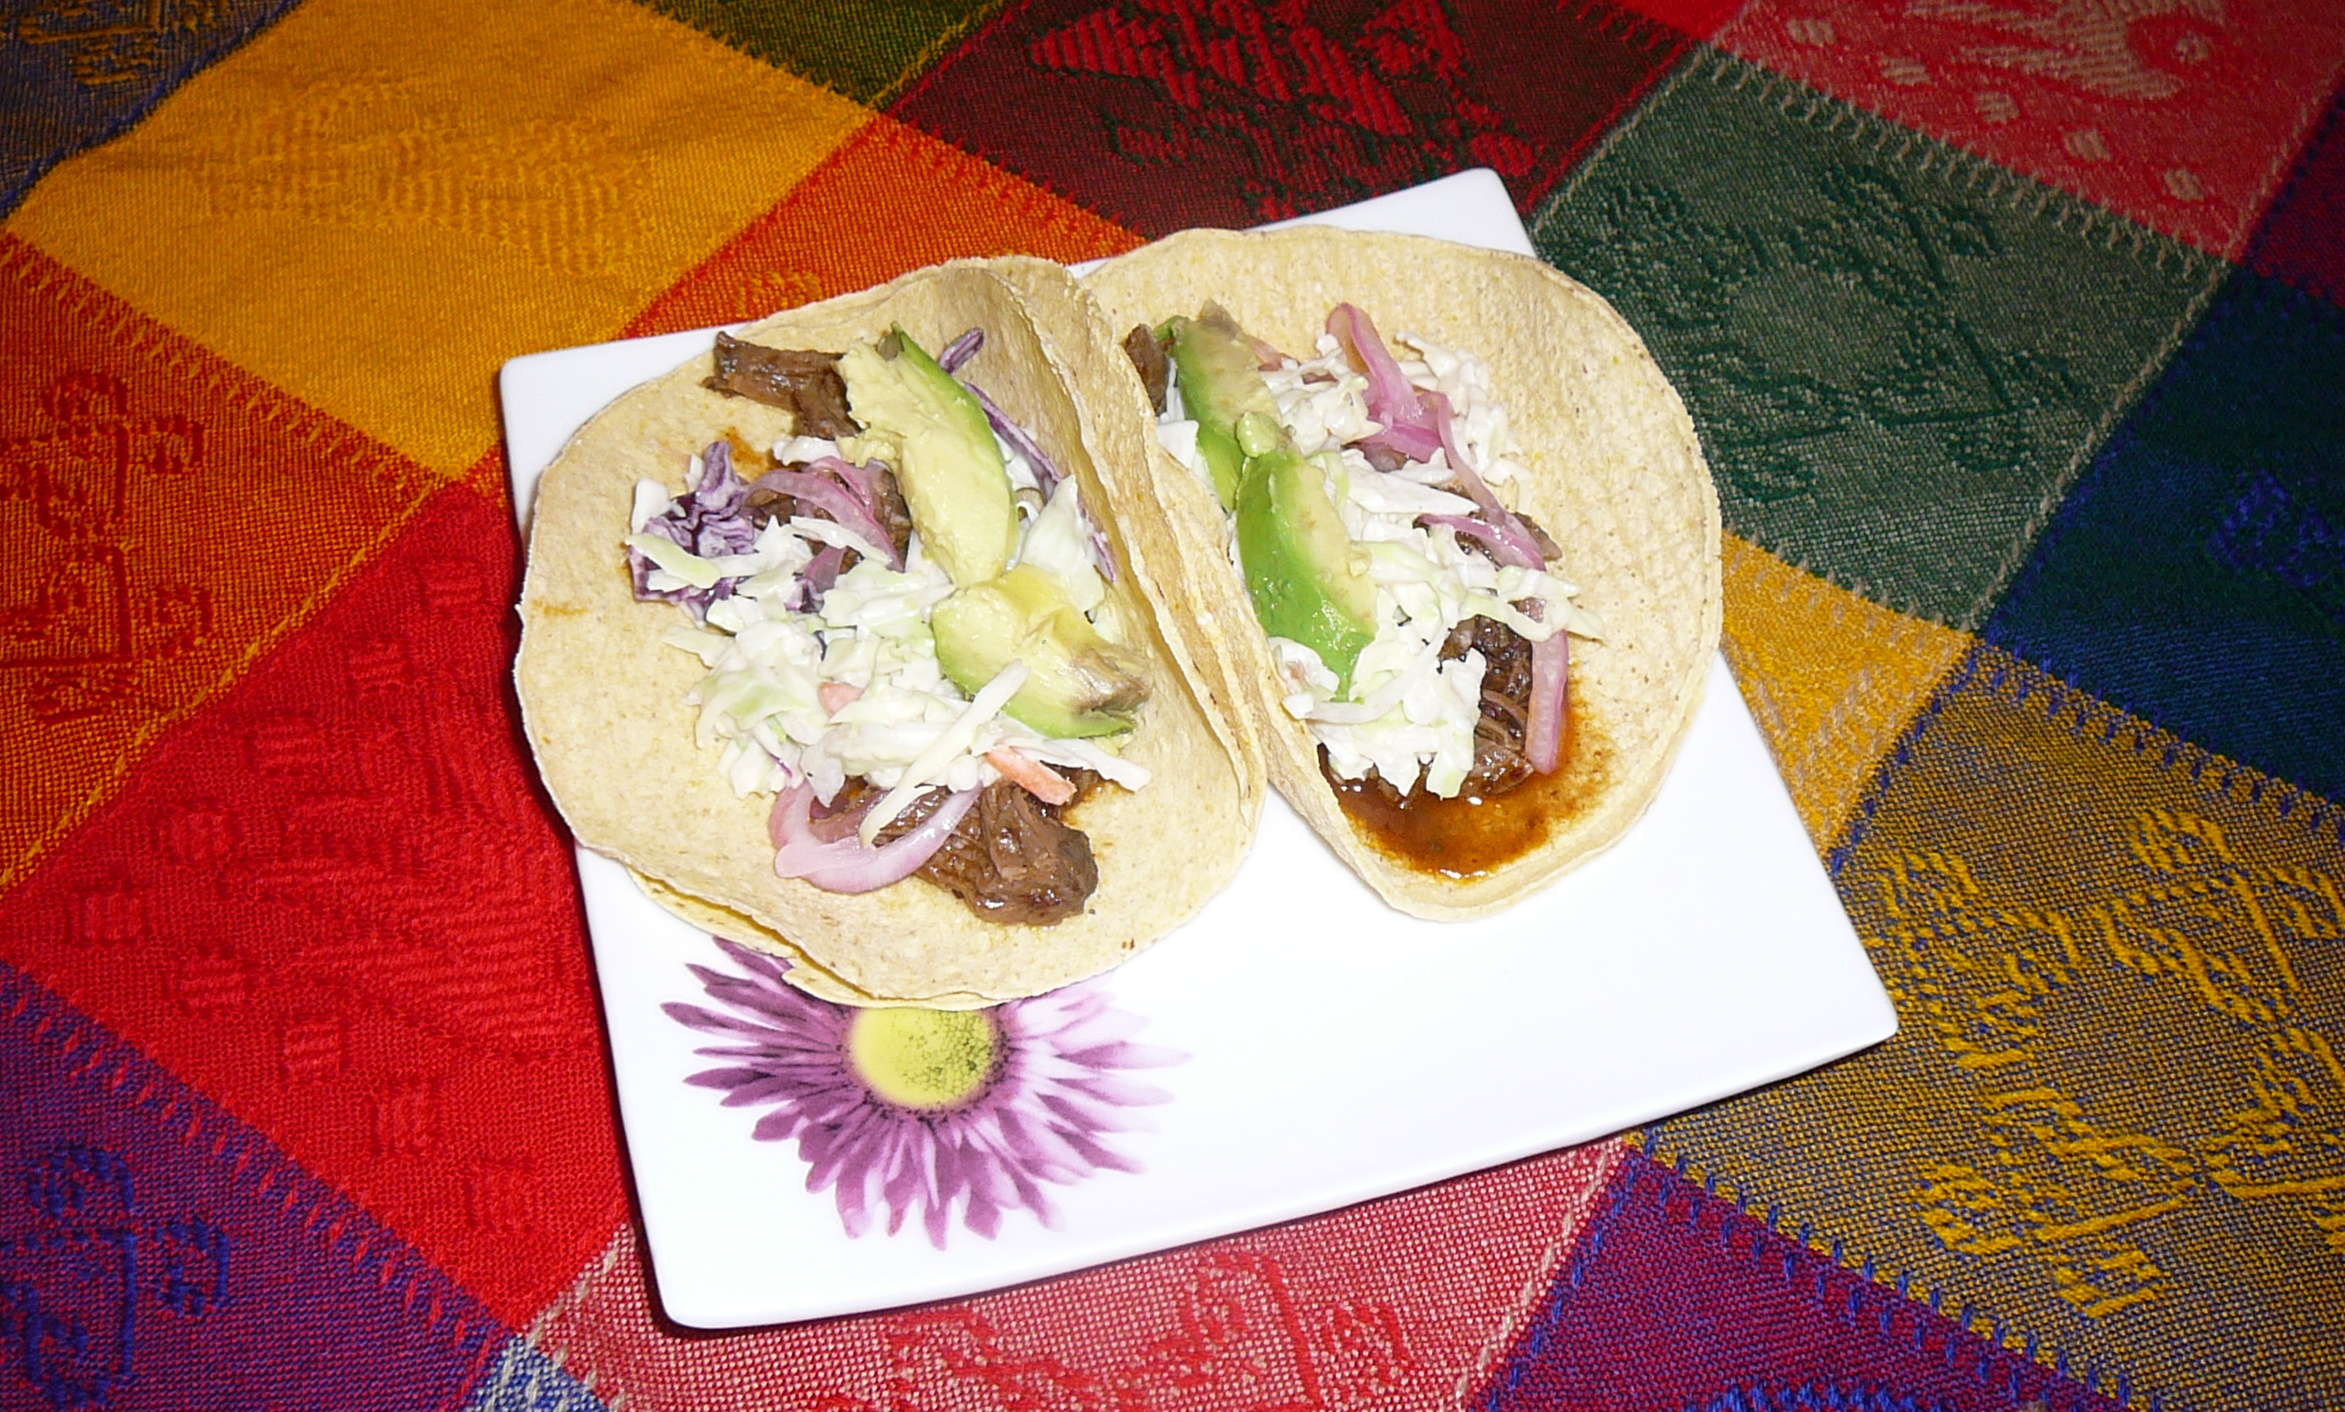
If you love beef tacos, don’t look any further than this recipe.  We have enjoyed more than our fair share of Mexican street tacos, and these fit right in there.

6-8 garlic cloves, minced

2 tsp mexican chili powder

1/2 tsp ground cumin

1 tsp freshly ground black pepper

1 1/2 tsp salt

1/4 cup cider vinegar

3 chipotle chiles, in adobo sauce

1 tbsp mexican oregano

2 tbsp tomato paste

1/2-3/4 cup chicken stock

Blend all ingredients together in food processor – be sure to taste it and adjust seasonings.  You really want it tangy and full of taste – if you are cooking this the next day put roast in a ziplock bag with the adobo sauce and marinate overnight.

Taste the sauce before putting it over the beef – if necessary you may have to adjust a bit – keep tasting for balance of flavour!

3 pound bone in chuck roast – MAKE SURE YOU USE A CUT WITH SOME FAT RUNNING THROUGH IT – a leaner cut of beef won’t give the same result!

Put roast in the bottom of a slow cooker, and then pour adobo sauce over.  Add enough water to come half way up the roast.  Put lid on and cook on slow for 6 hours.

Remove liquid from cooker and reduce in saucepan until sauce has thickened and is deliciously rich.  Shred beef with two forks.  When liquid has reduced by about half, return liquid to meat.

Serve with fresh tortillas, cole slaw, pickled red onions, and slices of avocado.  You will think you are on the streets of Mexico City!

Pickled Red Onions

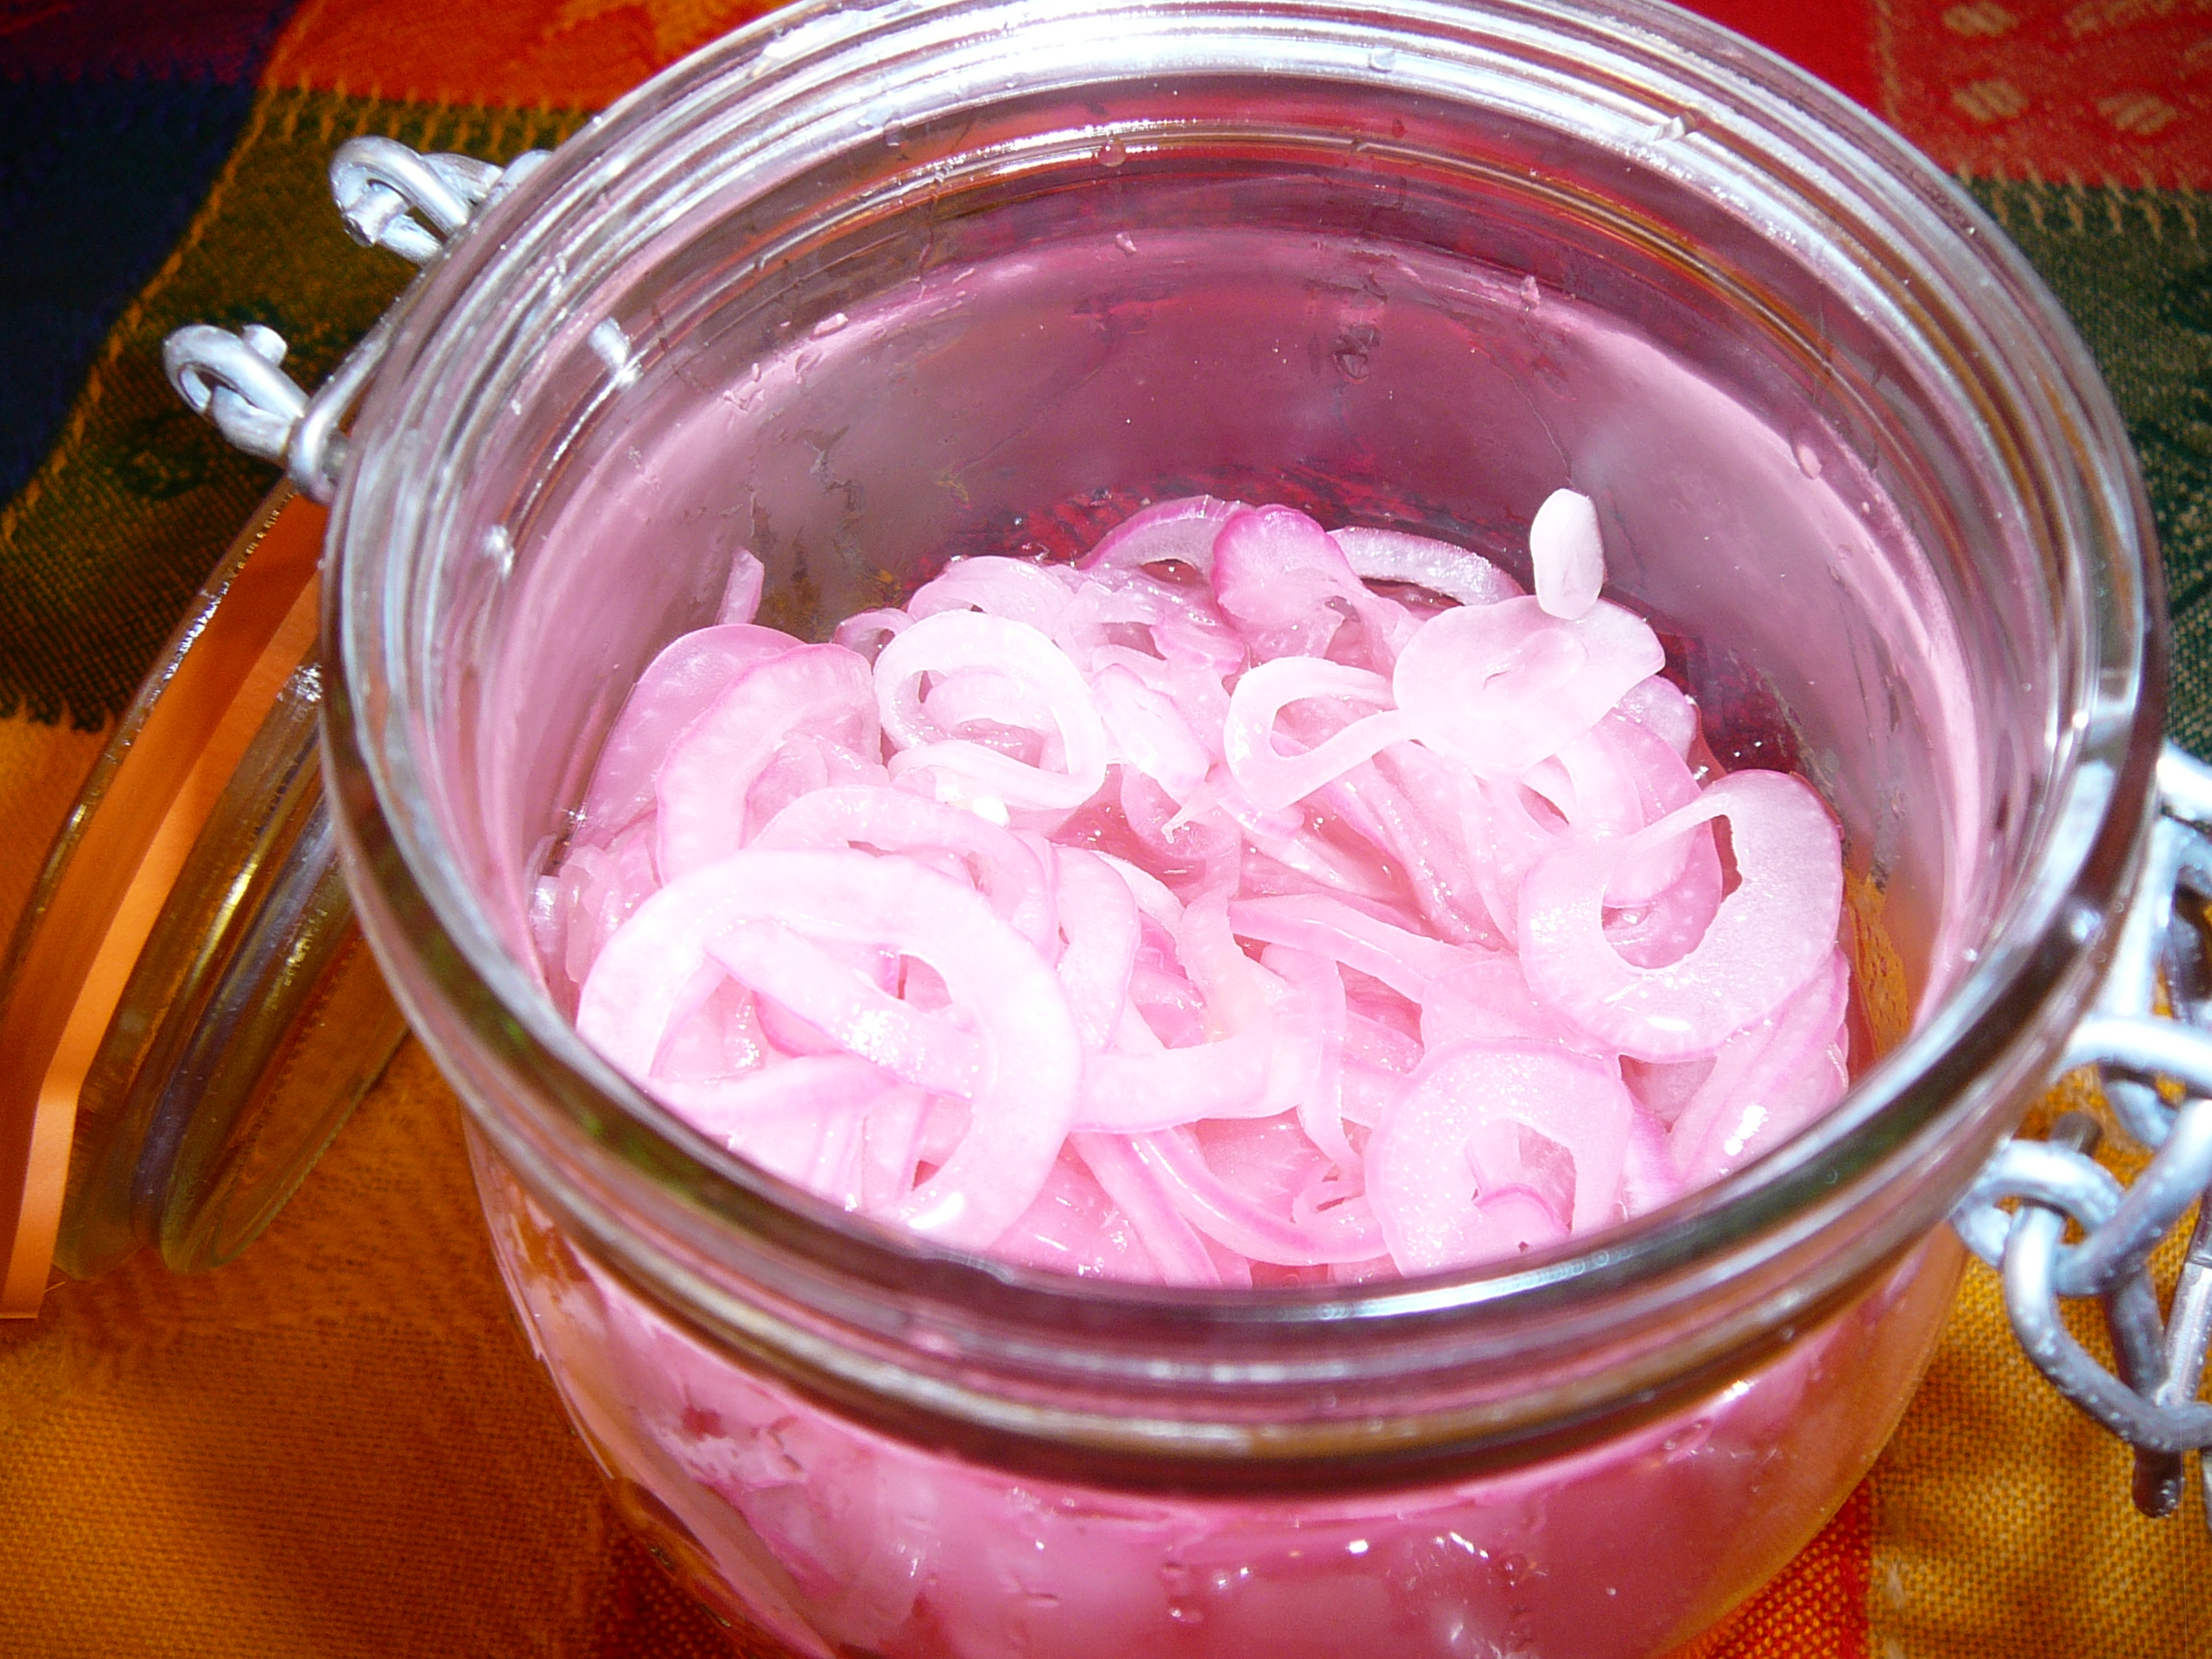
Pickled onions

Cebollas en Escabeche

Makes 1cup


INGREDIENTS

1 small red onion, peeled
1/2 cup fresh lime juice
Salt

 You really need to use fresh squeezed lime juice for this – nothing in a jar!

DIRECTIONS

With a knife or food processor, thinly slice the onions.  Scoop into a non-reactive bowl.  Pour boiling water over them, count to 10, then immediately pour the onions into a strainer.  Shake off all the water, pour the onions back into the bowl, pour on the lime juice and stir in the 1 1/2 teaspoons salt.  Cover and refrigerate for at least 1 hour.

These will last for a week or more in the refrigerator. (I usually make a big batch and they last weeks)

Pumpkin Scones

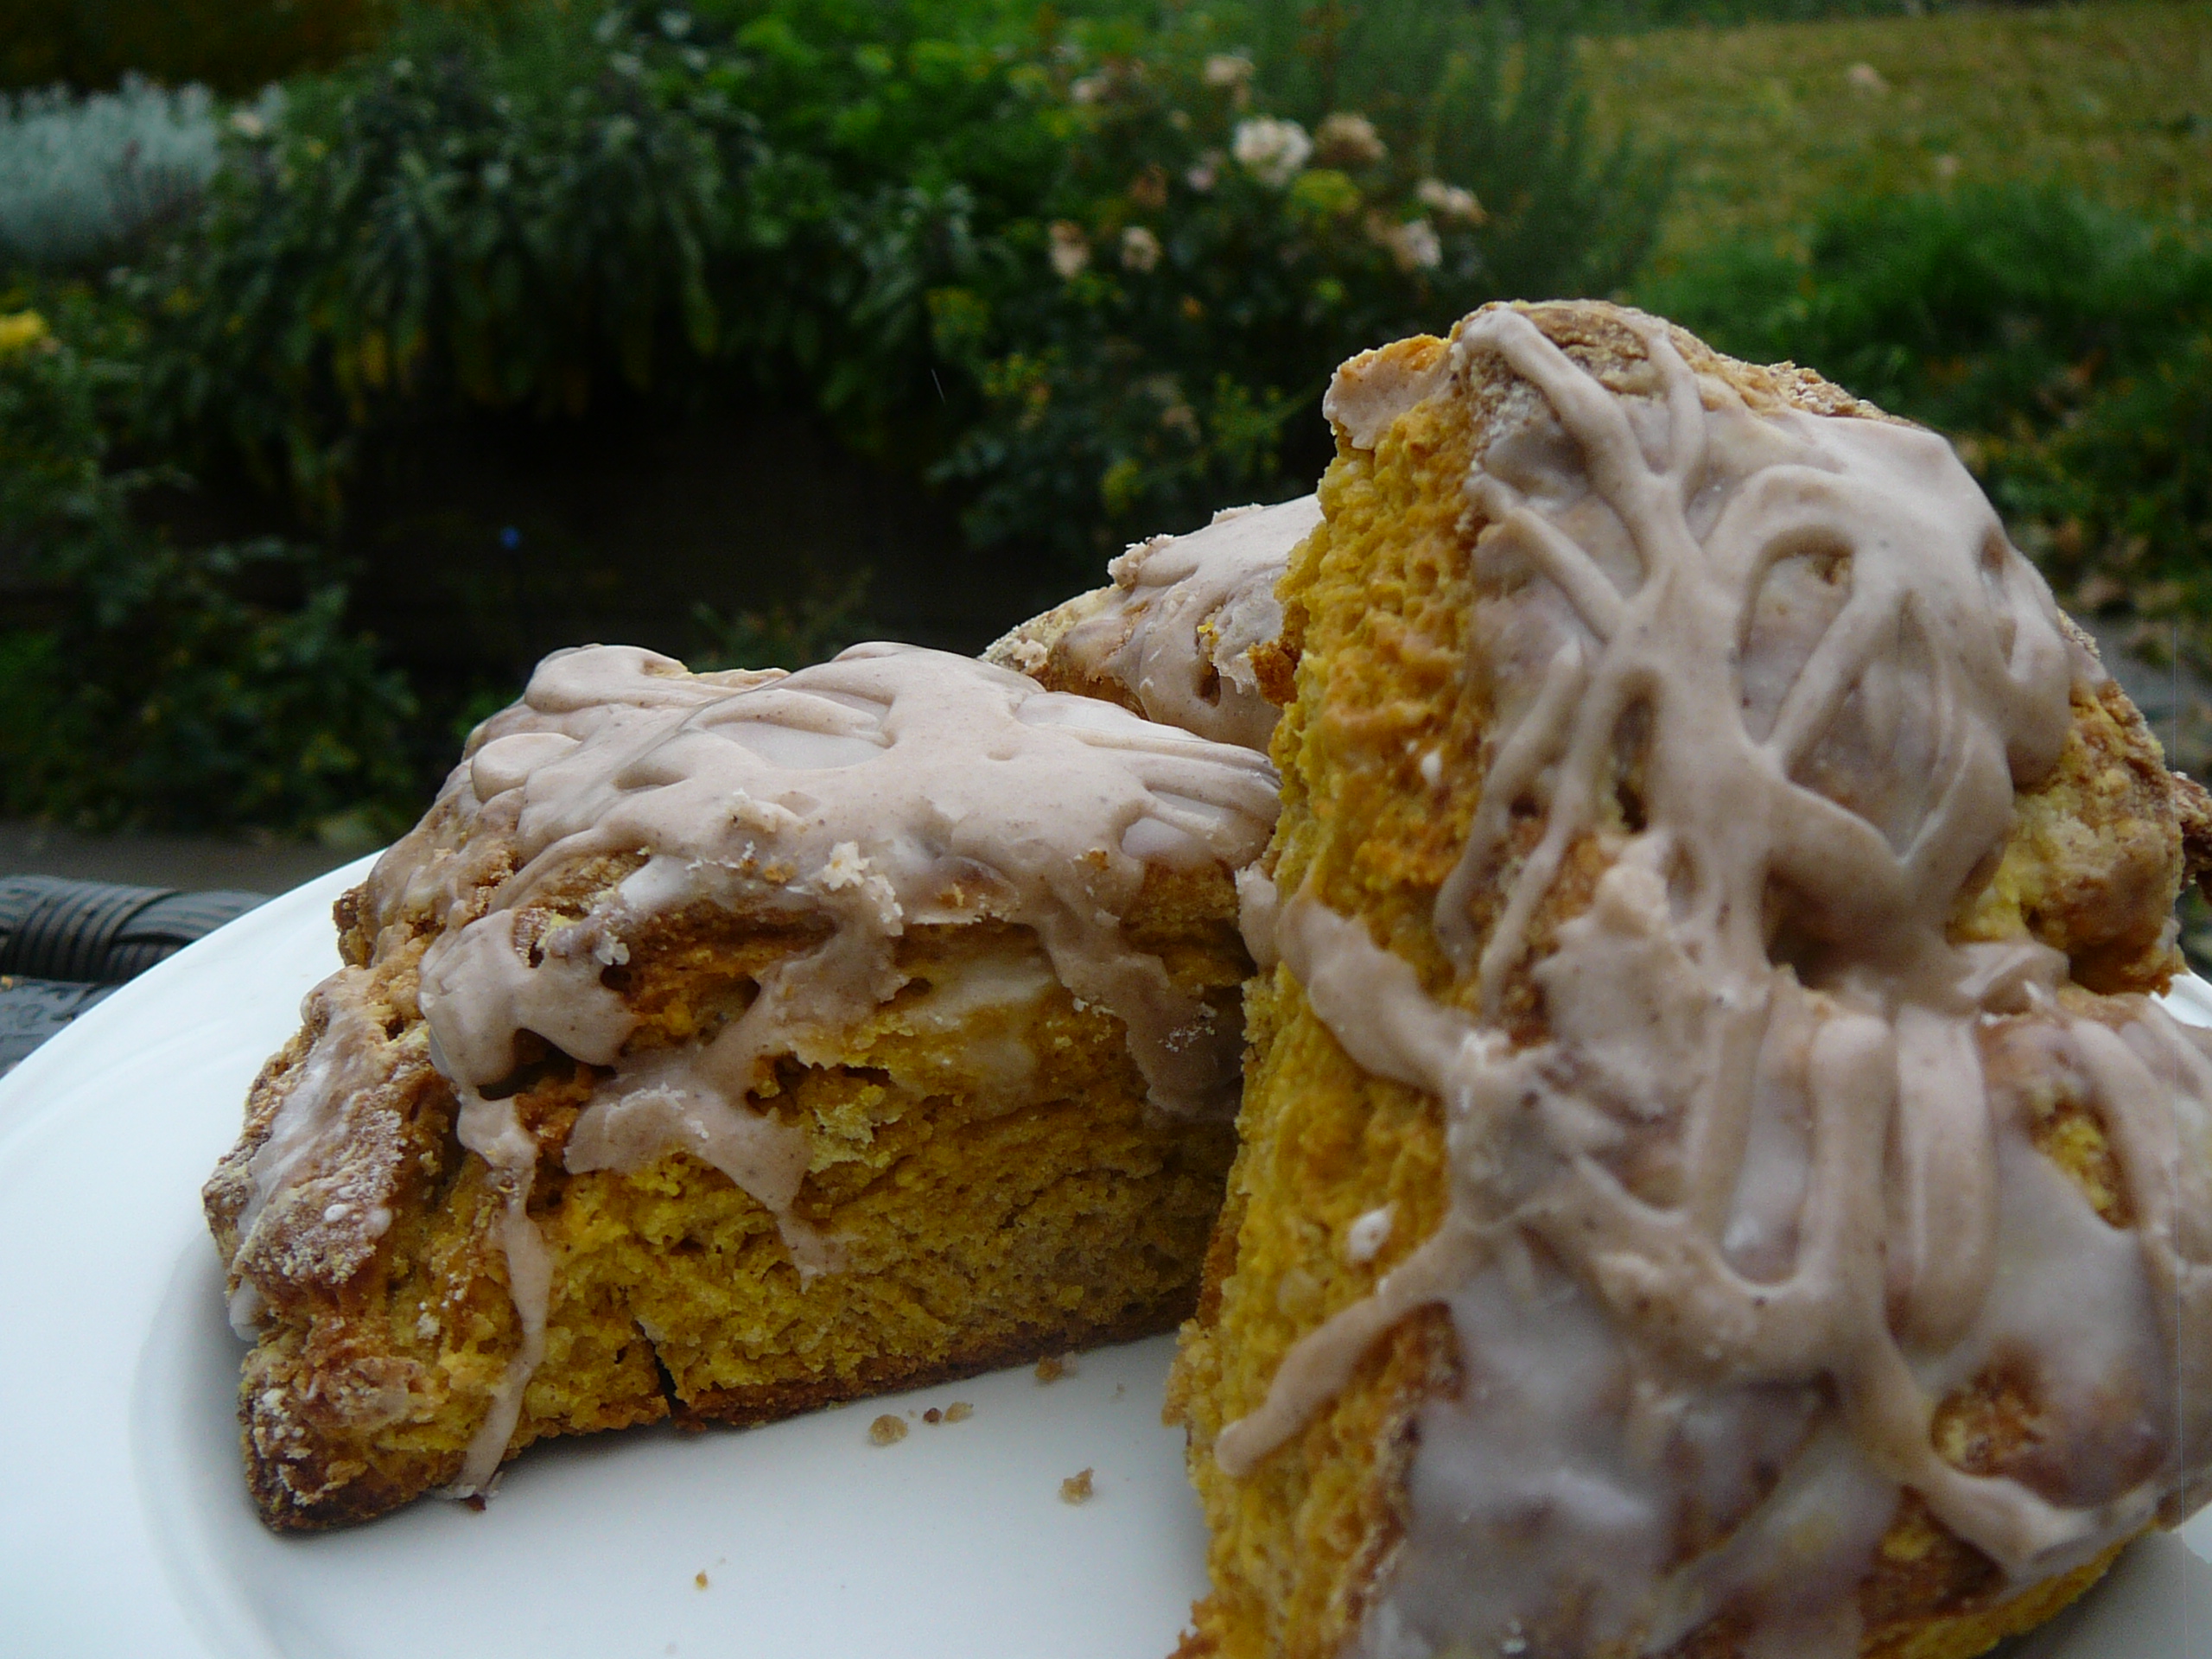
pumpkin scones

Pumpkin scones just scream fall.  You can either use your own pumpkin flesh or canned pumpkin – whatever you have works with these incredibly moist and pumpkin filled, spice laden muffins.


Preheat oven to 425°.

2 c flour
7 TBSP granulated sugar
1 TBSP baking powder
1/2 tsp salt
1/2 tsp ground cinnamon
1/2 tsp ground nutmeg
1/4 tsp ground cloves
1/4 tsp ground ginger
1/2 cup cooked or canned pumpkin

6 TBSP cold butter
3 TBSP half-and-half cream
1 large egg

Pumpkin scones 1

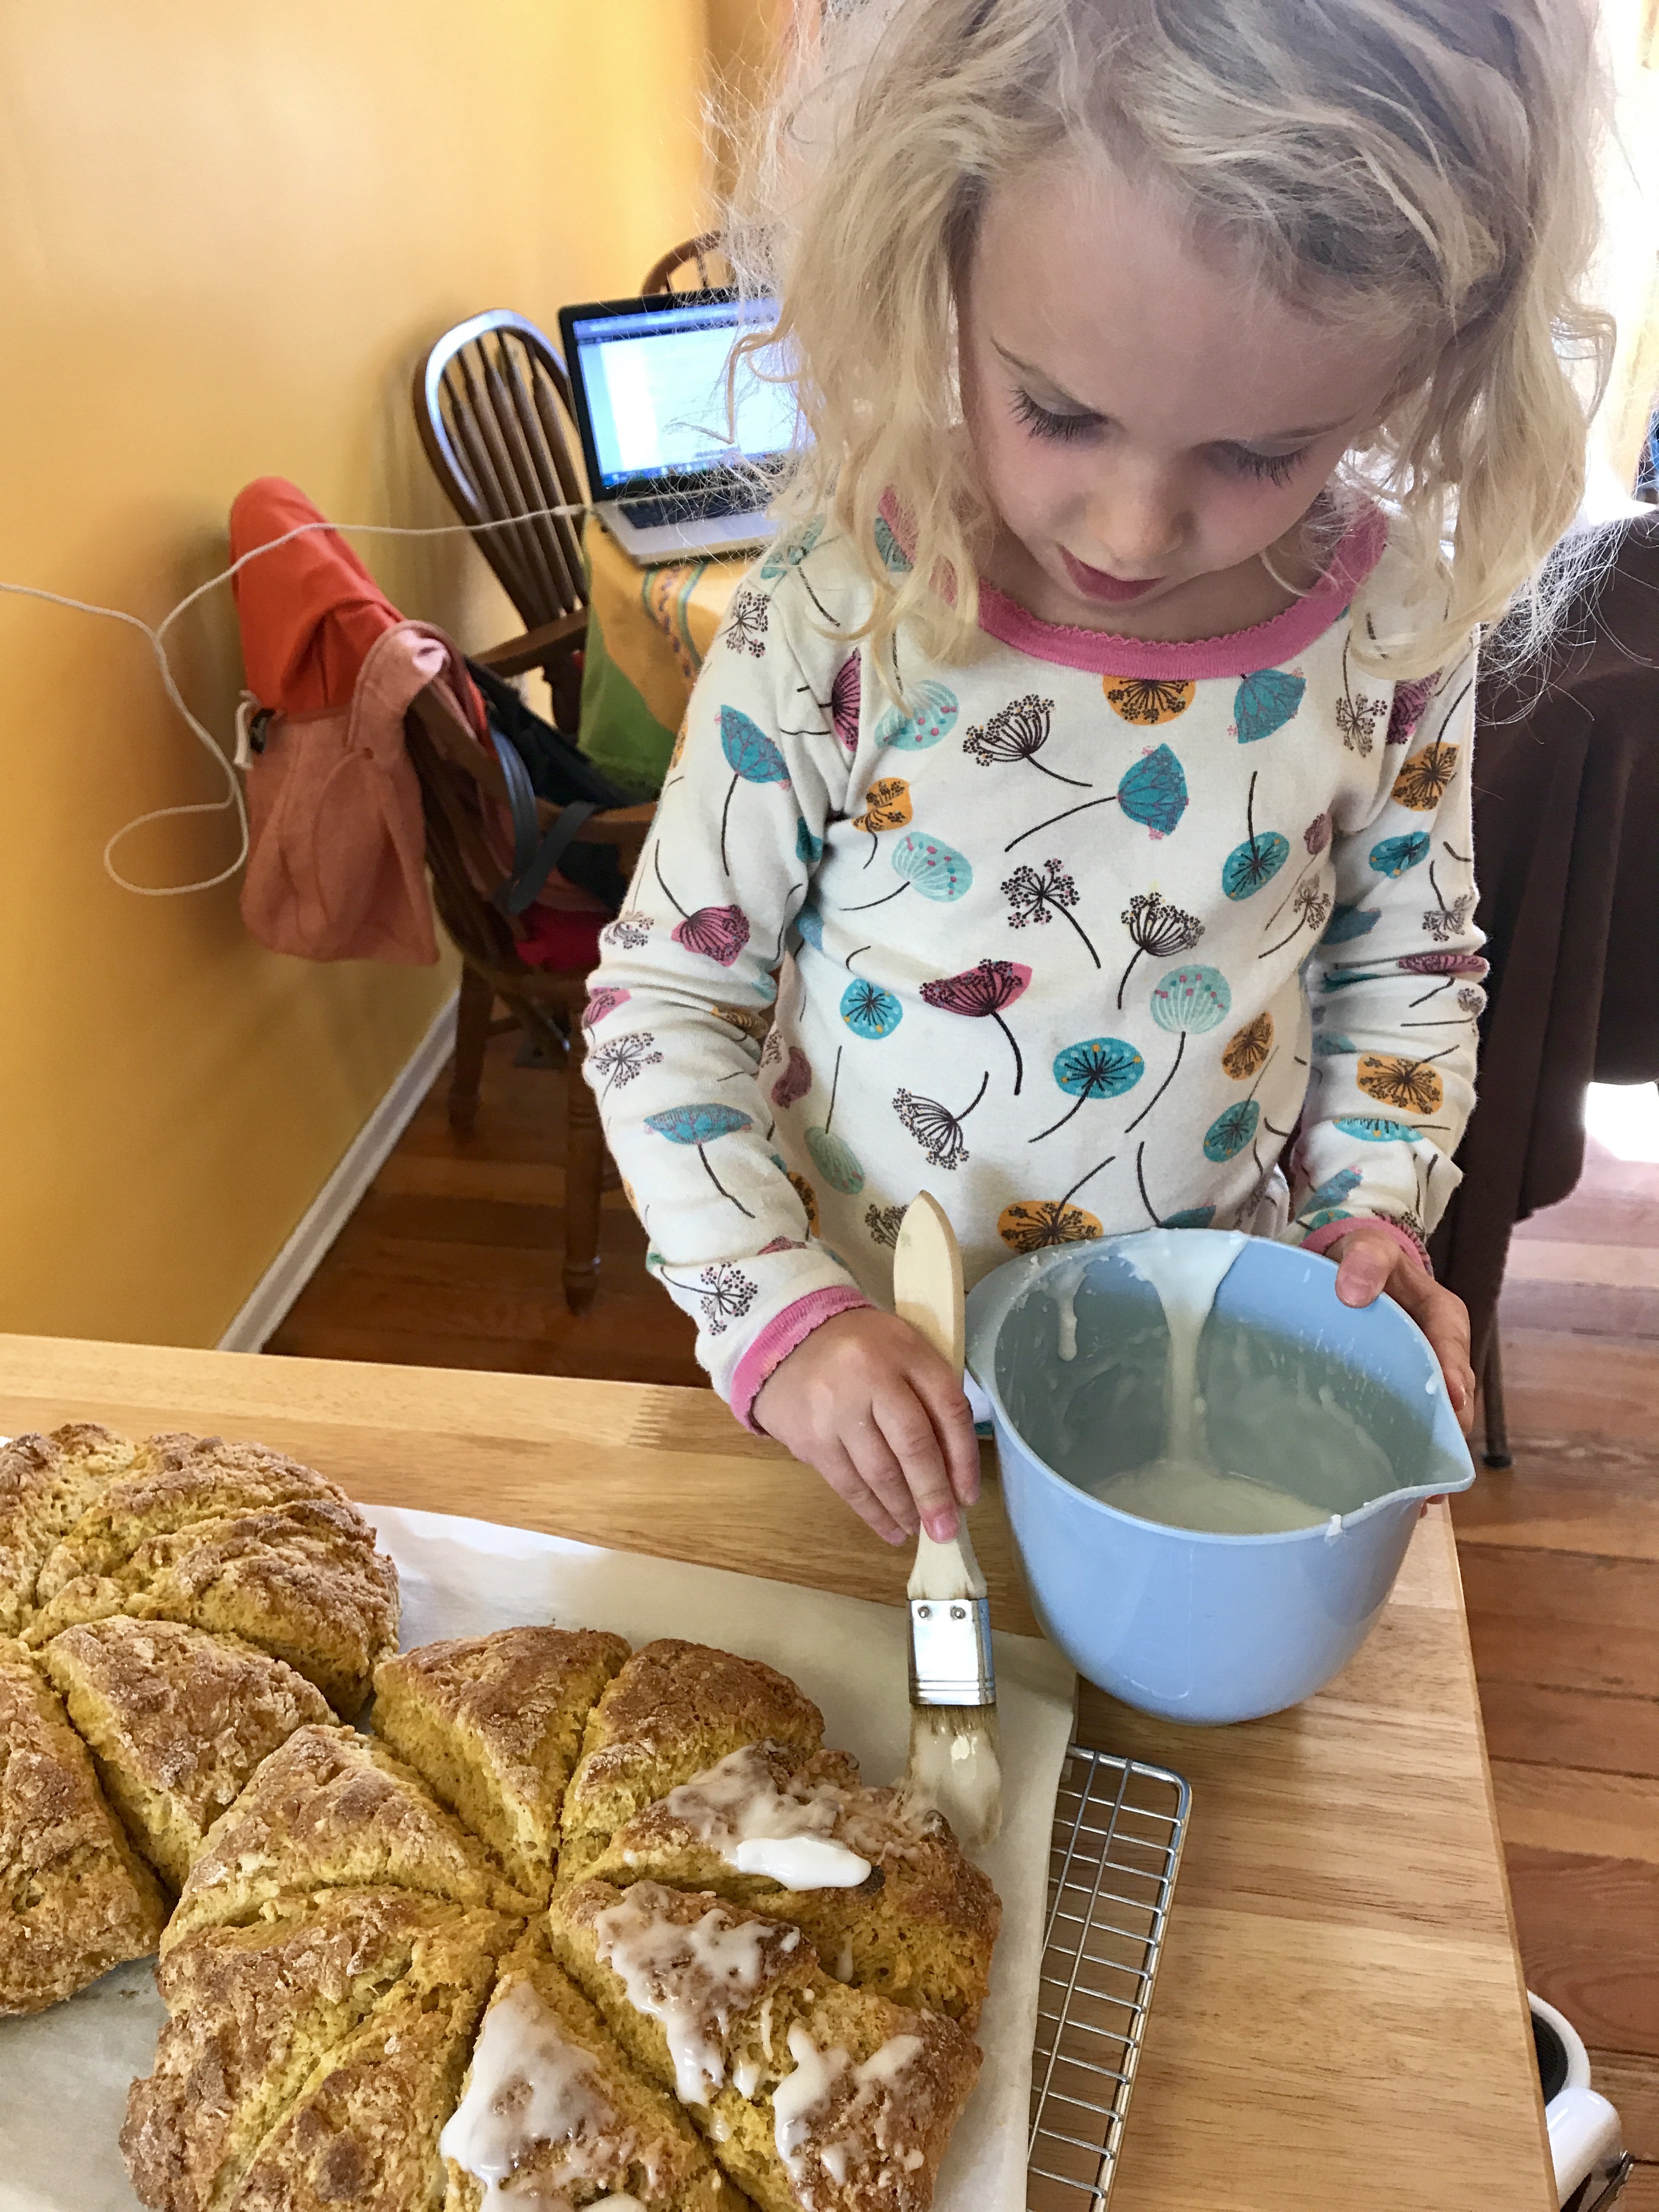
Baking Class – one of Sloan and Stella’s favourite activities in Nana’s kitchen.  (Nana’s too!)

White Glaze:
1 cup plus 1 TBSP powdered sugar
2 TBSP whole milk

Spiced Icing:
1 cup plus 3 TBSP powdered sugar
2 TBSP whole milk
1/4 tsp ground cinnamon
1/8 tsp ground nutmeg
pinch ground ginger
pinch ground cloves

Combine flour, sugar, baking powder, salt, 1/2 t cinnamon, 1/2 t nutmeg, 1/4
t cloves 1/4 t ginger in a large bowl.

In a separate medium bowl, whisk together pumpkin, half-and-half, & egg.

Cut cold butter into cubes then add it to the dry ingredients. Use a pastry knife or
a fork to combine butter with dry ingredients. Continue mixing until no
chucks of butter are visible.

Fold wet ingredients into dry ingredients, then form the dough into a ball.
Pat out dough onto a lightly floured into a round shape.

Cut through with a large knife, or a pizza wheel to make 6 wedges.

Bake for 14 to 16 minutes on a baking sheet that has been lightly oiled or
lined with parchment paper. Scones should begin to turn light brown.

While scones cool, prepare white glaze by combining ingredients Mix until smooth. When scones are cool, use a brush to paint a coating of the glaze over the top of each scone.

pumpkin scones 2

If you are as careful as Stella, the scones will get good coverage.

As that white glaze firms up, prepare spiced icing by combining
ingredients in another medium bowl until smooth.
Drizzle this thicker icing over each scone & allow the icing to dry before
serving (at least 1 hour). A squirt bottle works great for this, or you can 
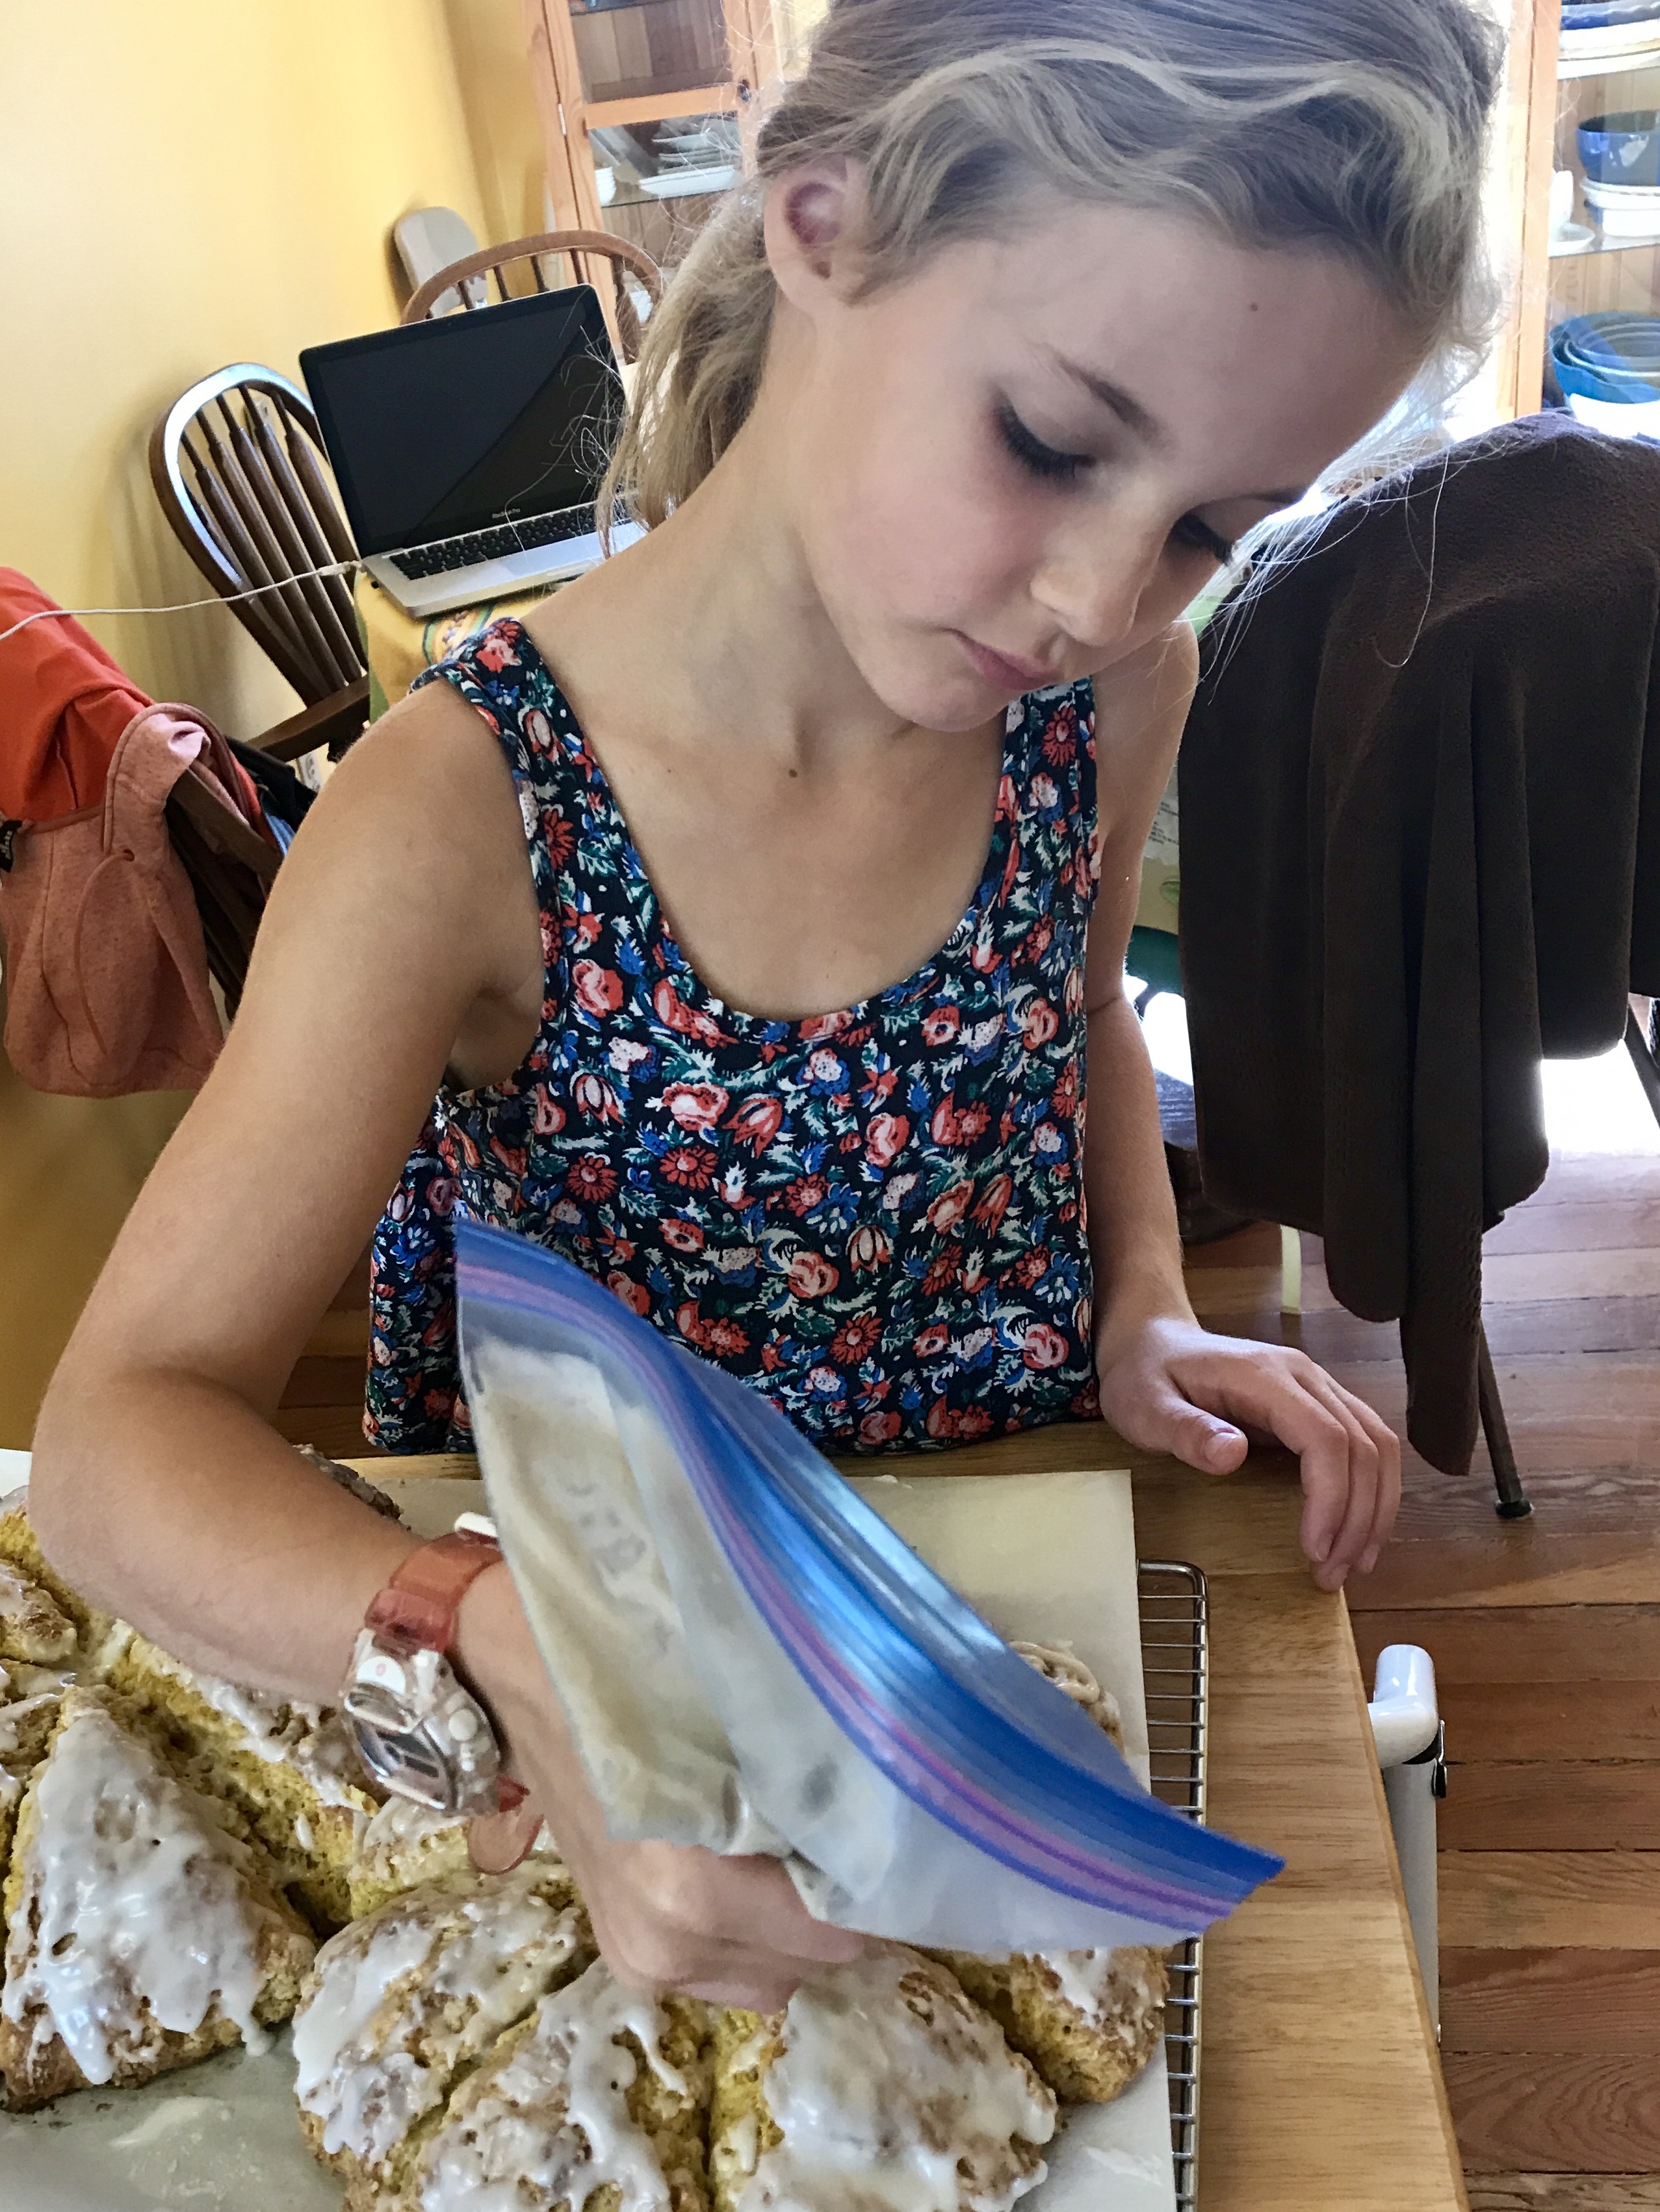
drizzle with a whisk.  Our other trick is to just fill a ziplock bag, and cut a tiny hole in one corner.

pumpkin scones

Sloan likes using the ziplock bag to drizzle – I think she likes the feel of the icing in her hand….

Doukhobor Borscht

We spent 2 years living in Castlegar, BC – Doukhobor territory – and I was determined to leave there with the best authentic borsch recipe I could.  Here it is – written out in this format so that you follow each step exactly.   This is a very rich, creamy and delicious version of Borscht – nothing at all like the beet borscht. 

It is a labour of love to make, but you will be so glad you did it.  Perfect for a rainy or cold day when you are going to be inside anyway!

Boil 2 ½ quarts of water in large stock pot.  Add ½ can tomatoes.  When water is boiling, add 1 tbsp salt, drop in 5 or 6 medium potatoes, peeled and cut in half.  Add ½ cup each of grated carrot and beet, and 1 medium onion, finely chopped.

While this is cooking, get yourself another large pot or cast iron pan – melt 3 tbsp butter and add ¾ cup finely chopped onion and let sauté for a few minutes until very soft and translucent – but DO NOT brown.  Add 3 cups of canned tomatoes, and let simmer until it becomes a thick sauce.  (Cooking this well removes the acid from the tomatoes so your cream won’t curdle)

Into yet another frying pan melt 3 tbsp butter and add 2 cups shredded cabbage.  Saute but do not brown.  Allow to cook until cabbage is soft and tender.  Shred another 2 cups of cabbage to add (raw) to the borscht later.

When potatoes are tender, remove them to a large bowl, add 2 tbsp butter and mash well until they are nice and creamy – slowly adding 1 small carton of cream.  Mix well and set aside.

Add 1 1/2 cup diced raw potatoes to stockpot and ½ of the tomato sauce mixture along with 2 tbsp butter.  When diced potatoes are tender add the uncooked shredded cabbage and bring to boiling point, but DO NOT BOIL!!  When cabbage is tender, add the fried cabbage, the rest of the tomato sauce and mashed potatoes.  Add ½ cup chopped fresh green pepper and black pepper to taste.

The finishing touch is stirring in some chopped fresh dill.

Serve hot with a dollop of sour cream and a dill sprig for garnish.  We like this with piping hot biscuits right out of the oven.