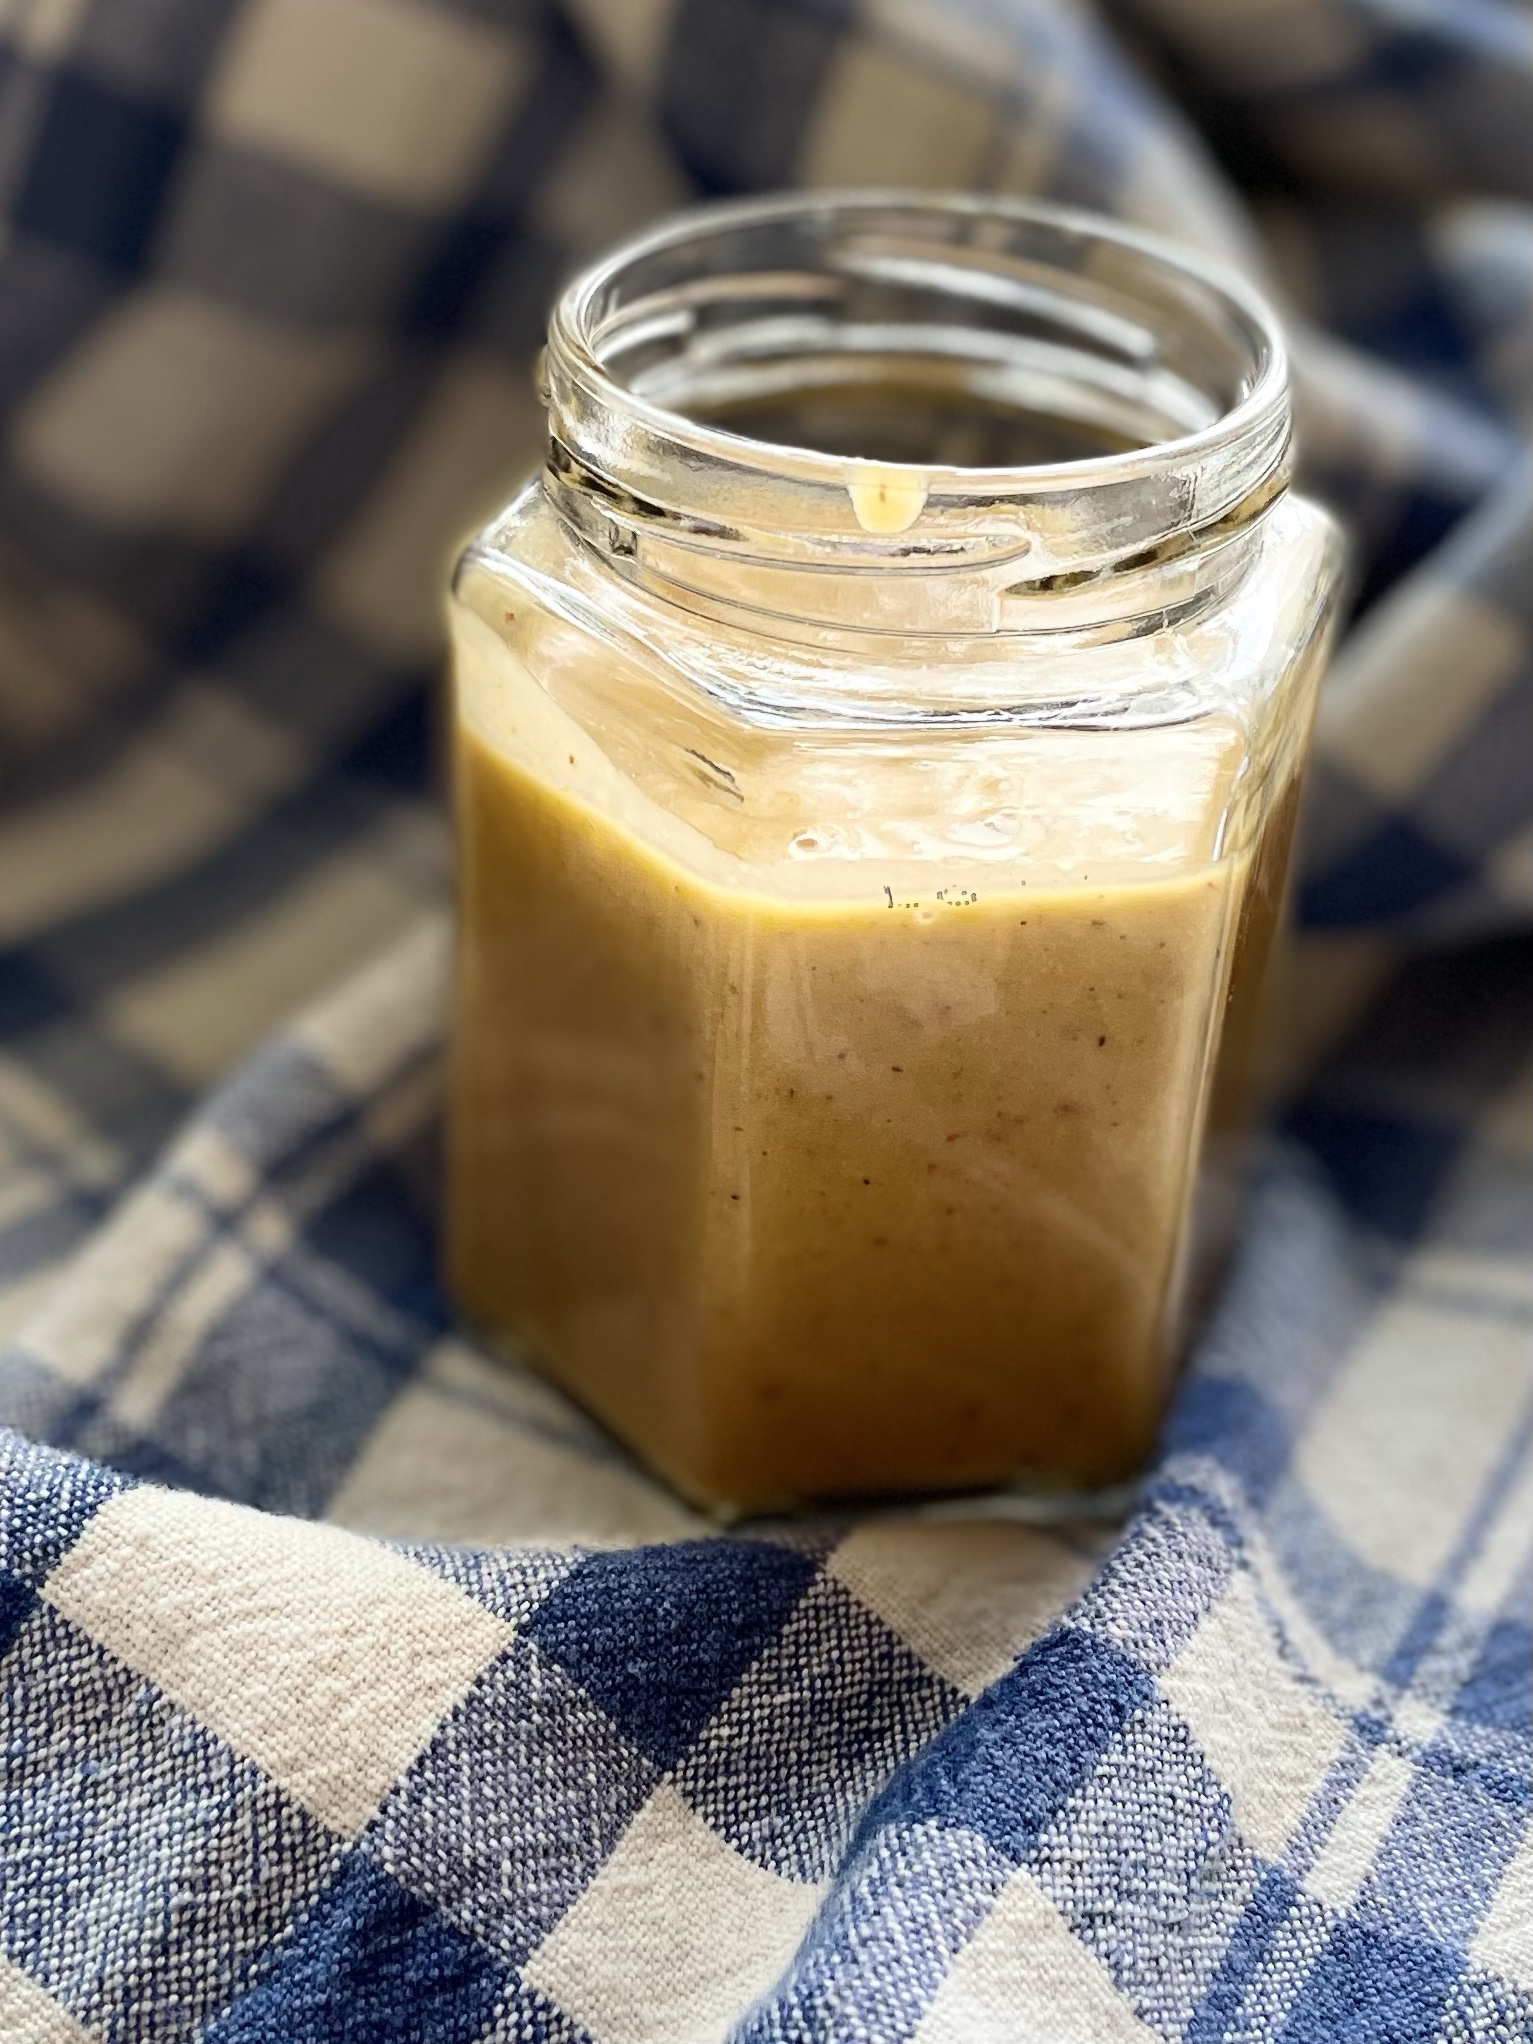
Is there anything better than a vinaigrette that you want to use on everything? I doubt it. We’ve used it to dress up grilled vegetables, served it drizzled over a Mexican steak bowl, and of course just as dressing for a simple salad. The added bonus is that this is the easiest dressing to make.
Use it in a variety of ways – today it was drizzled over a Mexican Steak Bowl, and it was perfect with the combination of sweet, smoky and spicy.
1/2 cup avocado oil
1/4 cup freshly squeezed lime juice
1 chipotle pepper from a can of chipotle in adobo sauce
2 tbsp honey
1 garlic clove
1/2 tsp cumin
1/2 tsp sea salt
freshly ground black pepper to taste
The directions are embarrassingly easy ….. simply toss it all in a blender and let it whizz until everything is creamy and smooth. The combination of chipotle, honey and lime is brilliant.
Grilled steak and vegetables, served over a bed of Mexi style rice and garnished with a juicy fresh tomato and cilantro salad. This dressing is amazing.
This recipe came from the the Love and Lemons website, and you can be sure anything from Jeanine Donofrio is going to be delicious.
It’s hard to spot the salad underneath, but it’s there! A tangle of wheat noodles and crunchy salad greens is the base of this – go ahead and use rice noodles or just omit the noodles entirely.
I love a full meal deal salad! This tangle of vegetables, both fresh and grilled, served mixed with noodles and garnished with steak and nuts is just the best. It’s on repeat around here. Go ahead and splurge for the best steak – you don’t need much to make it a complete meal.
This dressing is the star of the show – it is light and bright with just the perfect amount of zing.
1/2 cup rice wine vinegar
2 tsp fresh lime juice
2-3 tbsp chili garlic sauce
2 tbsp soy sauce (reduced sodium)
1 tbsp fish sauce
1 1/2 tsp raw sugar (or honey)
1 tsp minced ginger
1 tsp minced garlic
1 tbsp fresh Thai basil, roughly chopped
1 tbsp fresh mint, roughly chopped
1 tbsp fresh cilantro, roughly chopped
1/2 tsp black pepper, freshly ground
2 tsp toasted sesame seeds **
1/2 tsp ground coriander
1 tbsp toasted sesame oil
1/3 cup peanut oil
kosher salt to taste
** I’m a big fan of toasting nuts or seeds as it adds so much flavour. Watch closely because they go from deeply toasted (my personal favourite) to black …. beware. (yes, I speak from experience)
Whisk all the ingredients, except the oils, together in a bowl. Once combined, slowly drizzle in the oils and continue to whisk until well blended. This is the part where you taste, and adjust if needed – sometimes you need a bit more lime juice, salt or sweetener. If you prefer your dressing on the spicy side, add in a bit of Thai chili or chili flakes.
This recipe is just as versatile as whatever you have on hand. Tonight this dish included:
Chinese wheat noodles (cooked)
salad greens
mint leaves
basil leaves
cilantro leaves
cucumber
tomato
bean sprouts
grilled red pepper
grilled zucchini
steamed baby bok choy
grilled beef tenderloin
toasted cashews
toasted sesame seeds
I like to make a salad out of the cold cooked noodles and fresh vegetables, and pile that in the bottom of my bowl. Arrange the cooked vegetables around the sides along with the grilled steak. Drizzle with the dressing and sprinkle the cashews and sesame seeds over.
If you have time, and have a steak that needs marinating, just use a bit of the dressing. This works equally well with chicken, pork or tofu. If you want to use shrimp make sure to only give it a quick marinade.
When grilling the vegetables, drizzle with a little of the dressing before and after grilling.
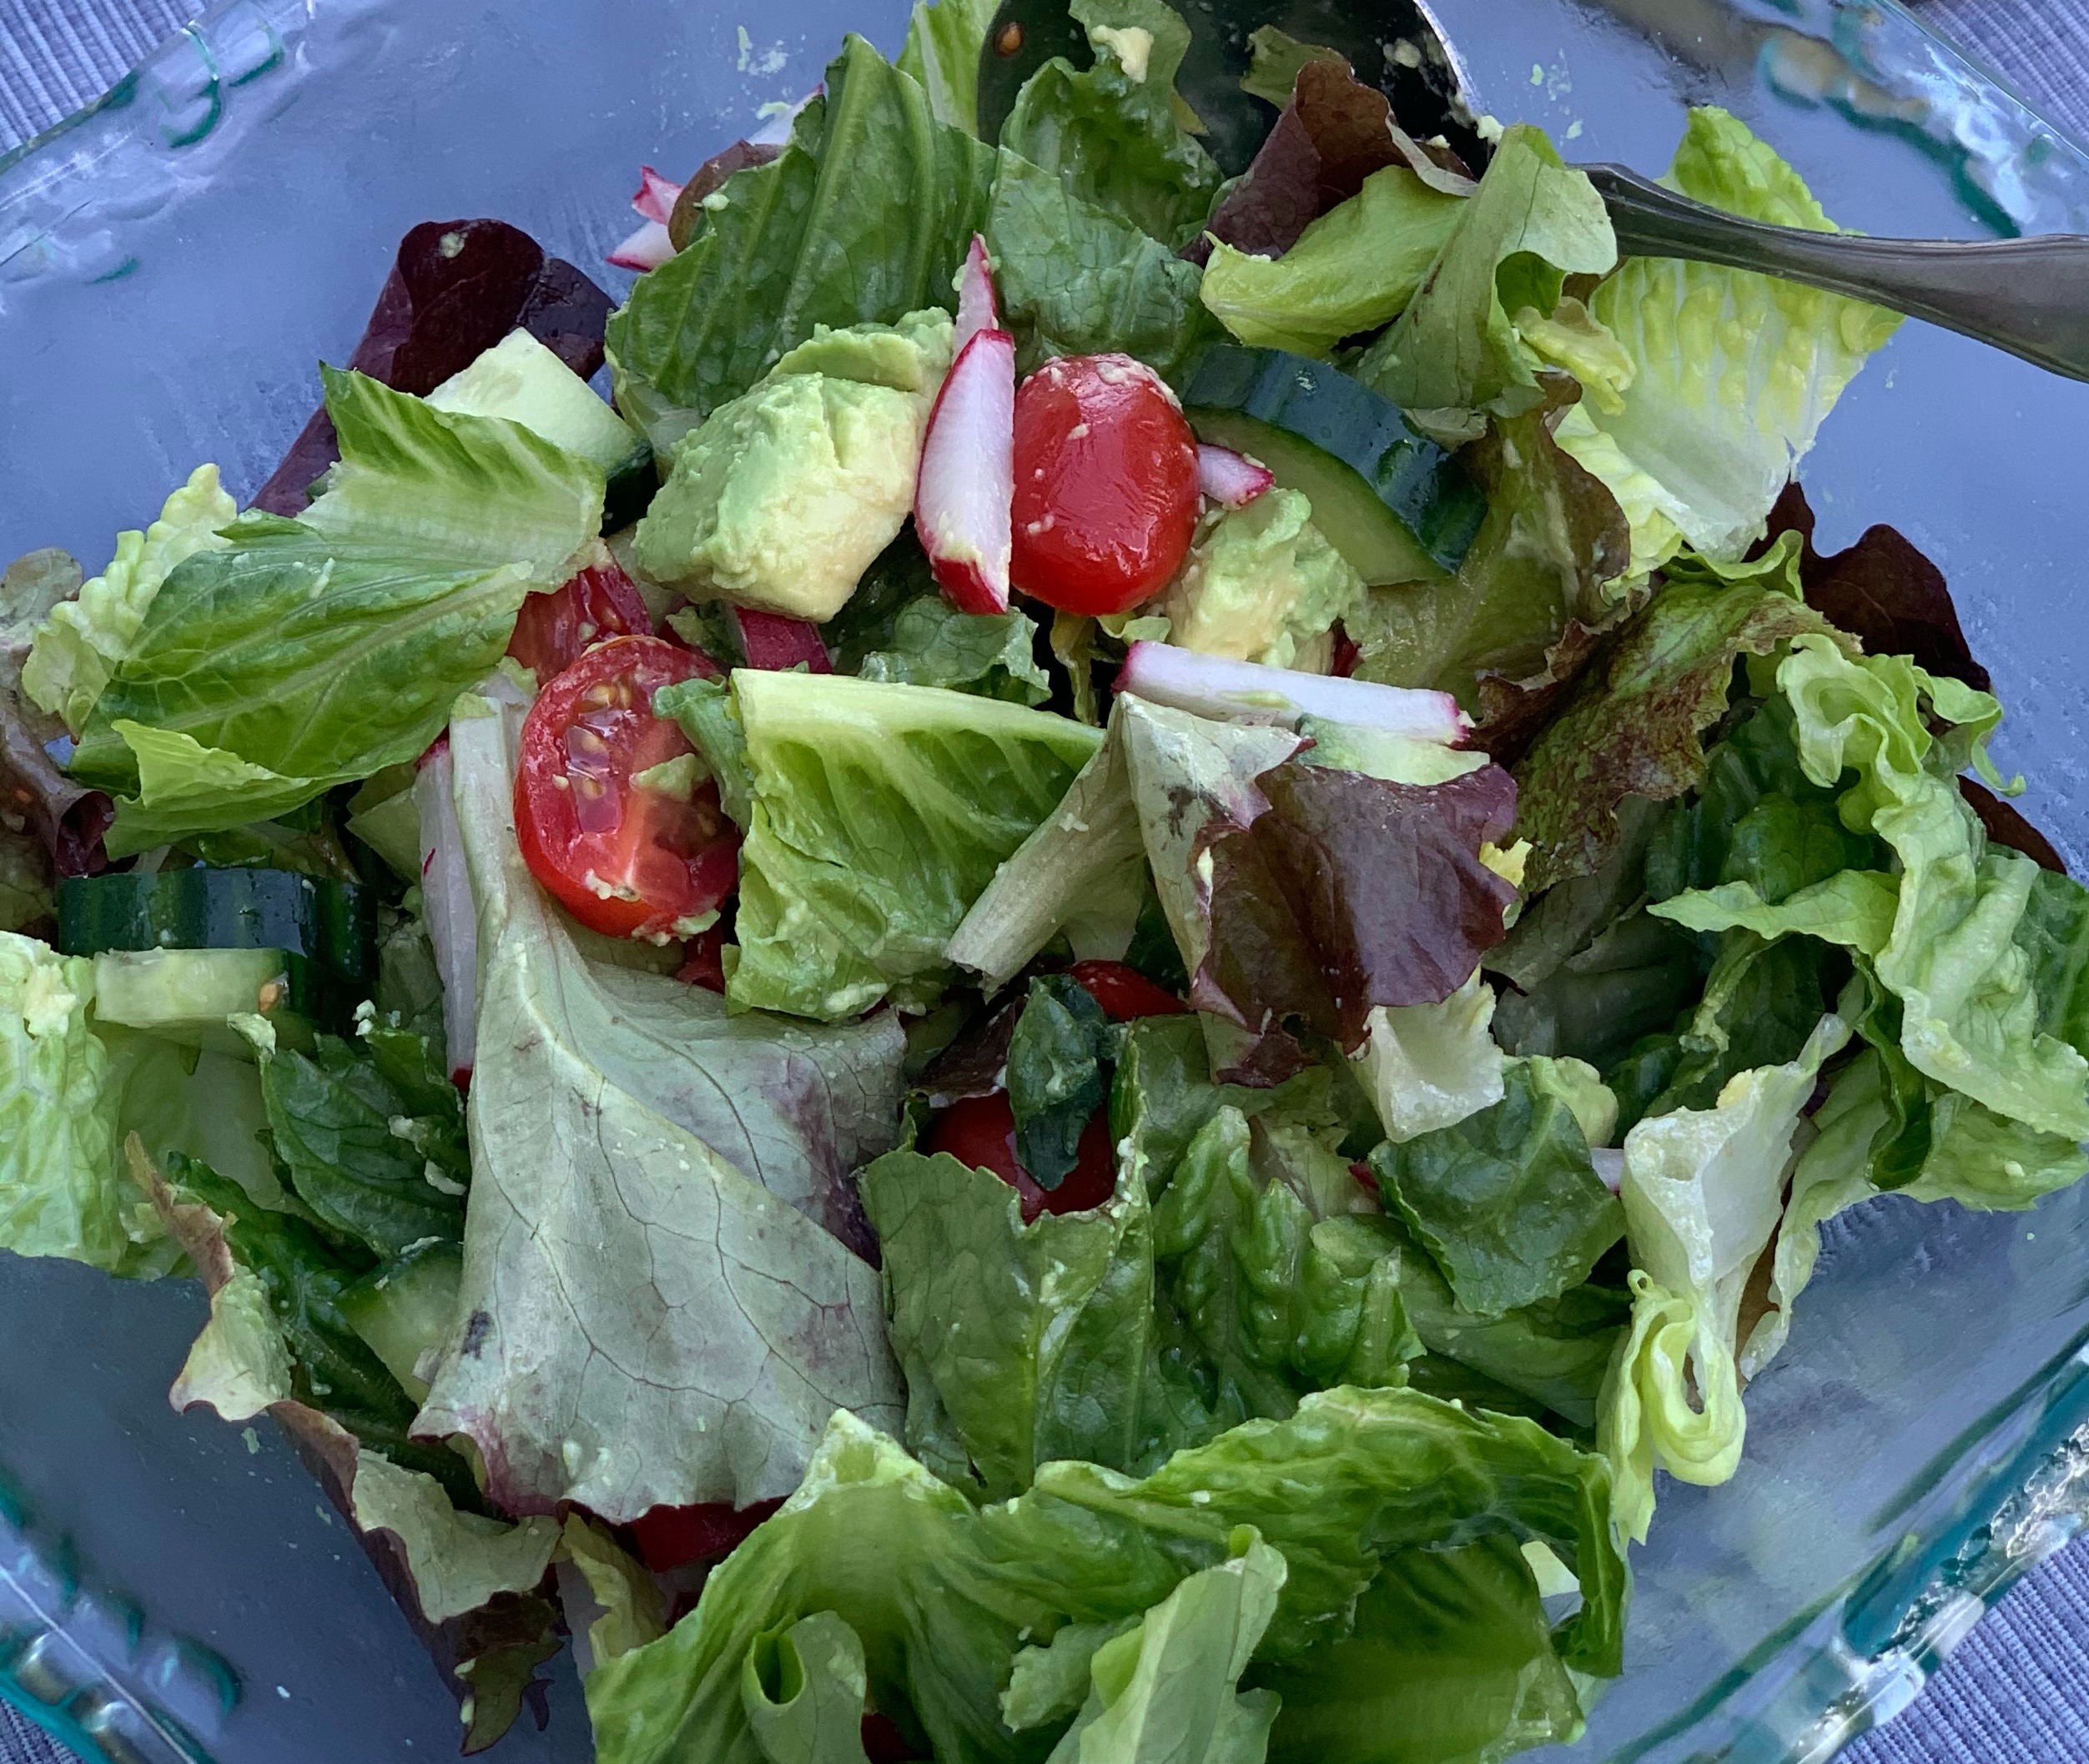
When you start with a fresh salad as the base, everything is tastier!!
OMG – so good. This and a salad was perfect for dinner.
I love making scallion pancakes, really wanted something that could be a whole meal deal, and ended up with this – a bit of mash up between Korean Pajeon pancakes, Japanese Okonomiyaki and Chinese scallion pancakes. This gojuchang dipping sauce makes it slightly more Korean influenced, but if you don’t have gojuchang in your fridge then you could easily make a dipping sauce of soy sauce and rice vinegar. (or buy something!)
PANCAKE BATTER
1 1/2 cup all purpose flour
1/3 cup potato starch (could sub corn starch if this isn’t one of your staples)
1 1/2 tsp sugar
1 1/2 tsp baking powder
1/4 tsp baking soda
1/2 tsp freshly ground pepper
1/4 tsp salt
1 1/2 cups ice water
2 garlic cloves, minced
Oil for cooking
VEGETABLE SUGGESTIONS
shredded cabbage
slivers of spinach
very thinly sliced cauliflower
minced red onion
very thinly sliced red pepper
lots of thinly sliced scallions (spring onions)
Prepare all your vegetables and set aside
If you are inclined to do so, go ahead and add shrimp or cooked shredded chicken to make it a heartier pancake.If you do – I’d add it as soon as the batter is spread out in the pan so you can distribute evenly.
DIPPING SAUCE
1/4 cup light soy sauce (I use reduced sodium)
1 tbsp rice vinegar
2 tsp toasted sesame oil
1 tsp sugar
2 tsp gojuchang
1/2 tsp finely slivered ginger
1 minced garlic clove
1 finely sliced spring onion
1 tbsp toasted sesame seeds
Mix well and taste. NO REALLY, SERIOUSLY, TASTE!!! Every different product has a slightly different flavour profile, and you have your own taste preferences so make sure this dipping sauce hits all the notes you are looking for and adjust as needed. Of course, if you aren’t a cooking nut like myself, you may not have all that in your pantry so just buy a jar of dumpling/gyoza dipping sauce! ha ha
METHOD
Whisk together dry ingredients until well combined. Make a well in the centre of the flour mixture and stir in the ice water and minced garlic. Stir just until combined, then add in the vegetables.
I haven’t specified any amounts for the vegetables, so feel free to experiment with how you like the pancakes. This amount of batter will make 4 good size pancakes with a generous serving of vegetables in each one – feel free to pack in as many veg as you like – you literally only need enough batter to hold it all together in the fry pan.
In a non stick pan, heat about 3 tbsp oil until quite hot – stick a wooden chopstick in, and if it sizzles you are ready!
Scoop in about 1 cup of batter and quickly spread it out so it resembles a pancake. Gently swirl the pan allowing the oil to circulate so the pancake gets crispy bits and nicely browned. Like any pancake, only flip it once you start to see bubbles popping on the surface.
Flip, drizzle another tablespoon or so of oil around the edges and swirl so this second side also gets crispy around the edges.
When nicely browned on both sides, remove to paper towel lined plate and keep warm. As soon as you remove it from the heat sprinkle with toasted sesame seeds, and a fresh grate of salt.
This is what I had in the fridge today, so this is what the pancake had! Go ahead and find your own favourites, I really wanted bean sprouts but couldn’t find any decent ones at the store.You could easily get more vegetables in there, and also create a thinner batter with just a bit more ice water. Whisk an egg into the batter if you are looking for extra protein but want to omit any seafood or meat, and keep it vegetarian.Todays version included some raw shrimp, which I quickly placed as soon as the batter was down in the pan, and then sprinkled with sesame seeds. I wouldn’t use cooked shrimp as they might toughen up. What a beauty! Sprinkle with seasoning as soon as you take them off the pan and keep warm until ready to serve. I also sprinkled with a little bit of Furikake today.
If you have never tried gojuchang, then do so! I love it. My first foray into cooking with it was for KFC, Korean Fried Cauliflower and was immediately hooked. It is a Korean chili paste that has so much flavour – slightly tangy and not too spicy.
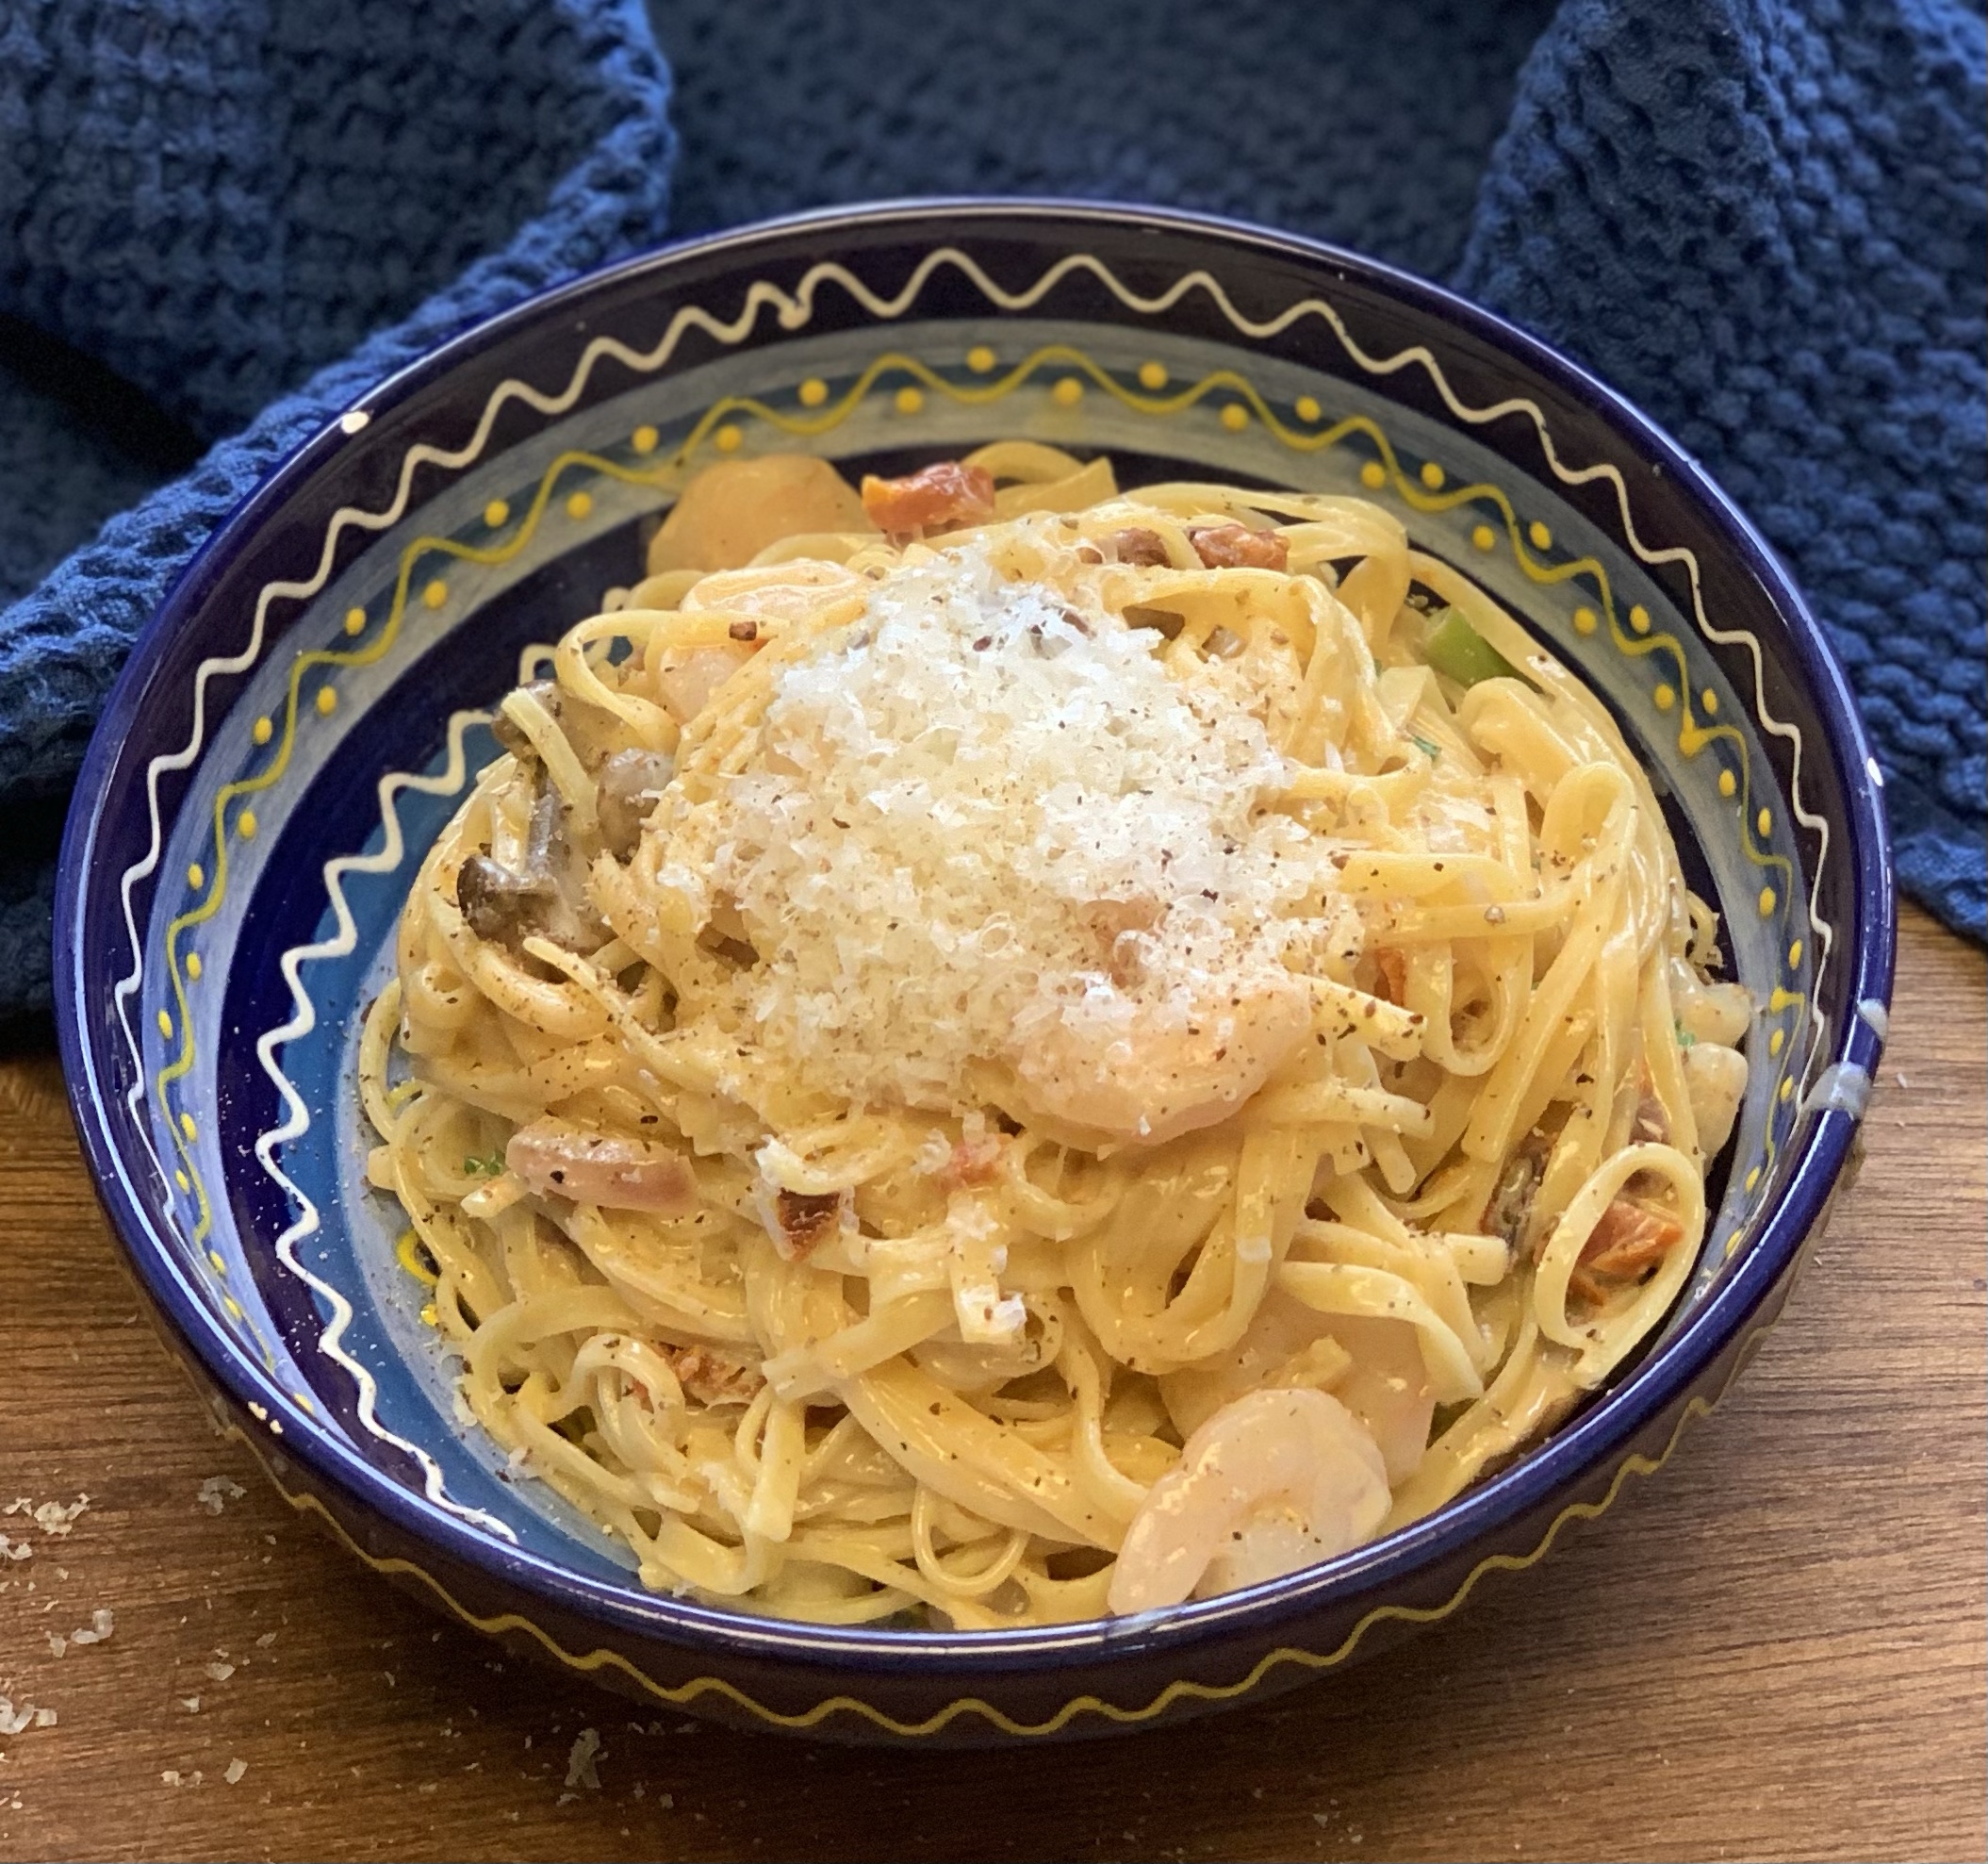
I don’t know about you, but an advertised 20 minute recipe NEVER takes me 20 minutes. This one was close tho ….. and very easy. Not only easy, but delicious and I’m more than happy to spend a few more minutes to achieve delicious.
8 ounces dried tagliatelle pasta (or really, any pasta you like!)
2 tbsp butter (separated, see below)
olive oil
10 ounces small, peeled and cleaned shrimp
3 garlic cloves (yes, really)
1/4 cup dry white wine (I like sauvignon blanc but any dry white will work – stay away from sweet tho)
1/2 cup chicken broth
3/4 cup heavy cream
1/2 cup thinly sliced onion
1 cup sliced crimini mushrooms
1 cup asparagus (cut into 1″ pieces)
1/2 cup minced sun dried tomatoes
1/2 tsp chili flakes (or to taste)
3/4 cup freshly grated parmesan (do NOT use purchased grated!)
2 tbsp fresh parsley, minced
black pepper
more parmesan for serving
Get a large pot of water on the stove and bring it to a boil. Salt and add pasta. Cook to one minute short of the cooking instructions …. (in order to finish in the cream sauce).
Before draining, scoop out about 1/2 cup of pasta water.
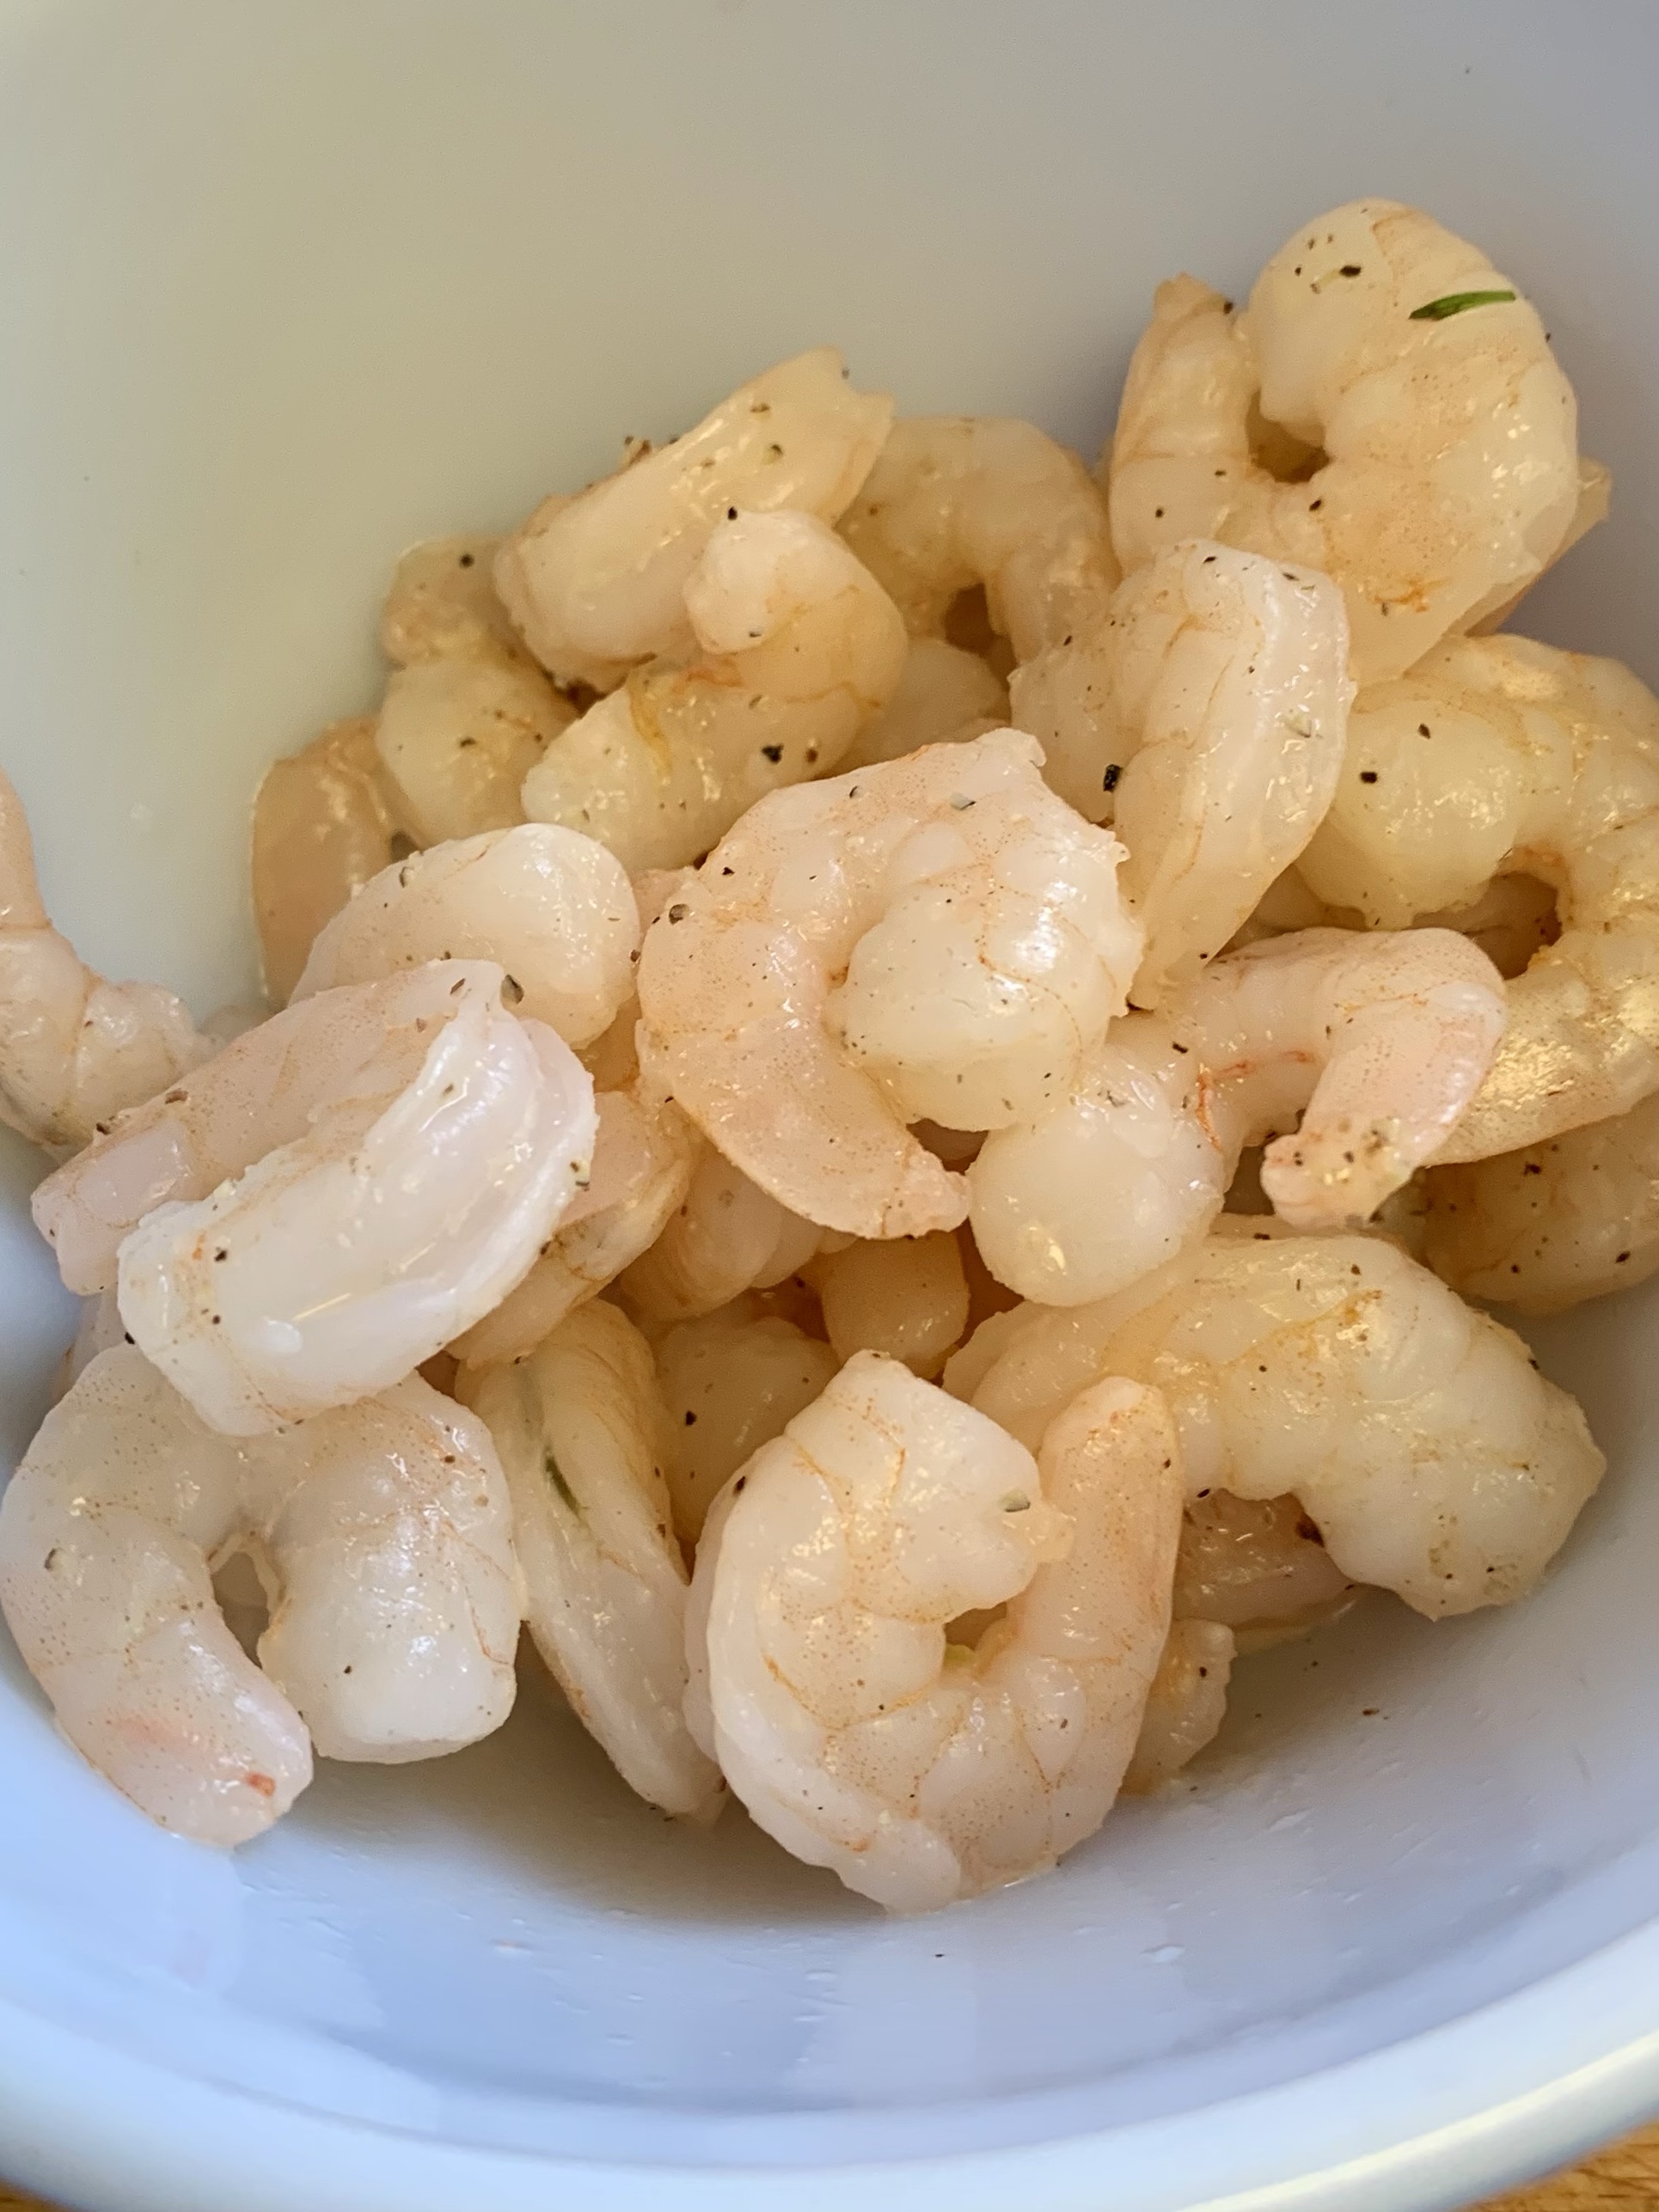
Get a nice flat bottom skillet (non-stick works great here) and melt 1 tbsp butter. Drain your shrimp and pat dry (you don’t want them to steam) ….. toss the shrimp into the melted butter and sauté quickly – until ALMOST cooked. Depending on your shrimp size this might only take a minute or two. There is nothing worse than rubbery, overcooked shrimp. Well, okay, lots of things are worse including this COVID nightmare we are living through…. Remove from heat and lightly season with salt and pepper.
In the same skillet heat the other tbsp butter and add a splash of olive oil – once melted add the onions, sauté until soft, add mushrooms and cook until just lightly browned, then add the garlic, asparagus and sun dried tomatoes. Add chili flakes.
Stir in the white wine and allow to reduce slightly, then add the chicken broth, cream and parmesan. Season to taste …. I didn’t need to add any more salt but that finishing black pepper is great.
Add your mostly cooked pasta to the skillet and toss to cover. The sauce will continue to thicken and this is the time to add some of your reserved pasta water a bit at a time, only as needed. Stir in the shrimp to heat through, toss with parsley and serve with a grating of fresh parmesan and black pepper.
Dig in!
These plump & juicy little guys are barely cooked and will finish in the cream sauceEasy to make this a vegetarian meal – just stir in as many veg as you like and omit the shrimp.
The perfect base for any kind of soup – wonton tonight, laksa another night.
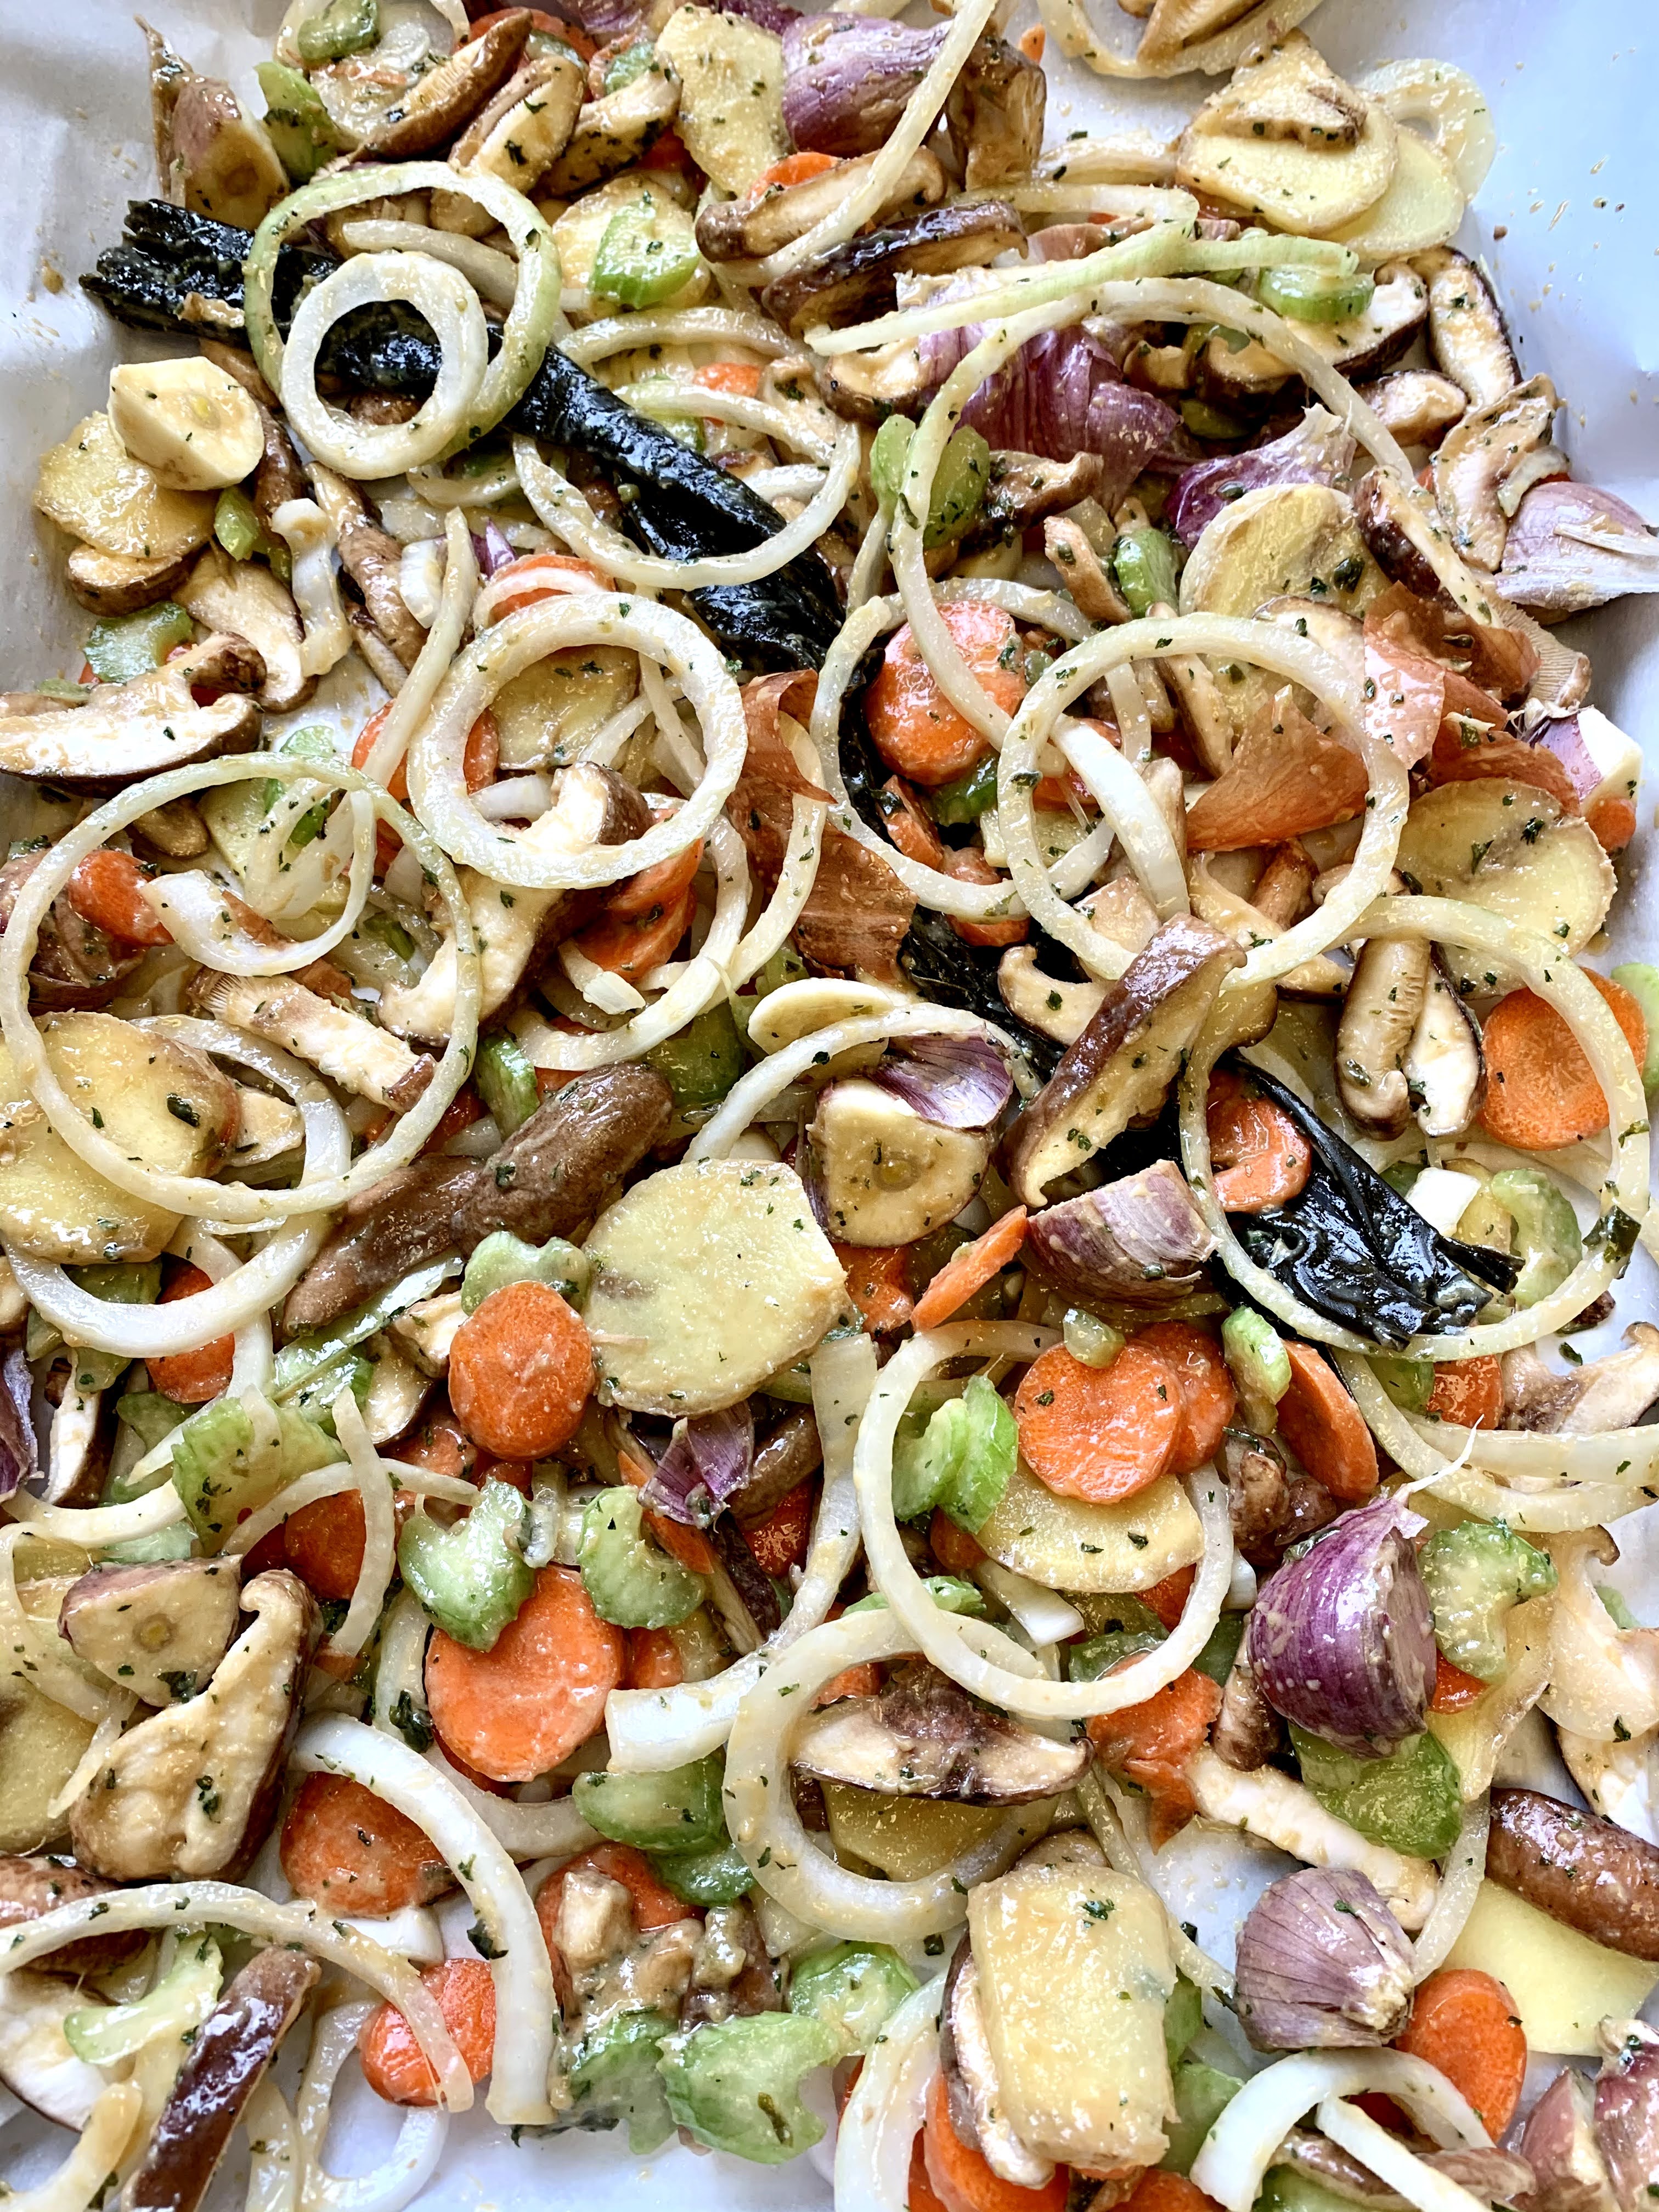
Cold dreary days lead to healing soups! Even the start of this, with the miso coated vegetables roasting in the oven promises great flavour. I promise you will feel like brighter days are coming by the time you finish this bowl of deliciousness. (Is that a word?)
4 tbsp white miso paste
3 tbsp grapeseed oil (or other neutral oil)
3 tbsp water
3 cups shiitake mushrooms, sliced
1 sheet of dried seaweed (optional but recommended)
1 large yellow onion, skin on, thinly sliced
1 large carrot, scrubbed clean and thinly sliced
2 large celery stalks, thinly sliced
2 heads of garlic, cut in half, skins on
4 inch knob of ginger, unpeeled, thinly sliced
5 sprigs parsley (or any other herb you have around!)
To finish: juice of one lemon, salt and pepper to taste
Preheat oven to 325 and cover a large baking sheet with parchment paper.
In a small bowl combine miso, oil and water, whisk to combine.
Place piece of seaweed and all prepared veg on the parchment and toss well with the miso mixture.
Roast for at least an hour, until veg are lightly browned.
Turn into a large stock pot, and cover with 10 cups of water. Bring to a boil and then simmer for 1-2 hours.
Strain the stock off, discard the vegetables (you’ve cooked all the goodness out of them!) and add in the juice of 1 lemon, seasoning to taste with salt and pepper.
This is delicious!!! I got it from the kitchen of Jillian Harris, she calls it Gut Healing Veggie Broth, and it is a sure fired winner.
Don’t you just know how good it is going to be already??Once that miso gets tossed in there with it all and starts roasting your whole house smells fabulous.The broth alone is a great starting place for amazing soups. LAKSA – totally delicious with this stock.
I am really not certain about how authentically Korean these fritters (Pajeon – pancakes??) are, but anything with kimchi & bound together with some potato starch is a step in the right direction.
We loved the way this entire bunch of vegetables was quickly tied together in a very light batter that puffed up and was still so delicate. Don’t miss out on the dipping sauce – its the perfect accompaniment.
PANCAKES/FRITTERS
½cup all-purpose flour
½cup potato starch (or 1/4 cup each white rice flour and cornstarch)
¾teaspoon fine sea salt, plus more as needed
½teaspoon baking powder
¾cup ice water
1large egg
¼cup finely chopped kimchi
4cups finely chopped or grated mixed vegetables (carrots, zucchini, bell peppers, kale, whatever you’ve got)
4scallions, cut into 2-inch-long sections and thinly sliced lengthwise
2tablespoons grapeseed or peanut oil, plus more as needed
DIPPING SAUCE
(highly recommend doubling it if you like dipping as much as we do)
3tablespoons soy sauce
2teaspoons rice wine vinegar, plus more to taste
1teaspoon finely grated fresh ginger or garlic (optional)
½teaspoon sesame oil, plus more to taste
Pinch of granulated sugar
PREPARATION
Prepare the pancakes: In a large bowl, whisk together all-purpose flour, potato starch, salt and baking powder.
In a medium bowl, combine water, egg and kimchi. Whisk kimchi mixture into flour mixture, and whisk until smooth. Fold in vegetables and about three-quarters of the scallions. (Save the rest for garnish.)
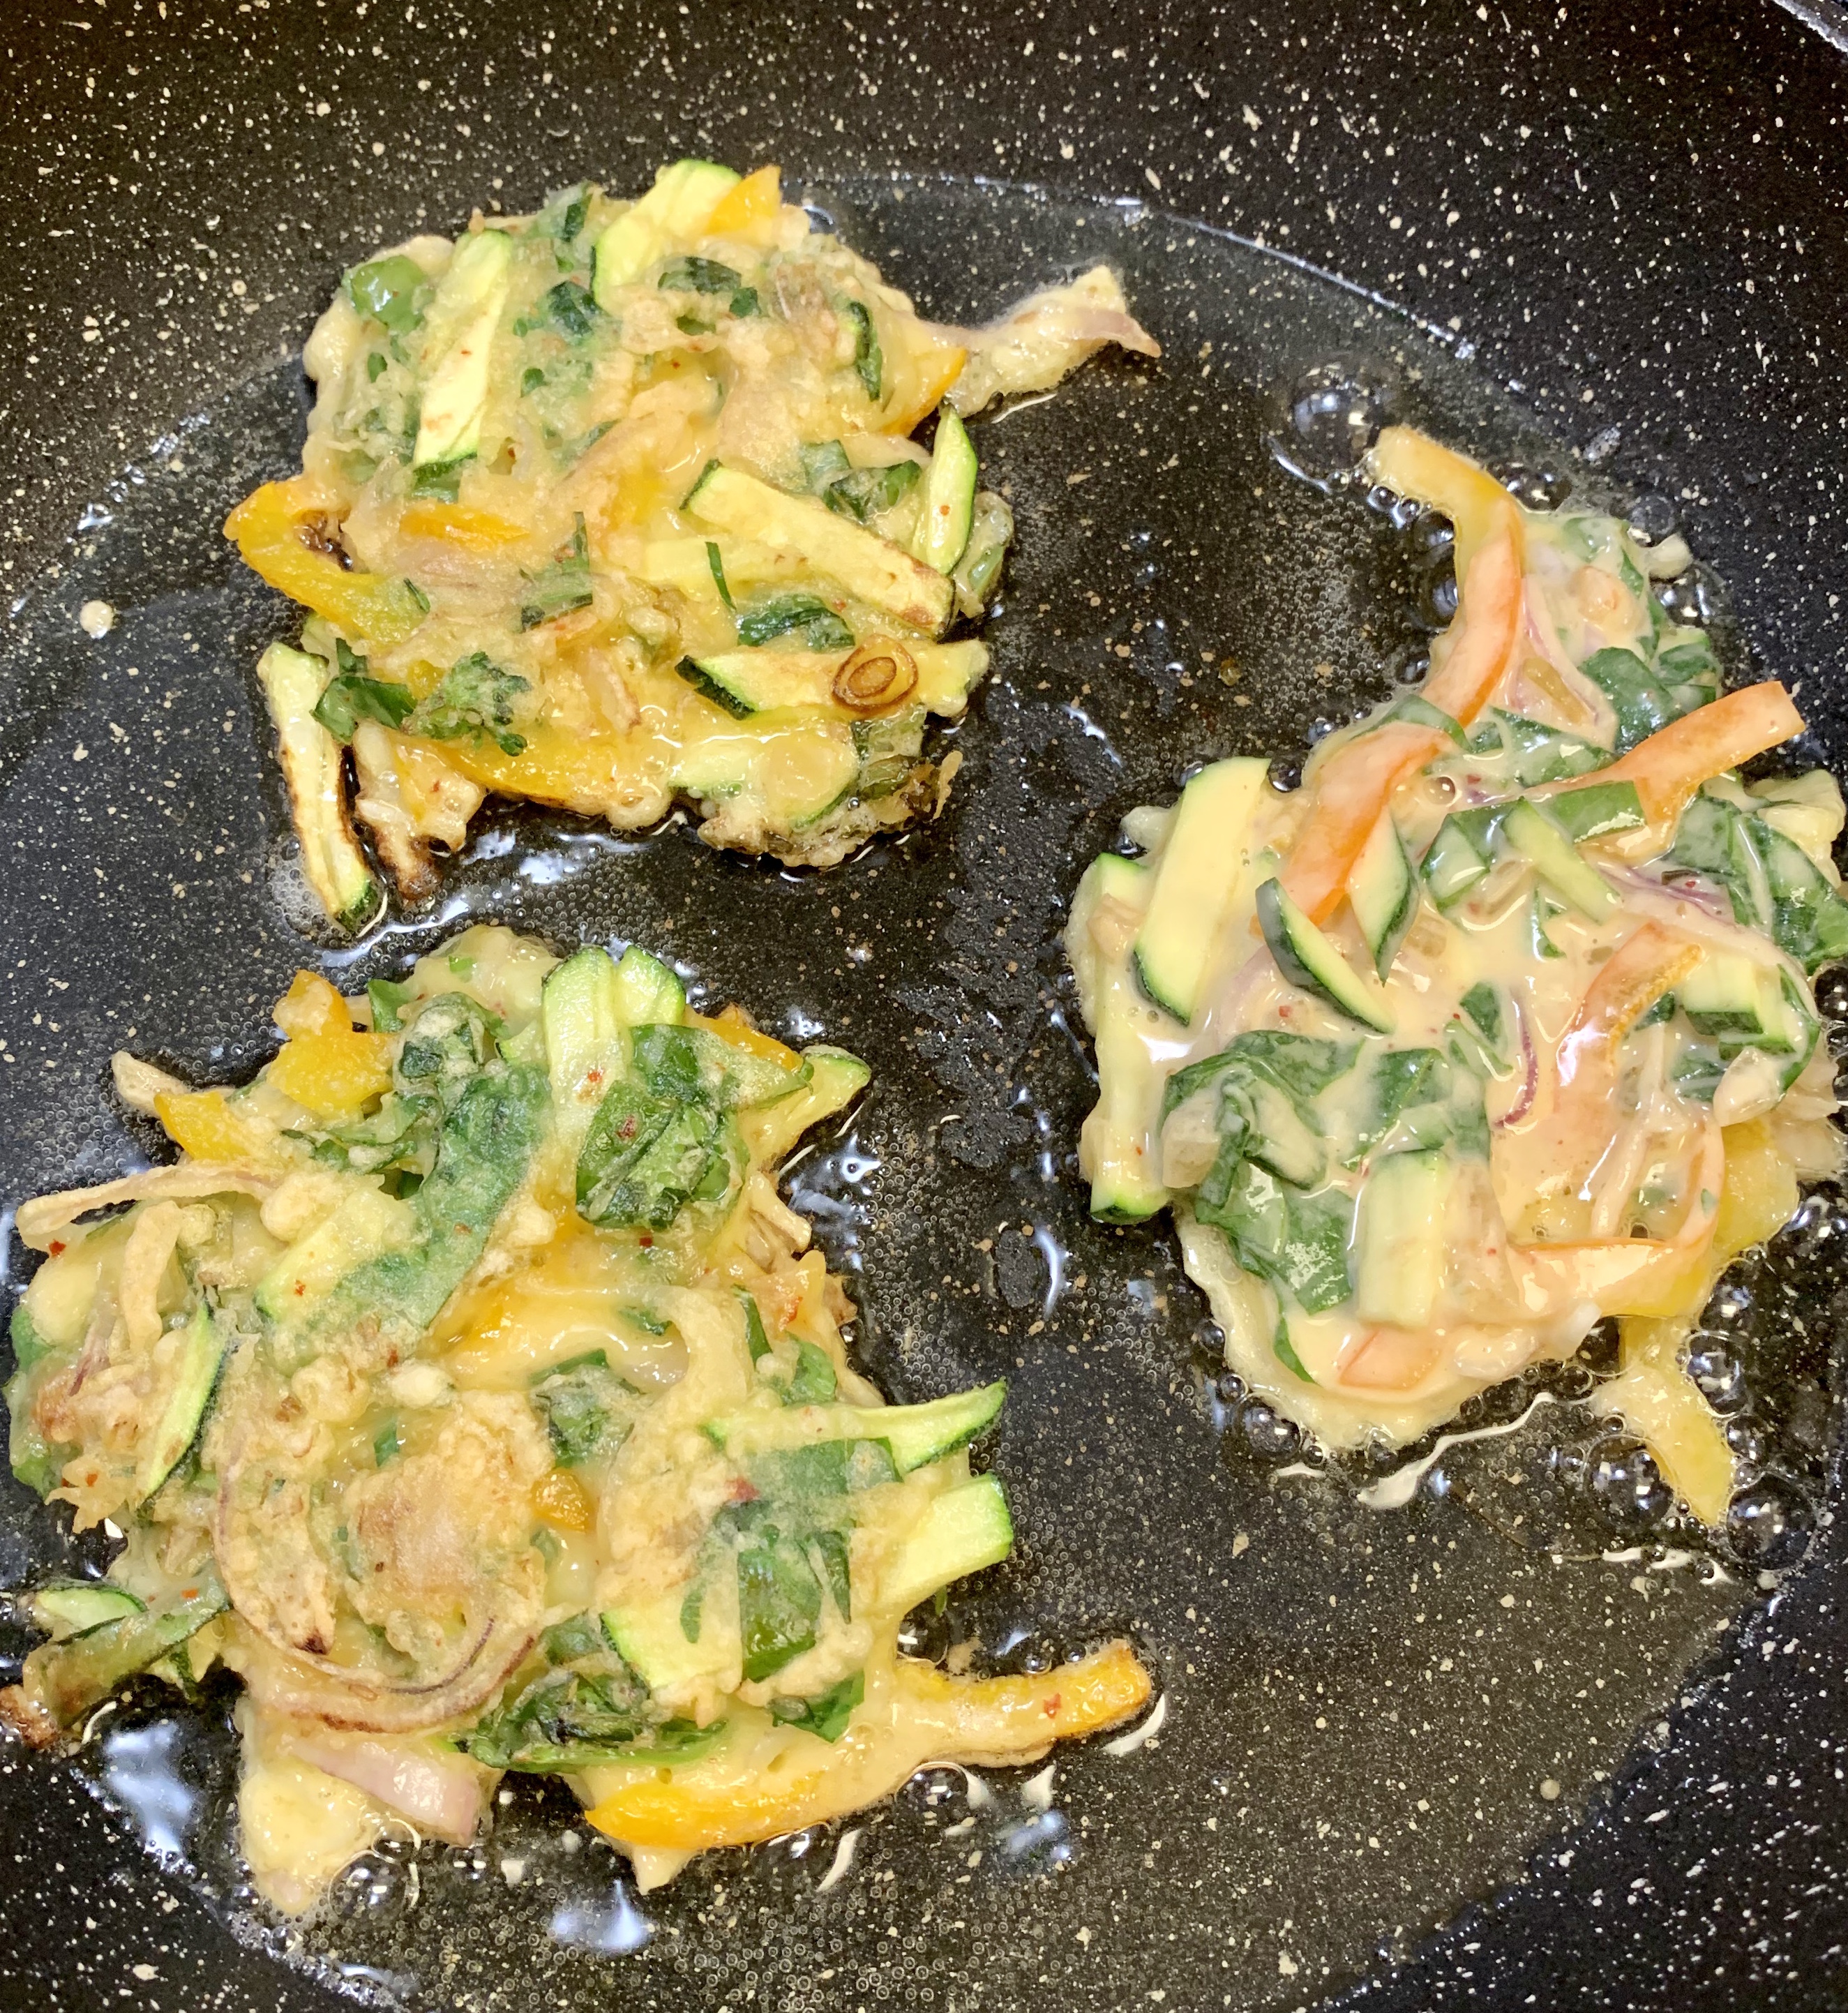
In a large nonstick skillet over medium heat, heat 2 tablespoons oil. Scoop 1/4 cup portions of batter into the skillet, as many as will fit while not touching, flatten, and fry until dark golden on the bottom, about 2 to 3 minutes. Flip and continue to fry until other side is browned, 2 to 3 minutes. Transfer to a paper towel-lined plate and sprinkle with a little more salt. Continue with remaining batter.
Before serving, make the dipping sauce: In a small bowl, stir together soy sauce, vinegar, ginger or garlic (if using), sesame oil and sugar. Sprinkle sliced scallion over pancakes, and serve with dipping sauce on the side.
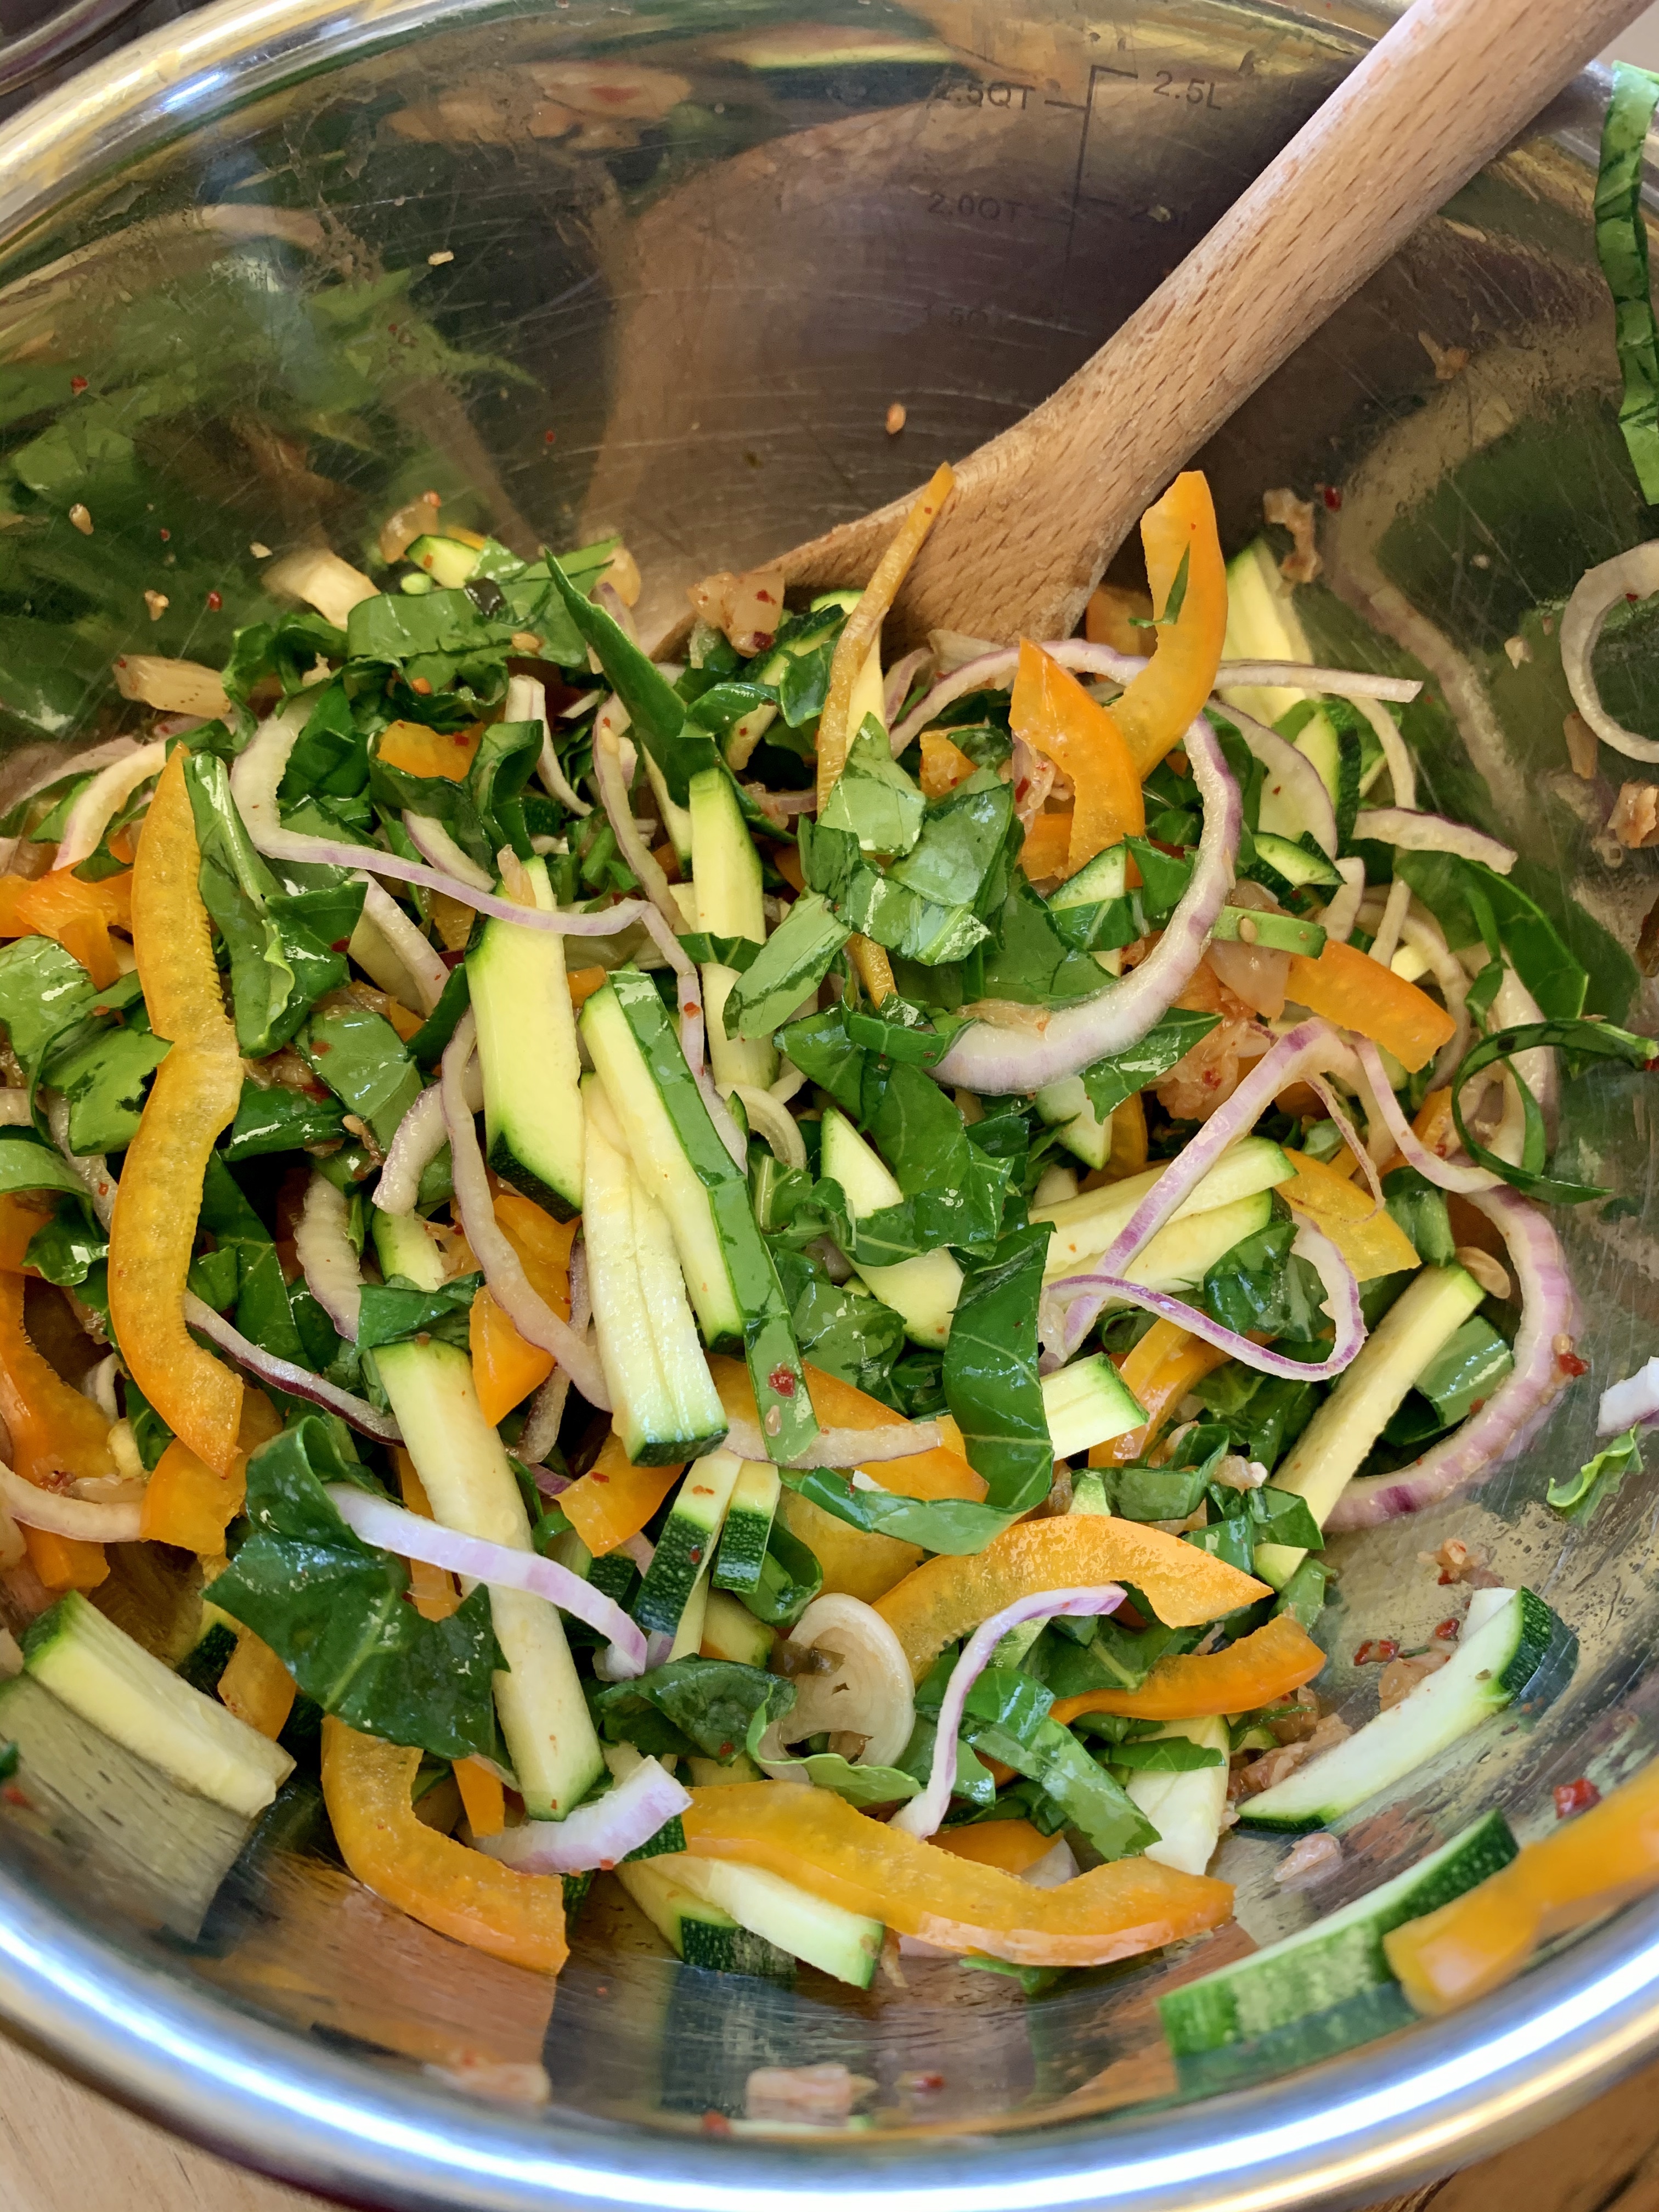
When you start with a big bowl full of these colourful vegetables you just know it is going to be delicious! Today I used zucchini, orange bell peppers, red onion and the leafy parts of Gai lan.
don’t overcrowd your pan – these fritters need some room to crisp up and not steam
These were so good I can’t wait to make them again!
I served the fritters with Korean Gojuchang noodles, and while it was all finger licking delicious, the colours and textures just cried for something green and crunchy – maybe lightly stir fried broccoli? Strange given that this whole meal is so vegetable forward, but I really wanted something light and crunchy to go with it all. Next time.
I found this recipe on NYT cooking, and couldn’t wait to try it. The fritters are as versatile as the vegetables found in your garden or fridge. I love the way red onions cook up, so used those in place of scallions in today’s effort.
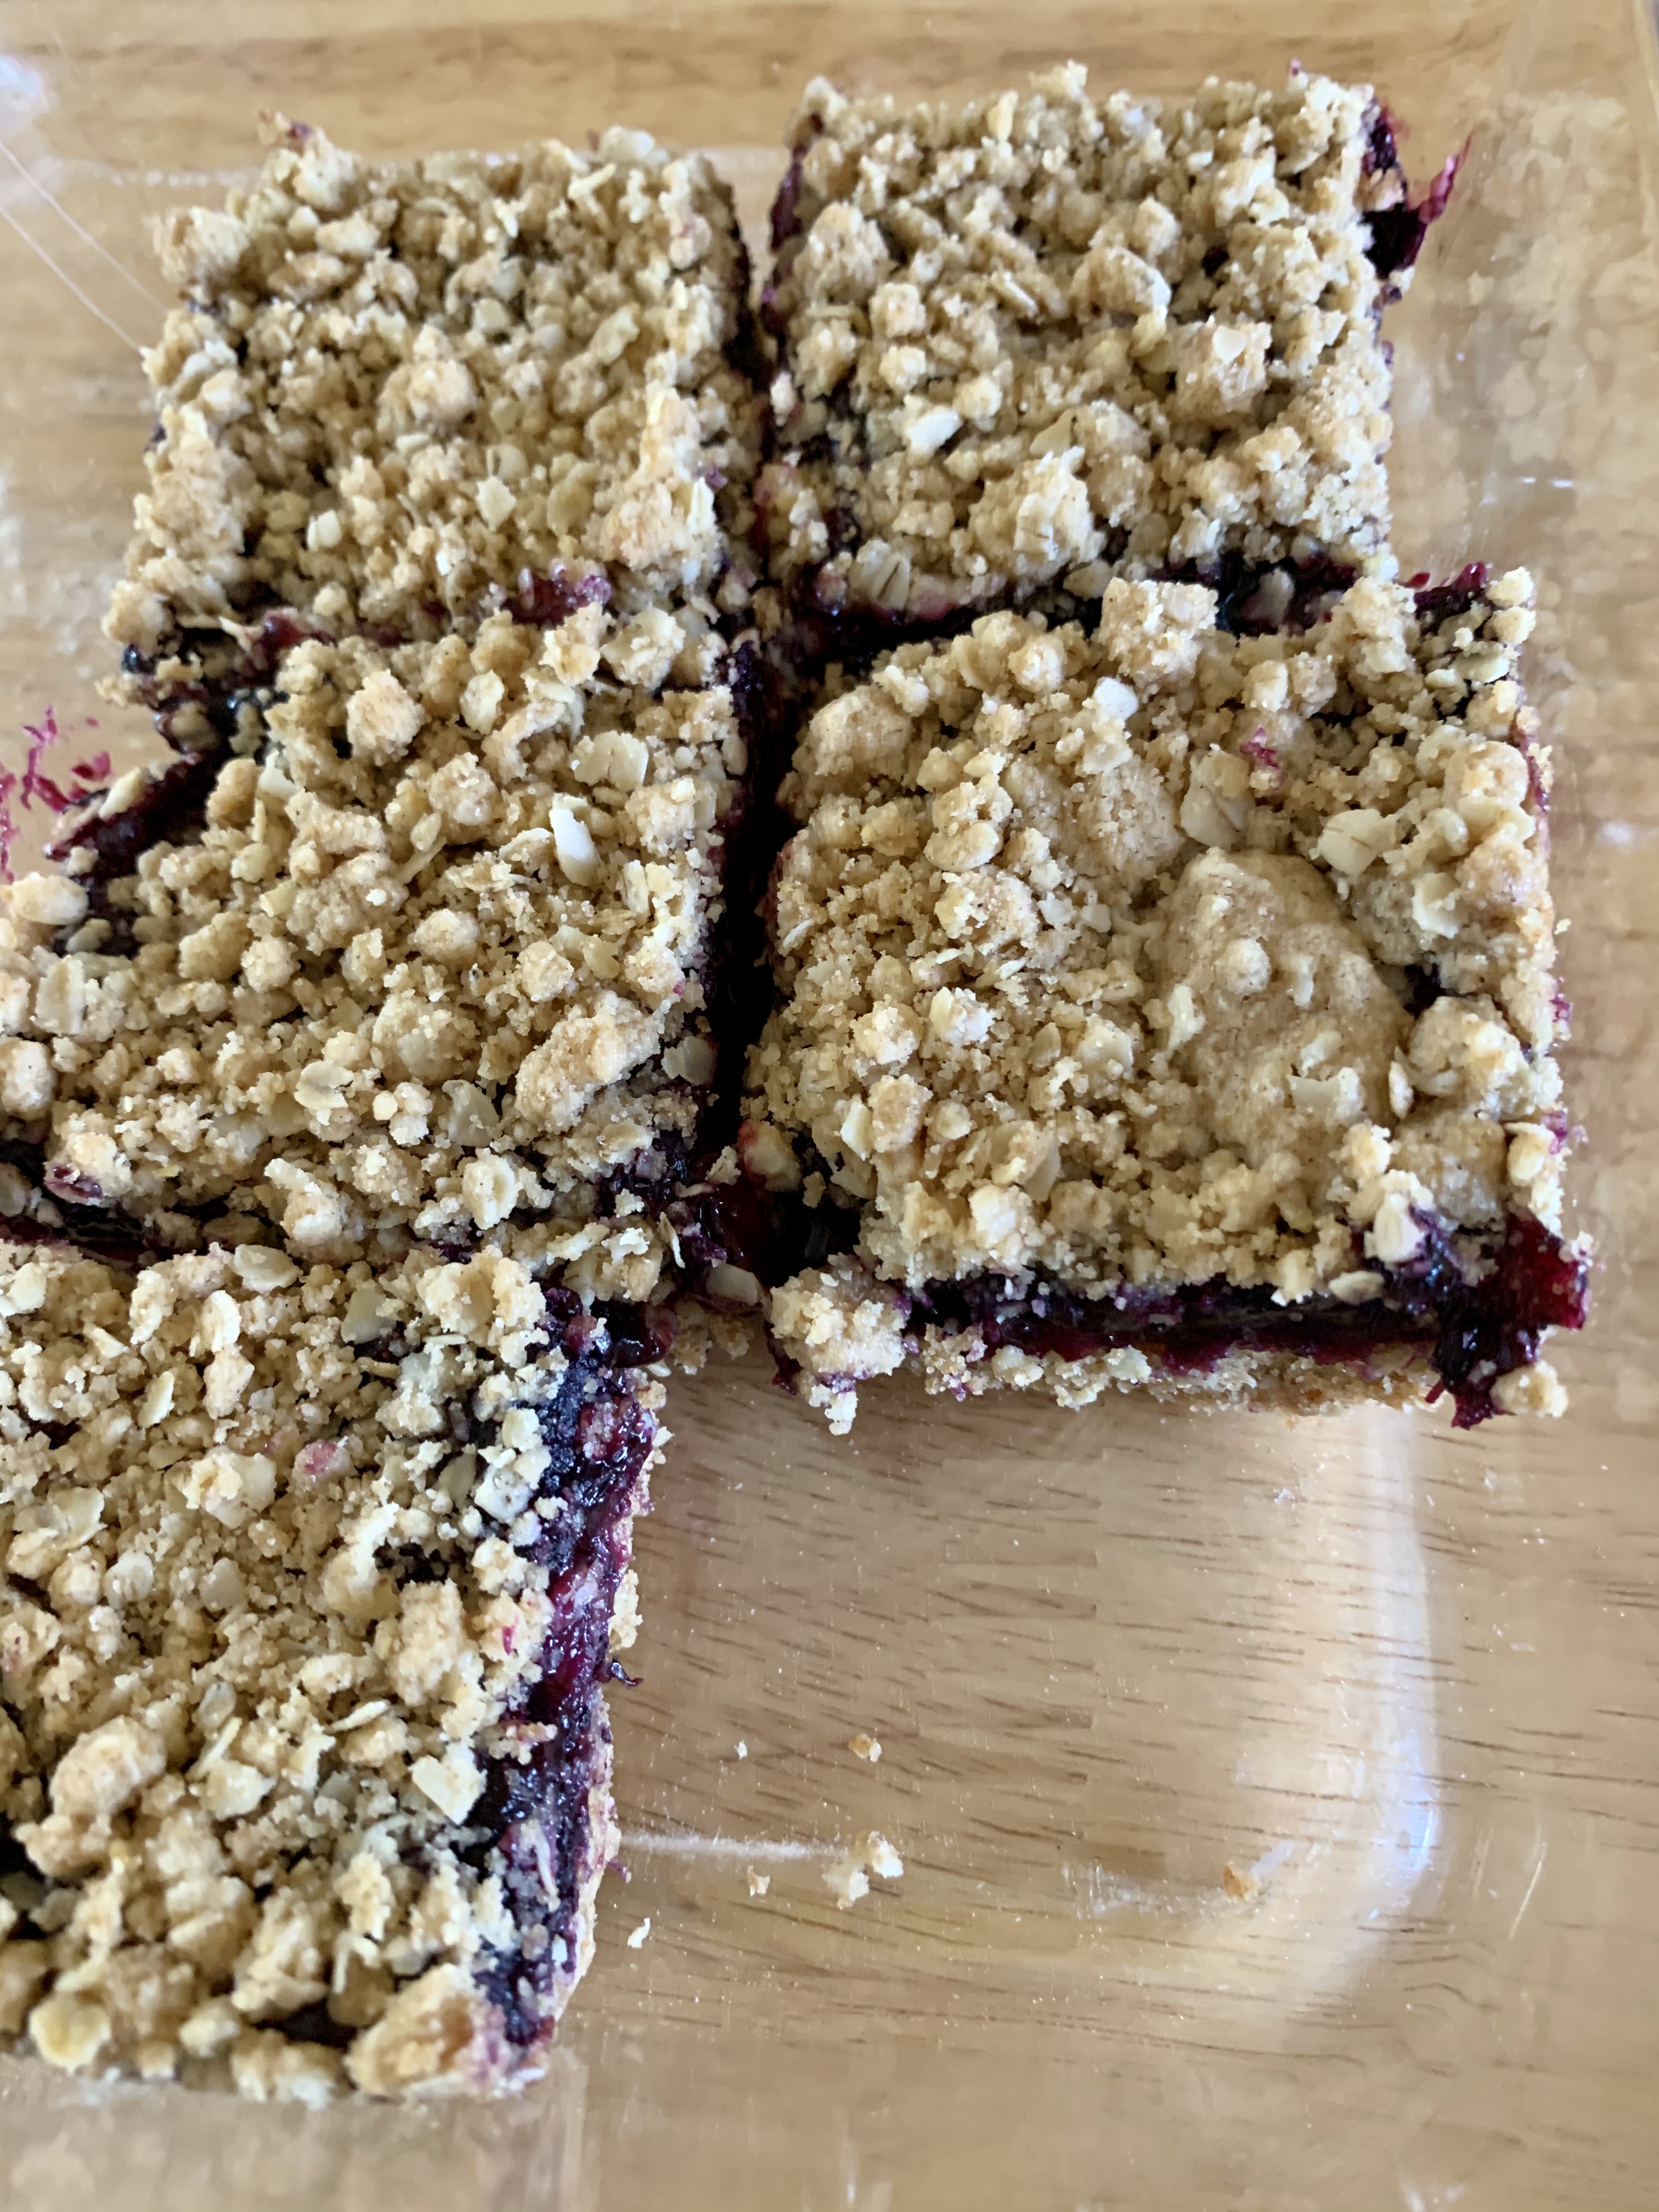
Is there anything better than oat bars that you can grab and eat while doing whatever you need to be doing? These are absolute perfection, with a hint of sweetness from the blueberries (last years frozen) and a bit of tang from the rhubarb (fresh this year).
These bars have the exact perfect ratio of fruit to oat bar, I could have devoured many more than I did. Thank goodness I didn’t. It’s hard enough not to eat all the sourdough I’m baking!
Ingredients
3 cups Rhubarb Cut Into 1 Inch Pieces
3 cups Blueberries
2 Tablespoons Lemon Juice
3/4 cup Sugar
4 Tablespoons Cornstarch
1-½ cup All-purpose Flour
1-½ cup Uncooked Quick Cooking Oats (not Instant)
3/4 cup Brown Sugar
¾ cup Softened Butter
½ teaspoon Baking Soda
1/2 teaspoon cinnamon
¼ teaspoon Salt
Preparation
Preheat oven to 350ºF.
Combine rhubarb, blueberries and lemon juice in a large saucepan and cook over medium heat until rhubarb is softened. No added liquid is needed as the water from the rhubarb and blueberries will come out naturally.
In a small bowl, combine sugar and cornstarch. Mix well to break up the lumps of cornstarch. Set aside.
While rhubarb and blueberries are cooking, begin making the crust. Combine flour, oats, brown sugar, butter, baking soda and salt together in a bowl until well mixed and crumbly. Reserve 1 1/2 cups of crust to be used as a topping. Grease a 13×9 pan with cooking spray. Press remaining crust mixture into the pan in an even layer. Set aside.
When rhubarb and blueberries are softened, use a potato masher to mash and smooth out the larger chunks. Once bigger pieces are broken up, mix in the sugar/cornstarch mixture. Continue to stir until thickened.
Once mixture is thickened, pour over crust. Top with reserved crust mixture.
Bake at 350ºF for 30 minutes.
Ready for the oven, and it already smells heavenly.
Make sure they cool completely before cutting them.
I found this recipe on http://www.tastykitchen.com, and the only changes I made were to include some cinnamon in the crust/topping mixture and reduce the sugar a bit … these are also their tips:
Tips:
1. Mixing the sugar and cornstarch together will prevent lumps of cornstarch in your mixture.
2. The bars will puff up considerably, so don’t be alarmed when you open the oven to take out the bars. They will be a bit jiggly. That’s OK! They are done!
3. When they cool, they’ll “deflate” a bit and set up nicely.
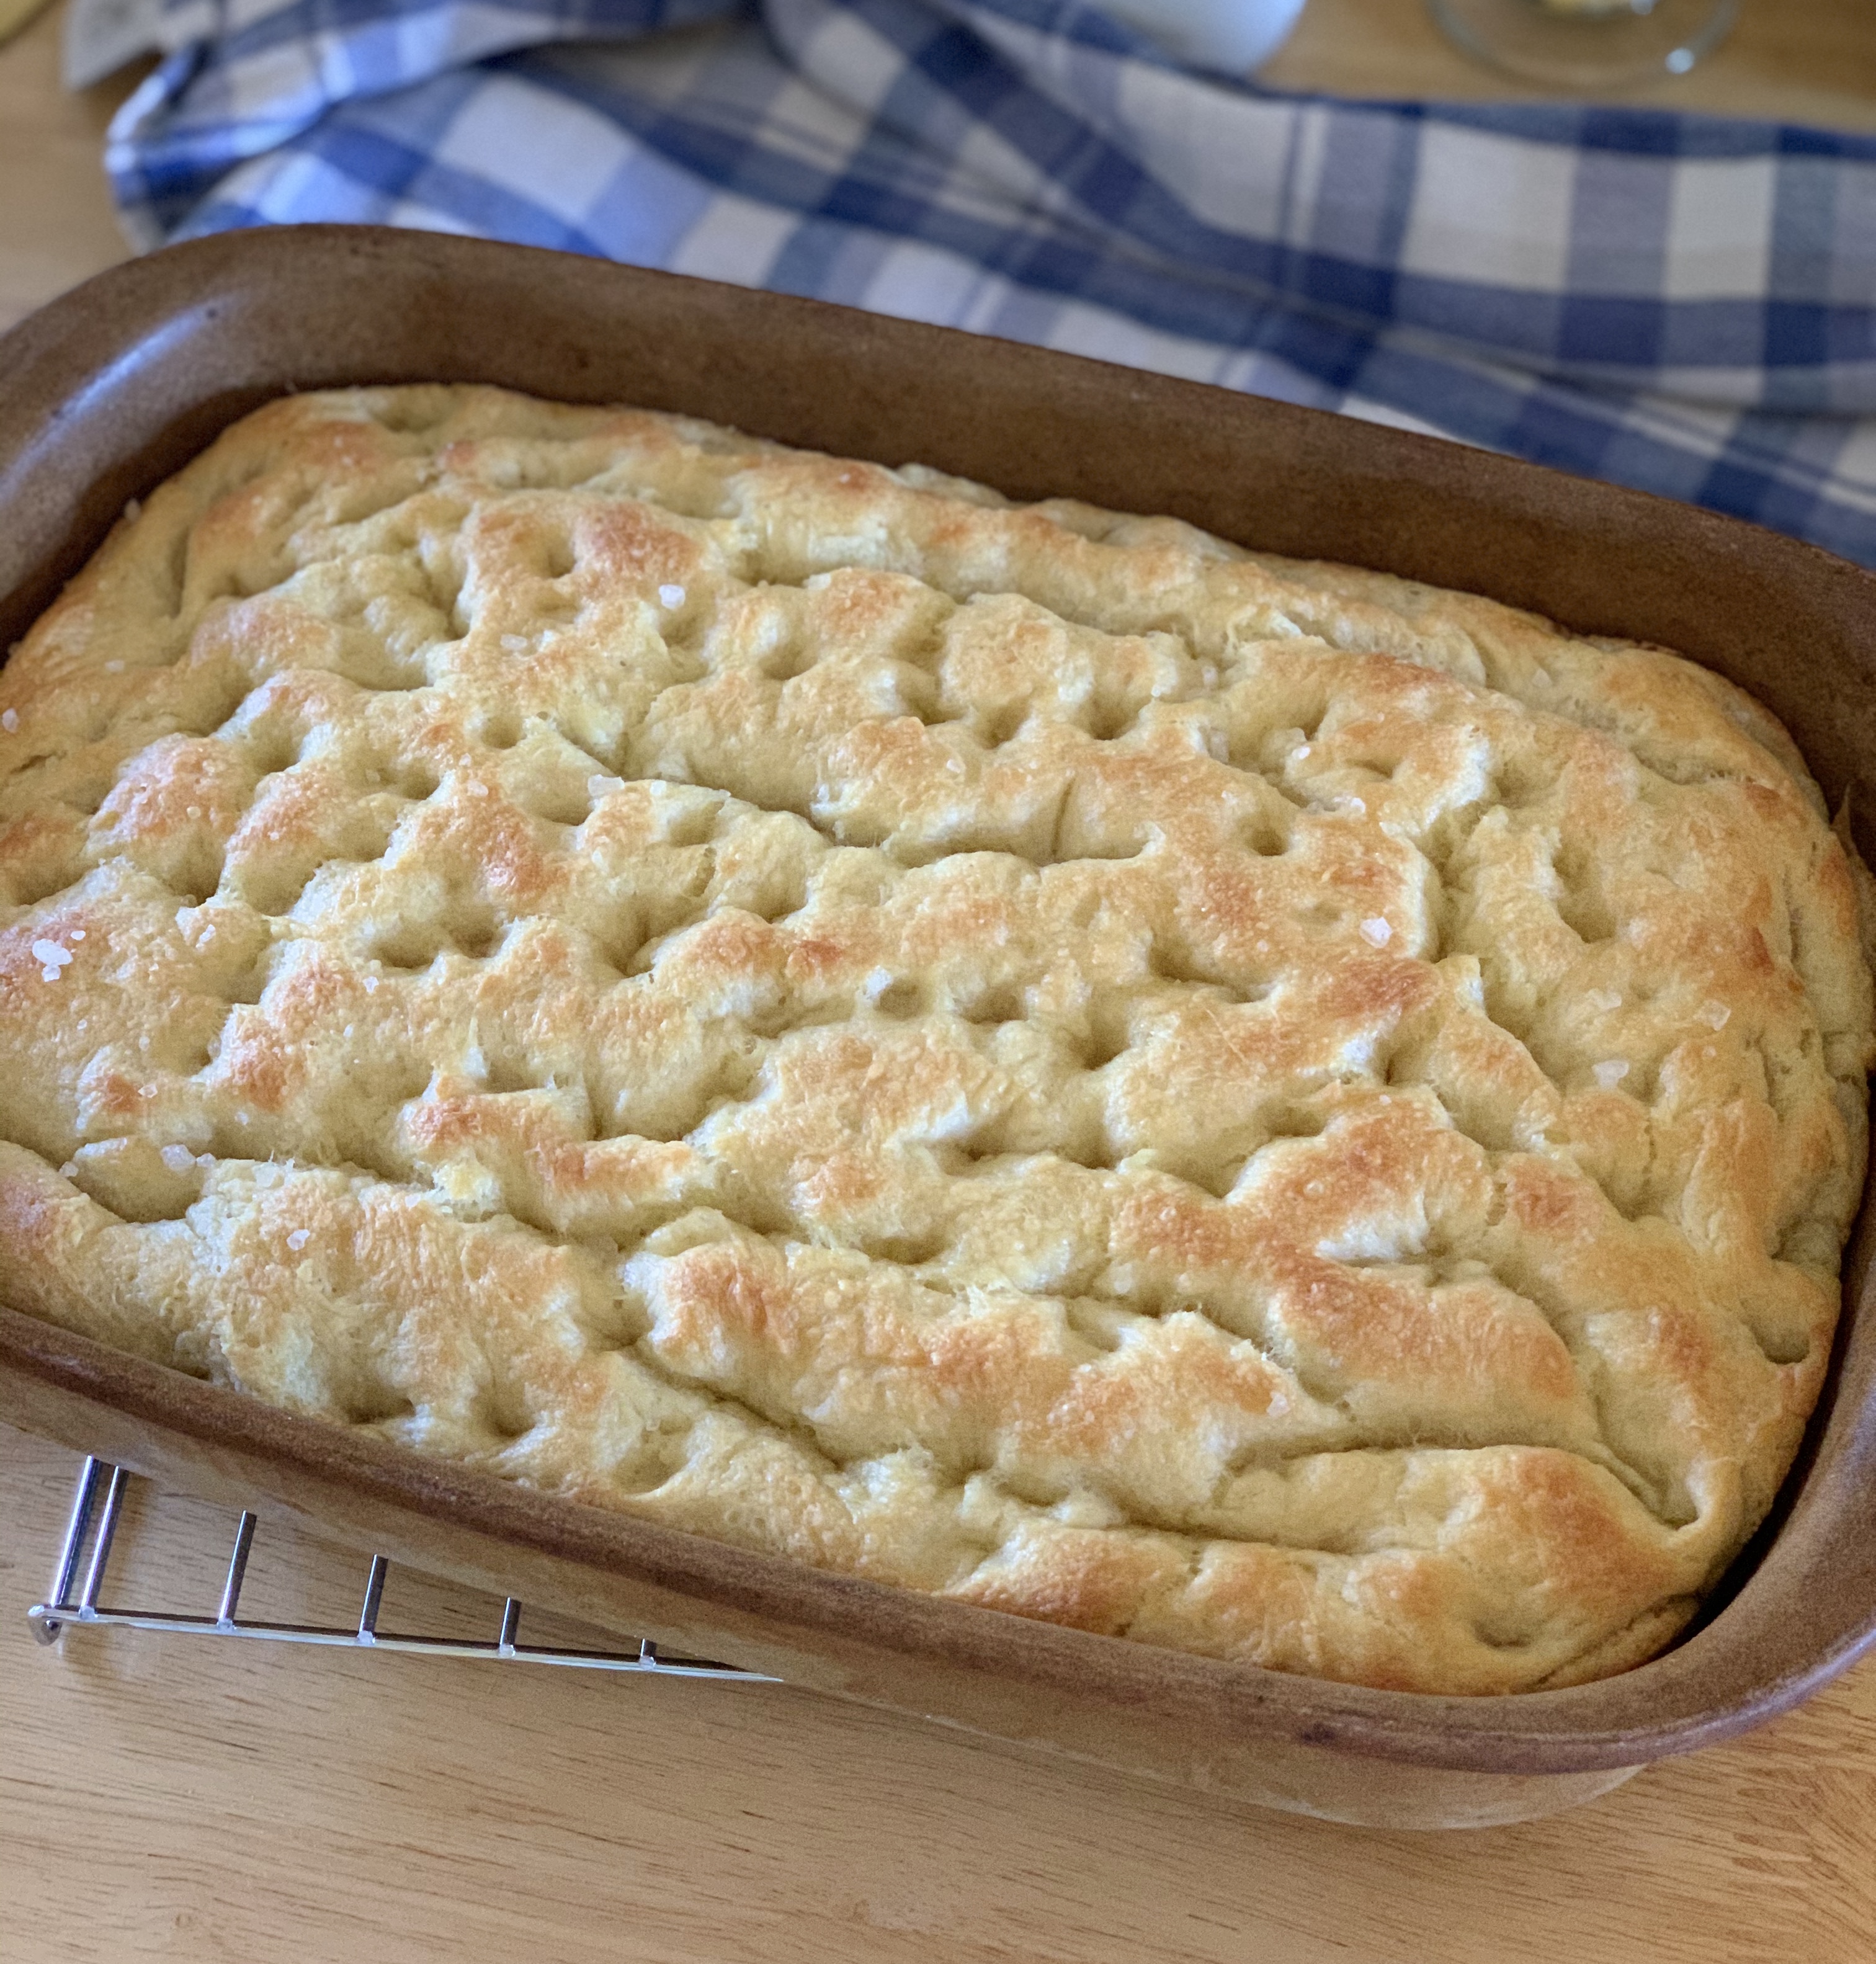
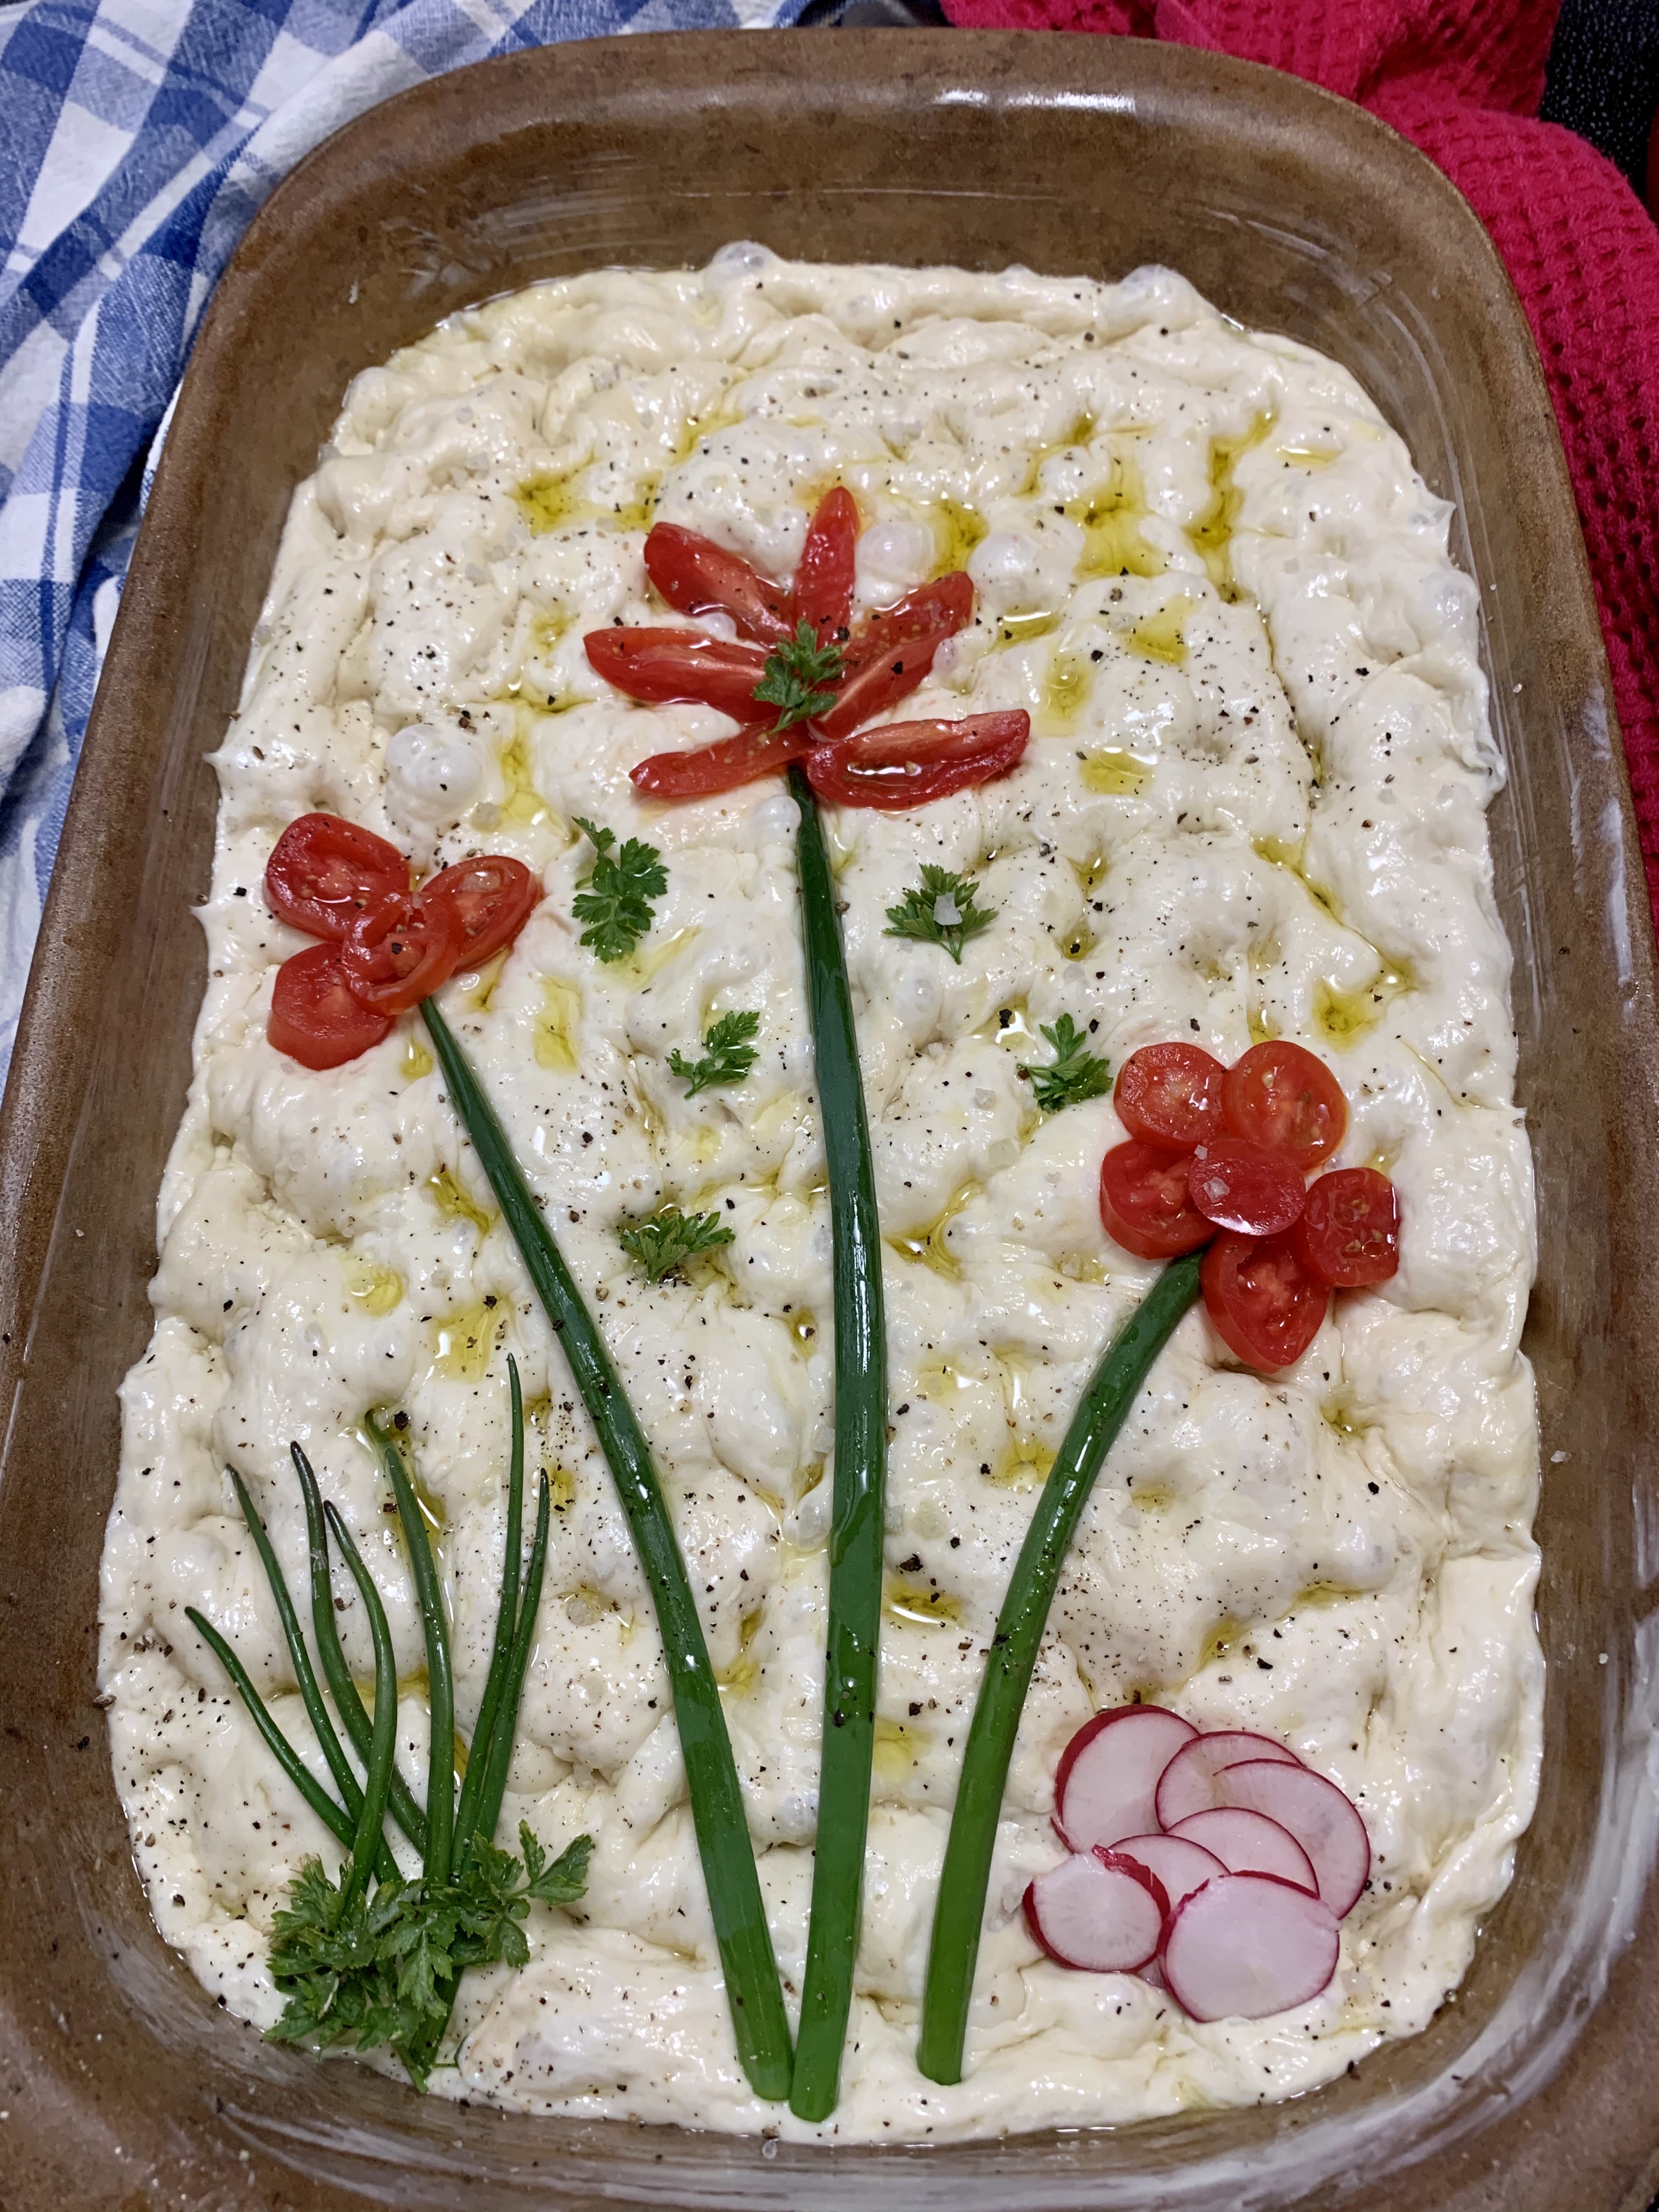
You are going to love this … soft, chewy, and the best focaccia you could possible imagine. Can’t you just smell it from the photo? Yum.
2 1/2 tsp active dry yeast (or 1 pack)
2 tsp honey
2 1/2 cups lukewarm water
1 tbsp kosher salt
5 cups all purpose flour
6 tbsp extra virgin olive oil – divided
4 tbsp butter
flaky sea salt
2-4 garlic cloves
Whisk 1¼-oz. envelope active dry yeast (about 2¼ tsp.), 2 tsp. honey, and 2½ cups lukewarm water in a medium bowl and let sit 5 minutes (it should foam or at least get creamy; if it doesn’t your yeast is dead and you should start again—check the expiration date!).
Add 5 cups (625 g) all-purpose flour and 1 Tbsp. kosher salt and mix with a rubber spatula until a shaggy dough forms and no dry streaks remain.
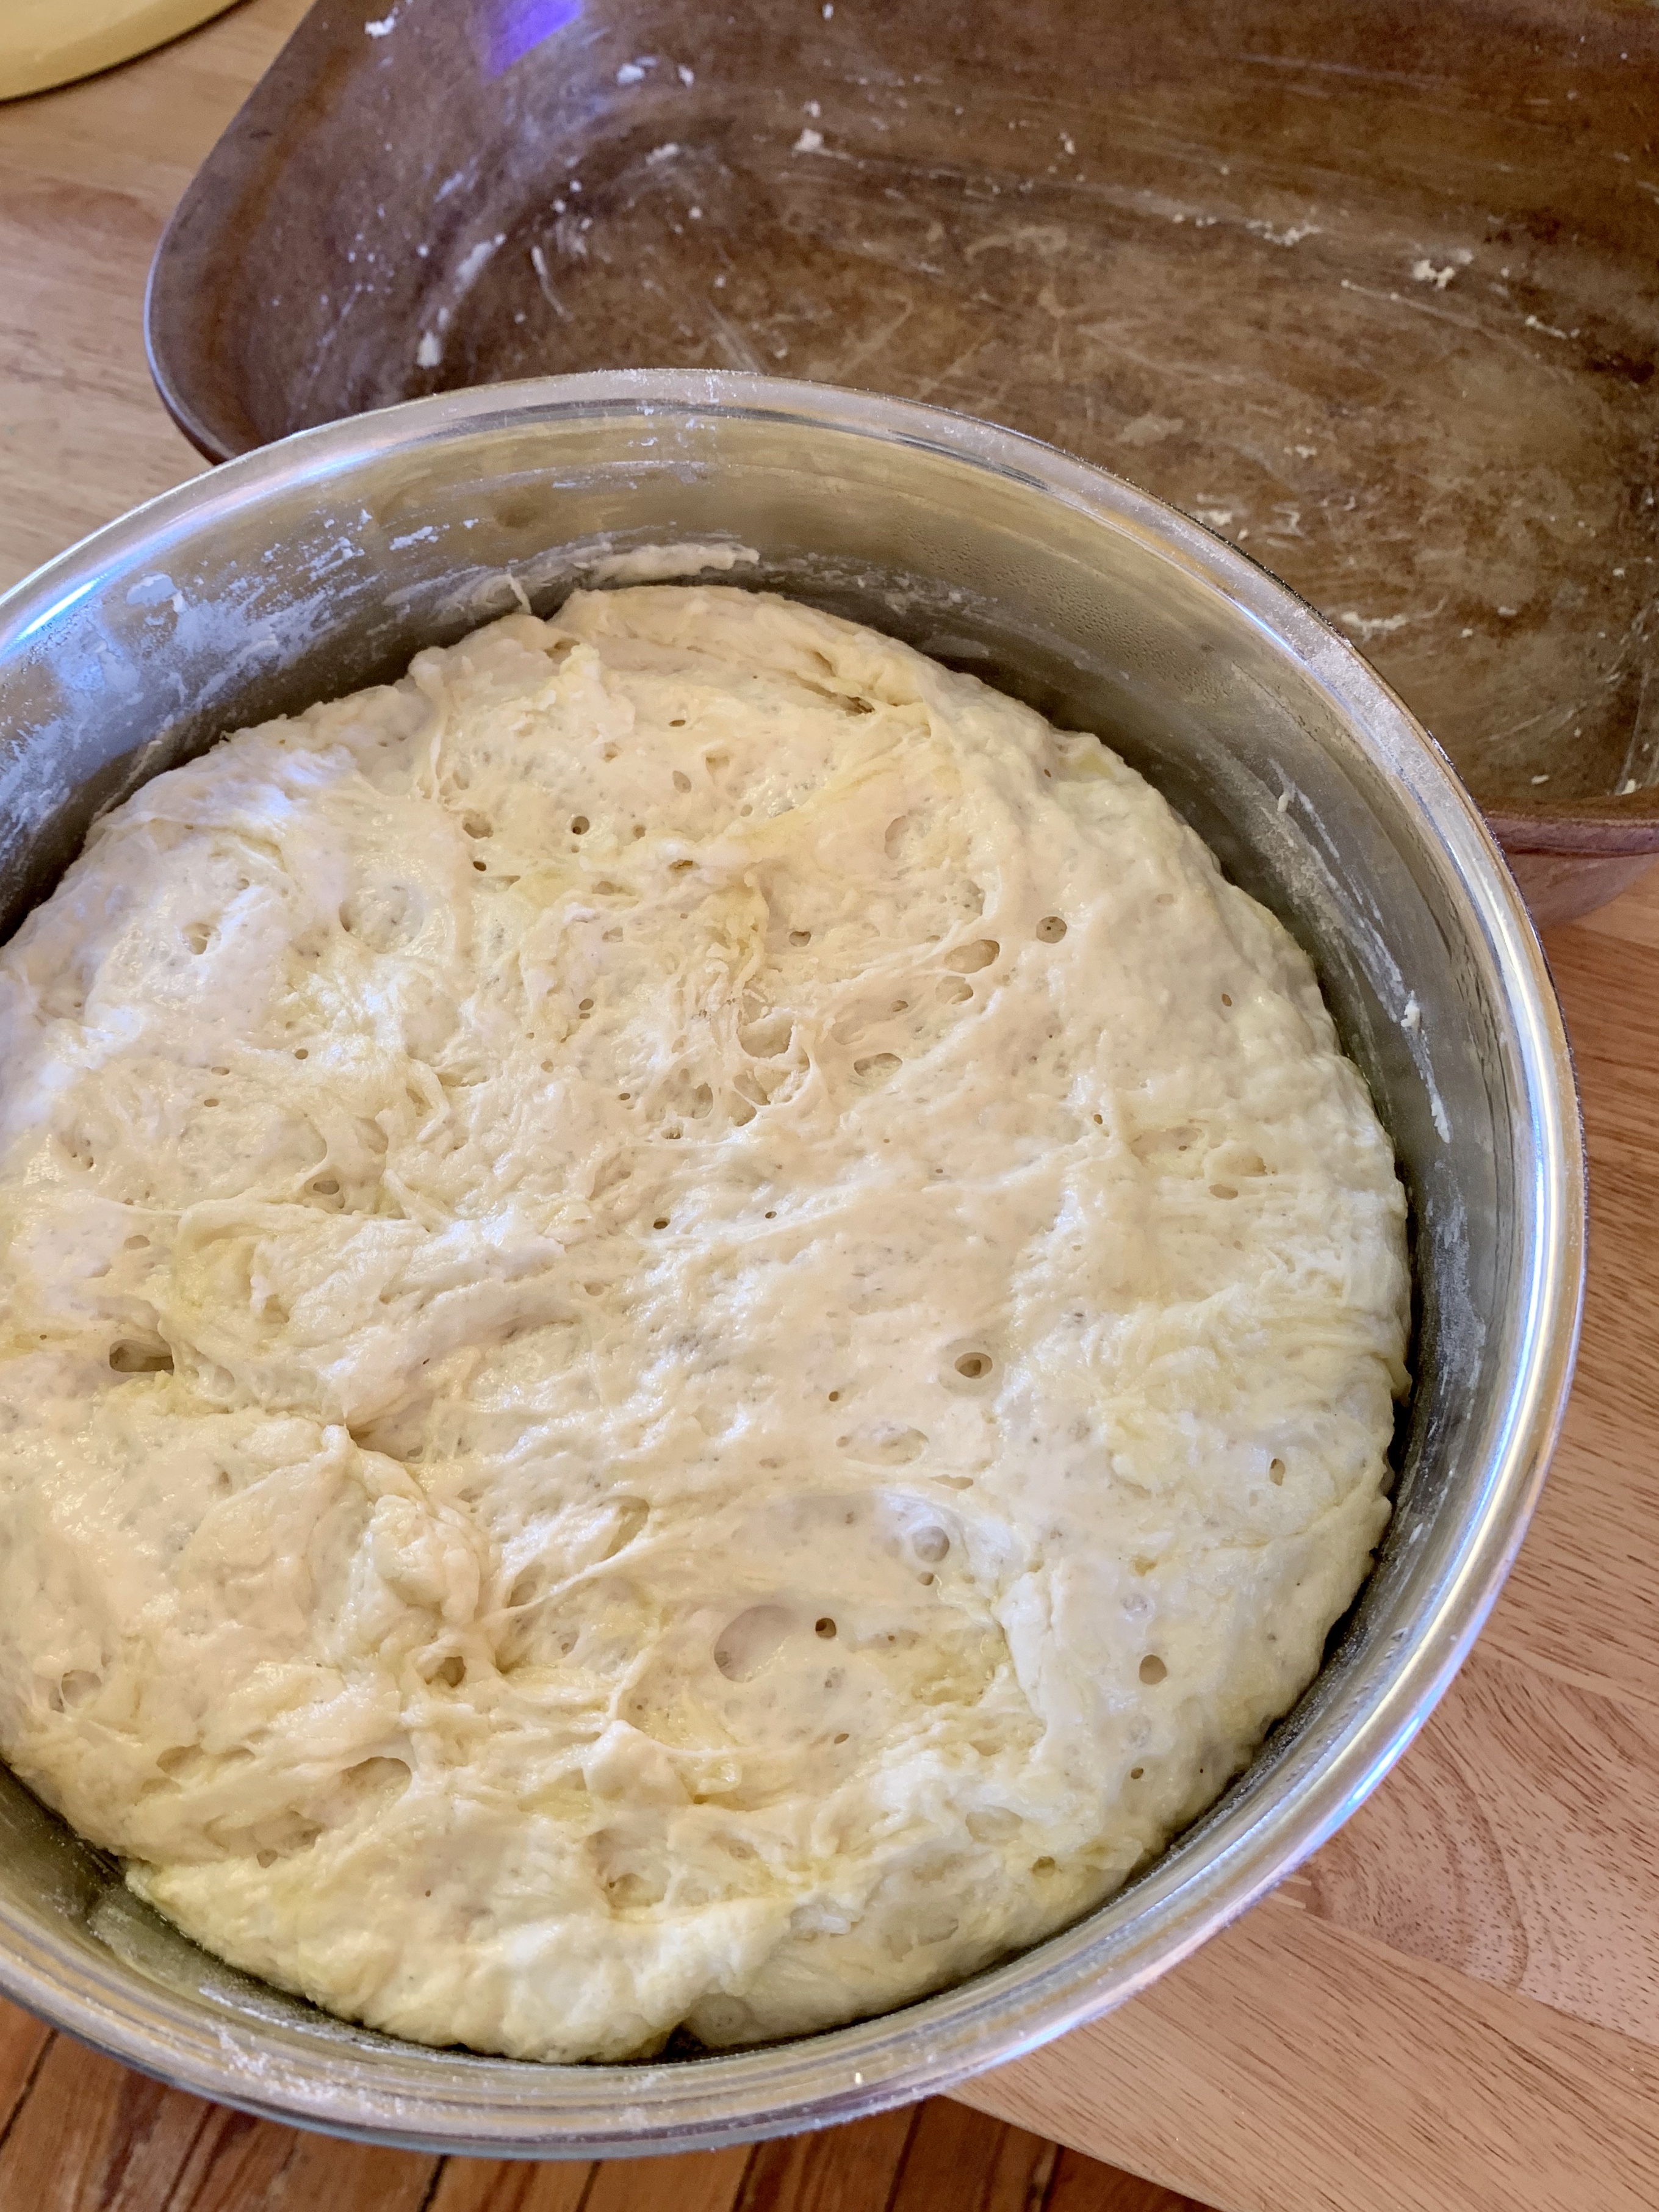
Pour 4 Tbsp. extra-virgin olive oil into a big bowl that will fit in your refrigerator. This puppy is going to rise! Transfer dough to bowl and turn to coat in oil. Cover with a silicone lid or plastic wrap and chill until dough is doubled in size (it should look very bubbly and alive), at least 8 hours and up to 1 day. If you’re in a rush, you can also let it rise at room temperature until doubled in size, 3–4 hours.
Generously butter a 13×9″ baking pan, for thicker focaccia that’s perfect for sandwiches, or an 18×13″ rimmed baking sheet, for focaccia that’s thinner, crispier, and great for snacking. The butter may seem superfluous, but it’ll ensure that your focaccia doesn’t stick. Pour 1 Tbsp. extra-virgin olive oil into center of pan. Keeping the dough in the bowl and using a fork in each hand, gather up edges of dough farthest from you and lift up and over into center of bowl. Give the bowl a quarter turn and repeat process. Do this 2 more times; you want to deflate dough while you form it into a rough ball.
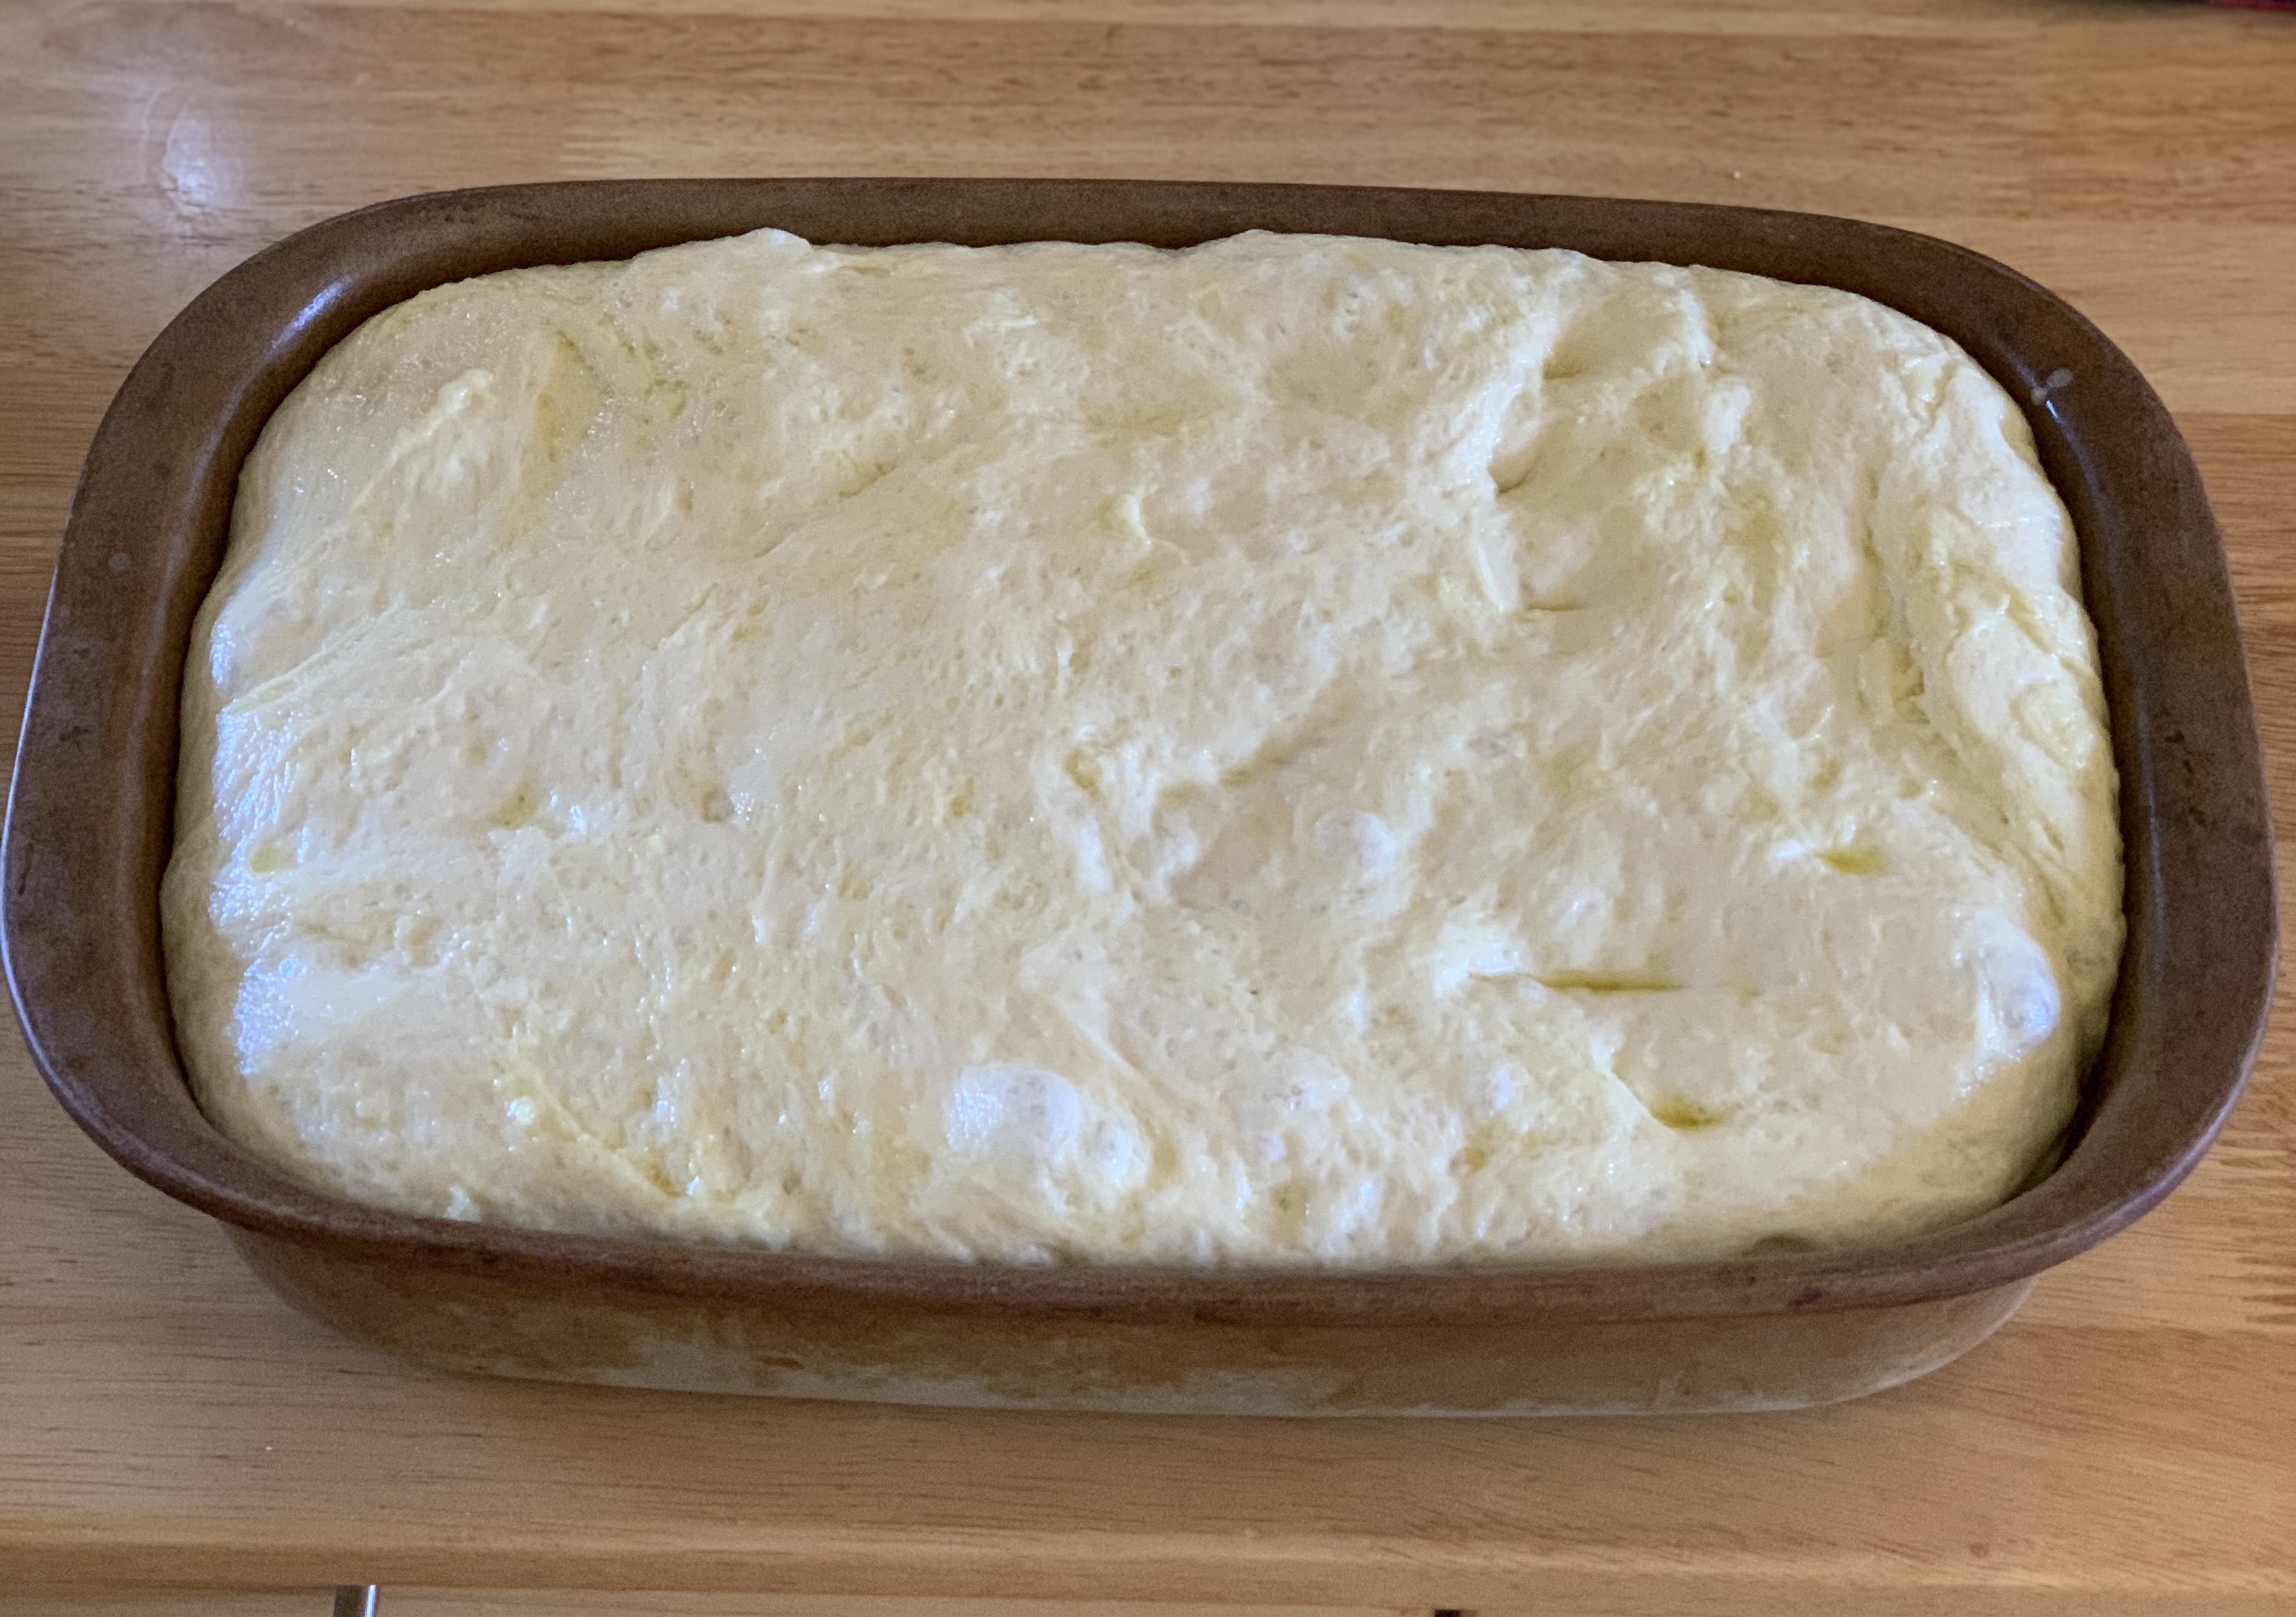
Transfer dough to prepared pan. Pour any oil left in bowl over and turn dough to coat it in oil. Let rise, uncovered, in a dry, warm spot (like near a radiator or on top of the fridge or a preheating oven) until doubled in size, at least 1½ hours and up to 4 hours.
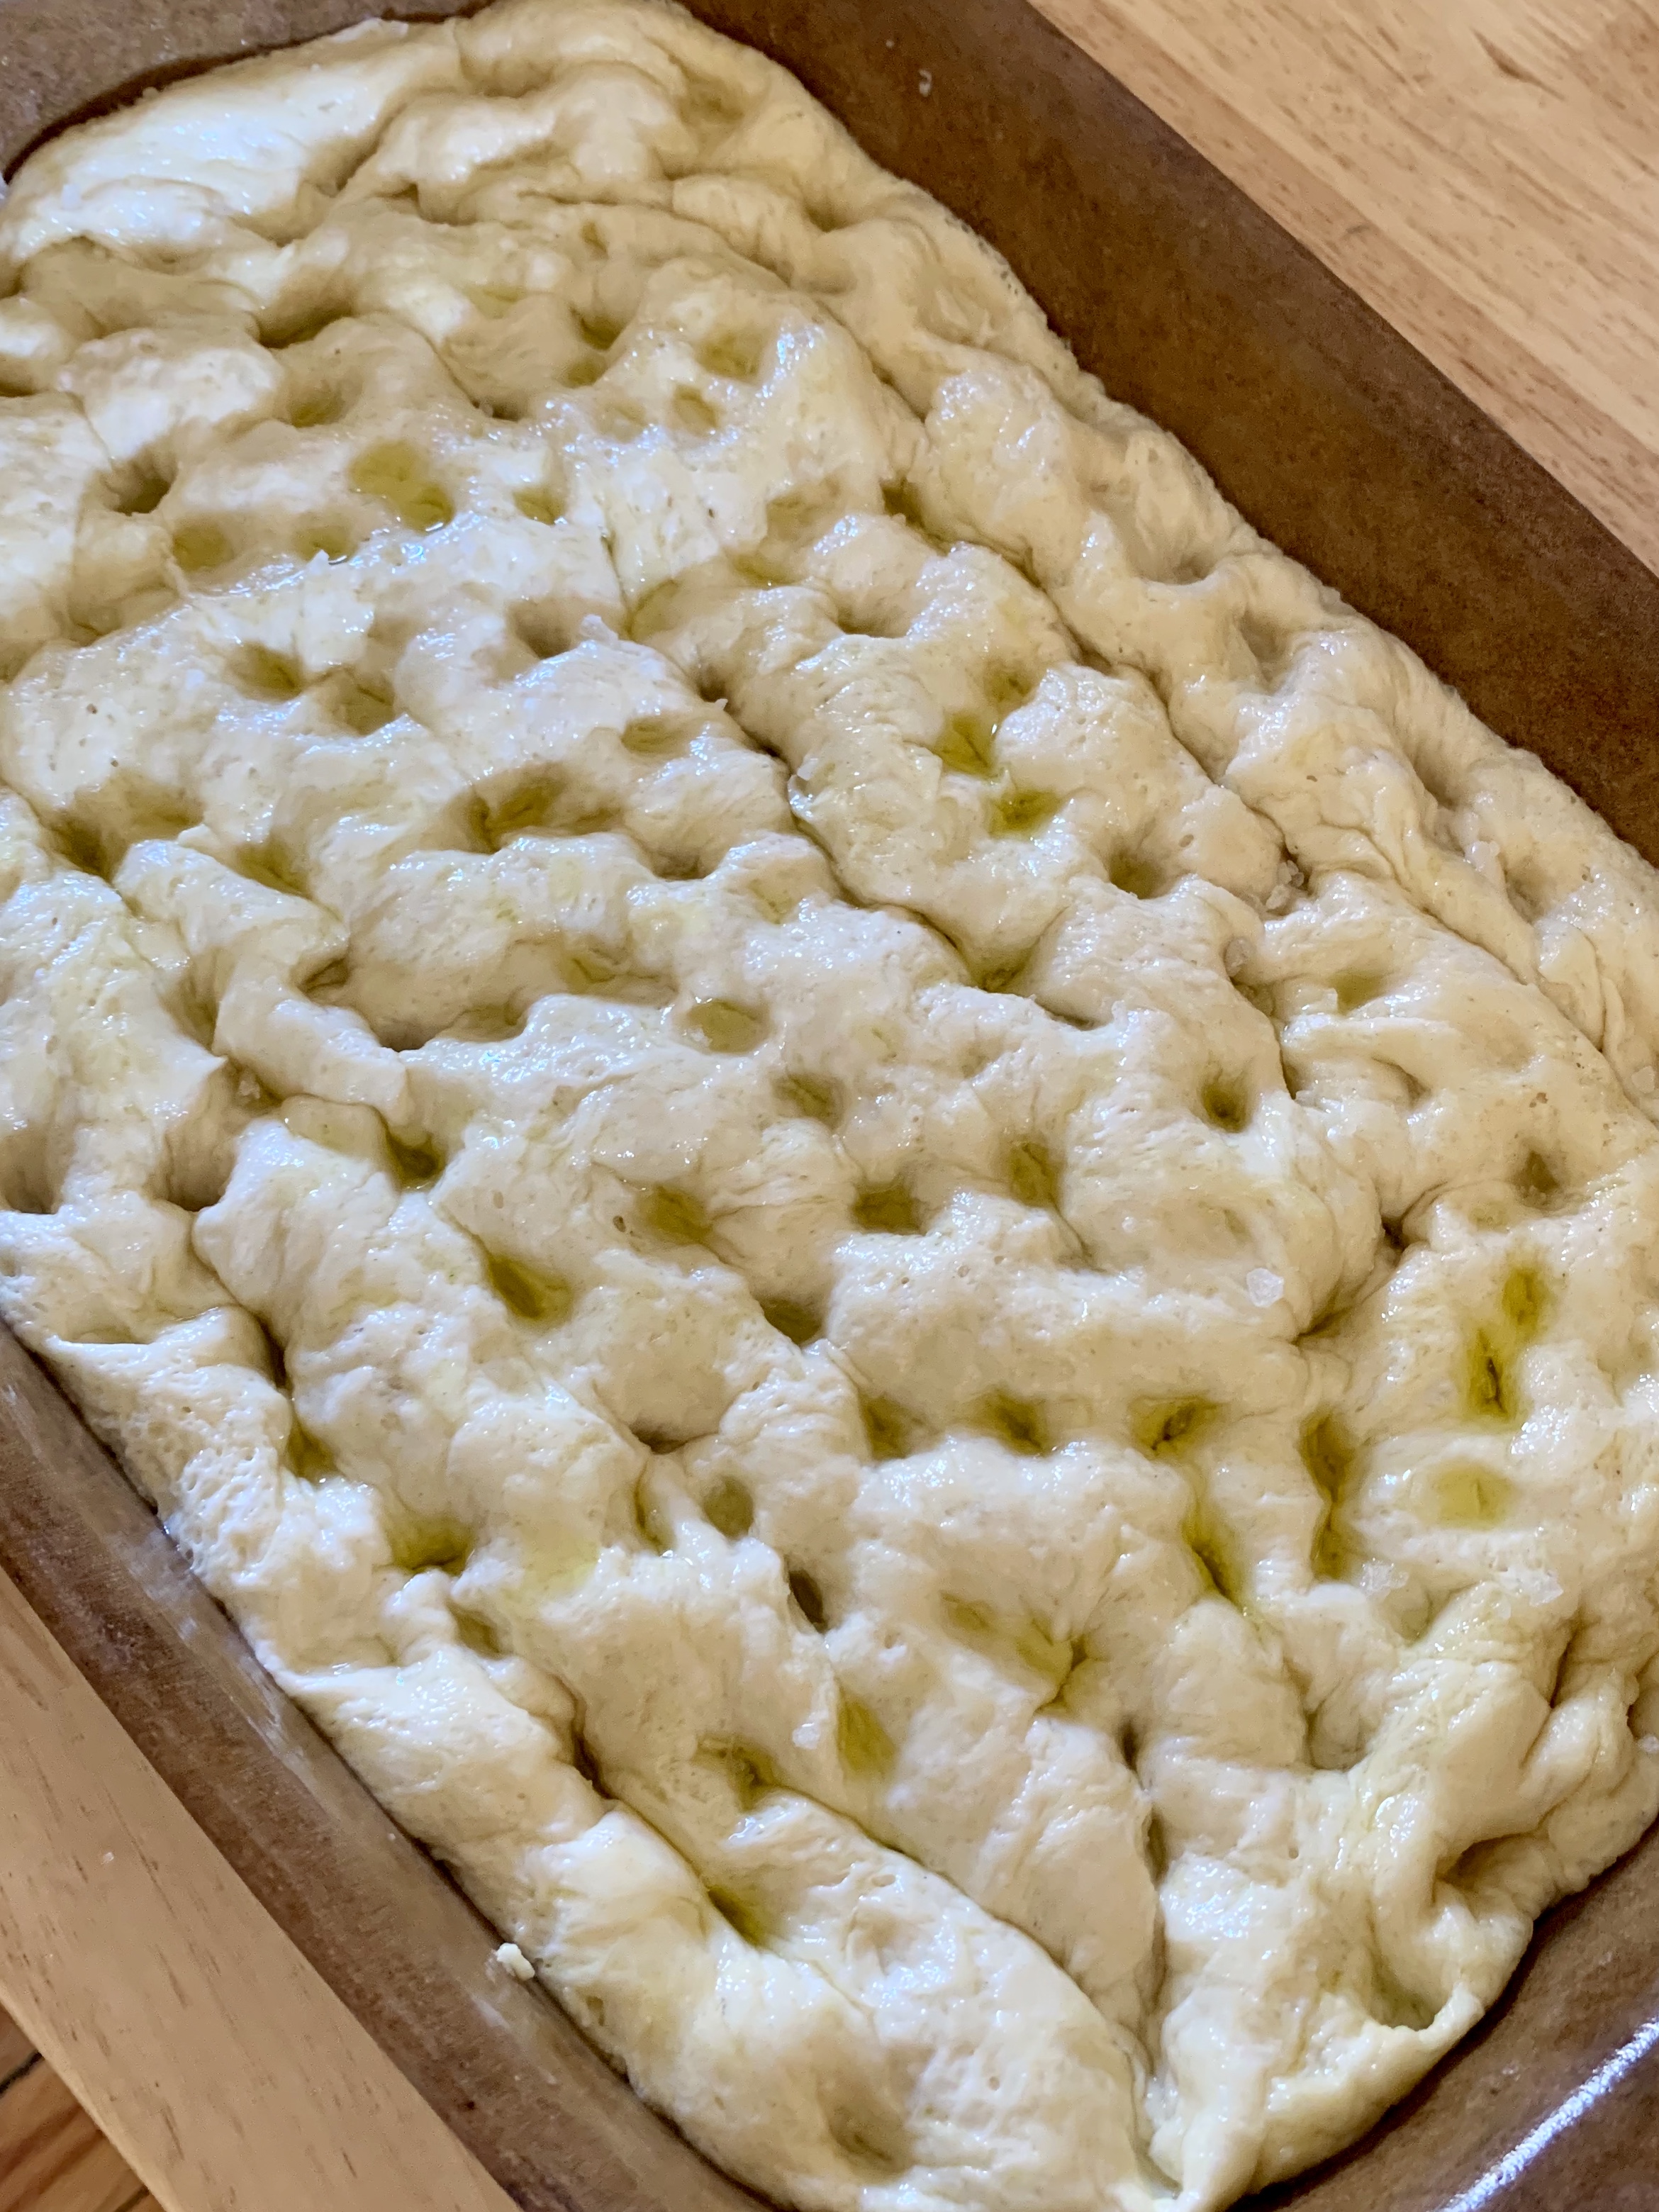
Place a rack in middle of oven; preheat to 450°. To see if the dough is ready, poke it with your finger. It should spring back slowly, leaving a small visible indentation. If it springs back quickly, the dough isn’t ready. (If at this point the dough is ready to bake but you aren’t, you can chill it up to 1 hour.) Lightly oil your hands. If using a rimmed baking sheet, gently stretch out dough to fill (you probably won’t need to do this if using a baking pan). Dimple focaccia all over with your fingers, like you’re aggressively playing the piano, creating very deep depressions in the dough (reach your fingers all the way to the bottom of the pan). Drizzle with remaining 1 Tbsp. extra-virgin olive oil and sprinkle with flaky sea salt. Bake focaccia until puffed and golden brown all over, 20–30 minutes.
Rising with bits of oil throughout, this little fella has filled the bowl!
It’s pretty darn cold outside today, but this is sitting with the sun streaming in the window and the radiator near …. it rose beautifully.
Just look, 2 hours later it is fluffy and puffed right to the brim.
This is the part where you could get as interesting as you like …. add olives, or rosemary, or little tomato slices ….
I stopped before this last step, just because I wasn’t sure the 12, 9 & 6 year olds at the table wanted the garlic …. but next time!!!
Hold off on this last step until you’re ready to serve the focaccia: Melt 4 Tbsp. unsalted butter in a small saucepan over medium heat. Remove from heat. Peel and grate in 2–4 garlic cloves with a Microplane (use 2 cloves if you’re garlic-shy or up to 4 if you love it). Return to medium heat and cook, stirring often, until garlic is just lightly toasted, 30–45 seconds. (Or, if you prefer raw garlic to toasted garlic, you can grate the garlic into the hot butter, off heat, then brush right away.)
Brush garlic-butter all over focaccia and slice into squares or rectangles.
Too much time on my hands …. the Covid- 19 Coronavirus has us all hunkered down in our homes …. look what happens when you can’t go anywhere …
I was afraid how things would look after baking, but it’s pretty good!
I’ve reposted this from Bon Appetit “Basically” as part of their baking series, it is amazing!!!
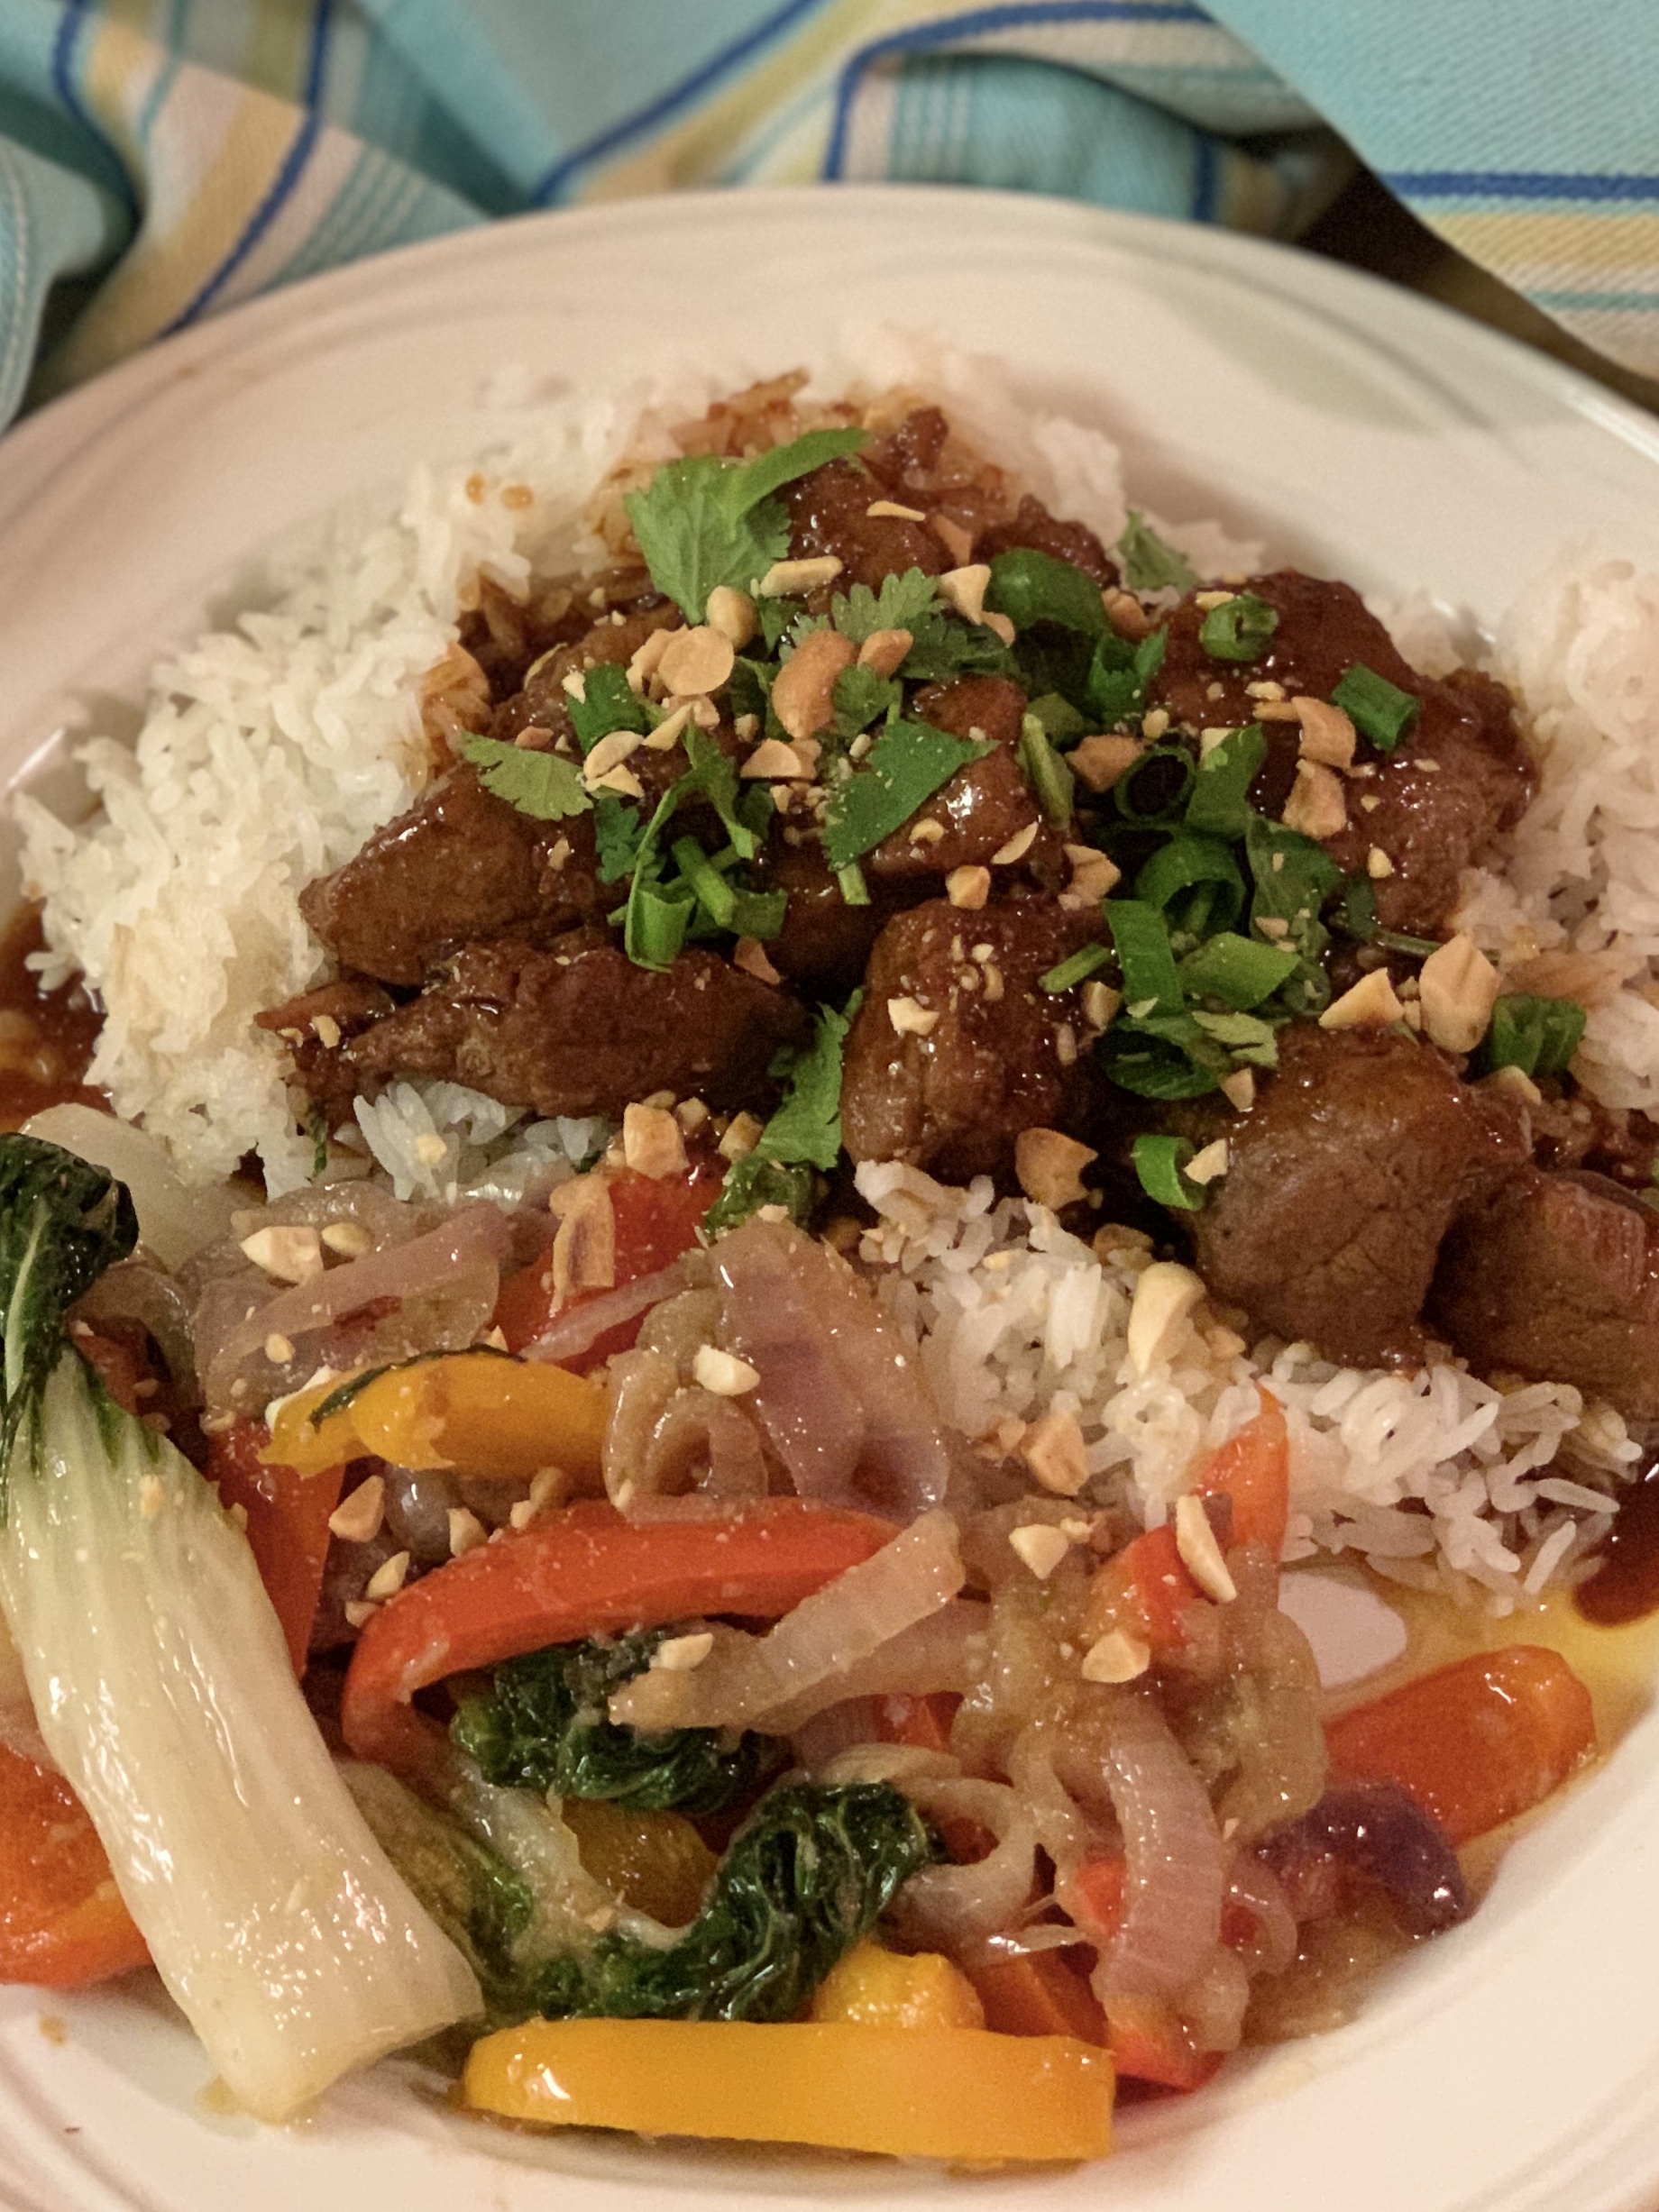
This flavour knocked it out of the park, especially considering how quickly it all comes together! Put your rice on, throw the pork in the pot and stir fry some vegetables while the pork cooks. Presto – you’re done. I think this one might go on regular rotation.
2 lbs pork tenderloin, cut in bite size pieces
2 tbsp vegetable oil
1 tbsp minced garlic
1 tbsp minced ginger
1 tbsp sesame oil
1/2 cup soy sauce (I prefer low sodium soy sauce)
3 tbsp raw sugar
1 tbsp chili garlic sauce
1 tbsp gojuchang (Korean chili rice pepper paste)
2 tbsp Thai sweet chili sauce
1 1/2 cup water
GARNISH:
thinly sliced green onions
toasted crushed peanuts
Saute pork pieces in saucepan with the vegetable oil, just until lightly browned. While that is happening, stir the rest of the ingredients together and pour over the pork. Bring to a boil. It looks like a lot of liquid but don’t worry, it will reduce and coat the pork with a shiny sticky glaze.
Once the liquid has come to a boil turn the heat down to a simmer and allow the pork to cook for about another 30 minutes, uncovered, until it is tender and the sauce has reduced somewhat.
Garnish wth the green onions and peanuts. Serve with rice and vegetables sautéed in garlic and ginger.
I haven’t tried anything other than the pork, but I imagine it would be just as good with chicken or beef – or even tofu if you are looking for a vegetarian option.
Vegetables first! The kids absolutely love a big platter of fresh vegetables, but this ranch dressing really makes it a favourite. Ready for them to arrive from the ski hill today and this platter will disappear in minutes.
This is the best creamy dressing to have on hand for those hungry moments. .. … or when the kids are arriving home from school or the ski hill. In general, we prefer vinaigrette’s for salad dressing, but this is so comforting and delicious we love it too.
1/3 cup mayonnaise
1/3 cup sour cream
1/3 cup buttermilk (you could use regular milk but I like the tang from buttermilk)
1 tsp dill weed
1/2 tsp each dried basil, oregano & parsley (in the summer of course fresh is best)
1/2 tsp garlic powder
1/4 tsp onion powder
1-2 tsp lemon juice (according to your own taste)
salt and pepper to taste
Give the whole thing a good mix and allow to sit long enough for all the seasonings to fully wake up and join the party. This is perfect as a dip, for a salad dressing I would thin it out a bit with either a bit more buttermilk or even a touch of water.