Unknown's avatar

About Chatty Kathy

Living in the beautiful Okanagan Valley in BC, we have an abundance of fresh food to cook with, and believe me, I do! We have 5 daughters, 3 grand daughters, and lots of honorary daughters ...I love cooking for family and friends and they all keep me busy in the kitchen. Here is hoping that this blog will allow my entire family to access those recipes they ask for, and maybe even enjoy a few travel photos!

Creamiest Hummous

Hummus 1

Drizzle the finished hummus with your best olive oil and a sprinkling of paprika.  A few toasted sesame seeds would be a great addition also. (I just didn’t think of it until I looked at my photos!)

  • 1 (15-ounce) can chickpeas or 1 1/2 cups (250 grams) cooked chickpeas
  • 1/4 cup (60 ml) fresh lemon juice (1 large lemon)
  • 1/4 cup (60 ml) well-stirred tahini
  • 1 small garlic clove, minced
  • 2 tablespoons (30 ml) extra-virgin olive oil, plus more for serving
  • 1/2 teaspoon ground cumin
  • Salt to taste
  • 2 to 3 tablespoons (30 to 45 ml) ice water
  • Dash ground paprika, for serving

UPDATE:  SINCE posting this originally, I’ve discovered a few more tricks.  

If you don’t have free hands for peeling the chickpeas, boil with 1/2 tsp baking soda per can for 20 minutes.  Drain well and rinse with cold water – ready to go.  

If you soak your garlic in the lemon juice for 10 minutes, and process that with the tahini at the first blending stage your garlic will have a much more mellow, smooth taste.  

DIRECTIONS

In the bowl of a food processor, combine the tahini and lemon juice and process for 1 minute, scrape the sides and bottom of the bowl then process for 30 seconds more. This extra time helps “whip” or “cream” the tahini, making the hummus smooth and creamy.

Add the olive oil, minced garlic, cumin, and a 1/2 teaspoon of salt to the whipped tahini and lemon juice. Process for 30 seconds, scrape the sides and bottom of the bowl then process another 30 seconds or until well blended.

Open, drain, and rinse the chickpeas. Add half of the chickpeas to the food processor and process for 1 minute. Scrape sides and bottom of the bowl, then add remaining chickpeas and process until thick and quite smooth; 1 to 2 minutes.

peeled chickpeas

I know, you are thinking “what goof peels chickpeas?”  Me.  Especially after Stella raved about the creamiest hummus she’d ever had.  At 5 years old, this girl knows food.  After that, how could I not peel my hummus.  After all, even if it takes you 20 min to peel that can of chickpeas, haven’t you ever wasted 20 min on something less interesting??

Most likely the hummus will be too thick or still have tiny bits of chickpea. To fix this, with the food processor turned on, slowly add 2 to 3 tablespoons of water until you reach the perfect consistency.

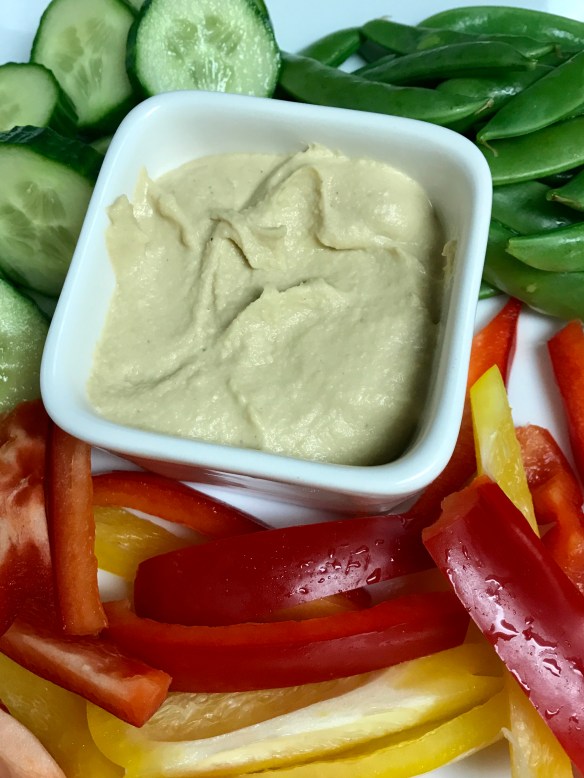
Taste for salt and adjust as needed. Serve hummus with a drizzle of olive oil and dash of paprika. Store homemade hummus in an airtight container and refrigerate up to one week.

Hummus 2

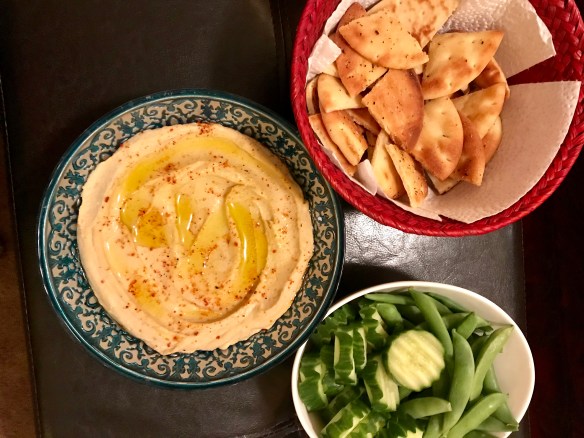
We served the hummus today with fresh vegetables as well as                                                            lightly seasoned and toasted pita wedges.


I heard a rumour that hummus made at home could be creamy, dreamy & simple, but every time I tried it I was less than satisfied.  Sure, it was tasty …. but dreamy?  No.  So I hit the blogs looking for a trick, and “inspired taste” provided it.  Look up the blog – Adam and Joanne have some amazing photos and descriptions, plus tips for cooking your own chickpeas and many other great ideas.  I’ve made this recipe a few times now, exactly as written (except that I am that weirdo that doesn’t mind a 10 minute mindless activity like skinning chickpeas).

Hummus 3

A few days later, my grand daughters Sloan and Stella were here, asking for a snack …. when I produced the vegetables I got a look ….. “Well Nana ……..do you have any of that amazing peeled chickpea hummus left?  Could we please have some of that too?”                                                       That, my friends, is how foodies are born.

Grilled Cauliflower & Shrimp with Romesco Dipping Sauce

Cauliflower & Shrimp with Romescu

Grilling the shrimp in the shell protects them from the searing heat of the barbecue, and is definitely worth doing.  Serve this as an appetizer and nobody minds getting in with their hands!


romescu

Go ahead and make a big batch of this, it goes really well with any cooked fish or chicken dish.

Romesco Sauce:

  • 1 jar (300 mL) roasted red peppers , including juices
  • 1/4 cup prepared tomato sauce
  • 3 tablespoons almond butter or 1/4 cup toasted slivered almonds
  • 2 teaspoons red wine vinegar
  • 1 teaspoon smoked paprika
  • 1/4 teaspoon cayenne pepper

Romesco Sauce: In blender, purée together red peppers including juices, tomato sauce, almond butter, vinegar, paprika and cayenne pepper until smooth. Season to taste with salt, if needed.  Transfer to small saucepan, and set aside.

  • 1 head cauliflower , cut in large florets
  • 1/4 teaspoon salt
  • 450 g unpeeled jumbo shrimp (21 to 25 count)
  • 1 tablespoon vegetable oil
  • 1 bunch green onions

Shrimp and Vegetables: Plunge cauliflower pieces into boiling salted water for just about 2-3 minutes, and then immediately drop into ice water bath.

This can easily be turned into a vegetarian dish by omitting the shrimp, just use an assortment of vegetables.

In bowl, toss together shrimp, oil and remaining salt.

Thread shrimp onto metal or soaked wooden skewers. Place shrimp and cauliflower on greased grill over medium-high heat; close lid and grill, turning once, until shrimp are pink and cauliflower is charred, about 8 minutes. Add green onions during last 3 minutes of grilling.

Heat Romesco Sauce, stirring frequently until warm, 1 to 2 minutes. Serve cauliflower, shrimp and green onions on large platter with sauce on the side for dipping.  Add some crusty fresh French bread and you’ve got a great appetizer!

Honey Garlic Chicken

I saw this recipe on “RecipeTin” and knew right away I would have to make it.  As promised, it is quick and easy, although definitely not as quick as listed.  I never find 15 minute recipes to actually take me that long ….. not sure if it is my common home stove (not gas) or my slow moving self … but nevertheless this was quick enough and the house smelled amazing!  Moist inside, sticky outside and with the best drizzle you can imagine.

honey Garlic Chicken 4

I made this tonight without a trip to the store.  Everything is something you probably have on hand.  If we weren’t trying to clean out our fridge before a holiday I would have had some cilantro, or green onions, or parsley to sprinkle on top and that would have looked so pretty!

  • 1 lb chicken breast or thighs,  boneless and skinless 
  • Salt and pepper
  • 1/4 cup flour
  • 3 1/2 tbsp unsalted butter (or 2 1/2 tbsp olive oil)
  • 2 garlic cloves , minced
  • 1 1/2 tbsp apple cider vinegar (or white or other clear vinegar)
  • 1 tbsp light soy sauce
  • 1/3 cup  honey (or maple syrup)
Instructions
  1. Cut the breasts in half horizontally to create 4 steaks in total.  If using chicken thighs, you don’t need to do anything to them!  Sprinkle each side with salt and pepper.
  2. Place flour in a shallow dish. Coat chicken in flour and shake off excess.
  3. Melt most of the butter in a large skillet over high heat – hold back about 1 tsp for later.
  4. Place chicken in skillet and cook for 2 – 3 minutes until golden.
  5. Turn and cook the other side for 1 minute.
  6. Turn heat down slightly to medium high.
  7. Make a bit of room in the pan and add garlic and top with remaining dab of butter. Stir garlic briefly once butter melts.
  8. Add vinegar, soy sauce and honey. Stir / shake pan to combine. Bring sauce to simmer, then simmer for 1 minute or until slightly thickened.
  9. Turn chicken to coat in sauce. If the sauce gets too thick, add a touch of water and stir.

  10. Remove from stove immediately. Place chicken on plates and drizzle over remaining sauce.
Honey Garlic Chicken 1

Don’t overcrowd your chicken in the pan or it will just steam instead of developing a lovely crust.

Honey Garlic Chicken 2

Turn once the first side has this lovely crispy, crackly golden crust.  Yes, you sure could do this without the flour to make it gluten free and it would taste delicious, just without that “crust”.

Honey Garlic Chicken 3

When you pour in that mixture of vinegar, soy and honey be ready for this rich, dark sauce to immediately start bubbling and smell tantalizing!  Allow it to thicken slightly, spooning sauce over just until chicken is cooked through.

Fajita Seasoning

Fajita Seasoning 1

Having this seasoning mix on hand makes dinner easy breezy!  (lemon squeezy??) Make a double batch and you can keep it for months in a cool, dry spot.  Use it on vegetables, fish or meat alike, these flavours go so well together and make dinner quick and simple.

  • 1 tbsp chili powder
  • 1 tsp ground cumin
  • 1 tsp smoked paprika
  • 1/4 tsp cayenne pepper (or to taste)
  • 1 tsp sea salt
  • 1 tsp ground black pepper

How easy is this? just toss it all into a bowl and thoroughly mix.  Do yourself a favour and make lots.

Fajita Seasoning

Just looking at this, you can tell it’s tasty, right??

This works with anything your imagination can come up with …. salad dressing or vegetable dip or seafood bake …. you let me know if you come up with more!


For fajitas:

  • protein (or not to make it vegetarian)
  • onions
  • peppers


To make fajitas, simply generously sprinkle slivered chicken (or any meat, seafood of your choice) and toss in fry pan until just cooked through.

Cook sliced peppers and onions separately so they don’t overcook.

Serve with:

  • lime crema (sounds fancy, but it’s just a squeeze of lime juice with sour cream and a bit of salt)
  • salsa
  • avocado
  • lime wedges
  • chopped cilantro
  • toasted pepitas (pumpkin seeds)
  • tortillas

You can so easily turn this into what is crazy popular right now,  power bowls!  Just serve with cooked quinoa or grain of your choice.

Turn it into a sheet pan dinner, also featured everywhere right now, just generously sprinkle everything with the seasoning and toss it into a hot oven (?400?).

Yes, you are welcome, you didn’t know dinner could be so quick, easy, healthy and delicious, did you???


Taco Seasoning Mix

Taco Seasoning 1

How pretty is this colourful group of seasoning?

Ever noticed how many ingredients you can’t spell or pronounce on those premade taco seasoning packs??  Stop the madness with this mixture.  A little bit of flour makes the ground meat have a wee bit of a saucy texture.  Don’t stop at ground meat for goodness sake (pun? word play?)..  Sprinkle this over vegetables and roast them up – drizzle with a little lime crema and you’ve got an amazingly tasty dish.

Ingredients

  • 1 tablespoon flour
  • 1 tablespoon chili powder
  • 1 tablespoon smoked paprika
  • 2 teaspoons salt
  • 1/2 teaspoon garlic powder
  • 1/2 teaspoon onion powder
  • 1 teaspoon turmeric
  • 1/2 teaspoon cumin
  • 1 teaspoon cayenne powder (use less if you aren’t keen on the heat)
  • 1/2 teaspoon oregano

Mix all this up in a small bowl, and then have it on hand to season meat or vegetables.  You’ll be so glad you took a few minutes to get this ready.

Taco Seasoning 2

To use this for ground meat tacos, brown your meat in a fry pan, then add 2 tbsp mixture for each pound of ground meat and add about 2 tbsp water, stir and cook just until meat is cooked through.

If you want to leave the flour out altogether that is just great, that makes it even more versatile:

Salad Vinaigrette:  1 tbsp mix to 2 tbsp lime juice and 7 tbsp olive oil.

Vegetable (or chip!) Dip: 1 tbsp (or to taste) with 1/4 cup each plain yogurt and good mayonnaise.

Grilled Shrimp:   Sprinkle a generous amount over shrimp before grilling.

Taco Seasoning 3

I like to mix up 3 x this recipe and just keep it on hand.  Try it, you’ll do the same thing!

Laksa

Laksa 5

Ready to be garnished with a squeeze of fresh lime juice, bean sprouts, maybe some cilantro sprigs and a few fresh sliced hot peppers – then drizzle more sauce over top and enjoy!

Laksa …. or Thai curry noodle soup …. whatever you call this, you are going to L O V E the exquisitely well balanced flavours in this noodle bowl.  This dish is so versatile and can be a completely vegetarian or even vegan dinner with a few tweaks.


  • 1 tbsp vegetable oil
  • 10 prawns/shrimp , peeled and deveined 
  • or
  • 1 chicken breast, finely sliced
  • 2 garlic cloves , finely grated
  • 2 tsp ginger , finely grated
  • 1 stalk lemongrass , peeled, finely grated 
  • 1 tbsp brown sugar
  • 1 1/2 tbsp fish sauce
  • 1 tbsp Penang curry paste
  • 1 tsp coriander powder
  • 2 tsp chilli garlic paste or other chilli paste , adjust to taste 
  • about 4-5 cups of fresh vegetables – sliced and ready to be added to the broth
  • 400 g/14oz coconut milk
  • 2 cups /500ml chicken broth (or vegetable)
  • 3 kaffir lime leaves
  • 2 slices fresh galangal
  • 2 tsp lime zest (1 lime)
  • 200 g / 7 oz fresh egg noodles, prepared per packet (although really you can use any noodle)
  • Big handful bean sprouts
Laksa 2

Have everything ready to go before you start cooking, and it will all come together quickly.

Toppings / for serving:
  • Lime wedges
  • Fresh coriander/cilantro leaves
  • Sliced red onion or scallions
Laksa 1

Did you even know lemongrass could be grated?  So easy and quick!


Instructions
Heat oil in a large saucepan over high heat. Add prawns or chicken and sear both sides until light golden (doesn’t need to cook inside). Remove onto plate.
Turn heat down to medium. If pot is looking dry, add a touch of extra oil.
Add garlic, ginger and lemongrass. Saute for 20 seconds until garlic is golden.
Add sugar and fish sauce. Stir and cook for 30 seconds – it should look like caramel.
Laksa 3


Add chilli paste, coriander and curry powder. Stir and cook for 30 seconds.
Add chicken broth and coconut milk. Stir and bring to simmer, add lime leaves and galangal.
Simmer for 2 minutes, then add lime zest and return prawns and chicken into broth, heat just until cooked through.
Laksa 4

Tonight’s bowl of laksa included mushrooms, snap peas, sweet peppers, zucchini & cauliflower.

Serving:
  1. Place noodles in bowl. Ladle over soup.
  2. Top with bean sprouts and coriander, plus toppings of choice (chilli, red onion, Asian fried shallots).
  3. Squeeze over lime juice to taste.

This recipe came from a great food blog – RecipeTin Eats – pop on over to her blog for some more great recipes.

Scallion Pancakes

Scallion Pancake 9

Crispy, flaky and little crunches of salt – perfection.

We fell in love with Scallion Pancakes at Mad Mango Cafe in Kelowna, served with an amazing laksa.  That’s a little bite of heaven.  Ever since, I’ve looked up a few recipes, and never quite had the courage to try making them.  Tonight’s menu included a chicken laksa, and just on a whim, decided to give these scallion pancakes a go.  I found this recipe on the “Serious Eats” website, and I didn’t change a thing.  They were far quicker and easier to make than I thought, and FAR exceeded our expectations.  If you have fun playing with dough, make sure to give this a try.

Ingredients

  • 2 cups all-purpose flour, plus extra for dusting work surface
  • 1 tsp kosher salt
  • 1 cup boiling water
  • Up to 1/4 cup toasted sesame seed oil
  • 2 cups thinly sliced scallion greens
  • flaky sea salt

Oil for frying

Salt for garnish

Directions

Place flour & salt in bowl of food processor. With processor running, slowly drizzle in about 3/4  cup of boiling water. Process for 15 seconds. If dough does not come together and ride around the blade, drizzle in more water a tablespoon at a time until it just comes together. Transfer to a floured work surface and knead a few times to form a smooth ball. Transfer to a bowl, cover with a damp towel or plastic wrap, and allow to rest for 30 minutes at room temperature, or up to overnight in the fridge.  (If you don’t have a food processor, just mix the dough together by hand and knead until smooth and soft)

Divide dough into four even pieces and roll each into a smooth ball. Working one ball at a time, roll out into a disk roughly 8-inches in diameter on a lightly floured surface.

Scallion Pancake 1

Okay, so my dough ball isn’t exactly a perfect circle, but that’s okay, it will get there.

Using a pastry brush, paint a very thin layer of sesame oil over the top of the disk. Roll disk up like a jelly roll, then twist roll into a tight spiral, tucking the end underneath. Flatten gently with your hand, then re-roll into an 8-inch disk.

Scallion Pancake 2

See?  What did I tell you, looks like a circle now!  Gently flatten with your hand, then start to roll.

Paint with another layer or sesame oil, sprinkle with 1/2 cup scallions, a sprinkle of flaky sea salt, and roll up like a jelly roll again. Twist into a spiral, flatten gently, and re-roll into a 7-inch disk. Repeat steps two and three with remaining pancakes.

Scallion Pancake 3

Scallion Pancake 4

Scallion Pancake 5

Make sure to brush on just a very delicate layer of sesame oil – if you get too much on there the oil will start to pop out when you roll the dough.

Heat oil in an 8-inch nonstick or cast-iron over medium-high heat until shimmering and carefully slip pancake into the hot oil. Cook, shaking the pan gently until first side is an even golden brown, about 2 minutes.

Scallion Pancake 6

Scallion Pancake 7

Just look at that flaky crust!

Scallion Pancake 8

As soon as you remove the pancake from the oil, immediately sprinkle with a little sea salt.

Carefully flip with a spatula or tongs (be careful not to splash the oil), and continue to cook, shaking pan gently, until second side is even golden brown, about 2 minutes longer. Transfer to a paper towel-lined plate to drain. Season with salt, cut into 6 wedges. Serve immediately with sauce for dipping.  Repeat with remaining 3 pancakes.

Dipping Sauce

  • 2 tablespoons soy sauce
  • 2 tablespoons Chinkiang or rice wine vinegar
  • 1 tablespoon finely sliced scallion greens
  • 1/2 teaspoon grated fresh ginger
  • 2 teaspoons sugar

Combine all ingredients, and set aside at room temperature.

Tartar Sauce


Tartar Sauce 1

I got this recipe from one of Ina Garten’s collections, and it is certainly my go to.  It can’t be much easier, which is always a good thing.  Just through everything into a food processor and give it a good whiz.  Set in fridge to allow the flavours to develop and you are done.  Of course, if you don’t have a small food processor, just chop and blend by hand, still an easy tartar sauce recipe.

  • 1/2 cup good mayonnaise
  • 2 tablespoons small-diced pickles or cornichons
  • 1 tablespoon Champagne or white wine vinegar
  • 1 tablespoon capers
  • 1 teaspoon coarse-grained mustard
  • Pinch kosher salt
  • Pinch freshly ground black pepper

Tartar Sauce

Sesame Maple Vinaigrette

An amazing trick to get complex flavour in a vinaigrette is to use more than one acid and more than one oil.  In this case, I’ve used balsamic vinegar and red wine vinegar for the acidic hit and sesame oil combined with a light grapeseed oil but you can also use a really good quality olive oil.

Sesame Maple Dressing

If your garlic cloves are home grown like these beauties, you may only want to use 1, unless you are trying to ward off a cold……

  • 2 tsp Dijon mustard
  • 2 garlic cloves, minced
  • 2 tbsp pure maple syrup
  • 2 tbsp sesame oil
  • 2 tbsp balsamic vinegar
  • 2 tbsp red wine vinegar
  • 1/4 tsp red chili flakes
  • 1/4 tsp salt
  • 1/2 cup vegetable oil (or olive oil)

Put all ingredients in jar and give it a whiz with your immersion blender, or put it in a blender.  Slowly add the oil while blending to emulsify it and make a delicious creamy dressing.

Serve with your favourite tossed green salad, or it goes equally well with warm roasted vegetables.

Summer Salad

Braised Lamb Shanks

The fall days just make me think of hearty, wholesome meals and this lamb shank is the best way to celebrate staying indoors and getting cozy.  The added bonus is that your house will smell dreamy while they slowly roast.

Lamb shank 5

  • 4 lamb shanks
  • salt & pepper
  • all purpose flour
  • olive oil
  • 2 yellow onions, diced
  • 3 celery ribs, diced
  • 2 carrots, diced
  • 2 cups red wine (make sure you use good wine, something you want to sip while the lamb is roasting)
  • 1 cup beef stock
  • 3 garlic cloves, crushed
  • 2 bay leaves
  • 2 ancho chiles, rehydrated in hot water for 20 minutes
  • 2 sprigs fresh rosemary
  • 1 tbsp smoked paprika
  • 1 14 ounce tin of good canned tomatoes

Garnish:  1 minced garlic clove, 1 small diced chili, and a small handful of parsley, all chopped and mixed.

Season lamb shanks with salt and pepper, then dust with flour.

Preheat oven to 300

Heat oil in braising pan, large enough to hold all 4 shanks in one layer.  Brown shanks all over, taking care not to overcrowd the pan.  You may have to do this in stages.

Remove shanks to keep warm while you reheat the pan, add a bit more oil and saute the onions, carrots & celery until they have softened.

Lamb shank 1

Deglaze the pan with red wine, stirring to get all the bits of goodness off the bottom.  Add beef stock, garlic cloves, ancho chili (stem and seeds removed), rosemary, paprika and tomatoes.  Stir well and nestle the lamb shanks back into the mixture.  Cover tightly and put in the oven.

Lamb shank 2

Relax with that wine …… enjoy the aromas coming out of the kitchen ….

This recipe is so forgiving – if you have more time roast at a lower temperature, if you are short, move the temperature up to 350 or 375 and shorten your cooking time.

Check for doneness and as soon as cooked through remove the lamb shanks from the braising liquid and set aside.

Lamb shank 3

The lamb is cooked, but not yet falling off the bone tender, and that is what you are looking for.

Lamb shank 4

At this point, if you want a clear stock, strain the solids off.  If you don’t mind a more rustic stock use your immersion blender or standard blender (if using a standard blender BE SURE to leave the lid off or some place for steam to escape … trust me on this).

Nestle those lamb shanks back into the liquid and continue to roast until the meat literally falls off the bone.

When ready to serve, sprinkle the garnish over top and prepare to enjoy the feast.