Crazy Good NO Knead Focaccia

No Knead Focaccia 2

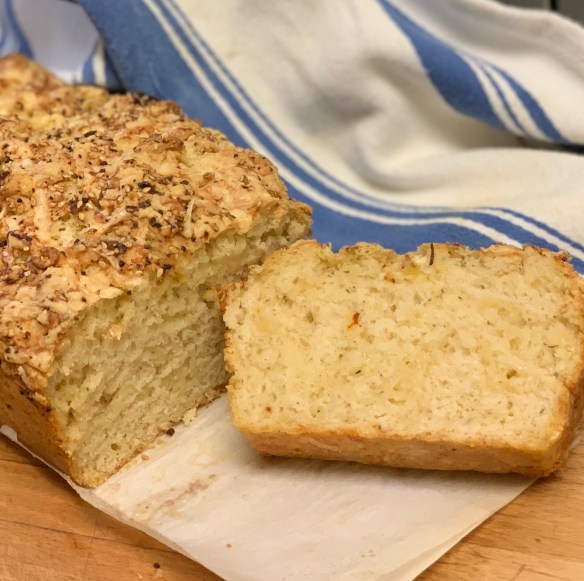
You are going to love this … soft, chewy, and the best focaccia you could possible imagine.  Can’t you just smell it from the photo?  Yum.

  • 2 1/2 tsp active dry yeast (or 1 pack)
  • 2 tsp honey
  • 2 1/2 cups lukewarm water
  • 1 tbsp kosher salt
  • 5 cups all purpose flour
  • 6 tbsp extra virgin olive oil – divided
  • 4 tbsp butter
  • flaky sea salt
  • 2-4 garlic cloves

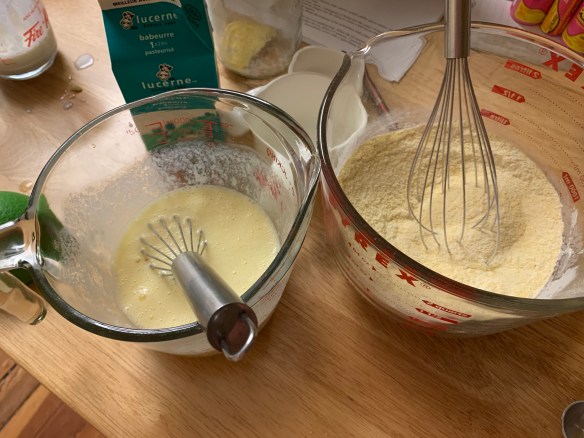
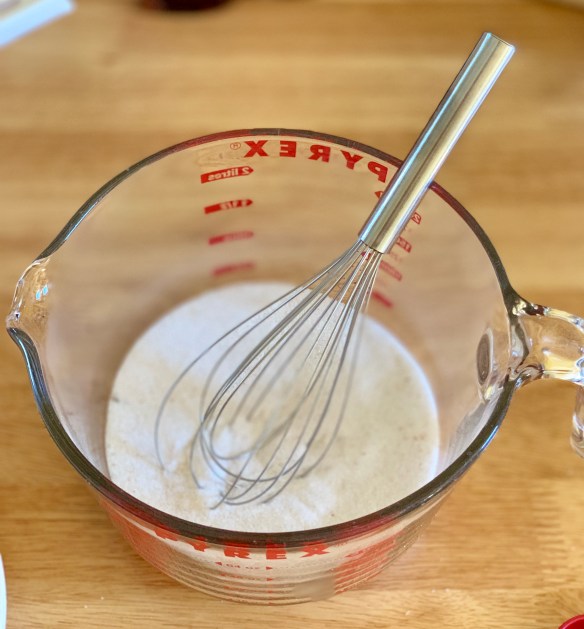
Whisk 1¼-oz. envelope active dry yeast (about 2¼ tsp.), 2 tsp. honey, and 2½ cups lukewarm water in a medium bowl and let sit 5 minutes (it should foam or at least get creamy; if it doesn’t your yeast is dead and you should start again—check the expiration date!).

Add 5 cups (625 g) all-purpose flour and 1 Tbsp. kosher salt and mix with a rubber spatula until a shaggy dough forms and no dry streaks remain.

Pour 4 Tbsp. extra-virgin olive oil into a big bowl that will fit in your refrigerator. This puppy is going to rise! Transfer dough to bowl and turn to coat in oil. Cover with a silicone lid or plastic wrap and chill until dough is doubled in size (it should look very bubbly and alive), at least 8 hours and up to 1 day. If you’re in a rush, you can also let it rise at room temperature until doubled in size, 3–4 hours.

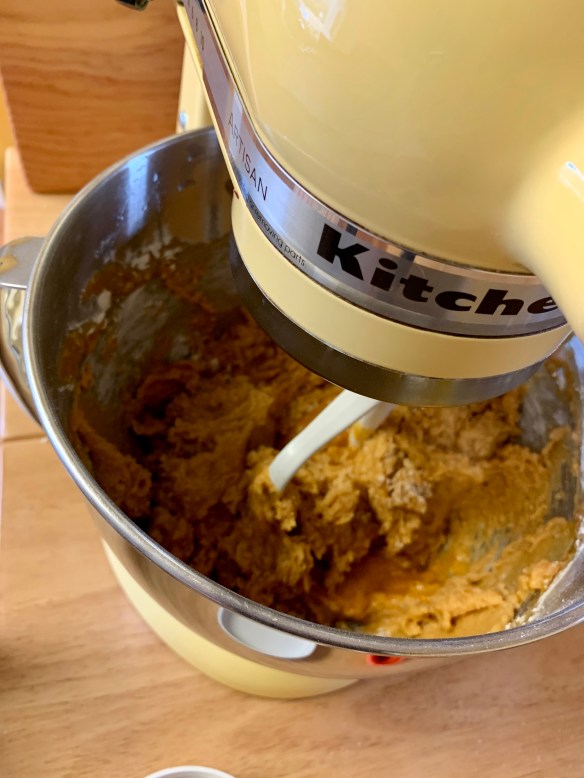
Generously butter a 13×9″ baking pan, for thicker focaccia that’s perfect for sandwiches, or an 18×13″ rimmed baking sheet, for focaccia that’s thinner, crispier, and great for snacking. The butter may seem superfluous, but it’ll ensure that your focaccia doesn’t stick. Pour 1 Tbsp. extra-virgin olive oil into center of pan. Keeping the dough in the bowl and using a fork in each hand, gather up edges of dough farthest from you and lift up and over into center of bowl. Give the bowl a quarter turn and repeat process. Do this 2 more times; you want to deflate dough while you form it into a rough ball.

Transfer dough to prepared pan. Pour any oil left in bowl over and turn dough to coat it in oil. Let rise, uncovered, in a dry, warm spot (like near a radiator or on top of the fridge or a preheating oven) until doubled in size, at least 1½ hours and up to 4 hours.

Place a rack in middle of oven; preheat to 450°. To see if the dough is ready, poke it with your finger. It should spring back slowly, leaving a small visible indentation. If it springs back quickly, the dough isn’t ready. (If at this point the dough is ready to bake but you aren’t, you can chill it up to 1 hour.) Lightly oil your hands. If using a rimmed baking sheet, gently stretch out dough to fill (you probably won’t need to do this if using a baking pan). Dimple focaccia all over with your fingers, like you’re aggressively playing the piano, creating very deep depressions in the dough (reach your fingers all the way to the bottom of the pan). Drizzle with remaining 1 Tbsp. extra-virgin olive oil and sprinkle with flaky sea salt. Bake focaccia until puffed and golden brown all over, 20–30 minutes.

No Knead Focaccia 3

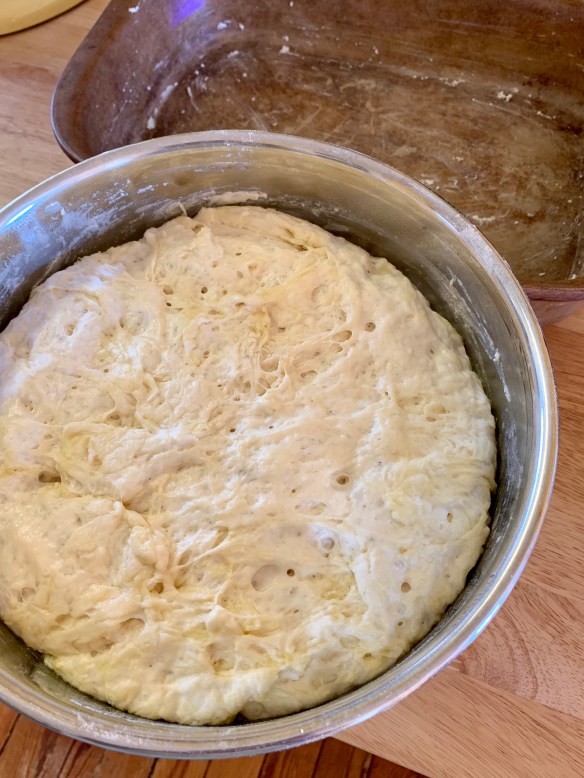
Rising with bits of oil throughout, this little fella has filled the bowl!

No Knead Focaccia 4

It’s pretty darn cold outside today, but this is sitting with the sun streaming in the window and the radiator near …. it rose beautifully.

No Knead Focaccia 1

Just look, 2 hours later it is fluffy and puffed right to the brim.

No Knead Focaccia 5

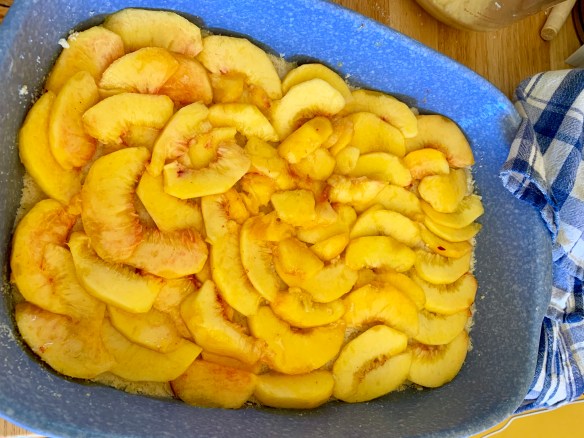
This is the part where you could get as interesting as you like …. add olives, or rosemary, or little tomato slices ….

I stopped before this last step, just because I wasn’t sure the 12, 9 & 6 year olds at the table wanted the garlic …. but next time!!!

Hold off on this last step until you’re ready to serve the focaccia: Melt 4 Tbsp. unsalted butter in a small saucepan over medium heat. Remove from heat. Peel and grate in 2–4 garlic cloves with a Microplane (use 2 cloves if you’re garlic-shy or up to 4 if you love it). Return to medium heat and cook, stirring often, until garlic is just lightly toasted, 30–45 seconds. (Or, if you prefer raw garlic to toasted garlic, you can grate the garlic into the hot butter, off heat, then brush right away.)

Brush garlic-butter all over focaccia and slice into squares or rectangles.

Focaccia Art 1

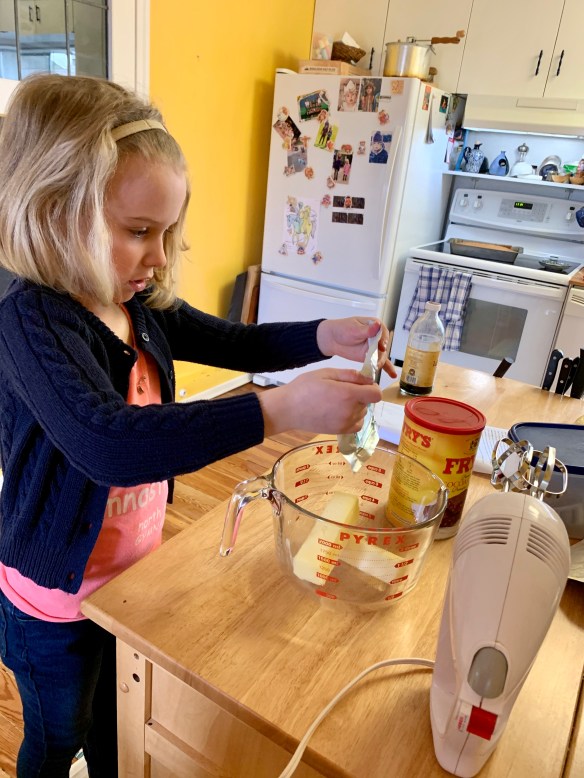
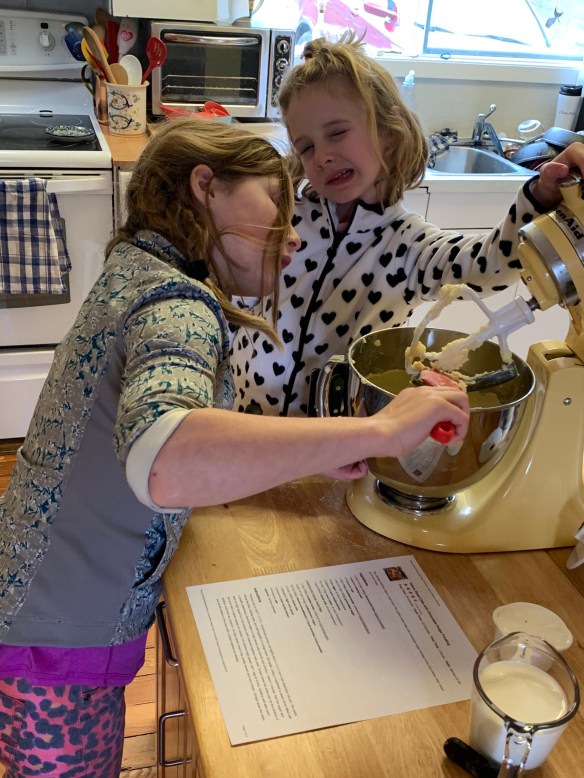
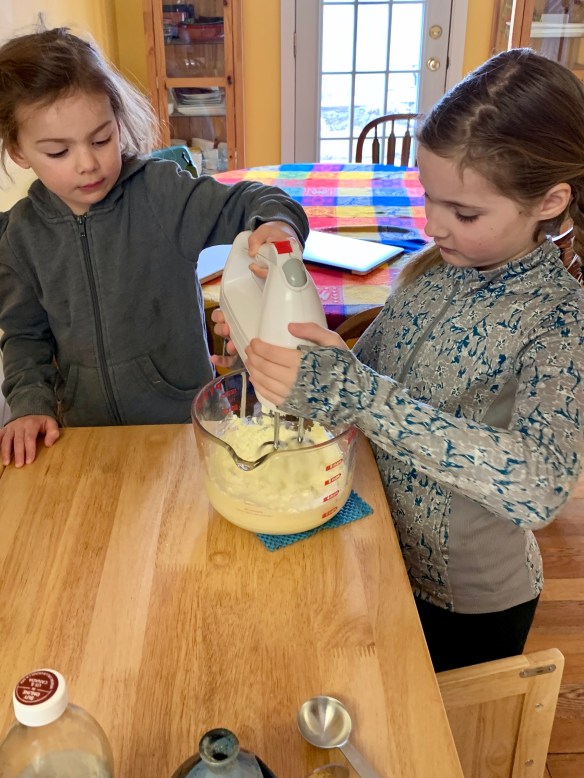
Too much time on my hands …. the Covid- 19 Coronavirus has us all hunkered down in our homes …. look what happens when you can’t go anywhere …

Focaccia Art 2

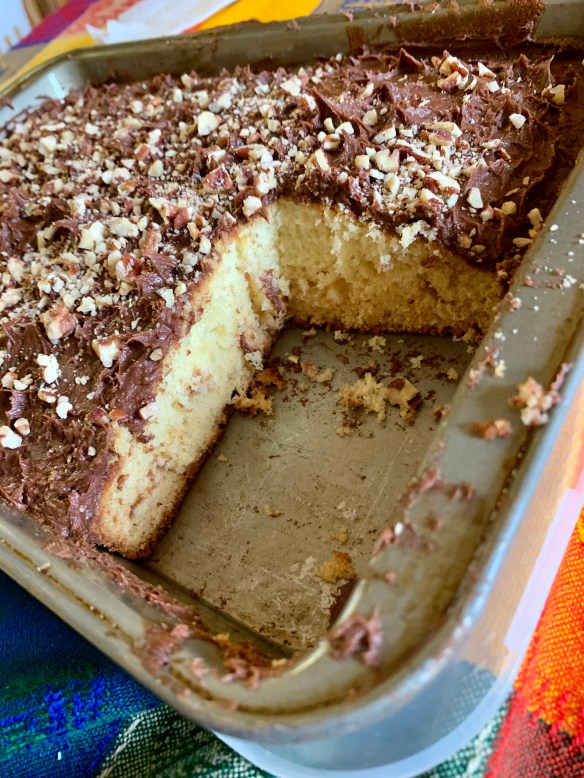
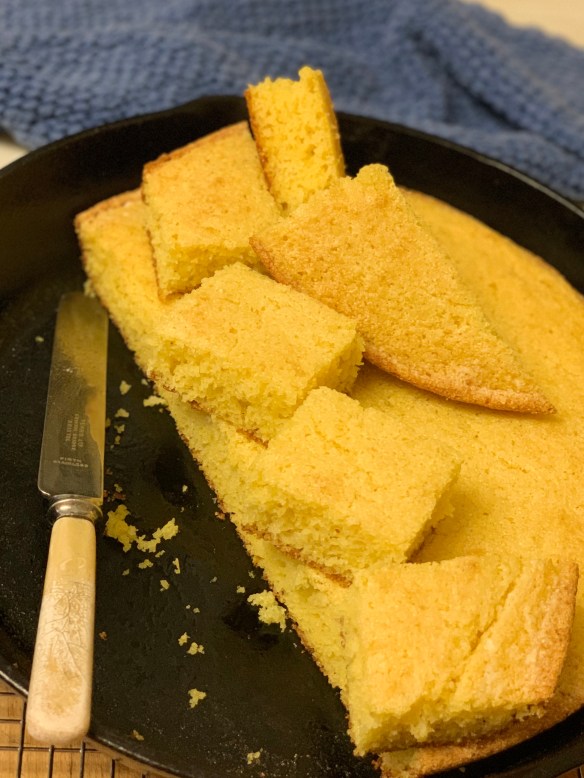
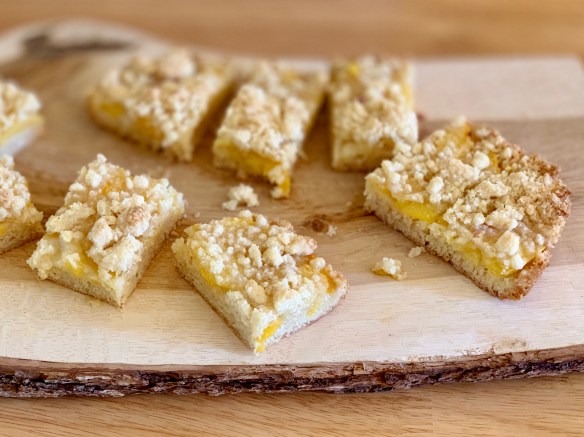
I was afraid how things would look after baking, but it’s pretty good!

I’ve reposted this from Bon Appetit “Basically” as part of their baking series, it is amazing!!!


Yellow Cake with Chocolate Buttercream

Stella arrived to the orchard with a plan …. an easy cake that she could frost with a chocolate icing.  This cake fit that description perfectly, and we were all blown away by how absolutely delicious it was.

yellow cake 1

Cake Ingredients

  • 2 and 1/4 cups (266g) cake  flour
  • 2 1/4 tsp baking powder
  • 1/4 teaspoon baking soda
  • 1/2 teaspoon salt
  • 1 cup (230g) unsalted butter, softened & at room temperature
  • 1 and 3/4 cups (350g) granulated sugar
  • 2 large eggs, at room temperature
  • 2 teaspoons pure vanilla extract
  • 1/2 cup (120g) sour cream, at room temperature
  • 1 cup (240ml) whole milk, at room temperature

Chocolate Fudge Frosting

  • 1 cup (230g) unsalted butter, softened & at room temperature
  • 4 and 1/2 cups (540g) confectioners’ (icing) sugar
  • 3/4 cup (65g) natural unsweetened or dutch-process cocoa powder
  • 1/2 cup (120ml) whole milk
  • 1 Tablespoon light corn syrup*
  • 2 teaspoons pure vanilla extract
  • 1/8 teaspoon salt
  • optional: rainbow sprinkles or lightly toasted pecan pieces – roughly chopped

Instructions

  1. Preheat oven to 350°F (177°C). Generously grease and lightly flour a 12×17 inch half sheet/jelly roll pan. Set aside.  SEE BELOW TO ADJUST FOR DIFFERENT PAN SIZES
  2. Whisk the flour, baking powder, baking soda, and salt together in a large bowl. Set aside. Using a handheld or stand mixer fitted with a paddle attachment, beat the butter on high speed until smooth and creamy – about 1 minute. Add the sugar and beat on high speed for 3 full minutes until creamed together fairly well. Scrape down the sides and up the bottom of the bowl with a rubber spatula as needed. On medium-high speed, add 1 egg at a time, beating well after each addition until both are mixed in. On high speed, beat in the vanilla extract and sour cream. Scrape down the sides and up the bottom of the bowl with a rubber spatula as needed.
  3. With the mixer running on low speed, add the dry ingredients to the wet ingredients alternating with the milk. Mix each addition just until incorporated. Do not overmix this batter. The batter will be smooth, velvety, and slightly thick.
  4. Spread the cake batter into the prepared pan. Smooth it out into a thin, even layer. Bake for 20-22 minutes or until the top is lightly browned and a toothpick inserted in the center comes out clean. Make sure you rotate the cake pan once or twice during bake time if your oven has hot spots. Remove from the oven and allow the cake to cool in the pan placed on a wire rack. As the cake is cooling, make the frosting.

Frosting Instructions

  1. Make the frosting: Using a handheld or stand mixer fitted with a paddle attachment, beat the butter on high speed until pale, smooth, and creamy – about 4 full minutes. Sift the confectioners’ sugar and cocoa together. On low speed, gradually add the sugar/cocoa mixture, followed by the milk, corn syrup, vanilla, and salt. Beat for 1 minute. Turn the mixer up to medium-high speed and beat for 3 full minutes. If the frosting is too thick, add a splash more of milk.
  2. Frost cooled cake and top with sprinkles. Slice and serve. Cover leftovers tightly and store in the refrigerator for up to 5 days.
  • Make Ahead & Freezing Instructions: Cake can be made 1 day in advance, covered tightly at room temperature, and then frosted before serving. Frosting can also be made 1 day ahead of time– cover tightly and keep in the refrigerator. Frosted or unfrosted cake can be frozen up to 3 months. Thaw overnight in the refrigerator before serving.
  • Sour Cream: Full-fat sour cream lends the best flavor! You can use plain yogurt instead. I suggest a full-fat variety.
  • Milk: Whole milk is best– the fat is what gives this cake it’s wonderfully rich texture. You can use 2% instead– or even buttermilk!
  • Corn Syrup: This tiny bit of corn syrup makes the frosting uniquely glossy and shiny. You can leave it out if you’d like.
  • Different Size Cakes & Cupcakes: you can use this recipe to make a 9×13 cake. Same oven temperature, just bake for about 35-40 minutes. You can also use this recipe to make about 18-20 cupcakes. Fill cupcake liners halfway. About 20 minutes bake time, same oven temperature.  
  • Frosting:  This makes enough for the larger size pan, or a layer cake, or to frost 18-20 cupcakes.  If you are making this in a 9×13 pan, you will only need about half.  Either halve the recipe or freeze some for another day, it freezes well.

yellow cake 9

yellow cake 3

Team Effort!

yellow cake 11

yellow cake 10

yellow cake 8

Sloan helping Liv keep the beaters upright …. don’t skip the beating time – in fact, use your timer and you will be amazed at how much fluffier your butter gets.

yellow cake 7

Best part of any baking project, right??

yellow cake 2

These kids …..

yellow cake 6

Stella was firm on the design …. she wanted smooth icing (thanks Sloan for doing that), then she wanted to create spikes ….. took a few tries, but she got it exactly the way she wanted, and then decided it needed a few pecans toasted and sprinkled over top.

yellow cake 4

Stella came up with the pecans for a topping and it was just perfect!

yellow cake 5

Total winner!  And, we are total winners with these 3 little sweeties.

I copied this entirely from Sally’s Baking Addiction, I’ve loved every one of her recipes that I have tried, and my 9 year old granddaughter Sloan insisted I get it on here right away so we don’t forget this recipe!

Moist Delicious Corn Bread

corn bread 2

Easily the quickest of quick breads, moist and tender …. this is absolutely delicious and one you must try.  Just another fantastic use for your cast iron skillet.  Serve this alongside some hearty chili or stew and you’ll have such a comforting meal.

  • 1 1/4 cups cornmeal
  • 3/4 cup all purpose unbleached flour
  • 1/4 cup sugar
  • 1 tbsp baking powder
  • 1 tsp baking soda
  • 1/4 tsp salt
  • 1 1/3 cups buttermilk
  • 2 large eggs, lightly beaten
  • 8 tbsp unsalted butter, melted
  1. Preheat oven to 425 and place a 12 inch cast iron skillet in to heat up while you make the batter.
  2. In a large bowl whisk together the dry ingredients.  In a separate bowl whisk up the buttermilk, eggs, and 7 tbsp of the melted butter.
  3. Reduce the oven temperature to 375 and remove the skillet.  CAREFULLY … remember it is hot.
  4. Coat the skillet with the remaining tbsp of melted butter.  Pour the batter in the skillet and place it in the oven.  Amazing to watch …. it right away starts to puff up around the edges.
  5. Bake for 20-25 minutes until firm, and a tester comes out clean.  Let cool for 15 minutes before serving.
corn bread 3

This comes together so quickly – whisk up dry and wet ingredients separately and then quickly combine them.  Stir until you don’t see any lumps, but don’t over mix the batter.

Corn bread 4

As soon as the batter hits the hot pan it starts to smell amazing and I loved the way it puffed up around the edges of the cast iron.

Corn bread 1

It might be difficult, but let it sit for 15 minutes after removing from the oven.  Still warm enough to melt butter but holds together like a dream ….. try it, and I bet you love it.

Have you checked out http://www.jocooks.com ??  I got this recipe from her blog and it is most assuredly the best cornbread I’ve tried.  In fact, I think every recipe I try of hers I love!

Beer Bread

Beer Bread 1

Today I created an extra crunchy crust …… first the melted butter, then sprinkled on some grated aged cheddar, and topped with the seasoned sesame seed mixture left from the dregs of the nuts and bolts mixture I made this Christmas – Y U M

This is the easiest, simplest quick bread!  The most difficult part of making this bread is waiting for it to come out of the oven while amazing smells are drifting through the house …..

  • 3 cups all purpose flour
  • 3 tsp baking powder
  • 1 tsp salt
  • 1/4 cup sugar
  • 1 can or bottle of beer
  • 1/4 cup melted butter

Preheat oven to 375 degrees.

Sift dry ingredients together and stir in 1 12 ounce bottle or can of beer – stir just until it all comes together and turn into a greased 9 x 5 inch loaf pan.  (I like to line the pan with parchment paper – it makes it so easy to lift out of the loaf pan.).

Drizzle the melted butter over and bake.

Bake for 1 hour until a tester comes out clean.

Rest for 10 minutes before removing from loaf pan, then let sit for at least 15 minutes before cutting.

Beer Bread 2

Aged white cheddar and Italian seasoning added today.


You can mix this up however you like – add in herbs, grated cheese or some seeds.

My cousin Vivian used dried dill weed in the flour mix, and put olive oil on top … try it!

I’ve had people ask if you can use soda instead of beer ….. not unless you add 2 tsp (or 1 packet) of instant yeast.  It is the beer that helps the bread to rise and not be a heavy lump of dough!

Did you know that you should sift your flour, and SCOOP (using a spoon) into your measuring cup instead of scooping with your measuring cup?  This helps make your flour lighter and in turn, your bread lighter.


Candy Cane Sugar Cookies

Just in time for Christmas!  I bought a small bag of crushed candy canes at Bulk Barn, probably about $2.00 worth …. thinking it would be great for decorating the sugar cookies we make every year.  Well, Sloan had a different idea and decided they should go in the cookies, so that’s what we did.  What a hit!

Peppermint cookies 1

  • 3/4 cup soft butter
  • 1 cup white sugar
  • 2 beaten eggs
  • 1/2 tsp vanilla
  • 2 1/2 cups all purpose flour
  • 2 tsp cream of tartar
  • 1 tsp baking soda
  • 1/4 tsp salt
  • 1/4 cup crushed candy canes

Preheat oven to 375 degrees.

Cream together butter and sugar.  When light and fluffy add in eggs and vanilla and beat until creamy and smooth.

Sift dry ingredients together and stir into butter mixture.  It will be a stiff mixture, so you may end up using your hands, we usually do.

Last, stir in the crushed candy cane.

Knead lightly until you have a workable dough, then cover tightly and put in the fridge for at least an hour.  (you can do this days ahead or even freeze it at this stage)

Roll out dough on lightly floured board and cut into desired shapes.

We always decorate our cookies before baking them, in place of the added sugar you get with decorating with icing.

I used to use raw egg, but find I get better results using evaporated milk and gel food colouring.  Just put a little milk in a cup and stir in enough food colouring to get the colour you want.

Bake at 375 for 8-10 minutes, watching carefully – every oven is different.


peppermint cookies 4

Get your kids involved!  Sloan is 9 and has been rolling and cutting dough for years now.

peppermint cookies 2

So many fun sugars and sprinkles available now for decorating the tops.

Peppermint Cookies 3

We do a  cooking class on Fridays – these four work so well together, and we have a great time with Pearl and Leo joining Sloan and Stella.

peppermin cookies 3

Each of the kids made their own dough & we baked up two batches – each family got to take one batch home for baking another day.

Peppermint cookies 5

Pearl has this tray ready to go in the oven, love all the vibrant colors.

Peppermint cookies 7

The most important part is taste testing ….


Stay tuned – more cooking classes to come!


Apple Crumble Muffins with Vanilla Glaze

If you are looking for a quick weekend baking project with a little sweetie, this is perfect!

Apple crumb muffins 1

Moist and delicious, these muffins are fantastic.  That crumb topping tho ….. :o)

Crumble

  • 1/3 cup packed brown sugar
  • 1 tbsp white sugar
  • 1 tsp ground cinnamon
  • 1/4 cup unsalted butter, melted
  • 2/3 cup all purpose flour

Muffins

  • 1/2 cup unsalted butter
  • 1/2 cup packed brown sugar
  • 1/4 cup white sugar
  • 2 large eggs
  • 1/2 cup Greek yogurt
  • 2 tsp pure vanilla extract
  • 1 3/4 cup all purpose flour
  • 1 tsp baking soda
  • 1 tsp baking powder
  • 1 tsp cinnamon
  • 1/2 tsp salt
  • 1/4 cup milk
  • 1 1/2 cups peeled, chopped apple

Vanilla Icing

  • 1 cup powder icing sugar
  • 3 tbsp cream
  • 1/2 tsp pure vanilla extract

Ingredients:

  1. Make the crumb topping: In a medium bowl, combine both sugars, the cinnamon, and melted butter. Using a rubber spatula, stir in the flour. The crumb topping will be thick and crumbly. Set aside.
  2. Preheat oven to 425°F (218°C). Spray a 12-count muffin pan with nonstick spray or line with cupcake liners. You may need a 2nd pan as this recipe makes up to 14 muffins, though you can always bake in batches using 1 pan. Set aside. *See note about jumbo size muffins.
  3. Make the muffins: Using a handheld or stand mixer fitted with a paddle attachment, beat the butter and both sugars together on high speed until smooth and creamy, about 2 minutes. Scrape down the sides and bottom of the bowl as needed. Add the eggs, yogurt, and vanilla extract. Beat on medium speed for 1 minute, then turn up to high speed until the mixture is combined and uniform in texture. Scrape down the sides and bottom of the bowl as needed.
  4. Whisk the flour, baking soda, baking powder, cinnamon, and salt together in a medium bowl. Pour the dry ingredients into the wet ingredients, add the milk and apple, and mix on low speed until everything is combined.
  5. Spoon the batter evenly into each cup or liner, filling each all the way to the top. Press a handful of the crumb topping into the top of each; crumble it with your hands to make some big chunks.
  6. Bake for 5 minutes at 425°F (218°C) degrees, then keeping the muffins in the oven, lower the oven temperature to 350°F (177°C) and bake for 15-17 more minutes or until a toothpick inserted in the center comes out clean. The total time these muffins take in the oven is about 20-22 minutes.
  7. Make the icing: whisk all of the ingredients together and drizzle over warm muffins.
  8. Muffins stay fresh stored at room temperature for a few days– then transfer to the fridge for up to 1 week.
apple crumb muffins 2

3 year old Liv is the best helper!  So glad we could do a little baking together while she was here.

apple crumb muffins 3

How can you not love such a cute little helper?

Have you tried the website:  Sally’s Baking Addiction?  I’ve tried a few recipes and they are all great, this one came from her – let me know if you try it.  Or better yet, let Sally know!!

Empanadas

Most cultures have a pastry/hand pie like this one ….. empanadas are famous in many countries, but I’ve only had the pleasure of eating them in Mexico so that is what I have fashioned these after.  They can be deep fried, but I prefer baking them for fluffy, flaky pastry and creamy filling.  Extra bonus points for the way your house smells while they are baking!

Empanada 1

In today’s version I used chicken, onion & red pepper, topped with a chunk of jalapeño havarti.  The tomatillo salsa was delicious for dipping!

Empanadas are such a treat.  These will give you flaky pastry, and a creamy tasty filling.

Make sure when you roll out your dough that you do it a little thinner than you would for a pie – you want to make sure you have a good ratio of filling to crust.

Empanada 2

Saute onions and garlic until softened, then add red pepper and cook for only a couple more minutes.  Stir in cooked shredded chicken and season to taste.  In this version, I added a couple of tablespoons of tomatillo salsa, and then topped with jalapeño havarti cheese for an extra bit of kick and creaminess.

Other suggestions for empanada filling:

  • ground meat seasoned with taco spices, topped with Oaxaca string cheese
  • leftover pulled pork and pickled red onions
  • wilted spinach, sautéed mushrooms and feta cheese
  • go sweet with fruit, cinnamon and a bit of vanilla

I’ve included my pastry recipe here, but if you aren’t into making your own pastry go ahead and use a prepared frozen pie shell.  Just take it out and roll it a bit thinner.

Cut your pastry into rounds, brush beaten egg around the outside and then put about a tablespoon or two of filling in the middle, add some cheese on top.  You will want enough filling so that your ratio of stuffing to pastry is tasty.  Fold edges up together and press to seal.  Set them on a baking sheet and pinch/crimp the top to make sure it is well sealed.

Brush beaten egg over the top of the sealed empanada, and then poke a hole so steam can escape and the pastry doesn’t leak too much of your goods outside the shell.

Bake at 375 for 25-30 minutes until golden brown.  You can also freeze them on a cookie sheet at this point and bake later, from frozen.  Just bake a little longer.

Empanada 3

Oh, these were G O O D.  Before baking season the tops with salt and pepper.

Everybody loves flaky pie crust – but people are divided on whether to use shortening, lard or butter.  Through trial and error, I think I have found the best of them all – by combining lard and butter.  Try it ….. so light and flaky – you will love it.

  • 1 egg
  • 1 tbsp vinegar
  • 3/4 tsp salt
  • 3 cups white flour
  • 3/4 cup cold vegetable lard or (if you prefer) shortening
  • 3/4 cup cold butter
  • 5 tbsp very cold water
  • Lightly beat egg and vinegar

Whisk flour and salt

Using a pastry blender or 2 knives, cut in lard/butter until pea sized.  Add very cold water to egg and vinegar mixture.  Make a hole in the center of the flour blend and stir in the egg/vinegar/water combination.  Work just until pastry comes together – adding slightly more liquid if it doesn’t, and if it is too wet, add a wee bit more flour.  Work together just until it all comes into a solid mass.  Knead very lightly on floured surface.  Wrap tightly and put in the fridge for at least 40 minutes.

Roll on lightly floured board until just thin enough to use for pie dough.

This recipe makes enough for 1 smaller pie (top and bottom) or a large deep dish pie crust bottom.

Pumpkin Donuts with Maple Glaze

Need a quick dessert?  Not tired of pumpkin yet?  Here you go – ready for the oven in about 10 minutes, and the glaze just takes minutes.  Not only will the house smell amazing, dessert will be awesome!

Pumpkin donuts 1

Spend a few dollars and buy yourself a silicone donut mold, I’ve had so much fun with it!

Doughnuts:

  • 2 cups all-purpose flour
  • 2 teaspoons pumpkin pie spice
  • 2 teaspoons baking powder
  • 1 teaspoon kosher salt
  • One 15-ounce can pumpkin puree
  • 1 1/2 cups sugar
  • 1/3 cup vegetable oil
  • 4 tablespoons (1/2 stick) unsalted butter, melted
  • 1 teaspoon vanilla extract
  • 3 large eggs
  1. For the doughnuts: Preheat the oven to 350 degrees F.
  2. Whisk the flour, pumpkin pie spice, baking powder and salt together in a medium bowl.
  3. Beat the pumpkin puree, sugar, vegetable oil, butter, vanilla and eggs and together in another large bowl until smooth.
  4. Add the flour mixture to the pumpkin mixture and beat until just combined.
  5. Fill three 6-cup nonstick doughnut pans with the batter so that each mold is almost full. Smooth the tops with a moistened finger.  (I always put my batter into a ziplock bag and pipe it into the molds, so much easier, and way less messy)
  6. Bake the doughnuts until a wooden pick inserted into the center comes out clean, about 15 minutes. Invert the doughnuts onto a cooling rack.

(I never seem to have pumpkin pie spice, so you can easily mix up 1 tsp cinnamon, 1/2 tsp ground ginger and 1/4 tsp each of cloves and freshly ground nutmeg to equal the 2 tsp)

pumpkin donuts 3

Dry ingredients whisked, and the wet stuff in my stand mixer, but you could easily do it all by hand, it only takes a few minutes to come together.

pumpkin donuts 2

pumpkin donuts 4

Once you get it all together, don’t overtax!  Just enough to bring it all together.


Glaze:

  • 1/4 cup unsalted butter
  • 1/2 cup pure maple syrup
  • 1 cup sifted confectioners’ sugar (this is important – gets rid of lumps!)
  • optional: 1/2 teaspoon maple extract

Heat butter and maple syrup in small sauce pan, just until butter is melted.  Quickly whisk in the sifted confectioners’ (icing) sugar until smooth.

It is best if you make this before the donuts as that allows the glaze to thicken slightly.

Dip the slightly cooled donuts in the glaze and allow to cool.  Best served that day, but no one is going to complain about a day old donut!  This makes enough to generously DOUBLE DIP about 12 donuts.  Seriously, go for the double dip, that maple glaze is killer good and courtesy of Sally’s Baking Addiction – check out her blog, all her recipes are great.

The donuts however, come from Valerie Bertinelli’s show and I’ve never had a fail on one of her recipes – they are so good and usually pretty quick to make.

Profiterole Cream Puffs

Cream Puffs 1

I love bite sized desserts!  So great to be able to get a taste of each, especially after a big dinner.  These mini cream puffs, and mini pumpkin cheesecake bites finished off Thanksgiving dinner just the right way.  Enjoy!

  • 1/2 cup water
  • 1/2 stick (1/4 cup) unsalted butter
  • 1/4 tsp salt
  • 1/2 cup all purpose flour
  • 2 eggs
  • pinch of ground cinnamon

Preheat oven to 400

Line a baking sheet with parchment paper

Profiteroles are actually quite simple, very few ingredients and easy enough to prepare … but the technique is important.

In a small sauce pan bring the water, butter and salt to a boil.  Reduce the heat and add the flour all at once …quickly start vigorously with a wooden spoon until it pulls away from the side of the pan, has a slightly shiny sheen to it and has formed a ball.  Turn it into a mixing bowl and beat in the eggs, one at a time.  This is the important part.  Beat that first egg in until it has fully incorporated.  You can either beat it in with your wooden spoon or if you don’t feel energetic enough, use a hand held beater.  When the batter is smooth, start on the second egg.  Beat again (vigorously) and stir in the bit of cinnamon.

Transfer the mixture to a pastry bag or ziplock.  Pipe onto prepared baking sheet.  Today I made them little mini’s to fill with cream and top with chocolate.  This mixture will make about 16 mini’s, but you can make them as big as you like.  Make sure you leave a fair bit of space around them as they do grow.

Bake for 20-25 minutes, rotating halfway through.

Once these have cooked and are completely cool they are ready for filling.  I ended up putting my custard into a piping bag and using a long tip to fill them before topping with chocolate.

Today I used my creamy custard to fill them, and then topped with a chocolate ganache.  What a hit!

You could also split them in half and serve with ice cream and warm chocolate fudge sauce …..

CREAMY CUSTARD FILLING 

  • 2 cups milk
  • 1/4 tsp salt
  • 1/4 cup sugar
  • 2 egg yolks
  • 3 tbsp cornstarch

In heavy saucepan, whisk all ingredients until incorporated very well then cook over medium-low heat until mixture thickens and boils, about 20 minutes.  Boil 1 minute stirring frequently.  Remove from heat and stir in 1 tsp vanilla.

I have also done this part in the microwave – stir every 2 minutes until mixture has thickened well.  Make sure you use a large bowl as the mixture will raise and lower several times while it cooks.

Cover right on the surface of the pudding with saran until cool, but not set, about 30 minutes.

CHOCOLATE ICING

  • 2 squares semisweet chocolate
  • 1 tbsp butter or margarine
  • 1/2 cup icing sugar
  • 2-3 tbsp milk

In heavy saucepan over low heat, melt chocolate and butter.  Remove saucepan from heat.  With wire whisk beat in 1/2 cup icing sugar and 2-3 tbsp milk until smooth and easy spreading consistency.

Cream Puffs 4

I ended up with some pretty funny shapes because I went back and added a bit more to each “blob” so I’d recommend only piping once for each profiterole.

Cream Puffs 2

Dry, and ready for filling …. see what I mean about the funny shapes?  ha ha

Cream Puffs 3

The Best Peach Shortbread

Peach Shortbread 6

1 cup white sugar
1 teaspoon baking powder
2 3/4 cups plus 2 tablespoons cups all-purpose flour
1/4 teaspoon cinnamon
1/8 teaspoon freshly grated nutmeg
1/4 teaspoon  salt
1 cup room temperature unsalted butter
1 large egg
2 -3 peaches, pitted and thinly sliced (between 1/8 and 1/4-inch thick)


Preheat the oven to 375°F.

Butter a 9×13 inch pan, or spray it with a nonstick spray.

In a medium bowl, stir together sugar, baking powder, flour, salt and spices with a whisk. Use a pastry blender, fork or your fingertips, blend the butter and egg into the flour mixture. It will be crumbly.

Pat 3/4 of the crumbs into the bottom of the prepared pan, pressing firmly. Tile peach slices over crumb base in a single layer. Scatter remaining crumbs evenly over peaches and bake in preheated oven for 30 minutes, until top is slightly brown and you can see a little color around the edges. Cool completely in pan before cutting into squares.

Peach Shortbread 1

I like to whisk the spices with the sugar first, then the flour.  It helps to make sure everything is well distributed.

Peach Shortbread 2

Press 3/4 of the flour/sugar mixture into your baking pan, reserving the rest for topping.

Peach Shortbread 3

These peaches are really the star here, but that buttery crust plays an amazingly delicious supporting role.

Peach Shortbread 7

Not so much topping that the peaches are hidden, and for a little extra crunch, sprinkle the top with a little raw sugar.

Peach Shortbread 4

OOOHHH, the smell of sweet peaches and buttery crumb can’t be beat.

Peach Shortbread 5

It might be difficult to wait, but they cut so much better if you let them cool.

This recipe came from smitten kitchen.com, so if you want to go one more step towards deliciousness, head over to her blog …. Deb Perelman …. she also browns the butter for a nutty flavour that apparently really comes through.  Today, I just didn’t have time, as I wanted to get these slightly cooled bars out to the workers to enjoy the fruits of their labours with peach picking, sorting and packing!