Sour Cream & Onion Biscuits

Buttermilk Chive 2

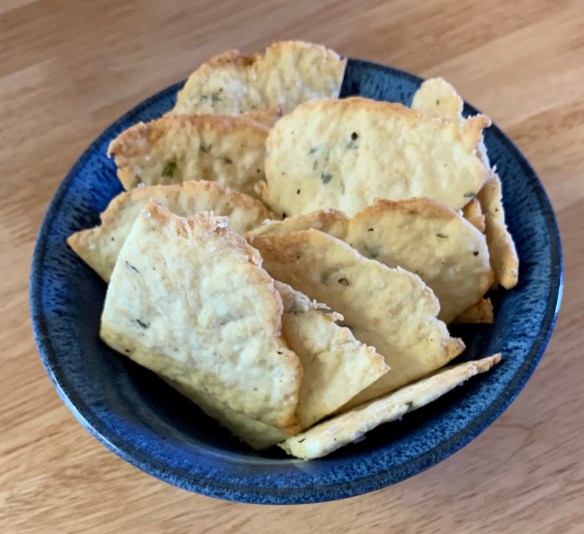
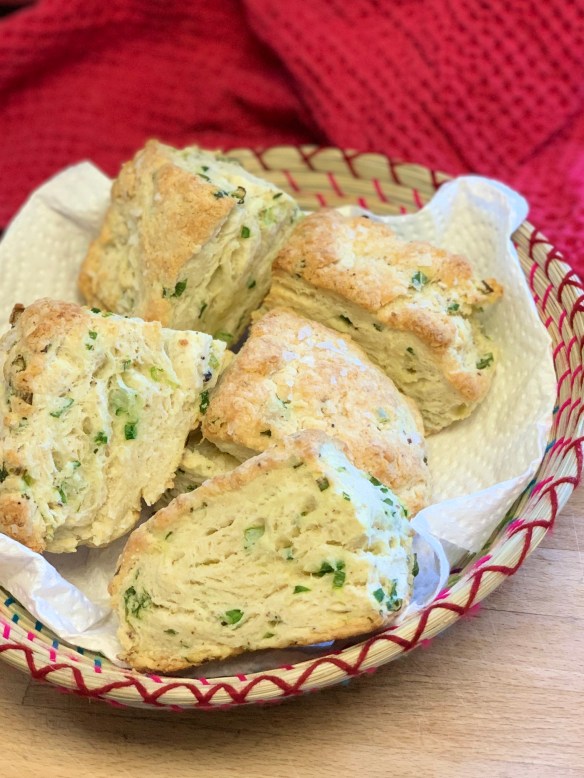
Layers and layers of flaky biscuit with fresh chives …. these are a winner any day of the week.

You know those potato chips of the same flavour??  I don’t like them one little bit.  In the first place, I don’t care for sour cream.  Sure, I use it in recipes, but never as a topping for anything where you just taste sour cream …. yuck.  I know I’m in the minority on that.  These biscuits though?  The sour cream makes them rich and gives them a slight tang that is perfect to offset that richness.  Scallions are my favourite in everything right now …. just desperate for fresh vegetables at this time of year I guess.

  • 8 scallions, sliced thinly
  • 12 Tbsp. chilled unsalted butter, divided
  • 2½ tsp. kosher salt
  • 1 tsp. freshly ground black pepper
  • 1¾ tsp. baking powder
  • ½ tsp. baking soda
  • 1¼ tsp. sugar
  • 2½ cups all-purpose flour, plus more for surface
  • 1¼ cups sour cream, plus more for serving
  • Flaky sea salt

Place a rack in middle of oven; preheat to 425°. Line a baking sheet with parchment paper. Trim root ends from 8 scallions. Thinly slice crosswise (not on a diagonal); set aside.

Melt 2 Tbsp. chilled unsalted butter by whatever method is easiest for you; set aside. Whisk 2½ tsp. kosher salt, 1 tsp. freshly ground black pepper, 1¾ tsp. baking powder, ½ tsp. baking soda, 1¼ tsp. sugar, and 2½ cups (313 g) all-purpose flour in a large bowl to combine.

Cut remaining 10 Tbsp. chilled unsalted butter into ½” pieces. Add to dry ingredients and toss to coat. Using your hands, work butter into dry ingredients, smashing it between your fingers and flattening it between your palm until there are lots of thin shards and pea-size bits. Add reserved scallions and toss to evenly distribute.

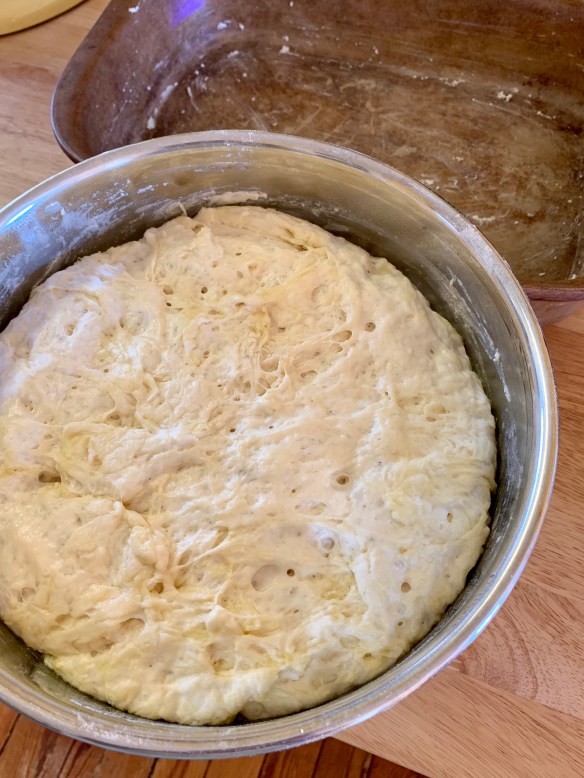
Create a well in the center of mixture and add 1¼ cups sour cream to the center. Using a fork and working in circles, mix until large shaggy clumps form. If your bowl is wide enough, fold dough over itself a couple of times inside it until it comes together.

  • Pat dough into an 8×4” rectangle about 1” thick.

  • Working from a short side, fold dough in thirds as you would a letter. It doesn’t need to overlap perfectly. Pat dough into another 8×4” rectangle, then fold dough in thirds like a letter one more time. (You’ll have done the folding procedure two times total.) Pat dough back into an 8×4” rectangle and straighten up with your hands and/or your bench scraper. (This folding method is what will create those nice flaky layers in your final biscuits.)

  • Cut rectangle in half lengthwise, then cut each half crosswise into 4 squares for a total of 8 biscuits.

Transfer biscuits to prepared baking sheet. Brush tops gently with melted butter; sprinkle with flaky sea salt.

Bake biscuits until golden brown, 18-22 minutes.  Serve warm with sour cream or butter.

Buttermilk Chive 3

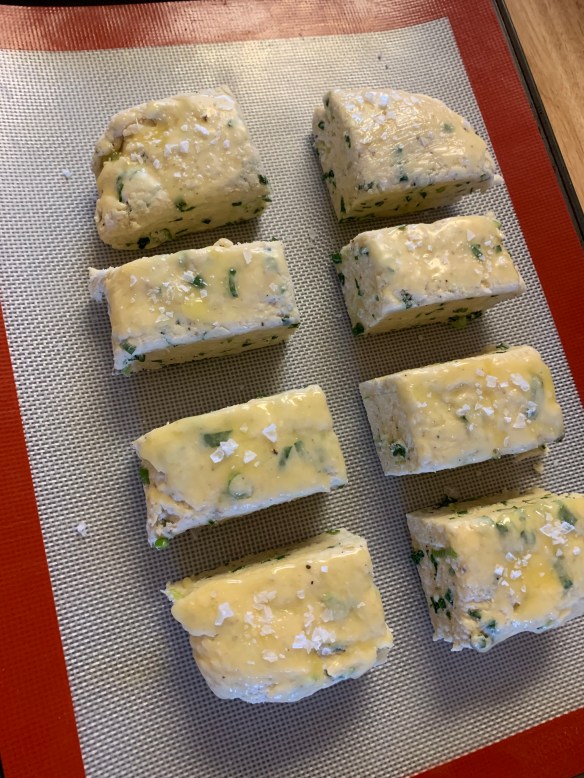
Ready for the oven – already you can tell they are perfect.

Buttermilk Chive 1

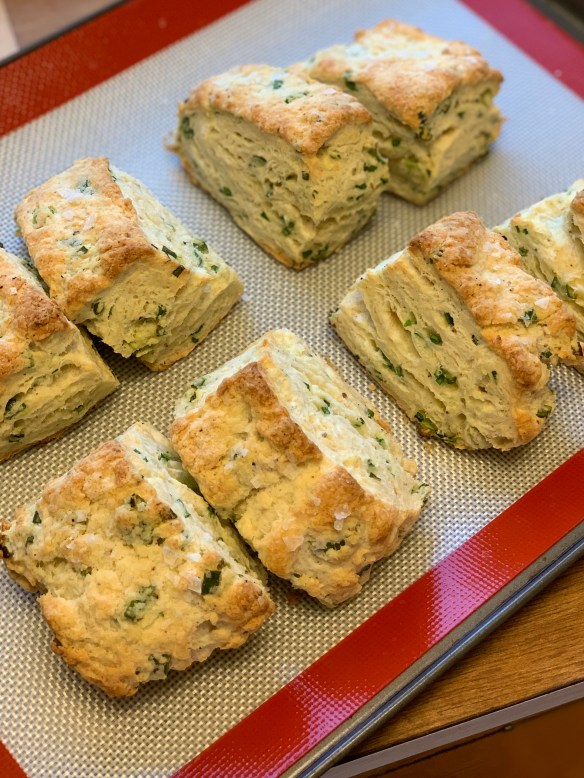
Just look at all those flaky layers – it comes from the folding technique.

If you want more concise instructions on how to make these, pop on over to the Bon Appetit website, and check out their “Basically” section.  Molly Baz made these, and not only are her instructions (complete with short videos) simply perfect, these biscuits are divine.

Flakiest Biscuits

Okay, here they are – BACK by popular demand … my fantastic baking powder biscuits.  

Biscuits 1

I’ve tried out a new technique …. folding the dough.  Pat into a rectangular shape and then fold into 3 (like folding a letter into an envelope), pat out into another rectangular shape and repeat.  You can literally see the folded dough, and just look at those flaky layers!  Finish with a little melted butter and sprinkle with salt and freshly cracked pepper before baking.

Once you get this down pat you will rely on these biscuits for anything from a summer morning with fresh peach jam or a winter evening served with a family favourite – chili, soup, stew … every household has their own comfort dinner!

  • 2 cups flour
  • 1 tsp salt
  • 1 tbsp sugar
  • 4 tsp baking powder
  • 1/2 cup cold butter
  • 1 egg
  • almost 1 cup milk or buttermilk

Stir dry ingredients to blend and then with pastry blender, or 2 forks, blend in 1/2 cup cold butter (my tip: freeze the butter for 15 min ahead of time, and use the large holes on a box grater to grate the butter – instant flakes of butter)

Lightly beat 1 egg in a 1 cup measure, then stir in enough milk to reach the 1 cup mark.

With a fork, stir the egg/milk mixture into the dry ingredients – only enough to have it start to hold together.  Turn onto floured surface and … oh so gently … without overmixing … pat it together, and then into a solid shape, about 1 inch or so in height.  Using floured biscuit cutter (or your favorite glass) cut out shapes and place on floured baking sheet.

These are so flexible – if you want to add any herbs, or cheese – do so at the dry ingredient stage.  Go ahead and experiment – makes these your own family favorite!

To guarantee extra tall, fluffy biscuits, pop them into the fridge or freezer for a few minutes.  The combination of hot oven and cold butter creates magic!

Bake at 400 for 15 – 20 minutes (depending on your oven – check it at 15) until lightly golden and very fluffy!  Image

Asian Chicken Mushroom Bowls with Peanut Sauce

So unlike me, but every so often I’m looking for a quick and easy dinner!  This hits all the notes with a delicious sauce, crunchy vegetables and the bright hit of those pickled vegetables – don’t skip them!

DD Chicken 5

INGREDIENTS: 

  • 1 tablespoon vegetable oil
  • 1 tablespoon toasted sesame oil
  • 1 pound ground chicken
  • 1 (3.5-ounce) package shiitake mushrooms, diced
  • 1 carrot, peeled and diced
  • 1 shallot, minced
  • 3 cloves garlic, minced
  • 1 tablespoon freshly grated ginger
  • 1/4 cup hoisin sauce
  • 2 teaspoons chili garlic sauce
  • 1 teaspoon fish sauce
  • 2 tablespoons chopped fresh cilantro leaves
  • 1 head butter lettuce

or

  • stir fried vegetables
  • cooked rice

FOR THE PEANUT SAUCE

  • 3 tablespoons creamy peanut butter
  • 1 tablespoon reduced sodium soy sauce
  • 1 tablespoon freshly squeezed lime juice
  • 2 teaspoons brown sugar
  • 1 teaspoon chili garlic sauce, or more, to taste
  • 1 teaspoon freshly grated ginger

QUICK PICKLED VEGETABLES

  • thinly sliced cucumbers & radishes
  • salt
  • vinegar (use what you have on hand, either white vinegar or rice wine vinegar

Thinly slice vegetables and place in non-reactive bowl.  Sprinkle with a little salt and then just cover with vinegar.  Set aside.

DIRECTIONS:

  1. To make the peanut sauce, whisk together peanut butter, soy sauce, lime juice, brown sugar, chili garlic sauce and ginger in a small bowl. Whisk in 2-3 tablespoons water until desired consistency is reached; set aside.
  2. Heat vegetable oil and sesame oil in a large skillet over medium high heat. Add ground chicken, mushrooms, carrot and shallot. Cook until browned, about 5-7 minutes, making sure to crumble the chicken as it cooks; drain excess fat.
  3. Stir in garlic and ginger until fragrant, about 1 minute.
  4. Stir in hoisin sauce, chili garlic sauce and fish sauce until heated through, about 30 seconds. Remove from heat; stir in cilantro.
  5. To serve, spoon several tablespoons of the chicken mixture into the center of a lettuce leaf, taco-style, drizzled with peanut sauce.

I’ve adapted (translate copied, but give credit where it is due!) this to a rice bowl from a Damn Delicious recipe for lettuce wraps …. if you haven’t been over to her site, treat yourself and go review a few recipes.   Needless to say we didn’t use carrots as Grant HATES cooked carrots so we just ignored that portion altogether.  Use whatever vegetables you have on hand to supplement the chicken mixture to create a colourful, delicious bowl.

DD chicken 2

Get everything ready to go, this all comes together so quickly.

DD chicken 3

Brown the chicken, mushrooms, onions, garlic and ginger, then stir in the sauce.

DD Chicken 6

Today’s vegetables were crunchy and delicious – use whatever you have on hand


DD Chicken 4

This takes only a few minutes to come together, so have your vegetables ready to go, and your rice cooked so you can put it all in your bowl within 20-30 minutes.

DD chicken 1

The leftovers are amazing in these fresh, soft pita’s I made.

Lamb Barbacoa

lamb barbacoa 4

Pretty simply delicious.  Feels just like you are at a roadside stand or a local Mercado in Mexico.  Serve with a salad and dinner is ready.

I wasn’t really sure what I wanted to do with the pack of frozen lamb stew meat in my freezer …… This turned out to be perfect!  It helps that whenever we come home from Mexico we bring dried peppers so I always have a good stock on hand.  The only thing I didn’t have, in fact, was the agave leaf, or banana leaf.  I’m sure it will add another dimension of flavour when I try that, but honestly this was just fantastic without.

FOR THE LAMB

  • 12-inch chunk of an agave leaf (penca de maguey) or 1 large banana leaf, optional
  • tablespoons vegetable oil
  • 3 pounds boneless lamb shoulder (you could also use beef or pork – marinade works with either)
  • 12-ounce bottle of beer (optional but I love this!)
  • Salt

FOR THE MARINADE

  • 2 dried guajillo chiles, stemmed, seeded and torn into large pieces
  • 2 dried ancho chiles, stemmed, seeded and torn into large pieces
  • 3 garlic cloves, peeled and roughly chopped
  • tablespoon cider vinegar
  • tablespoon dark brown sugar
  • teaspoon salt
  • 1 canned chipotle in adobo sauce
  • 1/4 teaspoon ground cinnamon, preferably Mexican canela
  • 1/2 teaspoon dried Mexican oregano

FOR SERVING

  • Your favorite hot sauce or salsa
  • A little chopped white onion or pickled red onions
  • A handful of cilantro leaves

This recipe came from Rick Bayless, and I have copied it here exactly as he posted it, but I’ve added my changes in the bold Italic font.

Roast the agave leaf being careful not to touch the exposed flesh of the agave) over an open flame, turning every few minutes until pliable and charred, 10 to 15 minutes, depending on the thickness.  (If using a banana leaf, run it briefly over an open flame to soften it.)  Cut into 3 pieces.  We are in the midst of Covid-19 pandemic, so I wasn’t about to run out to the store and try to buy agave leaf or banana leaf (the closest we can get to either of these is frozen banana leaf).  I just left this part out.

In the stovetop-safe insert of your slow cooker or in a very large (12-inch) skillet, heat the oil over medium-high.  Pat the lamb dry with a paper towel, sprinkle generously with salt and lay it in the insert of skillet.  Cook, turning occasionally, until richly brown on all sides, about 10 minutes.  Fit the insert into the machine or transfer the meat to the slow cooker.

Combine all the marinade ingredients in a blender with 2 cups of water and blend to a smooth puree.  Pour through a medium mesh strainer into the slow cooker. Nestle the pieces of agave leaf or banana leaf under and around the meat and pour the beer over the top, if you are using them.  Cover and turn on the slow cooker to high.  Your barbacoa  will be done in about 6 hours, though you can hold it for longer. (My slow-cooker can be programmed to switch from high after 6 hours to a “keep warm” temperature for up to another 6 hours. Some slow cookers click to “keep warm” automatically; others need to be switched manually.). I put the seasonings and the torn chile peppers into the blender along with hot water, and allowed it to sit for about 20 minutes before blending. This allowed the peppers to soften nicely and they blended up very smoothly.

Given that we are just “at home” these days, I didn’t use the slow cooker, but browned the meat well before adding it to a heavy cast iron dutch oven, covering with the marinade and slowly roasting at 275 for about 3 hours.  Honestly, I prefer this method most of the time anyway as it allows for the sauce to be richer.

lamb barbacoa 3

Just look at how rich that sauce is …. I don’t find the same result in a slow cooker.

When you are ready to serve, coarsely shred the lamb and arrange it on a warm platter.  Skim any fat from the sauce that remains in the slow cooker, then taste it.  If you feel it would be better with a more concentrated flavor, pour it into a medium saucepan or remove the insert and set it over high heat.  Boil for a few minutes to reduce that quantity, then taste and season with salt if it needs it. Spoon as much as you like over the lamb or beef.  (I like to sprinkle coarse salt over the meat at this point.)  Serve the barbacoa with the hot sauce or salsa, onion and cilantro.  Grab some tortillas, if you like, and you’re ready to make some delicious tacos.

lamb barbacoa 2

Needless to say, it isn’t necessary to make your own tortillas, but I love doing it.  I’m still struggling with getting my corn tortillas worthy of being a Mexican Abuela, but my flour tortilla game is strong!!  On Saturday mornings at one of our favourite mercados in Mexico City we have found the absolute B E S T pork carnitas.  This is the only spot we’ve ever seen this done, but they are making their tortillas loaded with herbs, so I tried that today.  Pretty successful, if I do say so myself.  I just kept adding herbs until it looked and smelled about right.

Lamb barbacoa 1

Most people come home from Mexico with decor, or tequila …… we bring home tortilla baskets, dried chile peppers and mezcal to make barbecue sauce.

Hot Tomato Feta Salad & Crispy Flatbread

Tomato Feta Salad 2
This could just as easily be an appetizer as a side dish ….tonight it was a side dish for our roasted chicken and it was delicious!  Super quick and easy, along with ingredients I love and that made it a total win.

1 cup cherry tomatoes, halved
1/3 cup chopped, pitted Kalmata olives
1 clove garlic, minced
1/4 cup minced red onion
2 tablespoons finely-chopped fresh flat-leaf parsley, divided
1 teaspoon dried oregano
1 teaspoon olive oil
Freshly ground black pepper
1 8- to 10-ounce block feta
Crackers, flatbread*, pita chips, or crostini, for dipping

In a bowl, mix the tomatoes, olives, onion, garlic, 1 tablespoon of the parsley, oregano, olive oil and a few grinds of pepper.

Feel free to substitute the feta with haloumi, or goat cheese, either would be great.

On a grill: Heat your grill to medium-high. Set the feta block in the middle of a piece of foil. Pile the tomato mixture on top of the feta. Fold up the edges of the foil so that it will hold in any liquid as it cooks. Place the packet straight on a grill for 15 minutes to warm it through. Remove from grill and transfer to plate or serving dish.

In the oven: Heat oven to 400°F. Check to see that your dish is oven-proof. Place the block of feta in the middle of your dish. Pile the tomato mixture on top of the feta. Bake for 15 minutes.

Both methods: The feta will not melt, just warm and soften. Garnish with parsley and serve with crackers; eat immediately. As it cools, the feta will firm up again.

Flatbread 1

I’m guilty of poaching this recipe right off the Smitten Kitchen website, and if you haven’t visited that site, hop on over.  Deb Perelman has fantastic recipes, but even just her writing style is worth a read.

Flatbread 4

Can’t believe how good these are!  I had to use the herb I had on hand, so these are made with thyme, not rosemary.  Can’t wait to try with fresh rosemary out of my garden.

*Flatbread.  also from http://www.smittenkitchen.com

  • 1 3/4 cups (230 grams) unbleached all-purpose flour
  • 1 tablespoon chopped rosemary plus 2 (6-inch) sprigs (optional)
  • 1 teaspoon baking powder
  • 3/4 teaspoon kosher salt
  • 1/2 cup (120 ml) water
  • 1/3 cup (80 ml) olive oil plus more for brushing
  • Flaky sea salt such as Maldon

Heat oven to 450°F with a heavy baking sheet on rack in middle. Lightly coat a large baking sheet with olive oil.

Stir together flour, chopped rosemary, baking powder, and salt in a large, wide bowl. Make a well in center, then add water and oil and gradually stir into flour with a wooden spoon until a dough forms. Use your hands to gently knead dough inside the bowl 4 or 5 times, until it comes together in a semi-smooth ball.

Divide dough into 3 large or 6 smaller pieces and roll out one piece at a time on an unfloured counter, to about 10-inch (for larger pieces of dough) or 7-inch rounds (smaller pieces) — shape can be rustic; dough should be thin. Lift flatbread onto prepared baking sheet. Repeat with remaining pieces of dough. I can sometimes squeeze 6 small flatbreads on a half-sheet pan; sometimes I need to bake 1 to 2 in a second batch.

Lightly brush tops with additional oil and scatter small clusters of rosemary leaves on top (if using), pressing in slightly. Sprinkle with sea salt. Bake until pale golden and browned in spots, 8 to 10 minutes, rotating flatbreads if needed on the pan for even color. Let cool then break into pieces.

I cut mine into triangles before baking, and they came out perfectly.  Read the full Smitten Kitchen recipe for more ideas, you will be happy you did.

Buttermilk Brined Roast Chicken

Chicken 2

Ohhhh – the skin ….. for those crispy skin lovers this chicken is a dream!  Best part of all, is that it protects the most deliciously moist chicken underneath.

I’ve been roasting chickens for a LONG time …… I rarely use a recipe, but with the isolation going on around Covid 19 I thought it was time to branch out and try something new.  This appeared in one of my Food & Wine magazines and I was pretty excited to give it a try.  Naturally with the isolation and reduced shopping I had to improvise.  I had a few dried morels, so used those in place of the porcini, and only had fresh thyme, so used that in place of the rosemary.  I also didn’t have quite that much buttermilk left, but just topped up the container with water to cover the chicken.  I followed the recipe method exactly though, and even though it took longer to cook in my oven …. more like an hour and a half, the result was worth the wait.

  • Kosher salt
  • 11 garlic cloves—9 smashed, 
2 thinly sliced
  • 2 tablespoons sugar
  • 2 tablespoons chopped rosemary or 
5 Douglas fir sprigs
  • 1 bay leaf
  • 1/2 cup dried porcini mushrooms
  • 1 quart buttermilk
  • One 3 1/2-pound whole chicken
  • 1 teaspoon unsalted butter, softened
  • 2 tablespoons extra-virgin olive oil
Step 1

In a medium saucepan, combine 
1/4 cup of salt with the smashed garlic, the sugar, rosemary, bay leaf and 
2 cups of water. Bring to a simmer, stirring to dissolve the salt and sugar. 
Transfer the mixture to a very large bowl and stir in 2 cups of cold water.

Step 2

In a spice grinder, grind the mushrooms to a powder. (You should have about 
3 tablespoons.) Whisk the porcini powder and buttermilk into the salt mixture. Place the chicken in the buttermilk 
brine, cover with plastic wrap and refrigerate for at least 6 hours or up to 12 hours.

Step 3

Preheat the oven to 425°. Remove 
the chicken from the brine and pat dry; 
discard the brine. Tuck the wing 
tips behind the breasts, tie the legs with kitchen twine and set the chicken, 
breast side up, in a rack over a roasting pan. Season all over with salt.

Step 4

Roast the chicken for 15 minutes. Brush the butter all over the chicken, then return it to the oven and roast 
for about 45 minutes longer, until an instant-read thermometer inserted 
in the thickest part of the thigh registers 165°. Transfer to a cutting board and let rest for 15 minutes.

Step 5

Meanwhile, in a small skillet, simmer the olive oil with the sliced garlic over moderately high heat, stirring occasionally, until the garlic just starts to brown and the oil is hot and fragrant, about 
3 minutes. Remove the skillet from the heat and let cool.

Step 6

Carve the chicken and arrange the pieces on a platter. Brush with some of the garlic oil and serve right away, 
passing the remaining oil at the table.

Chicken 1

No fancy presentation here, just the most delectable chicken drizzled with the garlic oil.

I copied this right out of my Food & Wine magazine, so it’s only fair to also let you know where it comes from!

Chefs Evan and Sarah Rich of RT Rotisserie in San Francisco make the very best chicken. They use a buttermilk brine that includes umami powder, garlic and Douglas fir—a signature ingredient from their flagship restaurant, Rich Table, that they forage themselves. In this adaptation, the chicken is roasted in the oven, and the brine is made with buttermilk, dried porcini, garlic and rosemary, though if you have access to Douglas fir sprigs, feel free to use them.

chicken 3

Resting the chicken is so important.  Tent it loosely with foil and allow it to sit for at least 15 minutes, this allows the juices to remain in the chicken – it’s worth it, I promise.

The ingredients and method are entirely out of Food & Wine, but the photos are my own!

Raspberry Coconut Banana Loaf

Here we are, in the midst of the Covid-19 crisis, I’m working from home, and my stress management is to bake.  Lots.  I planned on making a banana blueberry loaf, but where are the blueberries I was so sure were in my freezer?  Who knows?  Only realized that of course when I was in the midst of the batter, so here we are, and sometimes the best recipes come from necessity!  This is one of those happy circumstances.

banana loaf 2

Just look at that crunchy top!

  • 1 1/2 cups all purpose flour
  • 1 tsp baking soda
  • 1 tsp salt
  • 1/2 tsp baking powder
  • 1/2 tsp cinnamon
  • 1/2 tsp freshly grated nutmeg (if you can, trust me, this makes a difference)
  • 1/2 cup toasted shredded coconut


  • 1/2 cup melted butter (but not hot)
  • 1 cup sugar
  • 2 large eggs, beaten
  • 1 tbsp vanilla
  • 3/4 cup mashed banana
  • 1 cup raspberries (fresh or frozen – if frozen DO NOT THAW)

Raw sugar

Preheat oven to 350.

Butter and flour a standard loaf pan (9″ x 5″)

Whisk dry ingredients together in large mixing bowl.

In separate bowl beat together the sugar, melted butter, eggs, vanilla and banana.

When ready to combine, and only then, toss the raspberries with the flour mixture.  This will prevent them from sticking together.  Stir in the liquid mixture, and only stir just until it all comes together.  Do not overmix.

Turn batter into prepared pan and sprinkle the top with raw sugar – you won’t believe how crunchy that top will get – pure delight.

Bake at 350 for at least 60 minutes, use a tester to make sure it is cooked in the middle.  Remove from oven to a cooling rack and allow to sit for 15 minutes before removing from loaf pan.

As per my original plans you could just as easily use fresh or frozen blueberries!


Korean BBQ wings, sweet & spicy!

These are the quickest, easiest wings that deliver the most amazing flavour – they hit all those sweet, spicy and sticky notes.

Korean BBQ wings

  • 1.5 pounds chicken wings
  • 1 tbsp olive oil
  • 1/4 cup flour
  • 1/2 tsp salt
  • 1/2 tsp freshly cracked black pepper

Korean BBQ Sauce

  • 6 tbsp low sodium soy sauce
  • 3 tbsp brown sugar
  • 1 tbsp honey
  • 2 tbsp rice vinegar
  • 1 tbsp sriracha sauce
  • 2 tsp minced garlic
  • 2 tbsp sweet chili sauce
  • 1 tbsp water
  • 1 tsp corn starch

Garnish:  

  • sesame seeds
  • thinly sliced green onions

Preheat oven to 400 – use convection if you have it.

Combine flour, salt and pepper in bowl.  Pat wings dry and toss with olive oil, then lightly coat with the flour mixture.  Place on a rack over a baking sheet and put in prepared oven.  Bake for 40 minutes, flipping them at 10 minute intervals.

Prep sauce..

Turn oven to broil, toss wings in sauce and broil for 3 -4 minutes, then turn over and do another 3 minutes or so – watch carefully so they don’t burn!

SAUCE;

In a small sauce pan combine soy sauce, brown sugar, honey, rice vinegar, sriracha, garlic and sweet chili sauce.  Bring to a boil, then mix the water and corn starch together and stir into the sauce mixture.  Return the sauce to a boil, and simmer until it thickens. Set aside.

Garlic with sesame seeds & onions,  and get out the napkins!

KFC cauliflower

Perfect served with these KFC cauliflower bites – so yummy.


Crazy Good NO Knead Focaccia

No Knead Focaccia 2

You are going to love this … soft, chewy, and the best focaccia you could possible imagine.  Can’t you just smell it from the photo?  Yum.

  • 2 1/2 tsp active dry yeast (or 1 pack)
  • 2 tsp honey
  • 2 1/2 cups lukewarm water
  • 1 tbsp kosher salt
  • 5 cups all purpose flour
  • 6 tbsp extra virgin olive oil – divided
  • 4 tbsp butter
  • flaky sea salt
  • 2-4 garlic cloves

Whisk 1¼-oz. envelope active dry yeast (about 2¼ tsp.), 2 tsp. honey, and 2½ cups lukewarm water in a medium bowl and let sit 5 minutes (it should foam or at least get creamy; if it doesn’t your yeast is dead and you should start again—check the expiration date!).

Add 5 cups (625 g) all-purpose flour and 1 Tbsp. kosher salt and mix with a rubber spatula until a shaggy dough forms and no dry streaks remain.

Pour 4 Tbsp. extra-virgin olive oil into a big bowl that will fit in your refrigerator. This puppy is going to rise! Transfer dough to bowl and turn to coat in oil. Cover with a silicone lid or plastic wrap and chill until dough is doubled in size (it should look very bubbly and alive), at least 8 hours and up to 1 day. If you’re in a rush, you can also let it rise at room temperature until doubled in size, 3–4 hours.

Generously butter a 13×9″ baking pan, for thicker focaccia that’s perfect for sandwiches, or an 18×13″ rimmed baking sheet, for focaccia that’s thinner, crispier, and great for snacking. The butter may seem superfluous, but it’ll ensure that your focaccia doesn’t stick. Pour 1 Tbsp. extra-virgin olive oil into center of pan. Keeping the dough in the bowl and using a fork in each hand, gather up edges of dough farthest from you and lift up and over into center of bowl. Give the bowl a quarter turn and repeat process. Do this 2 more times; you want to deflate dough while you form it into a rough ball.

Transfer dough to prepared pan. Pour any oil left in bowl over and turn dough to coat it in oil. Let rise, uncovered, in a dry, warm spot (like near a radiator or on top of the fridge or a preheating oven) until doubled in size, at least 1½ hours and up to 4 hours.

Place a rack in middle of oven; preheat to 450°. To see if the dough is ready, poke it with your finger. It should spring back slowly, leaving a small visible indentation. If it springs back quickly, the dough isn’t ready. (If at this point the dough is ready to bake but you aren’t, you can chill it up to 1 hour.) Lightly oil your hands. If using a rimmed baking sheet, gently stretch out dough to fill (you probably won’t need to do this if using a baking pan). Dimple focaccia all over with your fingers, like you’re aggressively playing the piano, creating very deep depressions in the dough (reach your fingers all the way to the bottom of the pan). Drizzle with remaining 1 Tbsp. extra-virgin olive oil and sprinkle with flaky sea salt. Bake focaccia until puffed and golden brown all over, 20–30 minutes.

No Knead Focaccia 3

Rising with bits of oil throughout, this little fella has filled the bowl!

No Knead Focaccia 4

It’s pretty darn cold outside today, but this is sitting with the sun streaming in the window and the radiator near …. it rose beautifully.

No Knead Focaccia 1

Just look, 2 hours later it is fluffy and puffed right to the brim.

No Knead Focaccia 5

This is the part where you could get as interesting as you like …. add olives, or rosemary, or little tomato slices ….

I stopped before this last step, just because I wasn’t sure the 12, 9 & 6 year olds at the table wanted the garlic …. but next time!!!

Hold off on this last step until you’re ready to serve the focaccia: Melt 4 Tbsp. unsalted butter in a small saucepan over medium heat. Remove from heat. Peel and grate in 2–4 garlic cloves with a Microplane (use 2 cloves if you’re garlic-shy or up to 4 if you love it). Return to medium heat and cook, stirring often, until garlic is just lightly toasted, 30–45 seconds. (Or, if you prefer raw garlic to toasted garlic, you can grate the garlic into the hot butter, off heat, then brush right away.)

Brush garlic-butter all over focaccia and slice into squares or rectangles.

Focaccia Art 1

Too much time on my hands …. the Covid- 19 Coronavirus has us all hunkered down in our homes …. look what happens when you can’t go anywhere …

Focaccia Art 2

I was afraid how things would look after baking, but it’s pretty good!

I’ve reposted this from Bon Appetit “Basically” as part of their baking series, it is amazing!!!


Yellow Cake with Chocolate Buttercream

Stella arrived to the orchard with a plan …. an easy cake that she could frost with a chocolate icing.  This cake fit that description perfectly, and we were all blown away by how absolutely delicious it was.

yellow cake 1

Cake Ingredients

  • 2 and 1/4 cups (266g) cake  flour
  • 2 1/4 tsp baking powder
  • 1/4 teaspoon baking soda
  • 1/2 teaspoon salt
  • 1 cup (230g) unsalted butter, softened & at room temperature
  • 1 and 3/4 cups (350g) granulated sugar
  • 2 large eggs, at room temperature
  • 2 teaspoons pure vanilla extract
  • 1/2 cup (120g) sour cream, at room temperature
  • 1 cup (240ml) whole milk, at room temperature

Chocolate Fudge Frosting

  • 1 cup (230g) unsalted butter, softened & at room temperature
  • 4 and 1/2 cups (540g) confectioners’ (icing) sugar
  • 3/4 cup (65g) natural unsweetened or dutch-process cocoa powder
  • 1/2 cup (120ml) whole milk
  • 1 Tablespoon light corn syrup*
  • 2 teaspoons pure vanilla extract
  • 1/8 teaspoon salt
  • optional: rainbow sprinkles or lightly toasted pecan pieces – roughly chopped

Instructions

  1. Preheat oven to 350°F (177°C). Generously grease and lightly flour a 12×17 inch half sheet/jelly roll pan. Set aside.  SEE BELOW TO ADJUST FOR DIFFERENT PAN SIZES
  2. Whisk the flour, baking powder, baking soda, and salt together in a large bowl. Set aside. Using a handheld or stand mixer fitted with a paddle attachment, beat the butter on high speed until smooth and creamy – about 1 minute. Add the sugar and beat on high speed for 3 full minutes until creamed together fairly well. Scrape down the sides and up the bottom of the bowl with a rubber spatula as needed. On medium-high speed, add 1 egg at a time, beating well after each addition until both are mixed in. On high speed, beat in the vanilla extract and sour cream. Scrape down the sides and up the bottom of the bowl with a rubber spatula as needed.
  3. With the mixer running on low speed, add the dry ingredients to the wet ingredients alternating with the milk. Mix each addition just until incorporated. Do not overmix this batter. The batter will be smooth, velvety, and slightly thick.
  4. Spread the cake batter into the prepared pan. Smooth it out into a thin, even layer. Bake for 20-22 minutes or until the top is lightly browned and a toothpick inserted in the center comes out clean. Make sure you rotate the cake pan once or twice during bake time if your oven has hot spots. Remove from the oven and allow the cake to cool in the pan placed on a wire rack. As the cake is cooling, make the frosting.

Frosting Instructions

  1. Make the frosting: Using a handheld or stand mixer fitted with a paddle attachment, beat the butter on high speed until pale, smooth, and creamy – about 4 full minutes. Sift the confectioners’ sugar and cocoa together. On low speed, gradually add the sugar/cocoa mixture, followed by the milk, corn syrup, vanilla, and salt. Beat for 1 minute. Turn the mixer up to medium-high speed and beat for 3 full minutes. If the frosting is too thick, add a splash more of milk.
  2. Frost cooled cake and top with sprinkles. Slice and serve. Cover leftovers tightly and store in the refrigerator for up to 5 days.
  • Make Ahead & Freezing Instructions: Cake can be made 1 day in advance, covered tightly at room temperature, and then frosted before serving. Frosting can also be made 1 day ahead of time– cover tightly and keep in the refrigerator. Frosted or unfrosted cake can be frozen up to 3 months. Thaw overnight in the refrigerator before serving.
  • Sour Cream: Full-fat sour cream lends the best flavor! You can use plain yogurt instead. I suggest a full-fat variety.
  • Milk: Whole milk is best– the fat is what gives this cake it’s wonderfully rich texture. You can use 2% instead– or even buttermilk!
  • Corn Syrup: This tiny bit of corn syrup makes the frosting uniquely glossy and shiny. You can leave it out if you’d like.
  • Different Size Cakes & Cupcakes: you can use this recipe to make a 9×13 cake. Same oven temperature, just bake for about 35-40 minutes. You can also use this recipe to make about 18-20 cupcakes. Fill cupcake liners halfway. About 20 minutes bake time, same oven temperature.  
  • Frosting:  This makes enough for the larger size pan, or a layer cake, or to frost 18-20 cupcakes.  If you are making this in a 9×13 pan, you will only need about half.  Either halve the recipe or freeze some for another day, it freezes well.

yellow cake 9

yellow cake 3

Team Effort!

yellow cake 11

yellow cake 10

yellow cake 8

Sloan helping Liv keep the beaters upright …. don’t skip the beating time – in fact, use your timer and you will be amazed at how much fluffier your butter gets.

yellow cake 7

Best part of any baking project, right??

yellow cake 2

These kids …..

yellow cake 6

Stella was firm on the design …. she wanted smooth icing (thanks Sloan for doing that), then she wanted to create spikes ….. took a few tries, but she got it exactly the way she wanted, and then decided it needed a few pecans toasted and sprinkled over top.

yellow cake 4

Stella came up with the pecans for a topping and it was just perfect!

yellow cake 5

Total winner!  And, we are total winners with these 3 little sweeties.

I copied this entirely from Sally’s Baking Addiction, I’ve loved every one of her recipes that I have tried, and my 9 year old granddaughter Sloan insisted I get it on here right away so we don’t forget this recipe!