Oven Roasted Chicken Breasts

These chicken breasts will convince you that a quick delicious meal can be on your table in 20-30 minutes.  In the time this takes to roast you can have some rice made and vegetables sautéed for a complete dinner.

Chicken breast 2

These chicken breasts were so moist that the juices just glistened.

JUICY CHICKEN BREASTS – super easy, super quick and delicious!

  • Always season your chicken breast, not just salt and pepper but choose your favorite spices and herbs. Make sure to pat the chicken dry first before seasoning because moisture causes steam which will prevent your chicken from browning.
  • Don’t be afraid to add a little bit of fat like olive oil or butter. Chicken breasts need some fat to keep them juicy and flavorful.
  • If you’ve got the time, brine your chicken for 2 to 4 hours in a solution made with water, salt and other things you may prefer like soy sauce or beer. Basic brine ratio is 1 tbsp salt to 1 cup of water.
  • Baking time can vary depending on the thickness of the breasts, so invest in an instant read thermometer for best results. Cooking time is generally 20 to 30 minutes, or until the internal temperature registers 165 F degrees.
  • It’s important to take it out of the oven right then and allow it to rest for all those juices to evenly distribute throughout the chicken breast.
  • Save the pan drippings and use them to drizzle over the chicken for extra flavor!
Chicken Breast

I used paprika, garlic powder, Italian seasonings as well as salt and pepper.  The secret is to use way more seasoning than you think you will need, and top with a pat of butter.  That butter seeps down into the chicken and also helps to create those delicious pan juices.

I don’t usually love plain chicken breasts without stuffing, or crispy skin but these breasts are so moist and delicious I loved them, and so will you.  I found this recipe on “Jo Cooks” and couldn’t believe how quick and easy it was for this amount of flavour.

Beef Rouladen

European heritage means we’ve eaten our fair share of Rouladen.  Growing up we always thought we were Austrian German, but it turns out there is more Romanian heritage in us than we thought.  And, of course throw in an Irish Nana and and English Granddad and you have the Heinz 57 of DNA.

Rouladen 4

I used to always put carrot in with the pickles in the rouladen, but Grant doesn’t like either pickles or cooked carrots ….. sigh.  I love the flavour though, so compromised by only putting pickle in the roll up, and nestling carrots in with the gravy.  Total win win.

Ingredients

Rouladen:

  • 4 boneless round steaks very thin, about 4 inches wider x 7 inches long (often you can actually find a rouladen cut ready made)
  • Salt and pepper
  • Paprika
  • 4 Tbsp whole grain mustard or Dijon, regular yellow mustard
  • 8 slices bacon
  • 1/2 cup onion finely diced
  • 4 baby dill pickles halved or larger dill pickles quartered. Sweet pickle is also an option here.
  • 2 Tbsp olive oil
  1. Preheat oven to 350 F.
  2. If you weren’t able to find preprepared meat, then prep the rouladen by pounding out the beef until they are 1/4 inch thin and about 5 inches wide by 9 inches long. Sprinkle with salt, pepper and a sprinkling of paprika. Spread 1 Tbsp of whole grain mustard over each of the 4 pieces of beef. Place two pieces of bacon over each piece of beef, side by side, trimming any part of the bacon that extend over the ends. Scatter each with diced onion, dividing evenly between the four pieces. With the widest end of the short side facing you, place two pickle halves end to end about 1 1/2 inches from the end. It’s ok if they stick out the side at this point. Take the end closest to you and fold it up and over the pickles. Continue rolling by lifting and rolling until it is completely rolled. Take a skewer and secure the end of the roll to the main part of the roll, so it doesn’t unroll. Trim any excess pickle sticking out the sides so it is even with the sides of the roll. Roll up the remaining beef pieces similarly.
Rouladen 2

They already look good ….. you could use more pickle in these, but as I mentioned, it isn’t Grant’s favourite, so this worked out fine.

Rouladen 1

Assembly line!


Gravy:

  • 2 cups beef broth
  • 2 Tbsp red wine can omit or replace with a couple of teaspoons of red wine vinegar
  • 1 Tbsp tomato paste or ketchup, in a pinch
  • 1 tsp Dijon mustard or regular mustard
  • Pinch paprika
  • Salt and pepper to taste
  1. Stir together the gravy ingredients in a medium bowl and set aside.
Rouladen 3

All rolled up and ready for browning before a low slow oven roast.  Be prepared for your house to smell amazing.

Method:

  1. In a Dutch oven or large, heavy bottomed, oven-proof dish with a lid, heat olive oil over medium-high heat. Add the beef rolls to the pan, skewer/seam side down. Sear for a few minutes until lightly browned, then flip over and sear the other side. Place the rolls on their sides if necessary to sear the entire outside of each of the rolls.
  2. Once rolls are browned, add the prepared gravy mixture to the pan. Stir gently to scrape up any browned bits on the bottom of the pan. Bring liquid to a boil over medium-high heat, then cover pot and place in the preheated oven.
  3. Cook, covered in the oven until tender, about 1 – 1/2 hours (depending on the size of your rolls), flipping rolls over a couple of times during the cooking period.

To thicken gravy:

  • 2 Tbsp cornstarch
  • 2 Tbsp cold water
  1. Remove pot from oven and use tongs to remove rolls to a plate. Carefully remove the skewers from the rolls and discard, then cover plate loosely with foil while you thicken the gravy.
  2. Place pot on the stovetop over medium-high heat. Combine cornstarch and cold water in a small bowl and add to liquid in pot. Bring mixture to a boil, stirring, until thickened. If necessary, add a bit more cornstarch/water to gravy if not thick enough. Taste gravy and add additional salt, pepper and paprika, to taste.
  3. To serve, cut rolls in half diagonally in the middle. Place halves on side mashed potatoes and spoon gravy over-top. Garnish with chopped parsley, if desired.

Rouladen used to be a meal on a regular rotation in our house, but somehow I got away from it.  This long, unrelenting winter had me craving it all over again, but I couldn’t find our family recipe …eek.  Thank goodness I found this one from “Seasons and Suppers” which was the closest I could find to the way I remembered doing it.  So glad I did, it was delicious.  We served it with mashed potatoes, but it works equally well with broad egg noodles ….anything to soak up that luscious gravy.

Halibut Veracruzana

halibut veracruzana

This is one of those recipes that is more a guideline.  Inspired by the flavours of fish we’ve had served in the style of Veracruz in Mexico, this is so easy to prepare at home, and if you have a good source of fish, give it a try!

You will need:

  • enough fish to feed your family (I’ve used halibut here but any white fish will work)
  • green olives
  • fresh tomatoes
  • black olives
  • capers
  • roasted red peppers
  • fresh red peppers
  • your best olive oil
  • lemon
  • sea salt & pepper

Generously butter a baking dish (extra points for using a pretty one that you can also serve this dish in!)

Lay in your fish, cut in serving size.

Chop the olives, peppers and fresh tomato, and then cover your fish with all the toppings.  Again, be generous with seasoning – liberally sprinkling salt and pepper over it all.  Then – squeeze a whole lemon and drizzle olive oil over the top.

Roast at 375 just until fish flakes nicely.  This will entirely depend on the thickness of your fish, so watch it carefully and check after 10 minutes.

Serve over rice, with a bright, crunchy salad on the side.  Add crusty bread to soak up those juicy drippings and you’ve got a quick easy dinner good enough for company.

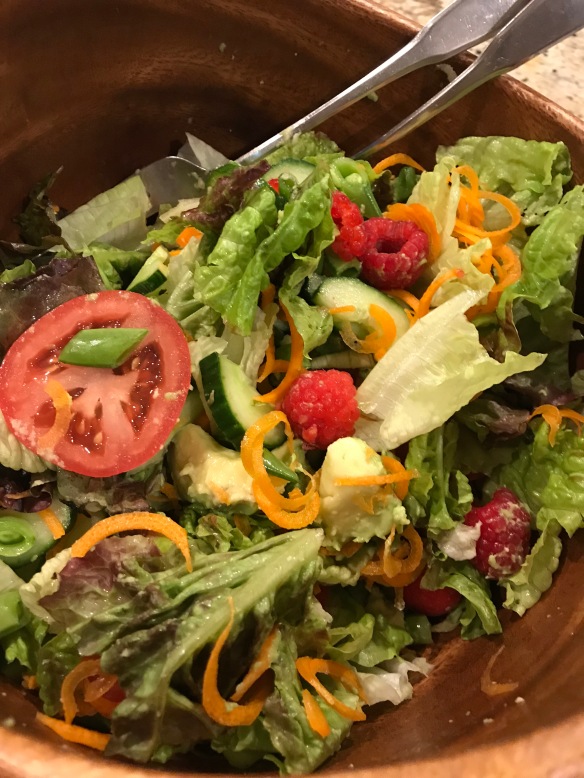
Tossed Salad

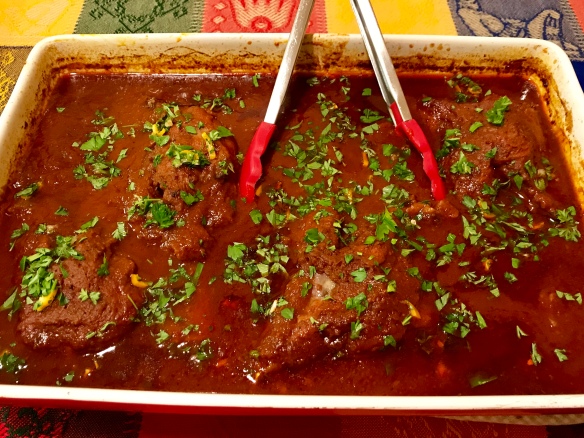
Braised Lamb Shanks

The fall days just make me think of hearty, wholesome meals and this lamb shank is the best way to celebrate staying indoors and getting cozy.  The added bonus is that your house will smell dreamy while they slowly roast.

Lamb shank 5

  • 4 lamb shanks
  • salt & pepper
  • all purpose flour
  • olive oil
  • 2 yellow onions, diced
  • 3 celery ribs, diced
  • 2 carrots, diced
  • 2 cups red wine (make sure you use good wine, something you want to sip while the lamb is roasting)
  • 1 cup beef stock
  • 3 garlic cloves, crushed
  • 2 bay leaves
  • 2 ancho chiles, rehydrated in hot water for 20 minutes
  • 2 sprigs fresh rosemary
  • 1 tbsp smoked paprika
  • 1 14 ounce tin of good canned tomatoes

Garnish:  1 minced garlic clove, 1 small diced chili, and a small handful of parsley, all chopped and mixed.

Season lamb shanks with salt and pepper, then dust with flour.

Preheat oven to 300

Heat oil in braising pan, large enough to hold all 4 shanks in one layer.  Brown shanks all over, taking care not to overcrowd the pan.  You may have to do this in stages.

Remove shanks to keep warm while you reheat the pan, add a bit more oil and saute the onions, carrots & celery until they have softened.

Lamb shank 1

Deglaze the pan with red wine, stirring to get all the bits of goodness off the bottom.  Add beef stock, garlic cloves, ancho chili (stem and seeds removed), rosemary, paprika and tomatoes.  Stir well and nestle the lamb shanks back into the mixture.  Cover tightly and put in the oven.

Lamb shank 2

Relax with that wine …… enjoy the aromas coming out of the kitchen ….

This recipe is so forgiving – if you have more time roast at a lower temperature, if you are short, move the temperature up to 350 or 375 and shorten your cooking time.

Check for doneness and as soon as cooked through remove the lamb shanks from the braising liquid and set aside.

Lamb shank 3

The lamb is cooked, but not yet falling off the bone tender, and that is what you are looking for.

Lamb shank 4

At this point, if you want a clear stock, strain the solids off.  If you don’t mind a more rustic stock use your immersion blender or standard blender (if using a standard blender BE SURE to leave the lid off or some place for steam to escape … trust me on this).

Nestle those lamb shanks back into the liquid and continue to roast until the meat literally falls off the bone.

When ready to serve, sprinkle the garnish over top and prepare to enjoy the feast.


Butternut Squash Salad

Roasted squash, crunchy pepitas, salty feta, and tart pickled red onions.  This salad has it all, and can be served warm or cold.  Make a big batch it keeps so well.

Butternut Squash Salad


1 butternut squash (about 2 pounds)

5 to 6 tablespoons olive oil, divided
Salt and freshly ground black pepper, to taste

1 cup cooked barley

Barley

1 cup chopped fresh kale, massaged well until it is bright green

Kale, massaged

Look how much brighter the massaged kale is, compared to the kale at the bottom of the photo.  Massaged kale is more tender and easy to digest also.

1/3 cup toasted salted pepitas (pumpkin seeds)
3 ounces feta cheese
1 tablespoon sherry vinegar
1 tablespoon water
1/2 teaspoon table salt
1/2 teaspoon granulated sugar
1/2 small red onion, finely chopped

preheat oven to 375

Peel squash and cut into bite size pieces.  Toss with olive oil, sprinkle with salt and lots of freshly ground pepper, and roast until tender, about 30-40 minutes.

To cook barley put 1/2 cup dry barley into saucepan with 2 cups water (or chicken stock for extra flavour).  Boil for 5 minutes, then turn off the heat and allow to sit for 1 hour.  Drain well.  You can easily do this a day ahead.

Dice red onion finely, and set aside in small bowl or jar.  Combine the sherry vinegar, water, salt and sugar and stir until well dissolved.  Pour over onions and allow to sit for at least 30 minutes.  You can also do this ahead of time, in fact I often have a jar of these in my fridge as they are amazing on salads, sandwiches and of course tacos!

Pickled red onion

Just love the bright colour pickled red onions get, with a gorgeous pink vinaigrette.  Yum.

The pumpkin seeds I have on hand all the time aren’t salted, so I toasted them in a little bit of olive oil, with a sprinkle of fresh sea salt.  They were so delicious I kept nibbling at them, good thing I ended up with enough for the salad.

When squash is ready, toss in a large bowl with all the other ingredients and about 3 tbsp  olive oil.

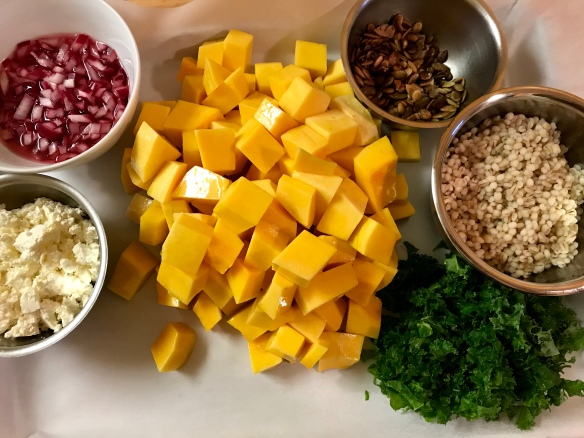
Butternut squash salad prep

Get everything ready ahead of time, and once the squash is roasted toss it all together.

Credit for this amazing salad goes to Smitten Kitchen, Deb used faro and I used barley but you can use any grain you like.  The kale was my idea too, had some in the fridge and thought it would add a nice pop of colour and texture, it did!

Roasted Marinated Sweet Red Peppers

It’s true, going through all the steps to grill and prepare these peppers does take a little bit of time.  Pick a sunny day and the sweet smell of them grilling will be enough payback.  Do enough for a dinner side dish also!  In the middle of winter when you open a jar you will immediately be transported back to that summer day.  I love using these in so many different appetizers, slivered in a salad or pasta or just served with a grilled steak.

Red pepper 4

These sweet peppers are an amazing way of capturing the tastes and smells of summer in a jar.

4 pounds firm, fresh and cleaned red bell peppers

Lightly oil peppers and sprinkle with salt and pepper.  Grill until charred in spots and softened.  Put in bowl, cover tightly and allow to sit for 15 minutes until you can easily slip the skins off.   If you don’t have a barbecue you can also do this over an open flame or in your oven with the broiler unit.

Red pepper 1

MARINADE

  • 1 cup bottled lemon juice
  • 2 cups white vinegar
  • 1 cup olive oil
  • 2 cloves garlic, quartered
  • 1 1/2 tsp salt

Bring all marinade ingredients to boil in a saucepan.

Red pepper marinade 2

In most cases I would suggest squeezing fresh lemon juice, but in this instance the consistency and acidic content of bottled lemon juice is what you need.

If you want to use these within a few weeks, just fill the jars with peppers and pour the boiling marinade over.

Red pepper 3

Seal and keep in the fridge.

SEALING AND PRESERVING

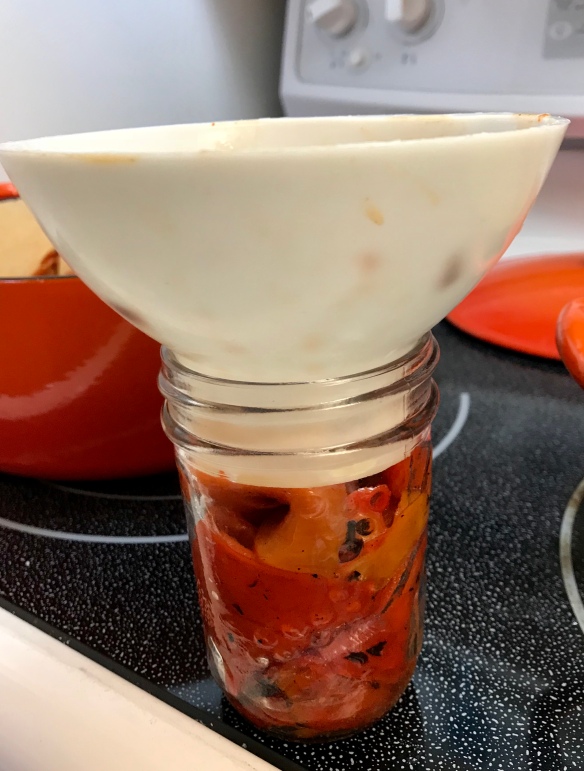
Scald jars in boiling water and heat canning lids and sealers in boiling water.  Fill jars with peppers, immediately fill to within 1/2 inch of the top.  Quickly close the jars with lids and sealers and boil in canner for 15 minutes.


Ginger Garlic Sticky Chicken Thighs

Ginger Garlic Chicken Thighs

It’s really important to allow the sauce to reduce before coating the chicken thighs.  This allows the flavours time to play together and makes these chicken bites finger licking good!

SAUCE

8 skinless, boneless chicken thighs

Combine all sauce ingredients in a small sauce pan, and over medium heat allow to gently boil, stirring occasionally until sauce has thickened and reduced slightly.

Allow to cool, then coat chicken in sauce generously and convection roast at 375 until cooked through ….. 30-35 min depending on the size of your chicken thighs, turning half way through.

Turn broiler on and allow to brown – watching carefully!

Sprinkle with toasted sesame seeds and sliced scallions.


Perfect Pulled Pork

During the winter months we just can’t use our smoker ….. too cold, it’s buried under snow and nobody wants to be out there checking the temperature.  I have a perfectly acceptable and delicious slow cooker recipe for pulled pork, but I’ve been looking for one that roasts low and slow in the oven for those crispy bits around the outside.  I found this one on a website:  www.kevinandamanda.com

Pulled pork rice bowl

I know, I know …. pulled pork sammies are the way to go, but we have not been eating a lot of wheat products, so for the second night we had “pulled pork bowls” and you know what???  I liked it even better!

It’s rare that I don’t make any changes, but this was phenomenal just the way it was written, and we all devoured it.

1 4-5 pound pork shoulder (butt) roast

Dry Rub

1 tbsp ground cumin
1 tbsp garlic powder
1 tbsp onion powder
1 tbsp chili powder
1 tbsp cayenne pepper
1 tbsp salt
1 tbsp ground pepper
1 tbsp paprika
1/2 cup brown sugar

Brine Solution

1/2 cup salt
1/2 cup brown sugar
8 cups cold water
3 tbsp dry rub mix
2 bay leaves

Add salt to cold water and stir very well until all the salt is completely dissolved. Then add the brown sugar and dry rub and stir well to combine.

Rinse the pork shoulder in cold water and place in a 2 gallon ziploc bag (or a container big enough so the shoulder is completely covered in brine solution). You can add more water if necessary to completely cover the pork.

And add two dried bay leaves.

And refrigerate for at least 12 hours. 24-36 hours is best. I usually do it about 24 hours. Make sure that however you keep it, either bag or container – that it is completely submerged.

At least 12 hours later…

Preheat oven to 225 degrees F. (Yes, 225 degrees, that is not a typo :)) Remove the pork shoulder from the brine solution and place in the roasting pan

Pat the skin dry with paper towels so you’ll get a nice, crisp crust.

Generously, generously, cover the WHOLE thing in your dry rub mix.And massage it into that skin real good. Be sure and get it up under any flaps you may come across.  Make sure the fat layer is on TOP.

Place uncovered in a 225 degree F oven on the middle rack.  This is totally adjustable.  The original recipe had the roast cooking for 13 hours, but I just didn’t have that much time.  I adjusted the temp to 250 for a 4 1/2 pound roast, and it took about 6 hours.

When shoulder has reached 200 degrees, turn off the oven and let the roast rest for about 2 hours before removing from the oven.  Keep the thermometer in the meat, so you can monitor the temperature. If the bottom of the pan is dry (or crusted with dried spices) cover the pan with foil to retain internal moisture of the meat during the resting period. Mine still had a lot of moisture in the bottom, so I didn’t cover mine.

Pulled Pork 1

After a couple hours, when the temperature drops to 170 degrees or slightly lower, remove the shoulder from the oven.

Remove the large sheet of crusted fat on the top. Using two large forks, begin pulling the meat apart. It will fall apart *very* easily and it should not take you long at all to pull apart this whole roast.  If you can stop yourself nibbling while you do this, it will feed quite a crowd!

Pulled Pork

Serve on buns with creamy cole slaw and prepare to be licking your fingers. My recipe for:

Jean’s creamy cole slaw 

2/3  cup mayonnaise

1/4 cup dijon mustard

1 tsp celery seed

1 tsp sugar

juice of 1/2 lemon

salt & pepper to taste


Blend well, and keep tasting – should have a nice balance of sweet and tangy.


Pumpkins Pumpkins Pumpkins


pumpkins-anyone

Pumpkins, anyone?????  It’s October and pumpkin season in the Okanagan.  These adorable little pumpkins are super for decorating, and make the best pumpkin flesh.  Roast up a few, and freeze it for using in the middle of winter when pumpkin season is just a memory.

fullsizeoutput_45e6

I like oven roasting my pumpkins, seems to intensify the flavour and – not only that, super easy!

Cut pumpkins in half, scoop out seeds and turn upside down on roasting pan (I like to cover with parchment paper for easy clean up)

fullsizeoutput_46eb

Set those yummy pumpkin seeds aside for another day …. roasted with some seasoning they are a great snack or addition to salads!

fullsizeoutput_46ea

Once you scoop out the roasted pumpkin flesh, use an immersion blender to puree it all, then turn it into a heavy bottom pot and allow to reduce slightly …. (4 cups pumpkin flesh should reduce to 3).  Removing some of this water makes for more flavourful pumpkin flesh.


Oven Roasted Tomato Sauce

img_9447

At this time of year the tomatoes are plentiful, and I do not like to see any go to waste …. also don’t have quite enough time to can it all!  This is my go to, for whatever amount of tomatoes I have ripe at the time.

Fill a roasting dish with tomatoes, (roughly chopped, skin on), garlic, onion, sweet peppers and entire stalks of fresh herbs.  (I also sneak a few carrots in there) Drizzle over some good quality olive oil, salt and pepper.  Roast at 350 for 2-4 hours, very flexible.  This also works in the crockpot.

img_9404

Allow to roast until reduced by about half.  Remove the stalks of fresh herbs, they have done their job …..

img_9450

Puree with immersion blender or food processor (if you use processor make SURE you have left room for steam to escape or this can be a nasty experience).  Stir in 1 small tin of tomato paste and season to taste with salt and pepper.

img_9451

Depending on the acidity of your tomatoes, you might like to stir in a bit of sugar, but taste first.img_9396

It is easy to just put the cooled sauce in a marked freezer bag, and put it in the freezer to enjoy all winter long.