Bright Crunchy Thai salad with Peanut Lime Dressing

Brighter skies, longer days, and warm temperatures mean I’m looking for meals that are lighter and feel so good to eat!  The flavours of this dressing are so good you are going to want a big batch to keep in the fridge – use it to dip any fresh vegetables in.

Sesame chli lime cashews 3

Served tonight with some lightly garlic buttered prawns …. a perfect meal.

Dressing

  • juice of 2 limes
  • zest of 1 lime
  • 2 tbsp fish sauce
  • 2 tbsp Ponzu sauce
  • 3 tbsp sweet chili sauce
  • 1 – 2 tsp grated or minced garlic (to your taste)
  •  1 tbsp grated or minced ginger
  • 1 tbsp peanut butter
  • 1 tbsp sesame oil
  • 1/4 cup cilantro (the stems are perfect for this, they pack so much flavour – just mince a bit before putting in the blender
  • 1/3 cup roasted peanuts

Combine all ingredients in blender and whiz up until smooth and creamy.

Gather up all the vegetables that scream fresh to you and make an awesome crunchy salad.

Lightly seasoned cashews make a fantastic crunchy topping!

In a frypan combine:

  • 1 1/3 cups cashews
  • 1/2 tsp chili powder
  • 1 tbsp sesame oil

Sesame Chili Lime cashews

Toss and heat until cashews are lightly browned and then cook for a further minute with:

  • 1 tbsp honey
  • zest of 1 lime
  • 2 tbsp black sesame seeds (lightly toasted)

Remove from heat and allow to cool.

Sesame chli lime cashews 2

This dressing makes more than you will need.  If you want to make a complete meal out of this, then scoop out about 1/2 cup and marinate a protein for grilling.  It works equally well with flank steak or chicken.  I haven’t tried it with tofu, but I’m sure it would be great.  Grill steak or chicken and allow to rest at least 15 minutes before slicing.  Cool before serving with the salad.

Kale & Mushroom Risotto

I love this risotto!  It has just a hint of parmesan, rather than being driven by parmesan richness.  It is creamy, and a delicious side dish.  Add some grilled prawns and you’ve got a complete meal.

Risotto 6

This creamy risotto packs a vegetable punch with loads of kale and mushrooms.

  • 6 to 8 cups chicken broth
  • 2 cups mushrooms
  • 1 large shallot
  • 1 bunch kale
  • 2½ tablespoons butter
  • ½ teaspoon kosher salt
  • 1 ½ cups Arborio rice
  • ¾ cup white wine or brandy
  • ¾ cup Parmesan cheese
  • ½ tsp kosher salt
  • Fresh ground pepper


Place broth in a medium sauce pan and heat to a simmer; reduce heat and keep warm.

Clean and chop the mushrooms and kale. Mince the shallot.

Risotto 1

This photo may not show enough kale, but I usually have equal amounts of kale and mushrooms.

In a large heavy-bottomed skillet, pot or Dutch oven, heat 2½ tablespoons butter over medium high heat. Add the shallot, mushrooms, kale, and ½ teaspoon salt, reduce heat to medium, and cook until translucent, stirring often, about 3 minutes.

Risotto 3

Love the bright kale against the earthy mushrooms.

Add 1½ cups Arborio rice and stir to combine, about 2 minutes. Increase heat to medium-high and add ¾ cup white wine. Cook, stirring, until liquid is almost evaporated, a few minutes.

Risotto 2

At this point, you’re ready to start adding the broth. Add ½ cup warmed broth to skillet. Cook, stirring frequently, until broth is almost absorbed. Repeat, gradually adding broth ½ cup at a time and stirring, until rice is tender but still al dente and sauce is creamy (you may not need all the broth). The process should take about 20 to 25 minutes.

Risotto 4

Stir in ¾ cup Parmesan cheese. Continue to stir until combined (or turn off the heat and cover the dish for a few minutes). Remove from heat and season to taste with kosher salt and pepper. Serve immediately, garnished with Parmesan cheese.

Risotto 5

This is very flexible – tonight’s version included crimini and Portobello mushrooms, but you could use any variety you like.  To make a vegetarian version use vegetable stock.  Make sure you love the flavor of your stock, so important to the finished product. This will lose its creaminess if you can’t serve it right away, so keep a little of the warmed broth if you need to soften it up a bit.

Citrus Loaf

I love the bright citrus flavour of this loaf.  Easy to make, and easier to eat!

Citrus loaf 5

This loaf takes little more than 10 minutes to put together, and while it is baking the citrus aroma is fantastic.

  • 1 medium lemon
  • 1 medium orange
  • 2 1/4 cups all purpose flour
  • 1 1/2 tsp baking powder
  • 3/4 tsp salt
  • 1 cup plus 2 tbsp sugar
  • 3/4 cup butter (I use salted for baking)
  • 3 eggs
  • 1/2 cup milk

Preheat oven to 375 degrees.

Grate 1 tbsp peel from lemon and squeeze 1 tbsp juice, set aside.

Grate 1 tbsp orange peel and squeeze 5 tbsp juice, set aside.

Citrus loaf 1

Citrus loaf 2

Stir the wet ingredients into the larger bowl, and mix only until just holding together.  If you mix it too much the dough won’t be quite as tender.

In large bowl cut softened butter into flour, baking powder, salt and 1 cup sugar.  Stir in peel.  In small bowl beat eggs, milk and4 tbsp orange juice lightly.  Stir into flour mixture just until flour is moist.  Do not over mix!

Spoon into greased and lightly floured loaf pan, baking for 1 hour.  Test, and when you tester comes out clean, remove from oven and allow to rest 10 minutes in loaf pan before removing.

citrus-loaf-3.jpg

If you line the loaf pan with parchment paper it makes removal quick and easy.


In saucepan, heat lemon juice, 1 tbsp orange juice and 2 tbsp sugar until boiling.  Cool, stirring, for about 3 minutes.  Brush over loaf once it has cooled off a bit, but not cold.

Citrus loaf 4

Boil the juices and sugar long enough for the syrup to thicken slightly, then remove from heat.

Citrus loaf 6

Every bite is light, juicy, citrusy and that glaze over the top is absolutely divine.


GARLIC HERB BUTTER MUSHROOMS

This is the quickest, easiest and least hands on side dish for your dinner table.  Also, goes perfectly wth a perfect medium rare steak …..

Mushrooms 3

Delicious!  I couldn’t believe how tasty these morsels were – make more than you think you will need, they are sure to disappear in a hurry.

INGREDIENTS

  • 1/4 cup unsalted butter, melted
  • 4 cloves garlic, minced
  • 1 tablespoon freshly squeezed lemon juice, optional
  • 1 teaspoon dried thyme
  • 1/2 teaspoon dried rosemary
  • Kosher salt and freshly ground black pepper, to taste
  • 3 pounds cremini mushrooms
Mushrooms 1

I had the fresh herbs on hand, so used those, but dried would work well too.


DIRECTIONS

    • Preheat oven to 375 degrees F. Lightly oil a baking sheet or coat with nonstick spray.
    • In a small bowl, whisk together butter, garlic, lemon juice, thyme and rosemary; season with salt and pepper, to taste.
    • Place mushrooms in a single layer onto the prepared baking sheet. Stir in butter mixture and gently toss to combine.
    • Place into oven and bake for 12-15 minutes, or until browned and tender, tossing occasionally.
    • Serve immediately, with a little fresh parsley.
Mushrooms 2

Just look at the garlic herb butter coating these delicate little mushrooms, ignore my much used mini sheet pan ….

This recipe was from the “damn delicious” website, and if you haven’t checked out her recipes, you certainly should!


Vanilla Bundt Cake

A perfect dessert, delicious but tasty!  This simple vanilla cake can be changed up so easily.  For this version I added some blood orange juice and zest, which worked perfectly with the fruity glaze.

Vanilla Bundt Cake 2

To create the blood orange cake, squeeze the juice from one blood orange into a one cup measure of milk, fill the remaining cup with milk.  Zest one orange and stir into the batter.

INGREDIENTS

  • 2 ¼ cups (315 g) unbleached all-purpose flour
  • 1 tbsp baking powder
  • ½ tsp salt
  • 3 eggs
  • 1 ¾ cups (370 g) sugar1 tsp vanilla extract
  • ½ cup (125 ml) canola oil
  • 1 cup (250 ml) milk

PREPARATION

  1. With the rack in the middle position, preheat the oven to 350°F (180°C). Generously butter and flour a 10 to 12-cup (2.5-3 litre) Bundt pan.
  2. In a bowl, combine the flour, baking powder and salt. Set aside.
  3. In another bowl, beat the eggs, sugar and vanilla at high speed with an electric mixer for about 10 minutes or until the mixture triples in volume and forms a ribbon. Drizzle in the oil while beating.
  4. At low speed, add the dry ingredients alternately with the milk, beating just until smooth. Spread the batter into the pan.
  5. Bake for 45 to 50 minutes or until a toothpick inserted in the centre of the cake comes out clean. Let cool for 15 minutes. Unmould and let cool completely on a wire rack.

Cauliflower & Feta Fritters

O M G – the salty creamy bits of feta combined with the still slightly tender but firm cauliflower bits are enough to make me want these on a regular repeat!!  I often find cauliflower a bit of a hard sell amongst the family members, but this will win over anybody sitting on the cauliflower fence.

Cauliflower 5

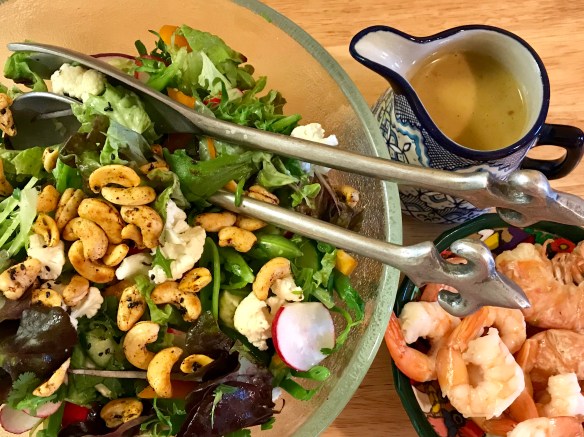
These make a great appetizer or side dish.  Serve for lunch with a green salad, any way you try it, they are a winner.

1 small head cauliflower (1 pound florets, i.e. stems and leaves removed), cut into generous 1 to 2 inch chunks
1 large egg
1 garlic clove, minced
Few gratings of fresh lemon zest
3 ounces crumbled feta (about 1/2 cup)

1/4 cup slivered green onions (optional but I loved the colour and brightness)

1/2 cup all-purpose flour
1/4 teaspoon Aleppo pepper flakes; less if using regular red pepper flakes, which are hotter
3/4 teaspoon table salt or more to taste
1/2 teaspoon baking powder

Cook cauliflower in simmering salted water, uncovered, until tender, about 5 to 6 minutes, until firm but tender. Using a slotted spoon, transfer to a bowl of ice water to stop cooking. Drain well. Spread on towels to dry as much as possible.

Cauliflower 2

Ice water is key to making sure your cauliflower doesn’t get overcooked and retains a bit of texture. Plunge it in right from the cooking liquid.

Cauliflower 3

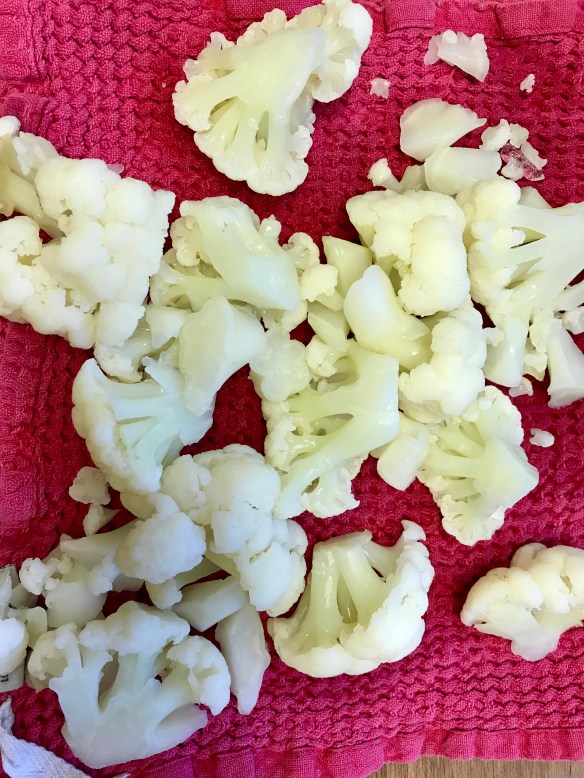
Let the cauliflower drain so they don’t get mushy. 

In the bottom of a large bowl, whisk together egg, garlic and lemon zest. Add cauliflower florets and mash with a potato masher until they’re crushed into an average of pea-sized pieces (i.e. some will be bigger, some smaller, but most will be little nubs).

Cauliflower 4

Sprinkle in feta and stir to combine egg mixture, cauliflower and feta. In a small dish, whisk flour, salt, pepper and baking powder until evenly combined. Sprinkle over cauliflower batter and stir just until combined.

Heat oven to 200 degrees F and place a tray inside. On the stove, heat a large, heavy skillet over moderate heat. Once hot, add a good slick of oil, about 2 to 3 tablespoons. Once the oil is hot (you can test it by flicking a droplet of water into it; it should hiss and sputter), scoop a two tablespoon-size mound of the batter and drop it into the pan, then flatten it slightly with your spoon or spatula. Repeat with additional batter, leaving a couple inches between each. Once brown underneath, about 2 to 3 minutes, flip each fritter and cook on the other side until equally golden, about another 1 to 2 minutes.

Transfer briefly to paper towels to drain, then the tray in the oven to keep them warm until needed. Once all fritters are cooked, mix yogurt with cumin, salt and pepper. Spread fritters on serving platter. Dollop each with cumin yogurt and sprinkle with pomegranate arils.

Do ahead: Fritters both freeze and reheat well. To warm and recrisp them, lay them on a tray and toast them at 400 degrees in the oven until crisp again.
Olive oil for frying

To serve

  • 3/4 cup plain yogurt
  • 1 tsp Italian seasoning
  • 1 tsp fresh basil
  • 1 tsp crushed pink peppercorns
  • 1/2 tsp whole grain mustard
  • squeeze fresh lime juice
  • salt and pepper to taste

Combine all ingredients, and season to taste with the salt and pepper

Full credit for this goes to Deb Perelman of Smitten Kitchen, I only made a few changes, and created my own dipping cream.   She is fritter obsessed, and I am quickly becoming just as obsessed with fritters.  Any vegetable seems to work as a fritter!  I think what sold these as being a bit different is the feta cheese.  Once you fry them up, that feta gets crispy and the flavour just intensifies.

Teriyaki Chicken Rice Bowls

Looking for a quick dinner?  When the grandkids are here, I sure am!  This was perfect, and the girls loved it.  They built their own bowls and tucked right in.

Teriyaki 2

Here was my surprise for the night – Sloan put this together, and then handed it to me.  “Here you go Nana, take a photo now …… it looks pretty good”.  Then she handed me her cilantro before adding her vegetables and digging in.  The cilantro, apparently, was only for the photo!  Yes, it is the only photo I got tonight.  I will have to do it again soon.

Do you know how easy it is to make your own teriyaki sauce?  This recipe is so quick and simple to do you will want to keep a jar of it in the fridge all the time.

TERIYAKI SAUCE

  • 1/2 cup light brown sugar
  • 1/2 cup low sodium soy sauce
  • 4  tbsp rice vinegar
  • 1 tsp ground ginger
  • 2 – 3 garlic cloves, minced
  • 2 tbsp cornstarch

Combine all ingredients in a small sauce pan and bring to a boil.  Allow to boil gently just until sauce has thickened.  Thin with a bit of water if necessary to have it sauce like, and not jelly like!

Teriyaki 3

This jar might not look like much, but this teriyaki sauce is the bomb!  

Cook rice according to instructions.

Cut about 1 pound of chicken breast into bite size pieces, and marinate with a few tablespoons of the teriyaki sauce, while you prep the rest:

Slice a variety of vegetables, whatever you like!

Teriyaki 1

This could so easily be a vegetarian meal – just serve with the stir fried vegetables, or use tofu in place of the chicken.

Prep some toppings:

  • rough chop on cilantro
  • slivered green onions
  • toast sesame seeds

Okay, now things come together quickly!

In a hot wok or skillet, heat a neutral oil and quickly fry the chicken just until cooked through.  Set aside.

Wipe out wok/skillet and heat a bit more oil.  Stir fry vegetables until just crisp tender.

Set everything out and allow everybody to build their own bowls.  Remember to set out your teriyaki sauce to drizzle over.

No Knead Bread, it’s a miracle!

This bread will make you look like a kitchen boss, make no mistake about it.  While you will find recipes everywhere for this ….. and they all tell you to let the dough sit for anywhere from 12-18 hours I am here to tell you you can fake it with as much time as you’ve got!  Yes, you may get a “better” result in that length of time, but throw it together the same afternoon you want to eat it and it will still be a miracle.

bread

You want to know how forgiving this is?  Stella said we needed bread with the spaghetti we were having for dinner ………. so today I tossed it all together about 3:30, let it sit for an hour, and then proceeded with the baking.  It was still amazing!!

I’ve been studying these recipes for no knead bread, mistrusting the whole concept.  After all, generally speaking I do things the long way …. you know that, right?  I think of my kitchen time as yoga, peaceful, calming and S L O W ….. Well, this hit all those boxes except for the slow part …. but it worked so well with a late night dinner. Tuesdays the grandkids have gymnastics, and I don’t get home from taking them until after 6.  So, beef stew leftovers just cried for something special like this to elevate dinner.  The night before I prepped the dough (took all of maybe 5 minutes) and forgot about it until after gymnastics.  Pop it into the oven and you won’t believe the results.

No Knead bread 5

Craggy and crusty on the outside, delicate and textured inside.  I’m hooked.

  • 3 cups all purpose flour
  • 1 1/2 teaspoons salt
  • 1/2 teaspoon instant yeast
  • 1 1/2 cups room temperature water
  1. DOUGH PREP: In a large mixing bowl, whisk the flour, salt, and yeast together until mixed. Stir in the water until a chunky, thick dough forms. If it needs a little more water, add a few more tablespoons, just enough to get it barely wet throughout. It’s gonna look scrappy and weird and you’re going to question me on whether or not this will work, but it will. Cover the mixing bowl with plastic wrap and let it rest for 12-18 hours at room temperature. Overnight is ideal here, kids.
Miracle no Knead bread

That’s it folks!  Stir in the room temperature water to your dry ingredients, and let it sit.  Sure doesn’t look pretty here, but just wait …..

No knead bread 2

Look what happens after it sits overnight!  Soft dough, little bubbles all over and through it.


  1. PREP FOR BAKING: When you’re ready to bake, preheat the oven to 450. Stick a 6 quart enamel coated cast iron Lodge Dutch Oven (or similar) in the oven for about 30 minutes to heat. At this point, the dough should be big and puffy and pretty loose, with little bubbles in it. Gently scrape the dough out onto a well-floured surface. (Remember: NO KNEAD.) Gently shape it into a ball with flour on the outside, set on a piece of parchment, and cover with plastic while your pan heats up.
No Knead bread 3

Prep …. ha ha …. today that consists of tossing a little flour onto a piece of parchment paper, and then gently turn out your dough onto the flour.  Roll it around just so that flour gets all over the surface, and under the dough.  Leave it on the parchment, and gently lift the whole package by the parchment and set it into the heated pan.


  1. BAKE: Remove the plastic from the dough. Lift the dough and parchment together into the pan so the parchment lines the bottom of the hot pan (be careful not to touch the pan since it’s very hot). Bake, covered, for 30 minutes. Remove the cover and bake another 10-15 minutes to get the exterior nice and golden brown and crispy. Voila! Done. Miracle no-knead bread, you boss you.
No Knead bread 4

Just a little peek of it in the dutch oven ….. I was DYING until I could peek.

No Knead 7

Oh my …. the flavour and texture of this bread were out of this world – we loved it.

No Knead 8

Do yourself a favour, and make bread!  This really will make you feel like a boss, go for it!  I recently bought a loaf of bread from a specialty bakery.  It was $7.00 a loaf, and while we thought it was great, try this for pennies …. just as delicious!

AJ's buckwheat

I know I’ve mentioned how easy and flexible this recipe is, but now I’m going to let you know how versatile!  This beautiful loaf was made by my friend AJ, with 50% buckwheat flour.  It’s gorgeous, and just makes me want to try other variations.  Thanks AJ!


I’ve reprinted this recipe from “Pinch of Yum” after studying these recipes for months!  Seems so strange to think of a bread that doesn’t require kneading, but this couldn’t be easier, and results in a great loaf of bread.  While the entire text portion is lifted from “Pinch of Yum” I’ve taken my own photos, and I’m hooked on the whole idea.  Thanks!

Caesar Salad

Caesar salad 3

Love the textures of a great Caesar salad – contrasting fresh crisp greens, crunchy bacon and croutons, soft parmesan and a creamy dressing.

Everybody needs a great Caesar dressing in their kitchen, try this one and adjust to your families taste.  My grandkids don’t love garlic, so when they are over I usually go light on the garlic cloves but that’s totally up to you!

  • 1 egg (or 1/4 cup mayonnaise)
  • juice of 1/2 lemon
  • 1-3 cloves garlic
  • 2 anchovy fillets (packed in oil)
  • 1 tbsp Worcestershire sauce
  • 1 tbsp dijon mustard
  • 1-2 tbsp red wine vinegar
  • pinch of sugar
  • 1/2 tsp salt
  • 1/2 tsp pepper
  • 1/2 – 3/4 cup oil (I like to use a combo of vegetable oil and really good extra virgin olive oil)
  • dash hot sauce (totally optional)

Combine all ingredients except oil in jar or blender.  Shake/blend really well until smooth, and slowly add oil until emulsified.  Taste and adjust for salt and pepper, adding more if necessary.

Caesar salad 1

Everybody helps make dinner around here, and Stella is learning the fine points of knife work!  Don’t worry, she quickly learned to rest the knife against her knuckles to avoid trimming her fingers……

Caesar salad 2

Assembling that cheese grater has all Sloan’s attention.

  • Wash your lettuce leaves and spin dry (you can do this ahead of time, wrap in clean kitchen towel and keep in fridge until ready to use, it really crisps up the lettuce)
  • Cook bacon until crisp and crumble.
  • Toss stale bread chunks in olive oil and a bit of salt and pepper and toast until dry and crunchy.  (This is also a great place to use dried herbs, and some garlic powder)
  • Grate Parmesan cheese

Toss lettuce pieces in very large bowl with the bacon, croutons and parmesan cheese.  Just before serving toss with dressing just until everything has a delicious coating.  Taste and squeeze a bit of lemon over if you like.

This easily goes from a side dish to a whole meal if you serve Caesar salad with grilled chicken or shrimp, and a side of garlic toast.


Grilled mushrooms on a cedar plank

As the snow drifts by the window I’m dreaming of making these again ….. smoky from the grill and cedar plank, and bursting with creamy cheesy goodness.

Grilled Mushrooms:Cedar Plank

  • 25 to 30 small cremini mushrooms (about 650 g), stemmed
  • 2 cup grated Asiago or Parmesan cheese
  • 1/2 cup water-packed artichoke hearts (about 2), drained, finely chopped and patted dry
  • 1/4 cup cream cheese , softened
  • 1/4 cup finely chopped green olives
  • 1 egg , lightly beaten
  • 1 clove garlic , grated
  • 1/2 teaspoon pepper
  • 2 tablespoons coarsely chopped fresh Italian parsley

To take these over the top, sprinkle with toasted and chopped hazelnuts, they add such a delightful crunch …. as you can see in this photo I didn’t have any handy this time!

Soak one 12- x 7-inch untreated cedar plank in water for 30 minutes or up to 24 hours. Meanwhile, using tip of spoon, gently scrape out mushroom gills to widen cavities.

In bowl, stir together Asiago, artichokes, cream cheese, olives, egg, garlic and pepper. Spoon 1 tbsp filling into each mushroom cap, pressing to flatten slightly.

Arrange on cedar plank, filling side up. Top with hazelnuts, if using, or you can always substitute toasted Panko crumbs.  Place plank on grill over medium-high heat; close lid and grill until mushrooms are tender and filling is bubbly, 15 to 20 minutes.

Sprinkle with parsley. Serve on plank on heat-resistant surface or transfer to platter.


If barbecuing isn’t an option for you this can also be done in the oven …. 425 for 20 minutes.